ECO mode FORD TAURUS 2005 4.G User Guide
[x] Cancel search | Manufacturer: FORD, Model Year: 2005, Model line: TAURUS, Model: FORD TAURUS 2005 4.GPages: 248, PDF Size: 2.66 MB
Page 81 of 248

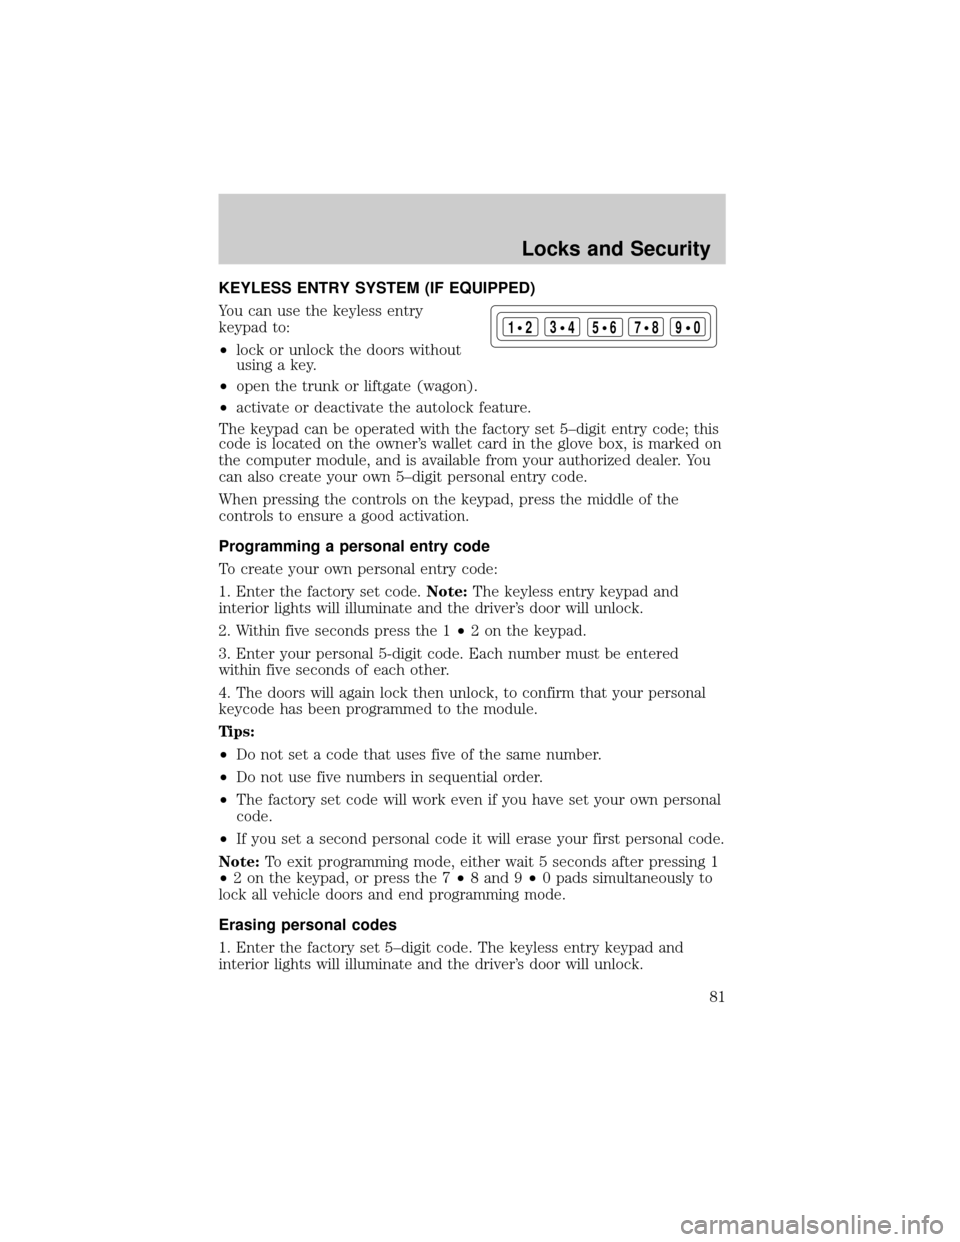
KEYLESS ENTRY SYSTEM (IF EQUIPPED)
You can use the keyless entry
keypad to:
²lock or unlock the doors without
using a key.
²open the trunk or liftgate (wagon).
²activate or deactivate the autolock feature.
The keypad can be operated with the factory set 5±digit entry code; this
code is located on the owner's wallet card in the glove box, is marked on
the computer module, and is available from your authorized dealer. You
can also create your own 5±digit personal entry code.
When pressing the controls on the keypad, press the middle of the
controls to ensure a good activation.
Programming a personal entry code
To create your own personal entry code:
1. Enter the factory set code.Note:The keyless entry keypad and
interior lights will illuminate and the driver's door will unlock.
2. Within five seconds press the 1²2 on the keypad.
3. Enter your personal 5-digit code. Each number must be entered
within five seconds of each other.
4. The doors will again lock then unlock, to confirm that your personal
keycode has been programmed to the module.
Tips:
²Do not set a code that uses five of the same number.
²Do not use five numbers in sequential order.
²The factory set code will work even if you have set your own personal
code.
²If you set a second personal code it will erase your first personal code.
Note:To exit programming mode, either wait 5 seconds after pressing 1
²2 on the keypad, or press the 7²8 and 9²0 pads simultaneously to
lock all vehicle doors and end programming mode.
Erasing personal codes
1. Enter the factory set 5±digit code. The keyless entry keypad and
interior lights will illuminate and the driver's door will unlock.
123
45678
90
Locks and Security
81
Page 82 of 248

2. Press and release the 1²2 within five seconds of completing Step 1.
3. Press and hold the 1²2 for two seconds to erase the customer
programmed codes.
All personal codes are now erased and only the factory set 5±digit code
will work.
Note:To exit programming mode, either wait 5 seconds after pressing 1
²2 on the keypad, or press the 7²8 and 9²0 pads simultaneously to
lock all vehicle doors and end programming mode.
Unlocking and locking the doors using keyless entry
To unlock the driver's door,enter the factory set 5-digit code or your
personal code. Each number must be pressed within five seconds of each
other. The interior lamps will illuminate.
To unlock all doors and the liftgate (wagon),enter the factory set
code or your personal code, then press the 3²4 control within five
seconds.
To unlock the trunk or unlock the liftgate (wagon),enter the
factory set code or your personal code, then press the 5²6 control
within five seconds.
To lock all doors,press the 7²8 and the 9²0 at the same time. You
do notneed to enter the keypad code first.
Autolock (if equipped)
This feature automatically locks all vehicle doors when the following
conditions are met:
²all the doors are closed,
²the engine is running,
²you shift into gear, putting the vehicle in motion, and.
²the vehicle's speed is greater than 3 mph (5 km/h).
Relock
The autolock feature repeats when the following conditions are met:
²any door is opened then closed while the engine is running, and
²you shift into gear, putting the vehicle in motion, and
²the vehicle's speed is greater than 3 mph (5 km/h).
To deactivate/reactivate the autolock feature using the power door
unlock control
You must complete Steps 1-7 within 30 seconds or the procedure will
have to be repeated. If the procedure needs to be repeated, you must
wait 30 seconds.
Locks and Security
82
Page 98 of 248

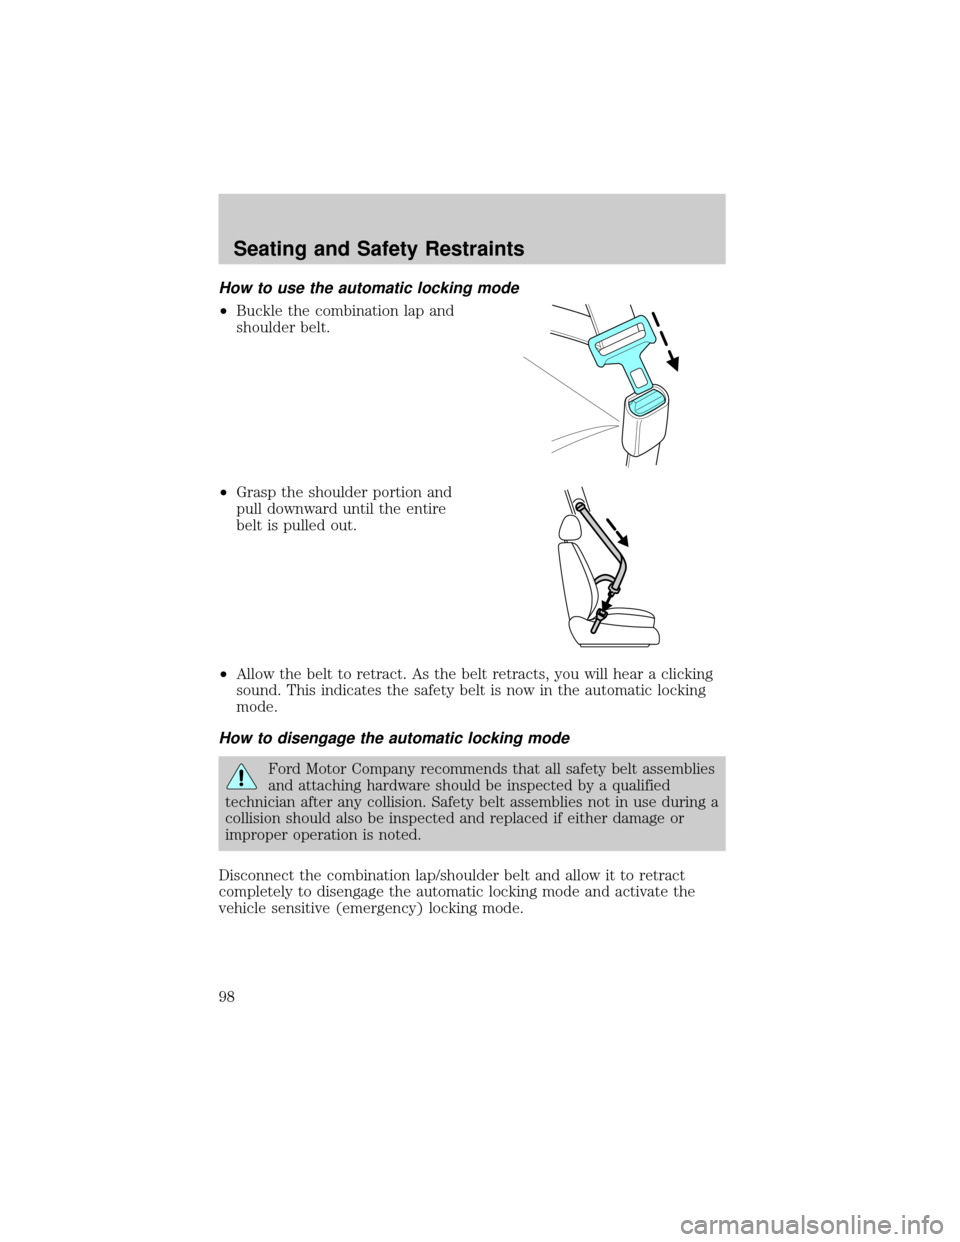
How to use the automatic locking mode
²Buckle the combination lap and
shoulder belt.
²Grasp the shoulder portion and
pull downward until the entire
belt is pulled out.
²Allow the belt to retract. As the belt retracts, you will hear a clicking
sound. This indicates the safety belt is now in the automatic locking
mode.
How to disengage the automatic locking mode
Ford Motor Company recommends that all safety belt assemblies
and attaching hardware should be inspected by a qualified
technician after any collision. Safety belt assemblies not in use during a
collision should also be inspected and replaced if either damage or
improper operation is noted.
Disconnect the combination lap/shoulder belt and allow it to retract
completely to disengage the automatic locking mode and activate the
vehicle sensitive (emergency) locking mode.
Seating and Safety Restraints
98
Page 121 of 248

²Review and follow the information
presented in theAir Bag
Supplemental Restraint System
section in this chapter.
²Use the correct safety belt buckle
for that seating position.
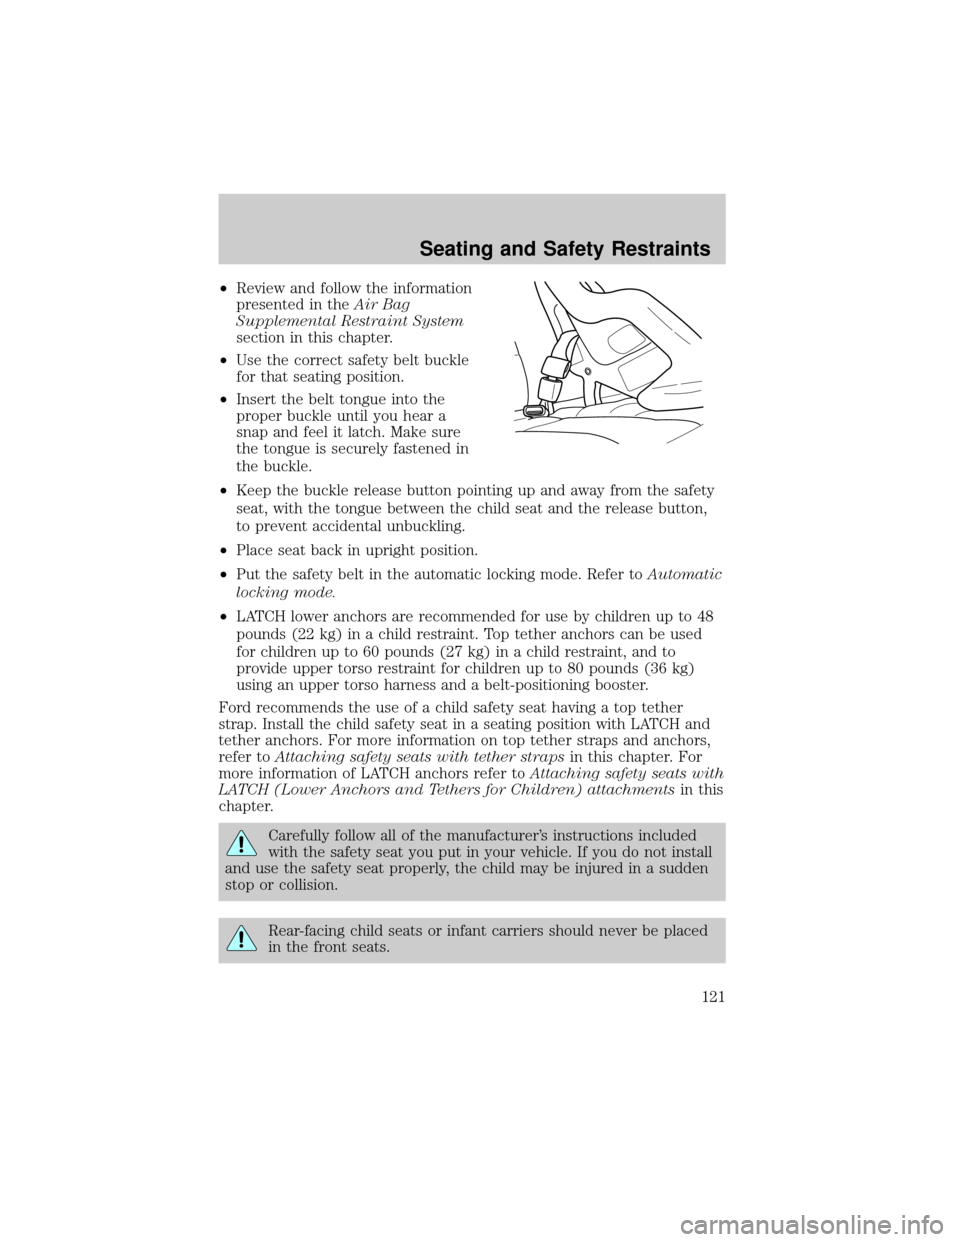
²Insert the belt tongue into the
proper buckle until you hear a
snap and feel it latch. Make sure
the tongue is securely fastened in
the buckle.
²Keep the buckle release button pointing up and away from the safety
seat, with the tongue between the child seat and the release button,
to prevent accidental unbuckling.
²Place seat back in upright position.
²Put the safety belt in the automatic locking mode. Refer toAutomatic
locking mode.
²LATCH lower anchors are recommended for use by children up to 48
pounds (22 kg) in a child restraint. Top tether anchors can be used
for children up to 60 pounds (27 kg) in a child restraint, and to
provide upper torso restraint for children up to 80 pounds (36 kg)
using an upper torso harness and a belt-positioning booster.
Ford recommends the use of a child safety seat having a top tether
strap. Install the child safety seat in a seating position with LATCH and
tether anchors. For more information on top tether straps and anchors,
refer toAttaching safety seats with tether strapsin this chapter. For
more information of LATCH anchors refer toAttaching safety seats with
LATCH (Lower Anchors and Tethers for Children) attachmentsin this
chapter.
Carefully follow all of the manufacturer's instructions included
with the safety seat you put in your vehicle. If you do not install
and use the safety seat properly, the child may be injured in a sudden
stop or collision.
Rear-facing child seats or infant carriers should never be placed
in the front seats.
Seating and Safety Restraints
121
Page 176 of 248

from Ford and Lincoln Mercury dealership management, recognized for
their business leadership qualities.
What the Board needs
To have your case reviewed you must complete the application in the
DSB brochure and mail it to the address provided on the application
form. Some states will require you to use certified mail, with return
receipt requested.
Your application is reviewed and, if it is determined to be eligible, you
will receive an acknowledgment indicating:
²The file number assigned to your application.
²The toll-free phone number of the DSB's independent administrator.
Your dealership and a Ford Motor Company representative will then be
asked to submit statements.
To properly review your case, the Board needs the following information:
²Legible copies of all documents and maintenance or repair orders
relevant to the case.
²The year, make, model, and Vehicle Identification Number (VIN) listed
on your vehicle ownership license.
²The date of repair(s) and mileage at the time of occurrence(s).
²The current mileage.
²The name of the dealer(s) who sold or serviced the vehicle.
²A brief description of your unresolved concern.
²A brief summary of the action taken by the dealer(s) and Ford Motor
Company.
²The names (if known) of all the people you contacted at the
dealership(s).
²A description of the action you expect to resolve your concern.
You will receive a letter of explanation if your application does not
qualify for Board review.
Oral presentations
If you would like to make an oral presentation, indicate YES to question
6 on the application. While it is your right to make an oral presentation
before the Board, this is not a requirement and the Board will decide the
case whether or not an oral presentation is made. An oral presentation
may be requested by the Board as well.
Customer Assistance
176
Page 210 of 248

2. Each time you fill the tank, record the amount of fuel added (in liters
or gallons).
3. After at least three to five tank fill-ups, fill the fuel tank and record
the current odometer reading.
4. Subtract your initial odometer reading from the current odometer
reading.
5. Follow one of the simple calculations in order to determine fuel
economy:
Calculation 1:Multiply liters used by 100, then divide by total
kilometers traveled.
Calculation 2:Divide total miles traveled by total gallons used.
Keep a record for at least one month and record the type of driving (city
or highway). This will provide an accurate estimate of the vehicle's fuel
economy under current driving conditions. Additionally, keeping records
during summer and winter will show how temperature impacts fuel
economy. In general, lower temperatures give lower fuel economy.
Driving style Ð good driving and fuel economy habits
Give consideration to the lists that follow and you may be able to change
a number of variables and improve your fuel economy.
Habits
²Smooth, moderate operation can yield up to 10% savings in fuel.
²Steady speeds without stopping will usually give the best fuel
economy.
²Idling for long periods of time (greater than one minute) may waste
fuel.
²Anticipate stopping; slowing down may eliminate the need to stop.
²Sudden or hard accelerations may reduce fuel economy.
²Slow down gradually.
²Driving at reasonable speeds (traveling at 88 km/h [55 mph] uses 15%
less fuel than traveling at 105 km/h [65 mph]).
²Revving the engine before turning it off may reduce fuel economy.
²Using the air conditioner or defroster may reduce fuel economy.
²You may want to turn off the speed control in hilly terrain if
unnecessary shifting between third and fourth gear occurs.
Unnecessary shifting of this type could result in reduced fuel
economy.
Maintenance and Specifications
210