check engine FORD TAURUS 2005 4.G User Guide
[x] Cancel search | Manufacturer: FORD, Model Year: 2005, Model line: TAURUS, Model: FORD TAURUS 2005 4.GPages: 248, PDF Size: 2.66 MB
Page 138 of 248
²Some noise is normal during operation. If the noise is excessive, check
for low power steering pump fluid level before seeking service by your
dealer.
²Heavy or uneven steering efforts may be caused by low power steering
pump fluid level. Check for low power steering pump fluid level before
seeking service by your dealer.
²Do not fill the power steering pump reservoir above the MAX mark on
the reservoir, as this may result in leaks from the reservoir.
If the power steering system breaks down (or if the engine is turned
off), you can steer the vehicle manually, but it takes more effort.
If the steering wanders or pulls, check for:
²an improperly inflated tire
²uneven tire wear
²loose or worn suspension components
²loose or worn steering components
²improper steering alignment
AUTOMATIC TRANSAXLE OPERATION
Brake-shift interlock
This vehicle is equipped with a brake-shift interlock feature that prevents
the gearshift lever from being moved from P (Park) when the ignition is
in the ON position unless brake pedal is depressed.
If you cannot move the gearshift lever out of P (Park) with ignition in
the ON position and the brake pedal depressed:
1. Apply the parking brake, turn ignition key to LOCK, then remove the
key.
2. Insert the key and turn it to OFF.Apply the brake pedal and shift
to N (Neutral).
When the key is in the ignition and in the OFF position, the
automatic transmission shift lever can be moved from the P
(Park) position without the brake pedal depressed. To avoid unwanted
vehicle movement, always set the parking brake.
3. Start the vehicle.
If it is necessary to use the above procedure to move the gearshift lever,
it is possible that a fuse has blown or the vehicle's brakelamps are not
operating properly. Refer toFuses and relaysin theRoadside
Emergencieschapter.
Driving
138
Page 148 of 248
Driving while you tow
When towing a trailer:
²Turn off the speed control. The speed control may shut off
automatically when you are towing on long, steep grades.
²Consult your local motor vehicle speed regulations for towing a trailer.
²To eliminate excessive shifting, use a lower gear. This will also assist
in transaxle cooling.
²Anticipate stops and brake gradually.
Servicing after towing
If you tow a trailer for long distances, your vehicle will require more
frequent service intervals. Refer to yourScheduled Maintenance Guide
for more information.
Trailer towing tips
²Practice turning, stopping and backing up before starting on a trip to
get the feel of the vehicle trailer combination. When turning, make
wider turns so the trailer wheels will clear curbs and other obstacles.
²Allow more distance for stopping with a trailer attached.
²If you are driving down a long or steep hill, shift to a lower gear. Do
not apply the brakes continuously, as they may overheat and become
less effective.
²The trailer tongue weight should be 10±15% of the loaded trailer
weight.
²After you have traveled 50 miles (80 km), thoroughly check your
hitch, electrical connections and trailer wheel lug nuts.
²To aid in engine/transmission cooling and A/C efficiency during hot
weather while stopped in traffic, place the gearshift lever in P (Park).
²Vehicles with trailers should not be parked on a grade. If you must
park on a grade, place wheel chocks under the trailer's wheels.
RECREATIONAL TOWING
Follow these guidelines for your specific powertrain combination to tow
your vehicle with all four wheels on the ground (such as behind a
recreational vehicle).
These guidelines are designed to ensure that your transmission is not
damaged due to insufficient lubrication.
Driving
148
Page 165 of 248
JUMP STARTING YOUR VEHICLE
The gases around the battery can explode if exposed to flames,
sparks, or lit cigarettes. An explosion could result in injury or
vehicle damage.
Batteries contain sulfuric acid which can burn skin, eyes and
clothing, if contacted.
Do not attempt to push-start your vehicle. Automatic
transmissions do not have push-start capability; doing so may
damage the catalytic converter.
Preparing your vehicle
When the battery is disconnected or a new battery is installed, the
transmission must relearn its shift strategy. As a result, the transmission
may have firm and/or soft shifts. This operation is considered normal and
will not affect function or durability of the transmission. Over time, the
adaptive learning process will fully update transmission operation.
1.Use only a 12±volt supply to start your vehicle.
2. Do not disconnect the battery of the disabled vehicle as this could
damage the vehicle's electrical system.
3. Park the booster vehicle close to the hood of the disabled vehicle
making sure the two vehiclesdo nottouch. Set the parking brake on
both vehicles and stay clear of the engine cooling fan and other moving
parts.
4. Check all battery terminals and remove any excessive corrosion before
you attach the battery cables. Ensure that vent caps are tight and level.
5. Turn the heater fan on in both vehicles to protect any electrical
surges. Turn all other accessories off.
Roadside Emergencies
165
Page 187 of 248
SERVICE RECOMMENDATIONS
To help you service your vehicle:
²We highlight do-it-yourself items in the engine compartment for easy
location.
²We provide a scheduled maintenance guide which makes tracking
routine service easy.
If your vehicle requires professional service, your dealership can provide
the necessary parts and service. Check yourWarranty Guide/Owner
Information Guideto find out which parts and services are covered.
Use only recommended fuels, lubricants, fluids and service parts
conforming to specifications. Motorcraft parts are designed and built to
provide the best performance in your vehicle.
PRECAUTIONS WHEN SERVICING YOUR VEHICLE
²Do not work on a hot engine.
²Make sure that nothing gets caught in moving parts.
²Do not work on a vehicle with the engine running in an enclosed
space, unless you are sure you have enough ventilation.
²Keep all open flames and other burning (cigarettes) material away
from the battery and all fuel related parts.
Working with the engine off
1. Set the parking brake and shift to P (Park).
2. Turn off the engine and remove the key.
3. Block the wheels.
Working with the engine on
1. Set the parking brake and ensure the gearshift is securely latched in P
(Park).
2. Block the wheels to prevent the vehicle from moving unexpectedly.
Note:Do not start your engine with the air cleaner removed and do not
remove it while the engine is running.
Maintenance and Specifications
Maintenance and Specifications
187
Page 192 of 248
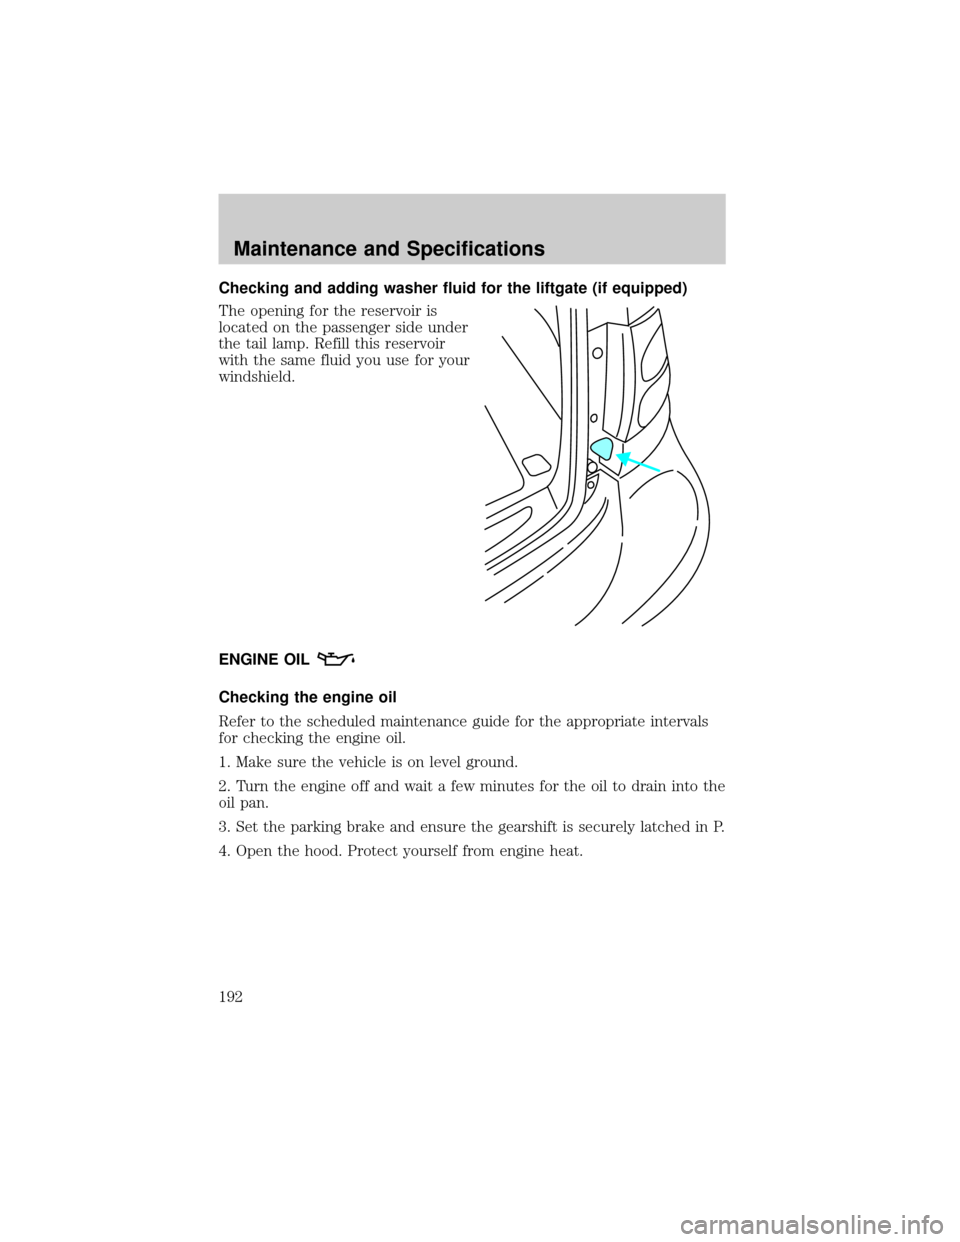
Checking and adding washer fluid for the liftgate (if equipped)
The opening for the reservoir is
located on the passenger side under
the tail lamp. Refill this reservoir
with the same fluid you use for your
windshield.
ENGINE OIL
Checking the engine oil
Refer to the scheduled maintenance guide for the appropriate intervals
for checking the engine oil.
1. Make sure the vehicle is on level ground.
2. Turn the engine off and wait a few minutes for the oil to drain into the
oil pan.
3. Set the parking brake and ensure the gearshift is securely latched in P.
4. Open the hood. Protect yourself from engine heat.
Maintenance and Specifications
192
Page 194 of 248
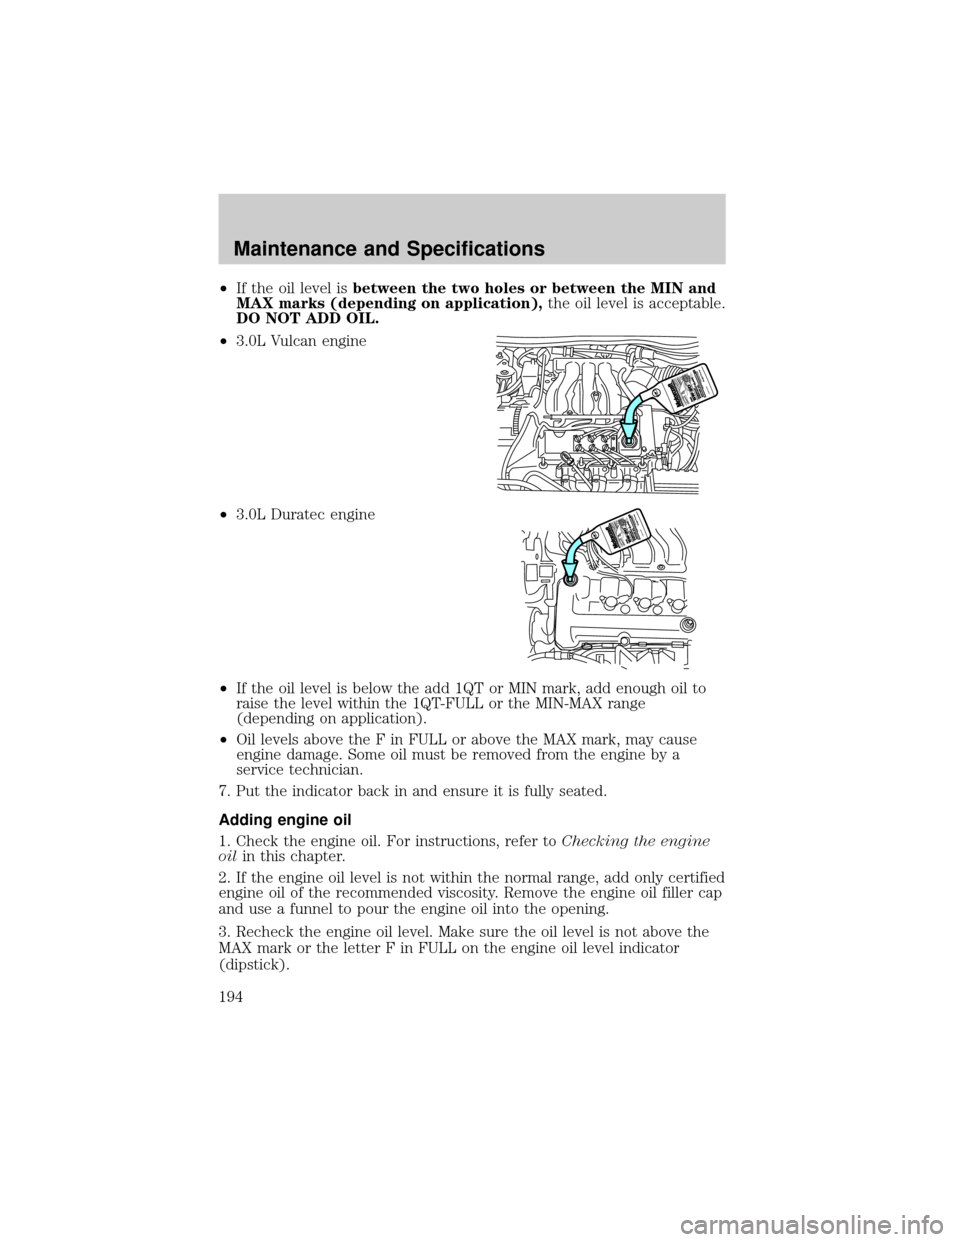
²If the oil level isbetween the two holes or between the MIN and
MAX marks (depending on application),the oil level is acceptable.
DO NOT ADD OIL.
²3.0L Vulcan engine
²3.0L Duratec engine
²If the oil level is below the add 1QT or MIN mark, add enough oil to
raise the level within the 1QT-FULL or the MIN-MAX range
(depending on application).
²Oil levels above the F in FULL or above the MAX mark, may cause
engine damage. Some oil must be removed from the engine by a
service technician.
7. Put the indicator back in and ensure it is fully seated.
Adding engine oil
1. Check the engine oil. For instructions, refer toChecking the engine
oilin this chapter.
2. If the engine oil level is not within the normal range, add only certified
engine oil of the recommended viscosity. Remove the engine oil filler cap
and use a funnel to pour the engine oil into the opening.
3. Recheck the engine oil level. Make sure the oil level is not above the
MAX mark or the letter F in FULL on the engine oil level indicator
(dipstick).
Maintenance and Specifications
194
Page 198 of 248

²Always dispose of automotive
batteries in a responsible manner.
Follow your local authorized
standards for disposal. Call your
local authorized recycling center
to find out more about recycling
automotive batteries.
ENGINE COOLANT
Checking engine coolant
The concentration and level of engine coolant should be checked at the
mileage intervals listed in theScheduled Maintenance Guide. The
coolant concentration should be maintained at 50/50 coolant and distilled
water, which equates to a freeze point of -34ÉF (-36ÉC). Coolant
concentration testing is possible with a hydrometer or antifreeze tester
(such as the Rotunda Battery and Antifreeze Tester, 014±R1060). The
level of coolant should be maintained at the ªFULL COLDº level or
within the ªCOLD FILL RANGEº in the coolant reservoir. If the level falls
below, add coolant per the instructions in theAdding engine coolant
section.
Your vehicle was factory-filled with a 50/50 engine coolant and water
concentration. If the concentration of coolant falls below 40% or above
60%, the engine parts could become damaged or not work properly.A
50±50 mixture of coolant and water provides the following:
²Freeze protection down to -34ÉF (-36ÉC).
²Boiling protection up to 265ÉF (129ÉC).
²Protection against rust and other forms of corrosion.
²Enables calibrated gauges to work properly.
LEAD
RETURN
RECYCLE
Maintenance and Specifications
198
Page 199 of 248

When the engine is cold, check the
level of the engine coolant in the
reservoir.
²The engine coolant should be at the ªFULL COLDº level or within the
ªCOLD FILL RANGEº as listed on the engine coolant reservoir
(depending upon application).
²Refer to theScheduled Maintenance Guidefor service interval
schedules.
²Be sure to read and understandPrecautions when servicing your
vehiclein this chapter.
If the engine coolant has not been checked at the recommended interval,
the engine coolant reservoir may become low or empty. If the reservoir is
low or empty, add engine coolant to the reservoir. Refer toAdding
engine coolantin this chapter.
Note:Automotive fluids are not interchangeable; do not use engine
coolant, antifreeze or windshield washer fluid outside of its specified
function and vehicle location.
Adding engine coolant
When adding coolant, make sure it is a 50/50 mixture of engine coolant
and distilled water. Add the mixture to the coolant reservoir,when the
engine is cool, until the appropriate fill level is obtained.
Maintenance and Specifications
199
Page 201 of 248
remove the coolant pressure relief cap on the radiator of a vehicle with
an overflow system, follow these steps to add engine coolant.
To reduce the risk of personal injury, make sure the engine is
cool before unscrewing the coolant pressure relief cap. The
cooling system is under pressure; steam and hot liquid can come out
forcefully when the cap is loosened slightly.
1. Before you begin, turn the engine off and let it cool.
2. When the engine is cool, wrap a thick cloth around the coolant
pressure relief cap on the coolant reservoir (a translucent plastic bottle).
Slowly turn cap counterclockwise (left) until pressure begins to release.
3. Step back while the pressure releases.
4. When you are sure that all the pressure has been released, use the
cloth to turn it counterclockwise and remove the cap.
5. Fill the coolant reservoir slowly with the proper coolant mixture (see
above), to within the ªCOLD FILL RANGEº or the ªFULL COLDº level on
the reservoir. If you removed the radiator cap in an overflow system, fill
the radiator until the coolant is visible and radiator is almost full.
6. Replace the cap. Turn until tightly installed. (Cap must be tightly
installed to prevent coolant loss.)
After any coolant has been added, check the coolant concentration, refer
toChecking engine coolant. If the concentration is not 50/50
(protection to ±34É F/±36É C), drain some coolant and adjust the
concentration. It may take several drains and additions to obtain a 50/50
coolant concentration.
Whenever coolant has been added, the coolant level in the coolant
reservoir should be checked the next few times you drive the vehicle. If
necessary, add enough 50/50 concentration of engine coolant and
distilled water to bring the liquid level to the proper level.
If you have to add more than 1.0 liter (1.0 quart) of engine coolant per
month, have your dealer check the engine cooling system. Your cooling
system may have a leak. Operating an engine with a low level of coolant
can result in engine overheating and possible engine damage.
Recycled engine coolant
Ford Motor Company does NOT recommend the use of recycled engine
coolant in vehicles originally equipped with Motorcraft Premium Gold
Engine Coolant since a Ford-approved recycling process is not yet
available.
Maintenance and Specifications
201
Page 204 of 248

²Avoid getting fuel liquid in your eyes. If fuel is splashed in the eyes,
remove contact lenses (if worn), flush with water for 15 minutes and
seek medical attention. Failure to seek proper medical attention could
lead to permanent injury.
²Fuels can also be harmful if absorbed through the skin. If fuel is
splashed on the skin and/or clothing, promptly remove contaminated
clothing and wash skin thoroughly with soap and water. Repeated or
prolonged skin contact with fuel liquid or vapor causes skin irritation.
²Be particularly careful if you are taking ªAntabuseº or other forms of
disulfiram for the treatment of alcoholism. Breathing gasoline and/or
ethanol vapors, or skin contact could cause an adverse reaction. In
sensitive individuals, serious personal injury or sickness may result. If
fuel is splashed on the skin, promptly wash skin thoroughly with soap
and water. Consult a physician immediately if you experience an
adverse reaction.
²FFV fuel tanks may contain zero to 85 percent ethanol. Any fuel
blends containing gasoline and ethanol should be treated the same as
ªFuel Ethanol º. To identify if your vehicle is an FFV, check your VIN
or the label on the inside of your fuel filler door. When checking the
VIN look for the engine type identifier (8th character). If your vehicle
is an FFV, then the character will be labeled as a ª2.º
Pure ethanol is the alcohol which is the intoxicating agent in liquor, beer
and wine. It is distilled from the fermentation of plants such as field corn
and sugar cane. When ethanol is used in the making of motor fuels, a
small amount of a bad tasting chemical is added to discourage beverage
use. The resulting fuel is called E
d100 meaning 100% pure ethanol
diluted by 2% to 5% gasoline as the ªdenaturant.º
Fuel ethanol (summer blend
d) is then made by adding 15% more
unleaded gasoline. The resulting fuel also has a higher octane rating than
unleaded regular gasoline and other properties which allow engine
designs with greater efficiency and power.
Winter blends may contain up to 30% (E70)unleaded gasoline (25% plus
the denaturant) to enhance cold engine starts. Severely cold weather
may require additional measures for reliable starting. Refer toCold
Weather Startingin theDrivingchapter.
Ethanol is more chemically active than gasoline. It corrodes some metals
and causes some plastic and rubber components to swell, break down or
become brittle and crack, especially when mixed with gasoline. Special
materials and procedures have been developed for flexible fuel vehicles
and the dispensers used by ethanol fuel providers.
Maintenance and Specifications
204