headlamp FORD TAURUS 2005 4.G User Guide
[x] Cancel search | Manufacturer: FORD, Model Year: 2005, Model line: TAURUS, Model: FORD TAURUS 2005 4.GPages: 248, PDF Size: 2.66 MB
Page 40 of 248
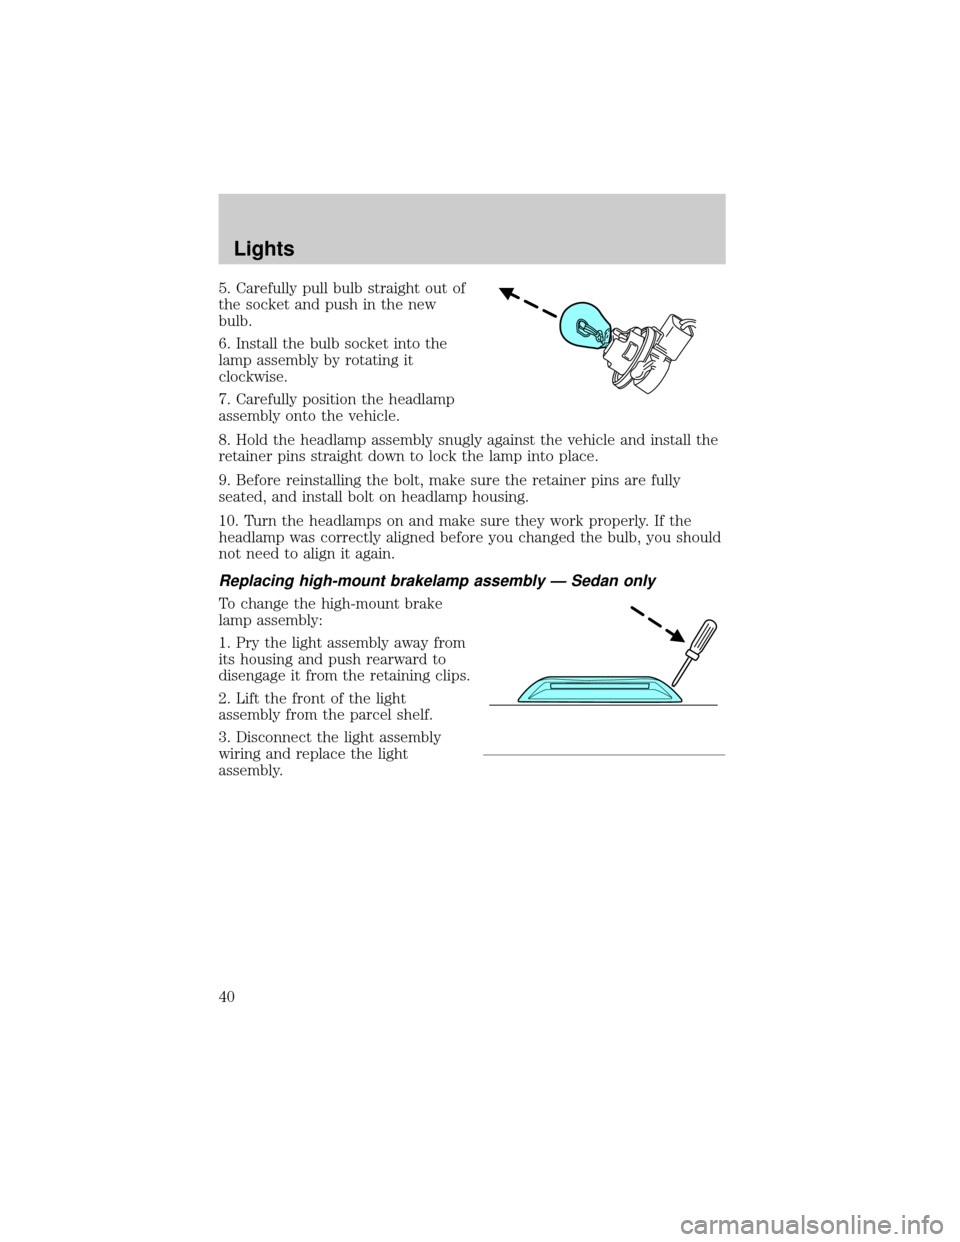
5. Carefully pull bulb straight out of
the socket and push in the new
bulb.
6. Install the bulb socket into the
lamp assembly by rotating it
clockwise.
7. Carefully position the headlamp
assembly onto the vehicle.
8. Hold the headlamp assembly snugly against the vehicle and install the
retainer pins straight down to lock the lamp into place.
9. Before reinstalling the bolt, make sure the retainer pins are fully
seated, and install bolt on headlamp housing.
10. Turn the headlamps on and make sure they work properly. If the
headlamp was correctly aligned before you changed the bulb, you should
not need to align it again.
Replacing high-mount brakelamp assembly Ð Sedan only
To change the high-mount brake
lamp assembly:
1. Pry the light assembly away from
its housing and push rearward to
disengage it from the retaining clips.
2. Lift the front of the light
assembly from the parcel shelf.
3. Disconnect the light assembly
wiring and replace the light
assembly.
Lights
40
Page 43 of 248
Replacing license plate lamp bulbs
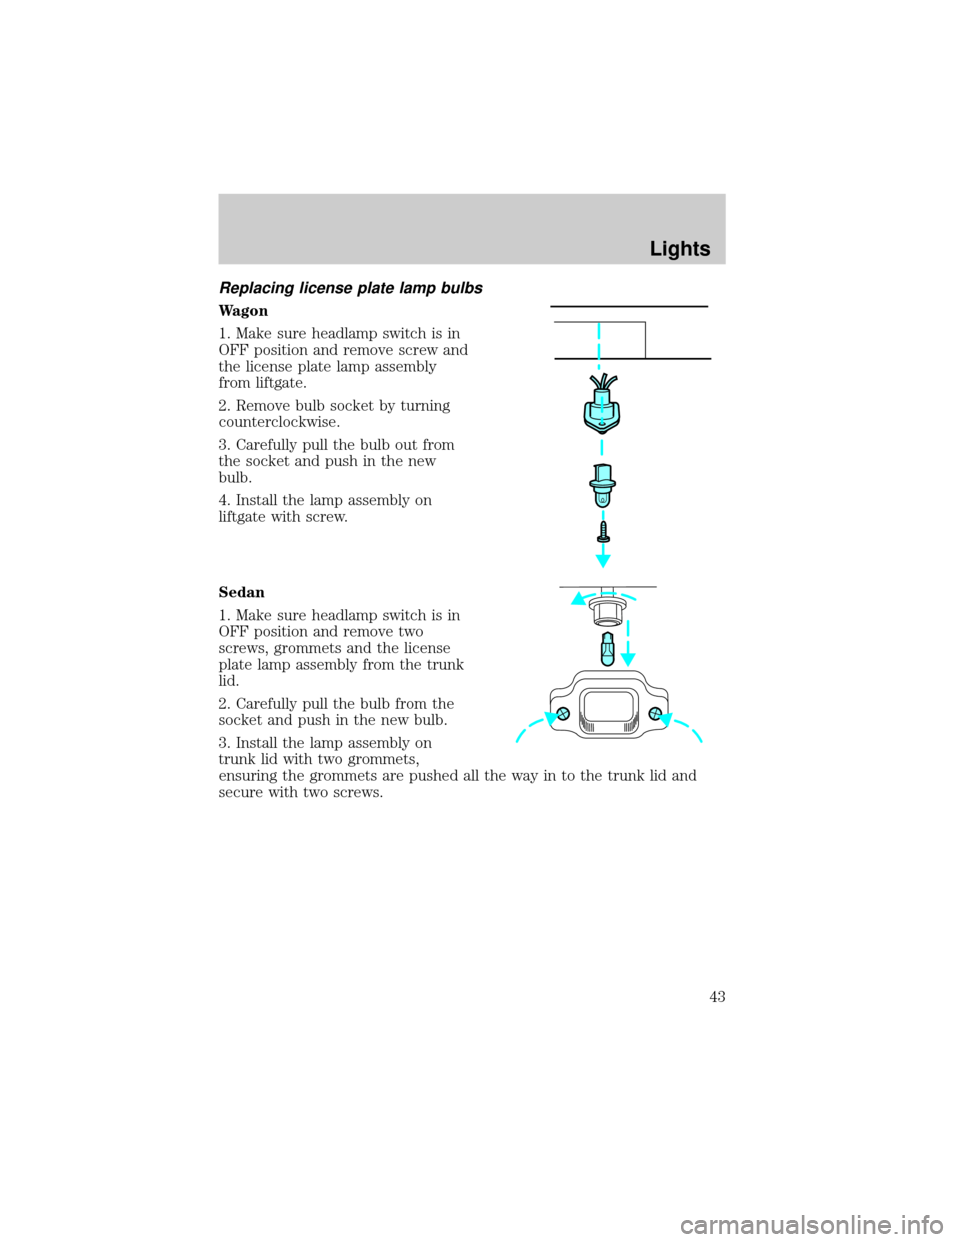
Wagon
1. Make sure headlamp switch is in
OFF position and remove screw and
the license plate lamp assembly
from liftgate.
2. Remove bulb socket by turning
counterclockwise.
3. Carefully pull the bulb out from
the socket and push in the new
bulb.
4. Install the lamp assembly on
liftgate with screw.
Sedan
1. Make sure headlamp switch is in
OFF position and remove two
screws, grommets and the license
plate lamp assembly from the trunk
lid.
2. Carefully pull the bulb from the
socket and push in the new bulb.
3. Install the lamp assembly on
trunk lid with two grommets,
ensuring the grommets are pushed all the way in to the trunk lid and
secure with two screws.
Lights
43
Page 44 of 248
Replacing tail/brake/turn signal/backup lamp bulbs
Sedan
The tail lamp, brake lamp, turn
signal lamp and backup lamp bulbs
are located in the same portion of
the tail lamp assembly. Follow the
same steps to replace either bulb.
1. Make sure headlamp switch is in
OFF position and open trunk and
remove two plastic mushroom nuts,
five push pins and the plastic cover
from inside the trunk to access the
lamp assembly.
2. Carefully pull the carpet away to
expose the lamp assembly hardware.
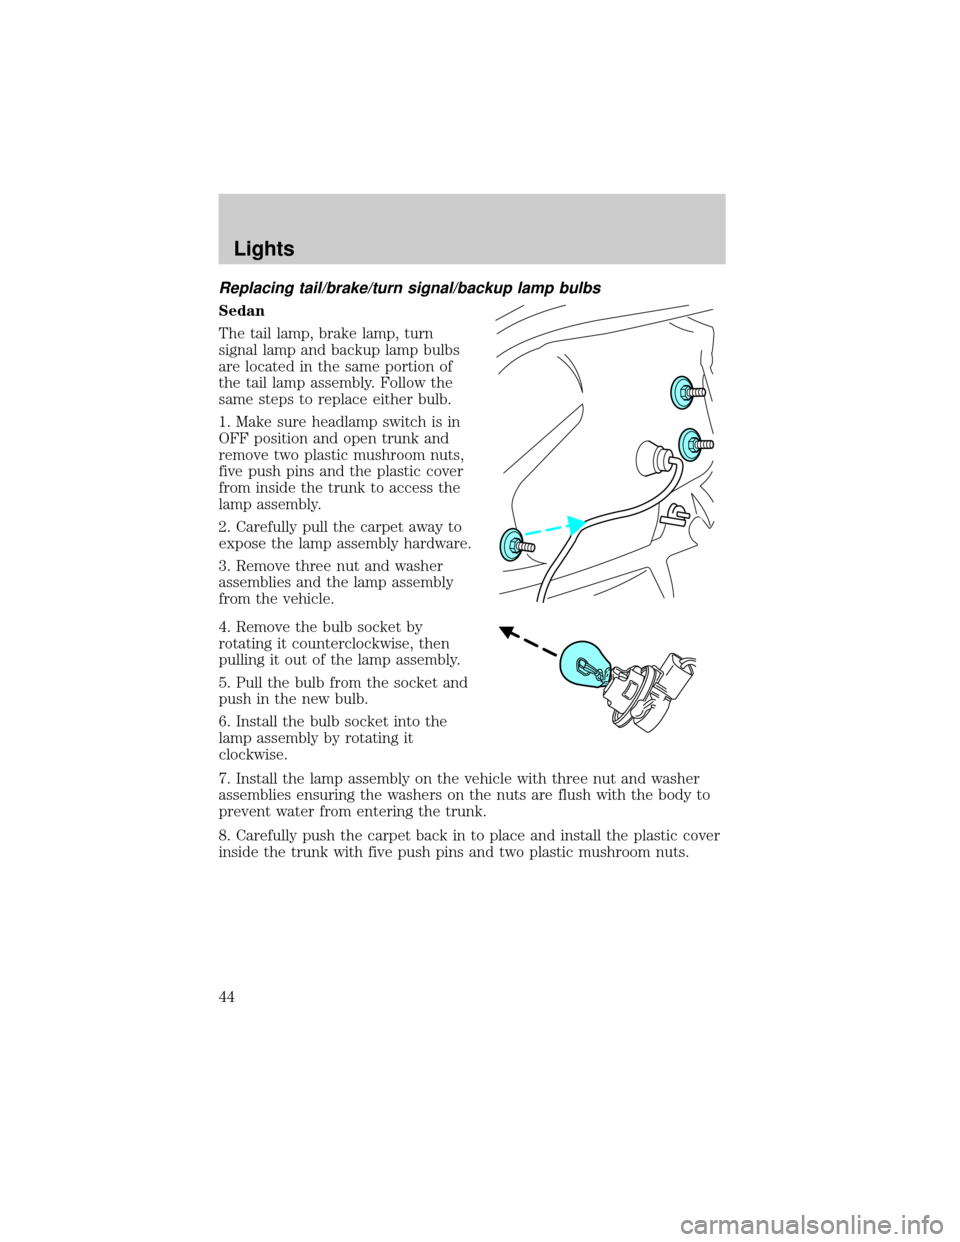
3. Remove three nut and washer
assemblies and the lamp assembly
from the vehicle.
4. Remove the bulb socket by
rotating it counterclockwise, then
pulling it out of the lamp assembly.
5. Pull the bulb from the socket and
push in the new bulb.
6. Install the bulb socket into the
lamp assembly by rotating it
clockwise.
7. Install the lamp assembly on the vehicle with three nut and washer
assemblies ensuring the washers on the nuts are flush with the body to
prevent water from entering the trunk.
8. Carefully push the carpet back in to place and install the plastic cover
inside the trunk with five push pins and two plastic mushroom nuts.
Lights
44
Page 45 of 248
Wagon
The tail lamp/turn lamp
bulbs/brake/backup are located in
the same portion of the tail lamp
assembly, one just below the other.
Follow the same steps to replace
either bulb:
1. Make sure headlamp switch is in
OFF position and open the liftgate
to expose the lamp assemblies.
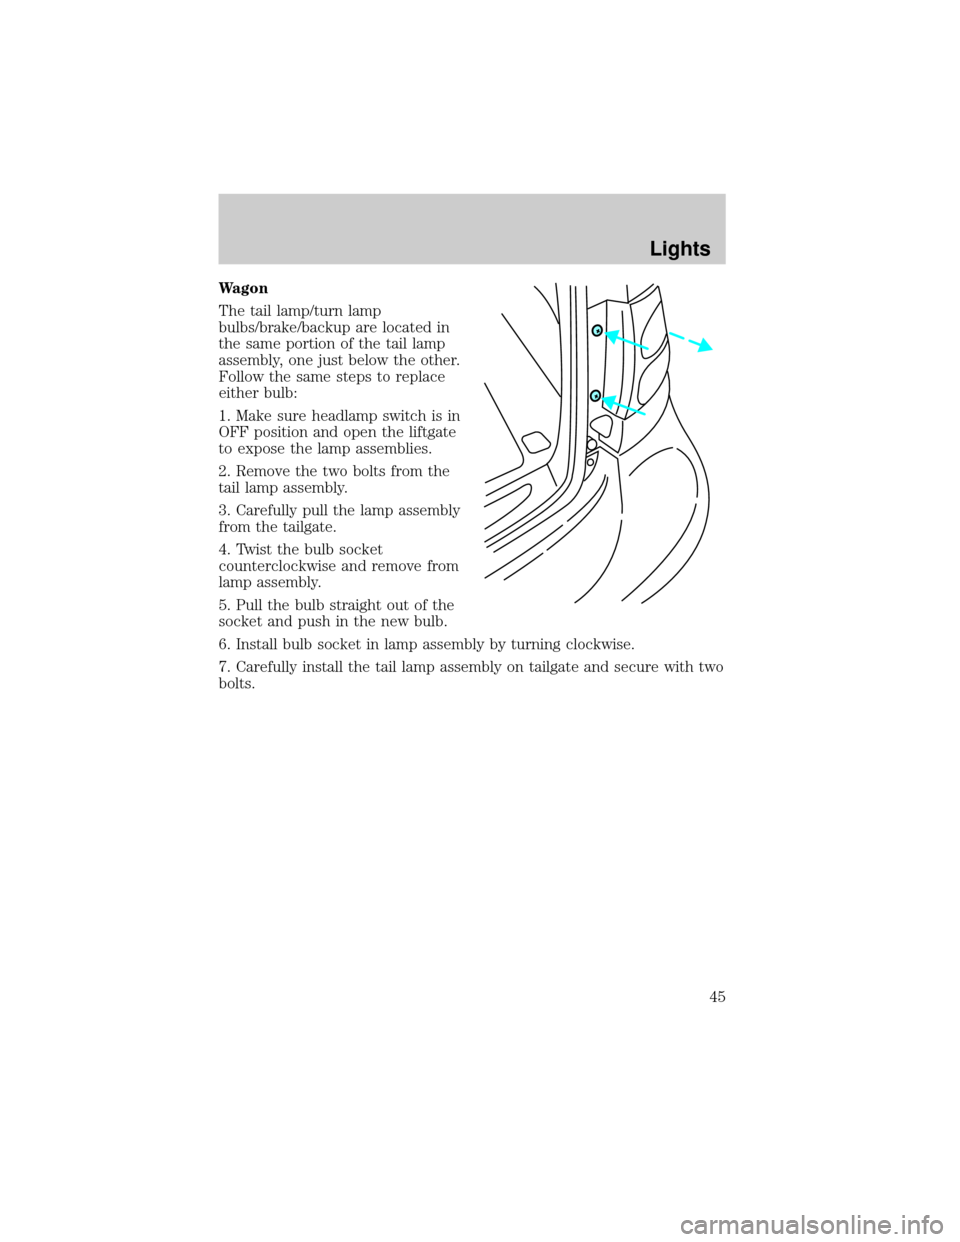
2. Remove the two bolts from the
tail lamp assembly.
3. Carefully pull the lamp assembly
from the tailgate.
4. Twist the bulb socket
counterclockwise and remove from
lamp assembly.
5. Pull the bulb straight out of the
socket and push in the new bulb.
6. Install bulb socket in lamp assembly by turning clockwise.
7. Carefully install the tail lamp assembly on tailgate and secure with two
bolts.
Lights
45
Page 46 of 248
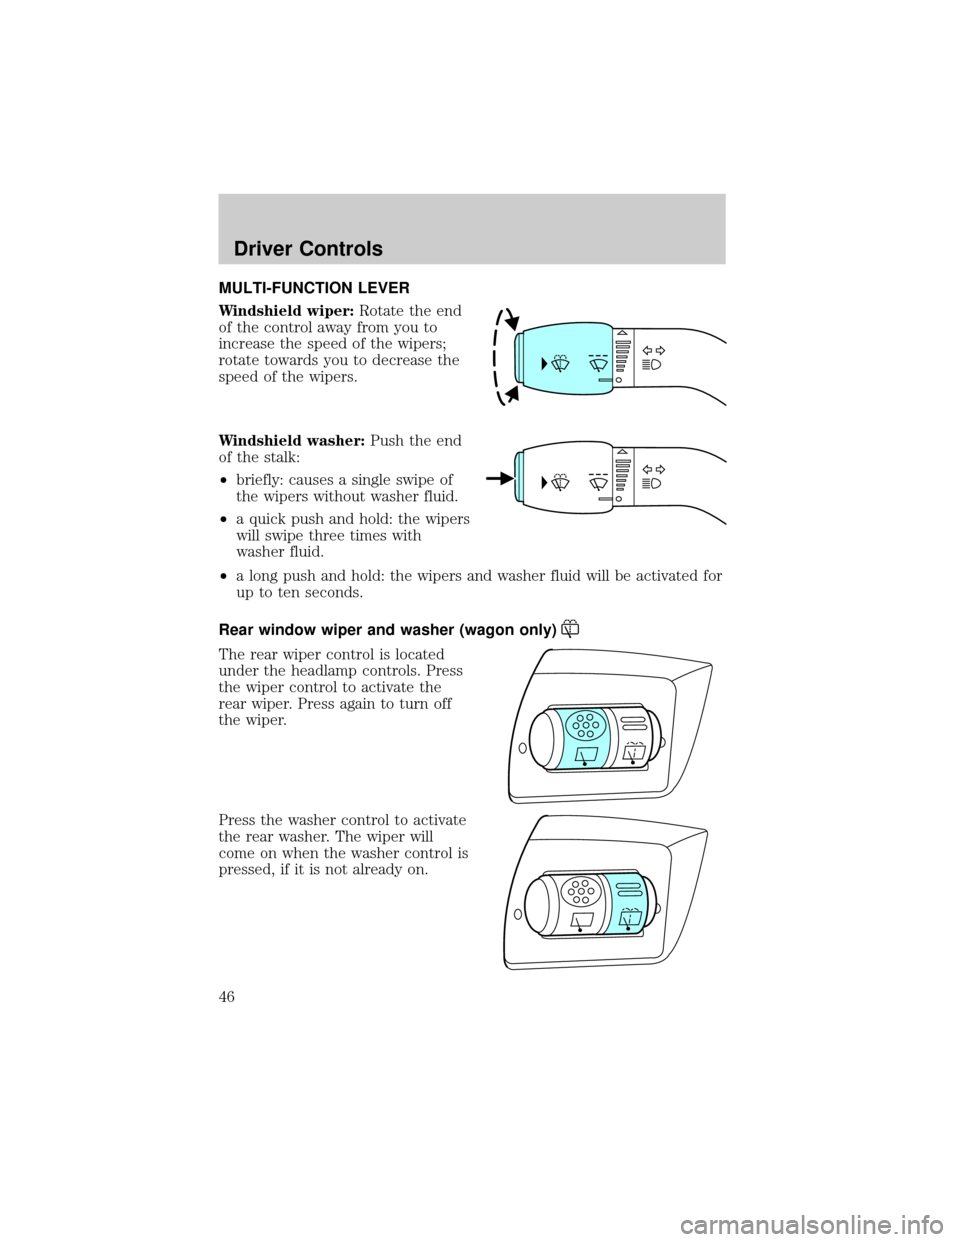
MULTI-FUNCTION LEVER
Windshield wiper:Rotate the end
of the control away from you to
increase the speed of the wipers;
rotate towards you to decrease the
speed of the wipers.
Windshield washer:Push the end
of the stalk:
²briefly: causes a single swipe of
the wipers without washer fluid.
²a quick push and hold: the wipers
will swipe three times with
washer fluid.
²a long push and hold: the wipers and washer fluid will be activated for
up to ten seconds.
Rear window wiper and washer (wagon only)
The rear wiper control is located
under the headlamp controls. Press
the wiper control to activate the
rear wiper. Press again to turn off
the wiper.
Press the washer control to activate
the rear washer. The wiper will
come on when the washer control is
pressed, if it is not already on.
Driver Controls
Driver Controls
46
Page 86 of 248
PERIMETER ALARM SYSTEM (IF EQUIPPED)
The perimeter anti-theft system will warn you in the event of an
unauthorized entry to your vehicle.
If there is any potential perimeter anti-theft problem with your vehicle,
ensureALL remote entry transmittersare taken to the dealership to
aid in troubleshooting.
Arming the system
When armed, this system will respond if unauthorized entry is
attempted. When unauthorized entry occurs, the system will flash the
headlamps and/or parking lamps and will sound the horn.
The system is ready to arm whenever key is removed from the ignition.
Either of the following actions will prearm the alarm system:
²Press the
control on the remote entry transmitter.
²Press the 7²8 and the 9²0 on the keyless entry keypad (if
equipped) at the same time.
²Open a door and press the power door lock control to lock all the
doors.
Note:The hood, each door and the liftgate (wagon) arm individually,
and if any of them are open, they must be closed in order to be armed.
When you press the
control on the remote entry transmitter twice
within three seconds:
²the horn will chirp twice to indicate the hood, each door and the
liftgate (wagon) are closed.
²the horn will chirp twice to indicate that either the hood, a door or
the liftgate (wagon) is still open.
Disarming the system
You can disarm the system by any of the following actions:
²Unlock the doors by pressing the
control on your remote entry
transmitter.
²Unlock the doors by using the keyless entry pad.
²Unlock the doors with a key. Turn the key full travel (toward the front
of the vehicle) to ensure the alarm disarms.
²Turn the ignition to the 4 (ON) position.
²Press the
control on the remote entry transmitter. This will only
shut the horn off when the alarm is sounding; the alarm system will
still be armed.
Locks and Security
86
Page 131 of 248
Do not park, idle, or drive your vehicle in dry grass or other dry
ground cover. The emission system heats up the engine
compartment and exhaust system, which can start a fire.
Do not start your vehicle in a closed garage or in other enclosed
areas. Exhaust fumes can be toxic. Always open the garage door
before you start the engine. SeeGuarding against exhaust fumesin
this chapter for more instructions.
If you smell exhaust fumes inside your vehicle, have your dealer
inspect your vehicle immediately. Do not drive if you smell
exhaust fumes.
Important safety precautions
A computer system controls the engine's idle revolutions per minute
(RPM). When the engine starts, the idle RPM runs higher than normal in
order to warm the engine. If the engine idle speed does not slow down
automatically, have the vehicle checked. Do not allow the vehicle to idle
for more than 10 minutes at the higher engine RPM.
Before starting the vehicle:
1. Make sure all occupants buckle their safety belts. For more
information on safety belts and their proper usage, refer to theSeating
and Safety Restraintschapter.
2. Make sure the headlamps and electrical accessories are off.
Driving
131
Page 154 of 248
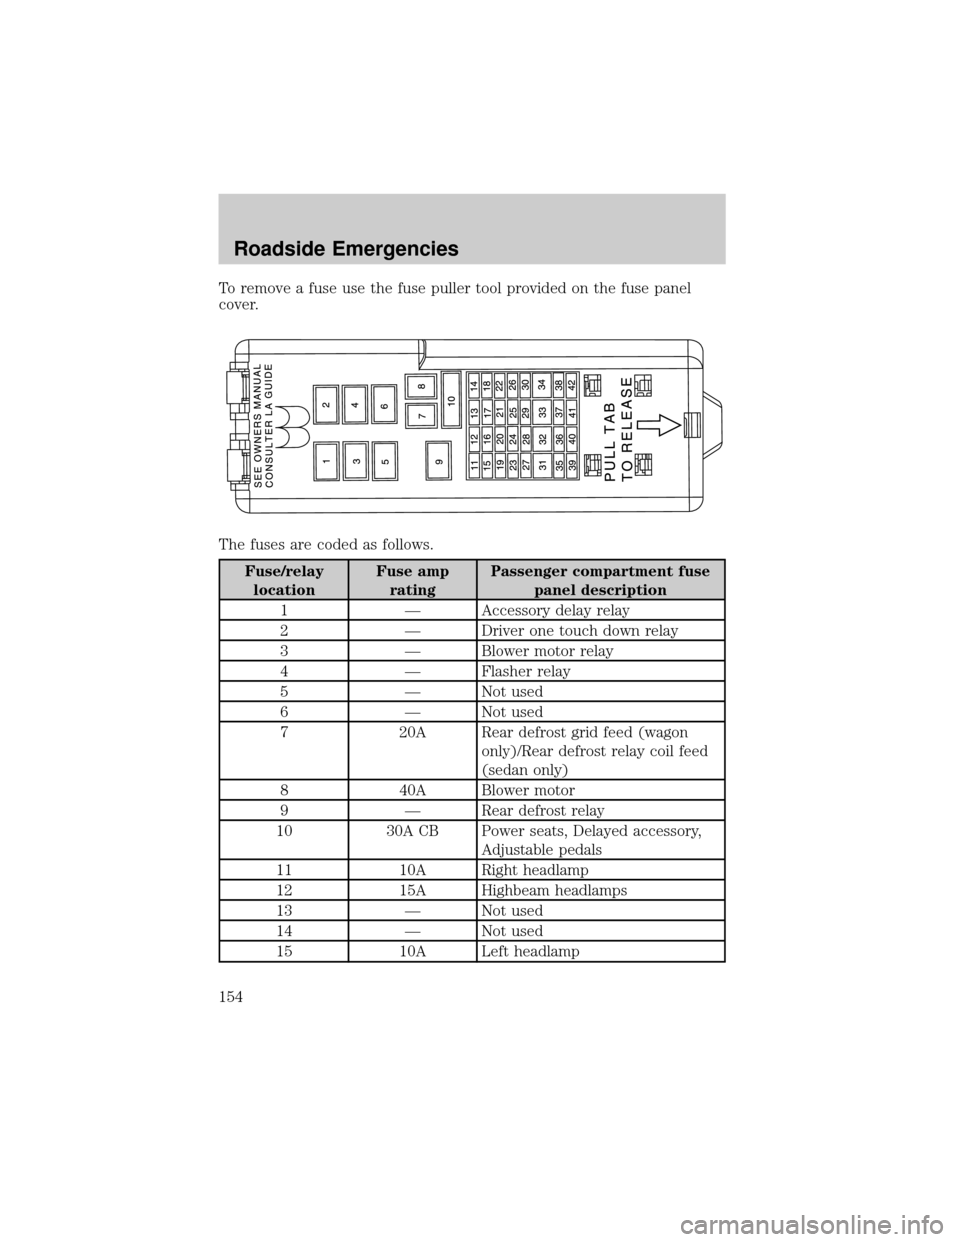
To remove a fuse use the fuse puller tool provided on the fuse panel
cover.
The fuses are coded as follows.
Fuse/relay
locationFuse amp
ratingPassenger compartment fuse
panel description
1 Ð Accessory delay relay
2 Ð Driver one touch down relay
3 Ð Blower motor relay
4 Ð Flasher relay
5 Ð Not used
6 Ð Not used
7 20A Rear defrost grid feed (wagon
only)/Rear defrost relay coil feed
(sedan only)
8 40A Blower motor
9 Ð Rear defrost relay
10 30A CB Power seats, Delayed accessory,
Adjustable pedals
11 10A Right headlamp
12 15A Highbeam headlamps
13 Ð Not used
14 Ð Not used
15 10A Left headlamp
Roadside Emergencies
154
Page 156 of 248
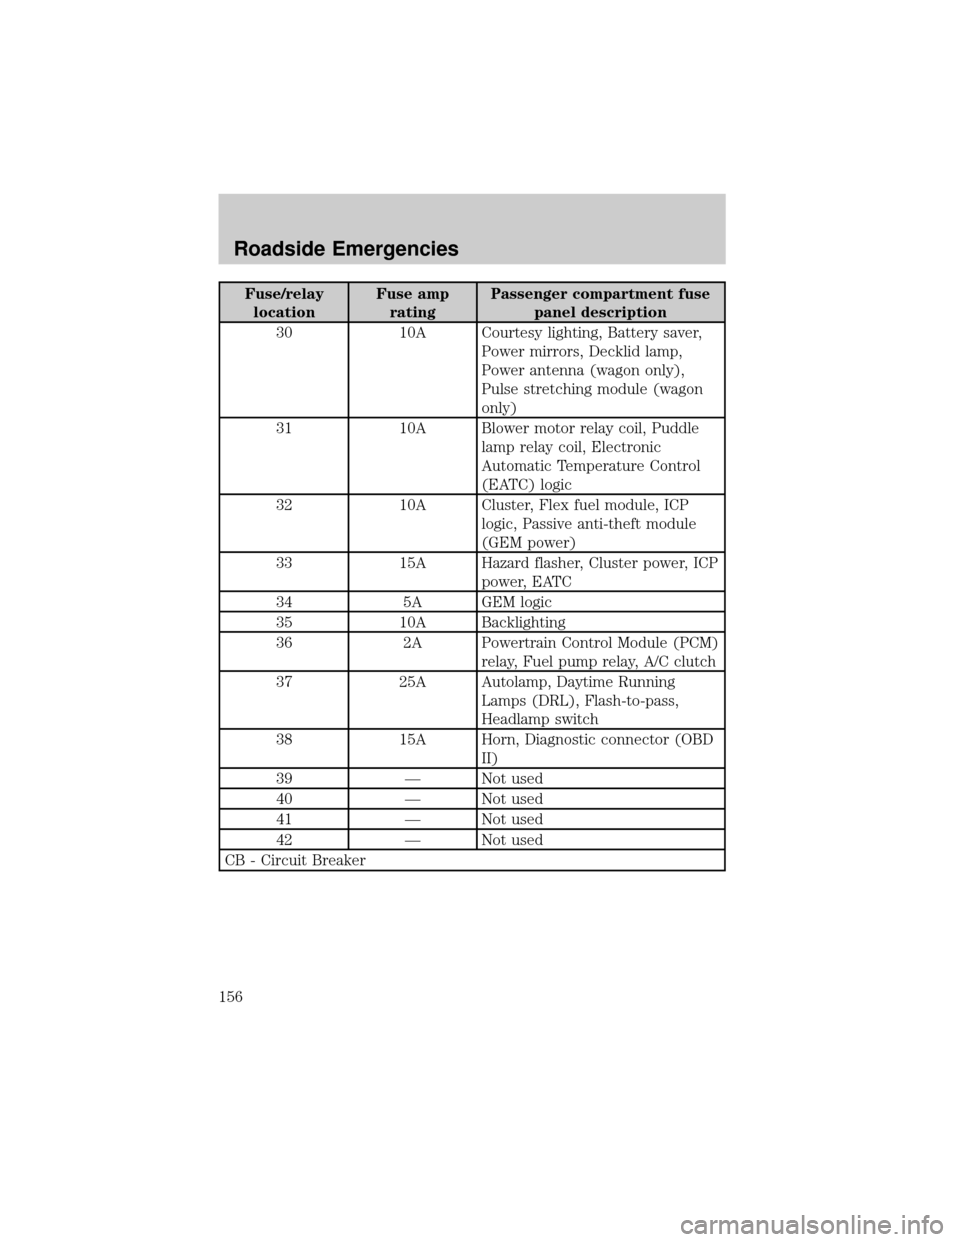
Fuse/relay
locationFuse amp
ratingPassenger compartment fuse
panel description
30 10A Courtesy lighting, Battery saver,
Power mirrors, Decklid lamp,
Power antenna (wagon only),
Pulse stretching module (wagon
only)
31 10A Blower motor relay coil, Puddle
lamp relay coil, Electronic
Automatic Temperature Control
(EATC) logic
32 10A Cluster, Flex fuel module, ICP
logic, Passive anti-theft module
(GEM power)
33 15A Hazard flasher, Cluster power, ICP
power, EATC
34 5A GEM logic
35 10A Backlighting
36 2A Powertrain Control Module (PCM)
relay, Fuel pump relay, A/C clutch
37 25A Autolamp, Daytime Running
Lamps (DRL), Flash-to-pass,
Headlamp switch
38 15A Horn, Diagnostic connector (OBD
II)
39 Ð Not used
40 Ð Not used
41 Ð Not used
42 Ð Not used
CB - Circuit Breaker
Roadside Emergencies
156
Page 241 of 248

GENUINE FORD ACCESSORIES FOR YOUR VEHICLE
A wide selection of Genuine Ford Accessories are available for your
vehicle through your local authorized Ford or Ford of Canada dealer.
These quality accessories have been specifically engineered to fulfill your
automotive needs; they are custom designed to complement the style
and aerodynamic appearance of your vehicle. In addition, each accessory
is made from high quality materials and meets or exceeds Ford's rigorous
engineering and safety specifications. Ford Motor Company will repair or
replace any properly dealer-installed Genuine Ford Accessory found to
be defective in factory-supplied materials or workmanship during the
warranty period, as well as any component damaged by the defective
accessory. The accessory will be warranted for whichever provides you
the greatest benefit:
²12 months or 12,000 miles (20,000 km) (whichever occurs first), or
²the remainder of your new vehicle limited warranty.
This means that Genuine Ford Accessories purchased along with your new
vehicle and installed by the dealer are covered for the full length of your
New Vehicle's Limited Warranty Ð 3 years or 36,000 miles (60,000 km)
(whichever occurs first). Contact your dealer for details and a copy of
the warranty.
Not all accessories are available for all models.
The following is a list of several Genuine Ford Accessory products for
your vehicle. Not all accessories are available for all models. For a
complete listing of the accessories that are available for your vehicle,
please contact your dealer or visit our online store at:
www.fordaccessoriesstore.com.
Exterior style
Bug shields
Deflectors
Exterior trim kits
Front end covers
Grille inserts
Headlamps, fog lights and Daytime Running Lamps (DRLs)
Splash guards
Wheels
Interior style
Cell phone holders
Electrochromatic compass/temperature interior mirrors
Accessories
Accessories
241