stop start FORD TAURUS X 2009 1.G User Guide
[x] Cancel search | Manufacturer: FORD, Model Year: 2009, Model line: TAURUS X, Model: FORD TAURUS X 2009 1.GPages: 358, PDF Size: 2.86 MB
Page 266 of 358
P (Park)
This position locks the transmission and prevents the front wheels from
turning.
To put your vehicle in gear:
•Depress the brake pedal
•Move the gearshift lever into the desired gear
To put your vehicle in P (Park):
•Come to a complete stop
•Move the gearshift lever and securely latch it in P (Park)
WARNING:Always set the parking brake fully and make sure
the gearshift is latched in P (Park). Turn the ignition to the off
position and remove the key whenever you leave your vehicle.
R (Reverse)
With the gearshift lever in R (Reverse), the vehicle will move backward.
Always come to a complete stop before shifting into and out of R
(Reverse).
N (Neutral)
With the gearshift lever in N (Neutral), the vehicle can be started and is
free to roll. Hold the brake pedal down while in this position.
D (Drive) with Overdrive
The normal driving position for the best fuel economy. Transmission
operates in gears one through six.
2009 Taurus X(219)
Owners Guide, 2nd Printing
USA(fus)
Driving
266
Page 274 of 358
When climbing a steep slope or hill, start in a lower gear rather than
downshifting to a lower gear from a higher gear once the ascent has
started. This reduces strain on the engine and the possibility of stalling.
If you do stall out, Do not try to turnaround because you might roll over.
It is better to back down to a safe location.
Apply just enough power to the wheels to climb the hill. Too much
power will cause the tires to slip, spin or lose traction, resulting in loss of
vehicle control.
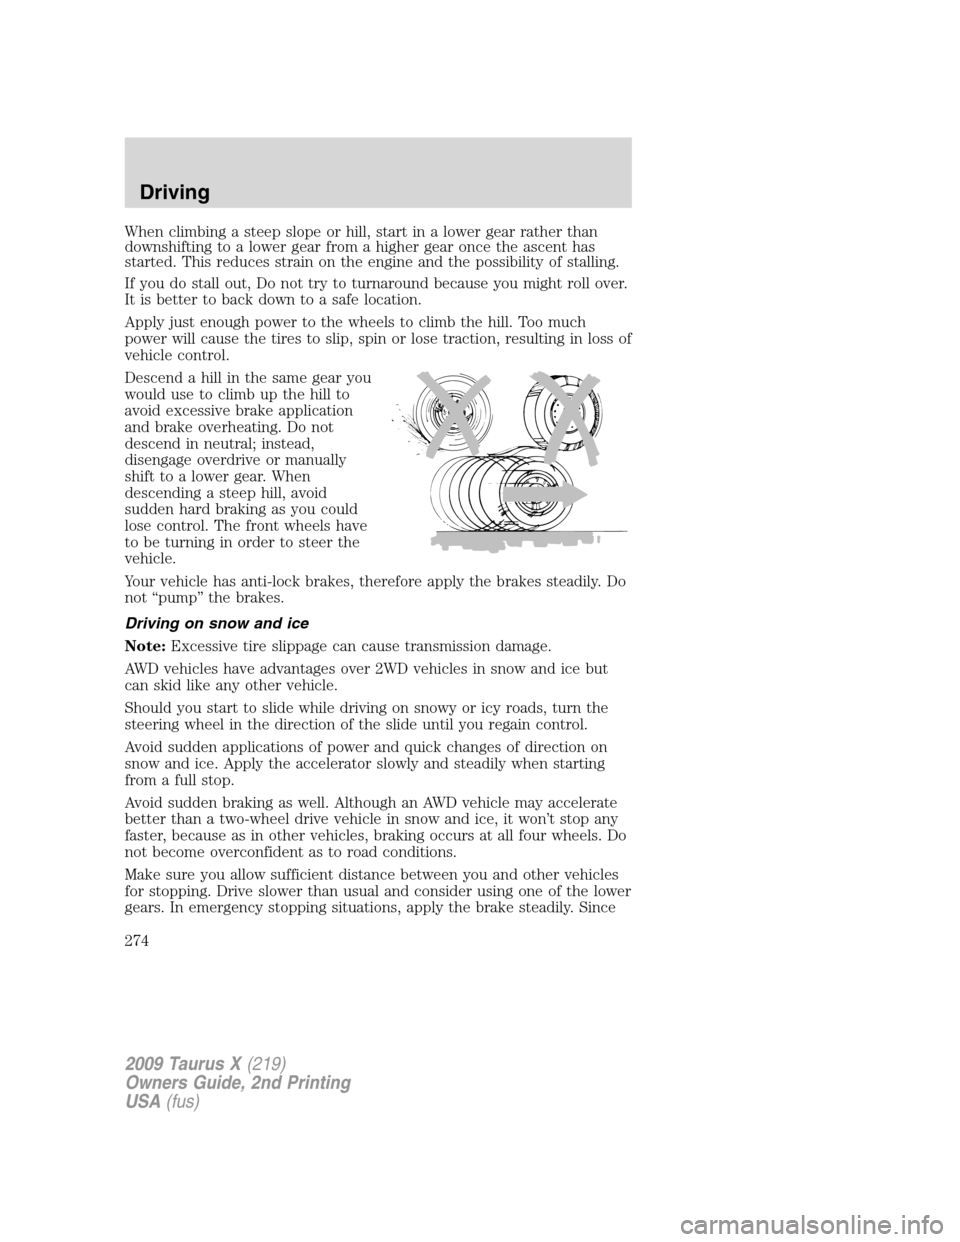
Descend a hill in the same gear you
would use to climb up the hill to
avoid excessive brake application
and brake overheating. Do not
descend in neutral; instead,
disengage overdrive or manually
shift to a lower gear. When
descending a steep hill, avoid
sudden hard braking as you could
lose control. The front wheels have
to be turning in order to steer the
vehicle.
Your vehicle has anti-lock brakes, therefore apply the brakes steadily. Do
not “pump” the brakes.
Driving on snow and ice
Note:Excessive tire slippage can cause transmission damage.
AWD vehicles have advantages over 2WD vehicles in snow and ice but
can skid like any other vehicle.
Should you start to slide while driving on snowy or icy roads, turn the
steering wheel in the direction of the slide until you regain control.
Avoid sudden applications of power and quick changes of direction on
snow and ice. Apply the accelerator slowly and steadily when starting
from a full stop.
Avoid sudden braking as well. Although an AWD vehicle may accelerate
better than a two-wheel drive vehicle in snow and ice, it won’t stop any
faster, because as in other vehicles, braking occurs at all four wheels. Do
not become overconfident as to road conditions.
Make sure you allow sufficient distance between you and other vehicles
for stopping. Drive slower than usual and consider using one of the lower
gears. In emergency stopping situations, apply the brake steadily. Since
2009 Taurus X(219)
Owners Guide, 2nd Printing
USA(fus)
Driving
274
Page 278 of 358
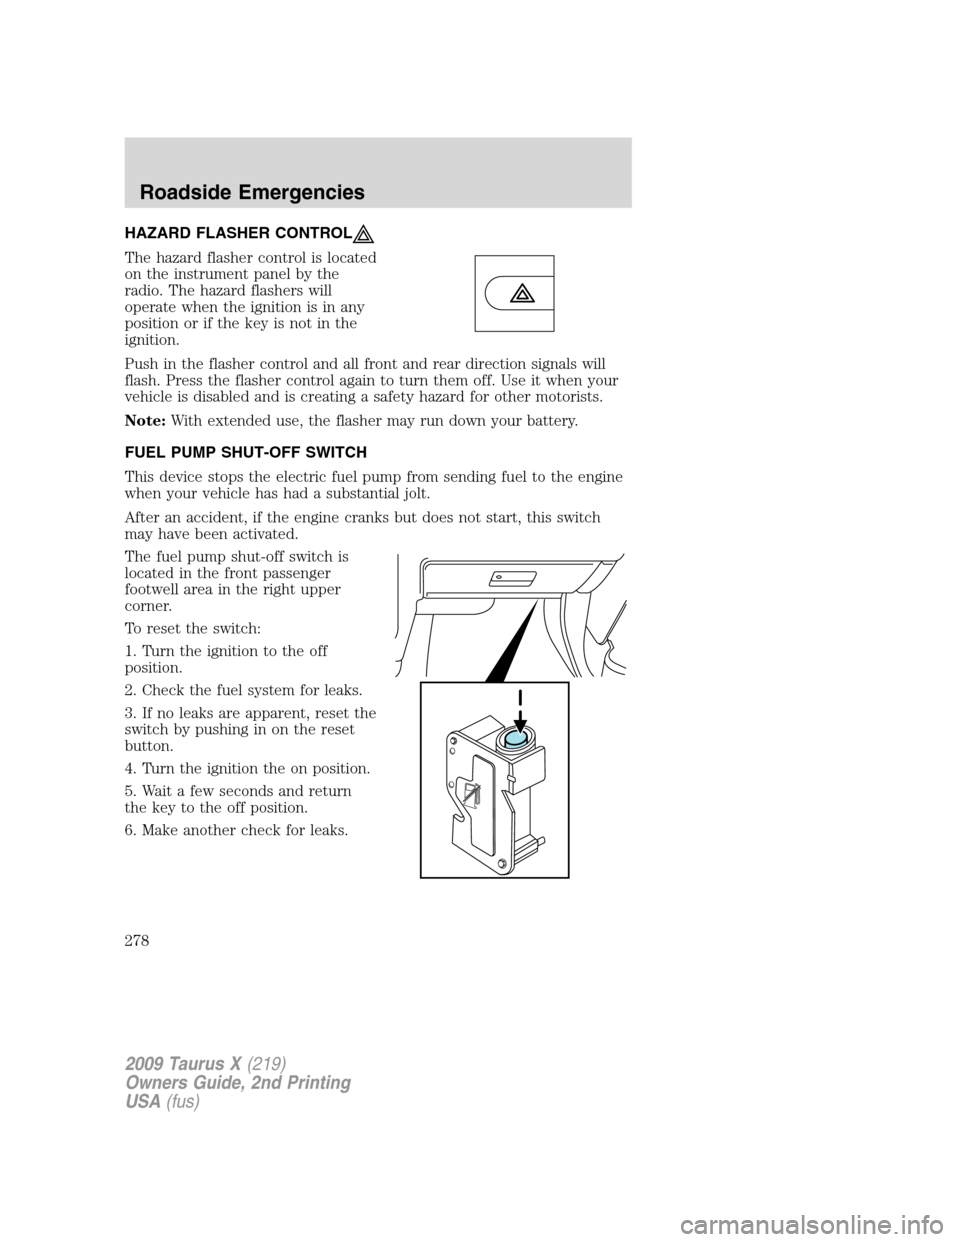
HAZARD FLASHER CONTROL
The hazard flasher control is located
on the instrument panel by the
radio. The hazard flashers will
operate when the ignition is in any
position or if the key is not in the
ignition.
Push in the flasher control and all front and rear direction signals will
flash. Press the flasher control again to turn them off. Use it when your
vehicle is disabled and is creating a safety hazard for other motorists.
Note:With extended use, the flasher may run down your battery.
FUEL PUMP SHUT-OFF SWITCH
This device stops the electric fuel pump from sending fuel to the engine
when your vehicle has had a substantial jolt.
After an accident, if the engine cranks but does not start, this switch
may have been activated.
The fuel pump shut-off switch is
located in the front passenger
footwell area in the right upper
corner.
To reset the switch:
1. Turn the ignition to the off
position.
2. Check the fuel system for leaks.
3. If no leaks are apparent, reset the
switch by pushing in on the reset
button.
4. Turn the ignition the on position.
5. Wait a few seconds and return
the key to the off position.
6. Make another check for leaks.
2009 Taurus X(219)
Owners Guide, 2nd Printing
USA(fus)
Roadside Emergencies
278
Page 321 of 358
4. Install the dipstick and ensure it is fully seated.
5. Fully install the engine oil filler cap by turning the filler cap clockwise
until it stops.
To avoid possible oil loss, DO NOT operate the vehicle with the
engine oil level dipstick and/or the engine oil filler cap removed.
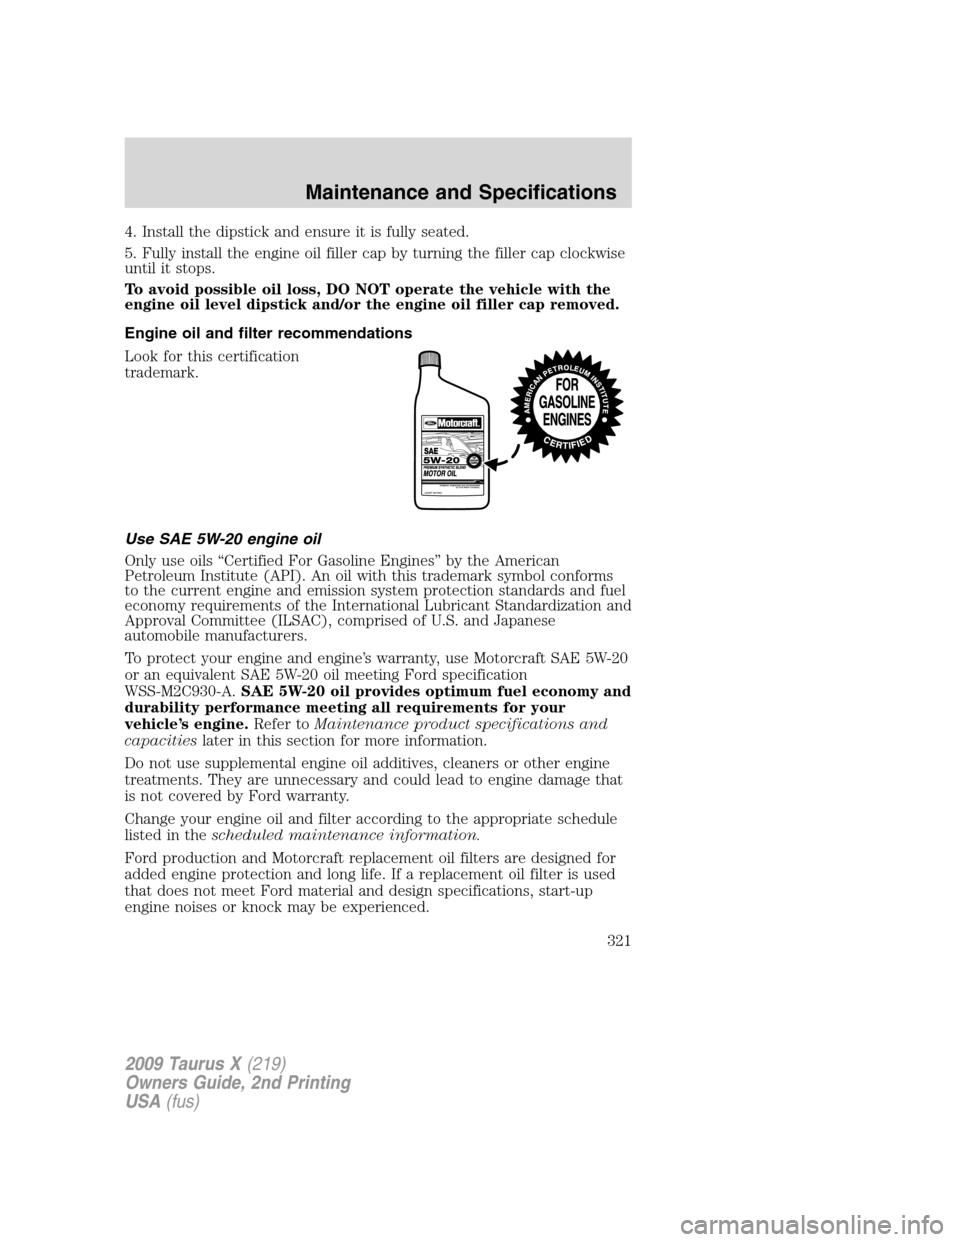
Engine oil and filter recommendations
Look for this certification
trademark.
Use SAE 5W-20 engine oil
Only use oils “Certified For Gasoline Engines” by the American
Petroleum Institute (API). An oil with this trademark symbol conforms
to the current engine and emission system protection standards and fuel
economy requirements of the International Lubricant Standardization and
Approval Committee (ILSAC), comprised of U.S. and Japanese
automobile manufacturers.
To protect your engine and engine’s warranty, use Motorcraft SAE 5W-20
or an equivalent SAE 5W-20 oil meeting Ford specification
WSS-M2C930-A.SAE 5W-20 oil provides optimum fuel economy and
durability performance meeting all requirements for your
vehicle’s engine.Refer toMaintenance product specifications and
capacitieslater in this section for more information.
Do not use supplemental engine oil additives, cleaners or other engine
treatments. They are unnecessary and could lead to engine damage that
is not covered by Ford warranty.
Change your engine oil and filter according to the appropriate schedule
listed in thescheduled maintenance information.
Ford production and Motorcraft replacement oil filters are designed for
added engine protection and long life. If a replacement oil filter is used
that does not meet Ford material and design specifications, start-up
engine noises or knock may be experienced.
2009 Taurus X(219)
Owners Guide, 2nd Printing
USA(fus)
Maintenance and Specifications
321
Page 323 of 358
WARNING:Keep batteries out of reach of children. Batteries
contain sulfuric acid. Avoid contact with skin, eyes or clothing.
Shield your eyes when working near the battery to protect against
possible splashing of acid solution. In case of acid contact with skin or
eyes, flush immediately with water for a minimum of 15 minutes and
get prompt medical attention. If acid is swallowed, call a physician
immediately.
WARNING:Battery posts, terminals and related accessories
contain lead and lead compounds.Wash hands after handling.
Because your vehicle’s engine is electronically controlled by a computer,
some control conditions are maintained by power from the battery. When
the battery is disconnected or a new battery is installed, the engine must
relearn its idle and fuel trim strategy for optimum driveability and
performance. To begin this process:
1. With the vehicle at a complete stop, set the parking brake.
2. Put the gearshift in P (Park), turn off all accessories and start the
engine.
3. Run the engine until it reaches normal operating temperature.
4. Allow the engine to idle for at least one minute.
5. Turn the A/C on and allow the engine to idle for at least one minute.
6. Release the parking brake. With your foot on the brake pedal and with
the A/C on, put the vehicle in D (Drive) and allow the engine to idle for
at least one minute.
7. Drive the vehicle to complete the relearning process.
•The vehicle may need to be driven 10 miles (16 km) or more to
relearn the idle and fuel trim strategy.
•If you do not allow the engine to relearn its idle trim, the idle
quality of your vehicle may be adversely affected until the idle
trim is eventually relearned.
If the battery has been disconnected or a new battery has been installed,
the clock and radio settings must be reset once the battery is
reconnected.
2009 Taurus X(219)
Owners Guide, 2nd Printing
USA(fus)
Maintenance and Specifications
323
Page 330 of 358
WARNING:Never remove the coolant reservoir cap while the
engine is running or hot. The hot coolant is under pressure and
may cause serious burns.
5. Re-start the engine and take your vehicle to a service facility.
Driving the vehicle without repairing the engine problem
increases the chance of engine damage. Take your vehicle to a
service facility as soon as possible.
FUEL FILTER
Your vehicle is equipped with a lifetime fuel filter that is integrated with
the fuel tank. Regular maintenance or replacement is not needed.
WHAT YOU SHOULD KNOW ABOUT AUTOMOTIVE FUELS
Important safety precautions
WARNING:Do not overfill the fuel tank. The pressure in an
overfilled tank may cause leakage and lead to fuel spray and fire.
WARNING:The fuel system may be under pressure. If the fuel
filler cap is venting vapor or if you hear a hissing sound, wait
until it stops before completely removing the fuel filler cap. Otherwise,
fuel may spray out and injure you or others.
WARNING:If you do not use the proper fuel filler cap,
excessive vacuum in the fuel tank may damage the fuel system
or cause the fuel cap to disengage in a collision, which may result in
serious personal injury.
WARNING:Automotive fuels can cause serious injury or death
if misused or mishandled.
WARNING:Gasoline may contain benzene, which is a
cancer-causing agent.
2009 Taurus X(219)
Owners Guide, 2nd Printing
USA(fus)
Maintenance and Specifications
330
Page 333 of 358
At the next opportunity, safely pull off of the road, remove the fuel filler
cap, align the cap properly and reinstall it. The check fuel cap
light
or “check fuel cap” message may not reset immediately; it may
take several driving cycles for the check fuel cap light
or “check fuel
cap” message to turn off. A driving cycle consists of an engine start-up
(after four or more hours with the engine off) followed by city and
highway driving.
Continuing to drive with the check fuel cap light
or “check fuel cap”
message on may cause the
light to turn on as well.
If you must replace the fuel filler cap, replace it with a fuel filler
cap that is designed for your vehicle. The customer warranty may
be void for any damage to the fuel tank or fuel system if the
correct genuine Ford, Motorcraft or other certified fuel filler cap
is not used.
WARNING:The fuel system may be under pressure. If the fuel
filler cap is venting vapor or if you hear a hissing sound, wait
until it stops before completely removing the fuel filler cap. Otherwise,
fuel may spray out and injure you or others.
WARNING:If you do not use the proper fuel filler cap,
excessive vacuum in the fuel tank may damage the fuel system
or cause the fuel cap to disengage in a collision, which may result in
personal injury.
Choosing the right fuel
Use only UNLEADED fuel or UNLEADED fuel blended with a maximum
of 10% ethanol. Do not use fuel ethanol (E85), diesel, methanol, leaded
fuel or any other fuel. The use of leaded fuel is prohibited by law and
could damage your vehicle.
2009 Taurus X(219)
Owners Guide, 2nd Printing
USA(fus)
Maintenance and Specifications
333
Page 340 of 358
These temporary malfunctions can be corrected by filling the fuel tank
with good quality fuel, properly tightening the fuel cap or letting the
electrical system dry out. After three driving cycles without these or any
other temporary malfunctions present, theService engine soon
indicator should stay off the next time the engine is started. A driving
cycle consists of a cold engine startup followed by mixed city/highway
driving. No additional vehicle service is required.
If theService engine soon
indicator remains on, have your vehicle
serviced at the first available opportunity. Although some malfunctions
detected by the OBD-II may not have symptoms that are apparent,
continued driving with theService engine soon
indicator on can
result in increased emissions, lower fuel economy, reduced engine and
transmission smoothness, and lead to more costly repairs.
Readiness for Inspection/Maintenance (I/M) testing
Some state/provincial and local governments may have
Inspection/Maintenance (I/M) programs to inspect the emission control
equipment on your vehicle. Failure to pass this inspection could prevent
you from getting a vehicle registration. Your vehicle may not pass the I/M
test if theService engine soon
indicator is on or not working
properly (bulb is burned out), or if the OBD-II system has determined
that some of the emission control systems have not been properly
checked. In this case, the vehicle is considered not ready for I/M testing.
If theService engine soon
indicator is on or the bulb does not
work, the vehicle may need to be serviced. Refer to the On board
diagnostics (OBD-II) description in this chapter.
If the vehicle’s engine or transmission has just been serviced, or the
battery has recently run down or been replaced, the OBD-II system may
indicate that the vehicle is not ready for I/M testing. To determine if the
vehicle is ready for I/M testing, turn the ignition key to the on position
for 15 seconds without cranking the engine. If theService engine
soon
indicator blinks eight times, it means that the vehicle is not
ready for I/M testing; if theService engine soon
indicator stays on
solid, it means that the vehicle is ready for I/M testing.
The OBD-II system is designed to check the emission control system
during normal driving. A complete check may take several days. If the
vehicle is not ready for I/M testing, the following driving cycle consisting
of mixed city and highway driving may be performed:
15 minutes of steady driving on an expressway/highway followed by
20 minutes of stop-and-go driving with at least four 30-second idle
periods.
2009 Taurus X(219)
Owners Guide, 2nd Printing
USA(fus)
Maintenance and Specifications
340