ECO mode FORD THUNDERBIRD 2002 11.G Owners Manual
[x] Cancel search | Manufacturer: FORD, Model Year: 2002, Model line: THUNDERBIRD, Model: FORD THUNDERBIRD 2002 11.GPages: 248, PDF Size: 2.1 MB
Page 11 of 248
These temporary malfunctions can be corrected by filling the fuel tank
with high quality fuel of the recommended octane and/or properly
installing and securely tightening the fuel cap. After three driving cycles
without these or any other temporary malfunctions present, the light
should turn off. (A driving cycle consists of a cold engine startup
followed by mixed city/highway driving.) No additional vehicle service is
required.
If the light remains on, have your vehicle serviced at the first available
opportunity.
Light is blinking:
Engine misfire is occurring which could damage your catalytic
converter.
You should drive in a moderate fashion (avoid heavy acceleration and
deceleration) and have your vehicle serviced at the first available
opportunity.
Under engine misfire conditions, excessive exhaust temperatures
could damage the catalytic converter, the fuel system, interior
floor coverings or other vehicle components, possibly causing a
fire.
Check fuel cap
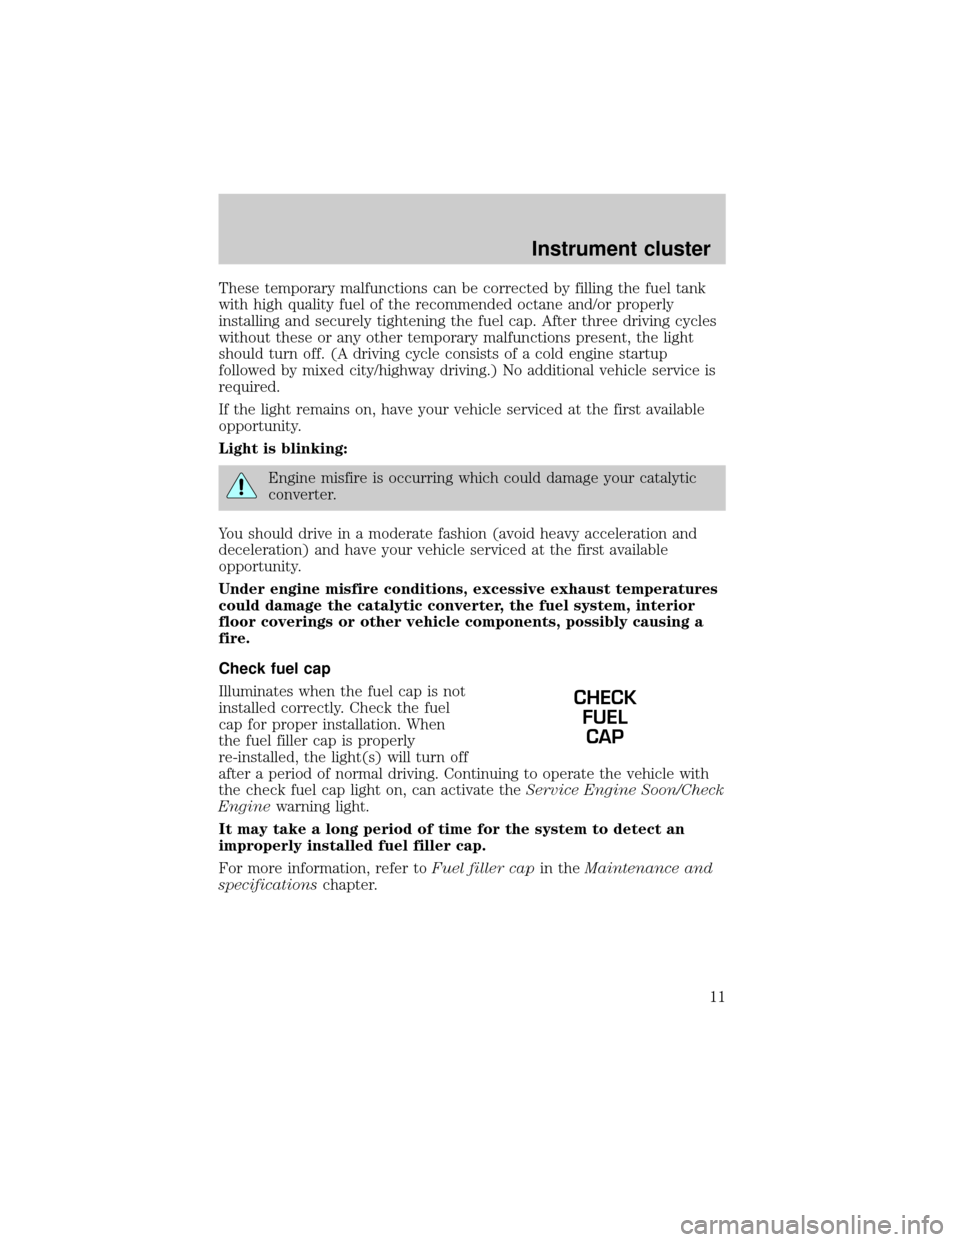
Illuminates when the fuel cap is not
installed correctly. Check the fuel
cap for proper installation. When
the fuel filler cap is properly
re-installed, the light(s) will turn off
after a period of normal driving. Continuing to operate the vehicle with
the check fuel cap light on, can activate theService Engine Soon/Check
Enginewarning light.
It may take a long period of time for the system to detect an
improperly installed fuel filler cap.
For more information, refer toFuel filler capin theMaintenance and
specificationschapter.
CHECK
FUEL
CAP
Instrument cluster
11
Page 33 of 248
Setting the clock
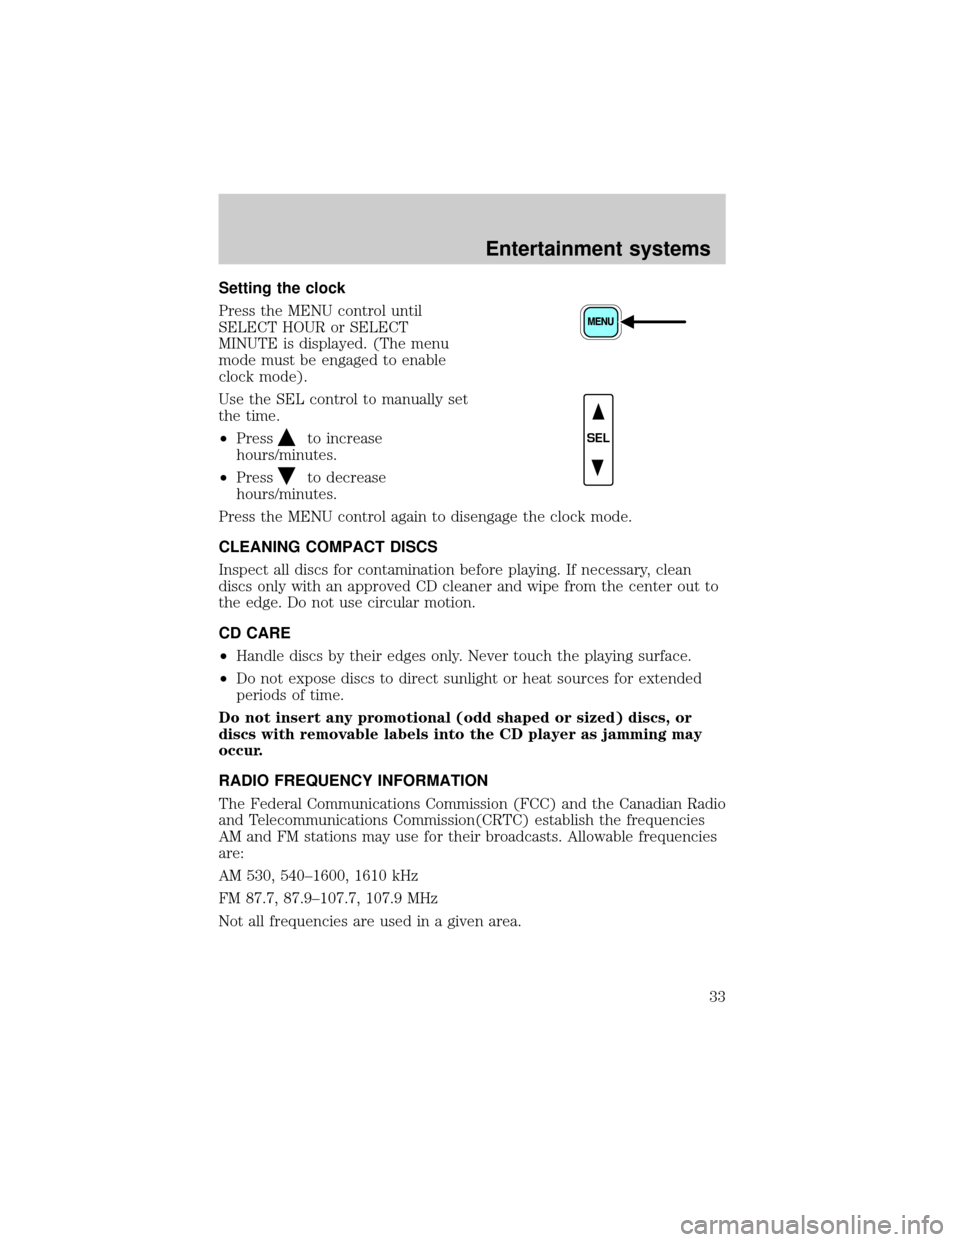
Press the MENU control until
SELECT HOUR or SELECT
MINUTE is displayed. (The menu
mode must be engaged to enable
clock mode).
Use the SEL control to manually set
the time.
²Press
to increase
hours/minutes.
²Press
to decrease
hours/minutes.
Press the MENU control again to disengage the clock mode.
CLEANING COMPACT DISCS
Inspect all discs for contamination before playing. If necessary, clean
discs only with an approved CD cleaner and wipe from the center out to
the edge. Do not use circular motion.
CD CARE
²Handle discs by their edges only. Never touch the playing surface.
²Do not expose discs to direct sunlight or heat sources for extended
periods of time.
Do not insert any promotional (odd shaped or sized) discs, or
discs with removable labels into the CD player as jamming may
occur.
RADIO FREQUENCY INFORMATION
The Federal Communications Commission (FCC) and the Canadian Radio
and Telecommunications Commission(CRTC) establish the frequencies
AM and FM stations may use for their broadcasts. Allowable frequencies
are:
AM 530, 540±1600, 1610 kHz
FM 87.7, 87.9±107.7, 107.9 MHz
Not all frequencies are used in a given area.
SEL
Entertainment systems
33
Page 42 of 248
In defrost and floor/defrost mode, if the outside temperature is about 2ÉC
(35ÉF) or higher, the air conditioner will automatically dehumidify the air
to reduce window fogging. However, the A/C indicator will be off and the
A/C override control cannot be selected.
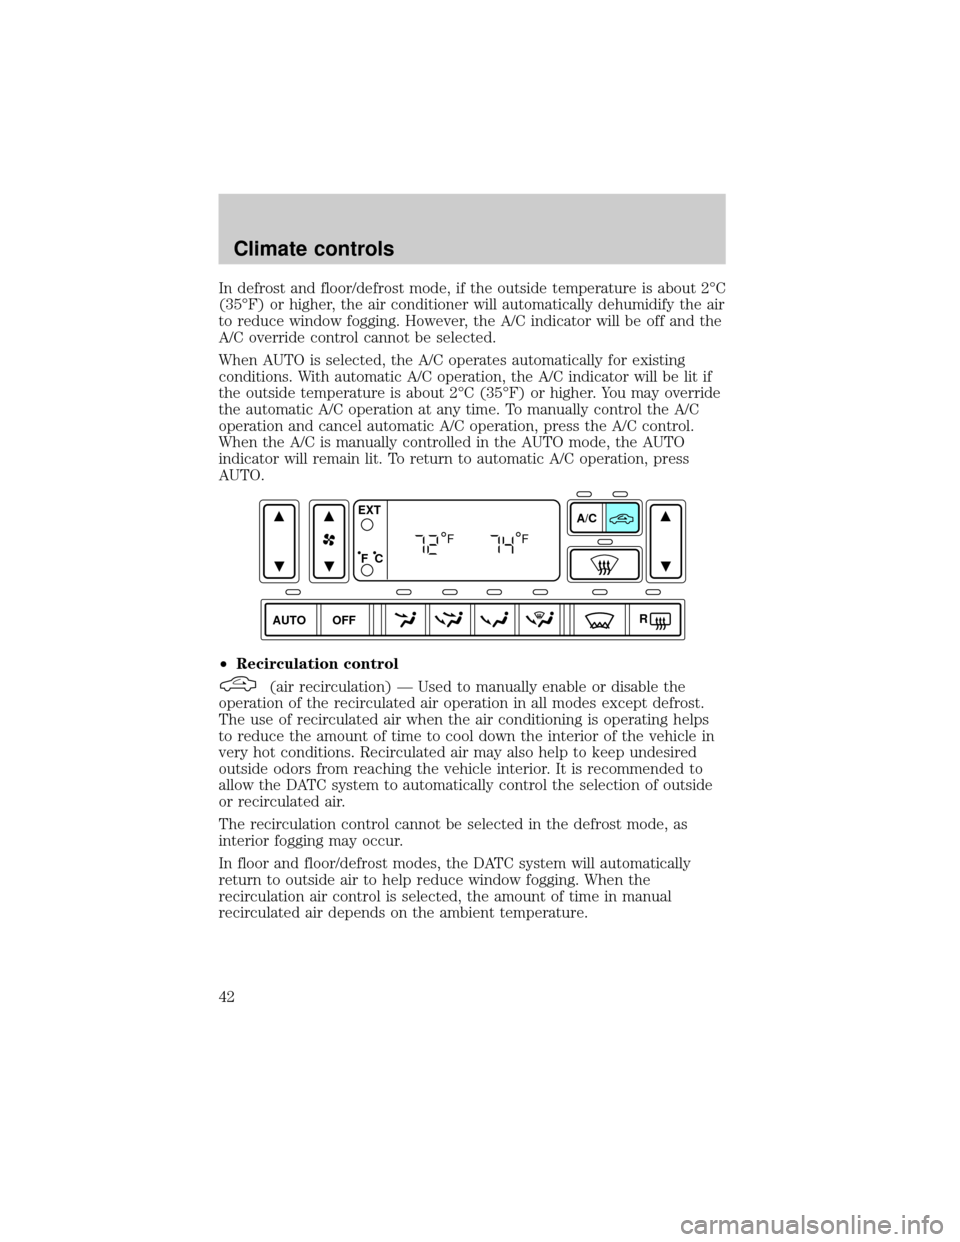
When AUTO is selected, the A/C operates automatically for existing
conditions. With automatic A/C operation, the A/C indicator will be lit if
the outside temperature is about 2ÉC (35ÉF) or higher. You may override
the automatic A/C operation at any time. To manually control the A/C
operation and cancel automatic A/C operation, press the A/C control.
When the A/C is manually controlled in the AUTO mode, the AUTO
indicator will remain lit. To return to automatic A/C operation, press
AUTO.
²Recirculation control
(air recirculation) Ð Used to manually enable or disable the
operation of the recirculated air operation in all modes except defrost.
The use of recirculated air when the air conditioning is operating helps
to reduce the amount of time to cool down the interior of the vehicle in
very hot conditions. Recirculated air may also help to keep undesired
outside odors from reaching the vehicle interior. It is recommended to
allow the DATC system to automatically control the selection of outside
or recirculated air.
The recirculation control cannot be selected in the defrost mode, as
interior fogging may occur.
In floor and floor/defrost modes, the DATC system will automatically
return to outside air to help reduce window fogging. When the
recirculation air control is selected, the amount of time in manual
recirculated air depends on the ambient temperature.
AUTO OFFA/C
R EXT
F C
FF
Climate controls
42
Page 45 of 248
With the ignition in RUN and the engine running, the feature will be
automatically enabled if the temperature is below 5ÉC (40ÉF). The
feature can be manually selected or deselected at any time. However, the
automatic feature will be enabled each time the engine is started.
In cold, dry conditions where wet snow or ice is not present it is
acceptable to manually deselect the operation of this feature.
The feature will run continuously unless a low battery condition is
detected, or unless the feature is manually deselected, and will only
activate when the vehicle engine is running (to prevent excessive drain
of the vehicle battery).
R(rear window defroster) Ð Refer toRear Window Defroster.
Displaying outside temperature
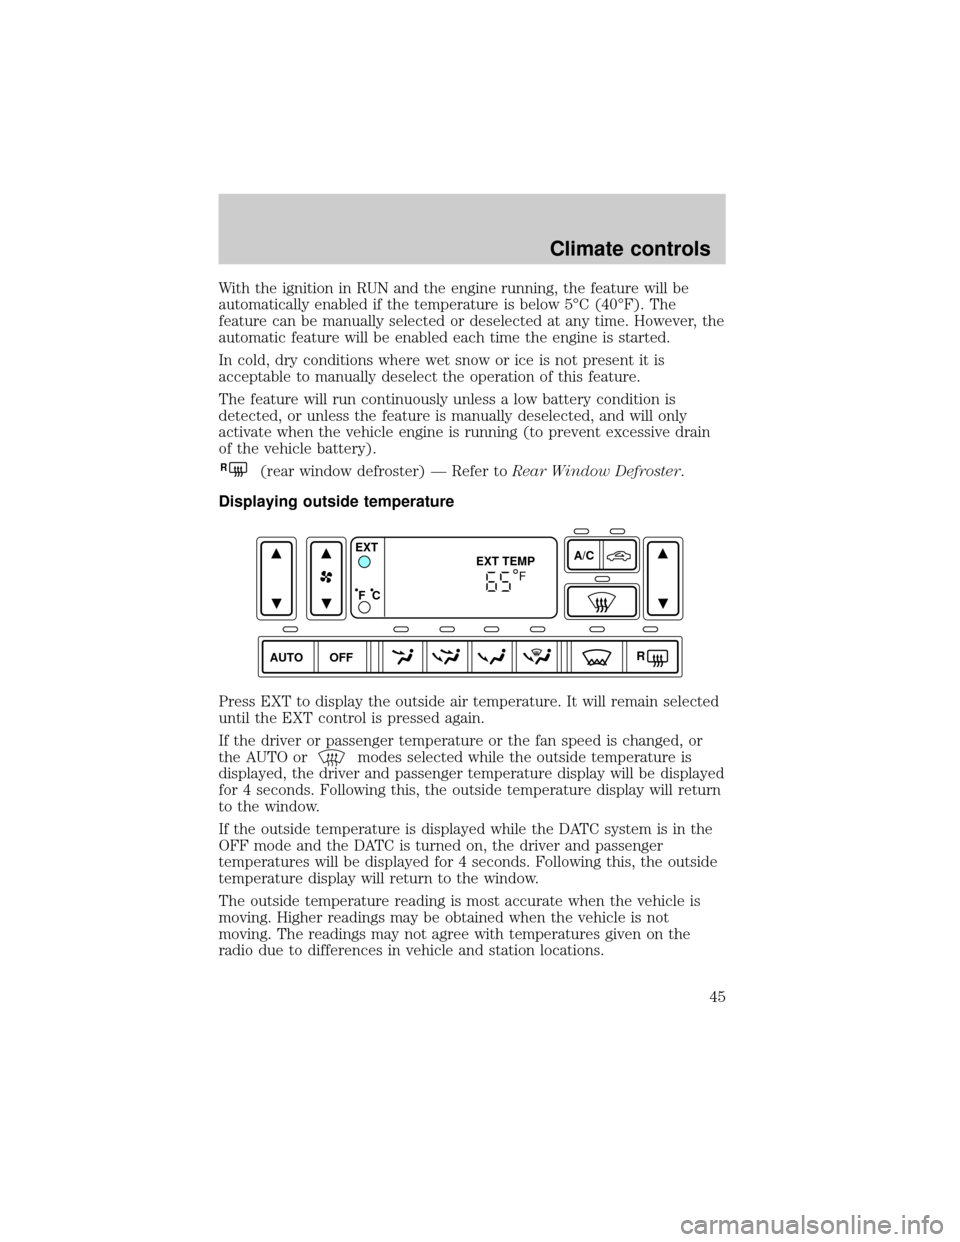
Press EXT to display the outside air temperature. It will remain selected
until the EXT control is pressed again.
If the driver or passenger temperature or the fan speed is changed, or
the AUTO or
modes selected while the outside temperature is
displayed, the driver and passenger temperature display will be displayed
for 4 seconds. Following this, the outside temperature display will return
to the window.
If the outside temperature is displayed while the DATC system is in the
OFF mode and the DATC is turned on, the driver and passenger
temperatures will be displayed for 4 seconds. Following this, the outside
temperature display will return to the window.
The outside temperature reading is most accurate when the vehicle is
moving. Higher readings may be obtained when the vehicle is not
moving. The readings may not agree with temperatures given on the
radio due to differences in vehicle and station locations.
AUTO OFFA/C
R EXT
EXT TEMP
F C
F
Climate controls
45
Page 72 of 248
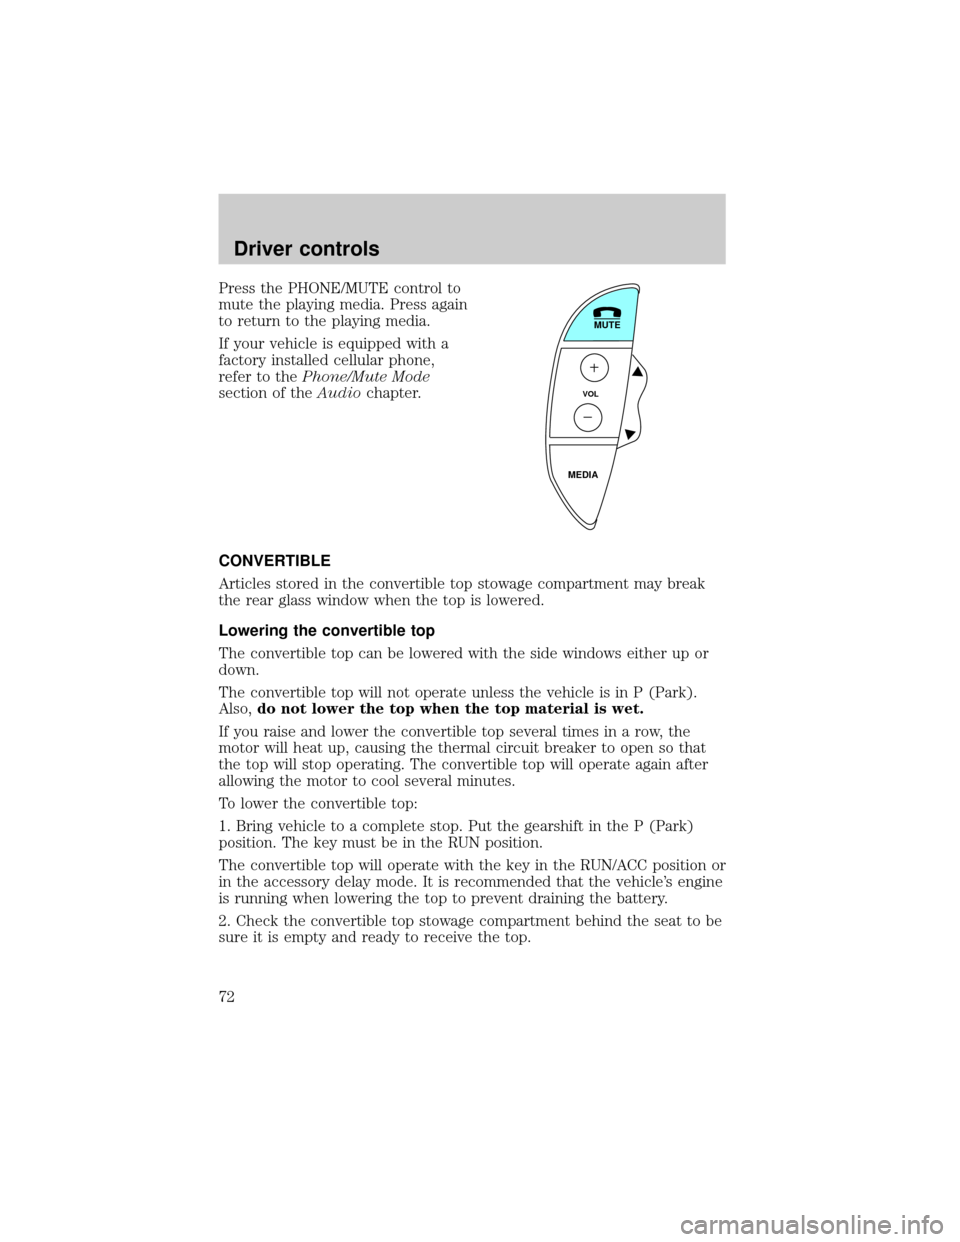
Press the PHONE/MUTE control to
mute the playing media. Press again
to return to the playing media.
If your vehicle is equipped with a
factory installed cellular phone,
refer to thePhone/Mute Mode
section of theAudiochapter.
CONVERTIBLE
Articles stored in the convertible top stowage compartment may break
the rear glass window when the top is lowered.
Lowering the convertible top
The convertible top can be lowered with the side windows either up or
down.
The convertible top will not operate unless the vehicle is in P (Park).
Also,do not lower the top when the top material is wet.
If you raise and lower the convertible top several times in a row, the
motor will heat up, causing the thermal circuit breaker to open so that
the top will stop operating. The convertible top will operate again after
allowing the motor to cool several minutes.
To lower the convertible top:
1. Bring vehicle to a complete stop. Put the gearshift in the P (Park)
position. The key must be in the RUN position.
The convertible top will operate with the key in the RUN/ACC position or
in the accessory delay mode. It is recommended that the vehicle's engine
is running when lowering the top to prevent draining the battery.
2. Check the convertible top stowage compartment behind the seat to be
sure it is empty and ready to receive the top.
MUTE
VOL
MEDIA
Driver controls
72
Page 74 of 248
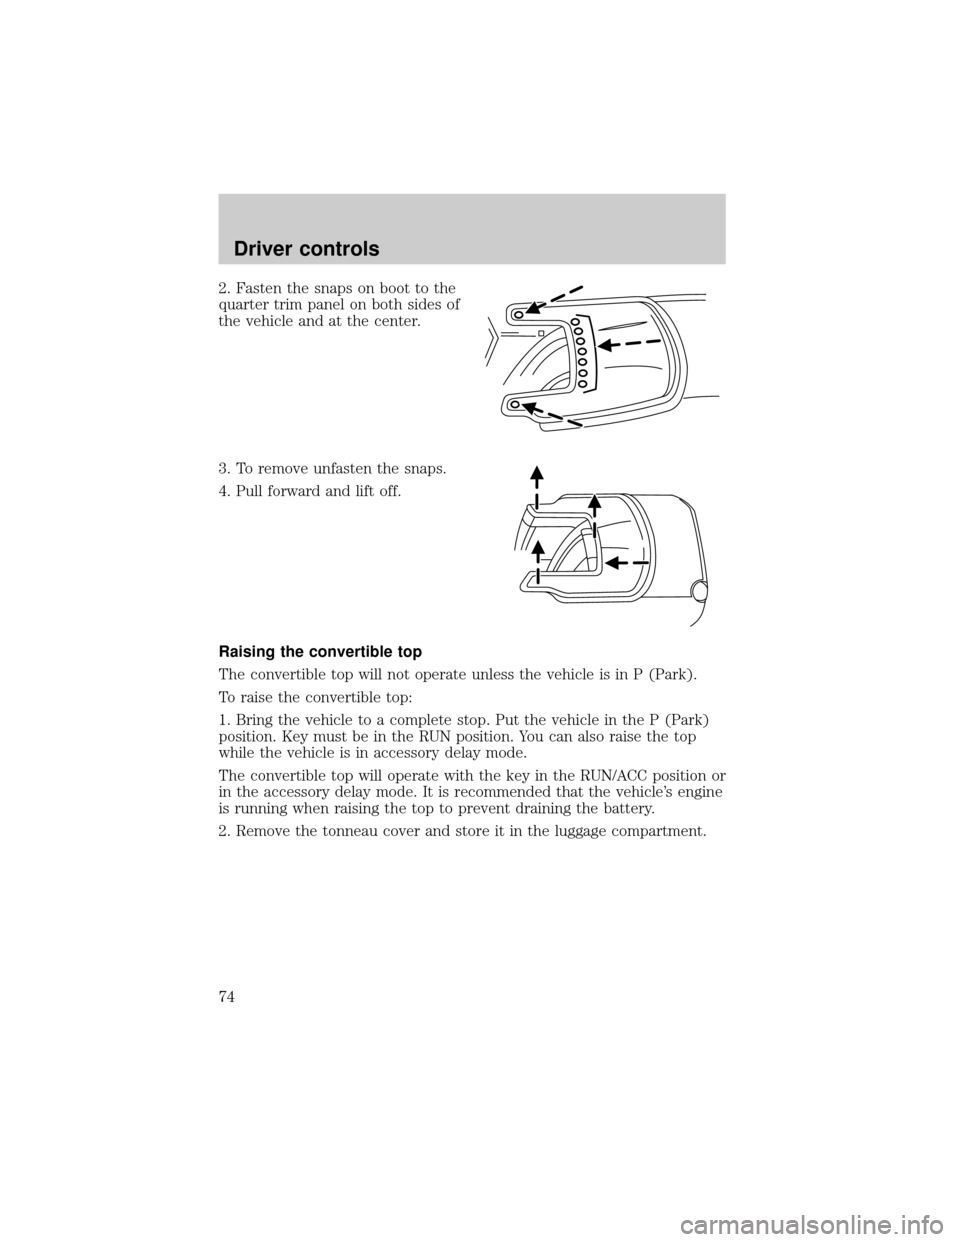
2. Fasten the snaps on boot to the
quarter trim panel on both sides of
the vehicle and at the center.
3. To remove unfasten the snaps.
4. Pull forward and lift off.
Raising the convertible top
The convertible top will not operate unless the vehicle is in P (Park).
To raise the convertible top:
1. Bring the vehicle to a complete stop. Put the vehicle in the P (Park)
position. Key must be in the RUN position. You can also raise the top
while the vehicle is in accessory delay mode.
The convertible top will operate with the key in the RUN/ACC position or
in the accessory delay mode. It is recommended that the vehicle's engine
is running when raising the top to prevent draining the battery.
2. Remove the tonneau cover and store it in the luggage compartment.
Driver controls
74
Page 90 of 248

The interior lamps will not turn off if:
²they have been turned on with the instrument panel dimmer control
switch or
²any door is open
The battery saver will turn off the interior lamps 30 minutes after the
last door is closed even if the dimmer control switch is on.
Autolock/Relock
This feature automatically locks all vehicle doors when:
²all doors are closed
²the engine is running
²you shift out of P (Park).
Relock
The autolock feature repeats when:
²the passenger's door is opened then closed while the engine is running
and
²you put the vehicle in motion.
Deactivating/activating the autolock/relock feature
Before following the procedure, make sure that the ignition is OFF and
all vehicle doors are closed.
You must complete steps 1-5 within 30 seconds or the procedure will
have to be repeated. Wait 30 seconds before repeating the procedure.
1. Turn the ignition key to RUN.
2. Press the power door unlock control three times.
3. Turn the ignition key from RUN to OFF.
4. Press the power door unlock control three times.
5. Turn the ignition back to RUN. The horn will chirp to indicate that
you have entered the programming mode.
6. Press the unlock control, then press the lock control. The horn will
chirp once if autolock was deactivated or twice (one short and one long
chirp) if autolock was activated.
7. Turn the ignition to OFF. The horn will chirp once to confirm the
procedure is complete.
Locks and security
90
Page 124 of 248
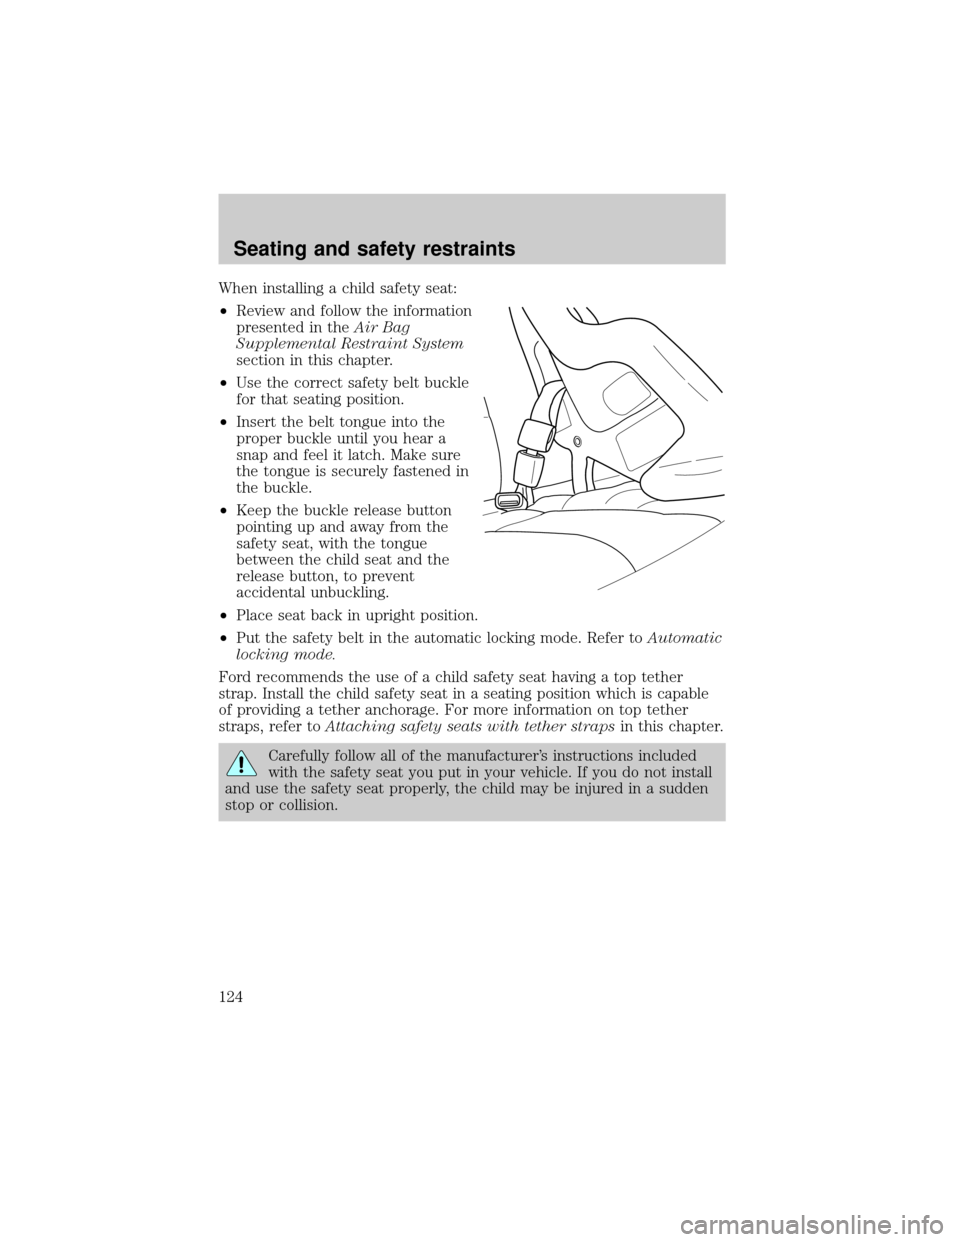
When installing a child safety seat:
²Review and follow the information
presented in theAir Bag
Supplemental Restraint System
section in this chapter.
²Use the correct safety belt buckle
for that seating position.
²Insert the belt tongue into the
proper buckle until you hear a
snap and feel it latch. Make sure
the tongue is securely fastened in
the buckle.
²Keep the buckle release button
pointing up and away from the
safety seat, with the tongue
between the child seat and the
release button, to prevent
accidental unbuckling.
²Place seat back in upright position.
²Put the safety belt in the automatic locking mode. Refer toAutomatic
locking mode.
Ford recommends the use of a child safety seat having a top tether
strap. Install the child safety seat in a seating position which is capable
of providing a tether anchorage. For more information on top tether
straps, refer toAttaching safety seats with tether strapsin this chapter.
Carefully follow all of the manufacturer's instructions included
with the safety seat you put in your vehicle. If you do not install
and use the safety seat properly, the child may be injured in a sudden
stop or collision.
Seating and safety restraints
124
Page 172 of 248
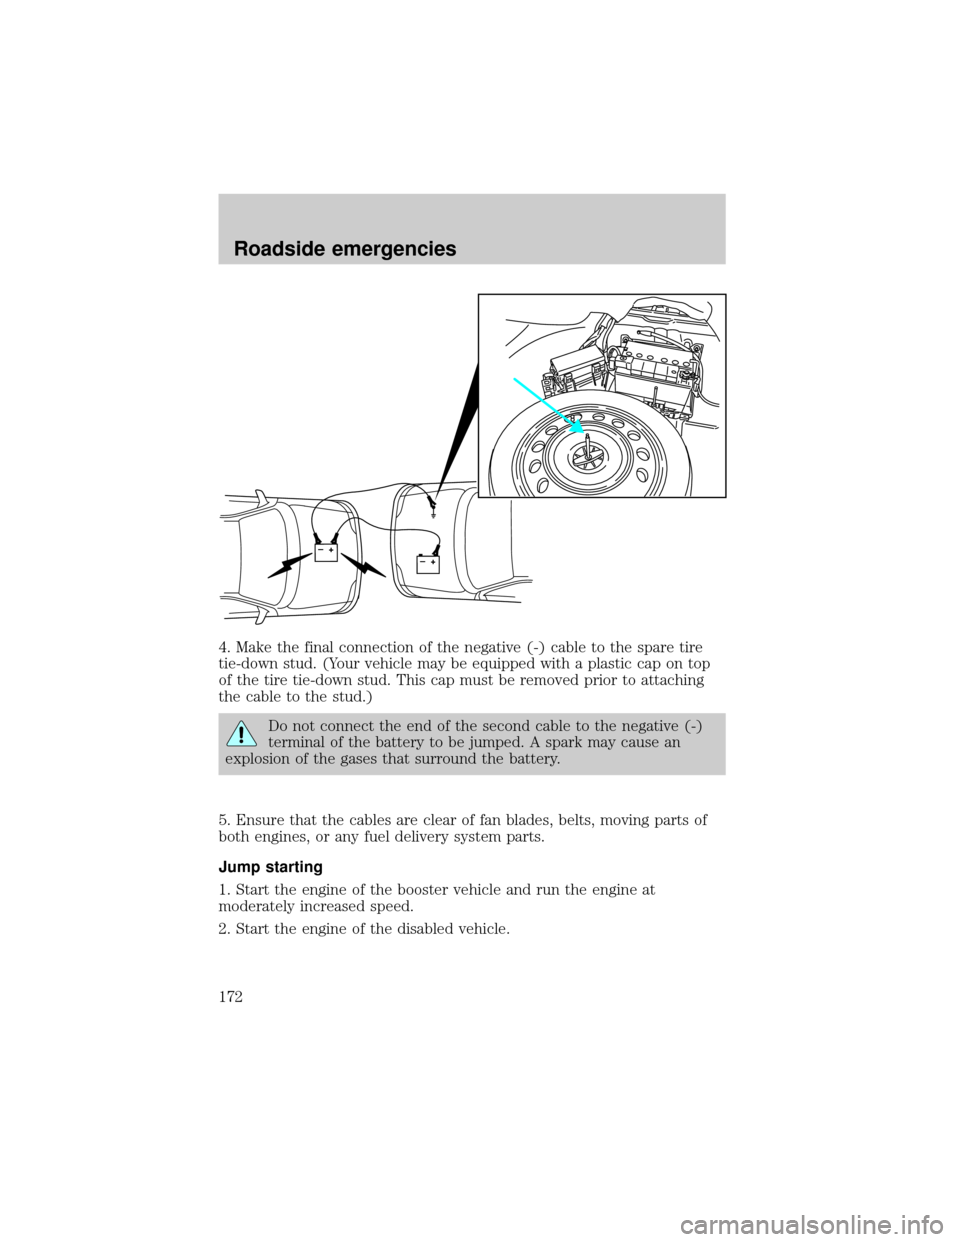
4. Make the final connection of the negative (-) cable to the spare tire
tie-down stud. (Your vehicle may be equipped with a plastic cap on top
of the tire tie-down stud. This cap must be removed prior to attaching
the cable to the stud.)
Do not connect the end of the second cable to the negative (-)
terminal of the battery to be jumped. A spark may cause an
explosion of the gases that surround the battery.
5. Ensure that the cables are clear of fan blades, belts, moving parts of
both engines, or any fuel delivery system parts.
Jump starting
1. Start the engine of the booster vehicle and run the engine at
moderately increased speed.
2. Start the engine of the disabled vehicle.
+–+–
Roadside emergencies
172
Page 181 of 248

Board membership
The Board consists of:
²three consumer representatives
²a Ford or Lincoln Mercury dealership representative
Consumer candidates for Board membership are recruited and trained by
an independent consulting firm. The dealership Board member is chosen
from Ford and Lincoln Mercury dealership management, recognized for
their business leadership qualities.
What the Board needs
To have your case reviewed you must complete the application in the
DSB brochure and mail it to the address provided on the application
form. Some states will require you to use certified mail, with return
receipt requested.
Your application is reviewed and, if it is determined to be eligible, you
will receive an acknowledgment indicating:
²the file number assigned to your application
²the toll-free phone number of the DSB's independent administrator
Your dealership and a Ford Motor Company representative will then be
asked to submit statements.
To properly review your case, the Board needs the following information:
²legible copies of all documents and maintenance or repair orders
relevant to the case
²the year, make, model, and Vehicle Identification Number (VIN) listed
on your vehicle ownership license
²the date of repair(s) and mileage at the time of occurrence(s)
²the current mileage
²the name of the dealer(s) who sold or serviced the vehicle
²a brief description of your unresolved concern
²a brief summary of the action taken by the dealer(s) and Ford Motor
Company
²the names (if known) of all the people you contacted at the
dealership(s)
²a description of the action you expect to resolve your concern
Customer assistance
181