lock FORD THUNDERBIRD 2003 11.G User Guide
[x] Cancel search | Manufacturer: FORD, Model Year: 2003, Model line: THUNDERBIRD, Model: FORD THUNDERBIRD 2003 11.GPages: 200, PDF Size: 1.79 MB
Page 31 of 200
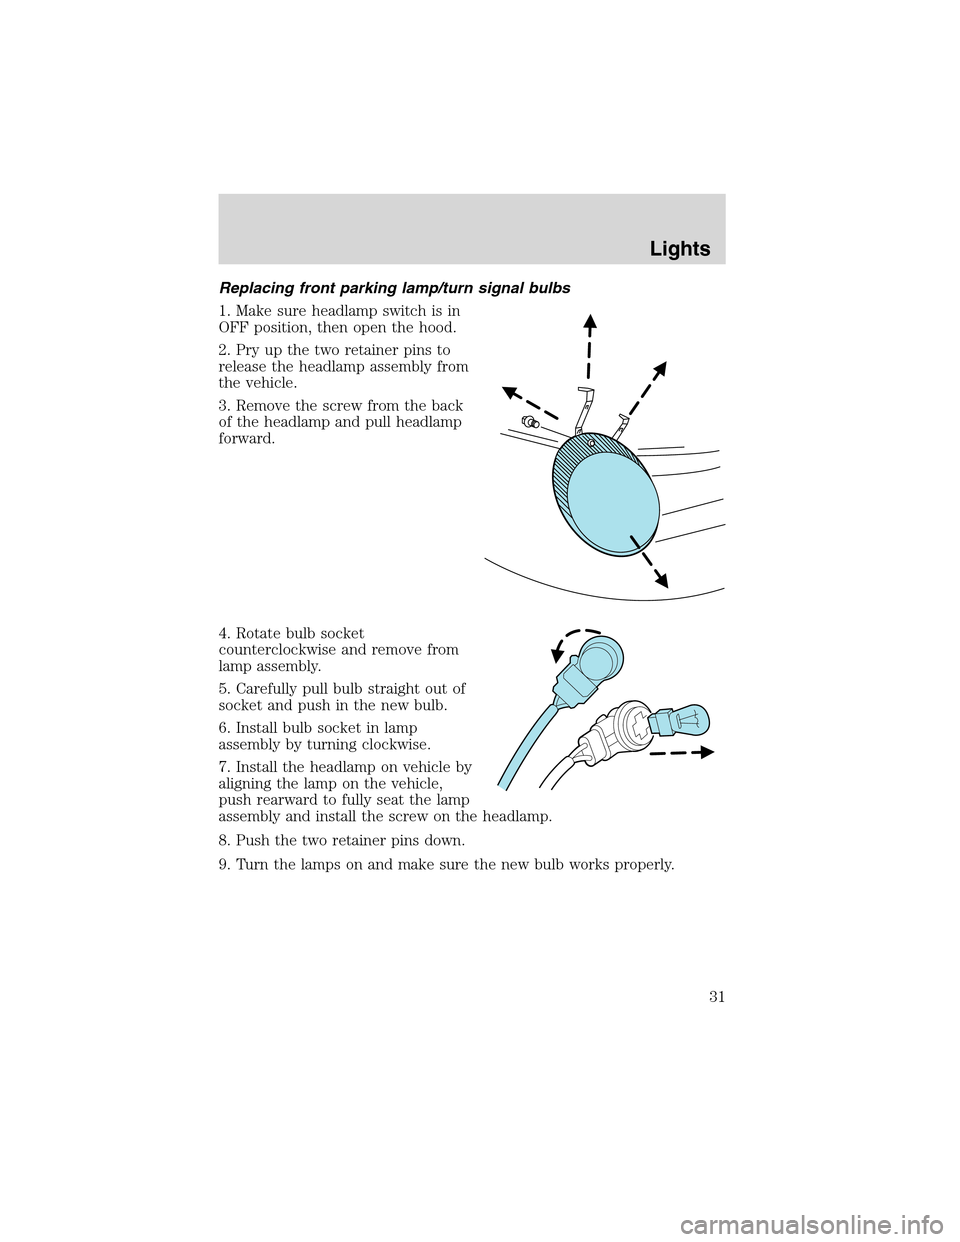
Replacing front parking lamp/turn signal bulbs
1. Make sure headlamp switch is in
OFF position, then open the hood.
2. Pry up the two retainer pins to
release the headlamp assembly from
the vehicle.
3. Remove the screw from the back
of the headlamp and pull headlamp
forward.
4. Rotate bulb socket
counterclockwise and remove from
lamp assembly.
5. Carefully pull bulb straight out of
socket and push in the new bulb.
6. Install bulb socket in lamp
assembly by turning clockwise.
7. Install the headlamp on vehicle by
aligning the lamp on the vehicle,
push rearward to fully seat the lamp
assembly and install the screw on the headlamp.
8. Push the two retainer pins down.
9. Turn the lamps on and make sure the new bulb works properly.
Lights
31
Page 32 of 200
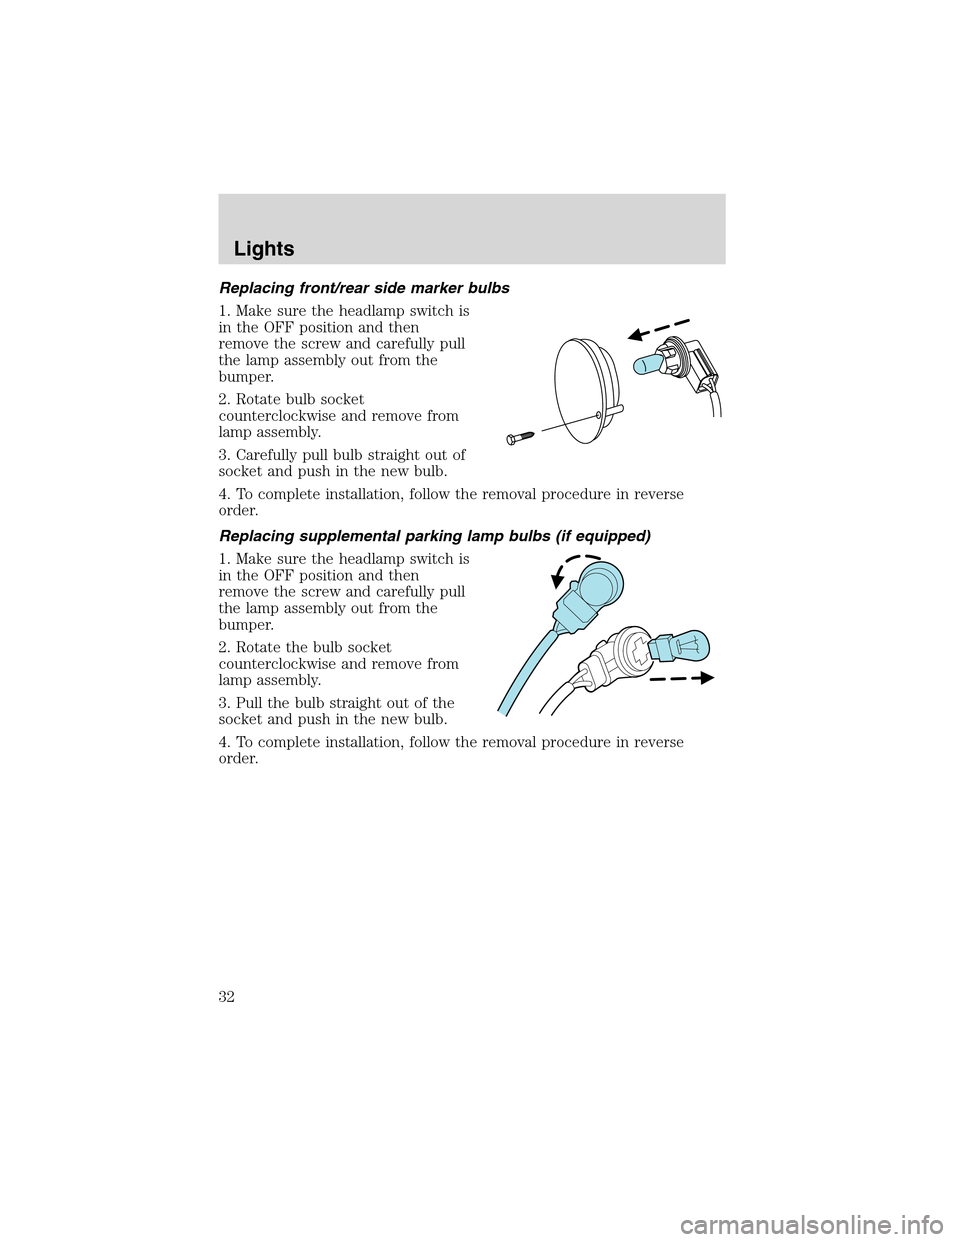
Replacing front/rear side marker bulbs
1. Make sure the headlamp switch is
in the OFF position and then
remove the screw and carefully pull
the lamp assembly out from the
bumper.
2. Rotate bulb socket
counterclockwise and remove from
lamp assembly.
3. Carefully pull bulb straight out of
socket and push in the new bulb.
4. To complete installation, follow the removal procedure in reverse
order.
Replacing supplemental parking lamp bulbs (if equipped)
1. Make sure the headlamp switch is
in the OFF position and then
remove the screw and carefully pull
the lamp assembly out from the
bumper.
2. Rotate the bulb socket
counterclockwise and remove from
lamp assembly.
3. Pull the bulb straight out of the
socket and push in the new bulb.
4. To complete installation, follow the removal procedure in reverse
order.
Lights
32
Page 34 of 200
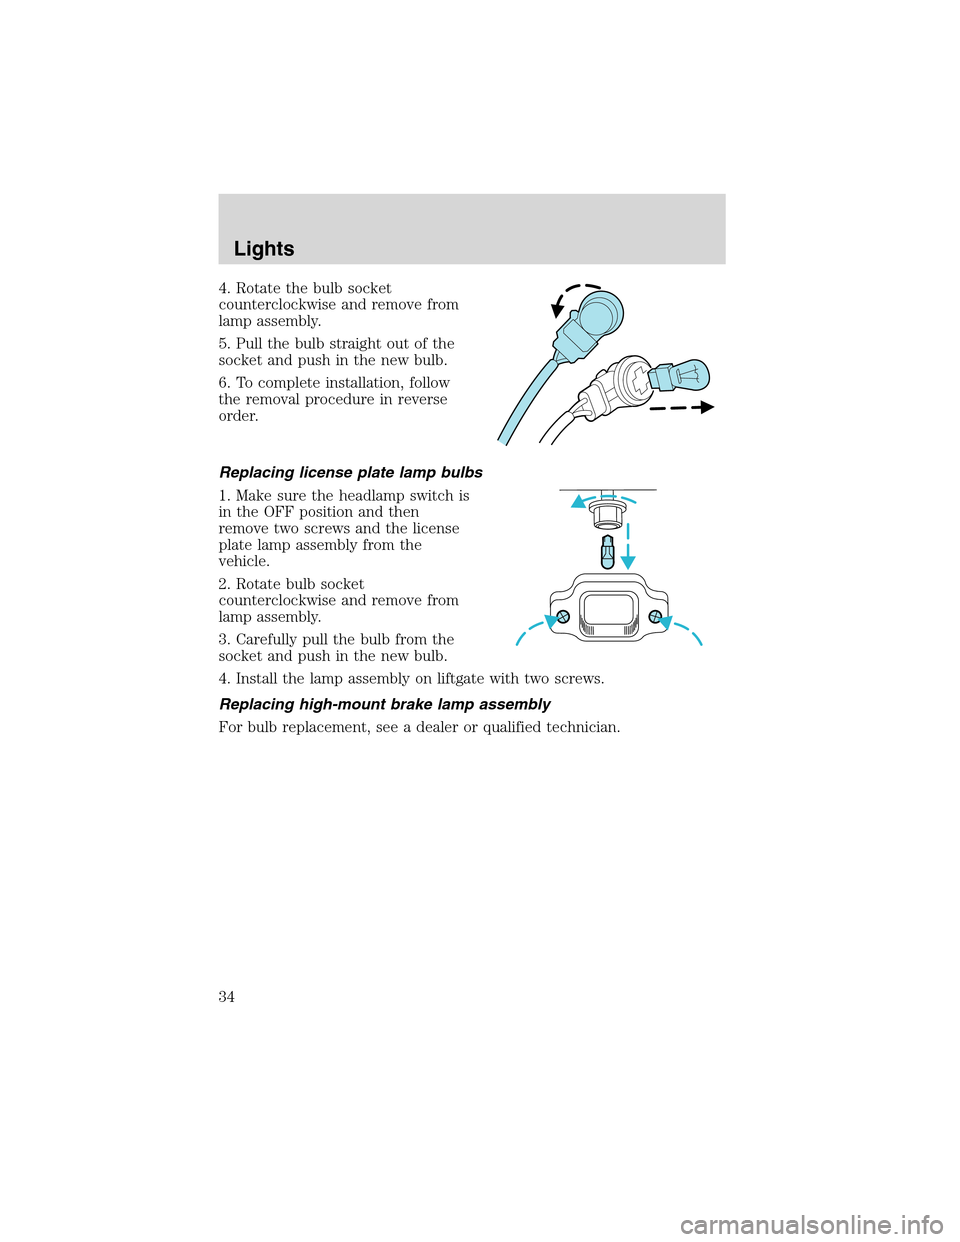
4. Rotate the bulb socket
counterclockwise and remove from
lamp assembly.
5. Pull the bulb straight out of the
socket and push in the new bulb.
6. To complete installation, follow
the removal procedure in reverse
order.
Replacing license plate lamp bulbs
1. Make sure the headlamp switch is
in the OFF position and then
remove two screws and the license
plate lamp assembly from the
vehicle.
2. Rotate bulb socket
counterclockwise and remove from
lamp assembly.
3. Carefully pull the bulb from the
socket and push in the new bulb.
4. Install the lamp assembly on liftgate with two screws.
Replacing high-mount brake lamp assembly
For bulb replacement, see a dealer or qualified technician.
Lights
34
Page 35 of 200
MULTI-FUNCTION LEVER
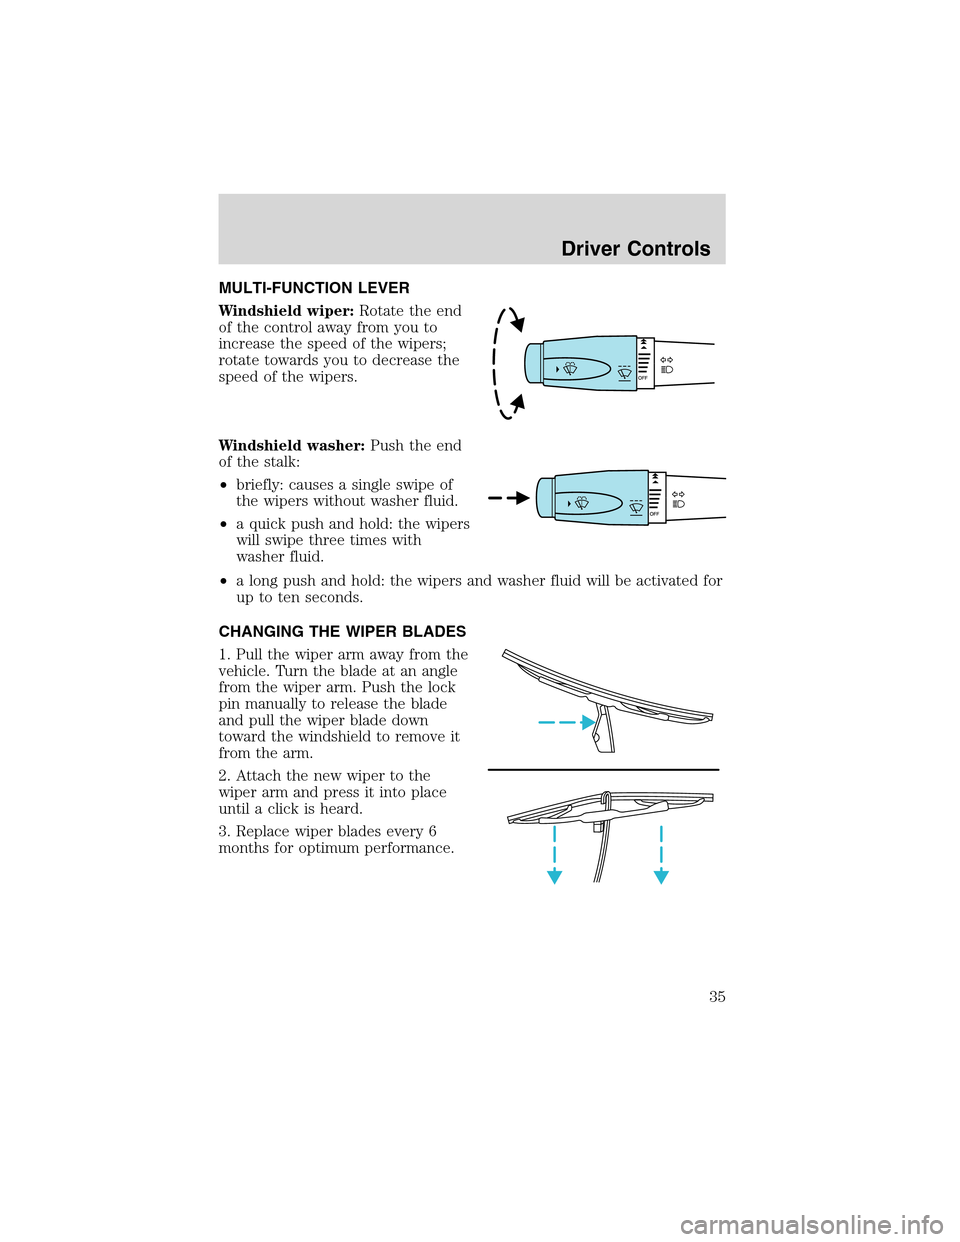
Windshield wiper:Rotate the end
of the control away from you to
increase the speed of the wipers;
rotate towards you to decrease the
speed of the wipers.
Windshield washer:Push the end
of the stalk:
•briefly: causes a single swipe of
the wipers without washer fluid.
•a quick push and hold: the wipers
will swipe three times with
washer fluid.
•a long push and hold: the wipers and washer fluid will be activated for
up to ten seconds.
CHANGING THE WIPER BLADES
1. Pull the wiper arm away from the
vehicle. Turn the blade at an angle
from the wiper arm. Push the lock
pin manually to release the blade
and pull the wiper blade down
toward the windshield to remove it
from the arm.
2. Attach the new wiper to the
wiper arm and press it into place
until a click is heard.
3. Replace wiper blades every 6
months for optimum performance.
Driver Controls
35
Page 39 of 200
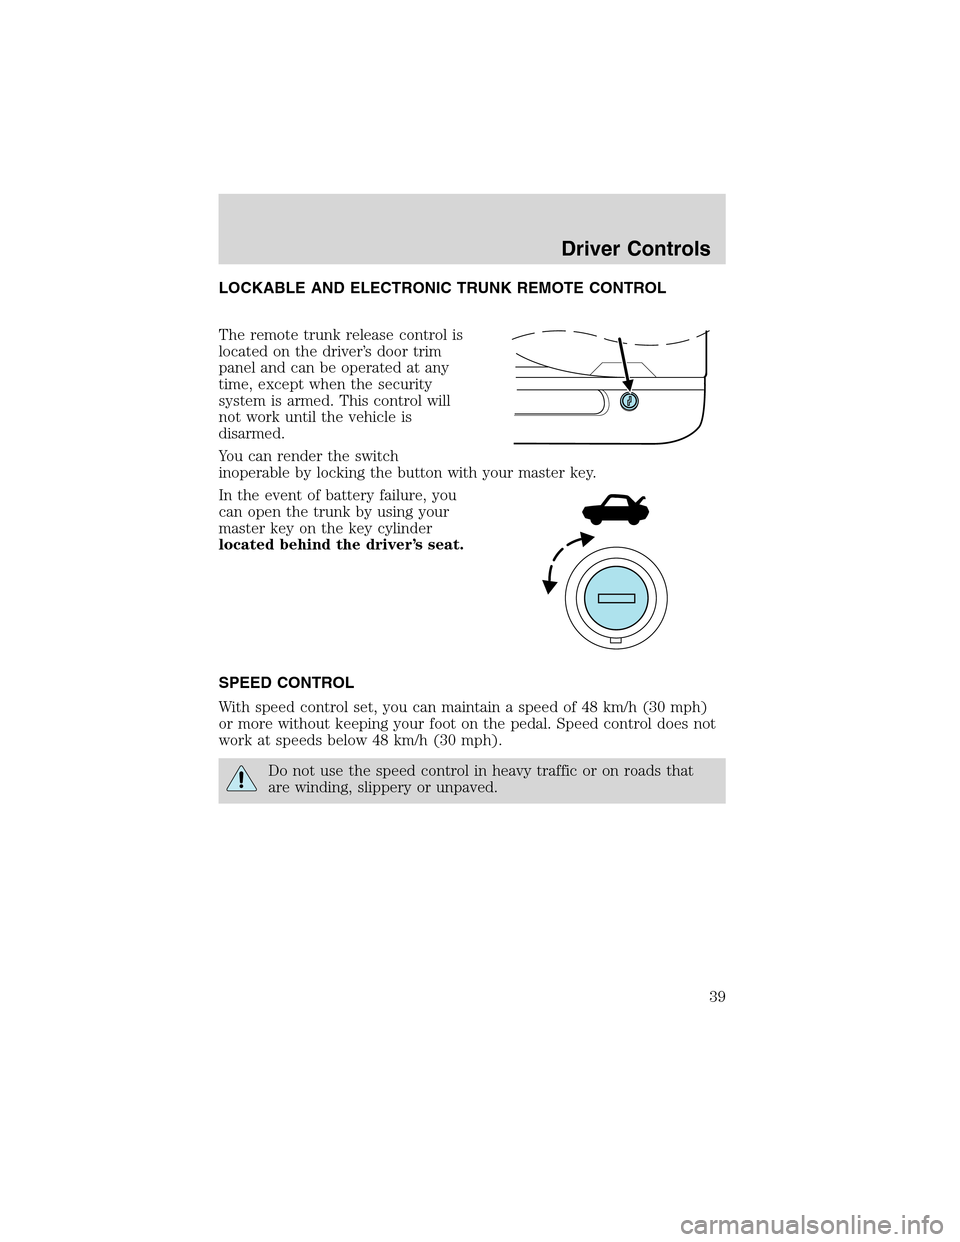
LOCKABLE AND ELECTRONIC TRUNK REMOTE CONTROL
The remote trunk release control is
located on the driver’s door trim
panel and can be operated at any
time, except when the security
system is armed. This control will
not work until the vehicle is
disarmed.
You can render the switch
inoperable by locking the button with your master key.
In the event of battery failure, you
can open the trunk by using your
master key on the key cylinder
located behind the driver’s seat.
SPEED CONTROL
With speed control set, you can maintain a speed of 48 km/h (30 mph)
or more without keeping your foot on the pedal. Speed control does not
work at speeds below 48 km/h (30 mph).
Do not use the speed control in heavy traffic or on roads that
are winding, slippery or unpaved.
Driver Controls
39
Page 44 of 200
Ifyouraiseandlowertheconvertibletop several times in a row, the
motor will heat up, causing the thermal circuit breaker to open so that
the top will stop operating. The convertible top will operate again after
allowing the motor to cool several minutes.
To lower the convertible top:
1. Bring vehicle to a complete stop. Put the gearshift in the P (Park)
position.
The convertible top will operate with the key in the RUN position,
RUN/ACC position or in the accessory delay mode. It is recommended
that the vehicle’s engine is running when lowering the top to prevent
draining the battery.
2. Check the convertible top stowage compartment behind the seat to be
sure it is empty and ready to receive the top.
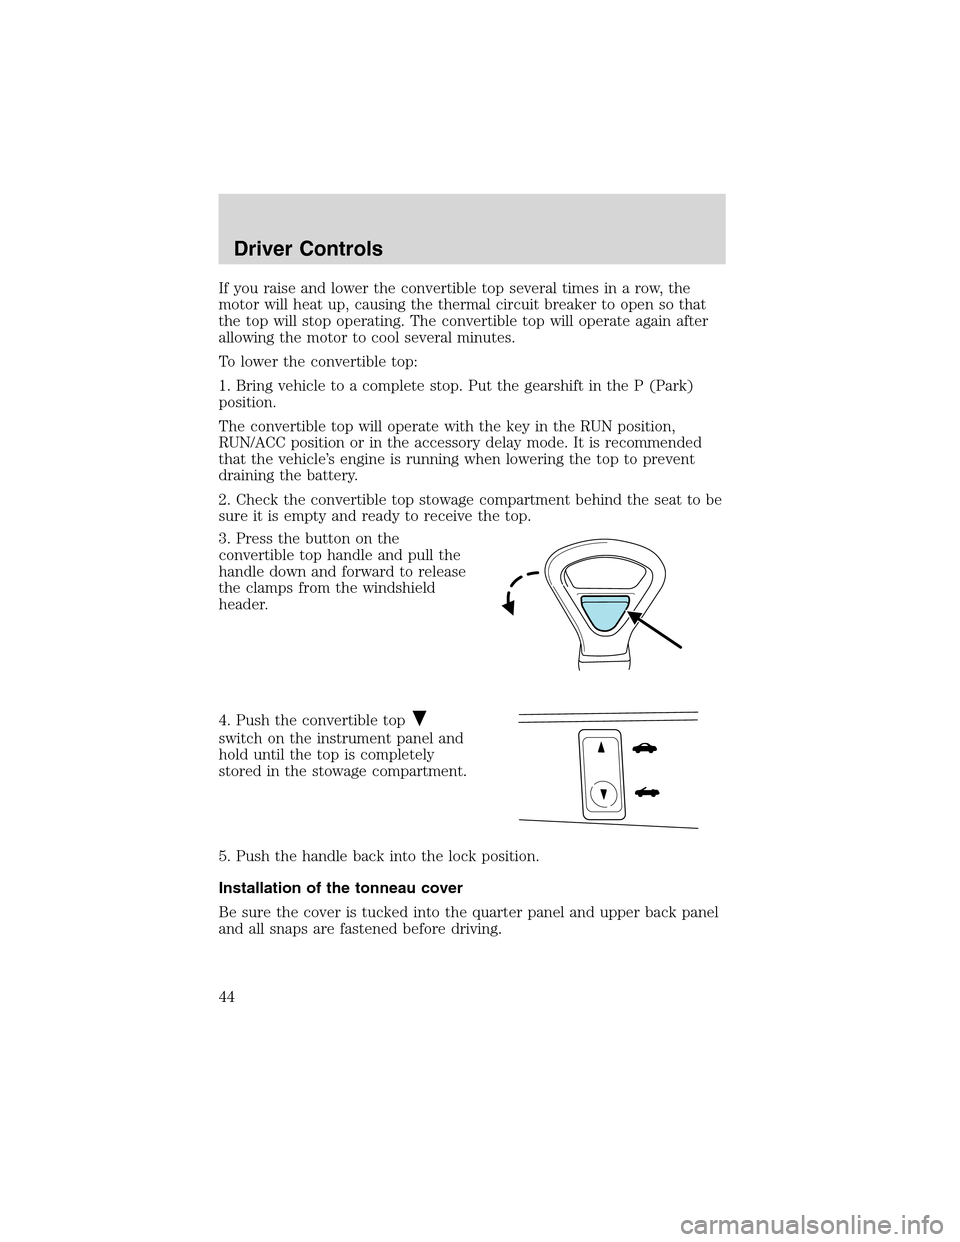
3. Press the button on the
convertible top handle and pull the
handle down and forward to release
the clamps from the windshield
header.
4. Push the convertible top
switch on the instrument panel and
hold until the top is completely
stored in the stowage compartment.
5. Push the handle back into the lock position.
Installation of the tonneau cover
Be sure the cover is tucked into the quarter panel and upper back panel
and all snaps are fastened before driving.
Driver Controls
44
Page 47 of 200
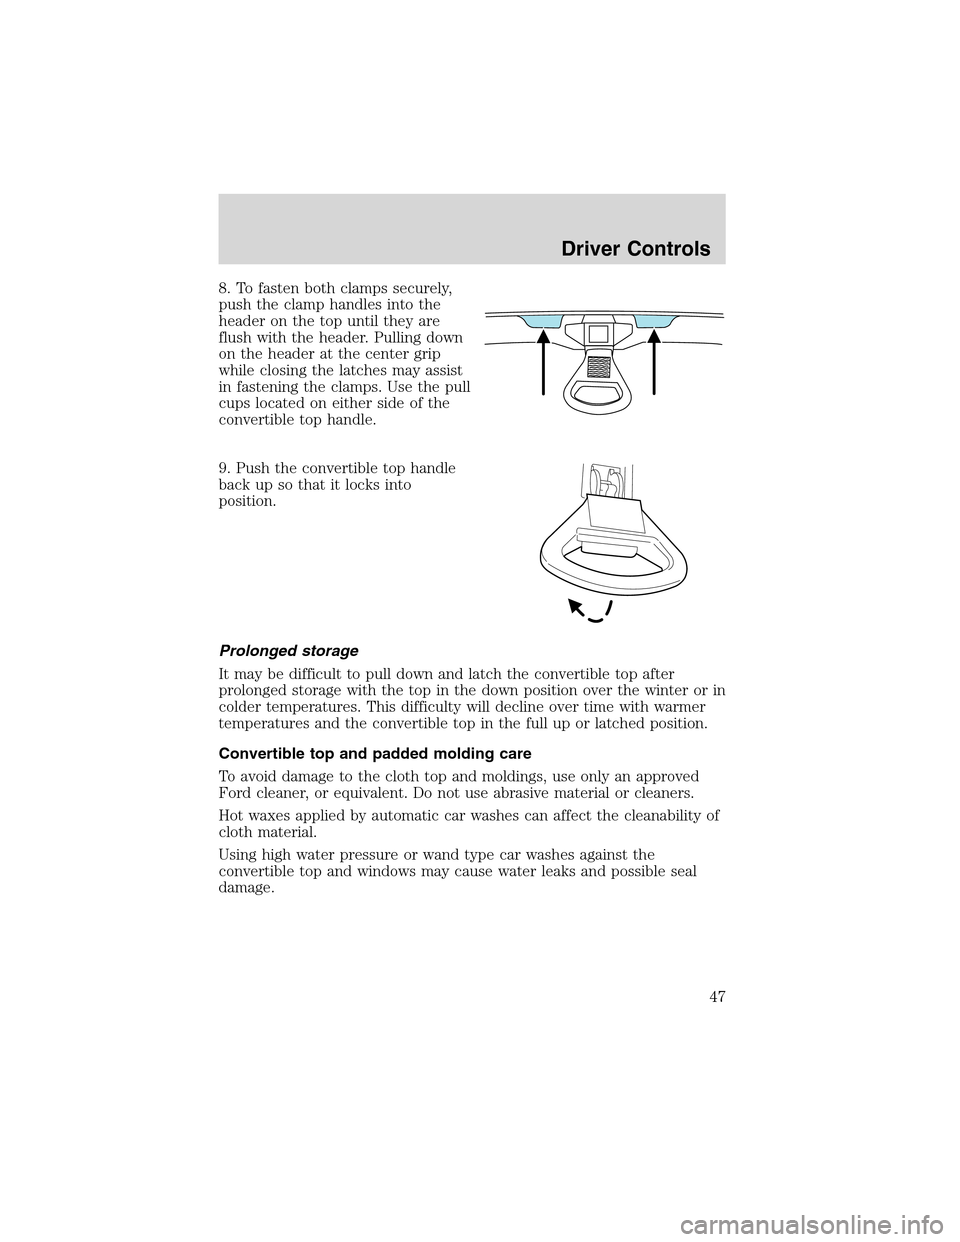
8. To fasten both clamps securely,
push the clamp handles into the
header on the top until they are
flush with the header. Pulling down
on the header at the center grip
while closing the latches may assist
in fastening the clamps. Use the pull
cups located on either side of the
convertible top handle.
9. Push the convertible top handle
back up so that it locks into
position.
Prolonged storage
It may be difficult to pull down and latch the convertible top after
prolonged storage with the top in the down position over the winter or in
colder temperatures. This difficulty will decline over time with warmer
temperatures and the convertible top in the full up or latched position.
Convertible top and padded molding care
To avoid damage to the cloth top and moldings, use only an approved
Ford cleaner, or equivalent. Do not use abrasive material or cleaners.
Hot waxes applied by automatic car washes can affect the cleanability of
cloth material.
Using high water pressure or wand type car washes against the
convertible top and windows may cause water leaks and possible seal
damage.
Driver Controls
47
Page 48 of 200
REMOVABLE TOP (IF EQUIPPED)
For more information see the CD Rom included with this guide.
Installing the removable top
The front screw fittings must be checked to see that they are
firmly seated after driving a distance of approximately 50 to 60
km (30 to 40 miles).
The removable top does not have the same crush resistance as
an integrated steel roof in case of collision or rollover.
The removable top is not, under any circumstances, to be used
to carry or support external loads.
Movement of the removable top requires at least two people.
The removable top weighs approximately 38 kg (84 lb). Also,
due to its shape, the weight is biased to the rear of the removable top.
Your vehicle must be turned OFF and placed in PARK on a level
surface prior to installing or removing the top.
Before installing the removable top, unsnap and properly store the
convertible top tonneau cover. Refer toInstallation of the tonneau
coverin theConvertiblesection. Also, thoroughly dry the convertible
top and then lower. Open the doors, lower the windows, and clean the
area where the removable top mounts on the body.
1. Remove the protective cover from the top. Using a mild detergent,
clean the weather-strips on the top before installing it on the vehicle.
2. Ensure that the removable top levers are rotated rearward to the fully
open position. Lock the wheels on the storage cart, loosen the
restraining straps on the cart, and with the help of at least another
person remove the top from the cart.
Driver Controls
48
Page 50 of 200
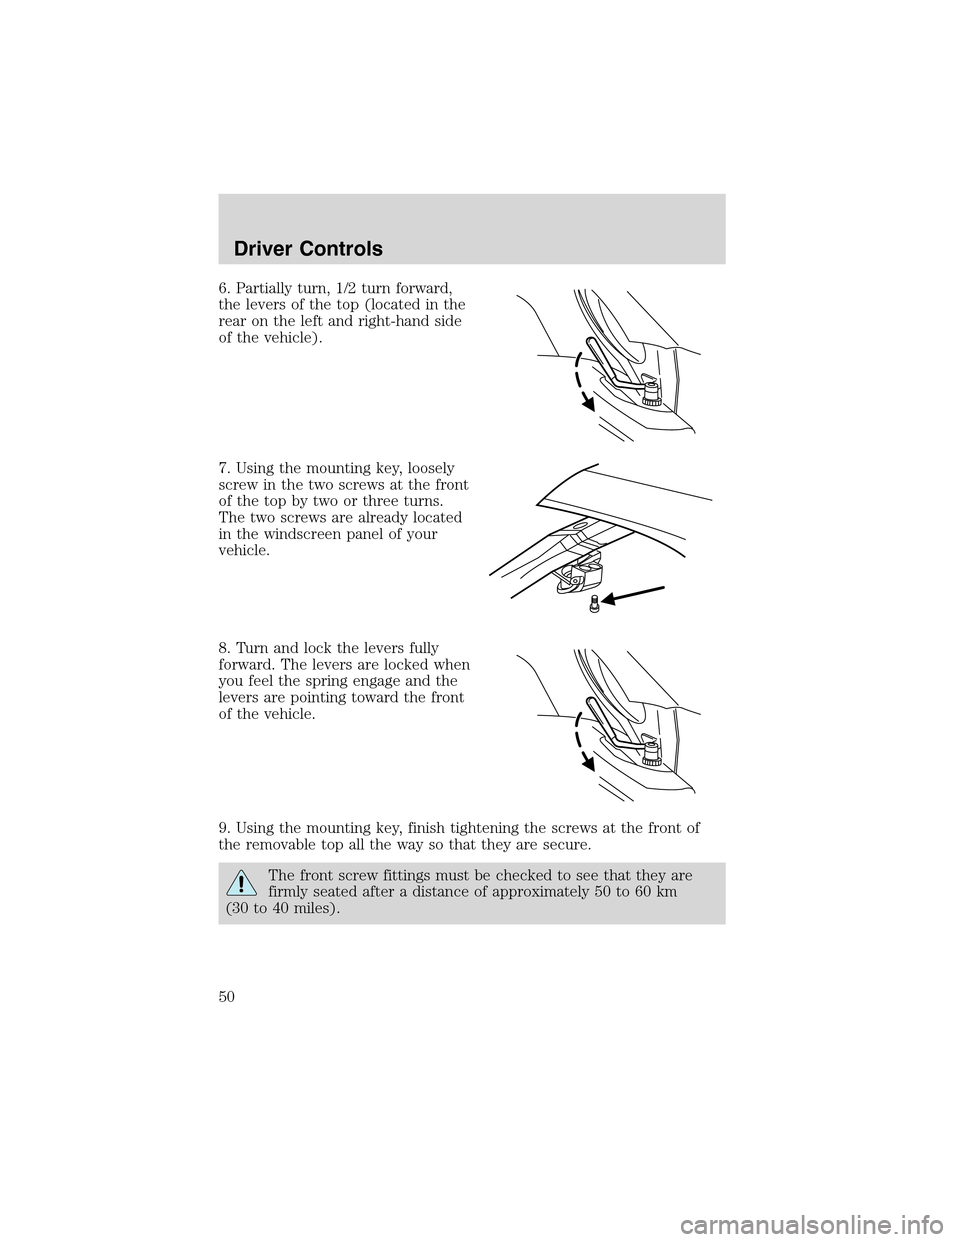
6. Partially turn, 1/2 turn forward,
the levers of the top (located in the
rear on the left and right-hand side
of the vehicle).
7. Using the mounting key, loosely
screw in the two screws at the front
of the top by two or three turns.
The two screws are already located
in the windscreen panel of your
vehicle.
8. Turn and lock the levers fully
forward. The levers are locked when
you feel the spring engage and the
levers are pointing toward the front
of the vehicle.
9. Using the mounting key, finish tightening the screws at the front of
the removable top all the way so that they are secure.
The front screw fittings must be checked to see that they are
firmly seated after a distance of approximately 50 to 60 km
(30 to 40 miles).
Driver Controls
50
Page 51 of 200
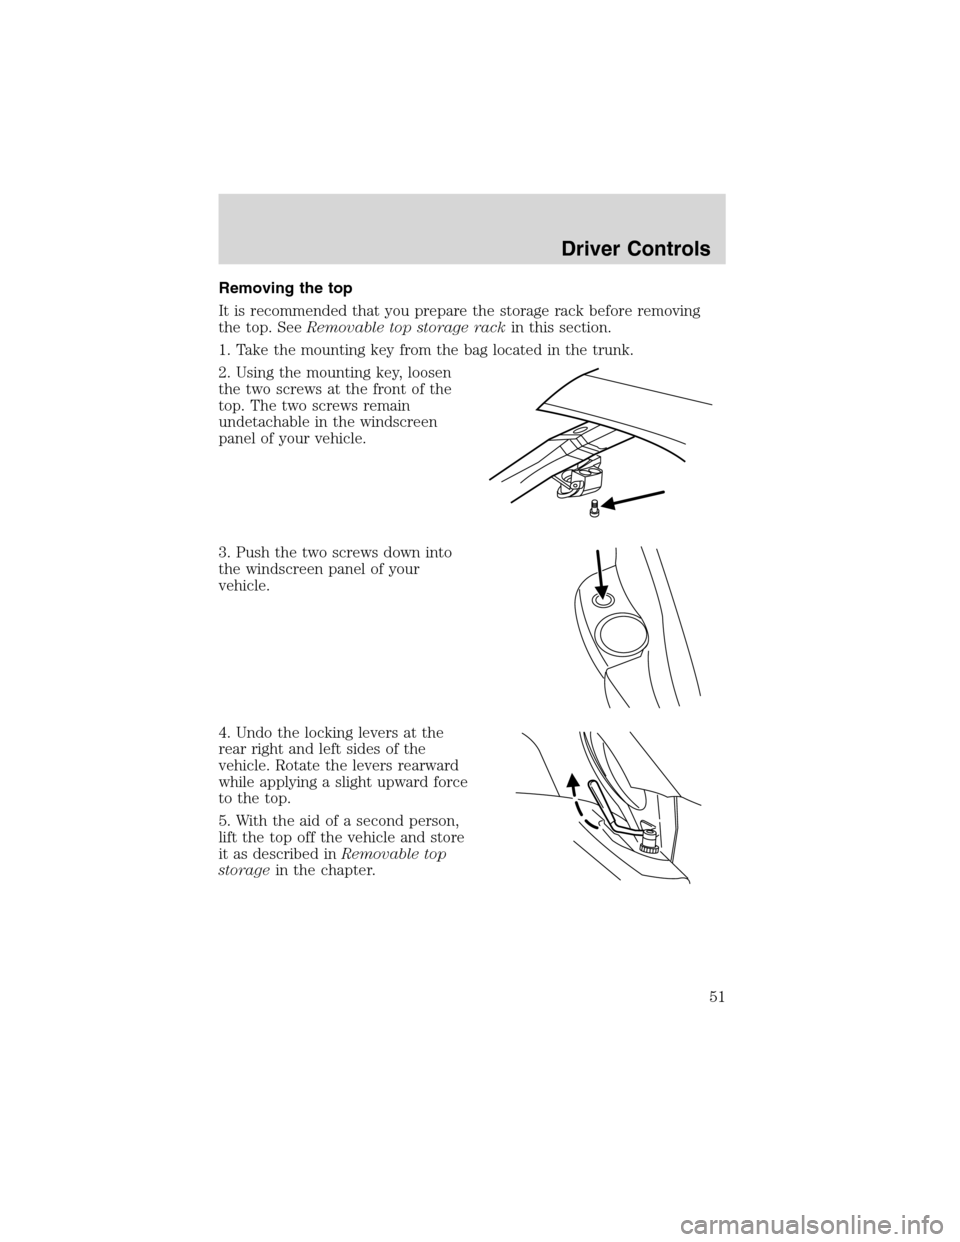
Removing the top
It is recommended that you prepare the storage rack before removing
the top. SeeRemovable top storage rackin this section.
1. Take the mounting key from the bag located in the trunk.
2. Using the mounting key, loosen
the two screws at the front of the
top. The two screws remain
undetachable in the windscreen
panel of your vehicle.
3. Push the two screws down into
the windscreen panel of your
vehicle.
4. Undo the locking levers at the
rear right and left sides of the
vehicle. Rotate the levers rearward
while applying a slight upward force
to the top.
5. With the aid of a second person,
lift the top off the vehicle and store
it as described inRemovable top
storagein the chapter.
Driver Controls
51