clock FORD THUNDERBIRD 2005 11.G Owners Manual
[x] Cancel search | Manufacturer: FORD, Model Year: 2005, Model line: THUNDERBIRD, Model: FORD THUNDERBIRD 2005 11.GPages: 224, PDF Size: 1.91 MB
Page 17 of 224
Occupancy:Press DSP again to change the occupancy mode to optimize
sound for ALL SEATS, DRIVER SEAT or TOP DOWN. Press SEL to
scroll through settings.
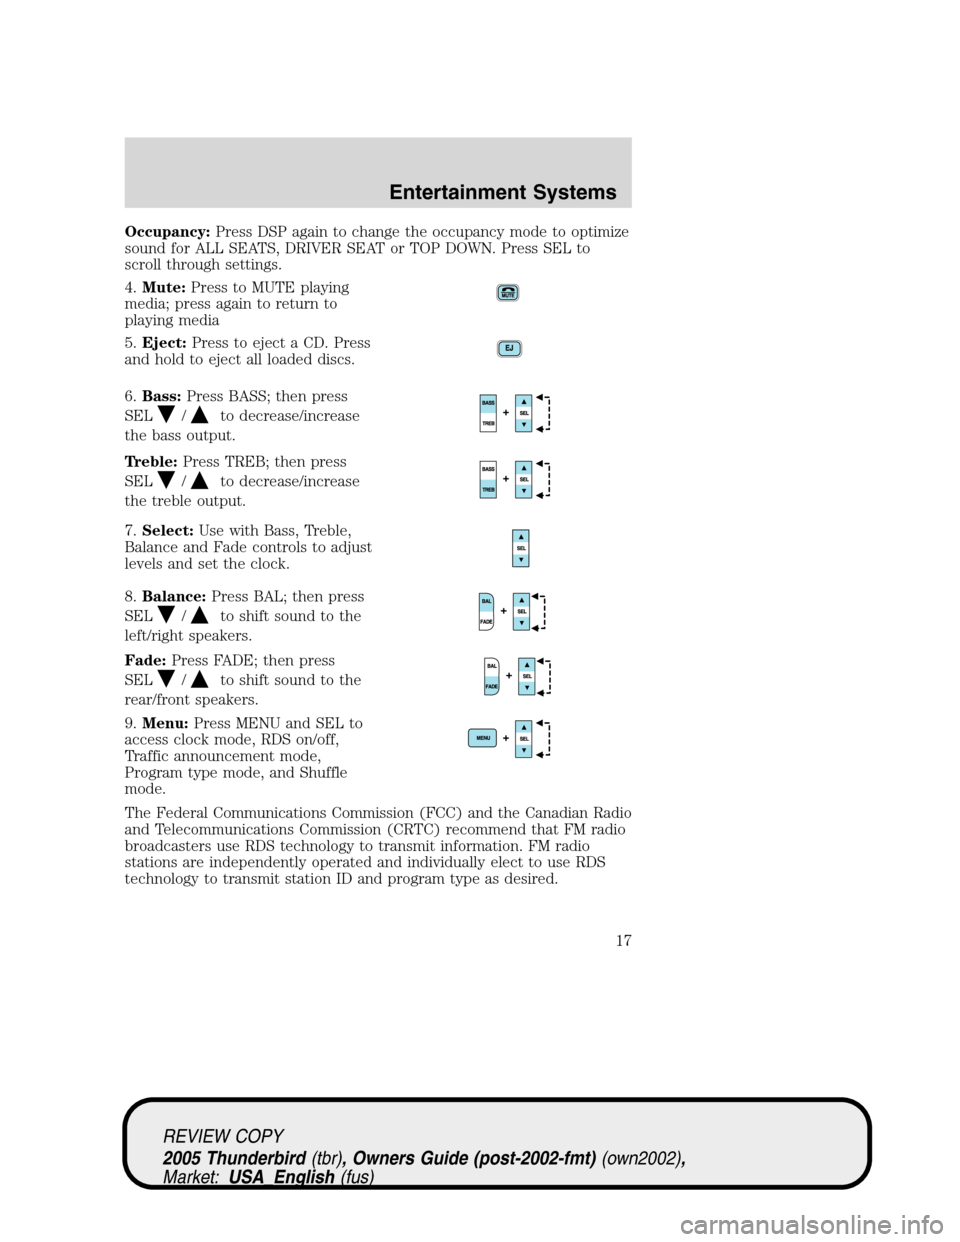
4.Mute:Press to MUTE playing
media; press again to return to
playing media
5.Eject:Press to eject a CD. Press
and hold to eject all loaded discs.
6.Bass:Press BASS; then press
SEL
/to decrease/increase
the bass output.
Treble:Press TREB; then press
SEL
/to decrease/increase
the treble output.
7.Select:Use with Bass, Treble,
Balance and Fade controls to adjust
levels and set the clock.
8.Balance:Press BAL; then press
SEL
/to shift sound to the
left/right speakers.
Fade:Press FADE; then press
SEL
/to shift sound to the
rear/front speakers.
9.Menu:Press MENU and SEL to
access clock mode, RDS on/off,
Traffic announcement mode,
Program type mode, and Shuffle
mode.
The Federal Communications Commission (FCC) and the Canadian Radio
and Telecommunications Commission (CRTC) recommend that FM radio
broadcasters use RDS technology to transmit information. FM radio
stations are independently operated and individually elect to use RDS
technology to transmit station ID and program type as desired.
REVIEW COPY
2005 Thunderbird(tbr), Owners Guide (post-2002-fmt)(own2002),
Market:USA_English(fus)
Entertainment Systems
17
Page 18 of 224
Traffic:Allows you to hear traffic broadcasts. With the feature ON, press
SEEK or SCAN to find a station broadcasting a traffic report (if it is
broadcasting RDS data).Traffic information is not available in most
U.S. markets.
FIND Program type:Allows you to search RDS-equipped stations for a
certain category of music format: Classic, Country, Info, Jazz, Oldies,
R&B, Religious, Rock, Soft, Top 40.
Show TYPE:Displays the station’s call letters and format.
Shuffle:Press to play tracks in a random order. Press MENU until SHUF
appears in the display. Use SEL to select SHUF DISC, SHUF TRAC or
SHUF OFF.
Compression:Brings soft and loud CD passages together for a more
consistent listening level. Press MENU until compression status is
displayed. Press the SEL control to enable the compression feature when
COMP OFF is displayed. Press the SEL control again to disable the
feature when COMP ON is displayed.
Setting the clock:Press MENU until SELECT HOUR or SELECT MINS
is displayed. Use SEL to manually increase (
) or decrease () the
hours/minutes. Press MENU again to disengage clock mode.
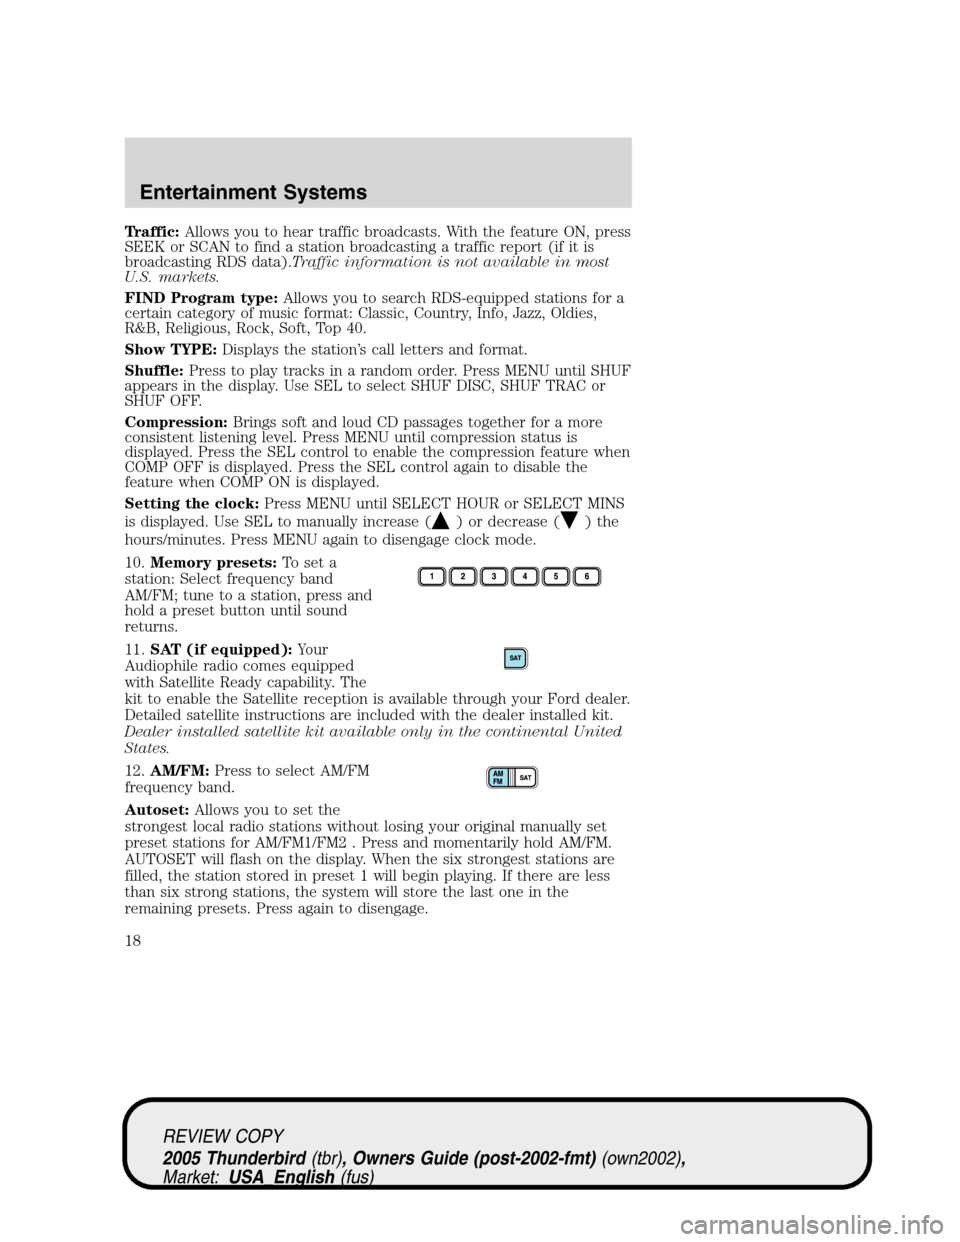
10.Memory presets:To set a
station: Select frequency band
AM/FM; tune to a station, press and
hold a preset button until sound
returns.
11.SAT (if equipped):Your
Audiophile radio comes equipped
with Satellite Ready capability. The
kit to enable the Satellite reception is available through your Ford dealer.
Detailed satellite instructions are included with the dealer installed kit.
Dealer installed satellite kit available only in the continental United
States.
12.AM/FM:Press to select AM/FM
frequency band.
Autoset:Allows you to set the
strongest local radio stations without losing your original manually set
preset stations for AM/FM1/FM2 . Press and momentarily hold AM/FM.
AUTOSET will flash on the display. When the six strongest stations are
filled, the station stored in preset 1 will begin playing. If there are less
than six strong stations, the system will store the last one in the
remaining presets. Press again to disengage.
REVIEW COPY
2005 Thunderbird(tbr), Owners Guide (post-2002-fmt)(own2002),
Market:USA_English(fus)
Entertainment Systems
18
Page 27 of 224
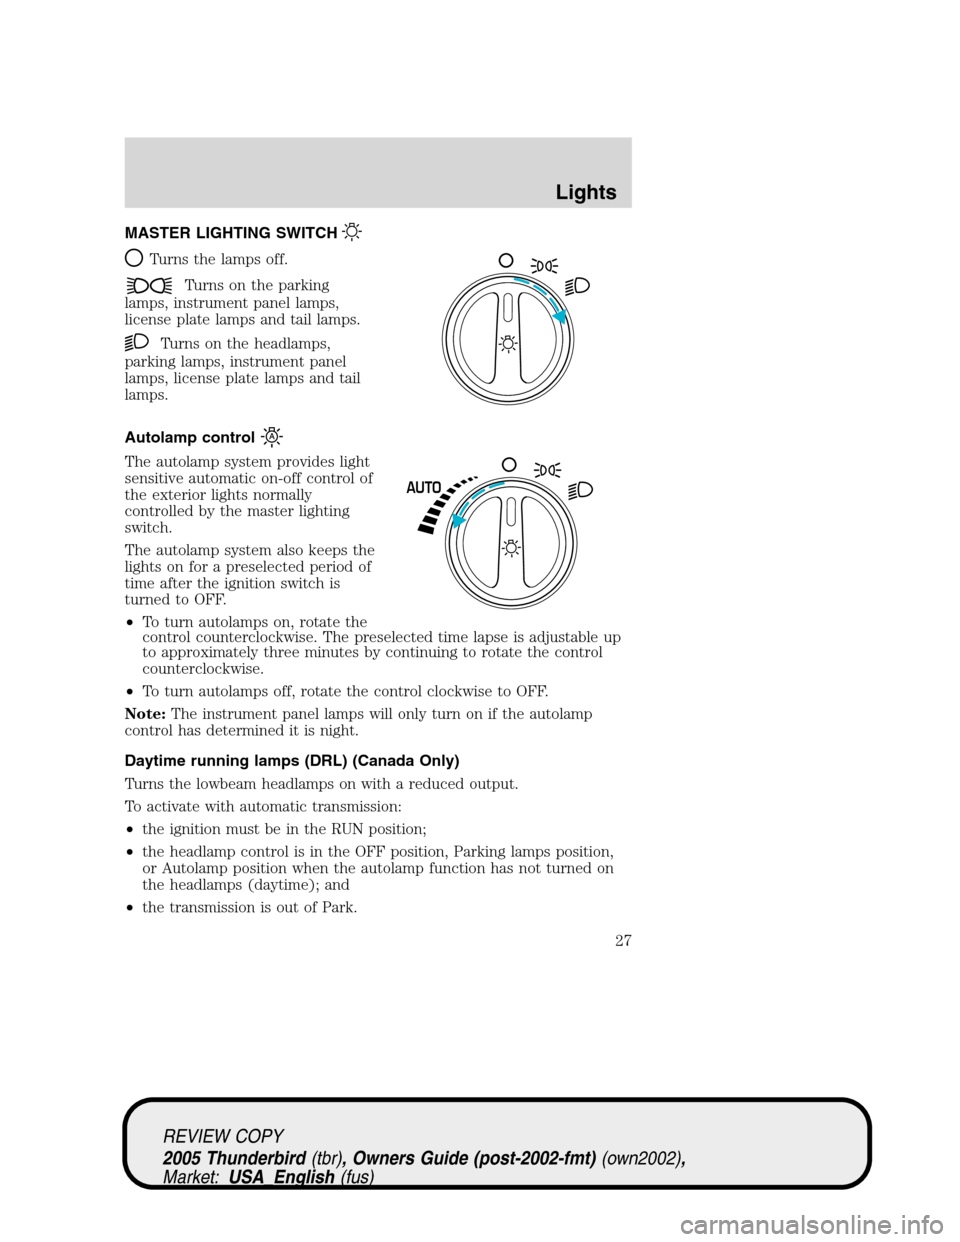
MASTER LIGHTING SWITCH
Turns the lamps off.
Turns on the parking
lamps, instrument panel lamps,
license plate lamps and tail lamps.
Turns on the headlamps,
parking lamps, instrument panel
lamps, license plate lamps and tail
lamps.
Autolamp control
The autolamp system provides light
sensitive automatic on-off control of
the exterior lights normally
controlled by the master lighting
switch.
The autolamp system also keeps the
lights on for a preselected period of
time after the ignition switch is
turned to OFF.
•To turn autolamps on, rotate the
control counterclockwise. The preselected time lapse is adjustable up
to approximately three minutes by continuing to rotate the control
counterclockwise.
•To turn autolamps off, rotate the control clockwise to OFF.
Note:The instrument panel lamps will only turn on if the autolamp
control has determined it is night.
Daytime running lamps (DRL) (Canada Only)
Turns the lowbeam headlamps on with a reduced output.
To activate with automatic transmission:
•the ignition must be in the RUN position;
•the headlamp control is in the OFF position, Parking lamps position,
or Autolamp position when the autolamp function has not turned on
the headlamps (daytime); and
•the transmission is out of Park.
AUTO
REVIEW COPY
2005 Thunderbird(tbr), Owners Guide (post-2002-fmt)(own2002),
Market:USA_English(fus)
Lights
Lights
27
Page 32 of 224
Replacing headlamp bulbs
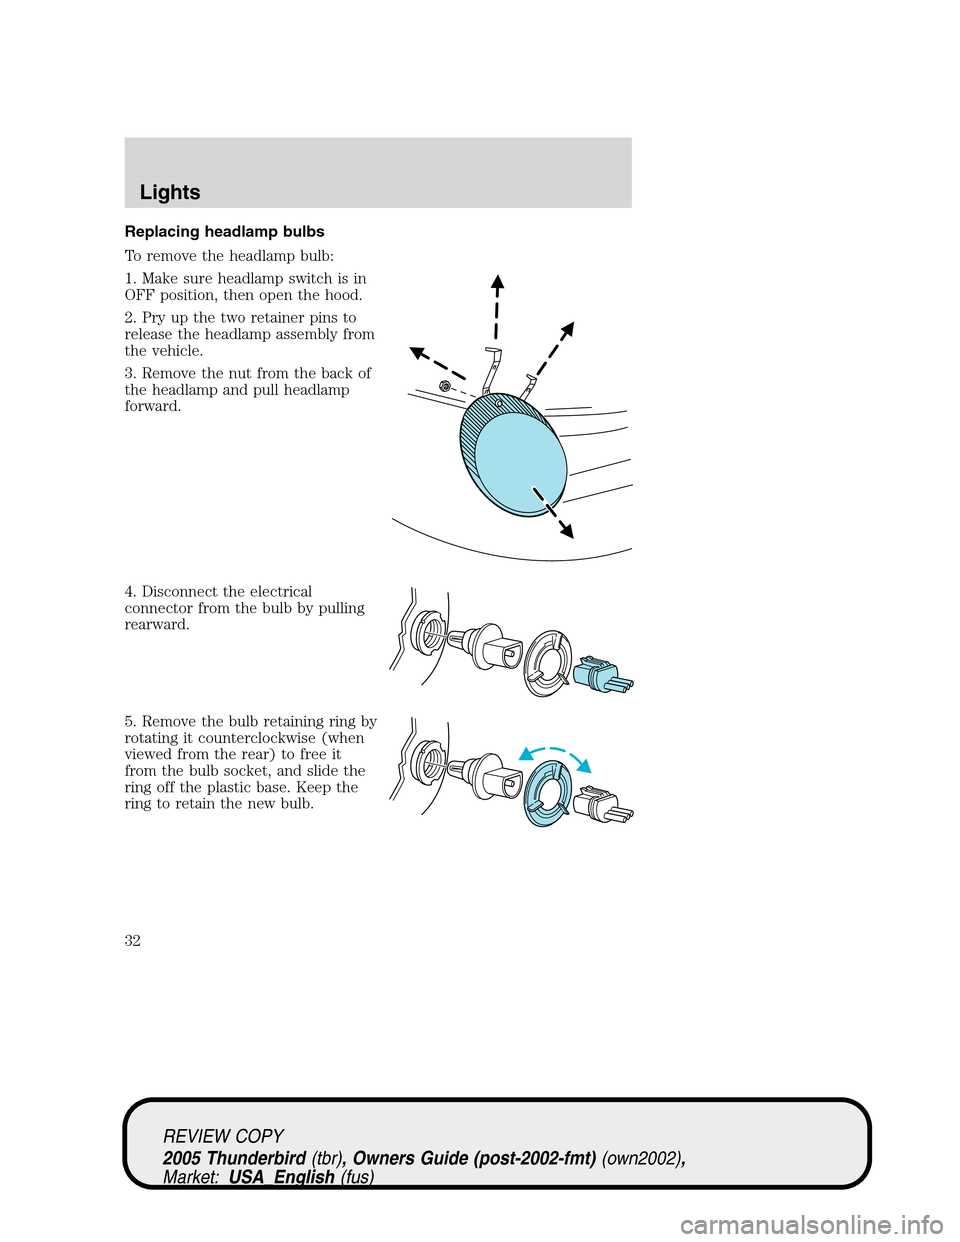
To remove the headlamp bulb:
1. Make sure headlamp switch is in
OFF position, then open the hood.
2. Pry up the two retainer pins to
release the headlamp assembly from
the vehicle.
3. Remove the nut from the back of
the headlamp and pull headlamp
forward.
4. Disconnect the electrical
connector from the bulb by pulling
rearward.
5. Remove the bulb retaining ring by
rotating it counterclockwise (when
viewed from the rear) to free it
from the bulb socket, and slide the
ring off the plastic base. Keep the
ring to retain the new bulb.
REVIEW COPY
2005 Thunderbird(tbr), Owners Guide (post-2002-fmt)(own2002),
Market:USA_English(fus)
Lights
32
Page 33 of 224
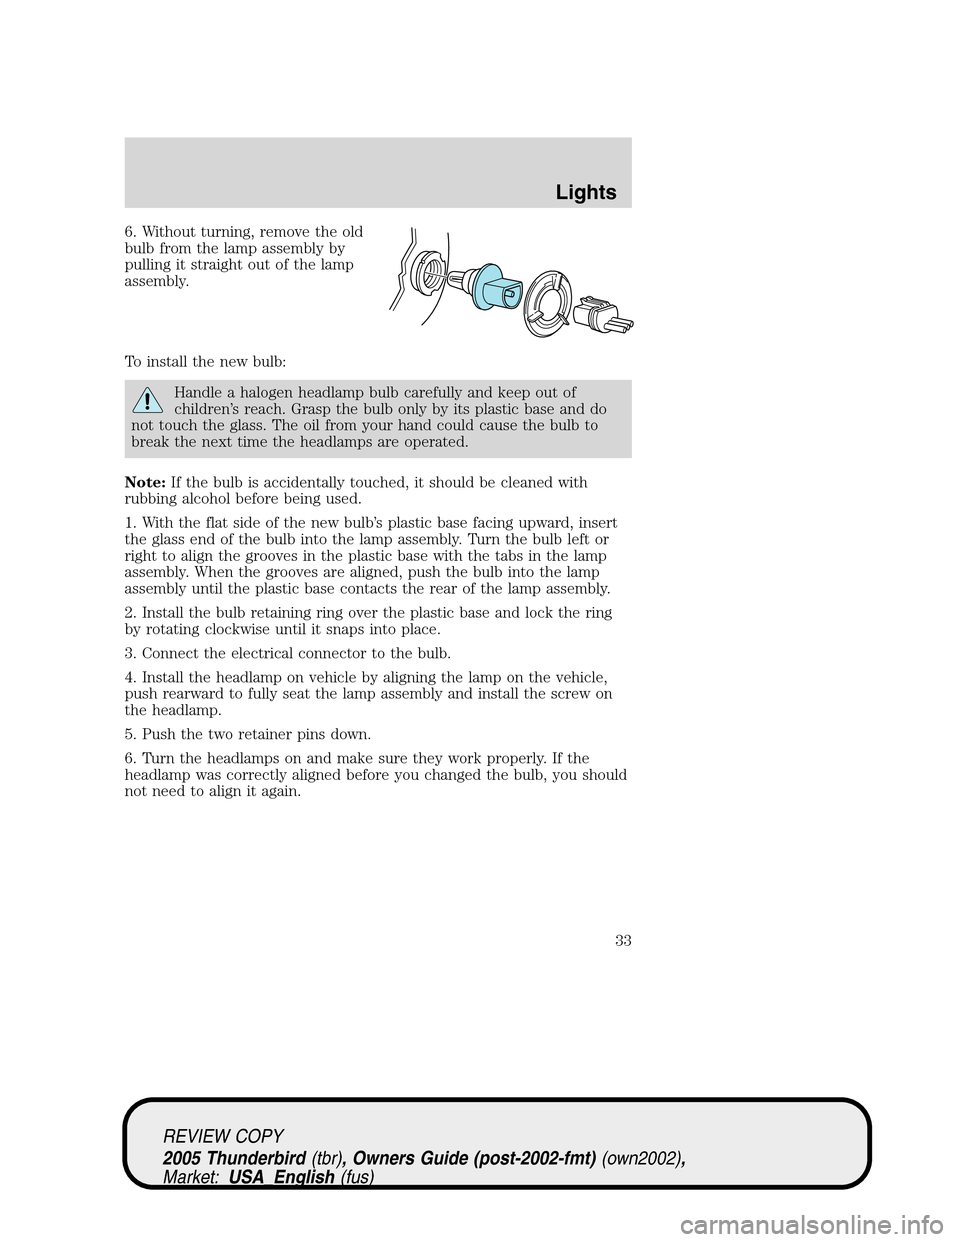
6. Without turning, remove the old
bulb from the lamp assembly by
pulling it straight out of the lamp
assembly.
To install the new bulb:
Handle a halogen headlamp bulb carefully and keep out of
children’s reach. Grasp the bulb only by its plastic base and do
not touch the glass. The oil from your hand could cause the bulb to
break the next time the headlamps are operated.
Note:If the bulb is accidentally touched, it should be cleaned with
rubbing alcohol before being used.
1. With the flat side of the new bulb’s plastic base facing upward, insert
the glass end of the bulb into the lamp assembly. Turn the bulb left or
right to align the grooves in the plastic base with the tabs in the lamp
assembly. When the grooves are aligned, push the bulb into the lamp
assembly until the plastic base contacts the rear of the lamp assembly.
2. Install the bulb retaining ring over the plastic base and lock the ring
by rotating clockwise until it snaps into place.
3. Connect the electrical connector to the bulb.
4. Install the headlamp on vehicle by aligning the lamp on the vehicle,
push rearward to fully seat the lamp assembly and install the screw on
the headlamp.
5. Push the two retainer pins down.
6. Turn the headlamps on and make sure they work properly. If the
headlamp was correctly aligned before you changed the bulb, you should
not need to align it again.
REVIEW COPY
2005 Thunderbird(tbr), Owners Guide (post-2002-fmt)(own2002),
Market:USA_English(fus)
Lights
33
Page 34 of 224
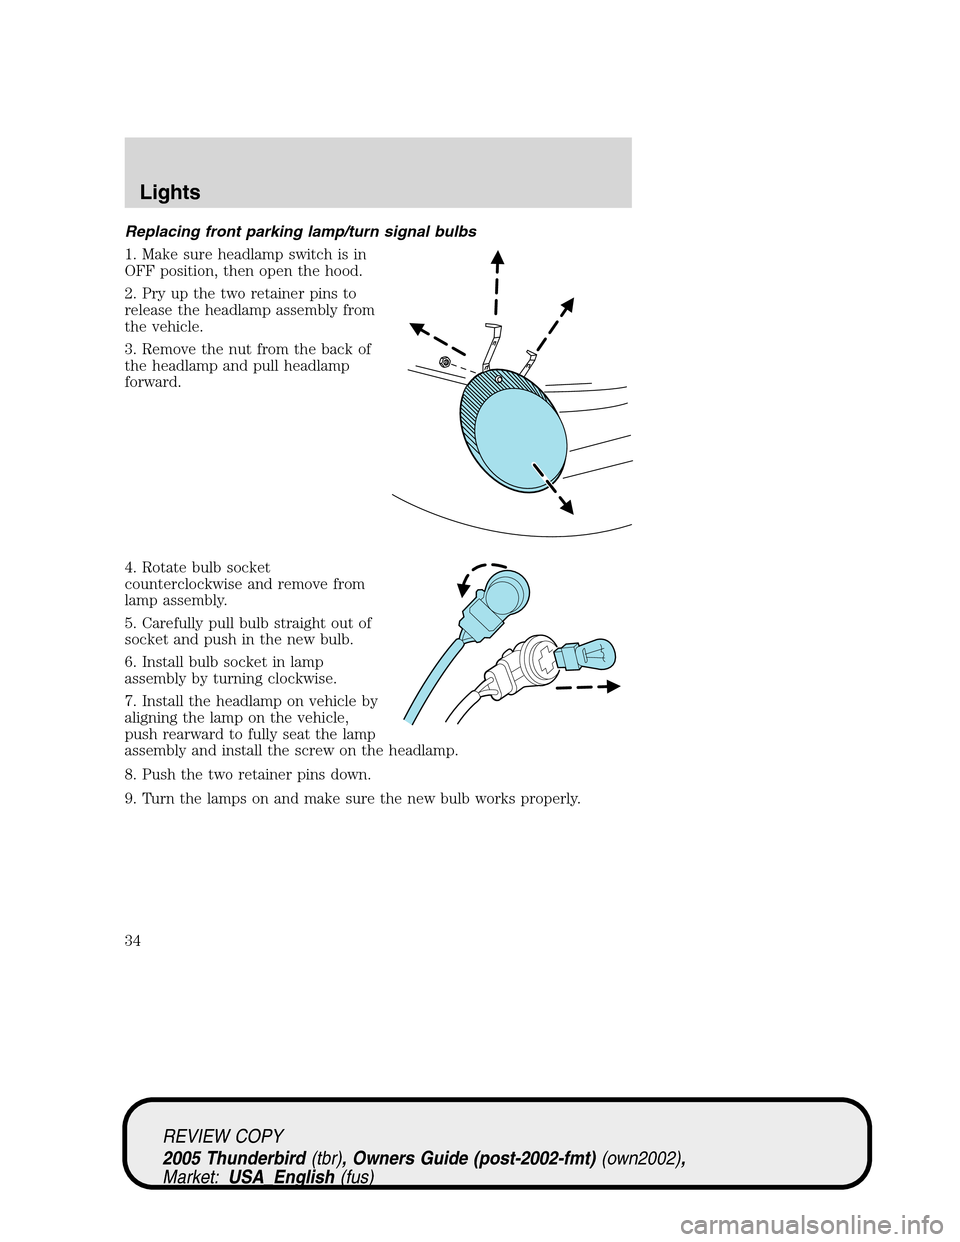
Replacing front parking lamp/turn signal bulbs
1. Make sure headlamp switch is in
OFF position, then open the hood.
2. Pry up the two retainer pins to
release the headlamp assembly from
the vehicle.
3. Remove the nut from the back of
the headlamp and pull headlamp
forward.
4. Rotate bulb socket
counterclockwise and remove from
lamp assembly.
5. Carefully pull bulb straight out of
socket and push in the new bulb.
6. Install bulb socket in lamp
assembly by turning clockwise.
7. Install the headlamp on vehicle by
aligning the lamp on the vehicle,
push rearward to fully seat the lamp
assembly and install the screw on the headlamp.
8. Push the two retainer pins down.
9. Turn the lamps on and make sure the new bulb works properly.
REVIEW COPY
2005 Thunderbird(tbr), Owners Guide (post-2002-fmt)(own2002),
Market:USA_English(fus)
Lights
34
Page 35 of 224
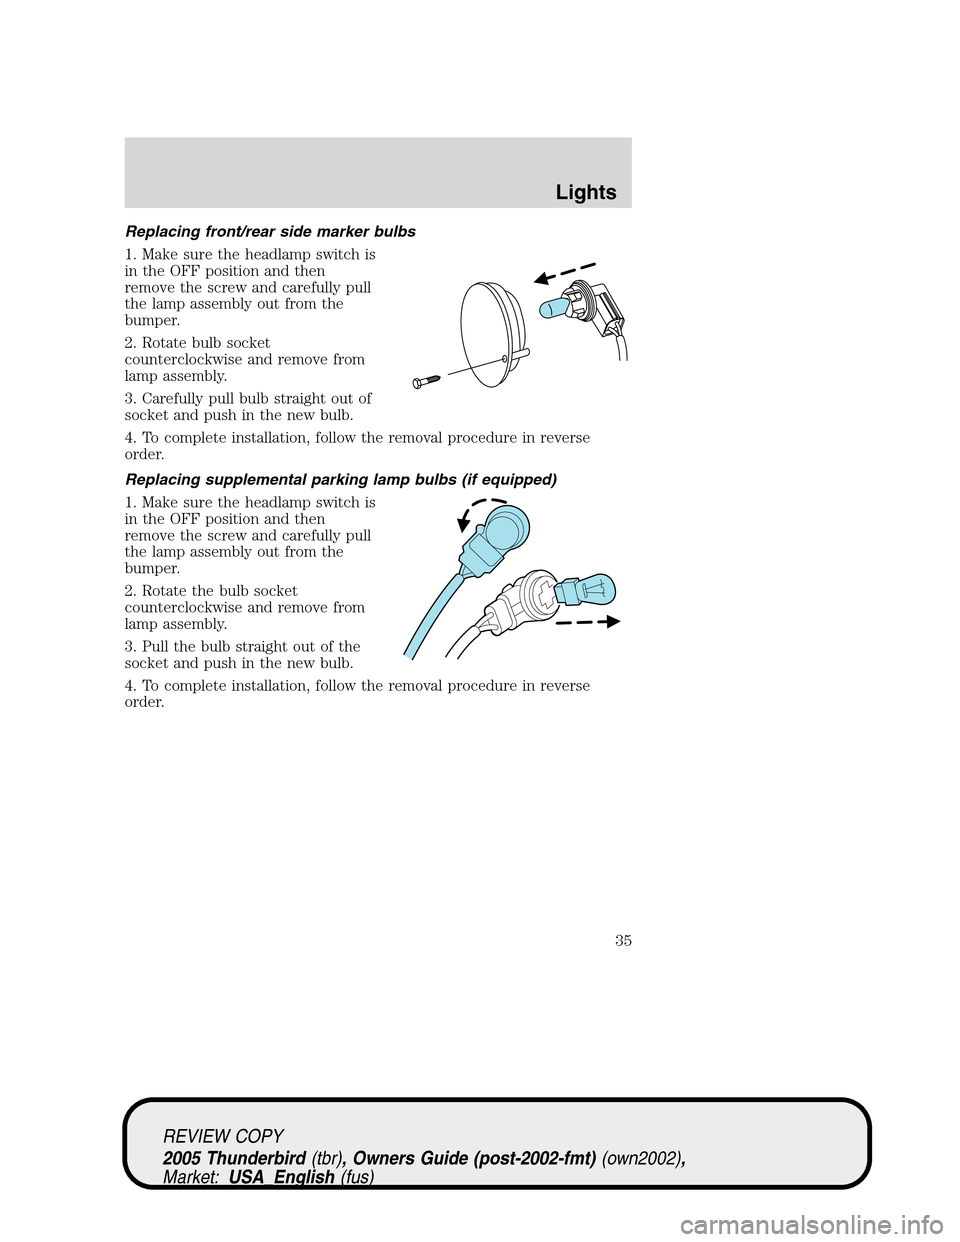
Replacing front/rear side marker bulbs
1. Make sure the headlamp switch is
in the OFF position and then
remove the screw and carefully pull
the lamp assembly out from the
bumper.
2. Rotate bulb socket
counterclockwise and remove from
lamp assembly.
3. Carefully pull bulb straight out of
socket and push in the new bulb.
4. To complete installation, follow the removal procedure in reverse
order.
Replacing supplemental parking lamp bulbs (if equipped)
1. Make sure the headlamp switch is
in the OFF position and then
remove the screw and carefully pull
the lamp assembly out from the
bumper.
2. Rotate the bulb socket
counterclockwise and remove from
lamp assembly.
3. Pull the bulb straight out of the
socket and push in the new bulb.
4. To complete installation, follow the removal procedure in reverse
order.
REVIEW COPY
2005 Thunderbird(tbr), Owners Guide (post-2002-fmt)(own2002),
Market:USA_English(fus)
Lights
35
Page 37 of 224
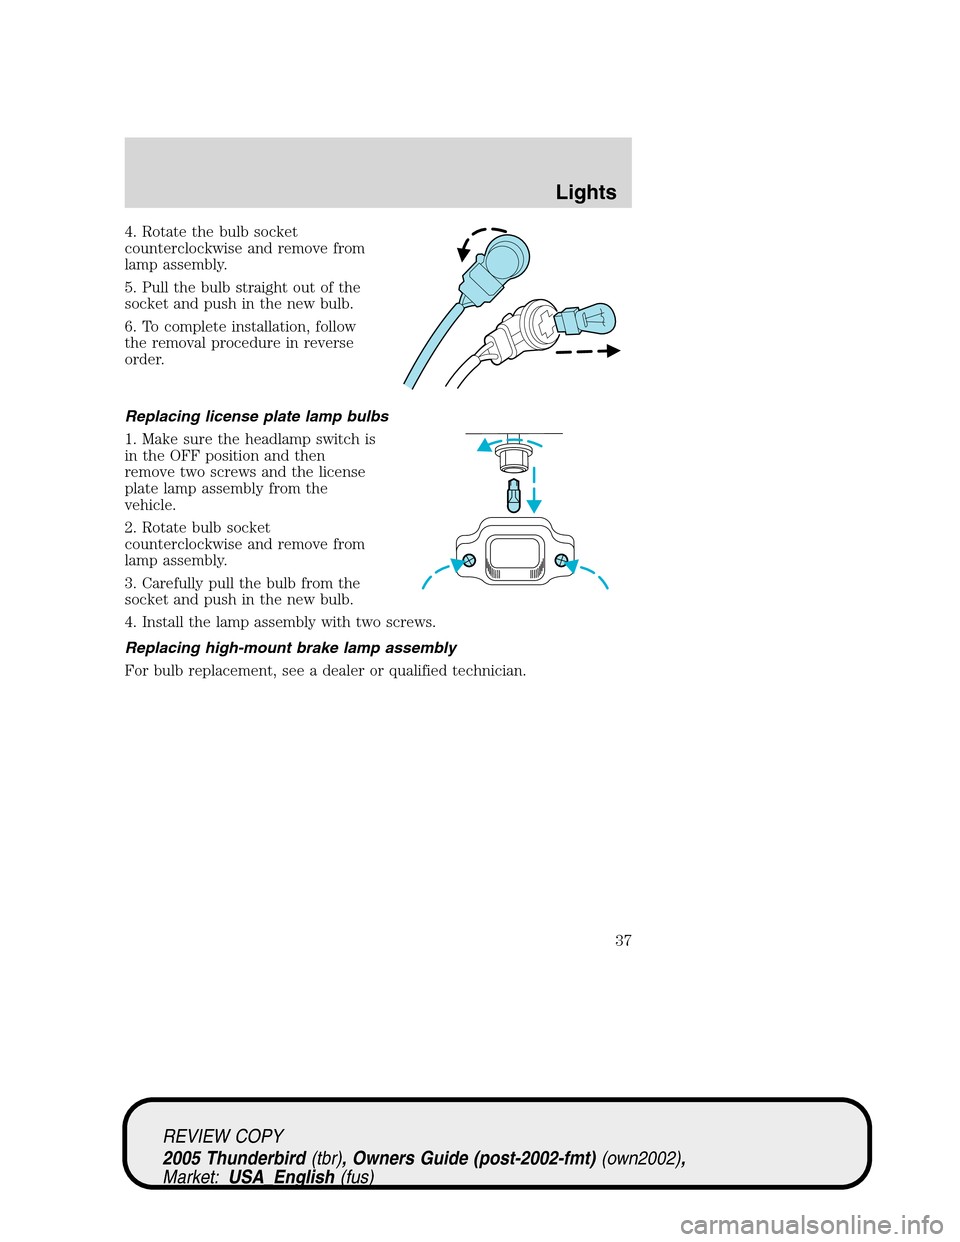
4. Rotate the bulb socket
counterclockwise and remove from
lamp assembly.
5. Pull the bulb straight out of the
socket and push in the new bulb.
6. To complete installation, follow
the removal procedure in reverse
order.
Replacing license plate lamp bulbs
1. Make sure the headlamp switch is
in the OFF position and then
remove two screws and the license
plate lamp assembly from the
vehicle.
2. Rotate bulb socket
counterclockwise and remove from
lamp assembly.
3. Carefully pull the bulb from the
socket and push in the new bulb.
4. Install the lamp assembly with two screws.
Replacing high-mount brake lamp assembly
For bulb replacement, see a dealer or qualified technician.
REVIEW COPY
2005 Thunderbird(tbr), Owners Guide (post-2002-fmt)(own2002),
Market:USA_English(fus)
Lights
37
Page 117 of 224
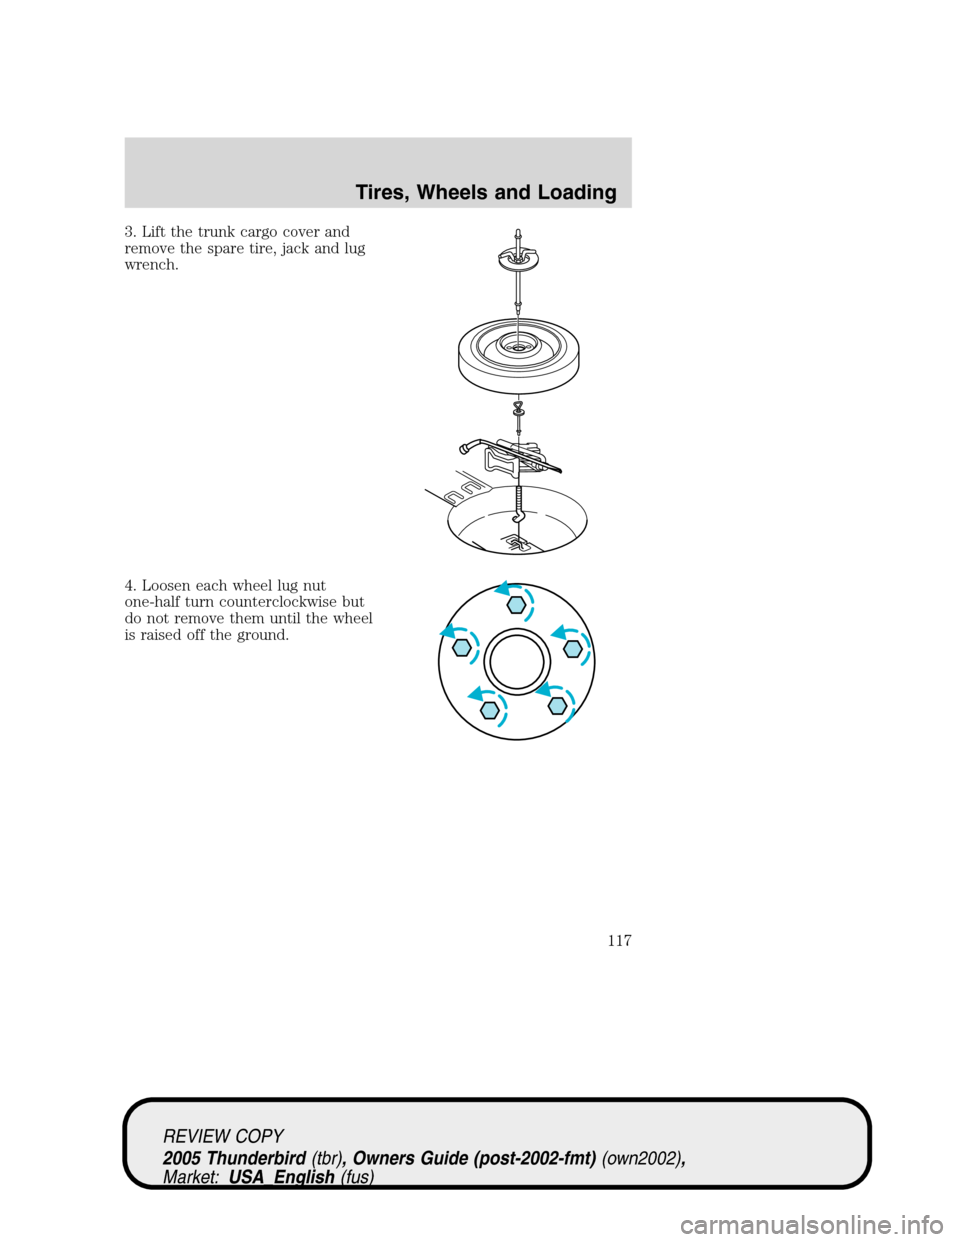
3. Lift the trunk cargo cover and
remove the spare tire, jack and lug
wrench.
4. Loosen each wheel lug nut
one-half turn counterclockwise but
do not remove them until the wheel
is raised off the ground.
REVIEW COPY
2005 Thunderbird(tbr), Owners Guide (post-2002-fmt)(own2002),
Market:USA_English(fus)
Tires, Wheels and Loading
117
Page 118 of 224
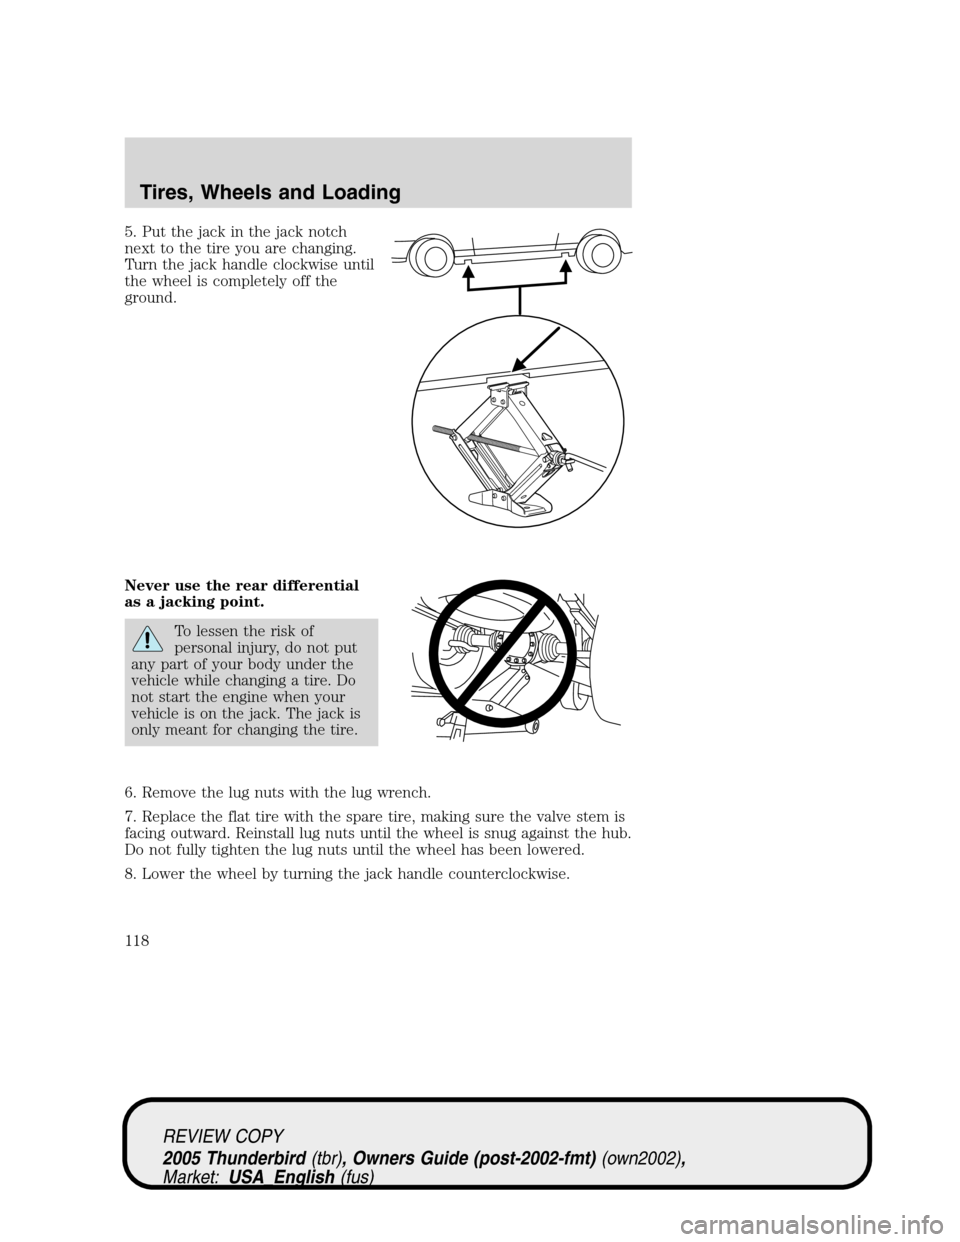
5. Put the jack in the jack notch
next to the tire you are changing.
Turn the jack handle clockwise until
the wheel is completely off the
ground.
Never use the rear differential
as a jacking point.
To lessen the risk of
personal injury, do not put
any part of your body under the
vehicle while changing a tire. Do
not start the engine when your
vehicle is on the jack. The jack is
only meant for changing the tire.
6. Remove the lug nuts with the lug wrench.
7. Replace the flat tire with the spare tire, making sure the valve stem is
facing outward. Reinstall lug nuts until the wheel is snug against the hub.
Do not fully tighten the lug nuts until the wheel has been lowered.
8. Lower the wheel by turning the jack handle counterclockwise.
REVIEW COPY
2005 Thunderbird(tbr), Owners Guide (post-2002-fmt)(own2002),
Market:USA_English(fus)
Tires, Wheels and Loading
118