parking brake FORD TRANSIT 2017 5.G User Guide
[x] Cancel search | Manufacturer: FORD, Model Year: 2017, Model line: TRANSIT, Model: FORD TRANSIT 2017 5.GPages: 484, PDF Size: 11.45 MB
Page 116 of 484
STARTING A GASOLINE
ENGINE
Before starting the engine check the
following:
•
Make sure all occupants have fastened
their safety belts.
• Make sure the headlamps and
electrical accessories are off.
• Make sure the parking brake is on.
• Make sure the transmission is in park
(P).
When you start the engine, the idle speed
increases, this helps to warm up the
engine. If the engine idle speed does not
slow down automatically, have your
vehicle checked by an authorized dealer.
Note: Do not touch the accelerator pedal.
1. Fully press the brake pedal.
2. Turn the key to the on position to switch the ignition on.
3. Turn the key to the start position to start your vehicle. Release the key
when the engine starts.
Note: You can only operate the starter for
a limited period of time, for example 10
seconds. The number of start attempts is
limited to approximately six. If you exceed
this limit, the system will not allow you to
try again until a period of time has elapsed,
for example 30 minutes.
Engine Idle Speed after Starting
The speed at which the engine idles
immediately after starting will adjust
automatically to minimize vehicle
emissions and maximize cabin comfort
and fuel economy. The idle speed will vary depending on
certain factors. These include vehicle
component and ambient temperatures as
well as electrical and climate system
demands.
Cold or Hot Engine
If the engine does not start within 10
seconds, wait for a short period and try
again.
If the engine does not start after three
attempts, wait 10 seconds and follow the
flooded engine procedure.
If you have difficulty starting the engine
when the temperature is below -13°F
(-25°C), press the accelerator pedal to the
mid-way point of its travel and try again.
Flooded Engine
1. Shift into park (P).
2. Fully depress the accelerator pedal and
hold it there.
3. Start the engine.
Note: If the engine does not start, repeat
the cold or hot engine procedure.
STARTING A DIESEL ENGINE WARNINGS
Do not use starting fluid, for example
ether, in the air intake system (see
air filter decal). Starting fluids could
cause immediate explosive damage to the
engine. Failure to follow this warning could
result in fire, serious personal injury or
death. Do not add gasoline, gasohol, alcohol
or Kerosene to diesel fuel. This action
creates a serious fire hazard and will
result in poor engine performance. Engine
damage caused by the use of incorrect fuel
is not covered by the vehicle warranty. 113
Transit (TTH) Canada/United States of America, HK3J 19A321 AA enUSA, Edition date: 04/2016, First Printing Starting and Stopping the Engine
Page 117 of 484
Note:
Avoid shutting the engine down after
an extensive idling period. Drive your vehicle
for several miles with the engine at normal
operating temperatures under a moderate
load.
Engine Glow Plugs The powertrain control and glow
plug control modules operate
the glow plug system.
The glow plug control module using the
engine coolant temperature, barometric
pressure sensor and the environmental
temperature sensor will determine how
long the glow plugs stay energized. The
required time for the glow plugs to remain
energized will decrease as the engine
coolant temperature, barometric pressure
and the environmental temperature
increases.
When you switch the ignition on, the glow
plug indicator lamp will illuminate if glow
plug heat is necessary as a starting aid.
Wait until the glow plug indicator lamp
turns off before starting the engine. The
lamp should always momentarily
illuminate when the engine is cold and you
switch the ignition on.
Cold Weather Operation
In cold weather below 32°F (0°C), the
engine may slowly increase to a higher idle
speed if left idling in park (P). As the engine
warms-up, the engine sound level
decreases due to the activation of
powertrain control module controlled
sound reduction features.
It is recommended that the engine block
heater be used for starting when the
temperature is -9°F (-23°C) or colder. See
Engine Block Heater
(page 116). Note:
Idling in cold weather does not heat
the engine to its normal operating
temperature. Long periods of idling,
especially in cold weather, can cause a
buildup of deposits which can cause engine
damage.
Starting a Cold or Hot Engine
Note: Do not press the accelerator pedal.
1. Fully depress the brake pedal.
2. Turn the key to the on position and wait
until the glow plug indicator lamp turns
off.
Note: Do not press the accelerator pedal.
3. Turn the key to the start position to start the engine.
4. Release the key.
Note: You may need to crank the engine for
up to 10 seconds when the outside air
temperature is
5°F (-15°C) or below.
Note: Engine power may be reduced for 15
seconds when the engine oil temperature
is
-9°F (-23°C) or below. This is to allow
the turbocharger to be lubricated.
Note: If the engine fails to start after a
number of attempts, the system will not
allow you to operate the starter for a short
period of time, for example 30 minutes.
Failure to Start
If the engine does not crank with the key
turned to the start position while the brake
pedal is fully depressed, do the following:
1. Switch the ignition off.
Note: Make sure the parking brake is fully
applied.
2. Release the brake pedal.
3. Fully depress the brake pedal.
4. Turn the key to the on position and wait
until the glow plug indicator lamp turns
off.
114
Transit (TTH) Canada/United States of America, HK3J 19A321 AA enUSA, Edition date: 04/2016, First Printing Starting and Stopping the Engine
Page 132 of 484
1. Stop your vehicle as soon as safely
possible and shift the transmission into
park (P) or neutral (N).
2. Apply the parking brake and switch the
ignition off.
3. Fully open the fuel tank filler door until
it engages.
4. Check the fuel filler inlet and the area around it for any items or debris that
may be obstructing its movement.
5. Insert a fuel pump nozzle or the fuel filler funnel provided with your vehicle
in to the fuel tank filler pipe opening.
This action should dislodge any debris
that may be preventing the fuel filler
inlet from fully closing.
Note: If this action corrects the problem
the message may not reset immediately. If
the message remains and the service engine
soon warning lamp appears in the
information display, have your vehicle
checked as soon as possible.
FUEL CONSUMPTION
Empty reserve is the amount of fuel
remaining in the tank after the fuel gauge
indicates empty. The amount of usable
fuel in the empty reserve varies and should
not be relied upon to increase driving range. •
The usable capacity of the fuel tank is
the amount of fuel that you can add to
the fuel tank when the fuel gauge
indicates empty, before the first fuel
filler nozzle automatic shutoff event.
• The advertised capacity is equal to the
volumetric difference between actual
fuel fill before the first fuel filler nozzle
automatic shutoff event and the fuel
quantity when the fuel gauge indicates
empty. See Capacities and
Specifications (page 281). It is the
usable capacity minus the empty
reserve.
• Due to the empty reserve, you may be
able to add more fuel than the
advertised capacity of the fuel tank
when the fuel gauge indicates empty.
Filling the Fuel Tank
For consistent results when refueling:
• Turn the ignition off before fueling; an
inaccurate reading results if the engine
is left running.
• Use the same fill rate
(low-medium-high) each time the tank
is filled.
• Allow no more than one automatic
shut-off when refueling.
Results are most accurate when the filling
method is consistent.
Calculating Fuel Economy
Do not measure fuel economy during the
first
1,000 mi (1,600 km) of driving (this is
your engine ’s break-in period). A more
accurate measurement is obtained after
2,000 mi (3,200 km)
to 3,000 mi
(4,800 km). Also, fuel expense, frequency
of fill ups or fuel gauge readings are not
accurate ways to measure fuel economy.
1. Fill the fuel tank completely and record
the initial odometer reading.
129
Transit (TTH) Canada/United States of America, HK3J 19A321 AA enUSA, Edition date: 04/2016, First Printing Fuel and Refueling
Page 137 of 484
You can also choose operator commanded
regeneration to clean the exhaust system
at this point. See the following Operator
Commanded Regeneration.
If you are not able to drive in a manner that
allows effective automatic cleaning or you
choose to carry out regeneration of the
diesel particulate filter while the engine is
idling, then operator commanded
regeneration must be carried out.
Operator Commanded Regeneration
(If Equipped)
If your vehicle is operated with significant
stationary operation, low speed drive
cycles less than
25 mph (40 km/h), short
drive cycles, drive time less than 15 minutes
or the vehicle does not fully warm up,
passive and active regeneration may not
sufficiently clean the diesel particulate filter system. Operator commanded
regeneration allows you to manually start
diesel particulate filter cleaning while the
engine is idling. If you are not sure whether
your vehicle is fitted with this feature,
contact an authorized dealer.
When to Carry Out Operator Commanded
Regeneration
Use the operator commanded
regeneration feature when the following
message appears in the information
display and:
•
You are not able to drive in a manner
that allows effective automatic
cleaning.
• You choose to manually start cleaning
the diesel particulate filter while the
engine is idling.
System Message Action and Description
Message
You must maintain the diesel particulate filter for it to
continue to function correctly. Do not disregard a system
maintenance message. The Ford Warranty may not cover
damage caused to your vehicle as a result of disregarding
this message.
Exhaust filter overloaded
Drive to clean
Operator Commanded Regeneration
Precautions and Safe Exhaust Position WARNING
Failure to comply with the following
instructions for operator
commanded regeneration may result
in fire, serious injury, death or property
damage. Before you start operator commanded
regeneration, do the following:
•
You must park your vehicle outside of
any structure.
• Move the gearshift lever to park
(P)
with the parking brake set on stable,
level ground.
• Your vehicle must be
9.8 ft (3 m) -
16.4 ft (5 m) away from any
obstructions and must be away from
materials that can easily combust or
melt, for example, paper, leaves,
petroleum products, fuels, plastics and
other dry organic material.
134
Transit (TTH) Canada/United States of America, HK3J 19A321 AA enUSA, Edition date: 04/2016, First Printing Fuel and Refueling
Page 144 of 484
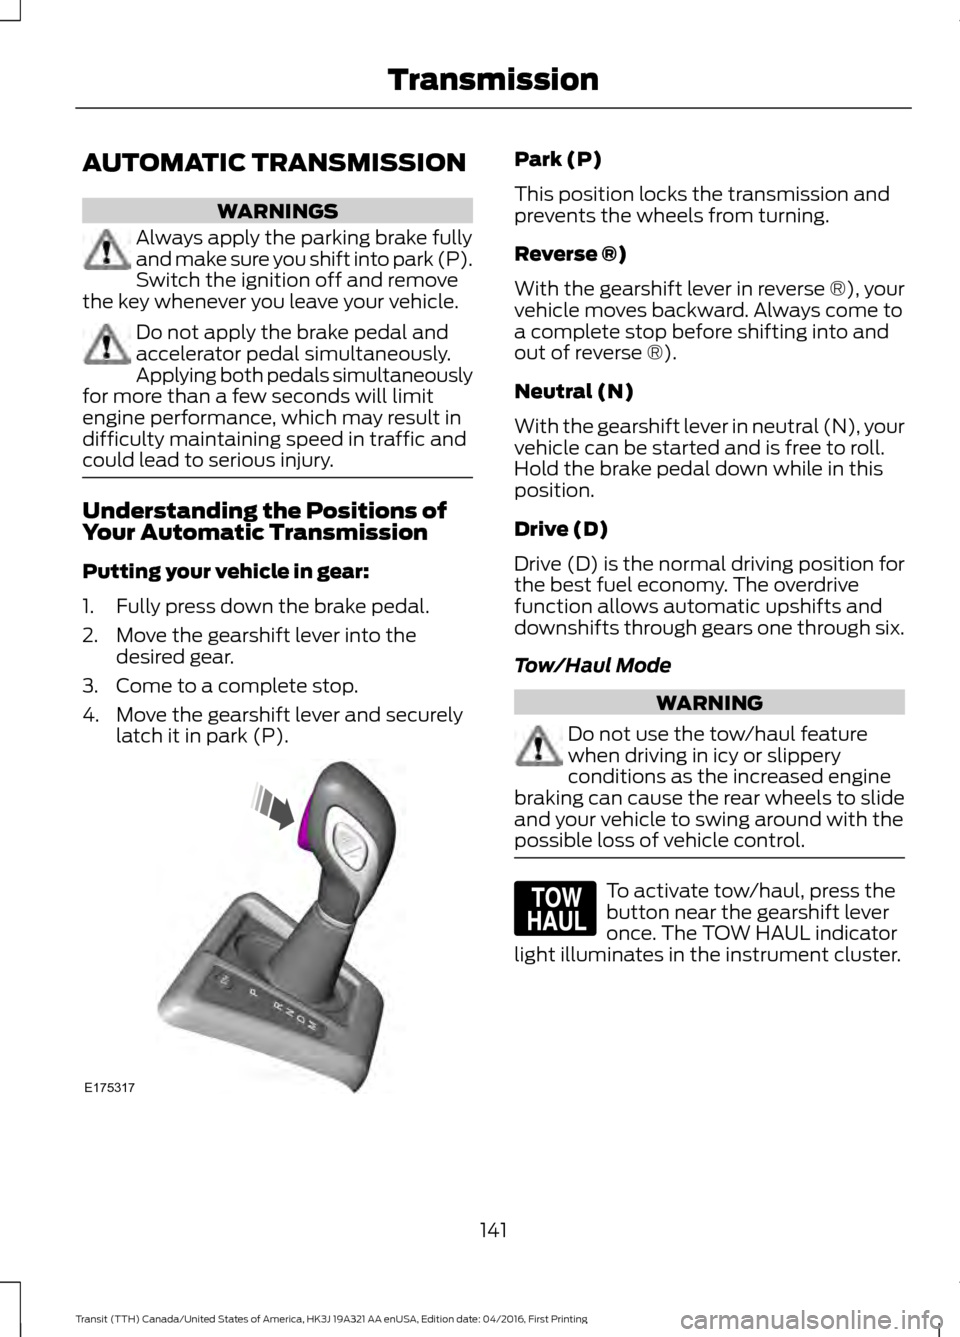
AUTOMATIC TRANSMISSION
WARNINGS
Always apply the parking brake fully
and make sure you shift into park (P).
Switch the ignition off and remove
the key whenever you leave your vehicle. Do not apply the brake pedal and
accelerator pedal simultaneously.
Applying both pedals simultaneously
for more than a few seconds will limit
engine performance, which may result in
difficulty maintaining speed in traffic and
could lead to serious injury. Understanding the Positions of
Your Automatic Transmission
Putting your vehicle in gear:
1. Fully press down the brake pedal.
2. Move the gearshift lever into the
desired gear.
3. Come to a complete stop.
4. Move the gearshift lever and securely latch it in park (P). Park (P)
This position locks the transmission and
prevents the wheels from turning.
Reverse ®)
With the gearshift lever in reverse ®), your
vehicle moves backward. Always come to
a complete stop before shifting into and
out of reverse ®).
Neutral (N)
With the gearshift lever in neutral (N), your
vehicle can be started and is free to roll.
Hold the brake pedal down while in this
position.
Drive (D)
Drive (D) is the normal driving position for
the best fuel economy. The overdrive
function allows automatic upshifts and
downshifts through gears one through six.
Tow/Haul Mode
WARNING
Do not use the tow/haul feature
when driving in icy or slippery
conditions as the increased engine
braking can cause the rear wheels to slide
and your vehicle to swing around with the
possible loss of vehicle control. To activate tow/haul, press the
button near the gearshift lever
once. The TOW HAUL indicator
light illuminates in the instrument cluster.
141
Transit (TTH) Canada/United States of America, HK3J 19A321 AA enUSA, Edition date: 04/2016, First Printing TransmissionE175317 E161509
Page 146 of 484
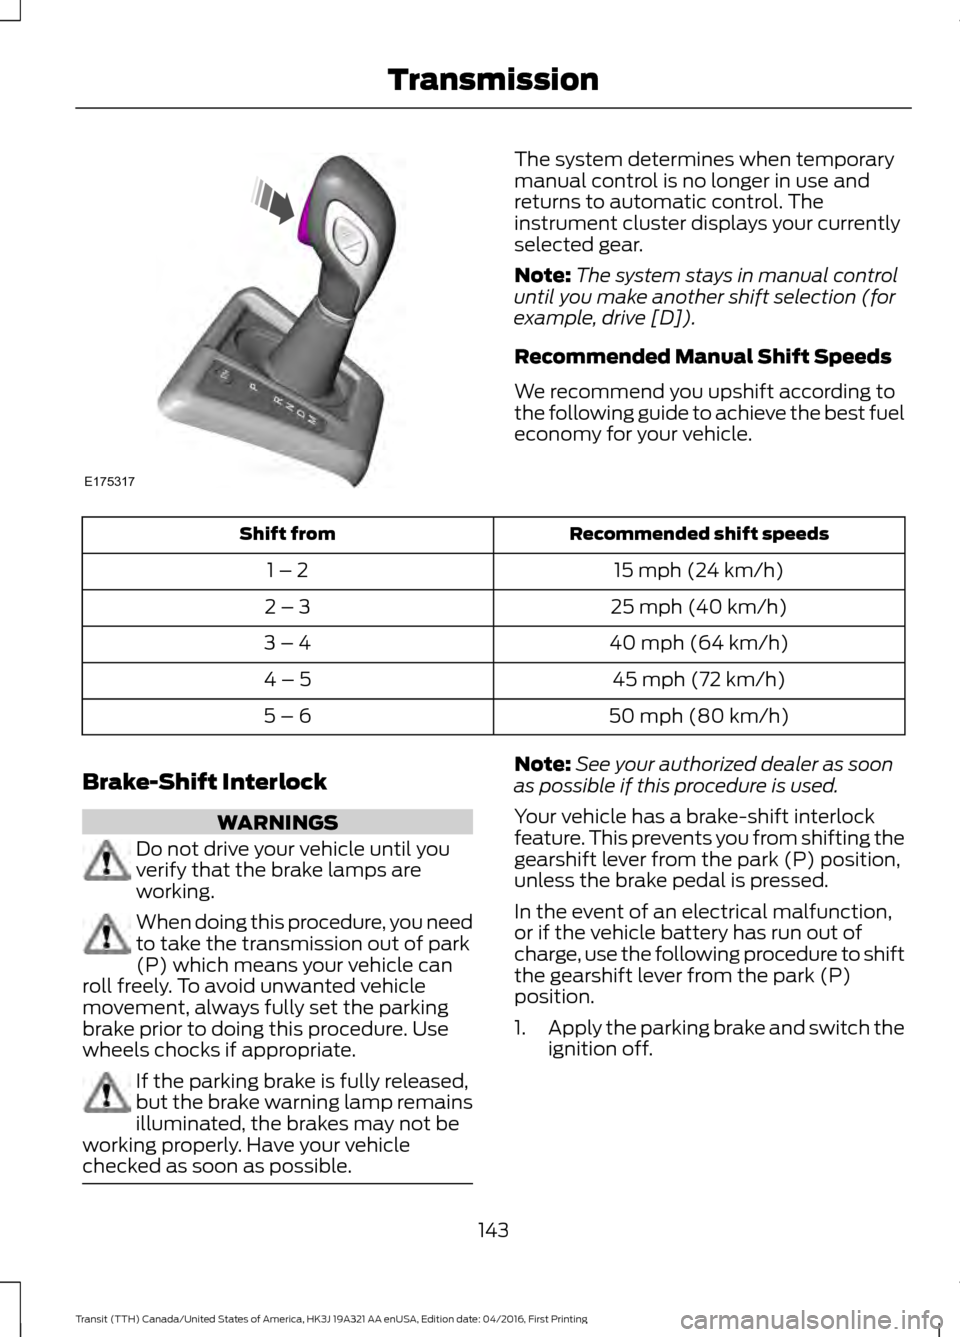
The system determines when temporary
manual control is no longer in use and
returns to automatic control. The
instrument cluster displays your currently
selected gear.
Note:
The system stays in manual control
until you make another shift selection (for
example, drive [D]).
Recommended Manual Shift Speeds
We recommend you upshift according to
the following guide to achieve the best fuel
economy for your vehicle. Recommended shift speeds
Shift from
15 mph (24 km/h)
1 – 2
25 mph (40 km/h)
2 – 3
40 mph (64 km/h)
3 – 4
45 mph (72 km/h)
4 – 5
50 mph (80 km/h)
5 – 6
Brake-Shift Interlock WARNINGS
Do not drive your vehicle until you
verify that the brake lamps are
working.
When doing this procedure, you need
to take the transmission out of park
(P) which means your vehicle can
roll freely. To avoid unwanted vehicle
movement, always fully set the parking
brake prior to doing this procedure. Use
wheels chocks if appropriate. If the parking brake is fully released,
but the brake warning lamp remains
illuminated, the brakes may not be
working properly. Have your vehicle
checked as soon as possible. Note:
See your authorized dealer as soon
as possible if this procedure is used.
Your vehicle has a brake-shift interlock
feature. This prevents you from shifting the
gearshift lever from the park (P) position,
unless the brake pedal is pressed.
In the event of an electrical malfunction,
or if the vehicle battery has run out of
charge, use the following procedure to shift
the gearshift lever from the park (P)
position.
1. Apply the parking brake and switch the
ignition off.
143
Transit (TTH) Canada/United States of America, HK3J 19A321 AA enUSA, Edition date: 04/2016, First Printing TransmissionE175317
Page 147 of 484
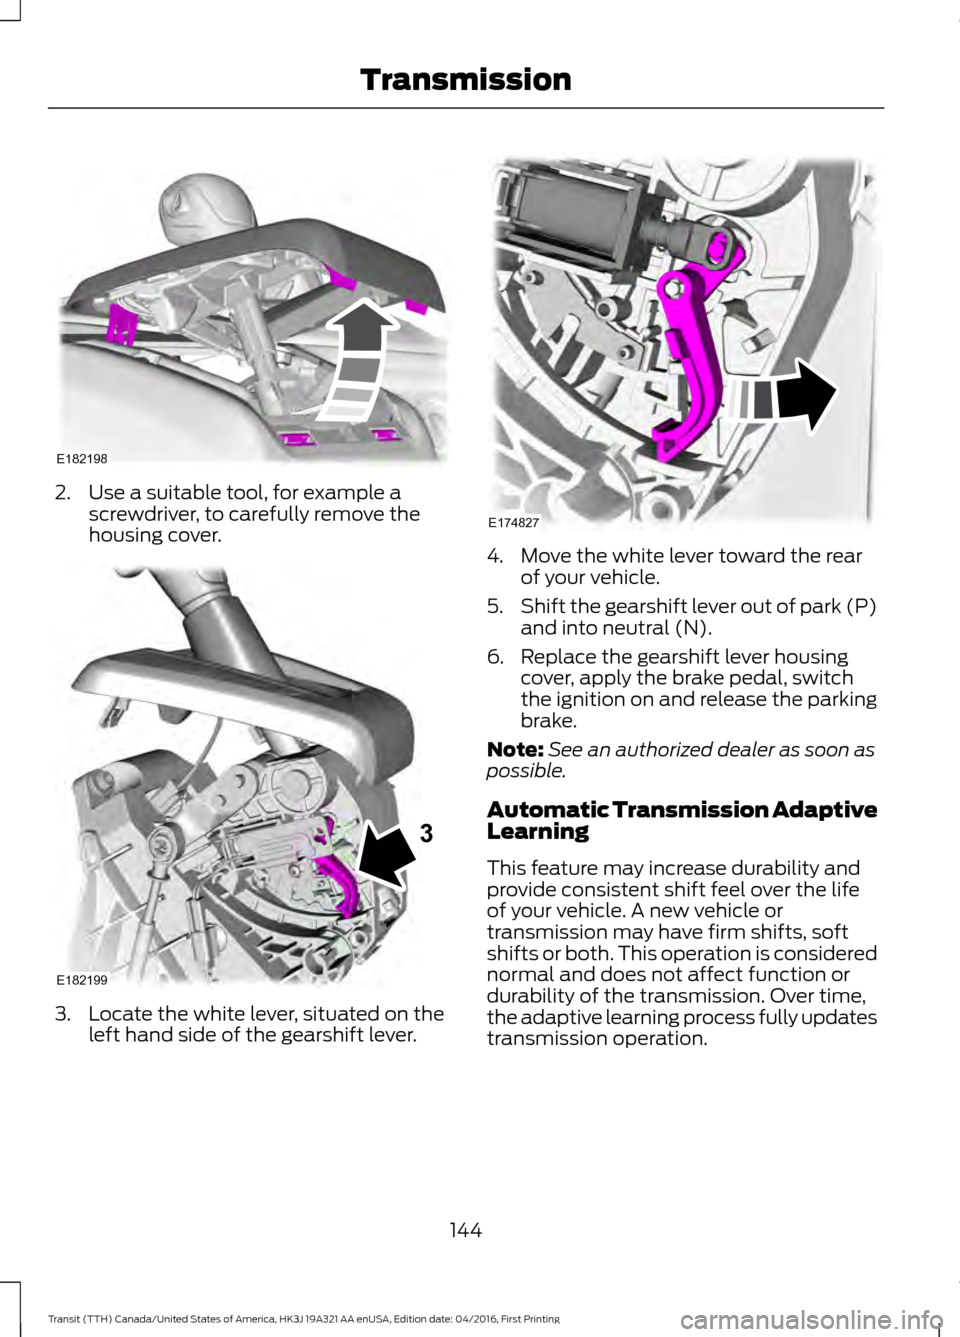
2. Use a suitable tool, for example a
screwdriver, to carefully remove the
housing cover. 3. Locate the white lever, situated on the
left hand side of the gearshift lever. 4. Move the white lever toward the rear
of your vehicle.
5. Shift the gearshift lever out of park (P)
and into neutral (N).
6. Replace the gearshift lever housing cover, apply the brake pedal, switch
the ignition on and release the parking
brake.
Note: See an authorized dealer as soon as
possible.
Automatic Transmission Adaptive
Learning
This feature may increase durability and
provide consistent shift feel over the life
of your vehicle. A new vehicle or
transmission may have firm shifts, soft
shifts or both. This operation is considered
normal and does not affect function or
durability of the transmission. Over time,
the adaptive learning process fully updates
transmission operation.
144
Transit (TTH) Canada/United States of America, HK3J 19A321 AA enUSA, Edition date: 04/2016, First Printing TransmissionE182198 E182199
3 E174827
Page 149 of 484
GENERAL INFORMATION
Note:
Occasional brake noise is normal. If
a metal-to-metal, continuous grinding or
continuous squeal sound is present, the
brake linings may be worn-out. Have the
system checked by an authorized dealer. If
your vehicle has continuous vibration or
shudder in the steering wheel while braking,
have it checked by an authorized dealer.
Note: Brake dust may accumulate on the
wheels, even under normal driving
conditions. Some dust is inevitable as the
brakes wear and does not contribute to
brake noise. See Cleaning the Wheels
(page 244). See
Warning Lamps and
Indicators (page 81).
Wet brakes result in reduced braking
efficiency. Gently press the brake pedal a
few times when driving from a car wash or
standing water to dry the brakes.
Brake Over Accelerator
In the event the accelerator pedal
becomes stuck or entrapped, apply steady
and firm pressure to the brake pedal to
slow the vehicle and reduce engine power.
If you experience this condition, apply the
brakes and bring your vehicle to a safe
stop. Move the gearshift lever to park (P),
switch the engine off and apply the parking
brake. Inspect the accelerator pedal for
any interference. If none are found and the
condition persists, have your vehicle towed
to the nearest authorized dealer.
Brake Assist
Brake assist detects when you brake
rapidly by measuring the rate at which you
press the brake pedal. It provides
maximum braking efficiency as long as you
press the pedal, and can reduce stopping
distances in critical situations. Anti-lock Brake System
This system helps you maintain steering
control during emergency stops by keeping
the brakes from locking. This lamp momentarily
illuminates when you turn the
ignition on. If the light does not
illuminate during start up, remains on or
flashes, the system may be disabled. Have
the system checked by an authorized
dealer. If the system is disabled, normal
braking is still effective. If the
brake warning lamp illuminates
when you release the parking brake, have
the system checked by an authorized
dealer.
HINTS ON DRIVING WITH
ANTI-LOCK BRAKES
Note: When the system is operating, the
brake pedal may pulse and may travel
further. Maintain pressure on the brake
pedal. You may also hear a noise from the
system. This is normal.
The anti-lock braking system will not
eliminate the risks when:
• You drive too closely to the vehicle in
front of you.
• Your vehicle is hydroplaning.
• You take corners too fast.
• The road surface is poor.
146
Transit (TTH) Canada/United States of America, HK3J 19A321 AA enUSA, Edition date: 04/2016, First Printing BrakesE138644 E138644
Page 150 of 484
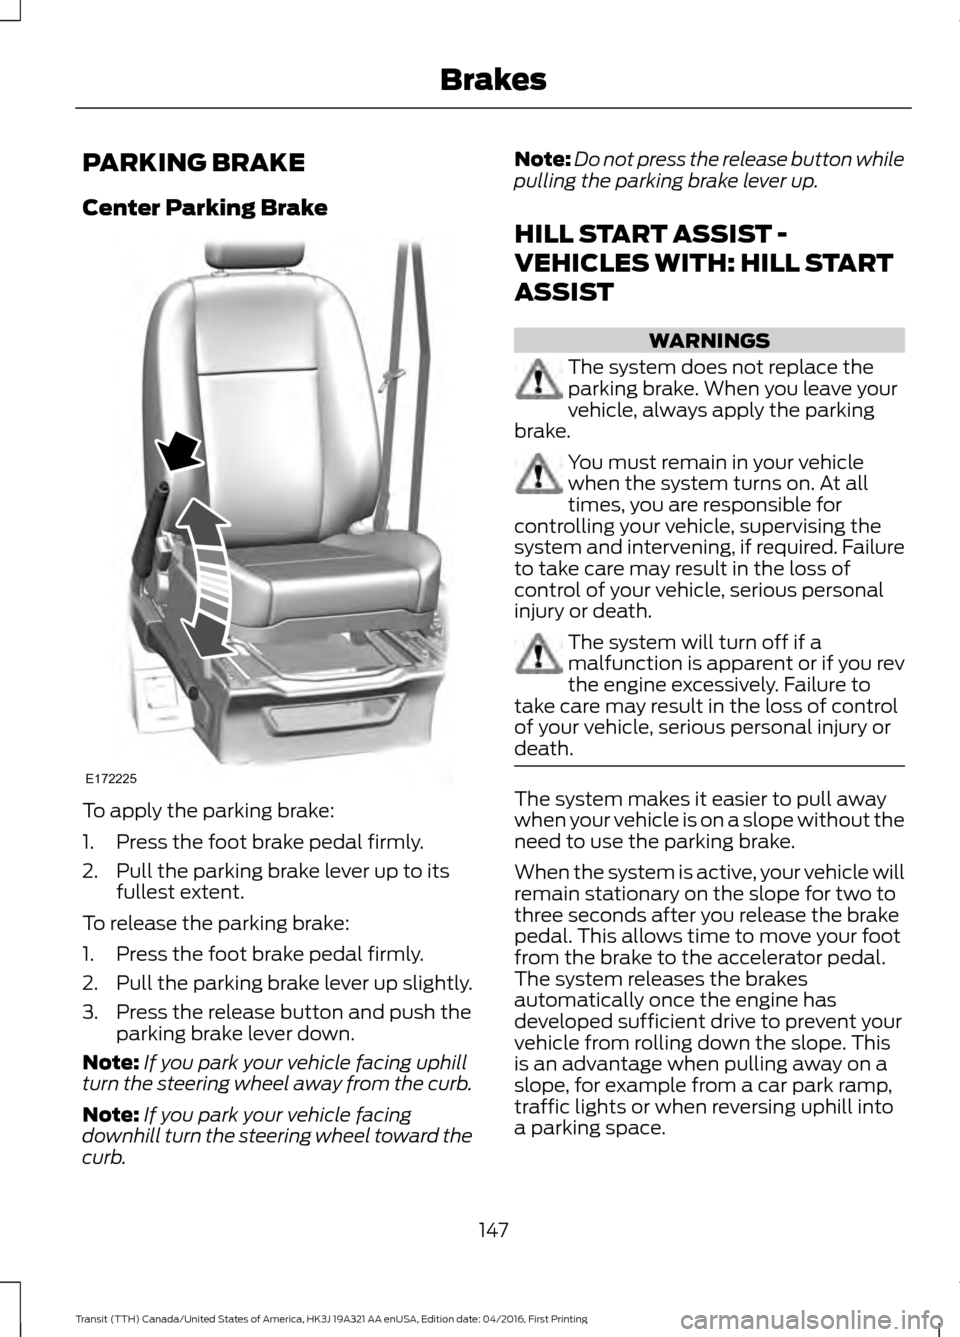
PARKING BRAKE
Center Parking Brake
To apply the parking brake:
1. Press the foot brake pedal firmly.
2. Pull the parking brake lever up to its
fullest extent.
To release the parking brake:
1. Press the foot brake pedal firmly.
2. Pull the parking brake lever up slightly.
3. Press the release button and push the parking brake lever down.
Note: If you park your vehicle facing uphill
turn the steering wheel away from the curb.
Note: If you park your vehicle facing
downhill turn the steering wheel toward the
curb. Note:
Do not press the release button while
pulling the parking brake lever up.
HILL START ASSIST -
VEHICLES WITH: HILL START
ASSIST WARNINGS
The system does not replace the
parking brake. When you leave your
vehicle, always apply the parking
brake. You must remain in your vehicle
when the system turns on. At all
times, you are responsible for
controlling your vehicle, supervising the
system and intervening, if required. Failure
to take care may result in the loss of
control of your vehicle, serious personal
injury or death. The system will turn off if a
malfunction is apparent or if you rev
the engine excessively. Failure to
take care may result in the loss of control
of your vehicle, serious personal injury or
death. The system makes it easier to pull away
when your vehicle is on a slope without the
need to use the parking brake.
When the system is active, your vehicle will
remain stationary on the slope for two to
three seconds after you release the brake
pedal. This allows time to move your foot
from the brake to the accelerator pedal.
The system releases the brakes
automatically once the engine has
developed sufficient drive to prevent your
vehicle from rolling down the slope. This
is an advantage when pulling away on a
slope, for example from a car park ramp,
traffic lights or when reversing uphill into
a parking space.
147
Transit (TTH) Canada/United States of America, HK3J 19A321 AA enUSA, Edition date: 04/2016, First Printing BrakesE172225
Page 151 of 484
Note:
The system will not operate if the
parking brake is applied.
Note: There is no warning light to indicate
the system is either on or off.
Using Hill Start Assist
1. Press the brake pedal to bring your vehicle to a complete standstill. Keep
the brake pedal pressed.
2. If the sensors detect that your vehicle is on a slope, the system will activate
automatically.
3. When you remove your foot from the brake pedal, your vehicle will remain
on the slope without rolling away for
approximately two to three seconds.
This hold time will automatically be
extended if you are in the process of
driving off.
4. Drive off in the normal manner. The system will release the brakes
automatically.
Note: When you remove your foot from the
brake pedal and press the pedal again when
the system is active, you will experience
significantly reduced brake pedal travel. This
is normal.
Switching the System On and Off
Vehicles with Manual Transmission
You can switch this feature on or off in the
information display. The system
remembers the last setting when you start
your vehicle.
Vehicles with Automatic Transmission
You cannot turn the system on or off.
When you switch the ignition on, the
system automatically turns on.
148
Transit (TTH) Canada/United States of America, HK3J 19A321 AA enUSA, Edition date: 04/2016, First Printing Brakes