engine FORD TRANSIT 2019 User Guide
[x] Cancel search | Manufacturer: FORD, Model Year: 2019, Model line: TRANSIT, Model: FORD TRANSIT 2019Pages: 529, PDF Size: 8.57 MB
Page 70 of 529
PRINCIPLE OF OPERATION
The remote control allows you to:
•
remotely lock or unlock the vehicle
doors
• unlock the doors without actively using
a key or remote control (intelligent
access only)
• remotely open the power liftgate (if
equipped)
• remotely start or stop the engine (if
equipped)
• arm and disarm the anti-theft system
• activate the panic alarm.
GENERAL INFORMATION ON
RADIO FREQUENCIES
This device complies with Part 15 of the
FCC Rules and with Licence exempt RSS
Standards of Industry Canada. Operation
is subject to the following two conditions:
• This device may not cause harmful
interference, and
• This device must accept any
interference received, including
interference that may cause undesired
operation. WARNING: Changes or
modifications not expressively approved
by the party responsible for compliance
could void the user's authority to operate
the equipment. The term "IC:" before the
radio certification number only signifies
that Industry Canada technical
specifications were met. The typical operating range for your
transmitter is approximately
33 ft (10 m).
Vehicles with the remote start feature will
have a greater range. One of the following
could cause a decrease in operating range:
• Weather conditions.
• Nearby radio towers.
• Structures around the vehicle.
• Other vehicles parked next to your
vehicle.
Other short distance radio transmissions,
for example amateur radios, medical
equipment, wireless headphones, remote
controls and alarm systems can also use
the radio frequency used by your remote
control. If the frequencies are jammed, you
will not be able to use your remote control.
You can lock and unlock the doors with the
key.
Note: Make sure to lock your vehicle before
leaving it unattended.
Note: If you are in range, the remote control
will operate if you press any button
unintentionally.
Note: The remote control contains sensitive
electrical components. Exposure to moisture
or impact may cause permanent damage.
67
2019 Transit (TTH) Canada/United States of America, Vehicles Built From: 02-01-2019, KK3J 19A321 AB enUSA, Edition date: 201812, First-Printing Keys and Remote Controls
Page 75 of 529
LOCKING AND UNLOCKING
Locking
Locking With the Key
Turn the top of the key toward the rear of
your vehicle.
Locking With the Remote Control
Press the button once. The
direction indicators will flash.
Press the button again within
three seconds to confirm that all the doors
are closed. The horn sounds and the
direction indicators flash.
Note: You can lock the driver door with the
key. Use the key when the remote control
is not functioning.
Note: Make sure you have locked your
vehicle before leaving it unattended.
Note: Do not leave the keys in your vehicle.
Unlocking
Unlocking With the Key
Turn the top of the key toward the front of
your vehicle.
Unlocking With the Remote Control Press the button once. The
direction indicators will flash.
Note: You can unlock the driver door with
the key. Use the key when the remote
control is not functioning.
Note: When you leave your vehicle
unattended for several weeks, the remote
control turns off.
Note: Unlock your vehicle and start the
engine using the key. Unlocking and starting
your vehicle once enables the remote
control. Unlocking the Rear Cargo Doors Press the button.
Reprogramming the Unlocking
Function
Note: When you press the unlock button,
either all the doors are unlocked or only the
driver and passenger doors are unlocked.
You can program the unlocking function
so that all doors are unlocked.
Press and hold the unlock and lock buttons
on the remote control simultaneously for
at least four seconds with the ignition off.
The direction indicators flash twice to
confirm the change.
To return to the original unlocking function,
repeat the process.
You can also change between the
unlocking modes in the information
display. See General Information (page
97).
Locking and Unlocking the Doors
From Inside Lock.
A
Unlock.
B
72
2019 Transit (TTH) Canada/United States of America, Vehicles Built From: 02-01-2019, KK3J 19A321 AB enUSA, Edition date: 201812, First-Printing Doors and Locks E148829
A
B
Page 80 of 529
PASSIVE ANTI-THEFT
SYSTEM (IF EQUIPPED)
Note: The system is not compatible with
non-Ford aftermarket remote start systems.
Use of these systems may result in vehicle
starting problems and a loss of security
protection.
Note: Metallic objects, electronic devices
or a second coded key on the same key
chain may cause vehicle starting problems
if they are too close to the key when starting
the engine. Prevent these objects from
touching the coded key while starting the
engine. Switch the ignition off, move all
objects on the key chain away from the
coded key and restart the engine if a
problem occurs.
Note: Do not leave a duplicate coded key
in the vehicle. Always take your keys and
lock all doors when leaving the vehicle.
SecuriLock®
The system is an engine immobilization
system. It is designed to help prevent the
engine from being started unless a
correctly coded key for your vehicle is used.
Using an incorrectly coded key may
prevent the engine from starting. A
message may appear in the information
display.
If you are unable to start the engine with a
correctly coded key, a malfunction has
happened and a message may appear in
the information display.
Automatic Arming
The engine immobilization system arms
immediately after you switch the ignition
off. Automatic Disarming
Switching the ignition on with a correctly
coded key disarms the engine
immobilization system.
Replacement Keys
The integrated keyhead transmitter
functions as a programmed ignition key
that operates all the locks and starts your
vehicle, as well as a remote control.
If your keys are lost or stolen and you do
not have a spare correctly coded key, you
will need to have your vehicle towed to an
authorized dealer. You need to erase the
coded keys from your vehicle and program
new coded keys.
Store an extra correctly coded key away
from the vehicle in a safe place to help
prevent any inconveniences. See an
authorized dealer to purchase additional
spare or replacement keys.
Programming a Spare Integrated
Keyhead Transmitter
You can program your own integrated
keyhead transmitter or standard
SecuriLock coded keys to your vehicle. This
procedure will program both the engine
immobilizer keycode and the remote entry
portion of the remote control to your
vehicle
Only use integrated keyhead transmitters
or standard SecuriLock keys.
You must have two previously
programmed correctly coded keys and the
new unprogrammed key readily accessible.
See an authorized dealer to have the spare
key programmed if two previously
programmed correctly coded keys are not
available.
Read and understand the entire procedure
before you begin.
1.
Insert the first previously programmed
correctly coded key into the ignition.
77
2019 Transit (TTH) Canada/United States of America, Vehicles Built From: 02-01-2019, KK3J 19A321 AB enUSA, Edition date: 201812, First-Printing Security
Page 81 of 529
2.
Switch the ignition from off to on. Keep
the ignition on for at least three
seconds, but no more than 10 seconds.
3. Switch the ignition off and remove the
first correctly coded key from the
ignition.
4. After three seconds but within 10 seconds of switching the ignition off,
insert the second previously correctly
coded key into the ignition.
5. Switch the ignition from off to on. Keep
the ignition on for at least three
seconds, but no more than 10 seconds.
6. Switch the ignition off and remove the
second previously programmed
correctly coded key from the ignition.
7. After three seconds but within 10 seconds of switching the ignition off
and removing the previously
programmed correctly coded key,
insert the new unprogrammed key into
the ignition.
8. Switch the ignition from off to on. Keep
the ignition on for at least six seconds.
9. Remove the newly programmed correctly coded key from the ignition.
If the key has been successfully
programmed it will start the engine and
operate the remote entry system (if the
new key is an integrated keyhead
transmitter).
If the key was not successfully
programmed, wait 10 seconds and repeat
Steps 1 through 8. If you are still
unsuccessful, take your vehicle to an
authorized dealer.
Note: You can program a maximum of eight
coded keys to your vehicle. All eight can be
integrated keyhead transmitters. ANTI-THEFT ALARM
Alarm System
The perimeter alarm is a deterrent against
unauthorized access to your vehicle
through the doors, luggage compartment
and the hood.
Triggering the Alarm
Once armed, the alarm is triggered in any
of the following ways:
•
If someone opens a door, cargo area
or the hood without a valid key or
remote control.
• If you switch the ignition on without a
valid key.
If the alarm is triggered, the horn will sound
for 30 seconds and the hazard warning
flasher will flash for five minutes.
Any further attempts to perform one of the
above will trigger the alarm again.
Arming the Alarm
To arm the alarm, lock your vehicle. See
Doors and Locks (page 72).
Disarming the Alarm
Disarm and silence the alarm by unlocking
the doors with the key and switching the
ignition on with a correctly coded key
within 12 seconds, or by unlocking the
doors or the cargo area with the remote
control.
78
2019 Transit (TTH) Canada/United States of America, Vehicles Built From: 02-01-2019, KK3J 19A321 AB enUSA, Edition date: 201812, First-Printing Security
Page 88 of 529
Note:
Tap the lever up or down to make the
direction indicators flash three times to
indicate a lane change.
INTERIOR LAMPS
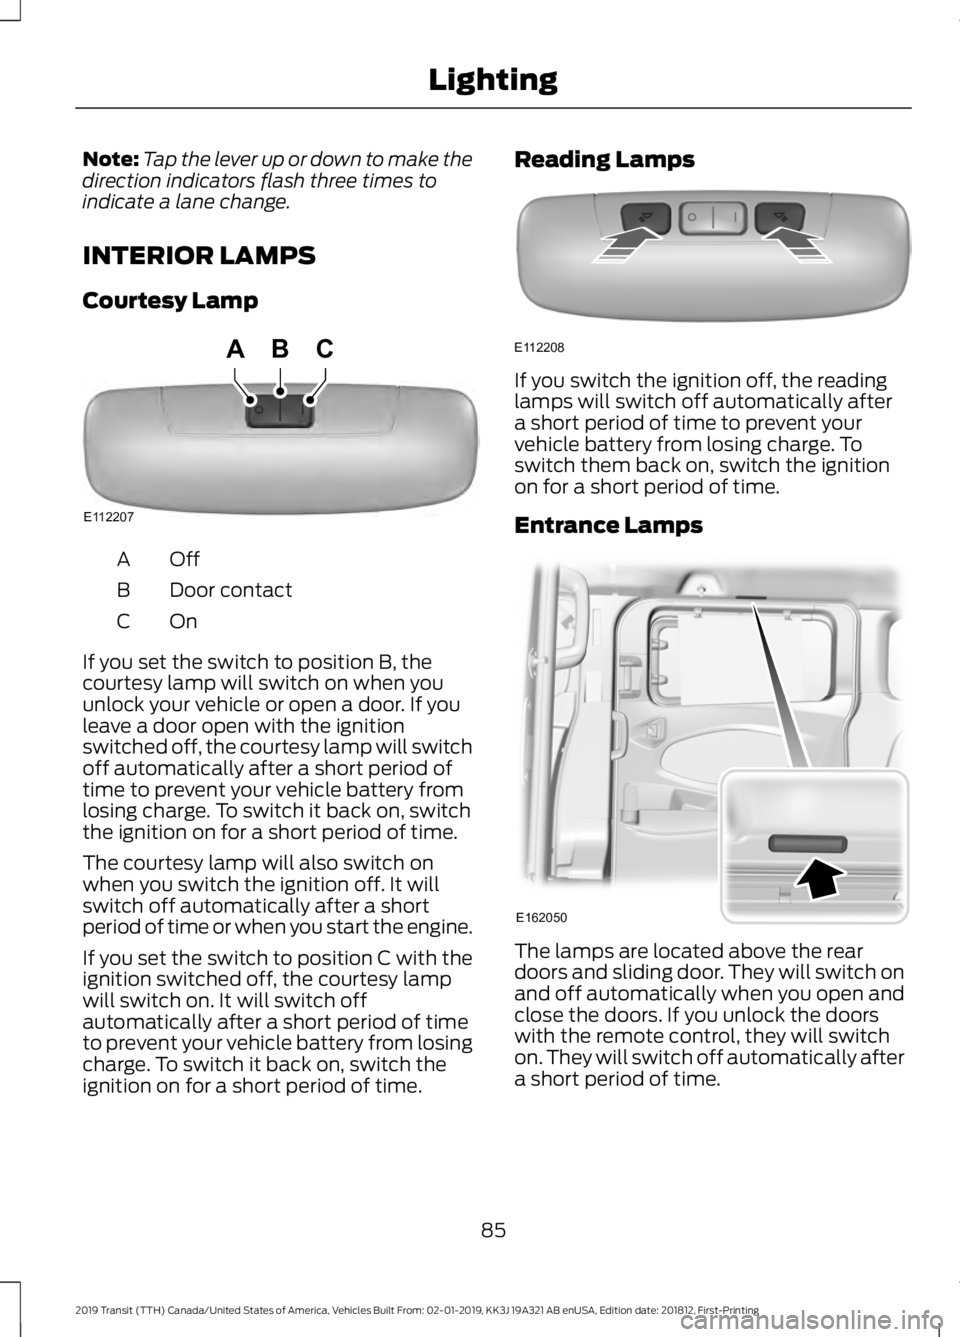
Courtesy Lamp OffA
Door contact
B
OnC
If you set the switch to position B, the
courtesy lamp will switch on when you
unlock your vehicle or open a door. If you
leave a door open with the ignition
switched off, the courtesy lamp will switch
off automatically after a short period of
time to prevent your vehicle battery from
losing charge. To switch it back on, switch
the ignition on for a short period of time.
The courtesy lamp will also switch on
when you switch the ignition off. It will
switch off automatically after a short
period of time or when you start the engine.
If you set the switch to position C with the
ignition switched off, the courtesy lamp
will switch on. It will switch off
automatically after a short period of time
to prevent your vehicle battery from losing
charge. To switch it back on, switch the
ignition on for a short period of time. Reading Lamps
If you switch the ignition off, the reading
lamps will switch off automatically after
a short period of time to prevent your
vehicle battery from losing charge. To
switch them back on, switch the ignition
on for a short period of time.
Entrance Lamps
The lamps are located above the rear
doors and sliding door. They will switch on
and off automatically when you open and
close the doors. If you unlock the doors
with the remote control, they will switch
on. They will switch off automatically after
a short period of time.
85
2019 Transit (TTH) Canada/United States of America, Vehicles Built From: 02-01-2019, KK3J 19A321 AB enUSA, Edition date: 201812, First-Printing LightingE112207
BCA E112208 E162050
Page 94 of 529
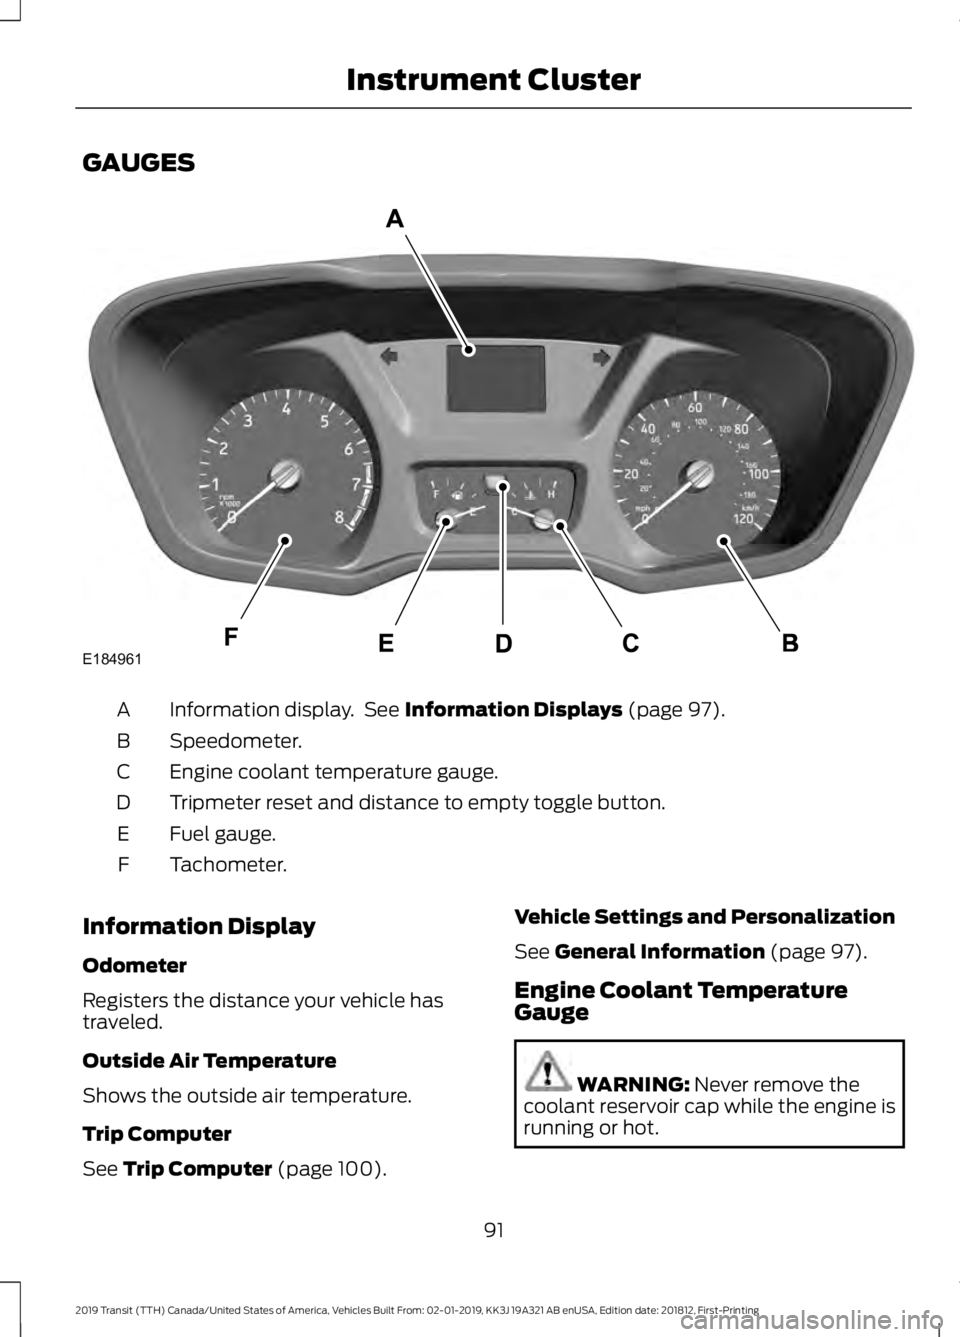
GAUGES
Information display. See Information Displays (page 97).
A
Speedometer.
B
Engine coolant temperature gauge.
C
Tripmeter reset and distance to empty toggle button.
D
Fuel gauge.
E
Tachometer.
F
Information Display
Odometer
Registers the distance your vehicle has
traveled.
Outside Air Temperature
Shows the outside air temperature.
Trip Computer
See
Trip Computer (page 100). Vehicle Settings and Personalization
See
General Information (page 97).
Engine Coolant Temperature
Gauge WARNING:
Never remove the
coolant reservoir cap while the engine is
running or hot.
91
2019 Transit (TTH) Canada/United States of America, Vehicles Built From: 02-01-2019, KK3J 19A321 AB enUSA, Edition date: 201812, First-Printing Instrument ClusterE184961
Page 95 of 529
At normal operating temperature, the
needle will remain in the center section.
If the needle enters the red section, the
engine is overheating. Stop your vehicle as
soon as it is safe to do so and switch the
engine off. Determine the cause once the
engine has cooled down. See Engine
Coolant Check (page 236).
Note: Do not restart the engine until the
cause of overheating has been determined
and resolved.
Tripmeter Reset and Distance to
Empty
(If Equipped)
Press the button to change between the
tripmeter and distance to empty
information. Press and hold the button to
reset the tripmeter.
Fuel Gauge
Note: The fuel gauge may vary slightly
when your vehicle is moving or on a gradient. Switch the ignition on. The fuel gauge will
indicate approximately how much fuel is
in the fuel tank. The arrow adjacent to the
fuel pump symbol indicates on which side
of your vehicle the fuel filler door is located.
The needle should move toward F when
you refuel your vehicle. If the needle points
to E after adding fuel, this indicates your
vehicle needs service soon.
After refueling some variability in needle
position is normal:
•
It may take a short time for the needle
to reach F after leaving the gas station.
This is normal and depends upon the
slope of pavement at the gas station.
• The fuel amount dispensed into the
tank is a little less or more than the
gauge indicated. This is normal and
depends upon the slope of pavement
at the gas station.
• If the gas station nozzle shuts off
before the tank is full, try a different
gas pump nozzle.
Low Fuel Reminder
A low fuel reminder triggers when the fuel
gauge needle is at 1/16th.
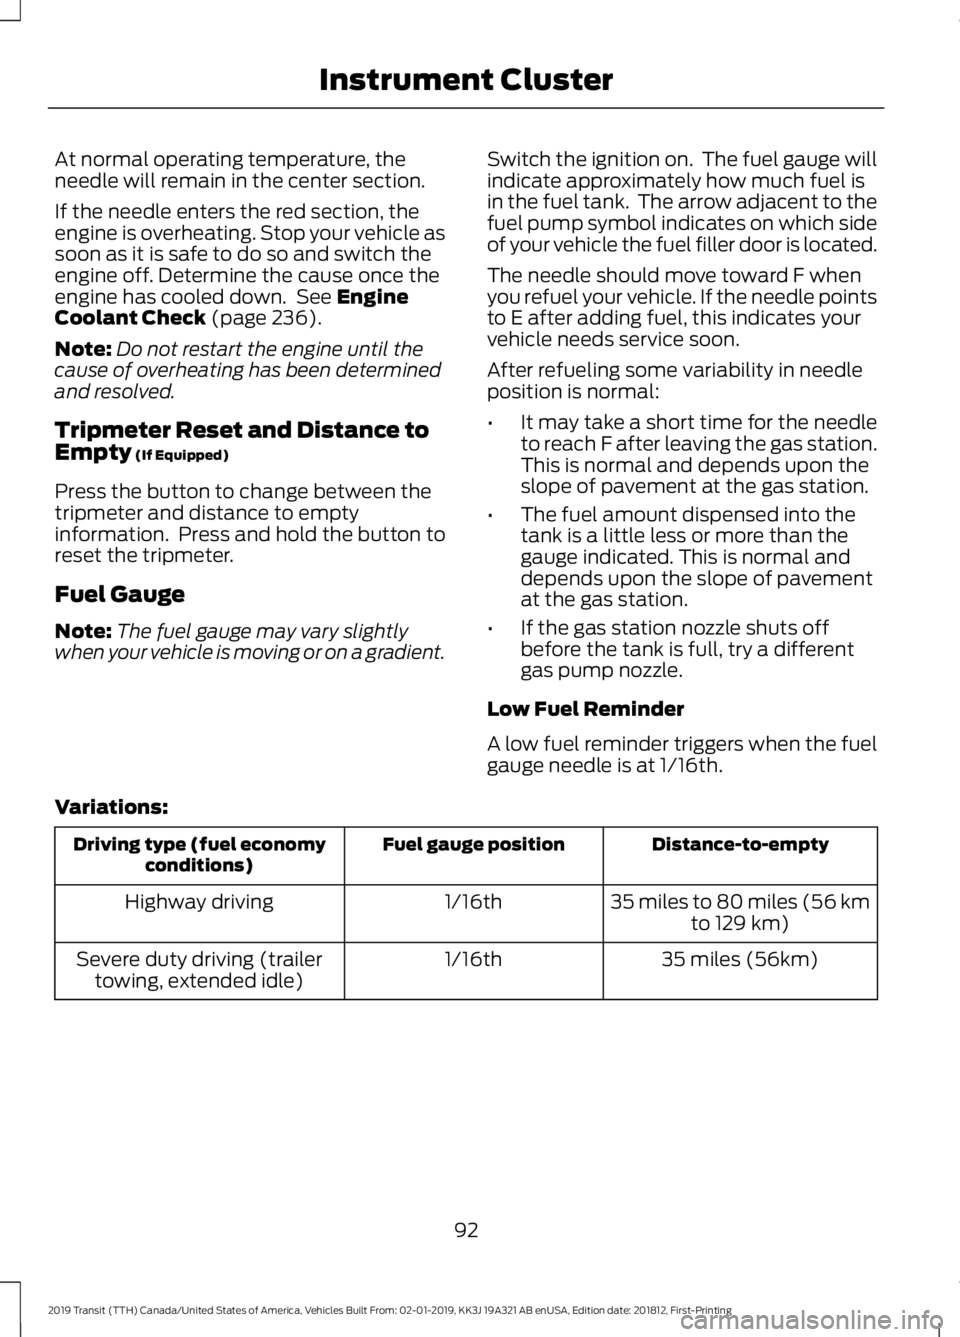
Variations: Distance-to-empty
Fuel gauge position
Driving type (fuel economy
conditions)
35 miles to 80 miles (56 kmto 129 km)
1/16th
Highway driving
35 miles (56km)
1/16th
Severe duty driving (trailer
towing, extended idle)
92
2019 Transit (TTH) Canada/United States of America, Vehicles Built From: 02-01-2019, KK3J 19A321 AB enUSA, Edition date: 201812, First-Printing Instrument Cluster
Page 96 of 529
WARNING LAMPS AND
INDICATORS
The following warning lamps and
indicators alert you to a vehicle condition
that may become serious. Some lamps
illuminate when you start your vehicle to
make sure they work. If any lamps remain
on after starting your vehicle, refer to the
respective system warning lamp for further
information.
Note:
Some warning indicators appear in
the information display and operate the
same as a warning lamp but do not
illuminate when you start your vehicle.
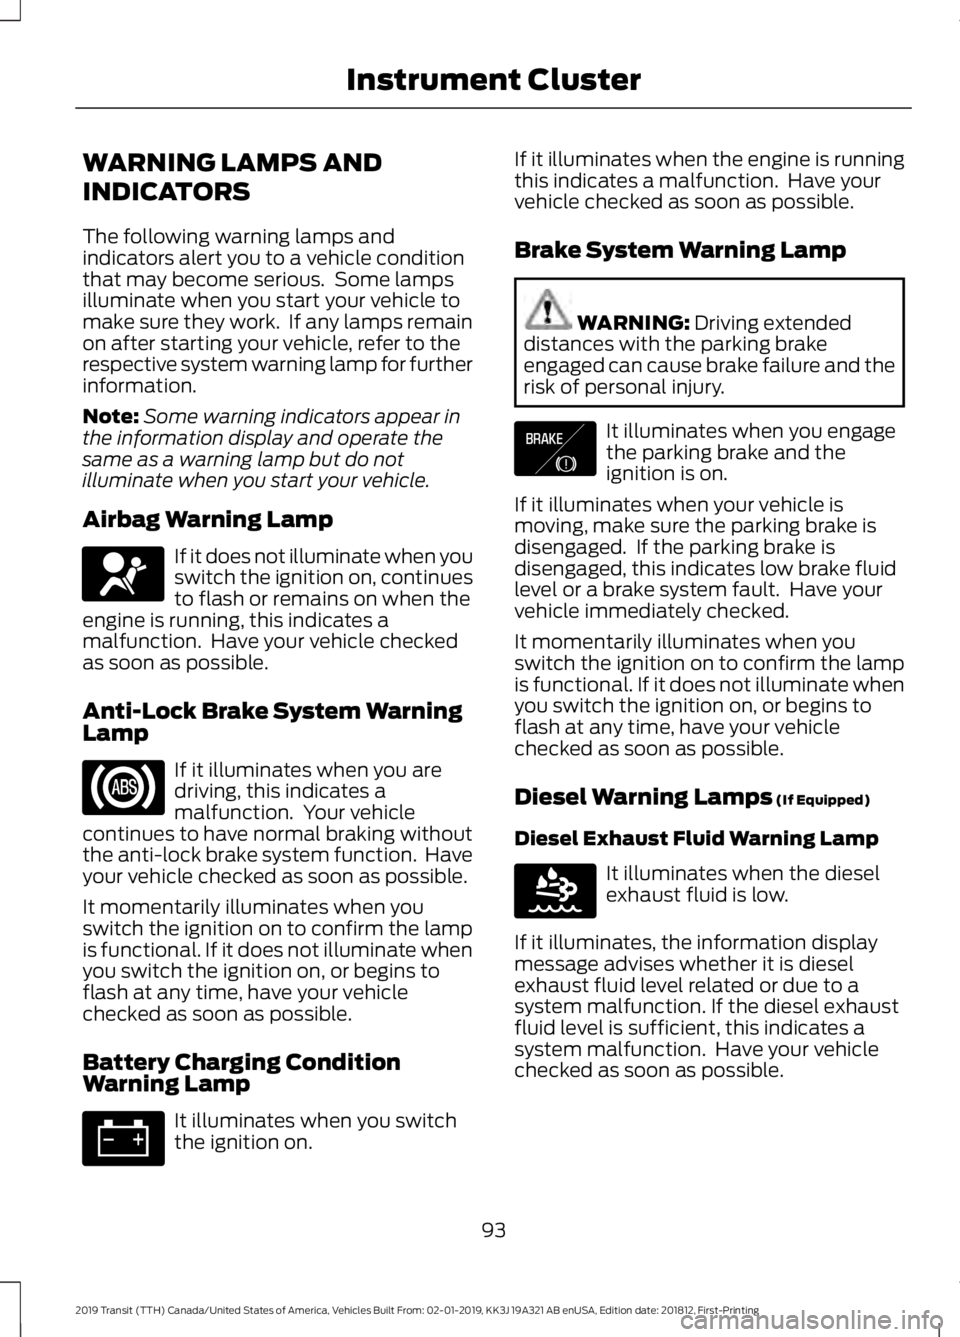
Airbag Warning Lamp If it does not illuminate when you
switch the ignition on, continues
to flash or remains on when the
engine is running, this indicates a
malfunction. Have your vehicle checked
as soon as possible.
Anti-Lock Brake System Warning
Lamp If it illuminates when you are
driving, this indicates a
malfunction. Your vehicle
continues to have normal braking without
the anti-lock brake system function. Have
your vehicle checked as soon as possible.
It momentarily illuminates when you
switch the ignition on to confirm the lamp
is functional. If it does not illuminate when
you switch the ignition on, or begins to
flash at any time, have your vehicle
checked as soon as possible.
Battery Charging Condition
Warning Lamp It illuminates when you switch
the ignition on. If it illuminates when the engine is running
this indicates a malfunction. Have your
vehicle checked as soon as possible.
Brake System Warning Lamp
WARNING: Driving extended
distances with the parking brake
engaged can cause brake failure and the
risk of personal injury. It illuminates when you engage
the parking brake and the
ignition is on.
If it illuminates when your vehicle is
moving, make sure the parking brake is
disengaged. If the parking brake is
disengaged, this indicates low brake fluid
level or a brake system fault. Have your
vehicle immediately checked.
It momentarily illuminates when you
switch the ignition on to confirm the lamp
is functional. If it does not illuminate when
you switch the ignition on, or begins to
flash at any time, have your vehicle
checked as soon as possible.
Diesel Warning Lamps
(If Equipped)
Diesel Exhaust Fluid Warning Lamp It illuminates when the diesel
exhaust fluid is low.
If it illuminates, the information display
message advises whether it is diesel
exhaust fluid level related or due to a
system malfunction. If the diesel exhaust
fluid level is sufficient, this indicates a
system malfunction. Have your vehicle
checked as soon as possible.
93
2019 Transit (TTH) Canada/United States of America, Vehicles Built From: 02-01-2019, KK3J 19A321 AB enUSA, Edition date: 201812, First-Printing Instrument ClusterE67017 E138644 E163176
Page 97 of 529
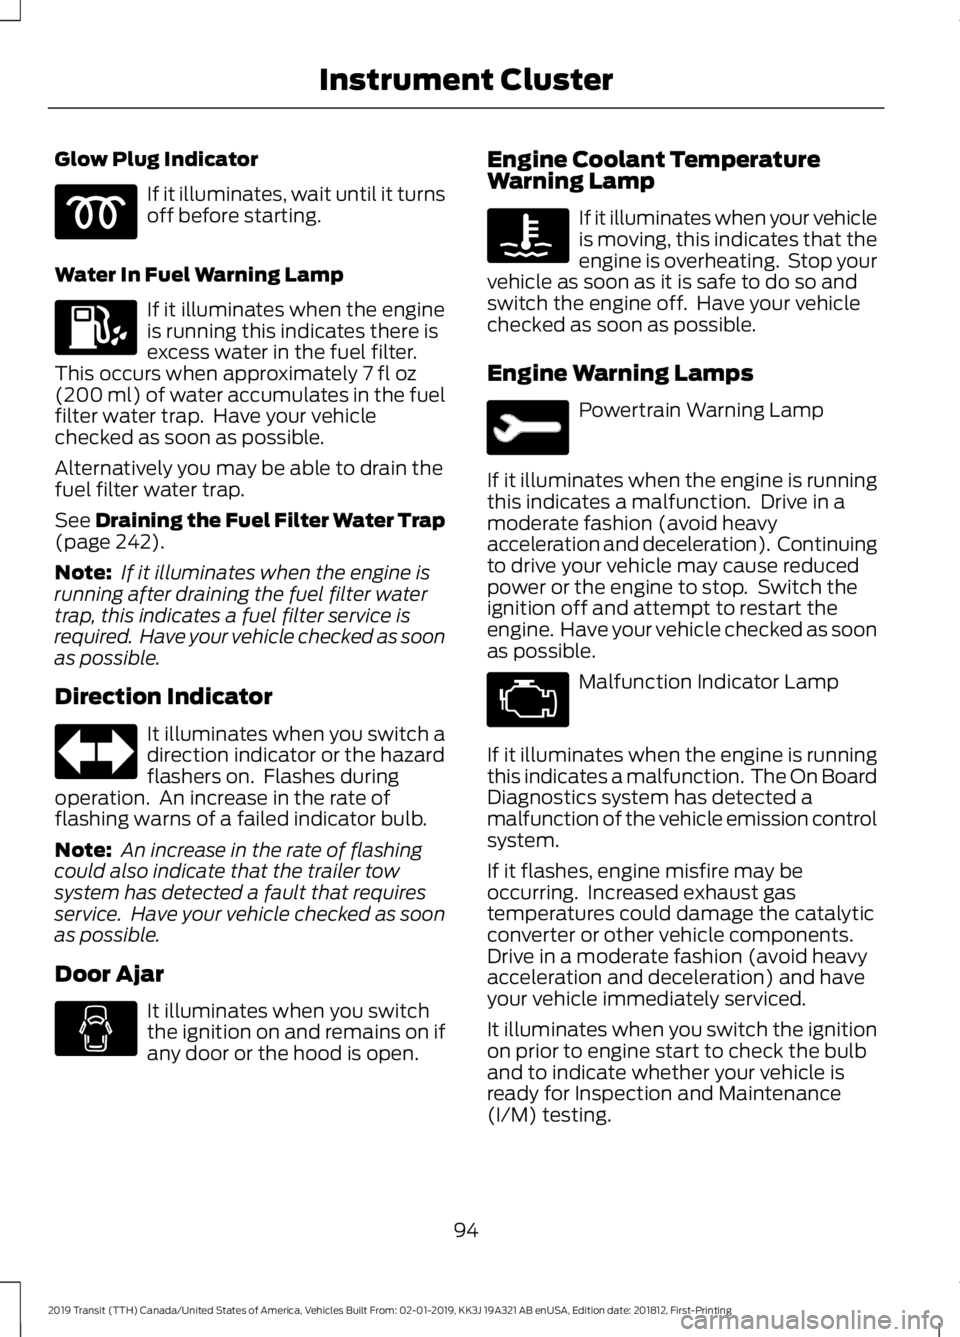
Glow Plug Indicator
If it illuminates, wait until it turns
off before starting.
Water In Fuel Warning Lamp If it illuminates when the engine
is running this indicates there is
excess water in the fuel filter.
This occurs when approximately 7 fl oz
(200 ml) of water accumulates in the fuel
filter water trap. Have your vehicle
checked as soon as possible.
Alternatively you may be able to drain the
fuel filter water trap.
See
Draining the Fuel Filter Water Trap
(page 242).
Note: If it illuminates when the engine is
running after draining the fuel filter water
trap, this indicates a fuel filter service is
required. Have your vehicle checked as soon
as possible.
Direction Indicator It illuminates when you switch a
direction indicator or the hazard
flashers on. Flashes during
operation. An increase in the rate of
flashing warns of a failed indicator bulb.
Note: An increase in the rate of flashing
could also indicate that the trailer tow
system has detected a fault that requires
service. Have your vehicle checked as soon
as possible.
Door Ajar It illuminates when you switch
the ignition on and remains on if
any door or the hood is open. Engine Coolant Temperature
Warning Lamp If it illuminates when your vehicle
is moving, this indicates that the
engine is overheating. Stop your
vehicle as soon as it is safe to do so and
switch the engine off. Have your vehicle
checked as soon as possible.
Engine Warning Lamps Powertrain Warning Lamp
If it illuminates when the engine is running
this indicates a malfunction. Drive in a
moderate fashion (avoid heavy
acceleration and deceleration). Continuing
to drive your vehicle may cause reduced
power or the engine to stop. Switch the
ignition off and attempt to restart the
engine. Have your vehicle checked as soon
as possible. Malfunction Indicator Lamp
If it illuminates when the engine is running
this indicates a malfunction. The On Board
Diagnostics system has detected a
malfunction of the vehicle emission control
system.
If it flashes, engine misfire may be
occurring. Increased exhaust gas
temperatures could damage the catalytic
converter or other vehicle components.
Drive in a moderate fashion (avoid heavy
acceleration and deceleration) and have
your vehicle immediately serviced.
It illuminates when you switch the ignition
on prior to engine start to check the bulb
and to indicate whether your vehicle is
ready for Inspection and Maintenance
(I/M) testing.
94
2019 Transit (TTH) Canada/United States of America, Vehicles Built From: 02-01-2019, KK3J 19A321 AB enUSA, Edition date: 201812, First-Printing Instrument Cluster
Page 98 of 529
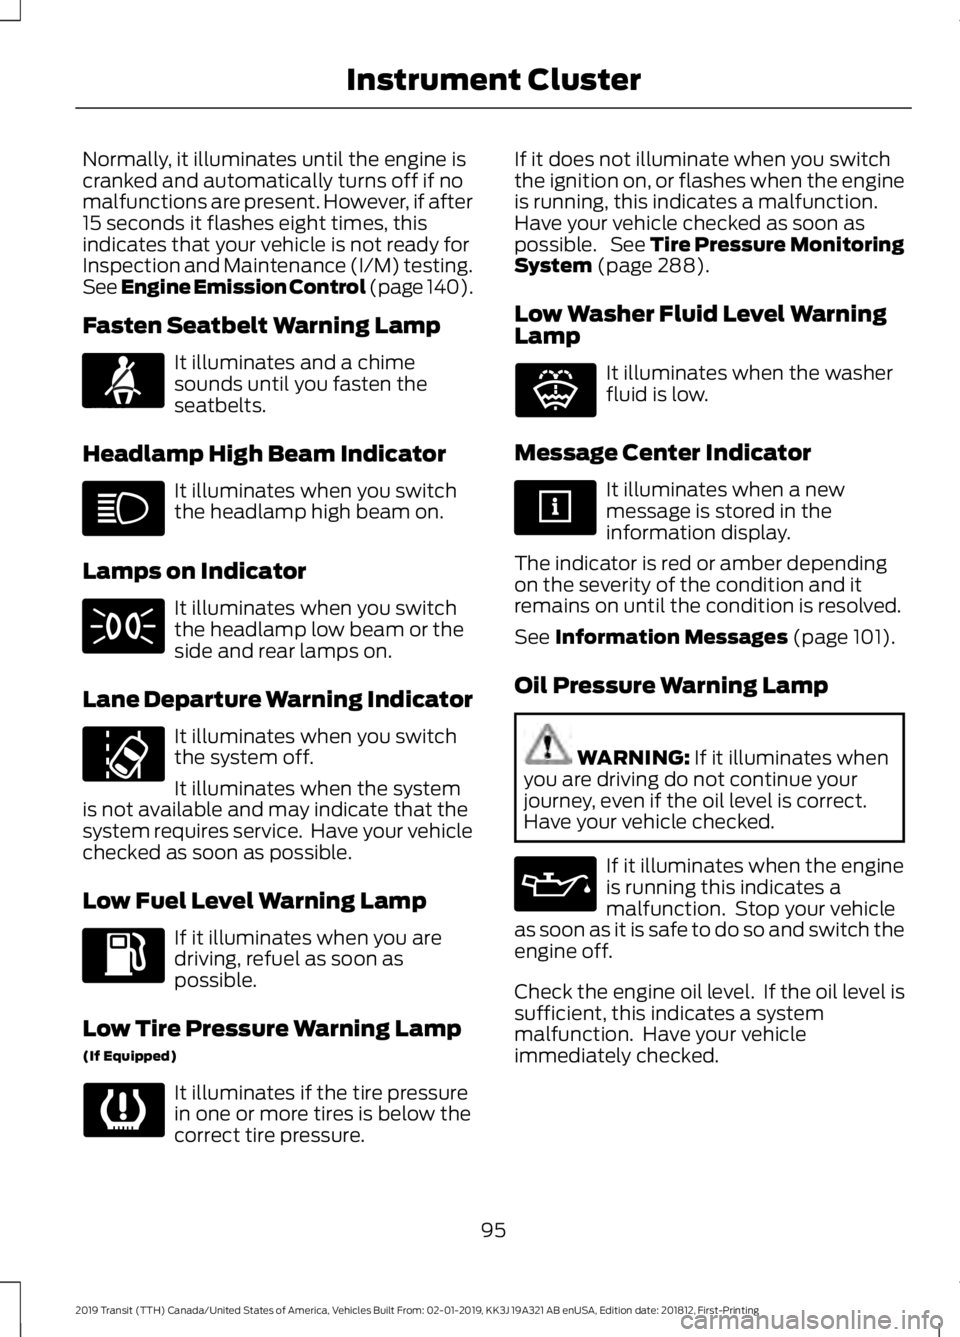
Normally, it illuminates until the engine is
cranked and automatically turns off if no
malfunctions are present. However, if after
15 seconds it flashes eight times, this
indicates that your vehicle is not ready for
Inspection and Maintenance (I/M) testing.
See Engine Emission Control (page 140).
Fasten Seatbelt Warning Lamp It illuminates and a chime
sounds until you fasten the
seatbelts.
Headlamp High Beam Indicator It illuminates when you switch
the headlamp high beam on.
Lamps on Indicator It illuminates when you switch
the headlamp low beam or the
side and rear lamps on.
Lane Departure Warning Indicator It illuminates when you switch
the system off.
It illuminates when the system
is not available and may indicate that the
system requires service. Have your vehicle
checked as soon as possible.
Low Fuel Level Warning Lamp If it illuminates when you are
driving, refuel as soon as
possible.
Low Tire Pressure Warning Lamp
(If Equipped) It illuminates if the tire pressure
in one or more tires is below the
correct tire pressure. If it does not illuminate when you switch
the ignition on, or flashes when the engine
is running, this indicates a malfunction.
Have your vehicle checked as soon as
possible. See
Tire Pressure Monitoring
System (page 288).
Low Washer Fluid Level Warning
Lamp It illuminates when the washer
fluid is low.
Message Center Indicator It illuminates when a new
message is stored in the
information display.
The indicator is red or amber depending
on the severity of the condition and it
remains on until the condition is resolved.
See
Information Messages (page 101).
Oil Pressure Warning Lamp WARNING:
If it illuminates when
you are driving do not continue your
journey, even if the oil level is correct.
Have your vehicle checked. If it illuminates when the engine
is running this indicates a
malfunction. Stop your vehicle
as soon as it is safe to do so and switch the
engine off.
Check the engine oil level. If the oil level is
sufficient, this indicates a system
malfunction. Have your vehicle
immediately checked.
95
2019 Transit (TTH) Canada/United States of America, Vehicles Built From: 02-01-2019, KK3J 19A321 AB enUSA, Edition date: 201812, First-Printing Instrument ClusterE71880 E132353