ECO mode FORD TRANSIT 2021 Owner's Guide
[x] Cancel search | Manufacturer: FORD, Model Year: 2021, Model line: TRANSIT, Model: FORD TRANSIT 2021Pages: 509, PDF Size: 8.21 MB
Page 209 of 509
SPEED LIMITER
Principle of Operation
WARNING: When you are going
downhill, your vehicle speed could
increase above the set speed. The
system does not apply the brakes. WARNING: The system is designed
to aid the driver. It is not intended to
replace your attention and judgment.
You are still responsible to drive with due
care and attention.
The system allows you to set a speed to
which your vehicle becomes limited. The
set speed sets the effective maximum
speed of your vehicle. You can temporarily
exceed the set speed if required, for
example to overtake.
Using Speed Limiter
The controls are on the steering wheel.
Switching the System On and Off Press to set the system in
standby mode. Press again to
switch the system off.
Setting the Speed Limiter Press the toggle button upward
or downward with the system in
standby mode to set the speed
limiter to the current vehicle
speed. The set speed is stored
and displayed in the information
display. You can adjust the set speed in small or
large increments. Press the toggle button
upward or downward once to adjust the
set speed in small increments. Press and
hold the toggle button upward or
downward to adjust the set speed in large
increments.
Canceling the Set Speed Press to cancel the set speed
limiter. The system returns to
standby mode.
Resuming the Set Speed Press to resume the set speed
limiter.
Intentionally Exceeding the Speed
Limit
Firmly press the accelerator pedal to
temporarily exceed the set speed limit. The
system resumes when the vehicle speed
drops below the set speed limit, or when
you press the
RES button.
System Warnings
If you intentionally exceed the set speed,
a warning appears in the information
display.
If you unintentionally exceed the set speed,
for example when you are going downhill,
a warning appears in the information
display and a tone sounds.
206
2021 Transit (TTH) Canada/United States of America, MK3J 19A321 AA enUSA, Edition date: 202010, Second-Printing Driving Aids
Page 212 of 509
WARNING: The system will not
operate if the sensor cannot track the
road lane markings. WARNING:
If damage occurs in the
immediate area surrounding the sensor,
have your vehicle checked as soon as
possible. WARNING:
The system may not
correctly operate if your vehicle is fitted
with a suspension kit not approved by
us.
The system is designed to alert you by
providing temporary steering assistance
or steering wheel vibration when it detects
an unintended lane departure. The system
detects and tracks the road lane markings
using a camera mounted behind the
interior mirror. The system only operates
when the vehicle speed is greater than
approximately
37 mph (60 km/h). You
can view the system status in the
information display.
Note: The system works when the camera
can detect at least one lane marking or the
edge of the road.
The system may not correctly operate in
any of the following conditions:
• The system does not detect at least
one lane marking or the edge of the
road.
• You switch the direction indicator on.
• You apply direct steering, accelerate
fast or brake hard.
• The vehicle speed is less than
37 mph
(60 km/h).
• The anti-lock brake, stability control or
traction control system activates.
• Narrow lane width. The system may not correct lane
positioning in any of the following
conditions:
•
High winds.
• Uneven road surfaces.
• Heavy or uneven loads.
• Incorrect tire pressure.
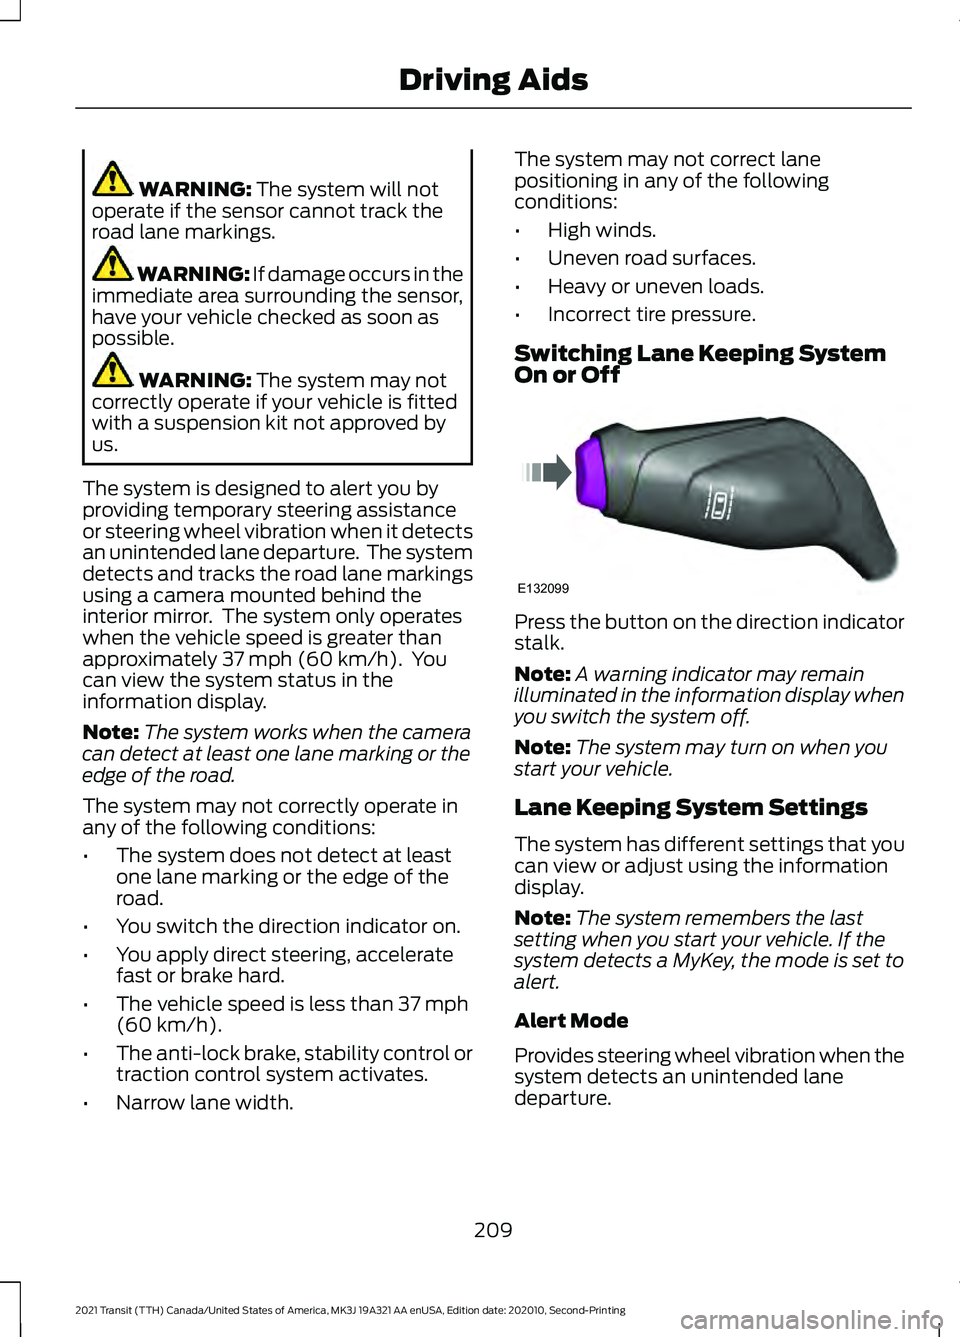
Switching Lane Keeping System
On or Off Press the button on the direction indicator
stalk.
Note:
A warning indicator may remain
illuminated in the information display when
you switch the system off.
Note: The system may turn on when you
start your vehicle.
Lane Keeping System Settings
The system has different settings that you
can view or adjust using the information
display.
Note: The system remembers the last
setting when you start your vehicle. If the
system detects a MyKey, the mode is set to
alert.
Alert Mode
Provides steering wheel vibration when the
system detects an unintended lane
departure.
209
2021 Transit (TTH) Canada/United States of America, MK3J 19A321 AA enUSA, Edition date: 202010, Second-Printing Driving AidsE132099
Page 213 of 509
Adjusting the Steering Wheel Vibration
Intensity
1. Using the information display controls
on the steering wheel, select Driver
Assist..
2. Select
Lane Keeping System.
3. Select
Intensity.
4. Select a setting and press the
OK
button.
Note: This setting does not affect aid mode.
Note: The system remembers the last
setting when you start your vehicle.
Adjusting the Lane Keeping System
Sensitivity
1. Using the information display controls on the steering wheel, select
Driver
Assist..
2. Select
Lane Keeping System.
3. Select
Sensitivity.
4. Select a setting and press the
OK
button.
Aid Mode
Provides temporary steering assistance
toward the lane center when the system
detects an unintended lane departure.
Note: When aid mode is on and the system
does not detect any steering activity for a
short period of time, for example lightly
holding the steering wheel, the system alerts
you to put your hands on the steering wheel.
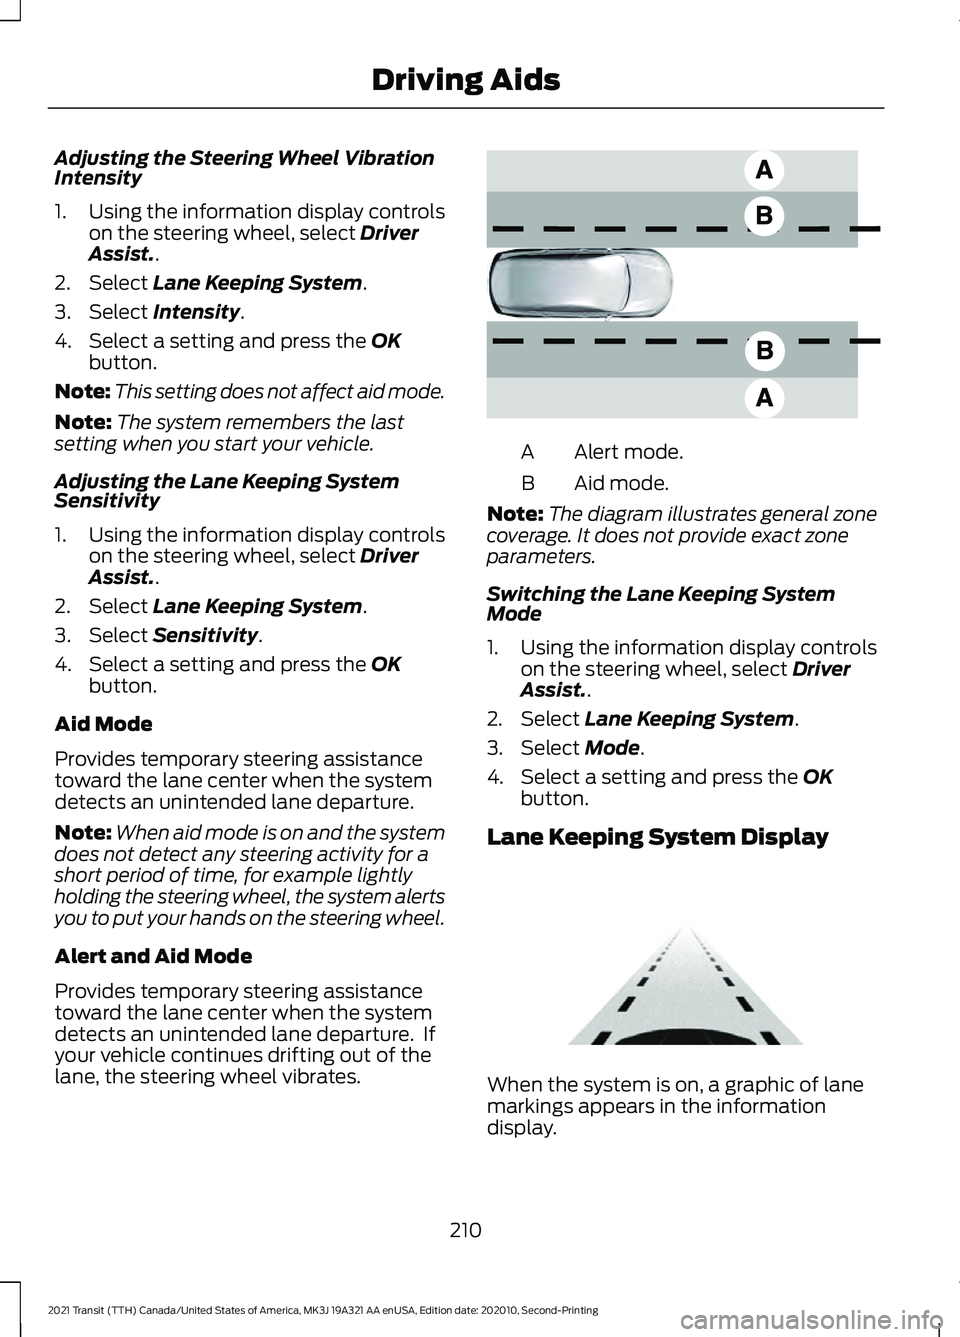
Alert and Aid Mode
Provides temporary steering assistance
toward the lane center when the system
detects an unintended lane departure. If
your vehicle continues drifting out of the
lane, the steering wheel vibrates. Alert mode.
A
Aid mode.
B
Note: The diagram illustrates general zone
coverage. It does not provide exact zone
parameters.
Switching the Lane Keeping System
Mode
1. Using the information display controls on the steering wheel, select Driver
Assist..
2. Select
Lane Keeping System.
3. Select
Mode.
4. Select a setting and press the
OK
button.
Lane Keeping System Display When the system is on, a graphic of lane
markings appears in the information
display.
210
2021 Transit (TTH) Canada/United States of America, MK3J 19A321 AA enUSA, Edition date: 202010, Second-Printing Driving AidsE165517 E313922
Page 214 of 509
Lane Keeping System Warning
Lamps and Indicators
Lane Keeping Alert Indicators
It illuminates in the information
display when you switch the
system on and Aid Mode or Alert
and Aid Mode are selected. It illuminates in the information
display when you switch the
system on and Alert Mode is
selected.
Lane Keeping Aid Warning Lamp It could illuminate when you
switch the system off. If it
illuminates when you are driving,
this indicates a malfunction. Have your
vehicle checked as soon as possible.
Black and White Information Display System Status
Indicator
Unavailable.
Gray.
Available.
White.
Temporary steering assistance.
White and inverted.
Temporary steering assistance and steering wheel vibration.
White and flashing.
Color Information Display System Status
Indicator
Unavailable.
Gray.
Available.
Green.
Temporary steering assistance.
Amber.
Temporary steering assistance and steering wheel vibration.
Red.
Lane Keeping System Messages Action
Message
The system has detected a fault that requires service. Have
your vehicle checked as soon as possible.
Lane Keeping Sys.
Malfunction Service
Required
211
2021 Transit (TTH) Canada/United States of America, MK3J 19A321 AA enUSA, Edition date: 202010, Second-Printing Driving AidsE251020
Page 222 of 509
ECO
Eco Mode
How Does Eco Mode Work
The system is designed to monitor certain
driving characteristics to help you drive
more efficiently. See Economical Driving
(page 246).
Note: The efficiency levels do not result in
a defined fuel consumption figure.
Note: The system only indicates the
efficiency level for the current trip. The
system resets each time you switch the
ignition on.
Instantaneous Efficiency Level
The display ring increases as the
instantaneous efficiency level increases
and illuminates when it reaches maximum
efficiency. The level continuously updates
to indicate the efficiency level for the
current trip.
Viewing the Instantaneous Efficiency
Level
1. Using the information display controls on the steering wheel, select
MyView.
2. Select
Eco Coach.
Trip Summary
The calculated trip summary is shown as
four colored bars. The bars travel from left
to right as the calculated efficiency levels
increase. The bars indicate the average
efficiency level for acceleration,
deceleration, speed and gear shifting
during the total distance traveled by your
vehicle for the current trip.
Note: Vehicles with an automatic
transmission do not have a bar for gear
shifting. Viewing the Trip Summary
1. Using the information display controls
on the steering wheel, select
MyView.
2. Select
Eco Coach.
Efficient Drive Mode
What Is Efficient Drive Mode
Efficient drive mode is a predictive coach
that provides near real-time traffic
information to help you drive more
efficiently by releasing the accelerator
pedal.
Switching Efficient Drive Mode On and
Off
1. Using the information display controls on the steering wheel, select
Driver
Assist..
2. Select
Eco Coach.
3. Switch
Eco Advice on and off.
Displaying the Efficient Drive Mode
1. Using the information display controls on the steering wheel, select
Driver
Assist..
The display ring can provide information
about speed limit, freeway ramp, slope,
curve, crosswalk, etc.
Efficient Drive Mode Indicator It indicates that you have to
slowly decelerate.
219
2021 Transit (TTH) Canada/United States of America, MK3J 19A321 AA enUSA, Edition date: 202010, Second-Printing Driving AidsE308186
Page 229 of 509
Using the Front View Camera
The front view camera provides a video
image of the area in front of your vehicle.
To use the front view camera system,
place the transmission in any gear except
reverse (R). An image of the front of your
vehicle appears once you press the camera
enable button and your vehicle speed is
below 6 mph (10 km/h).
Note: The area displayed on the screen may
vary according to your vehicle's orientation
or road condition.
Note: The front view camera will switch off
if your vehicle speed exceeds
6 mph
(10 km/h). You will have to switch the
system back on by using the enable button
once below the speed threshold.
Note: The camera system may not operate
correctly if mud, water or debris obstructs
the camera's view. You can clean the lens
with a soft, lint-free cloth and non-abrasive
cleaner or by using your front washer. See
Wipers and Washers
(page 97). The camera button is located on
the audio unit.
Camera Views
Press the camera button to toggle
between different views.
• Front Normal View: Provides an image
of what is directly in front of your
vehicle.
• Front Split View: Provides an extended
view of what is in front of your vehicle.
Access this view by pressing the
camera button from the Front Normal
View screen. DRIVE CONTROL
Selectable Drive Modes
Your vehicle has various drive modes that
you can select for different driving
conditions. Depending on the drive mode
that you select, the system adjusts various
vehicle settings, for example steering, gear
shifting, handling and powertrain response.
Selecting a Drive Mode
The button is on the instrument panel.
Repeatedly press the button to
scroll through the available drive
modes. Release the button to
confirm your selected drive mode.
Normal Vehicle settings suited for
balanced driving.
Note: This is the default mode each time
you switch the ignition on.
Eco Vehicle settings suited for
economical driving.
Slippery Vehicle settings suited for driving
on slippery roads.
Tow/Haul Vehicle settings suited for
towing or hauling.
Mud/Ruts Vehicle settings suited for driving
through mud and ruts.
226
2021 Transit (TTH) Canada/United States of America, MK3J 19A321 AA enUSA, Edition date: 202010, Second-Printing Driving AidsE188847 E298514 E225310 E267164 E269320 E246592 E296606
Page 230 of 509
Selectable Drive Modes Information Messages
Action
Message
The system is not available. If it is still not available the next
time you switch the ignition on, the system has detected a
fault that requires service. Have your vehicle checked as soon
as possible.
Drive Mode Not Available
227
2021 Transit (TTH) Canada/United States of America, MK3J 19A321 AA enUSA, Edition date: 202010, Second-Printing Driving Aids
Page 231 of 509
ROOF RACKS AND LOAD
CARRIERS - BUS
WARNING: Your vehicle is not
approved for roof racks. Never install a
roof rack to your vehicle.
ROOF RACKS AND LOAD
CARRIERS - VAN WARNING:
When loading the roof
racks, we recommend you evenly
distribute the load, as well as maintain
a low center of gravity. Loaded vehicles,
with higher centers of gravity, may
handle differently than unloaded
vehicles. Take extra precautions, such
as slower speeds and increased stopping
distance, when driving a heavily loaded
vehicle. WARNING:
Do not exceed the
maximum front and rear axle loads for
your vehicle. WARNING:
Read and follow the
manufacturer's instructions when you
are fitting a roof rack.
Maximum Roof Load lb (kg)
Variant
419 (190)
Low-Roof.
331 (150)
Medium-Roof.
220 (100)
High-Roof.
Make sure that you securely fasten the
load. Check that the straps are secure
before driving and at each fuel stop. We recommend that you use genuine Ford
accessory crossbars specifically designed
for your vehicle.
Never place loads directly on the roof
panel.
LOAD RETAINING FIXTURES
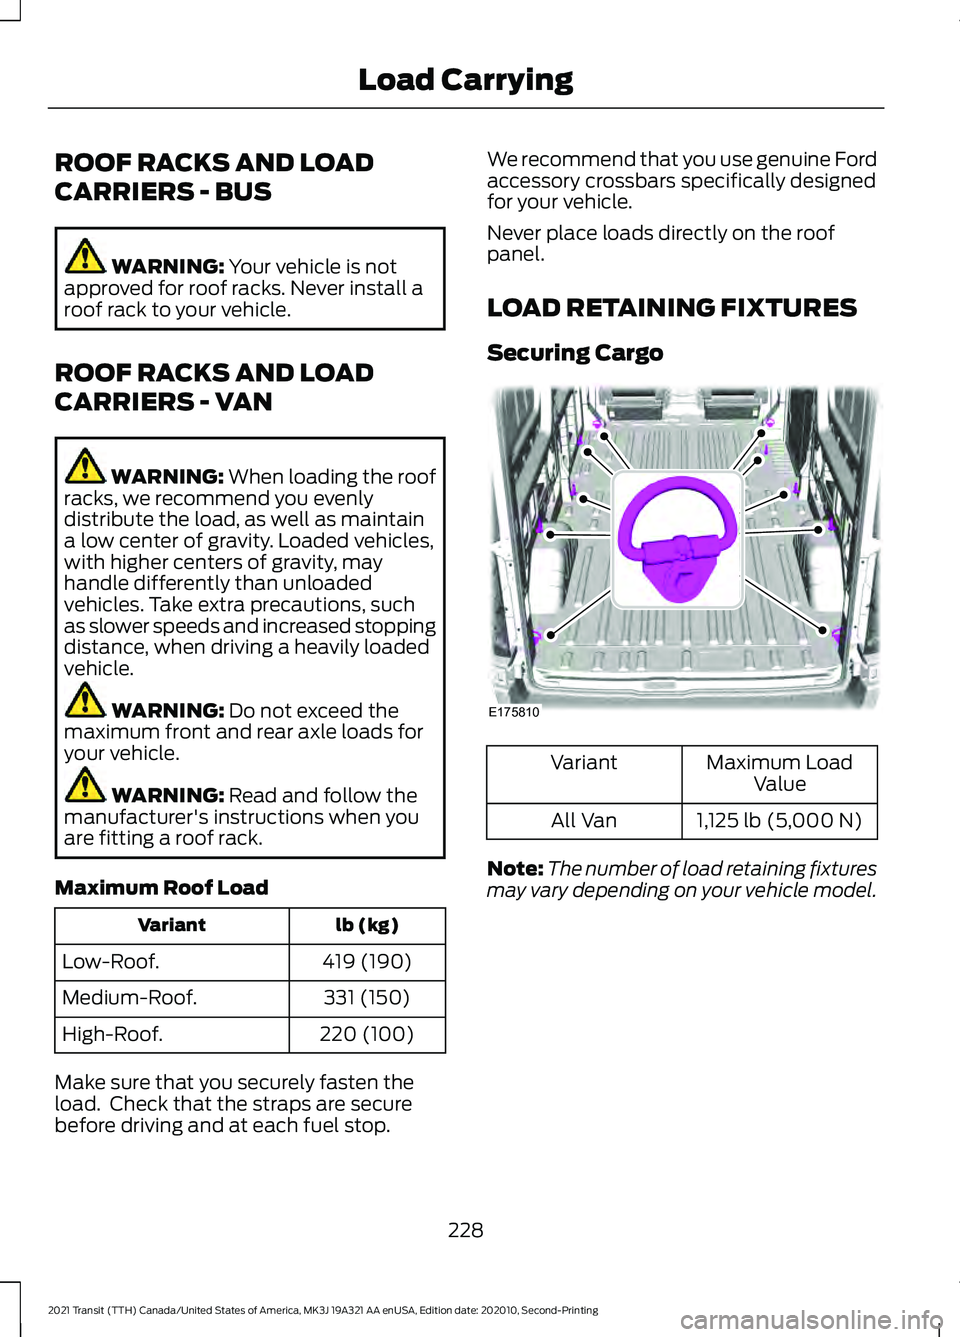
Securing Cargo
Maximum Load
Value
Variant
1,125 lb (5,000 N)
All Van
Note: The number of load retaining fixtures
may vary depending on your vehicle model.
228
2021 Transit (TTH) Canada/United States of America, MK3J 19A321 AA enUSA, Edition date: 202010, Second-Printing Load CarryingE175810
Page 240 of 509
Calculating the Maximum
Loaded Trailer Weight for Your
Vehicle
1. Start with the gross combined
weight rating for your vehicle
model and axle ratio. See the
previous charts.
2. Subtract all of the following
that apply to your vehicle:
• Vehicle curb weight
• Hitch hardware weight, such as
a draw bar, ball, locks or weight
distributing hardware
• Driver weight
• Passenger(s) weight
• Payload, cargo and luggage
weight
• Aftermarket equipment weight.
This equals the maximum loaded
trailer weight for this combination.
Note: The trailer tongue load is
considered part of the payload for
your vehicle. Reduce the total
payload by the final trailer tongue
weight.
Note: Consult an authorized dealer
to determine the maximum trailer
weight allowed for your vehicle if
you are not sure. RECOMMENDED TOWING
WEIGHTS - M2 BUS
Note:
Make sure to take into
consideration trailer frontal area.
Vehicles equipped with the Trailer
Tow Package or the Heavy Duty
Payload Package should not
exceed 55 ft² (5.1 m²) trailer frontal
area.
Note: Exceeding this limitation
may significantly reduce the
performance of your towing
vehicle. Selecting a trailer with a
low aerodynamic drag and rounded
front design helps optimize
performance and fuel economy.
Note: For high altitude operation,
reduce the gross combined weight
by 2% per 1,000 ft (300 m)
starting at the 1,000 ft (300 m)
elevation point.
Note: Certain states require
electric trailer brakes for trailers
over a specified weight. Be sure to
check state regulations for this
specified weight. The maximum
trailer weights listed may be limited
to this specified weight, as your
vehicle's electrical system may not
include the wiring connector
needed to use electric trailer
brakes.
Your vehicle may tow a trailer
provided the maximum trailer
weight is less than or equal to the
maximum trailer weight listed for
your vehicle configuration on the
following charts.
237
2021 Transit (TTH) Canada/United States of America, MK3J 19A321 AA enUSA, Edition date: 202010, Second-Printing Towing
Page 242 of 509
Calculating the Maximum
Loaded Trailer Weight for Your
Vehicle
1. Start with the gross combined
weight rating for your vehicle
model and axle ratio. See the
previous charts.
2. Subtract all of the following
that apply to your vehicle:
• Vehicle curb weight
• Hitch hardware weight, such as
a draw bar, ball, locks or weight
distributing hardware
• Driver weight
• Passenger(s) weight
• Payload, cargo and luggage
weight
• Aftermarket equipment weight.
This equals the maximum loaded
trailer weight for this combination.
Note: The trailer tongue load is
considered part of the payload for
your vehicle. Reduce the total
payload by the final trailer tongue
weight.
Note: Consult an authorized dealer
to determine the maximum trailer
weight allowed for your vehicle if
you are not sure. ESSENTIAL TOWING CHECKS
Follow these guidelines for safe towing:
•
Do not tow a trailer until your vehicle
has covered at least 1,000 mi
(1,600 km). See Breaking-In (page
247).
• Consult your local motor vehicle laws
for towing a trailer.
• See the instructions included with
towing accessories for the correct
installation and adjustment
specifications.
• Service your vehicle more frequently if
you tow a trailer. See
Scheduled
Maintenance (page 446).
• If you use a rental trailer, follow the
instructions the rental agency gives
you.
Refer to
Load Carrying for load
specification terms found on the tire label,
Safety Compliance label and instructions
on calculating your vehicle's maximum
load. See
Load Limit (page 229).
Remember to account for the trailer
tongue weight as part of your vehicle load
when calculating the total vehicle weight.
Trailer Towing Connector
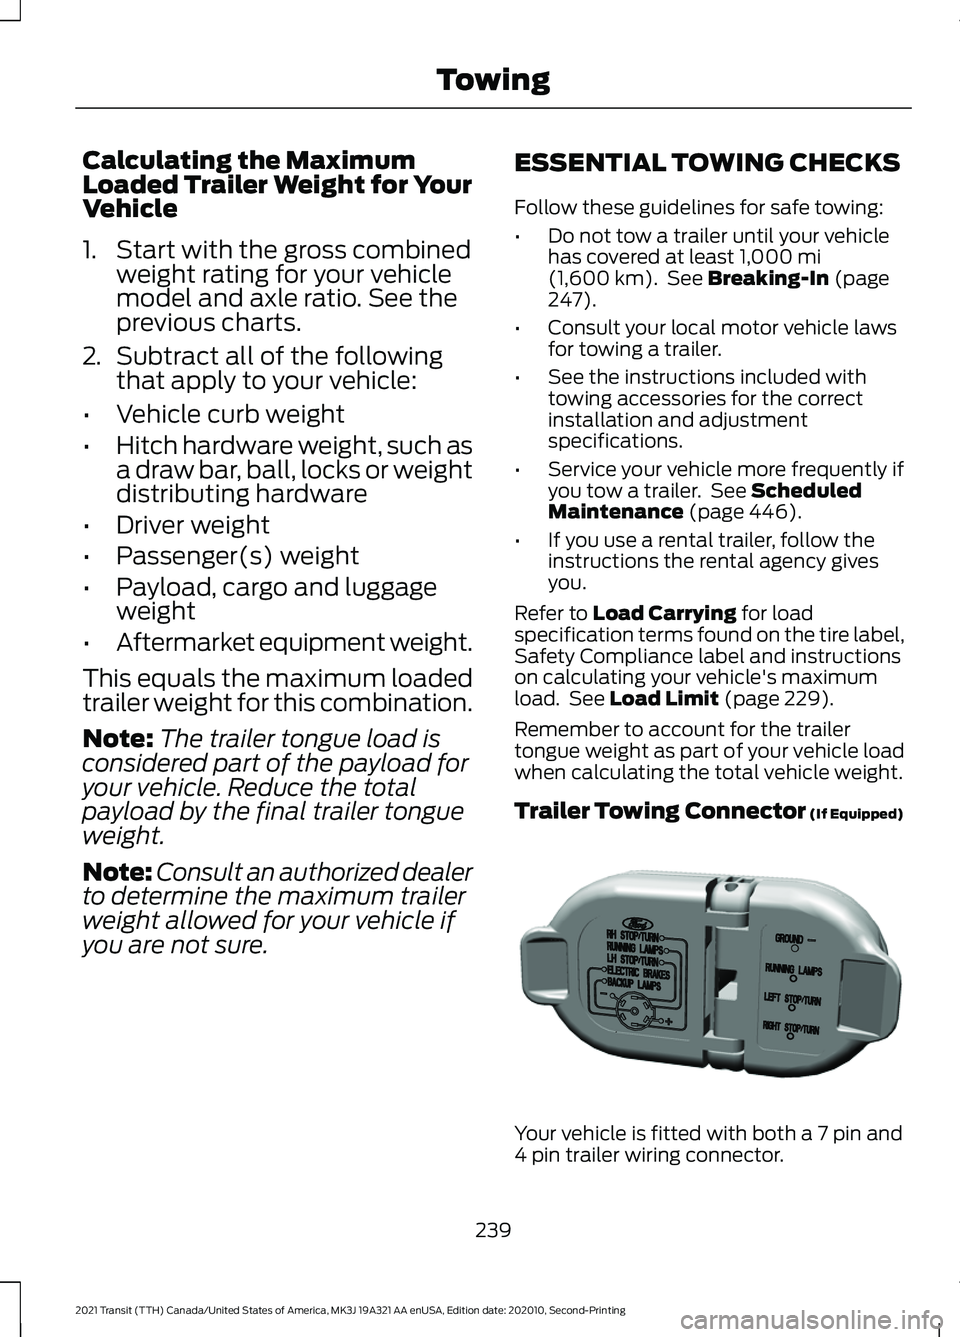
(If Equipped) Your vehicle is fitted with both a 7 pin and
4 pin trailer wiring connector.
239
2021 Transit (TTH) Canada/United States of America, MK3J 19A321 AA enUSA, Edition date: 202010, Second-Printing TowingE163167