tow FORD TRANSIT 2021 Service Manual
[x] Cancel search | Manufacturer: FORD, Model Year: 2021, Model line: TRANSIT, Model: FORD TRANSIT 2021Pages: 509, PDF Size: 8.21 MB
Page 202 of 509
Cruise Control Indicator
The indicator appears when you
switch the system on.
USING ADAPTIVE CRUISE
CONTROL (IF EQUIPPED) WARNING: You are responsible for
controlling your vehicle at all times. The
system is designed to be an aid and does
not relieve you of your responsibility to
drive with due care and attention. Failure
to follow this instruction could result in
the loss of control of your vehicle,
personal injury or death. WARNING:
Pay close attention to
changing road conditions such as
entering or leaving a highway, on roads
with intersections or roundabouts, roads
without visible lanes of travel, roads that
are winding, slippery, unpaved, or steep
slopes. WARNING:
The system may not
detect stationary or slow moving
vehicles below
6 mph (10 km/h). WARNING:
Do not use the system
when towing a trailer that has
aftermarket electronic trailer brake
controls. Failure to follow this instruction
could result in the loss of control of your
vehicle, personal injury or death. WARNING:
The system is not a
crash warning or avoidance system. WARNING:
The system does not
detect pedestrians or objects in the road. WARNING:
The system does not
detect oncoming vehicles in the same
lane. WARNING:
Do not use the system
in poor visibility, for example fog, heavy
rain, spray or snow. WARNING:
Do not use tire sizes
other than those recommended because
this can affect the normal operation of
the system. Failure to do so may result
in a loss of vehicle control, which could
result in serious injury.
The system adjusts the vehicle speed to
maintain the set gap between you and the
vehicle in front of you in the same lane.
You can select four gap settings.
The system uses a radar that projects a
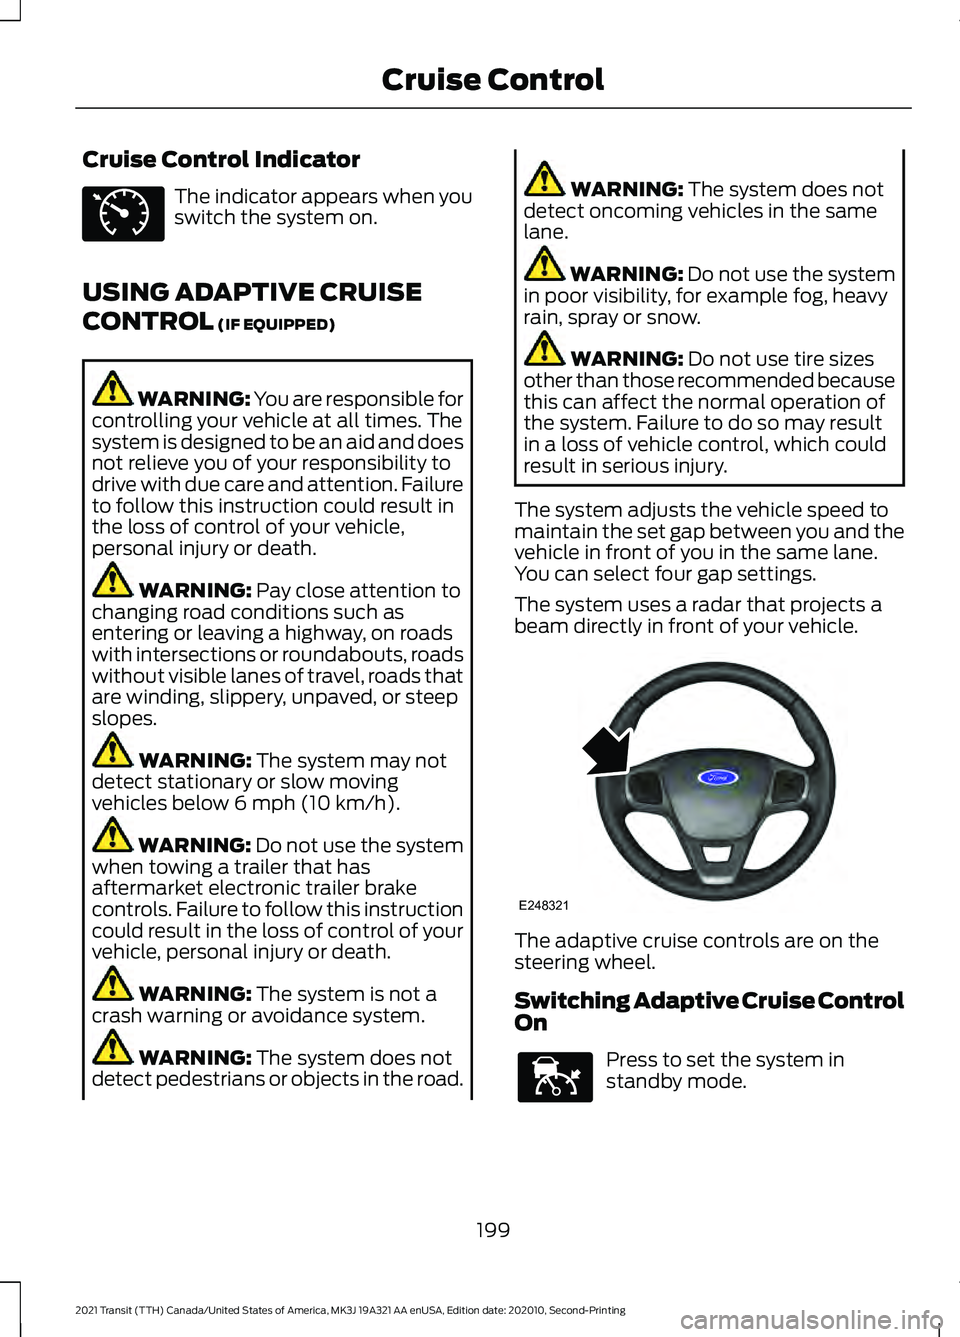
beam directly in front of your vehicle. The adaptive cruise controls are on the
steering wheel.
Switching Adaptive Cruise Control
On
Press to set the system in
standby mode.
199
2021 Transit (TTH) Canada/United States of America, MK3J 19A321 AA enUSA, Edition date: 202010, Second-Printing Cruise ControlE71340 E248321 E144529
Page 213 of 509
Adjusting the Steering Wheel Vibration
Intensity
1. Using the information display controls
on the steering wheel, select Driver
Assist..
2. Select
Lane Keeping System.
3. Select
Intensity.
4. Select a setting and press the
OK
button.
Note: This setting does not affect aid mode.
Note: The system remembers the last
setting when you start your vehicle.
Adjusting the Lane Keeping System
Sensitivity
1. Using the information display controls on the steering wheel, select
Driver
Assist..
2. Select
Lane Keeping System.
3. Select
Sensitivity.
4. Select a setting and press the
OK
button.
Aid Mode
Provides temporary steering assistance
toward the lane center when the system
detects an unintended lane departure.
Note: When aid mode is on and the system
does not detect any steering activity for a
short period of time, for example lightly
holding the steering wheel, the system alerts
you to put your hands on the steering wheel.
Alert and Aid Mode
Provides temporary steering assistance
toward the lane center when the system
detects an unintended lane departure. If
your vehicle continues drifting out of the
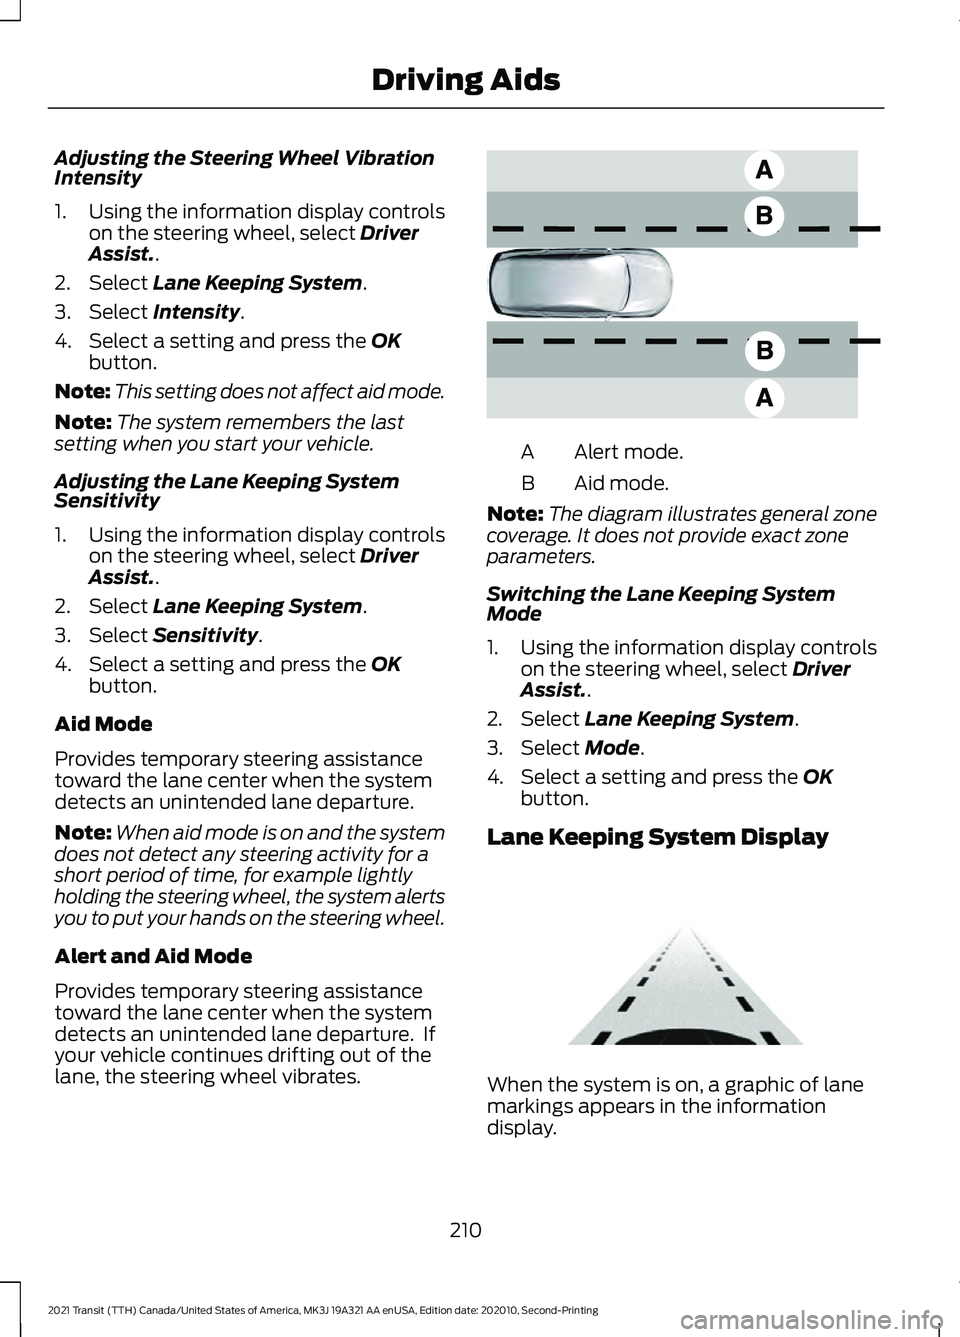
lane, the steering wheel vibrates. Alert mode.
A
Aid mode.
B
Note: The diagram illustrates general zone
coverage. It does not provide exact zone
parameters.
Switching the Lane Keeping System
Mode
1. Using the information display controls on the steering wheel, select Driver
Assist..
2. Select
Lane Keeping System.
3. Select
Mode.
4. Select a setting and press the
OK
button.
Lane Keeping System Display When the system is on, a graphic of lane
markings appears in the information
display.
210
2021 Transit (TTH) Canada/United States of America, MK3J 19A321 AA enUSA, Edition date: 202010, Second-Printing Driving AidsE165517 E313922
Page 216 of 509
Note:
Do not cover the sensors with bumper
stickers, repair compound or other objects.
Note: Blocked sensors could affect system
performance.
If the sensors are blocked, a message may
appear in the information display. The
indicators remain illuminated in the exterior
mirror but the system does not alert you.
Switching the Blind Spot
Information System On and Off
1. Using the information display controls on the steering wheel, select Settings.
2. Select Driver Assistance.
3. Select
Blind Spot.
4. Switch
Blind Spot on or off.
When you switch the system off, a warning
lamp illuminates in the instrument cluster
and the alert indicators flash twice.
The system remembers the last setting
when you start your vehicle.
Note: The system may not correctly operate
when towing a trailer. The system turns off
when you attach a trailer, if your vehicle has
an approved trailer tow module and tow
bar. For vehicles with an aftermarket trailer
tow module or tow bar, turn the system off
when you attach a trailer.
To permanently switch the system off,
contact an authorized dealer.
Blind Spot Information System
Indicator When the system detects a
vehicle, an alert indicator
illuminates in the exterior mirror
on the side the approaching vehicle is
coming from. If you turn the direction
indicator on for that side of your vehicle,
the alert indicator flashes.
Note: The system may not alert you if a
vehicle quickly passes through the detection
zone. Blind Spot Information System
with Trailer Tow
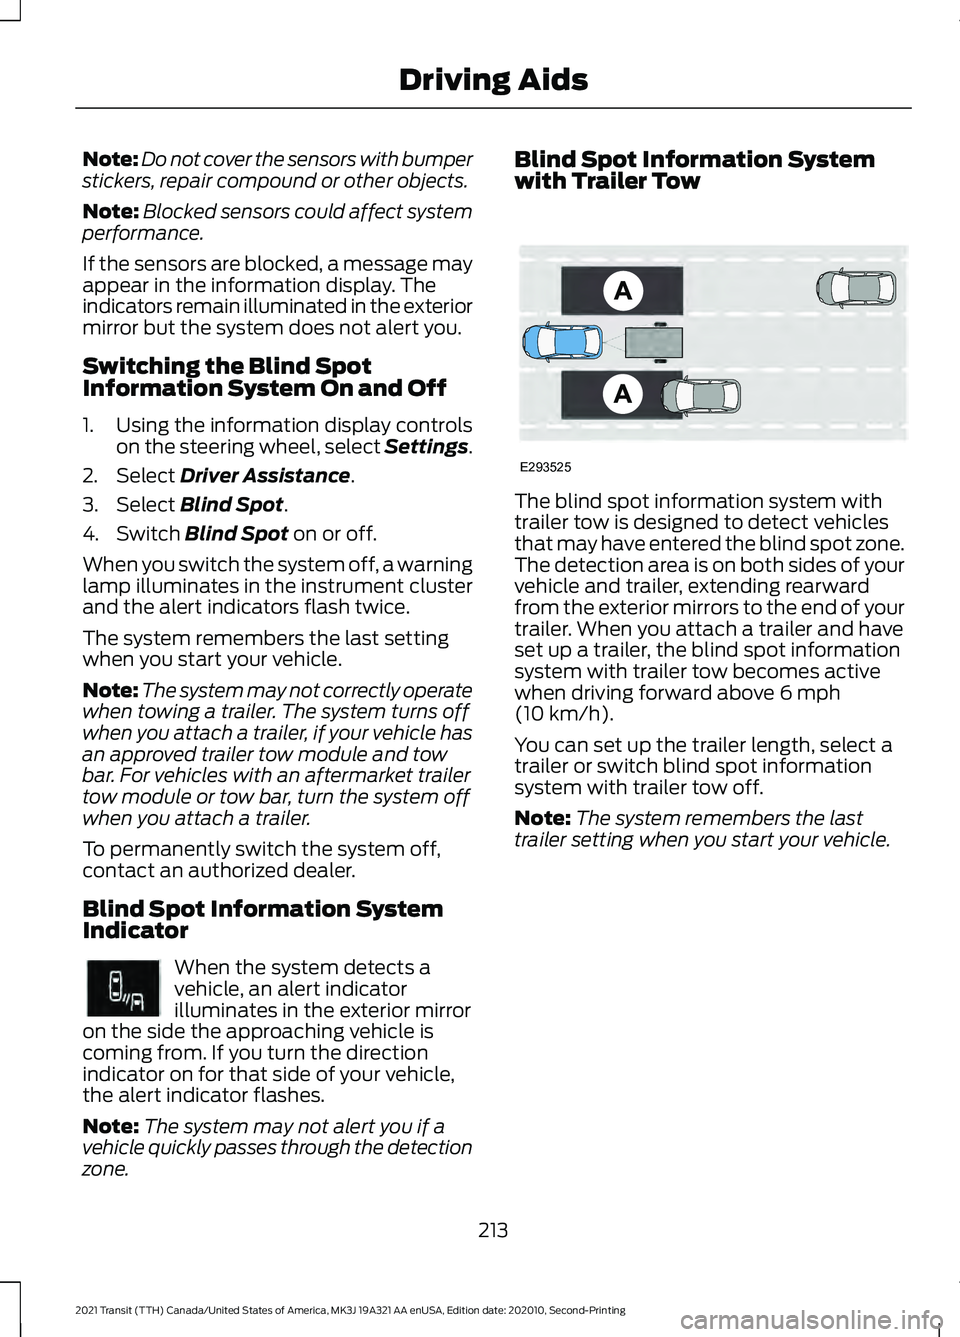
The blind spot information system with
trailer tow is designed to detect vehicles
that may have entered the blind spot zone.
The detection area is on both sides of your
vehicle and trailer, extending rearward
from the exterior mirrors to the end of your
trailer. When you attach a trailer and have
set up a trailer, the blind spot information
system with trailer tow becomes active
when driving forward above
6 mph
(10 km/h).
You can set up the trailer length, select a
trailer or switch blind spot information
system with trailer tow off.
Note: The system remembers the last
trailer setting when you start your vehicle.
213
2021 Transit (TTH) Canada/United States of America, MK3J 19A321 AA enUSA, Edition date: 202010, Second-Printing Driving AidsE249861E249861 E293525
Page 217 of 509
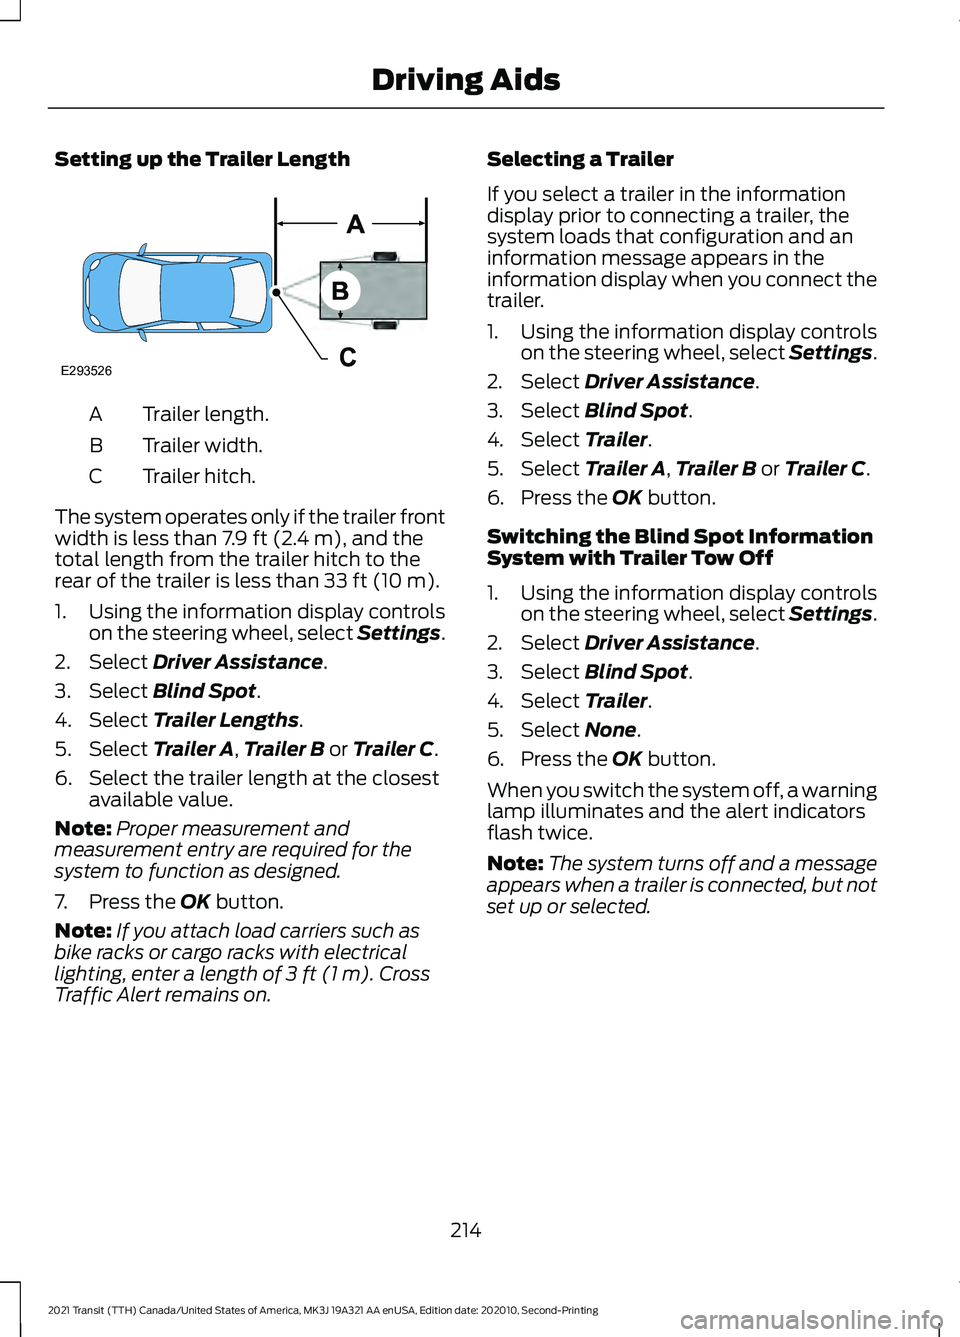
Setting up the Trailer Length
Trailer length.
A
Trailer width.
B
Trailer hitch.
C
The system operates only if the trailer front
width is less than 7.9 ft (2.4 m), and the
total length from the trailer hitch to the
rear of the trailer is less than
33 ft (10 m).
1. Using the information display controls on the steering wheel, select Settings.
2. Select
Driver Assistance.
3. Select
Blind Spot.
4. Select
Trailer Lengths.
5. Select
Trailer A, Trailer B or Trailer C.
6. Select the trailer length at the closest available value.
Note: Proper measurement and
measurement entry are required for the
system to function as designed.
7. Press the
OK button.
Note: If you attach load carriers such as
bike racks or cargo racks with electrical
lighting, enter a length of
3 ft (1 m). Cross
Traffic Alert remains on. Selecting a Trailer
If you select a trailer in the information
display prior to connecting a trailer, the
system loads that configuration and an
information message appears in the
information display when you connect the
trailer.
1. Using the information display controls
on the steering wheel, select Settings.
2. Select
Driver Assistance.
3. Select
Blind Spot.
4. Select
Trailer.
5. Select
Trailer A, Trailer B or Trailer C.
6. Press the
OK button.
Switching the Blind Spot Information
System with Trailer Tow Off
1. Using the information display controls on the steering wheel, select Settings.
2. Select
Driver Assistance.
3. Select
Blind Spot.
4. Select
Trailer.
5. Select
None.
6. Press the
OK button.
When you switch the system off, a warning
lamp illuminates and the alert indicators
flash twice.
Note: The system turns off and a message
appears when a trailer is connected, but not
set up or selected.
214
2021 Transit (TTH) Canada/United States of America, MK3J 19A321 AA enUSA, Edition date: 202010, Second-Printing Driving AidsE293526
Page 218 of 509
Blind Spot Information System
Limitations
Some trailers may cause a slight change
in system performance:
•
Wide box trailers, especially those
wider than the towing vehicle, may
cause false alerts to occur when driving
next to infrastructure or near parked
cars. A false alert may also occur while
making a 90-degree turn or driving
through a roundabout.
• Wide trailers that have a total length
greater than 20 ft (6 m) may cause
delayed alerts when a vehicle is
passing at high speed. •
Box trailers that have a width greater
than
7.9 ft (2.4 m) may cause early
alerts when you pass a vehicle.
• Clam shell or V-Nose box trailers with
a width greater than 7.9 ft (2.4 m) may
cause delayed alerts when a vehicle
traveling the same speed as your
vehicle merges lanes.
Blind Spot Information System
Warning Lamp It illuminates in the instrument
cluster if you switch the system
off.
If it illuminates when the system is on this
indicates a malfunction. Have your vehicle
checked as soon as possible.
Blind Spot Information System Information Messages Description
Message
Displays if the new trailer is attached but not selected. Select
a trailer.
Trailer Blind Spot Add
Trailer Exit Press OK to
Select
Displays if the blind spot information system sensors are
blocked.
Blind Spot Not Available
Sensor Blocked See
Manual
Displays if you attach a trailer to your vehicle.
Blind spot & cross Traffic
alert deact. Trailer
attached
The system has detected a fault that requires service. Have
your vehicle checked as soon as possible.
Blind Spot System Fault
215
2021 Transit (TTH) Canada/United States of America, MK3J 19A321 AA enUSA, Edition date: 202010, Second-Printing Driving AidsE249861E249861
Page 221 of 509

Cross Traffic Alert behavior when
trailer is attached
Note:
The system may not correctly operate
when towing a trailer. For vehicles with an
approved trailer tow module and tow bar,
the system turns off when you attach a
trailer. For vehicles with an aftermarket
trailer tow module or tow bar, we
recommend that you switch the system off
when you attach a trailer.
Cross traffic alert remains on when you
attach a trailer in vehicles equipped with
a Blind Sport Information System with
Trailer Tow under the following conditions:
• You connect a trailer.
• The trailer is a bike rack or cargo rack
with a maximum length of 3 ft (1 m).
• You set the trailer length to
3 ft (1 m)
in the information display.
See
Blind Spot Information System
(page 212).
Switching the System On and Off
To switch cross traffic alert on or off, use
the Information display. See
General
Information (page 115). Note:
The system turns on every time you
switch the ignition on. To permanently
switch the system off, contact an authorized
dealer.
Cross Traffic Alert Indicator When the system detects an
approaching vehicle a tone
sounds, a warning lamp
illuminates in the relevant exterior mirror
and arrows appear in the information
display to show which side the
approaching vehicle is coming from.
Note: If arrows do not display, a message
appears in the information display.
If the system malfunctions, a warning lamp
illuminates in the instrument cluster and
a message appears in the information
display. Have your vehicle checked as soon
as possible.
Note: In exceptional conditions, the system
could alert you, even when there is nothing
in the detection zone, for example a vehicle
passing further away from your vehicle.
Cross Traffic Alert Information Messages Action
Message
Displays instead of indication arrows when the system
detects a vehicle. Check for approaching traffic.
Cross Traffic Alert
Displays if the cross traffic alert system sensors are blocked.
Clean the sensors. If the message continues to appear, have
your vehicle checked as soon as possible.
Cross Traffic Not Avail-
able Sensor Blocked See
Manual
The system has malfunctioned. Have your vehicle checked
as soon as possible.
Cross Traffic System
Fault
Displays if you attach a trailer to your vehicle.
Cross Traffic Alert Deac-
tivated Trailer Attached
218
2021 Transit (TTH) Canada/United States of America, MK3J 19A321 AA enUSA, Edition date: 202010, Second-Printing Driving AidsE268294
Page 229 of 509
Using the Front View Camera
The front view camera provides a video
image of the area in front of your vehicle.
To use the front view camera system,
place the transmission in any gear except
reverse (R). An image of the front of your
vehicle appears once you press the camera
enable button and your vehicle speed is
below 6 mph (10 km/h).
Note: The area displayed on the screen may
vary according to your vehicle's orientation
or road condition.
Note: The front view camera will switch off
if your vehicle speed exceeds
6 mph
(10 km/h). You will have to switch the
system back on by using the enable button
once below the speed threshold.
Note: The camera system may not operate
correctly if mud, water or debris obstructs
the camera's view. You can clean the lens
with a soft, lint-free cloth and non-abrasive
cleaner or by using your front washer. See
Wipers and Washers
(page 97). The camera button is located on
the audio unit.
Camera Views
Press the camera button to toggle
between different views.
• Front Normal View: Provides an image
of what is directly in front of your
vehicle.
• Front Split View: Provides an extended
view of what is in front of your vehicle.
Access this view by pressing the
camera button from the Front Normal
View screen. DRIVE CONTROL
Selectable Drive Modes
Your vehicle has various drive modes that
you can select for different driving
conditions. Depending on the drive mode
that you select, the system adjusts various
vehicle settings, for example steering, gear
shifting, handling and powertrain response.
Selecting a Drive Mode
The button is on the instrument panel.
Repeatedly press the button to
scroll through the available drive
modes. Release the button to
confirm your selected drive mode.
Normal Vehicle settings suited for
balanced driving.
Note: This is the default mode each time
you switch the ignition on.
Eco Vehicle settings suited for
economical driving.
Slippery Vehicle settings suited for driving
on slippery roads.
Tow/Haul Vehicle settings suited for
towing or hauling.
Mud/Ruts Vehicle settings suited for driving
through mud and ruts.
226
2021 Transit (TTH) Canada/United States of America, MK3J 19A321 AA enUSA, Edition date: 202010, Second-Printing Driving AidsE188847 E298514 E225310 E267164 E269320 E246592 E296606
Page 233 of 509
is the maximum payload for your
vehicle as built by the assembly
plant. If you install any additional
equipment on your vehicle, you
must determine the new payload.
Subtract the weight of the
equipment from the payload listed
on the Tire and Loading label.
When towing, trailer tongue
weight or king pin weight is also
part of payload.
WARNING: The
appropriate loading capacity of
your vehicle can be limited either
by volume capacity (how much
space is available) or by payload
capacity (how much weight the
vehicle should carry). Once you
have reached the maximum
payload of your vehicle, do not
add more cargo, even if there is
space available. Overloading or
improperly loading your vehicle
can contribute to loss of vehicle
control and vehicle rollover.
GAWR (Gross Axle Weight
Rating)
GAWR is the maximum allowable
weight that a single axle (front or
rear) can carry. These numbers
are on the Safety Compliance
Certification label. The label is
located on the door hinge pillar,
door-latch post, or the door edge
that meets the door-latch post,
next to the driver seating position. The total load on each axle must
never exceed its Gross Axle
Weight Rating.
GVWR (Gross Vehicle Weight
Rating)
GVWR is the maximum allowable
weight of the fully loaded vehicle.
This includes all options,
equipment, passengers and cargo.
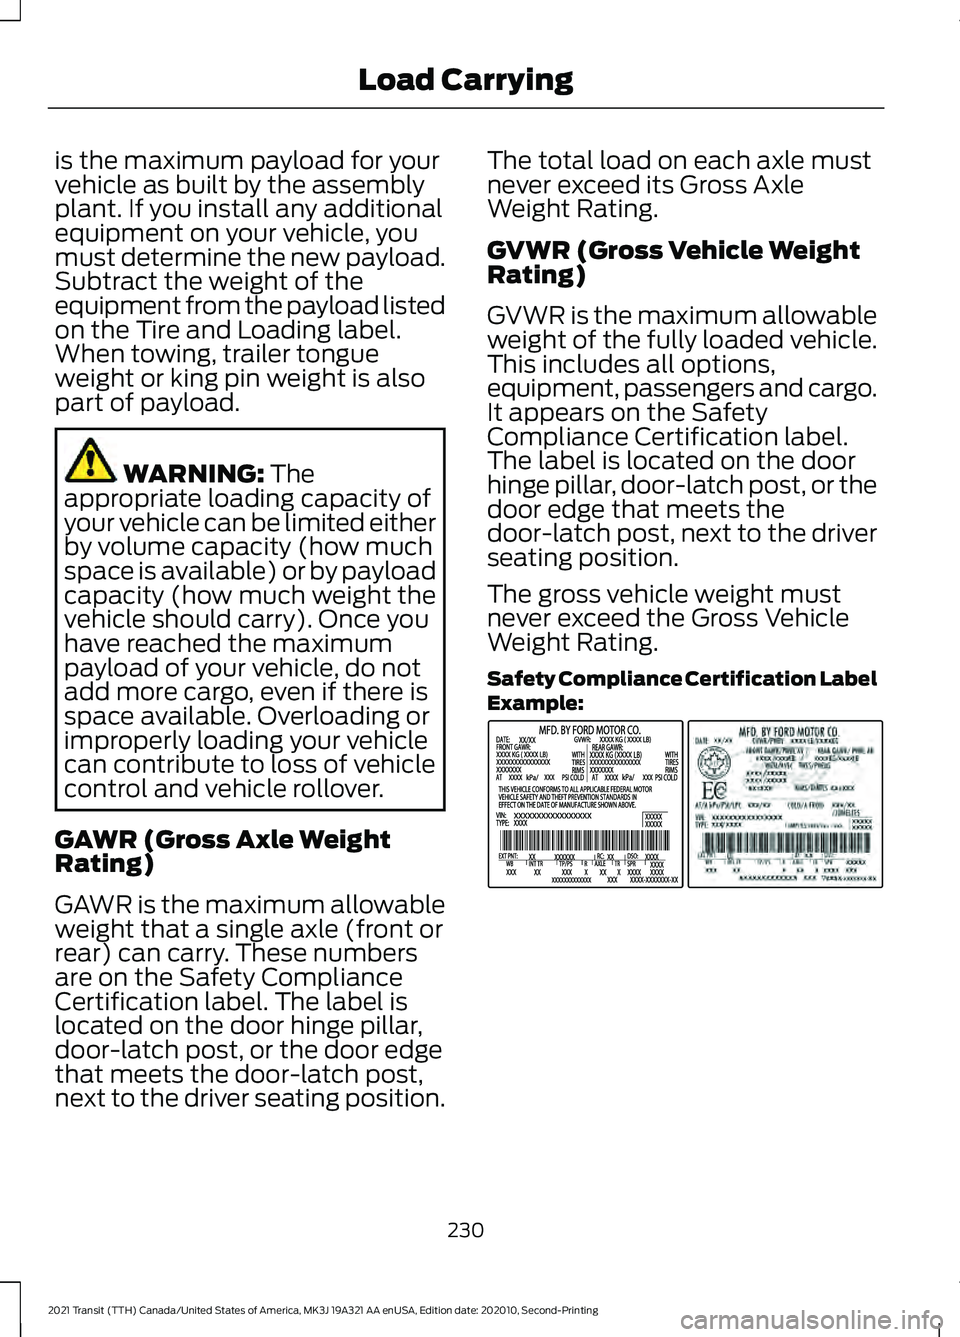
It appears on the Safety
Compliance Certification label.
The label is located on the door
hinge pillar, door-latch post, or the
door edge that meets the
door-latch post, next to the driver
seating position.
The gross vehicle weight must
never exceed the Gross Vehicle
Weight Rating.
Safety Compliance Certification Label
Example:
230
2021 Transit (TTH) Canada/United States of America, MK3J 19A321 AA enUSA, Edition date: 202010, Second-Printing Load CarryingE198828
Page 234 of 509
WARNING: Exceeding the
Safety Compliance Certification
label vehicle weight limits can
adversely affect the
performance and handling of
your vehicle, cause vehicle
damage and can result in the
loss of control of your vehicle,
serious personal injury or death.
Maximum Loaded Trailer
Weight
Maximum loaded trailer weight is
the highest possible weight of a
fully loaded trailer the vehicle can
tow. Consult an authorized dealer
(or the RV and Trailer Towing
Guide available at an authorized
dealer) for more detailed
information.
GCWR (Gross Combined
Weight Rating)
GCWR is the maximum allowable
weight of the vehicle and the
loaded trailer, including all cargo
and passengers, that the vehicle
can handle without risking
damage. (Important: The towing
vehicle ’s braking system is rated
for operation at Gross Vehicle
Weight Rating, not at Gross
Combined Weight Rating.)
Separate functional brakes should be used for safe control of towed
vehicles and for trailers where the
Gross Combined Weight of the
towing vehicle plus the trailer
exceed the Gross Vehicle Weight
Rating of the towing vehicle.
The gross combined weight must
never exceed the Gross Combined
Weight Rating.
Note:
For trailer towing
information refer to the RV and
Trailer Towing Guide available at
an authorized dealer. WARNING:
Do not exceed
the GVWR or the GAWR
specified on the certification
label. WARNING:
Do not use
replacement tires with lower
load carrying capacities than the
original tires because they may
lower your vehicle's GVWR and
GAWR limitations. Replacement
tires with a higher limit than the
original tires do not increase the
GVWR and GAWR limitations. WARNING: Exceeding any
vehicle weight rating can
adversely affect the
performance and handling of
your vehicle, cause vehicle
damage and can result in the
loss of control of your vehicle,
serious personal injury or death.
231
2021 Transit (TTH) Canada/United States of America, MK3J 19A321 AA enUSA, Edition date: 202010, Second-Printing Load Carrying
Page 235 of 509
Steps for determining the
correct load limit:
1. Locate the statement "The
combined weight of occupants
and cargo should never exceed
XXX kg or XXX lb." on your
vehicle ’s placard.
2. Determine the combined
weight of the driver and
passengers that will be riding
in your vehicle.
3. Subtract the combined weight
of the driver and passengers
from XXX kg or XXX lb.
4. The resulting figure equals the
available amount of cargo and
luggage load capacity. For
example, if the “XXX” amount
equals 1,400 lb. and there will
be five 150 lb. passengers in
your vehicle, the amount of
available cargo and luggage
load capacity is 650 lb.
(1400-750 (5 x 150) = 650 lb.)
5. Determine the combined
weight of luggage and cargo
being loaded on the vehicle.
That weight may not safely
exceed the available cargo and
luggage load capacity
calculated in Step 4.
6. If your vehicle will be towing a
trailer, load from your trailer
will be transferred to your
vehicle. Consult this manual to
determine how this reduces the
available cargo and luggage
load capacity of your vehicle. Helpful examples for calculating
the available amount of cargo
and luggage load capacity
Suppose your vehicle has a
1400-pound (635-kilogram) cargo
and luggage capacity. You decide
to go golfing. Is there enough load
capacity to carry you, four of your
friends and all the golf bags? You
and four friends average 220
pounds (99 kilograms) each and
the golf bags weigh approximately
30 pounds (13.5 kilograms) each.
The calculation would be: 1400 -
(5 x 220) - (5 x 30) = 1400 - 1100
- 150 = 150 pounds. Yes, you have
enough load capacity in your
vehicle to transport four friends
and your golf bags. In metric units,
the calculation would be: 635
kilograms - (5 x 99 kilograms) -
(5 x 13.5 kilograms) = 635 - 495 -
67.5 = 72.5 kilograms.
Suppose your vehicle has a
1400-pound (635-kilogram) cargo
and luggage capacity. You and
one of your friends decide to pick
up cement from the local home
improvement store to finish that
patio you have been planning for
the past two years. Measuring the
inside of the vehicle with the rear
seat folded down, you have room
for twelve 100-pound
(45-kilogram) bags of cement. Do
you have enough load capacity to
transport the cement to your
home? If you and your friend each
weigh 220 pounds (99 kilograms),
the calculation would be: 1400 -
(2 x 220) - (12 x 100) = 1400 - 440
232
2021 Transit (TTH) Canada/United States of America, MK3J 19A321 AA enUSA, Edition date: 202010, Second-Printing Load Carrying