reset FORD TRANSIT CONNECT 2010 1.G Owners Manual
[x] Cancel search | Manufacturer: FORD, Model Year: 2010, Model line: TRANSIT CONNECT, Model: FORD TRANSIT CONNECT 2010 1.GPages: 258, PDF Size: 1.98 MB
Page 4 of 258
CONGRATULATIONS
Congratulations on acquiring your new Ford. Please take the time to get
well acquainted with your vehicle by reading this handbook. The more
you know and understand about your vehicle, the greater the safety and
pleasure you will derive from driving it.
For more information on Ford Motor Company and its products visit the
following website:
•In the United States: www.ford.com
•In Canada: www.ford.ca
•In Australia: www.ford.com.au
•In Mexico: www.ford.com.mx
Additional owner information is given in separate publications.
This Owner’s Guide describes every option and model variant available
and therefore some of the items covered may not apply to your
particular vehicle. Furthermore, due to printing cycles it may describe
options before they are generally available.
Remember to pass on this Owner’s Guide when reselling the vehicle. It is
an integral part of the vehicle.
WARNING: Fuel pump shut-off switch:In the event of an
accident the safety switch will automatically cut off the fuel
supply to the engine. The switch can also be activated through sudden
vibration (e.g. collision when parking). To reset the switch, refer to the
Fuel pump shut-off switchin theRoadside Emergencieschapter.
SAFETY AND ENVIRONMENT PROTECTION
Warning symbols in this guide
How can you reduce the risk of personal injury to yourself or others? In
this guide, answers to such questions are contained in comments
highlighted by the warning triangle symbol. These comments should be
read and observed.
Introduction
4
2010 Transit Connect(tst)
Owners Guide, 3rd Printing
USA(fus)
Page 10 of 258
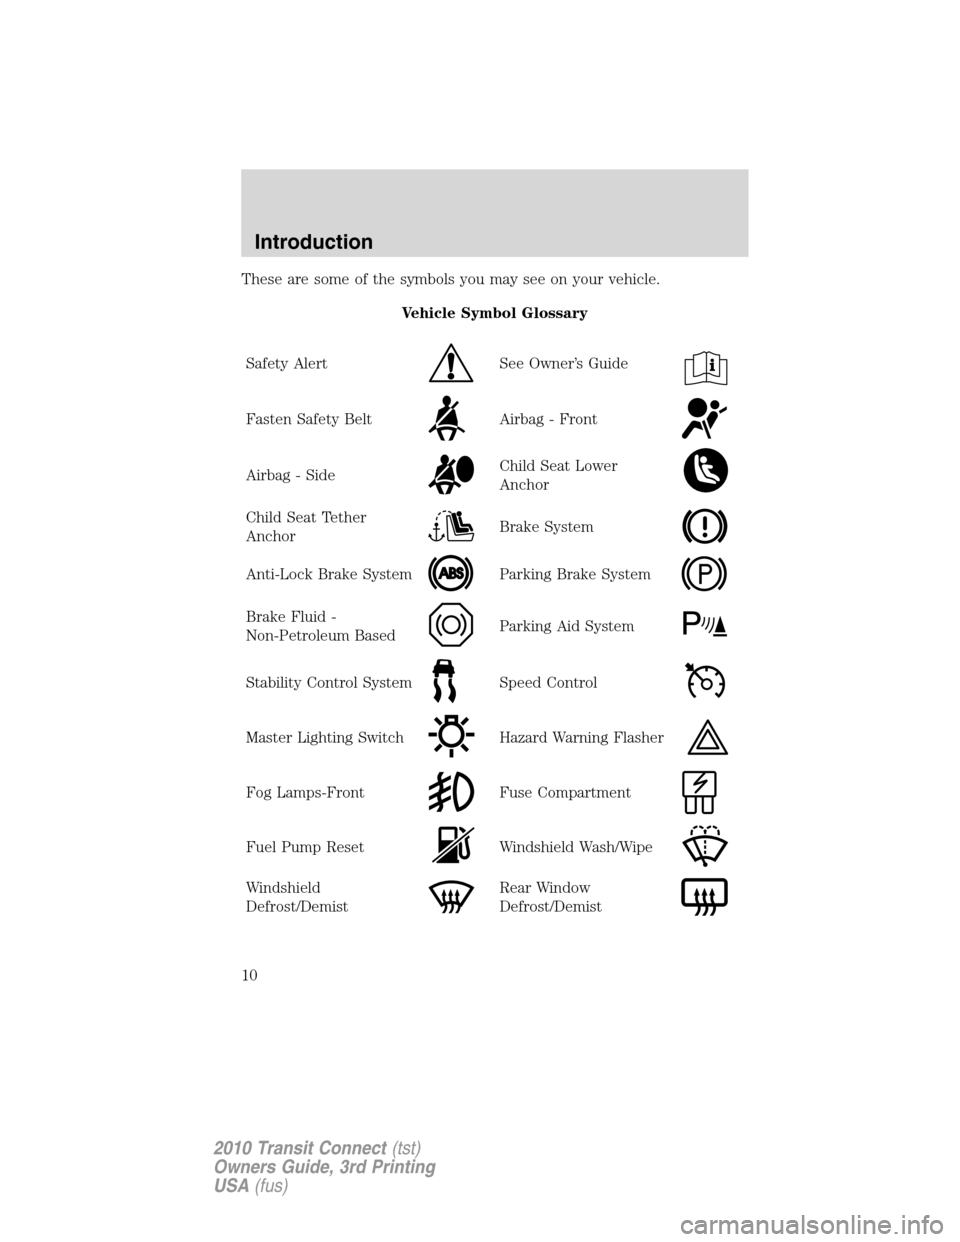
These are some of the symbols you may see on your vehicle.
Vehicle Symbol Glossary
Safety Alert
See Owner’s Guide
Fasten Safety BeltAirbag - Front
Airbag - SideChild Seat Lower
Anchor
Child Seat Tether
AnchorBrake System
Anti-Lock Brake SystemParking Brake System
Brake Fluid -
Non-Petroleum BasedParking Aid System
Stability Control SystemSpeed Control
Master Lighting SwitchHazard Warning Flasher
Fog Lamps-FrontFuse Compartment
Fuel Pump ResetWindshield Wash/Wipe
Windshield
Defrost/DemistRear Window
Defrost/Demist
Introduction
10
2010 Transit Connect(tst)
Owners Guide, 3rd Printing
USA(fus)
Page 19 of 258
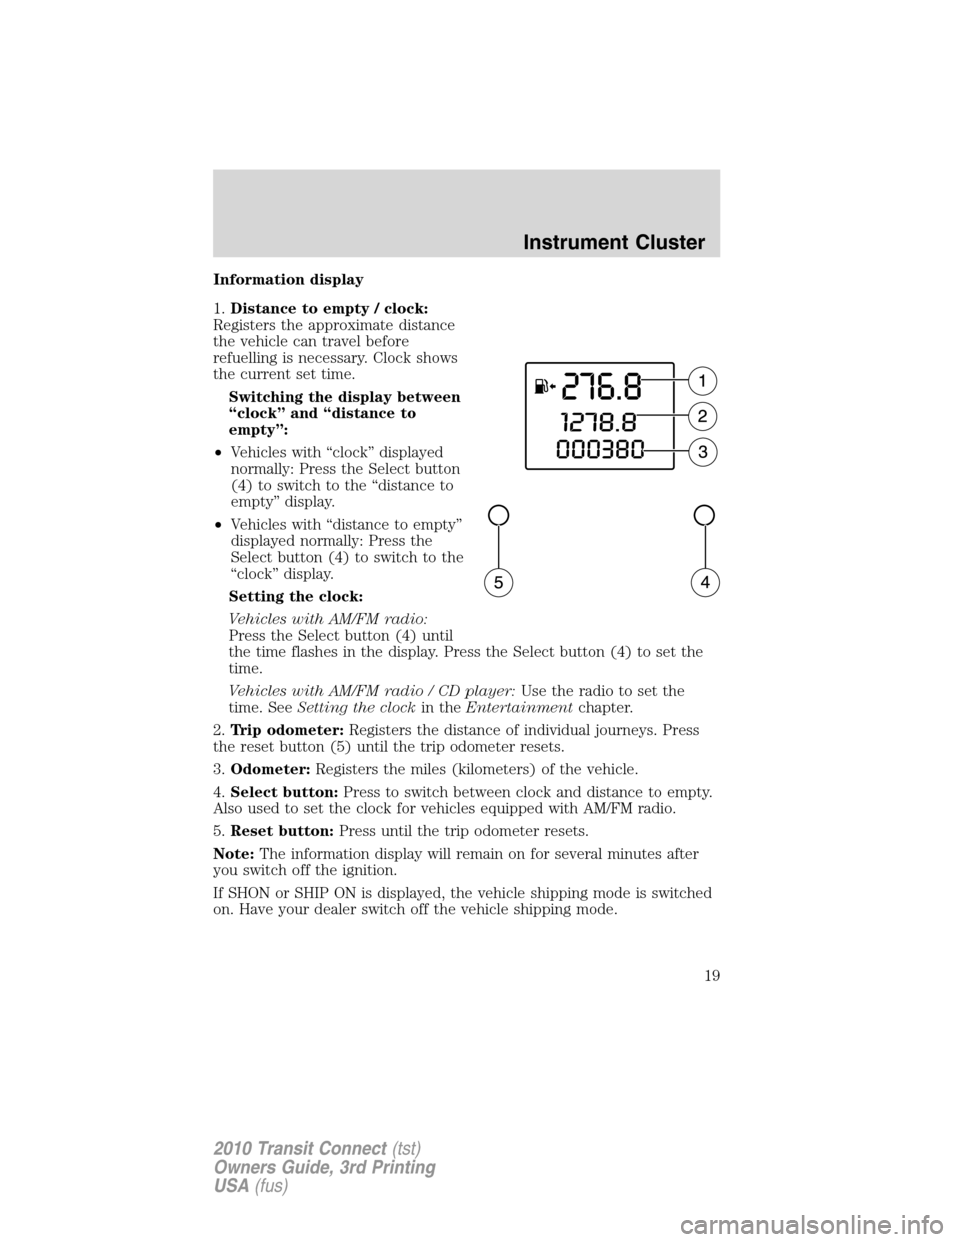
Information display
1.Distance to empty / clock:
Registers the approximate distance
the vehicle can travel before
refuelling is necessary. Clock shows
the current set time.
Switching the display between
“clock” and “distance to
empty”:
•Vehicles with “clock” displayed
normally: Press the Select button
(4) to switch to the “distance to
empty” display.
•Vehicles with “distance to empty”
displayed normally: Press the
Select button (4) to switch to the
“clock” display.
Setting the clock:
Vehicles with AM/FM radio:
Press the Select button (4) until
the time flashes in the display. Press the Select button (4) to set the
time.
Vehicles with AM/FM radio / CD player:Use the radio to set the
time. SeeSetting the clockin theEntertainmentchapter.
2.Trip odometer:Registers the distance of individual journeys. Press
the reset button (5) until the trip odometer resets.
3.Odometer:Registers the miles (kilometers) of the vehicle.
4.Select button:Press to switch between clock and distance to empty.
Also used to set the clock for vehicles equipped with AM/FM radio.
5.Reset button:Press until the trip odometer resets.
Note:The information display will remain on for several minutes after
you switch off the ignition.
If SHON or SHIP ON is displayed, the vehicle shipping mode is switched
on. Have your dealer switch off the vehicle shipping mode.
Instrument Cluster
19
2010 Transit Connect(tst)
Owners Guide, 3rd Printing
USA(fus)
Page 20 of 258
AUDIO SYSTEMS
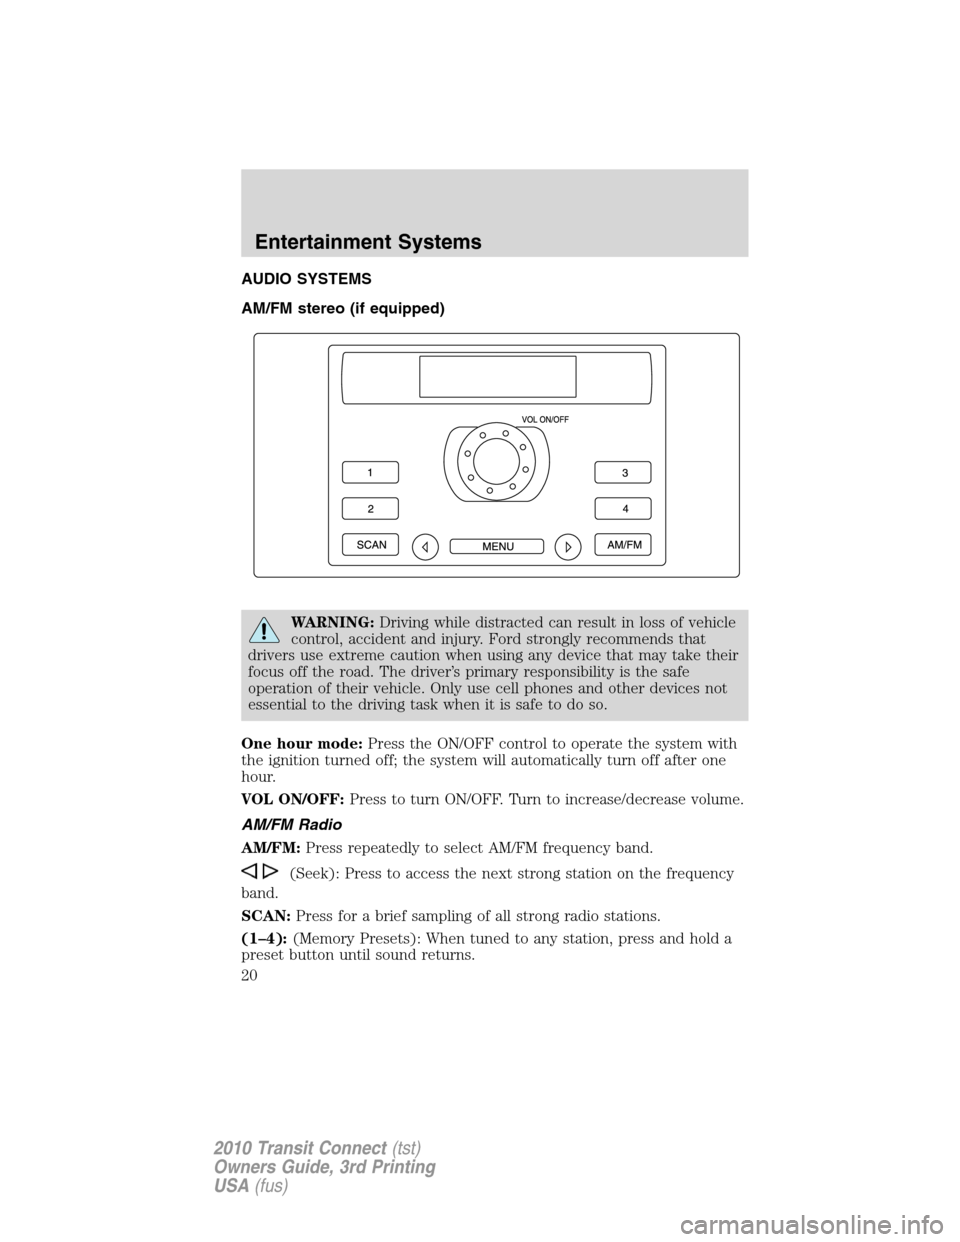
AM/FM stereo (if equipped)
WARNING:Driving while distracted can result in loss of vehicle
control, accident and injury. Ford strongly recommends that
drivers use extreme caution when using any device that may take their
focus off the road. The driver’s primary responsibility is the safe
operation of their vehicle. Only use cell phones and other devices not
essential to the driving task when it is safe to do so.
One hour mode:Press the ON/OFF control to operate the system with
the ignition turned off; the system will automatically turn off after one
hour.
VOL ON/OFF:Press to turn ON/OFF. Turn to increase/decrease volume.
AM/FM Radio
AM/FM:Press repeatedly to select AM/FM frequency band.
(Seek): Press to access the next strong station on the frequency
band.
SCAN:Press for a brief sampling of all strong radio stations.
(1–4):(Memory Presets): When tuned to any station, press and hold a
preset button until sound returns.
Entertainment Systems
20
2010 Transit Connect(tst)
Owners Guide, 3rd Printing
USA(fus)
Page 22 of 258
Setting the clock
To set the time or date, turn the radio on and press CLOCK until the
time begins to flash. Press
orto access the desired selection
(date or time). Once the desired selection is flashing, turn the VOL
(Volume) control to adjust the time or date forward/backward. Press
CLOCK again.
AM/FM radio
AM/FM:Press repeatedly to select AM/FM1/FM2 frequency bands.
(Seek): Press to access the next strong station on the frequency
band.
SCAN:Press for a brief sampling of all strong radio stations.
(1–6):(Memory Presets): When tuned to any station, press and hold a
preset button until sound returns.
Note:If TP appears in the display, it is an indicator that RDS is active.
Autostore feature:The autostore feature allows you to store the six
strongest stations available from the FM frequency band. To use, press
and hold the AM/FM button. The sound will mute and AST will appear in
the display indicating the feature is active. When the search is complete,
the sound will return and the six strongest stations will be stored in the
memory presets (and overwrite any stations previously stored in the AST
band).
Note:You can also manually store stations in the AST band. When the
AST band is active, simply tune to the desired station and press and hold
a memory preset. The new station will be saved and will override the
previously saved station.
CD player
To load a CD, simply insert the disc, label side up, into the CD slot.
(Eject): Press to eject the CD.
(Seek): Pressto access the previous/next track.
SCAN:Press for a brief sampling of all tracks on the current disc.
Sound Adjustments
BASS/TRE:Press to toggle between bass and treble adjustments. Once
the desired selection appears in the display, press
to adjust the
levels.
Entertainment Systems
22
2010 Transit Connect(tst)
Owners Guide, 3rd Printing
USA(fus)
Page 145 of 258
TPMS reset procedure
The TPMS reset procedure needs to be performed after each tire
rotation.
WARNING:To determine the required pressure for your vehicle
– refer to the Safety Compliance Certification Label or Tire Label
located on the B-Pillar or the edge of the driver’s door. SeeVehicle
loadingin this chapter for more information.
Overview
To provide the vehicle’s load carrying capability, this vehicle requires
different recommended tire pressures in the front tires as compared to
the rear tires. The Tire Pressure Monitoring System (TPMS) equipped on
these vehicles is designed to illuminate the Low Tire Pressure Warning
indicator at two different pressures; one for the front tires and one for
the rear tires.
Since tires need to be rotated to provide consistent performance and
maximum tire life, the Tire Pressure Monitoring System needs to know
when the tires are rotated to determine which set of tires are on the
front and which are on the rear. With this information, the system can
detect and properly warn of low tire pressures.
TPMS reset tips:
•To reduce the chances of interference from another vehicle, the TPMS
reset procedure should be performed at least 3 feet (1 meter) away
from another Ford Motor Company vehicle undergoing the TPMS reset
procedure at the same time.
•Do not wait more than two (2) minutes between resetting each tire
sensor or the system will timeout and the entire procedure will have
to be repeated on all four wheels.
•A double horn chirp indicates the need to repeat the procedure.
Performing the TPMS reset procedure
It is recommended that you read the entire procedure before attempting.
1. Drive the vehicle above 20 mph (32 km/h) for at least 2 minutes and
then park in a safe location where you can easily get to all four tires and
have access to an air pump.
2. Place the ignition in the off position and keep the key in the ignition.
Tires, Wheels and Loading
145
2010 Transit Connect(tst)
Owners Guide, 3rd Printing
USA(fus)
Page 146 of 258
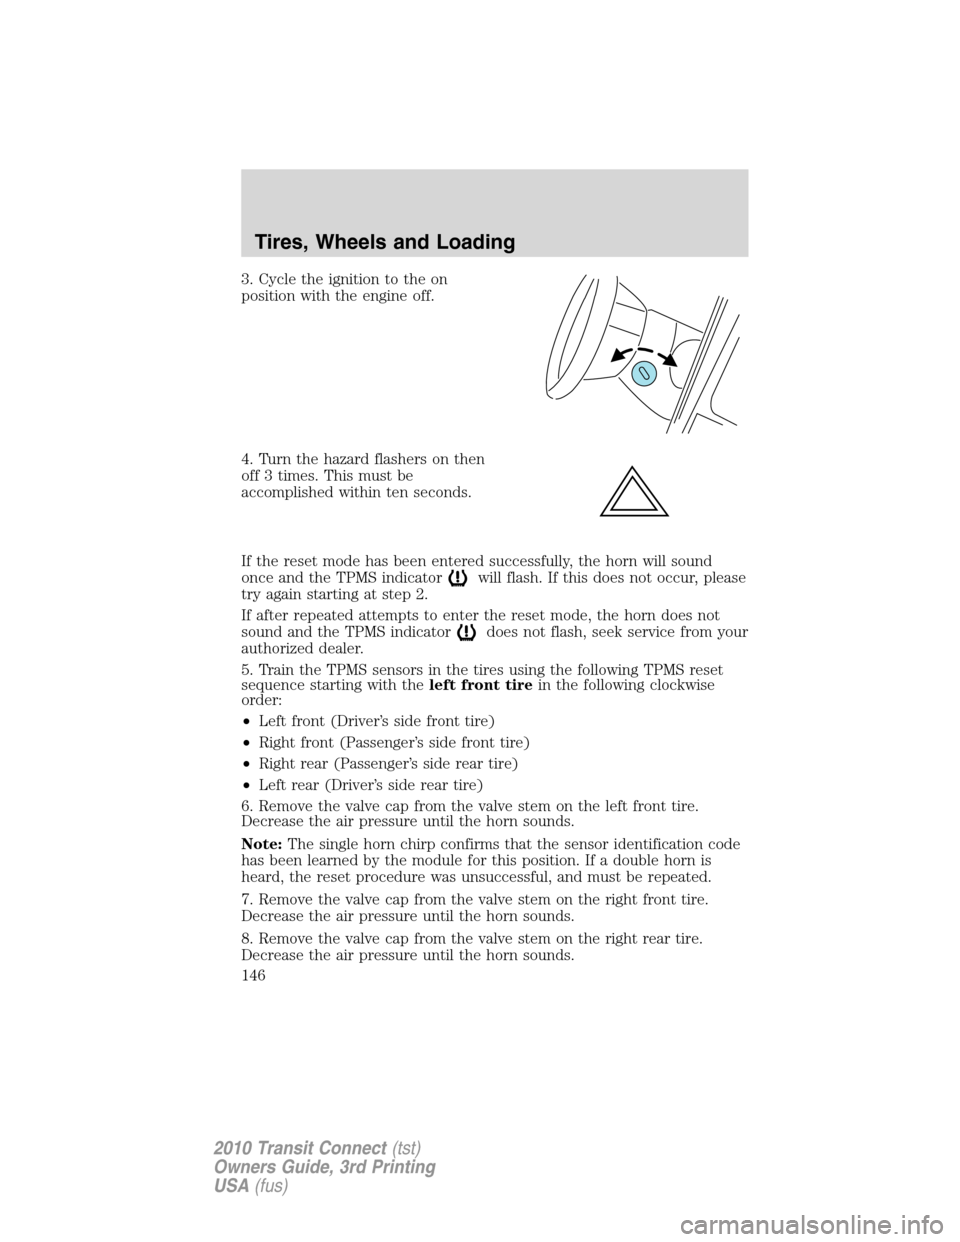
3. Cycle the ignition to the on
position with the engine off.
4. Turn the hazard flashers on then
off 3 times. This must be
accomplished within ten seconds.
If the reset mode has been entered successfully, the horn will sound
once and the TPMS indicator
will flash. If this does not occur, please
try again starting at step 2.
If after repeated attempts to enter the reset mode, the horn does not
sound and the TPMS indicator
does not flash, seek service from your
authorized dealer.
5. Train the TPMS sensors in the tires using the following TPMS reset
sequence starting with theleft front tirein the following clockwise
order:
•Left front (Driver’s side front tire)
•Right front (Passenger’s side front tire)
•Right rear (Passenger’s side rear tire)
•Left rear (Driver’s side rear tire)
6. Remove the valve cap from the valve stem on the left front tire.
Decrease the air pressure until the horn sounds.
Note:The single horn chirp confirms that the sensor identification code
has been learned by the module for this position. If a double horn is
heard, the reset procedure was unsuccessful, and must be repeated.
7. Remove the valve cap from the valve stem on the right front tire.
Decrease the air pressure until the horn sounds.
8. Remove the valve cap from the valve stem on the right rear tire.
Decrease the air pressure until the horn sounds.
Tires, Wheels and Loading
146
2010 Transit Connect(tst)
Owners Guide, 3rd Printing
USA(fus)
Page 147 of 258
9. Remove the valve cap from the valve stem on the left rear tire.
Decrease the air pressure until the horn sounds.
Training is complete after the horn sounds for the last tire trained
(driver’s side rear tire) and the TPMS indicator
stops flashing.
10. Turn the ignition off. If two short horn beeps are heard, the reset
procedure was unsuccessful and must be repeated.
If after repeating the procedure and two short beeps are heard when the
ignition is turned to off, seek assistance from your authorized dealer.
11. Set all four tires to the recommended air pressure as indicated on
the Safety Compliance Certification Label or Tire Label located on the
B-Pillar or the edge of the driver’s door. SeeVehicle loadingin this
chapter for more information.
SNOW TIRES AND CHAINS
WARNING:Snow tires must be the same size, load index, speed
rating as those originally provided by Ford. Use of any tire or
wheel not recommended by Ford can affect the safety and
performance of your vehicle, which could result in an increased risk of
loss of vehicle control, vehicle rollover, personal injury and death.
Additionally, the use of non-recommended tires and wheels could
cause steering, suspension, axle or transfer case/power transfer unit
failure.
The original equipment tires on your vehicle have an all-weather tread
design to provide traction, handling and braking performance in
year-round driving. You may install snow tires for improved traction
when driving in areas with sustained periods of snow or icy driving
conditions.
If you choose to install snow tires on your vehicle, they must be the
same size, construction, and load range as the original tires listed on the
tire placard, and they must be installed on all four wheels. Mixing tires of
different size or construction on your vehicle can adversely affect your
vehicle’s handling and braking, and may lead to loss of vehicle control.
WARNING:Do not use snow chains or cables on this vehicle as
they may cause damage to your vehicle which may lead to loss
of vehicle control.
Tires, Wheels and Loading
147
2010 Transit Connect(tst)
Owners Guide, 3rd Printing
USA(fus)
Page 169 of 258
WARNING:If the parking brake is fully released, but the brake
warning lamp remains illuminated, the brakes may not be
working properly. See your authorized dealer.
AUTOMATIC TRANSMISSION OPERATION
Understanding the gearshift positions of the 4–speed automatic
transmission
This vehicle is equipped with an adaptive Transmission Shift Strategy.
Adaptive Shift Strategy offers the optimal transmission operation and
shift quality. When the vehicle’s battery has been disconnected for any
type of service or repair, the transmission will need to relearn the normal
shift strategy parameters, much like having to reset your radio stations
when your vehicle battery has been disconnected. The Adaptive
Transmission Strategy allows the transmission to relearn these operating
parameters. This learning process could take several transmission
upshifts and downshifts; during this learning process, slightly firmer
shifts may occur. After this learning process, normal shift feel and shift
scheduling will resume.
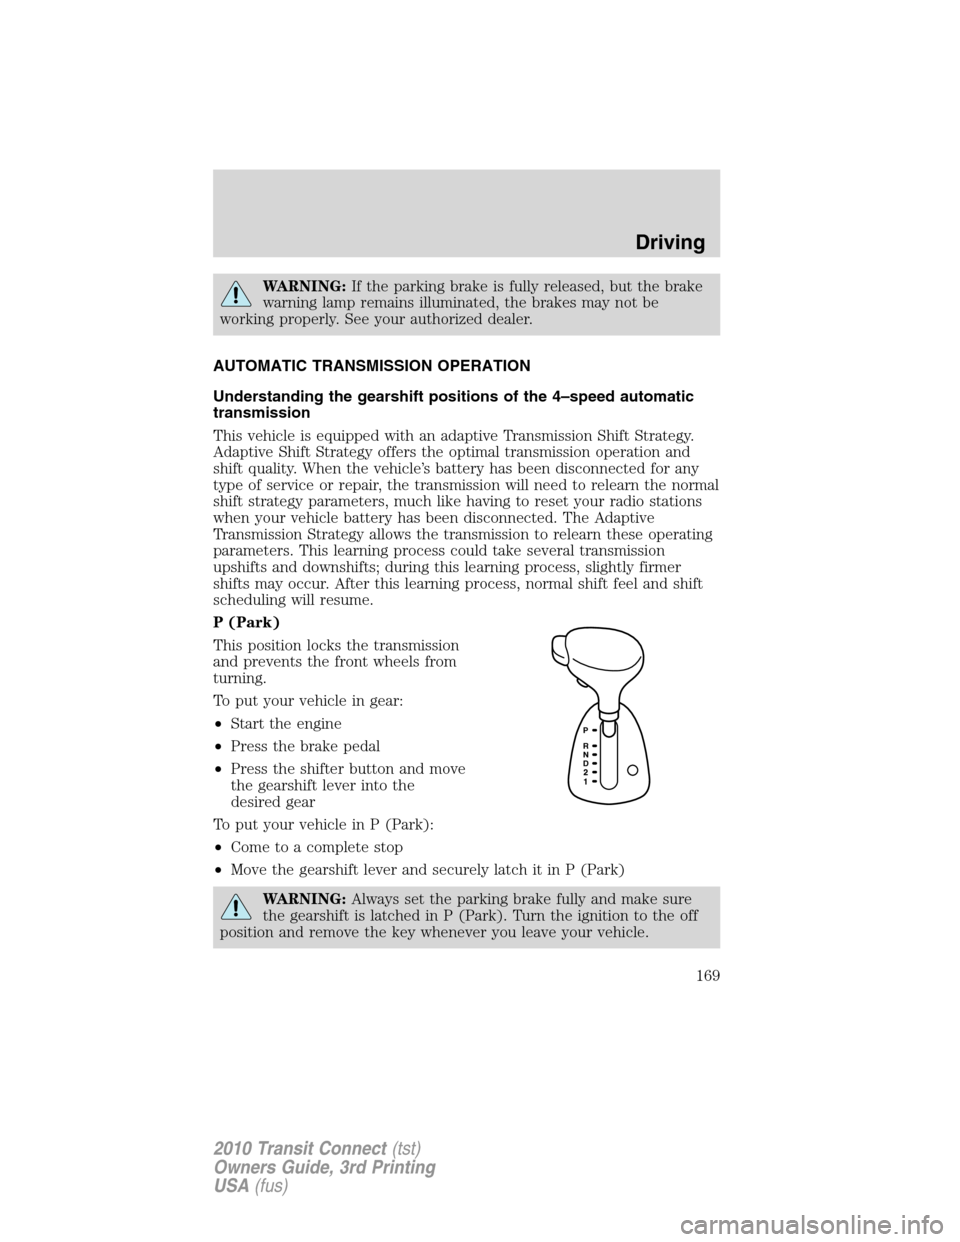
P (Park)
This position locks the transmission
and prevents the front wheels from
turning.
To put your vehicle in gear:
•Start the engine
•Press the brake pedal
•Press the shifter button and move
the gearshift lever into the
desired gear
To put your vehicle in P (Park):
•Come to a complete stop
•Move the gearshift lever and securely latch it in P (Park)
WARNING:Always set the parking brake fully and make sure
the gearshift is latched in P (Park). Turn the ignition to the off
position and remove the key whenever you leave your vehicle.
Driving
169
2010 Transit Connect(tst)
Owners Guide, 3rd Printing
USA(fus)
Page 176 of 258
FUEL PUMP SHUT-OFF SWITCH
This device stops the electric fuel pump from sending fuel to the engine
when your vehicle has had a substantial jolt.
After an accident, if the engine cranks but does not start, this switch
may have been activated.
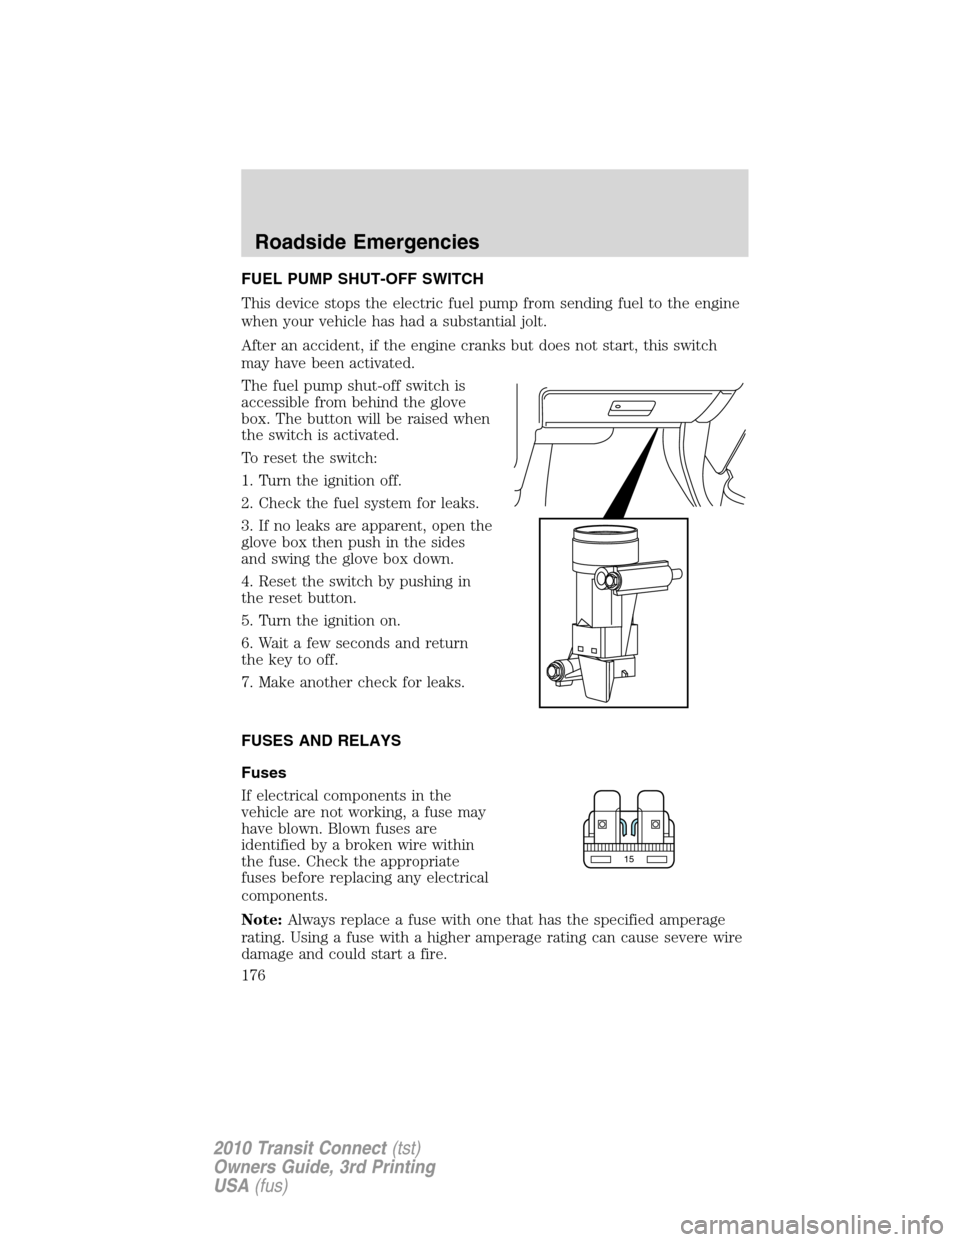
The fuel pump shut-off switch is
accessible from behind the glove
box. The button will be raised when
the switch is activated.
To reset the switch:
1. Turn the ignition off.
2. Check the fuel system for leaks.
3. If no leaks are apparent, open the
glove box then push in the sides
and swing the glove box down.
4. Reset the switch by pushing in
the reset button.
5. Turn the ignition on.
6. Wait a few seconds and return
the key to off.
7. Make another check for leaks.
FUSES AND RELAYS
Fuses
If electrical components in the
vehicle are not working, a fuse may
have blown. Blown fuses are
identified by a broken wire within
the fuse. Check the appropriate
fuses before replacing any electrical
components.
Note:Always replace a fuse with one that has the specified amperage
rating. Using a fuse with a higher amperage rating can cause severe wire
damage and could start a fire.
15
Roadside Emergencies
176
2010 Transit Connect(tst)
Owners Guide, 3rd Printing
USA(fus)