warning FORD TRANSIT CONNECT 2014 2.G Owner's Guide
[x] Cancel search | Manufacturer: FORD, Model Year: 2014, Model line: TRANSIT CONNECT, Model: FORD TRANSIT CONNECT 2014 2.GPages: 411, PDF Size: 6.62 MB
Page 55 of 411
MANUAL LIFTGATE (If Equipped)
WARNINGS
It is extremely dangerous to ride in a
cargo area, inside or outside of your
vehicle. In a crash, people riding in
these areas are more likely to be seriously
injured or killed. Do not allow people to ride
in any area of your vehicle that is not
equipped with seats and safety belts. Make
sure everyone in your vehicle is in a seat
and properly using a safety belt. Failure to
follow this warning could result in serious
personal injury or death. Make sure to close and latch the
liftgate to prevent drawing exhaust
fumes into your vehicle. This will also
prevent passengers and cargo from falling
out. If you must drive with the liftgate open,
keep the vents or windows open so outside
air comes into your vehicle. Failure to
follow this warning could result in serious
personal injury. Note:
Be careful when opening or closing
the liftgate in a garage or other enclosed
area to avoid damaging the liftgate.
Note: Do not hang anything from the
spoiler, rear window or liftgate, for example
a bike rack. This could damage the liftgate
and its components.
Opening and Closing the Liftgate
To Open the Liftgate 1.
Press the unlock button, or the tailgate
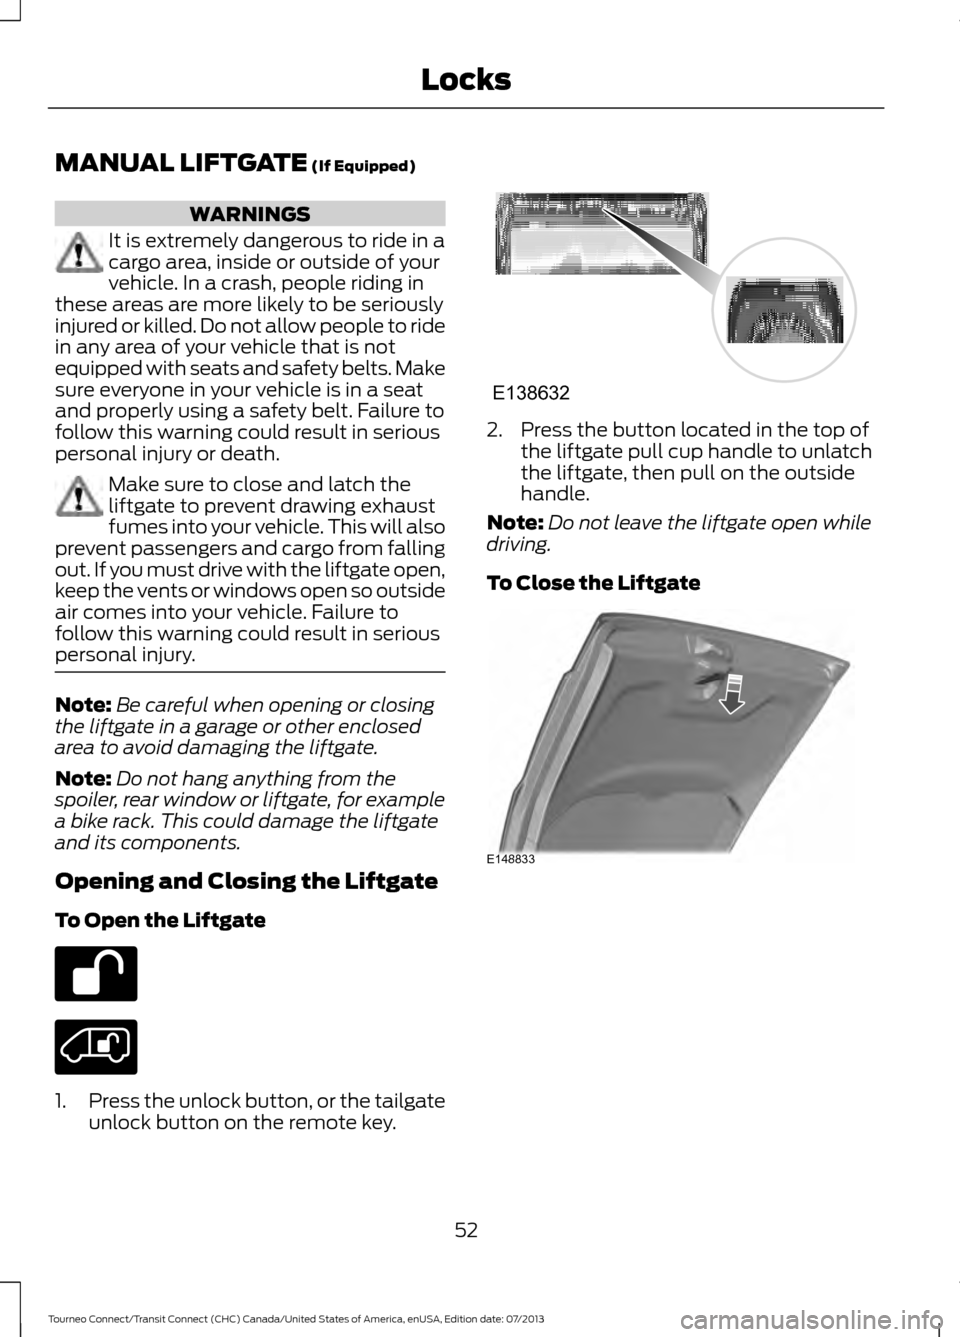
unlock button on the remote key. 2. Press the button located in the top of
the liftgate pull cup handle to unlatch
the liftgate, then pull on the outside
handle.
Note: Do not leave the liftgate open while
driving.
To Close the Liftgate 52
Tourneo Connect/Transit Connect (CHC) Canada/United States of America, enUSA, Edition date: 07/2013 Locks E138632 E148833
Page 57 of 411
1.
Insert the first previously programmed
correctly coded key into the ignition.
2. Switch the ignition from off to on. Keep
the ignition on for at least three
seconds, but no more than 10 seconds.
3. Switch the ignition off and remove the
first correctly coded key from the
ignition.
4. After three seconds but within 10 seconds of switching the ignition off,
insert the second previously correctly
coded key into the ignition.
5. Switch the ignition from off to on. Keep
the ignition on for at least three
seconds, but no more than 10 seconds.
6. Switch the ignition off and remove the
second previously programmed
correctly coded key from the ignition.
7. After three seconds but within 10 seconds of switching the ignition off
and removing the previously
programmed correctly coded key,
insert the new unprogrammed key into
the ignition.
8. Switch the ignition from off to on. Keep
the ignition on for at least six seconds.
9. Remove the newly programmed correctly coded key from the ignition.
If the key has been successfully
programmed it will start the engine and
operate the remote entry system (if the
new key is an integrated keyhead
transmitter).
If the key was not successfully
programmed, wait 10 seconds and repeat
Steps 1 through 8. If you are still
unsuccessful, take your vehicle to an
authorized dealer.
Note: You can program a maximum of eight
coded keys to your vehicle. All eight can be
integrated keyhead transmitters. ANTI-THEFT ALARM (If Equipped)
Alarm System
The perimeter alarm is a deterrent against
unauthorized access to your vehicle
through the doors, luggage compartment
and the hood. It also protects the audio
unit.
Triggering the Alarm
Once armed, the alarm is triggered in any
of the following ways:
• If someone opens a door, luggage
compartment or the hood without a
valid key or remote control.
• If someone removes the audio or
navigation system.
• If you switch the ignition on without a
valid key.
If the alarm is triggered, the horn will sound
for 30 seconds and the hazard warning
flasher will flash for five minutes.
Any further attempts to perform one of the
above will trigger the alarm again.
Arming the Alarm
To arm the alarm, lock your vehicle. See
Locks
(page 48).
Disarming the Alarm
Disarm and silence the alarm by unlocking
the doors with the key and switching the
ignition on with a correctly coded key
within 12 seconds, or by unlocking the
doors or the luggage compartment with
the remote control.
54
Tourneo Connect/Transit Connect (CHC) Canada/United States of America, enUSA, Edition date: 07/2013 Security
Page 58 of 411
ADJUSTING THE STEERING
WHEEL
WARNING
Do not adjust the steering wheel
when your vehicle is moving.
Note:
Make sure that you are sitting in the
correct position. See Sitting in the Correct
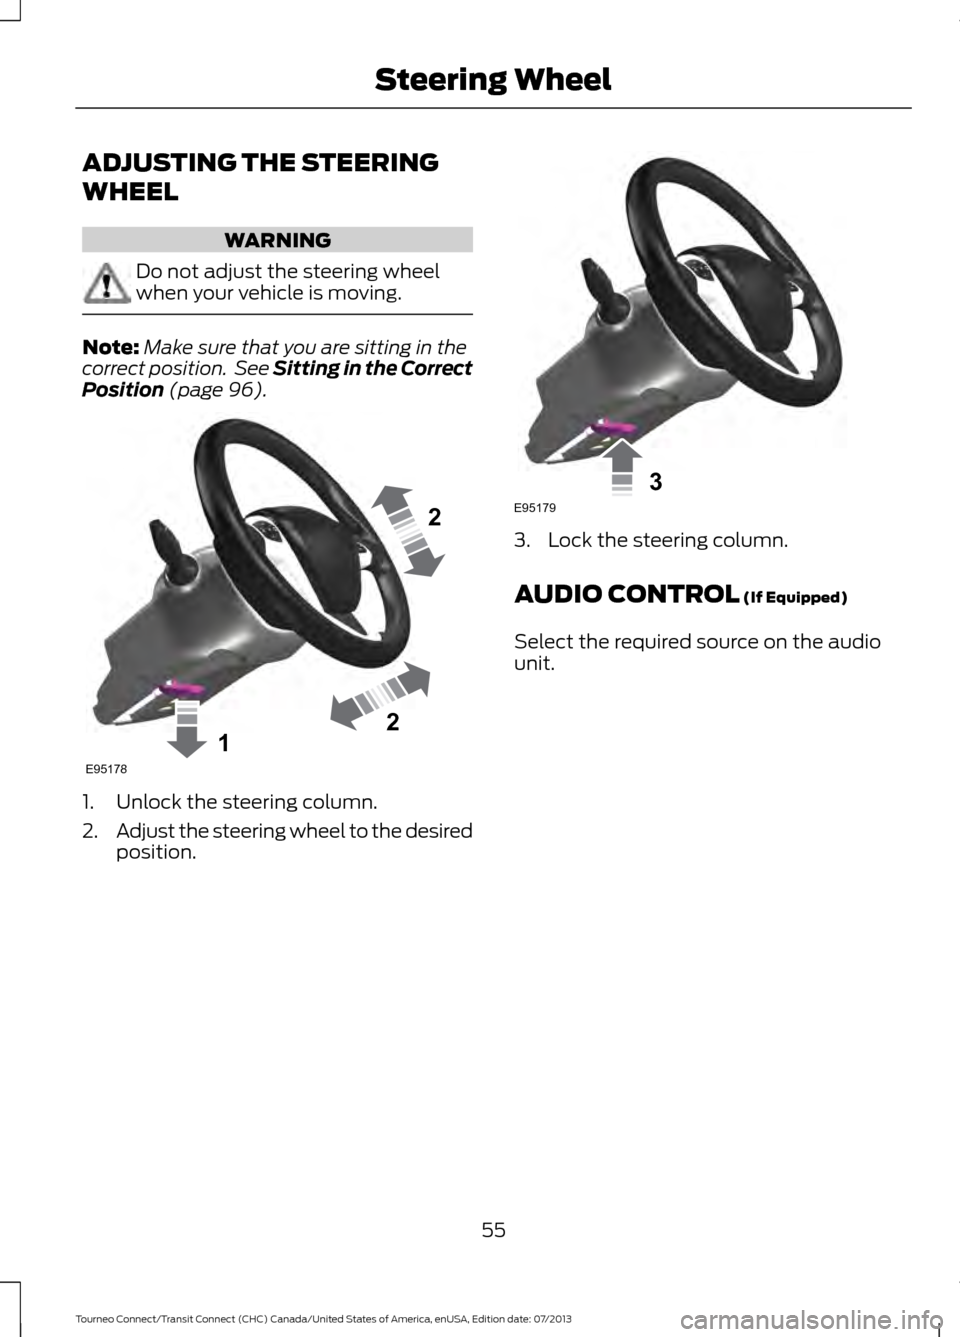
Position (page 96). 1. Unlock the steering column.
2.
Adjust the steering wheel to the desired
position. 3. Lock the steering column.
AUDIO CONTROL
(If Equipped)
Select the required source on the audio
unit.
55
Tourneo Connect/Transit Connect (CHC) Canada/United States of America, enUSA, Edition date: 07/2013 Steering Wheel122E95178 3E95179
Page 66 of 411
When the headlamp switch is in the
Autolamps position, the windshield wiper
activated exterior lamps will turn on within
10 seconds when you switch the
windshield wipers on. The exterior lamps
will turn off approximately 60 seconds
after you switch the windshield wipers off.
This feature does not turn on the exterior
lamps:
•
during a mist wipe
• while the wipers are on to clear washer
fluid during a wash condition
• if the wipers are in automatic or
intermittent modes.
Note: If you have autolamps and
autowipers switched on the low beam
headlamps will turn on automatically when
the windshield wipers operate continuously.
Note: You may have to manually switch
the headlamps on in severe weather
conditions.
Note: If you have autolamps switched on
you can only switch the high beam
headlamps on once the system has turned
the headlamps on.
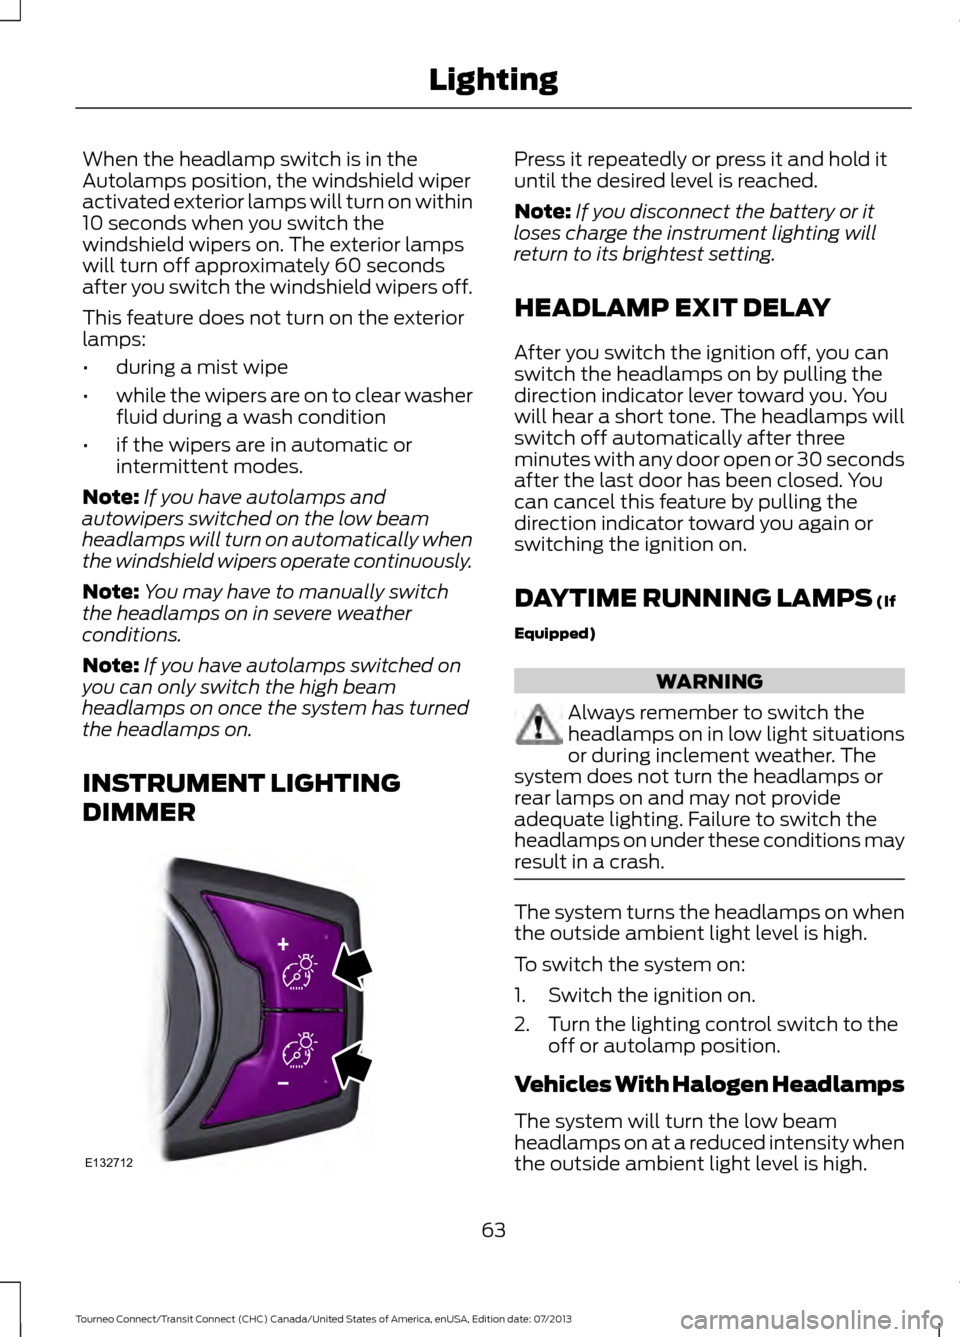
INSTRUMENT LIGHTING
DIMMER Press it repeatedly or press it and hold it
until the desired level is reached.
Note:
If you disconnect the battery or it
loses charge the instrument lighting will
return to its brightest setting.
HEADLAMP EXIT DELAY
After you switch the ignition off, you can
switch the headlamps on by pulling the
direction indicator lever toward you. You
will hear a short tone. The headlamps will
switch off automatically after three
minutes with any door open or 30 seconds
after the last door has been closed. You
can cancel this feature by pulling the
direction indicator toward you again or
switching the ignition on.
DAYTIME RUNNING LAMPS (If
Equipped) WARNING
Always remember to switch the
headlamps on in low light situations
or during inclement weather. The
system does not turn the headlamps or
rear lamps on and may not provide
adequate lighting. Failure to switch the
headlamps on under these conditions may
result in a crash. The system turns the headlamps on when
the outside ambient light level is high.
To switch the system on:
1. Switch the ignition on.
2. Turn the lighting control switch to the
off or autolamp position.
Vehicles With Halogen Headlamps
The system will turn the low beam
headlamps on at a reduced intensity when
the outside ambient light level is high.
63
Tourneo Connect/Transit Connect (CHC) Canada/United States of America, enUSA, Edition date: 07/2013 LightingE132712
Page 70 of 411
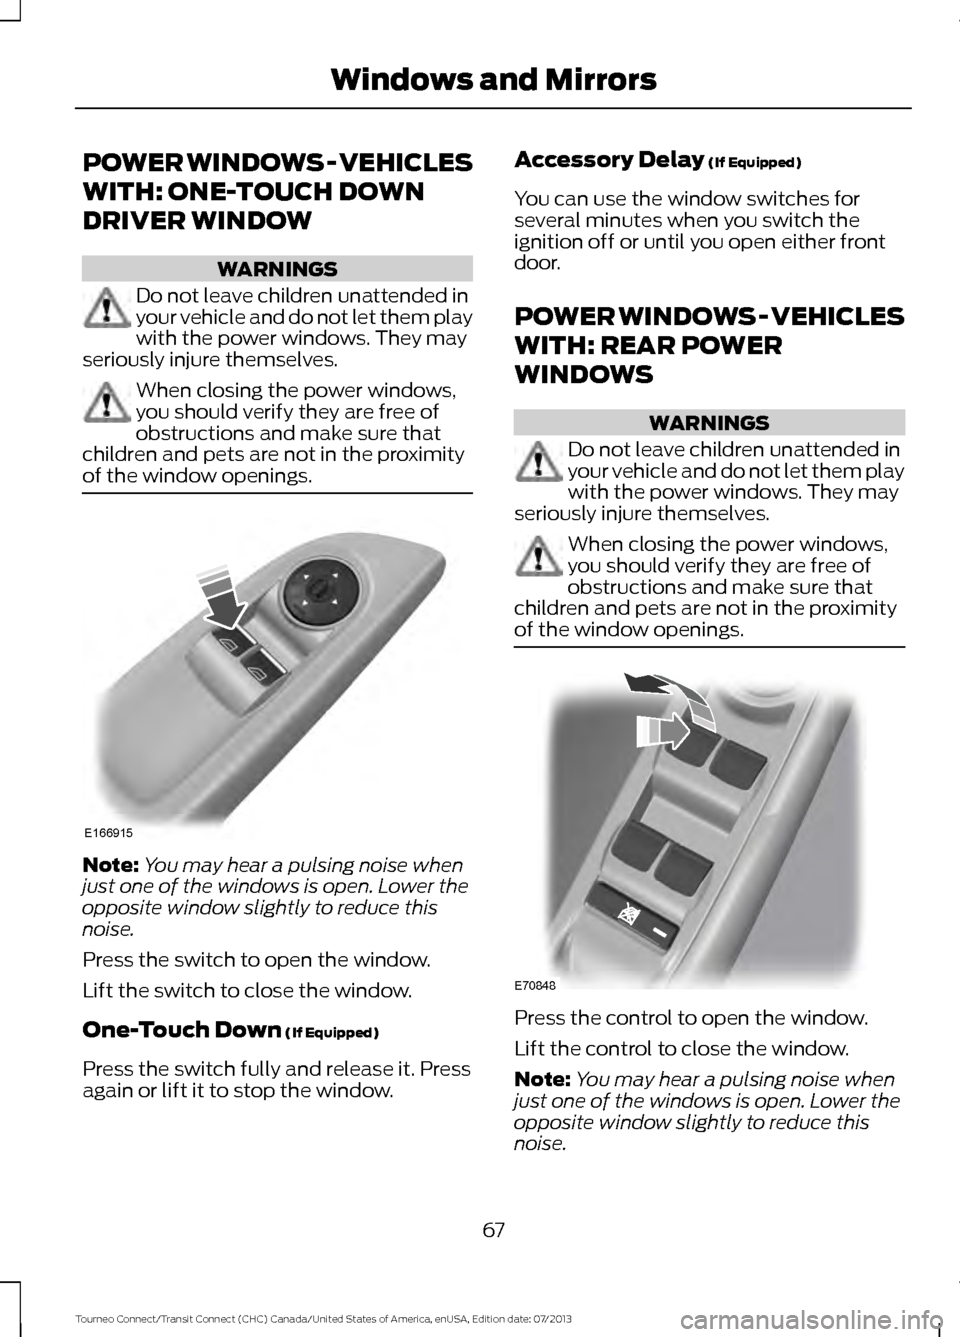
POWER WINDOWS - VEHICLES
WITH: ONE-TOUCH DOWN
DRIVER WINDOW
WARNINGS
Do not leave children unattended in
your vehicle and do not let them play
with the power windows. They may
seriously injure themselves. When closing the power windows,
you should verify they are free of
obstructions and make sure that
children and pets are not in the proximity
of the window openings. Note:
You may hear a pulsing noise when
just one of the windows is open. Lower the
opposite window slightly to reduce this
noise.
Press the switch to open the window.
Lift the switch to close the window.
One-Touch Down (If Equipped)
Press the switch fully and release it. Press
again or lift it to stop the window. Accessory Delay
(If Equipped)
You can use the window switches for
several minutes when you switch the
ignition off or until you open either front
door.
POWER WINDOWS - VEHICLES
WITH: REAR POWER
WINDOWS WARNINGS
Do not leave children unattended in
your vehicle and do not let them play
with the power windows. They may
seriously injure themselves. When closing the power windows,
you should verify they are free of
obstructions and make sure that
children and pets are not in the proximity
of the window openings. Press the control to open the window.
Lift the control to close the window.
Note:
You may hear a pulsing noise when
just one of the windows is open. Lower the
opposite window slightly to reduce this
noise.
67
Tourneo Connect/Transit Connect (CHC) Canada/United States of America, enUSA, Edition date: 07/2013 Windows and MirrorsE166915 E70848
Page 71 of 411
One-Touch Down (If Equipped)
Press the control fully and release it. Press
again or lift it to stop the window.
One-Touch Up
(If Equipped)
Lift the control fully and release it. Press
or lift it again to stop the window.
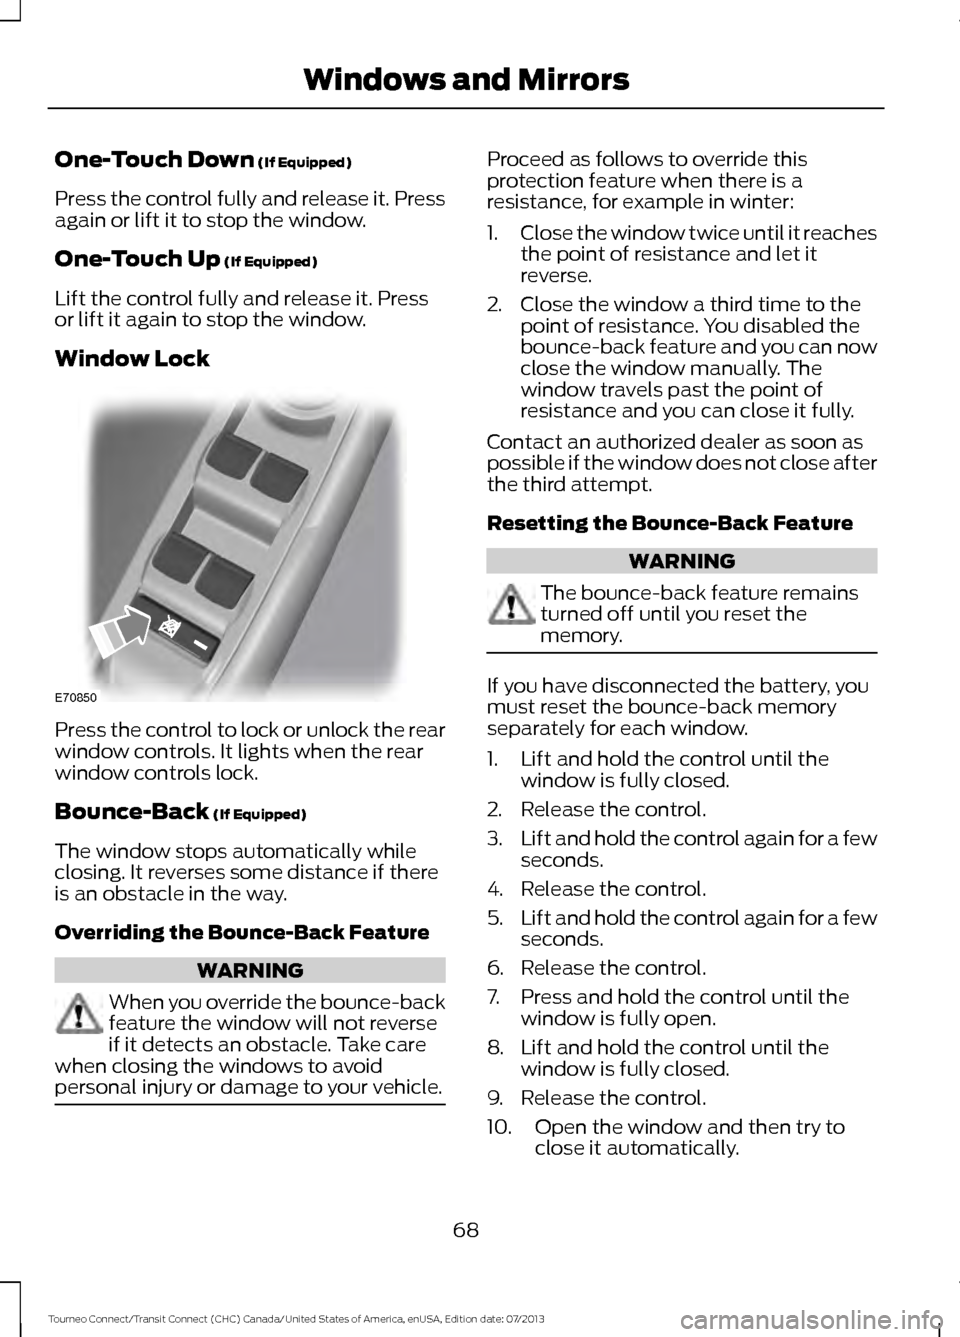
Window Lock Press the control to lock or unlock the rear
window controls. It lights when the rear
window controls lock.
Bounce-Back
(If Equipped)
The window stops automatically while
closing. It reverses some distance if there
is an obstacle in the way.
Overriding the Bounce-Back Feature WARNING
When you override the bounce-back
feature the window will not reverse
if it detects an obstacle. Take care
when closing the windows to avoid
personal injury or damage to your vehicle. Proceed as follows to override this
protection feature when there is a
resistance, for example in winter:
1.
Close the window twice until it reaches
the point of resistance and let it
reverse.
2. Close the window a third time to the point of resistance. You disabled the
bounce-back feature and you can now
close the window manually. The
window travels past the point of
resistance and you can close it fully.
Contact an authorized dealer as soon as
possible if the window does not close after
the third attempt.
Resetting the Bounce-Back Feature WARNING
The bounce-back feature remains
turned off until you reset the
memory.
If you have disconnected the battery, you
must reset the bounce-back memory
separately for each window.
1. Lift and hold the control until the
window is fully closed.
2. Release the control.
3. Lift and hold the control again for a few
seconds.
4. Release the control.
5. Lift and hold the control again for a few
seconds.
6. Release the control.
7. Press and hold the control until the window is fully open.
8. Lift and hold the control until the window is fully closed.
9. Release the control.
10. Open the window and then try to close it automatically.
68
Tourneo Connect/Transit Connect (CHC) Canada/United States of America, enUSA, Edition date: 07/2013 Windows and MirrorsE70850
Page 72 of 411
11. Repeat the procedure if the window
does not close automatically.
Accessory Delay (If Equipped)
You can use the window controls for
several minutes after switching off the
ignition or until opening either front door.
GLOBAL OPENING AND
CLOSING
(If Equipped)
You can use the remote control to operate
the windows with the ignition off.
Note: You can enable or disable this feature
in the information display or see an
authorized dealer. See
General
Information (page 77).
Note: To operate this feature, accessory
delay must not be active.
Opening the Windows
You can only open the windows for a short
time after you unlock your vehicle with the
remote control. After you unlock your
vehicle, press and hold the remote control
unlock button to open the windows and
vent the moonroof. Release the button
once movement starts. Press the lock or
unlock button to stop movement.
Closing the Windows WARNING
When closing the windows and
moonroof, you should verify they are
free of obstructions and make sure
that children and pets are not in the
proximity of the window openings. To close the windows and moonroof, press
and hold the remote control lock button.
Release the button once movement starts.
Press the lock or unlock button to stop
movement. EXTERIOR MIRRORS
Power Exterior Mirrors
(If Equipped) WARNING
Do not adjust the mirrors when your
vehicle is moving. This could result
in the loss of control of your vehicle,
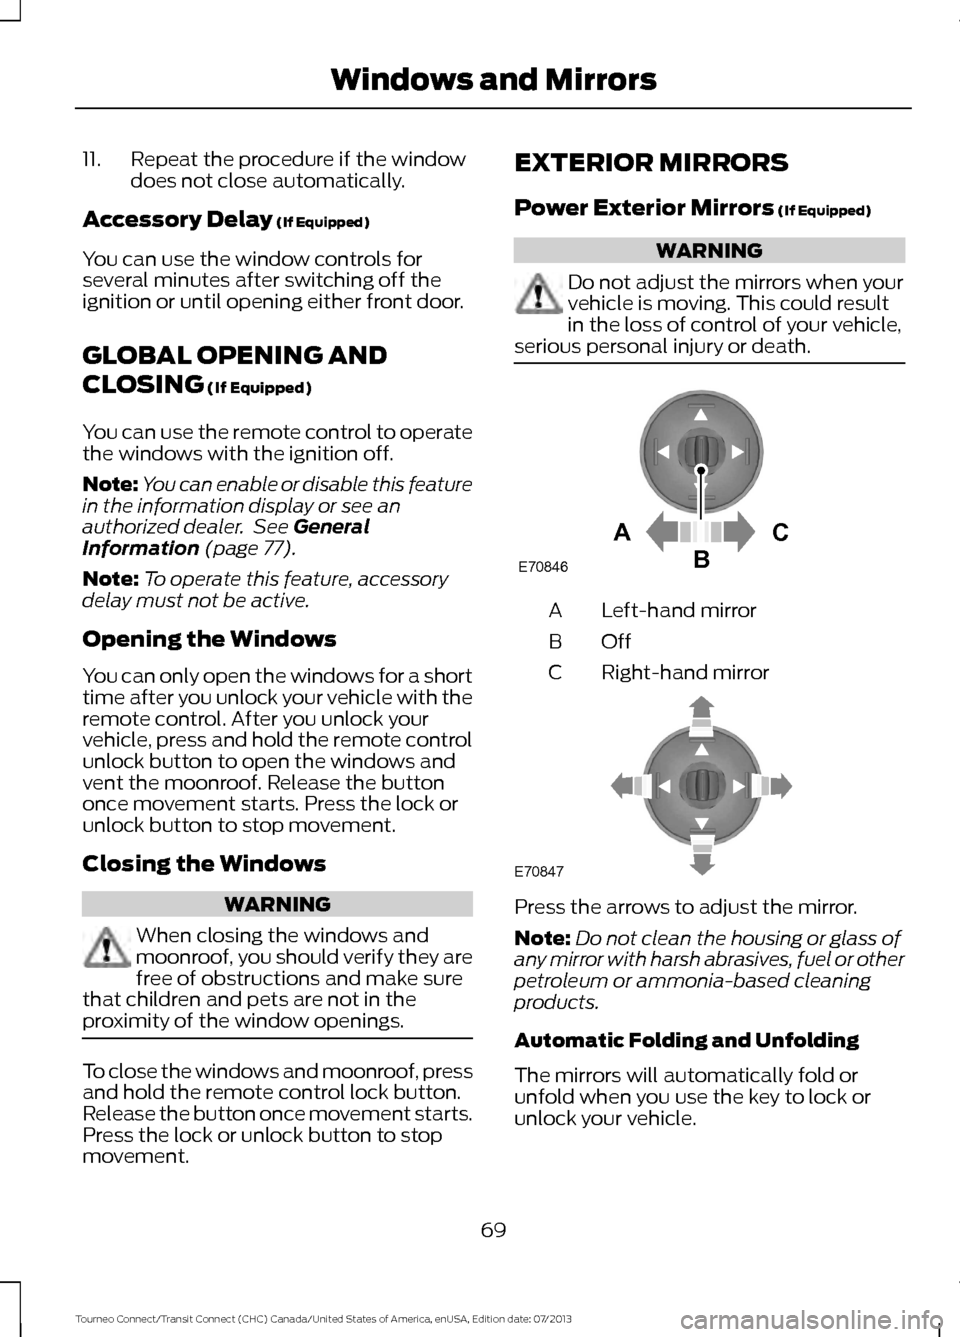
serious personal injury or death. Left-hand mirror
A
OffB
Right-hand mirror
C Press the arrows to adjust the mirror.
Note:
Do not clean the housing or glass of
any mirror with harsh abrasives, fuel or other
petroleum or ammonia-based cleaning
products.
Automatic Folding and Unfolding
The mirrors will automatically fold or
unfold when you use the key to lock or
unlock your vehicle.
69
Tourneo Connect/Transit Connect (CHC) Canada/United States of America, enUSA, Edition date: 07/2013 Windows and MirrorsAC
B
E70846 E70847
Page 73 of 411
Note:
If you fold the mirrors using the
manual fold button, you can only unfold
them again manually.
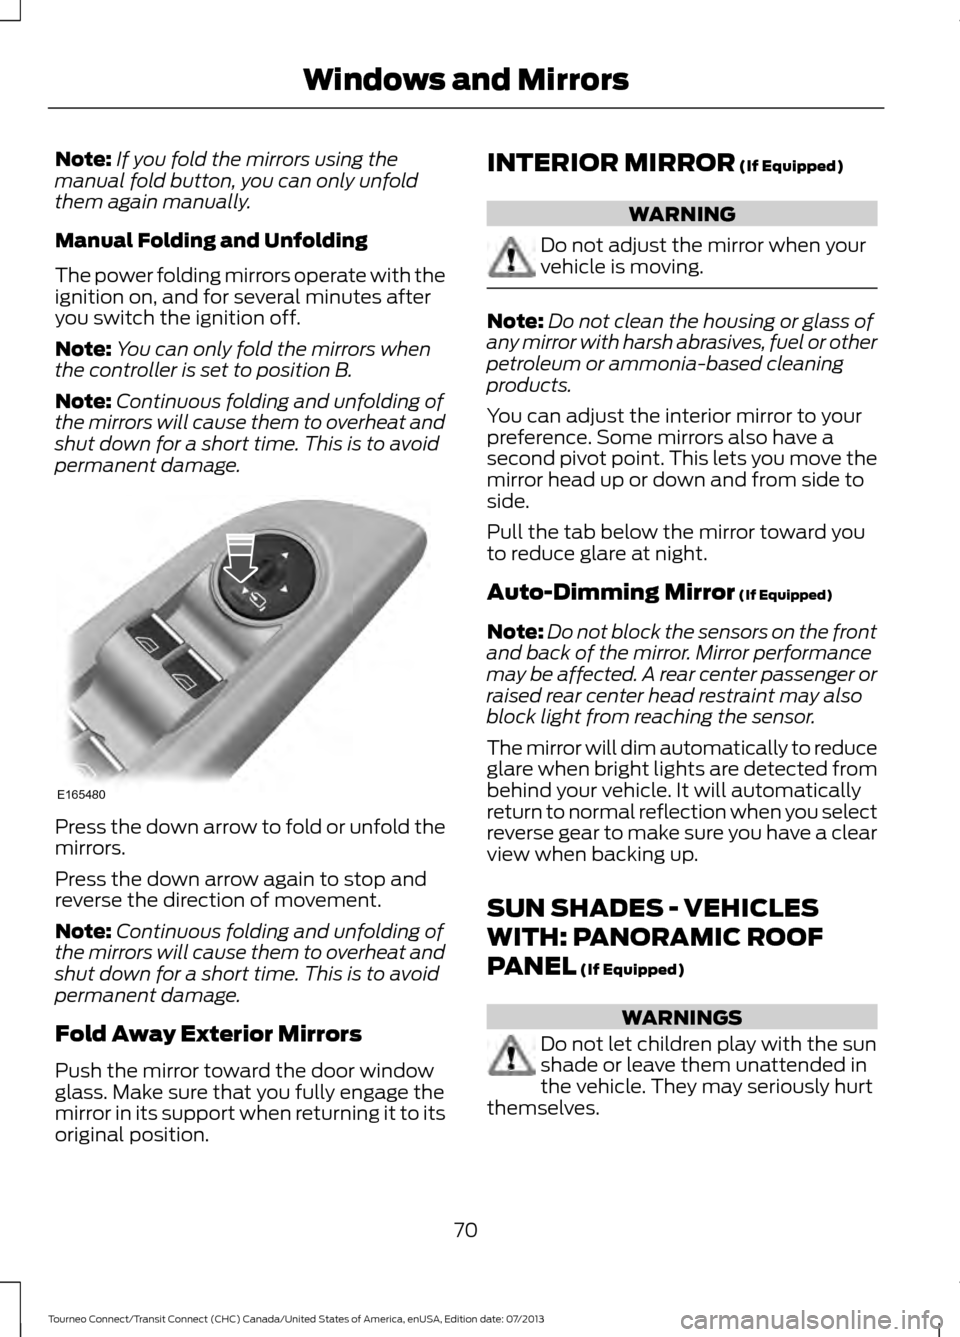
Manual Folding and Unfolding
The power folding mirrors operate with the
ignition on, and for several minutes after
you switch the ignition off.
Note: You can only fold the mirrors when
the controller is set to position B.
Note: Continuous folding and unfolding of
the mirrors will cause them to overheat and
shut down for a short time. This is to avoid
permanent damage. Press the down arrow to fold or unfold the
mirrors.
Press the down arrow again to stop and
reverse the direction of movement.
Note:
Continuous folding and unfolding of
the mirrors will cause them to overheat and
shut down for a short time. This is to avoid
permanent damage.
Fold Away Exterior Mirrors
Push the mirror toward the door window
glass. Make sure that you fully engage the
mirror in its support when returning it to its
original position. INTERIOR MIRROR (If Equipped) WARNING
Do not adjust the mirror when your
vehicle is moving.
Note:
Do not clean the housing or glass of
any mirror with harsh abrasives, fuel or other
petroleum or ammonia-based cleaning
products.
You can adjust the interior mirror to your
preference. Some mirrors also have a
second pivot point. This lets you move the
mirror head up or down and from side to
side.
Pull the tab below the mirror toward you
to reduce glare at night.
Auto-Dimming Mirror
(If Equipped)
Note: Do not block the sensors on the front
and back of the mirror. Mirror performance
may be affected. A rear center passenger or
raised rear center head restraint may also
block light from reaching the sensor.
The mirror will dim automatically to reduce
glare when bright lights are detected from
behind your vehicle. It will automatically
return to normal reflection when you select
reverse gear to make sure you have a clear
view when backing up.
SUN SHADES - VEHICLES
WITH: PANORAMIC ROOF
PANEL
(If Equipped) WARNINGS
Do not let children play with the sun
shade or leave them unattended in
the vehicle. They may seriously hurt
themselves.
70
Tourneo Connect/Transit Connect (CHC) Canada/United States of America, enUSA, Edition date: 07/2013 Windows and MirrorsE165480
Page 74 of 411
WARNINGS
When closing the sun shade, you
should verify that it is free of
obstructions and make sure that
children and pets are not in the proximity
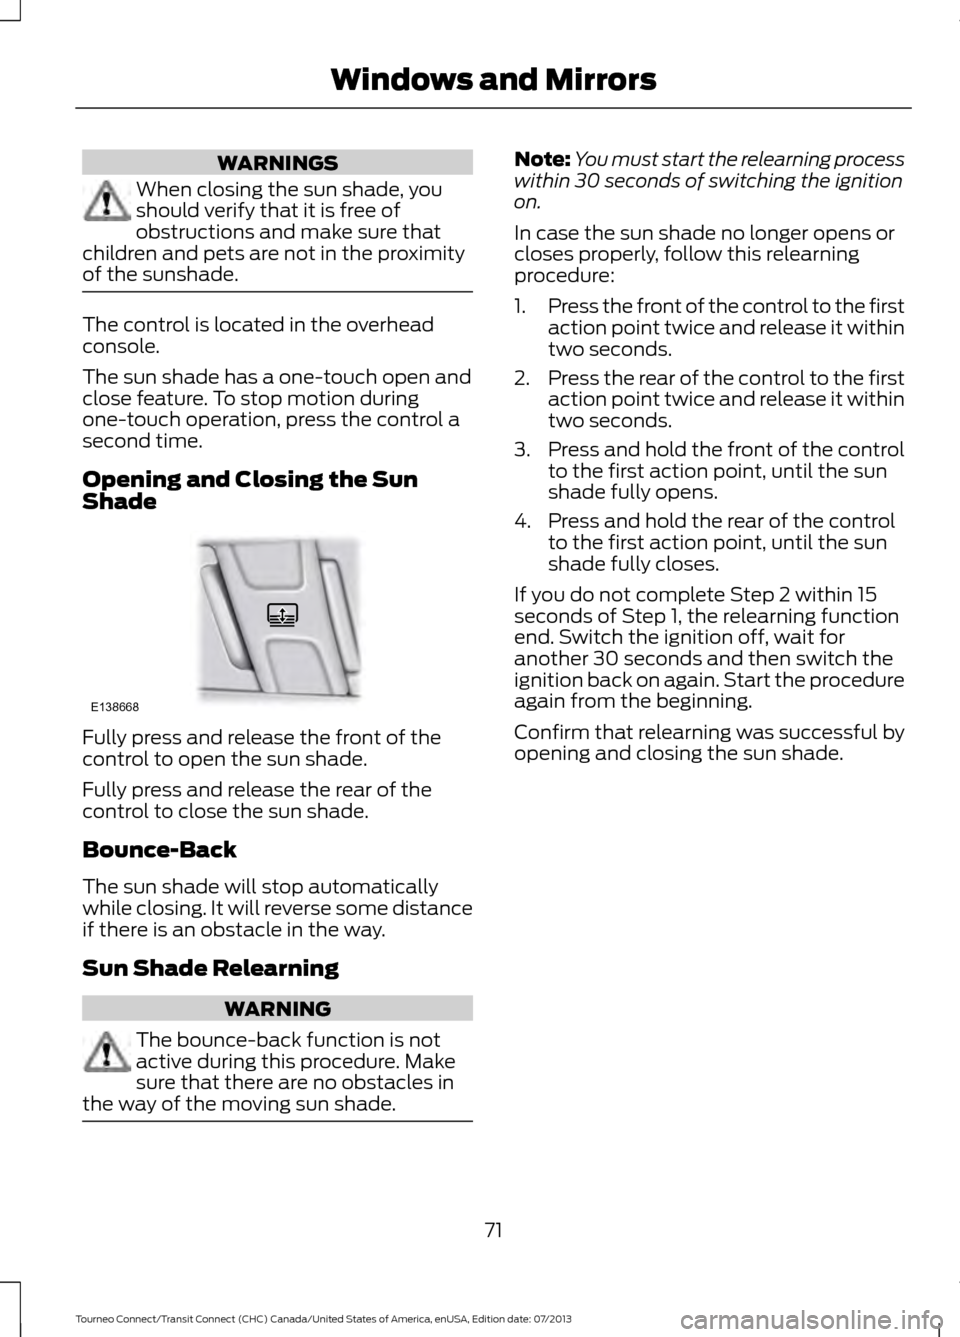
of the sunshade. The control is located in the overhead
console.
The sun shade has a one-touch open and
close feature. To stop motion during
one-touch operation, press the control a
second time.
Opening and Closing the Sun
Shade
Fully press and release the front of the
control to open the sun shade.
Fully press and release the rear of the
control to close the sun shade.
Bounce-Back
The sun shade will stop automatically
while closing. It will reverse some distance
if there is an obstacle in the way.
Sun Shade Relearning
WARNING
The bounce-back function is not
active during this procedure. Make
sure that there are no obstacles in
the way of the moving sun shade. Note:
You must start the relearning process
within 30 seconds of switching the ignition
on.
In case the sun shade no longer opens or
closes properly, follow this relearning
procedure:
1. Press the front of the control to the first
action point twice and release it within
two seconds.
2. Press the rear of the control to the first
action point twice and release it within
two seconds.
3. Press and hold the front of the control
to the first action point, until the sun
shade fully opens.
4. Press and hold the rear of the control to the first action point, until the sun
shade fully closes.
If you do not complete Step 2 within 15
seconds of Step 1, the relearning function
end. Switch the ignition off, wait for
another 30 seconds and then switch the
ignition back on again. Start the procedure
again from the beginning.
Confirm that relearning was successful by
opening and closing the sun shade.
71
Tourneo Connect/Transit Connect (CHC) Canada/United States of America, enUSA, Edition date: 07/2013 Windows and MirrorsE138668
Page 75 of 411
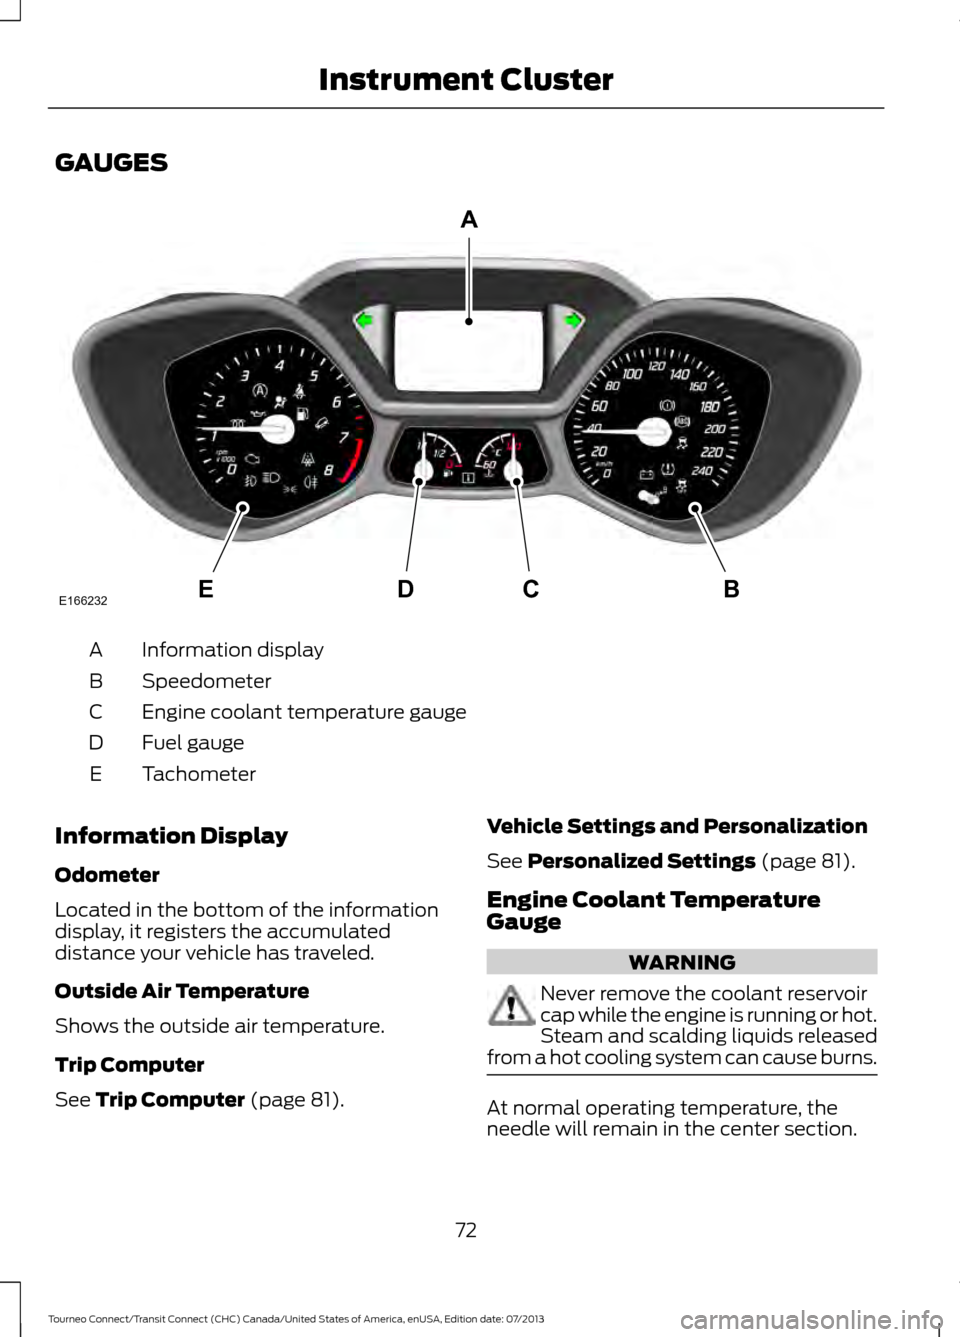
GAUGES
Information display
A
Speedometer
B
Engine coolant temperature gauge
C
Fuel gauge
D
Tachometer
E
Information Display
Odometer
Located in the bottom of the information
display, it registers the accumulated
distance your vehicle has traveled.
Outside Air Temperature
Shows the outside air temperature.
Trip Computer
See Trip Computer (page 81). Vehicle Settings and Personalization
See
Personalized Settings (page 81).
Engine Coolant Temperature
Gauge WARNING
Never remove the coolant reservoir
cap while the engine is running or hot.
Steam and scalding liquids released
from a hot cooling system can cause burns. At normal operating temperature, the
needle will remain in the center section.
72
Tourneo Connect/Transit Connect (CHC) Canada/United States of America, enUSA, Edition date: 07/2013 Instrument ClusterE166232CD
A
BE