ECO mode FORD TRANSIT CONNECT 2014 2.G Owners Manual
[x] Cancel search | Manufacturer: FORD, Model Year: 2014, Model line: TRANSIT CONNECT, Model: FORD TRANSIT CONNECT 2014 2.GPages: 411, PDF Size: 6.62 MB
Page 10 of 411
ABOUT THIS MANUAL
Thank you for choosing Ford. We
recommend that you take some time to
get to know your vehicle by reading this
manual. The more that you know about
it, the greater the safety and pleasure you
will get from driving it.
WARNING
Driving while distracted can result in
loss of vehicle control, crash and
injury. We strongly recommend that
you use extreme caution when using any
device that may take your focus off the
road. Your primary responsibility is the safe
operation of your vehicle. We recommend
against the use of any hand-held device
while driving and encourage the use of
voice-operated systems when possible.
Make sure you are aware of all applicable
local laws that may affect the use of
electronic devices while driving. Note:
This manual describes product
features and options available throughout
the range of available models, sometimes
even before they are generally available. It
may describe options not fitted to the
vehicle you have purchased.
Note: Some of the illustrations in this
manual may show features as used in
different models, so may appear different
to you on your vehicle. However, the
essential information in the illustrations is
always correct.
Note: Always use and operate your vehicle
in line with all applicable laws and
regulations.
Note: Pass on this manual when selling
your vehicle. It is an integral part of your
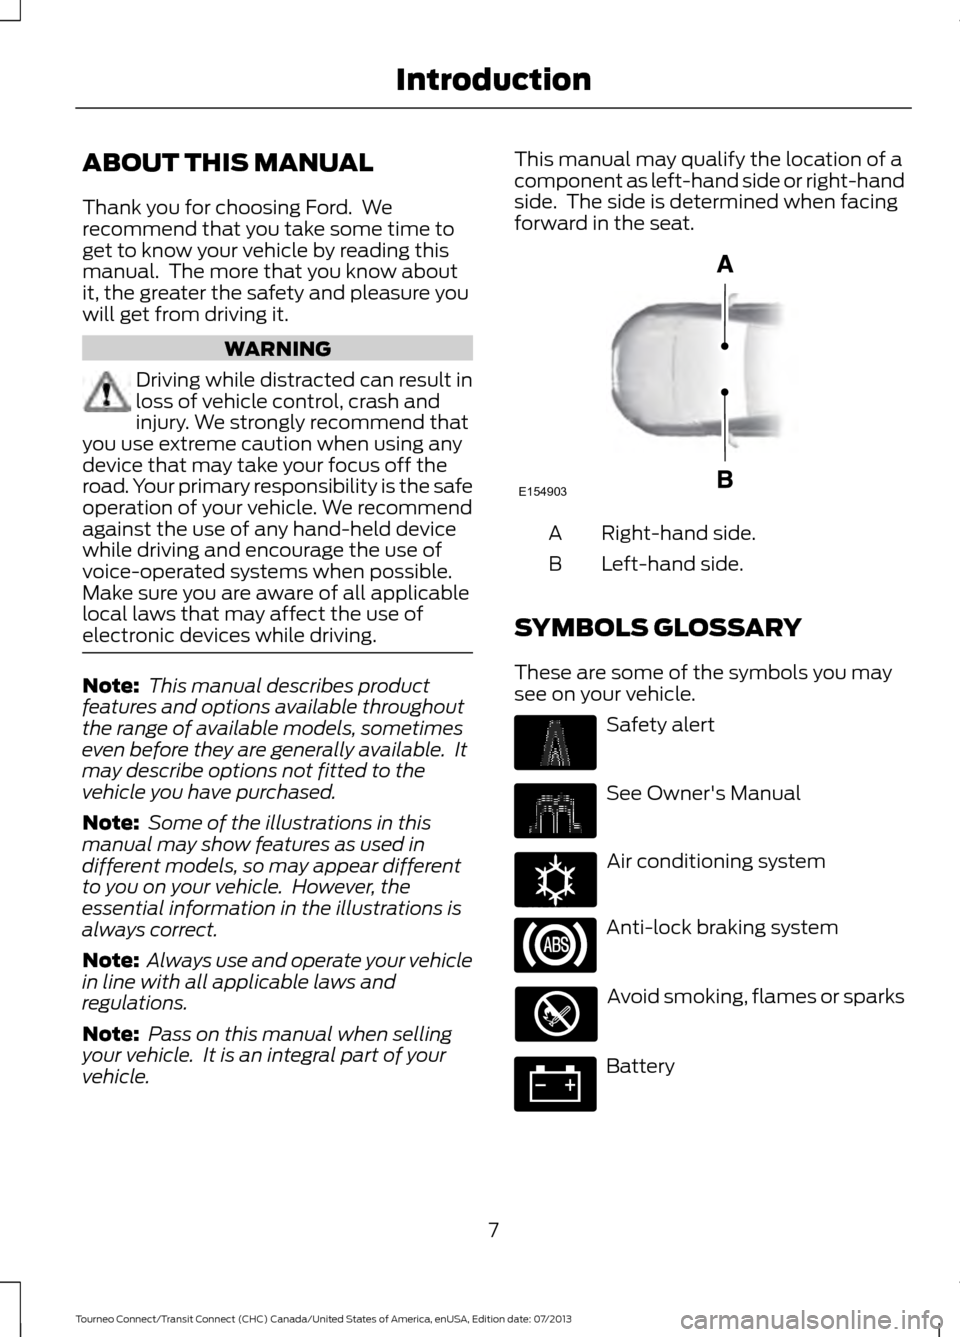
vehicle. This manual may qualify the location of a
component as left-hand side or right-hand
side. The side is determined when facing
forward in the seat.
Right-hand side.
A
Left-hand side.
B
SYMBOLS GLOSSARY
These are some of the symbols you may
see on your vehicle. Safety alert
See Owner's Manual
Air conditioning system
Anti-lock braking system
Avoid smoking, flames or sparks
Battery
7
Tourneo Connect/Transit Connect (CHC) Canada/United States of America, enUSA, Edition date: 07/2013 IntroductionE154903 E162384
Page 28 of 411
PRINCIPLE OF OPERATION
WARNINGS
Always drive and ride with your
seatback upright and the lap belt
snug and low across the hips.
To reduce the risk of injury, make
sure children sit where they can be
properly restrained.
Never let a passenger hold a child on
his or her lap while your vehicle is
moving. The passenger cannot
protect the child from injury in a crash. All occupants of your vehicle,
including the driver, should always
properly wear their safety belts, even
when an airbag supplemental restraint
system is provided. Failure to properly wear
your safety belt could seriously increase
the risk of injury or death. It is extremely dangerous to ride in a
cargo area, inside or outside of a
vehicle. In a crash, people riding in
these areas are more likely to be seriously
injured or killed. Do not allow people to ride
in any area of your vehicle that is not
equipped with seats and safety belts. Be
sure everyone in your vehicle is in a seat
and using a safety belt properly. In a rollover crash, an unbelted
person is significantly more likely to
die than a person wearing a safety
belt. Each seating position in your vehicle
has a specific safety belt assembly
which is made up of one buckle and
one tongue that are designed to be used
as a pair. 1) Use the shoulder belt on the
outside shoulder only. Never wear the
shoulder belt under the arm. 2) Never
swing the safety belt around your neck over
the inside shoulder. 3) Never use a single
belt for more than one person. WARNINGS
When possible, all children 12 years
old and under should be properly
restrained in a rear seating position.
Failure to follow this could seriously
increase the risk of injury or death. Safety belts and seats can become
hot in a vehicle that has been closed
up in sunny weather; they could burn
a small child. Check seat covers and
buckles before you place a child anywhere
near them. Front and rear seat occupants,
including pregnant women, should
wear safety belts for optimum
protection in an accident. All seating positions in your vehicle have
lap and shoulder safety belts. All
occupants of the vehicle should always
properly wear their safety belts, even when
an airbag supplemental restraint system
is provided.
The safety belt system consists of:
•
Lap and shoulder safety belts.
• Shoulder safety belt with automatic
locking mode, (except driver safety
belt).
• Height adjuster at the front outboard
seating positions.
• Safety belt pretensioner at the front
outboard seating positions.
• Belt tension sensor at the front
outboard passenger seating position. •
Safety belt warning light and chime. 25
Tourneo Connect/Transit Connect (CHC) Canada/United States of America, enUSA, Edition date: 07/2013 Safety Belts
Page 33 of 411
Then...
If...
The Belt-Minder feature will not activate.
You and the front seat passenger buckle
your safety belts before you switch the
ignition on or less than 1– 2 minutes elapse
after you switch the ignition on...
The Belt-Minder feature activates, the
safety belt warning light illuminates and a
warning tone sounds for 6 seconds every
25 seconds, repeating for about 5 minutes
or until you and the front seat passenger
buckle your safety belts.
You or the front seat passenger do not
buckle your safety belts before your vehicle
reaches at least 6 mph (9.7 km/h) and 1–
2
minutes elapse after you switch the ignition
on...
The Belt-Minder feature activates, the
safety belt warning light illuminates and a
warning tone sounds for 6 seconds every
25 seconds, repeating for about 5 minutes
or until you and the front seat passenger
buckle your safety belts.
The safety belt for the driver or front
passenger is unbuckled for about 1 minute
while the vehicle is traveling at least 6 mph
(9.7 km/h) and more than 1–
2 minutes
elapse after you switch the ignition on...
Deactivating and Activating the
Belt-Minder Feature WARNING
While the system allows you to
switch this feature off, the intent of
the system is to remind you to wear
your safety belt to improve your chance to
survive an accident. We recommend you
leave the system switched on for yourself
and others who may use the vehicle. Note:
The driver and front passenger
warnings switch on and off independently.
When you perform this procedure for one
seating position, do not buckle the other
position as this will terminate the process.
Read Steps 1–4 thoroughly before
proceeding with the programming
procedure. Before following the procedure, make sure
that:
•
The parking brake is set.
• The transmission is in park (P) or
neutral (N).
• The ignition is off.
• The driver and front passenger safety
belts are unbuckled.
1. Switch the ignition on. Do not start the
vehicle.
2. Wait until the safety belt warning light turns off (about 1 minute). After Step
2, wait an additional 5 seconds before
proceeding with Step 3. Once you start
Step 3, you must complete the
procedure within 30 seconds.
3. For the seating position you are switching off, buckle then unbuckle the
safety belt three times at a moderate
speed, ending in the unbuckled state.
After Step 3, the safety belt warning
light turns on.
30
Tourneo Connect/Transit Connect (CHC) Canada/United States of America, enUSA, Edition date: 07/2013 Safety Belts
Page 53 of 411
Smart Unlocks For Intelligent
Access Keys (If Equipped)
This feature helps to prevent you from
unintentionally locking your intelligent
access key inside your vehicle ’s passenger
compartment or rear cargo area.
When you lock your vehicle using the
power door lock control (with the door
open, vehicle in park and ignition off), your
vehicle will search for an intelligent access
key in the passenger compartment after
you close the door. If your vehicle finds a
key, all of the doors will immediately
unlock and the horn will chirp, indicating
that a key is inside.
In order to override the smart unlock
feature and intentionally lock the
intelligent access key inside your vehicle,
you can lock your vehicle after all doors
are closed by pressing the lock button on
another intelligent access key or touching
the locking area on the handle with another
intelligent access key in your hand.
When you open one of the front doors and
lock your vehicle using the power door lock
control, all doors will lock then unlock if,
the ignition is on, or the ignition is off and
the gearshift lever is not in park
P.
Auto lock and Auto unlock Feature
Auto lock
The Auto lock feature will lock the doors
and liftgate when all of the following
conditions have been met:
• All doors are closed.
• The ignition is on.
• Your vehicle is moving at a speed
greater than 12 mph (20 km/h) for
more than two seconds. Auto unlock
The auto unlock feature will unlock all the
doors when all of the following conditions
have been met:
•
The ignition is on, all doors are closed,
and your vehicle is moving at a speed
greater than 12 mph (20 km/h) for
more than two seconds.
• Your vehicle has come to a stop and
you switch the ignition off or to the
accessory position.
• The driver door is opened within 10
minutes of you switching the ignition
off or to the accessory position.
Note: The doors will not auto unlock if your
vehicle has been electronically locked after
the ignition is turned off and before the
driver door is opened.
Enabling or Disabling Auto lock and
Auto unlock
Note: An authorized dealer or you can carry
out this procedure.
To enable or disable these features, do the
following:
1. Switch the ignition on.
2. Press the power door unlock button three times.
3. Switch the ignition off.
4. Press the power door unlock button three times.
5. Switch the ignition on. The horn will chirp indicating your vehicle is in
programming mode.
Auto lock:
Press the power door lock
button for less than one second and
release. The horn will chirp once if disabled
or twice (one short and one long chirp) if
enabled.
50
Tourneo Connect/Transit Connect (CHC) Canada/United States of America, enUSA, Edition date: 07/2013 Locks
Page 66 of 411
When the headlamp switch is in the
Autolamps position, the windshield wiper
activated exterior lamps will turn on within
10 seconds when you switch the
windshield wipers on. The exterior lamps
will turn off approximately 60 seconds
after you switch the windshield wipers off.
This feature does not turn on the exterior
lamps:
•
during a mist wipe
• while the wipers are on to clear washer
fluid during a wash condition
• if the wipers are in automatic or
intermittent modes.
Note: If you have autolamps and
autowipers switched on the low beam
headlamps will turn on automatically when
the windshield wipers operate continuously.
Note: You may have to manually switch
the headlamps on in severe weather
conditions.
Note: If you have autolamps switched on
you can only switch the high beam
headlamps on once the system has turned
the headlamps on.
INSTRUMENT LIGHTING
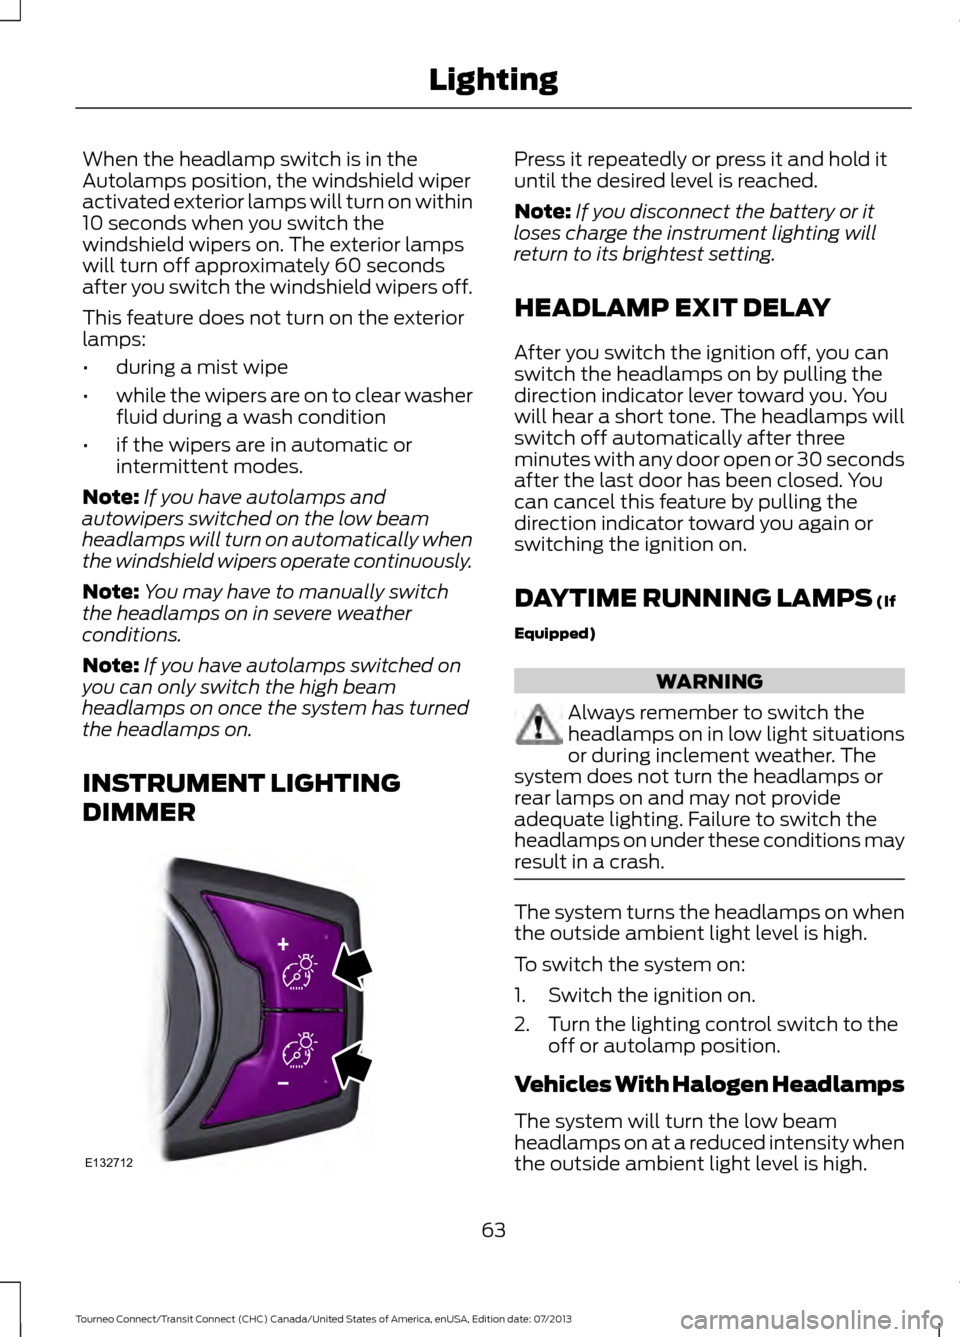
DIMMER Press it repeatedly or press it and hold it
until the desired level is reached.
Note:
If you disconnect the battery or it
loses charge the instrument lighting will
return to its brightest setting.
HEADLAMP EXIT DELAY
After you switch the ignition off, you can
switch the headlamps on by pulling the
direction indicator lever toward you. You
will hear a short tone. The headlamps will
switch off automatically after three
minutes with any door open or 30 seconds
after the last door has been closed. You
can cancel this feature by pulling the
direction indicator toward you again or
switching the ignition on.
DAYTIME RUNNING LAMPS (If
Equipped) WARNING
Always remember to switch the
headlamps on in low light situations
or during inclement weather. The
system does not turn the headlamps or
rear lamps on and may not provide
adequate lighting. Failure to switch the
headlamps on under these conditions may
result in a crash. The system turns the headlamps on when
the outside ambient light level is high.
To switch the system on:
1. Switch the ignition on.
2. Turn the lighting control switch to the
off or autolamp position.
Vehicles With Halogen Headlamps
The system will turn the low beam
headlamps on at a reduced intensity when
the outside ambient light level is high.
63
Tourneo Connect/Transit Connect (CHC) Canada/United States of America, enUSA, Edition date: 07/2013 LightingE132712
Page 78 of 411
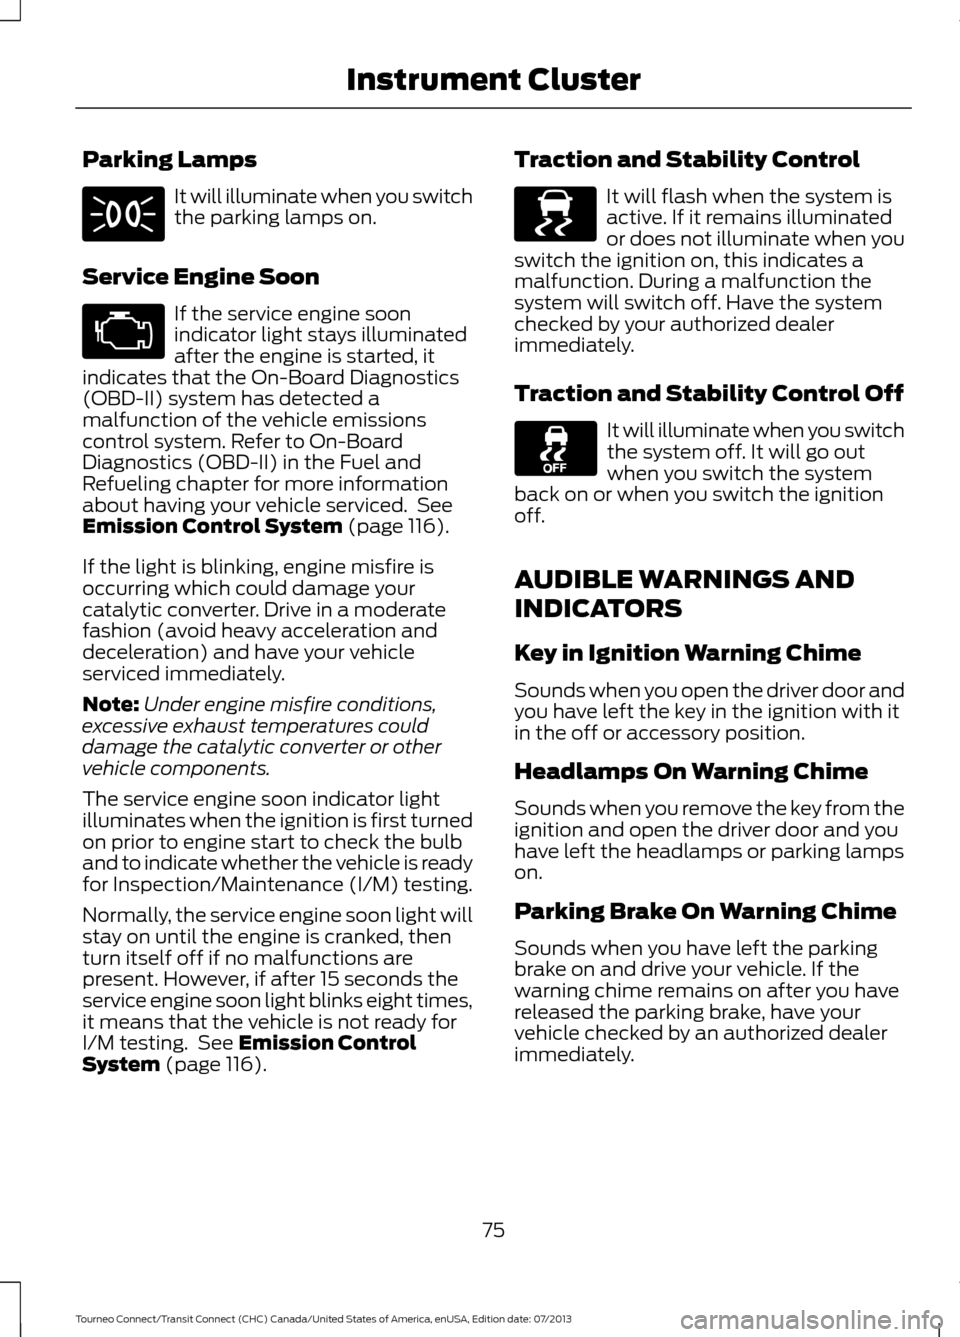
Parking Lamps
It will illuminate when you switch
the parking lamps on.
Service Engine Soon If the service engine soon
indicator light stays illuminated
after the engine is started, it
indicates that the On-Board Diagnostics
(OBD-II) system has detected a
malfunction of the vehicle emissions
control system. Refer to On-Board
Diagnostics (OBD-II) in the Fuel and
Refueling chapter for more information
about having your vehicle serviced. See
Emission Control System (page 116).
If the light is blinking, engine misfire is
occurring which could damage your
catalytic converter. Drive in a moderate
fashion (avoid heavy acceleration and
deceleration) and have your vehicle
serviced immediately.
Note: Under engine misfire conditions,
excessive exhaust temperatures could
damage the catalytic converter or other
vehicle components.
The service engine soon indicator light
illuminates when the ignition is first turned
on prior to engine start to check the bulb
and to indicate whether the vehicle is ready
for Inspection/Maintenance (I/M) testing.
Normally, the service engine soon light will
stay on until the engine is cranked, then
turn itself off if no malfunctions are
present. However, if after 15 seconds the
service engine soon light blinks eight times,
it means that the vehicle is not ready for
I/M testing. See
Emission Control
System (page 116). Traction and Stability Control It will flash when the system is
active. If it remains illuminated
or does not illuminate when you
switch the ignition on, this indicates a
malfunction. During a malfunction the
system will switch off. Have the system
checked by your authorized dealer
immediately.
Traction and Stability Control Off It will illuminate when you switch
the system off. It will go out
when you switch the system
back on or when you switch the ignition
off.
AUDIBLE WARNINGS AND
INDICATORS
Key in Ignition Warning Chime
Sounds when you open the driver door and
you have left the key in the ignition with it
in the off or accessory position.
Headlamps On Warning Chime
Sounds when you remove the key from the
ignition and open the driver door and you
have left the headlamps or parking lamps
on.
Parking Brake On Warning Chime
Sounds when you have left the parking
brake on and drive your vehicle. If the
warning chime remains on after you have
released the parking brake, have your
vehicle checked by an authorized dealer
immediately.
75
Tourneo Connect/Transit Connect (CHC) Canada/United States of America, enUSA, Edition date: 07/2013 Instrument Cluster E138639
Page 93 of 411
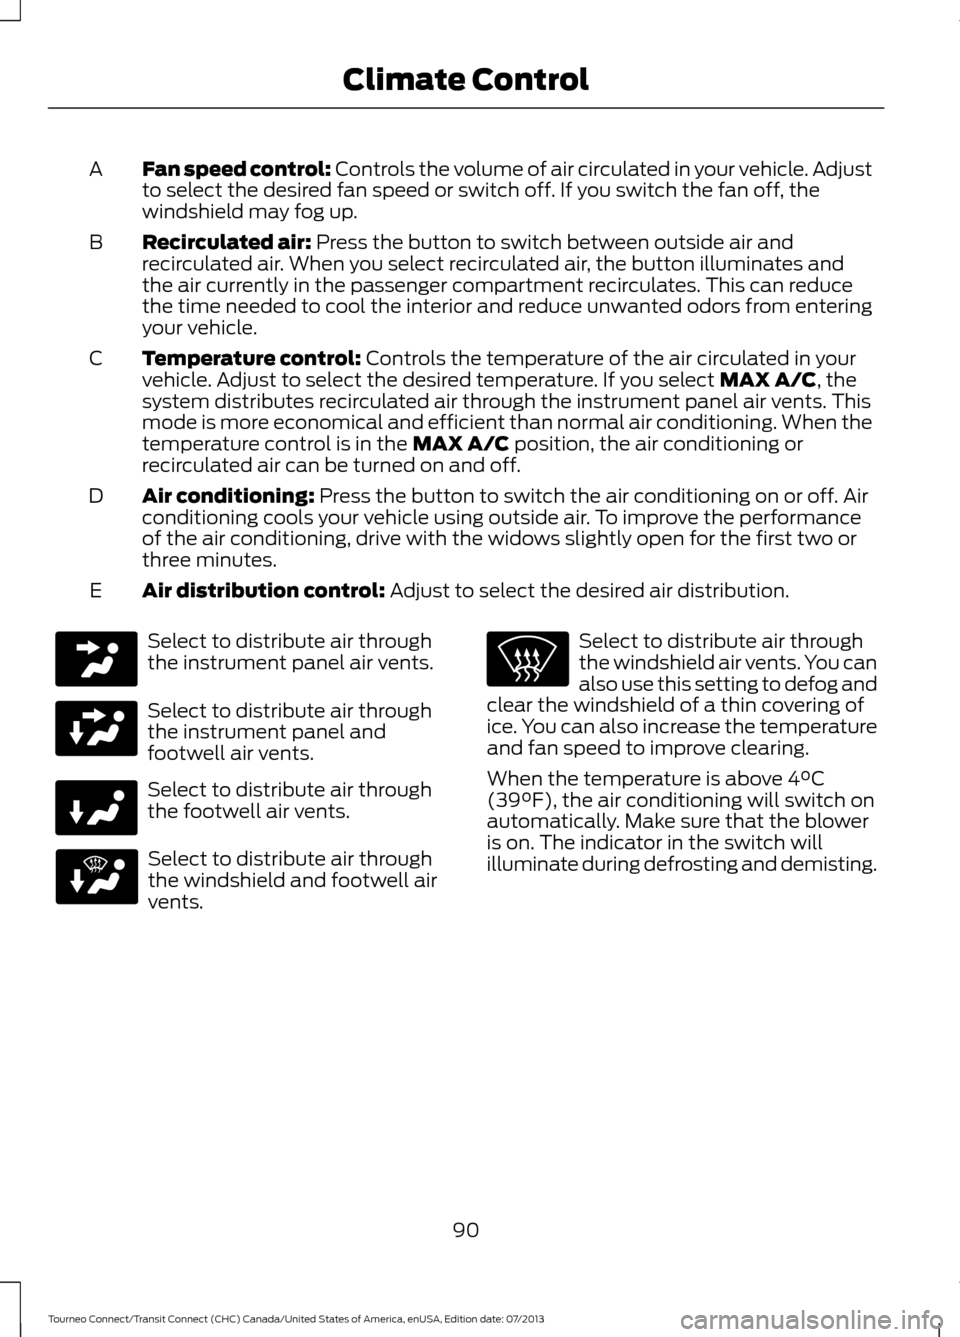
Fan speed control: Controls the volume of air circulated in your vehicle. Adjust
to select the desired fan speed or switch off. If you switch the fan off, the
windshield may fog up.
A
Recirculated air:
Press the button to switch between outside air and
recirculated air. When you select recirculated air, the button illuminates and
the air currently in the passenger compartment recirculates. This can reduce
the time needed to cool the interior and reduce unwanted odors from entering
your vehicle.
B
Temperature control:
Controls the temperature of the air circulated in your
vehicle. Adjust to select the desired temperature. If you select MAX A/C, the
system distributes recirculated air through the instrument panel air vents. This
mode is more economical and efficient than normal air conditioning. When the
temperature control is in the
MAX A/C position, the air conditioning or
recirculated air can be turned on and off.
C
Air conditioning:
Press the button to switch the air conditioning on or off. Air
conditioning cools your vehicle using outside air. To improve the performance
of the air conditioning, drive with the widows slightly open for the first two or
three minutes.
D
Air distribution control:
Adjust to select the desired air distribution.
E Select to distribute air through
the instrument panel air vents.
Select to distribute air through
the instrument panel and
footwell air vents.
Select to distribute air through
the footwell air vents.
Select to distribute air through
the windshield and footwell air
vents. Select to distribute air through
the windshield air vents. You can
also use this setting to defog and
clear the windshield of a thin covering of
ice. You can also increase the temperature
and fan speed to improve clearing.
When the temperature is above 4°C
(39°F), the air conditioning will switch on
automatically. Make sure that the blower
is on. The indicator in the switch will
illuminate during defrosting and demisting.
90
Tourneo Connect/Transit Connect (CHC) Canada/United States of America, enUSA, Edition date: 07/2013 Climate Control
Page 94 of 411
AUTOMATIC CLIMATE CONTROL (If Equipped)
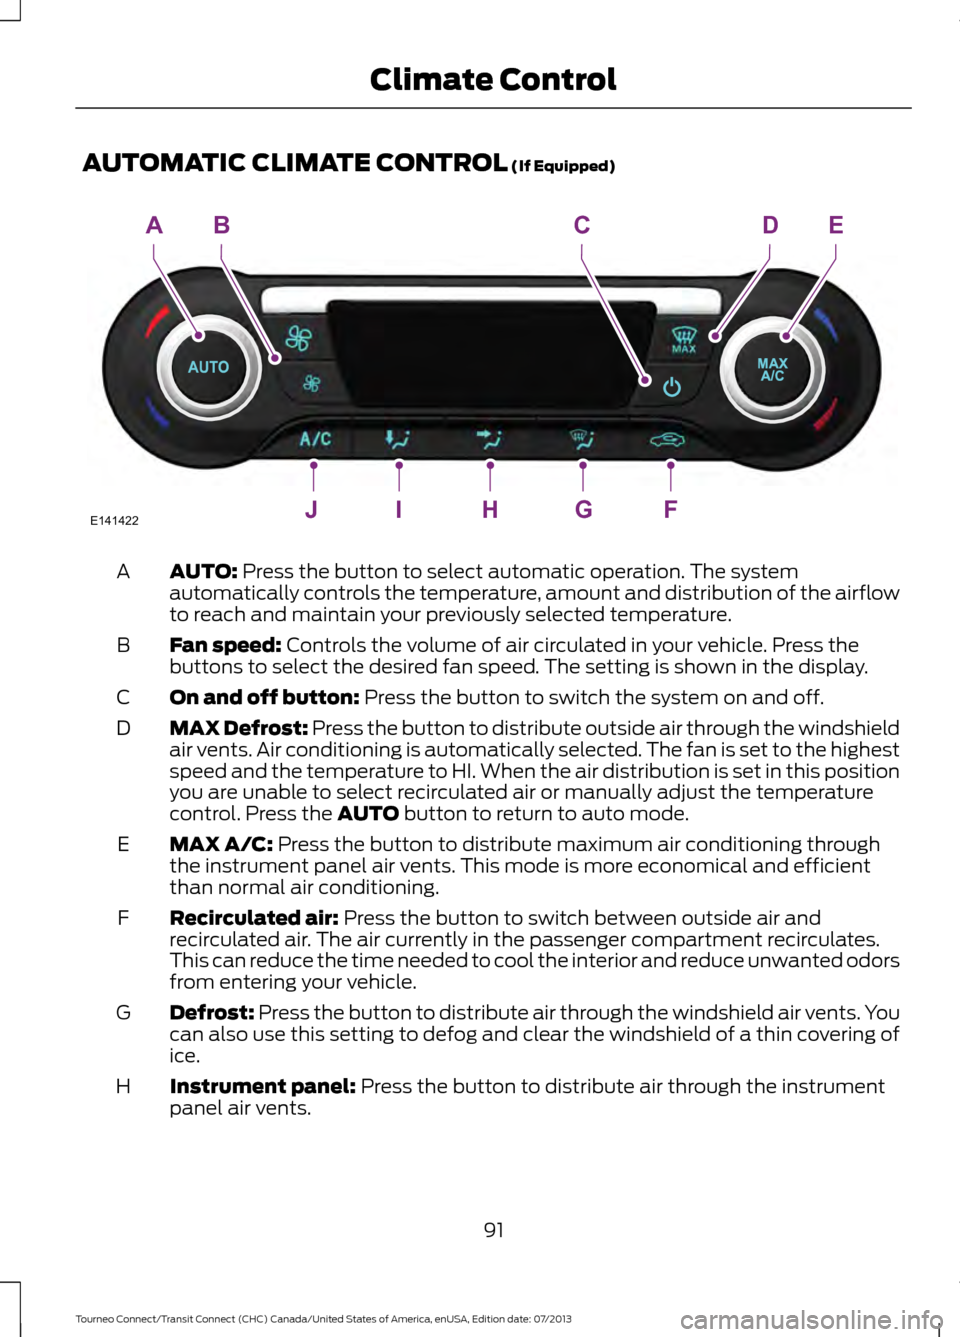
AUTO:
Press the button to select automatic operation. The system
automatically controls the temperature, amount and distribution of the airflow
to reach and maintain your previously selected temperature.
A
Fan speed:
Controls the volume of air circulated in your vehicle. Press the
buttons to select the desired fan speed. The setting is shown in the display.
B
On and off button:
Press the button to switch the system on and off.
C
MAX Defrost:
Press the button to distribute outside air through the windshield
air vents. Air conditioning is automatically selected. The fan is set to the highest
speed and the temperature to HI. When the air distribution is set in this position
you are unable to select recirculated air or manually adjust the temperature
control. Press the
AUTO button to return to auto mode.
D
MAX A/C:
Press the button to distribute maximum air conditioning through
the instrument panel air vents. This mode is more economical and efficient
than normal air conditioning.
E
Recirculated air:
Press the button to switch between outside air and
recirculated air. The air currently in the passenger compartment recirculates.
This can reduce the time needed to cool the interior and reduce unwanted odors
from entering your vehicle.
F
Defrost:
Press the button to distribute air through the windshield air vents. You
can also use this setting to defog and clear the windshield of a thin covering of
ice.
G
Instrument panel:
Press the button to distribute air through the instrument
panel air vents.
H
91
Tourneo Connect/Transit Connect (CHC) Canada/United States of America, enUSA, Edition date: 07/2013 Climate ControlE141422JIHGF
ABCDE
Page 123 of 411
To use SelectShift, move the gearshift
lever into S (Sport). Use the +/- buttons
on the side of your gearshift lever to
manually change gears.
•
Press the (+) button to upshift.
• Press the (-) button to downshift.
Note: After you have assumed manual
control with SelectShift your vehicle will
remain in this mode until you return the
gearshift lever from (S) Sport, back to (D)
Drive.
Upshift to the recommended shift speeds
according to the following chart: Upshifts when accelerating (recom-
mended for best fuel economy)
Shift from:15 mph (24 km/h)
1 - 2
25 mph (40 km/h)
2 - 3
40 mph (64 km/h)
3 - 4
45 mph (72 km/h)
4 - 5
50 mph (80 km/h)
5 - 6
The instrument cluster will display the
selected gear that you are currently in and
a shift indicator arrow to assist in
optimizing shifting.
SelectShift will automatically make some
shifts for you in the event that your engine
speed is running at too high, or to low an
RPM.
Note: Engine damage may occur if
excessive engine revving is held without
shifting.
Brake-Shift Interlock WARNINGS
Do not drive your vehicle until you
verify that the brake lamps are
working. WARNINGS
When doing this procedure, you will
be taking the vehicle out of park
which means the vehicle can roll
freely. To avoid unwanted vehicle
movement, always fully set the parking
brake prior to doing this procedure. Use
wheel chocks if appropriate. If the parking brake is fully released,
but the brake warning lamp remains
illuminated, the brakes may not be
working properly. See your authorized
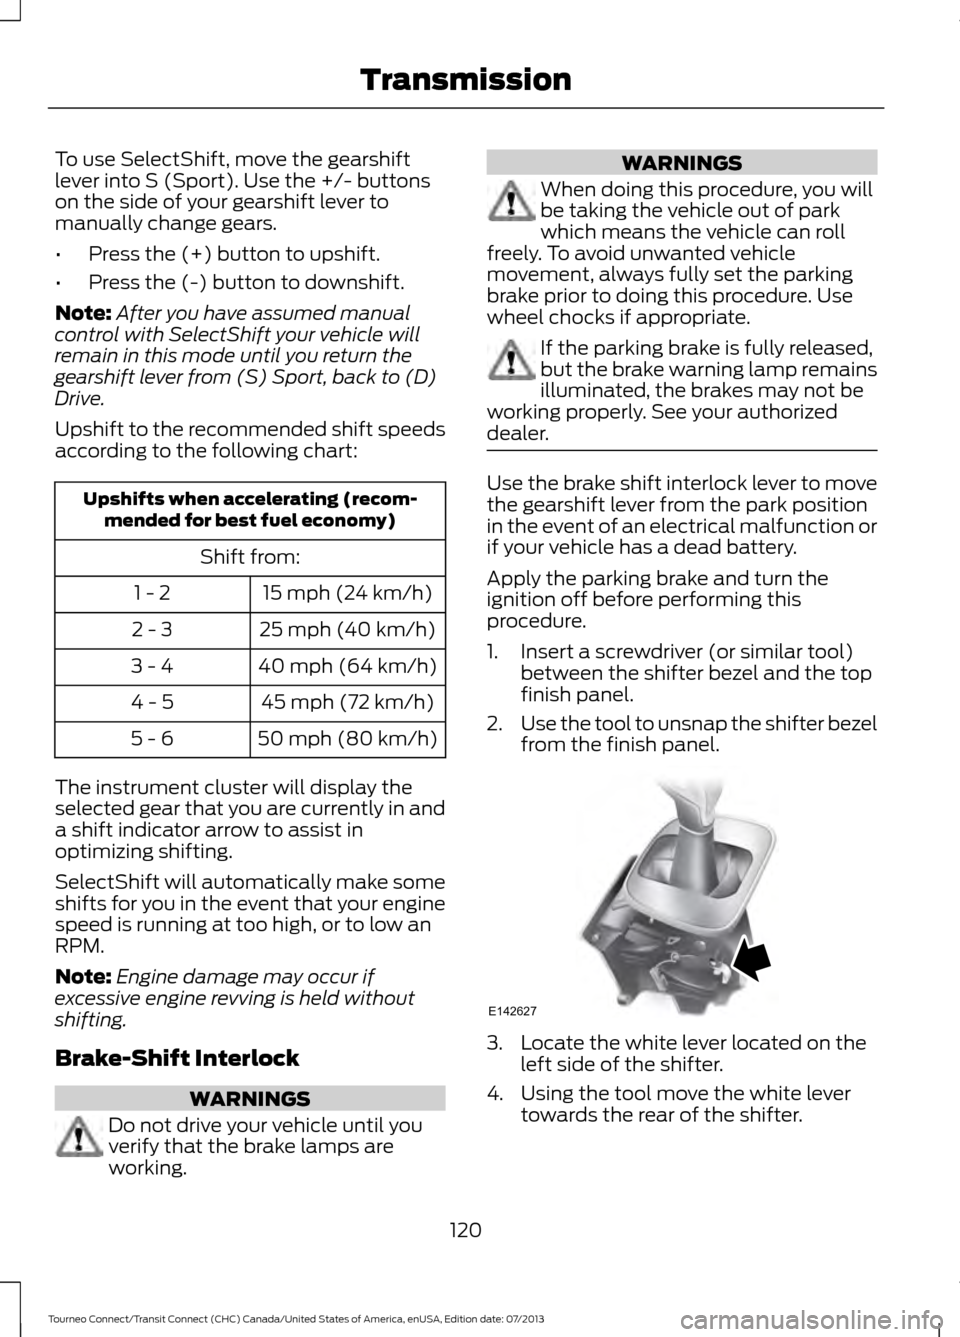
dealer. Use the brake shift interlock lever to move
the gearshift lever from the park position
in the event of an electrical malfunction or
if your vehicle has a dead battery.
Apply the parking brake and turn the
ignition off before performing this
procedure.
1. Insert a screwdriver (or similar tool)
between the shifter bezel and the top
finish panel.
2. Use the tool to unsnap the shifter bezel
from the finish panel. 3. Locate the white lever located on the
left side of the shifter.
4. Using the tool move the white lever towards the rear of the shifter.
120
Tourneo Connect/Transit Connect (CHC) Canada/United States of America, enUSA, Edition date: 07/2013 TransmissionE142627
Page 154 of 411
You can tow your vehicle from the front
with wheel lift equipment to raise the front
wheels off the ground. We recommend
that you place the rear wheels on a dolly
to prevent damage to the rear of your
vehicle.
You can tow your vehicle from the rear with
wheel lift equipment.
Note:
You must place the front wheels on
a dolly to prevent damage to the
transmission.
TOWING THE VEHICLE ON
FOUR WHEELS
Emergency Towing
If your vehicle is disabled and you have no
access to a tow dolly, car-hauling trailer or
a flatbed transport vehicle, it can only be
flat-towed with all wheels on the ground
under the following conditions:
• Your vehicle is facing forward so that
it is towed in a forward direction.
• The transmission selector lever is
placed in position N. If the transmission
gear shift lever cannot be moved to
position
N, it may need to be
overridden. See Automatic
Transmission (page 119).
• Maximum speed is 35 mph (56 km/h).
• Maximum distance is 50 miles (80
kilometers).
Drive off slowly and smoothly without
jerking the vehicle that is being towed.
You must only use the towing eye that was
delivered with your vehicle. See
Towing
Points (page 149).
Tow ropes or rigid towing bars must be
placed on the same side. For example; right
hand rear towing point to right hand front
towing point. You must use a tow rope or rigid towing
bar that is of the correct strength for the
weight of the towing vehicle and the
vehicle that is being towed.
Note:
Using a rigid towing bar is the safest
way to tow a vehicle.
The weight of the vehicle that is being
towed must not exceed the weight of the
towing vehicle.
Recreational Vehicle Towing
Note: Put your climate control system in
recirculated air mode to prevent exhaust
fumes from entering the vehicle. See
Climate Control
(page 88).
Follow these guidelines if you have a need
for recreational (RV) towing. An example
of recreational towing would be towing
your vehicle behind a motorhome. We
designed these guidelines to prevent
damage to your transmission.
Front-wheel drive vehicles
CANNOT be
flat-towed (all wheels on the ground), as
transmission damage may occur. You can
tow your vehicle with the front wheels off
the ground by using a tow dolly. If you are
using a tow dolly, follow the instructions
specified by the equipment provider.
151
Tourneo Connect/Transit Connect (CHC) Canada/United States of America, enUSA, Edition date: 07/2013 Towing