auto door lock FORD TRANSIT CONNECT 2019 Owners Manual
[x] Cancel search | Manufacturer: FORD, Model Year: 2019, Model line: TRANSIT CONNECT, Model: FORD TRANSIT CONNECT 2019Pages: 493, PDF Size: 7.43 MB
Page 6 of 493
Doors and Locks
Locking and Unlocking
................................63
Sliding Door ....................................................
66
Keyless Entry ...................................................
67
Liftgate
Manual Liftgate .............................................
69
Security
Passive Anti-Theft System ........................
70
Anti-Theft Alarm ............................................
72
Steering Wheel
Adjusting the Steering Wheel ...................
74
Wipers and Washers
Windshield Wipers ........................................
75
Autowipers .......................................................
75
Windshield Washers ....................................
76
Rear Window Wiper and Washers ...........
77
Lighting
General Information .....................................
78
Lighting Control .............................................
78
Autolamps .......................................................
79
Instrument Lighting Dimmer .....................
79
Headlamp Exit Delay ..................................
80
Automatic High Beam Control ................
80
Front Fog Lamps ............................................
81
Cornering Lamps ............................................
81
Direction Indicators ......................................
82
Interior Lamps ................................................
82
Windows and Mirrors
Power Windows - Vehicles With: Rear Power Windows .......................................
83
Power Windows - Vehicles With: One-Touch Open Driver Window .......
84
Global Opening .............................................
84
Exterior Mirrors ...............................................
84Interior Mirror - Vehicles Without:
Auto-Dimming Interior Mirror ...............
85
Interior Mirror - Vehicles With: Auto-Dimming Interior Mirror ...............
85
Sun Shades .....................................................
85
Instrument Cluster
Gauges ..............................................................
87
Warning Lamps and Indicators ...............
88
Audible Warnings and Indicators ...........
90
Information Displays
General Information .....................................
92
Clock ..................................................................
94
Trip Computer ................................................
94
Personalized Settings .................................
94
Information Messages ................................
94
Climate Control
Manual Climate Control ...........................
108
Automatic Climate Control .....................
109
Hints on Controlling the Interior Climate - Vehicles With: Automatic
Temperature Control ................................
111
Hints on Controlling the Interior Climate - Vehicles With: Manual Temperature
Control ..........................................................
112
Rear Passenger Climate Controls ...........
112
Heated Windshield .......................................
113
Heated Rear Window ..................................
113
Heated Exterior Mirrors ...............................
113
Cabin Air Filter ................................................
113
Seats
Sitting in the Correct Position ..................
115
Head Restraints .............................................
115
Manual Seats ..................................................
117
Power Seats ...................................................
119
Rear Seats - Short Wheelbase ...............
120
2
2019 Transit Connect (CHC) Canada/United States of America, CG3739en enUSA, Edition date: 201804, First-Printing Table of Contents
Page 67 of 493
LOCKING AND UNLOCKING
Remote Control
You can use the remote control at any
time.
Unlocking the Doors
The position lamps illuminate when you
unlock the doors. When you switch the
ignition on, they automatically turn off.
Note:
You can unlock the driver door with
the key. Use the key when the remote
control is not functioning.
Note: When you leave your vehicle
unattended for several weeks, the remote
control turns off. Your vehicle must be
unlocked and the engine started using the
key. Unlocking and starting your vehicle
once enables the remote control.
One-Stage Unlocking Press the button to unlock all
doors. The direction indicators
will flash.
Two-Stage Unlocking Press the button to unlock the
front doors. Press the button
again within three seconds to
unlock all doors. The direction indicators
will flash.
Reprogramming the Unlocking
Function
When you press the unlock button only the
driver and passenger doors unlock.
Pressing the unlock button again unlocks
all doors.
You can reprogram the unlocking function
so that all doors unlock when you press
the unlock button once.
1. Switch the ignition off. 2. Press and hold both the lock and
unlock buttons on the remote control
until the direction indicators flash twice
to confirm the change.
To return to the original unlocking function,
repeat the process.
Locking the Doors Press the button to lock all
doors. The direction indicators
will flash.
Press the button again within three
seconds to confirm that all the doors are
closed. The doors will lock again, the horn
will sound and the direction indicators will
flash if all the doors and the liftgate are
closed.
Note: If any door or the litigate is open, or
if the hood is open on vehicles with an
anti-theft alarm or remote start, the horn
does not sound.
Locking and Unlocking the Doors
From Inside
The power door lock control is on the driver
and front passenger door panels. Press the button to lock or
unlock all the doors. The lamp
illuminates with the doors
locked.
Opening the Double Rear Doors
Note: If there is a ladder fitted to the rear
cargo door, do not open the door fully if the
side-loading door is open.
63
2019 Transit Connect (CHC) Canada/United States of America, CG3739en enUSA, Edition date: 201804, First-Printing Doors and Locks E102566
Page 68 of 493
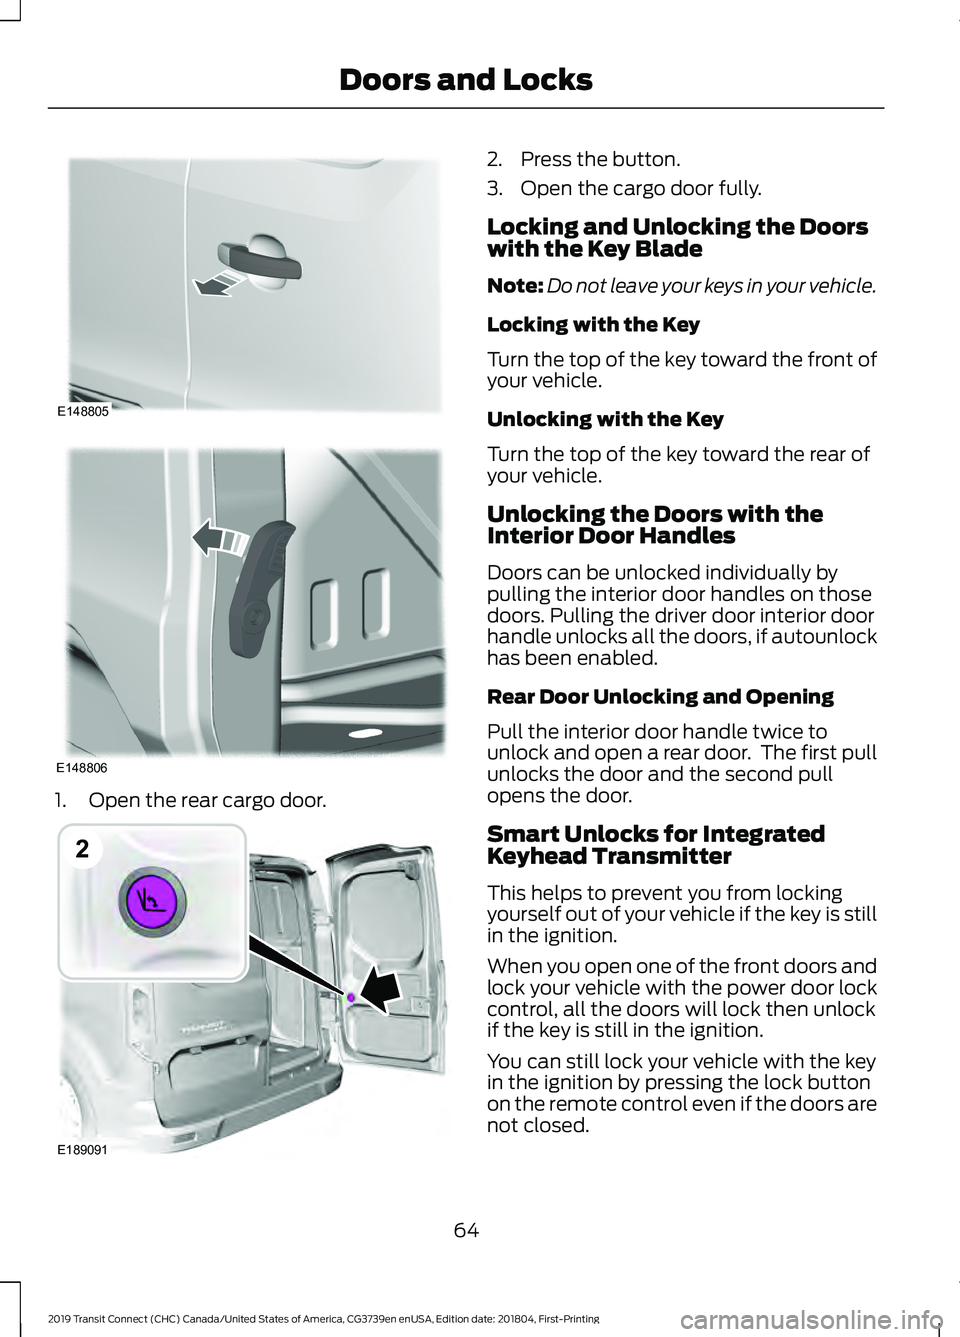
1. Open the rear cargo door. 2. Press the button.
3. Open the cargo door fully.
Locking and Unlocking the Doors
with the Key Blade
Note:
Do not leave your keys in your vehicle.
Locking with the Key
Turn the top of the key toward the front of
your vehicle.
Unlocking with the Key
Turn the top of the key toward the rear of
your vehicle.
Unlocking the Doors with the
Interior Door Handles
Doors can be unlocked individually by
pulling the interior door handles on those
doors. Pulling the driver door interior door
handle unlocks all the doors, if autounlock
has been enabled.
Rear Door Unlocking and Opening
Pull the interior door handle twice to
unlock and open a rear door. The first pull
unlocks the door and the second pull
opens the door.
Smart Unlocks for Integrated
Keyhead Transmitter
This helps to prevent you from locking
yourself out of your vehicle if the key is still
in the ignition.
When you open one of the front doors and
lock your vehicle with the power door lock
control, all the doors will lock then unlock
if the key is still in the ignition.
You can still lock your vehicle with the key
in the ignition by pressing the lock button
on the remote control even if the doors are
not closed.
64
2019 Transit Connect (CHC) Canada/United States of America, CG3739en enUSA, Edition date: 201804, First-Printing Doors and LocksE148805 E148806 E189091
2
Page 69 of 493
If both front doors are closed, you can lock
your vehicle by any method, regardless of
whether the key is in the ignition or not.
Autolock
Autolock locks all the doors and liftgate
when all of the following occur:
•
All doors are closed.
• The ignition is on.
• Your vehicle is moving at a speed
greater than 4 mph (7 km/h) for more
than two seconds. Autounlock
Autounlock unlocks all the doors when all
of the following occur:
•
The ignition is on, all doors are closed,
and your vehicle is moving at a speed
greater than
4 mph (7 km/h) for more
than two seconds.
• Your vehicle has come to a stop and
you switch the ignition off or to the
accessory position.
• The driver door is opened within 10
minutes of you switching the ignition
off or to the accessory position.
Note: The doors will not autounlock if your
vehicle has been electronically locked after
you switch the ignition off and before you
open the driver door.
Switching Autounlock On or Off
To switch autounlock on or off, use the information display controls on the steering
wheel to select the following: Action
Menu Item
Press the menu button.
Settings
Press the
OK button.
Vehicle Settings
Press the
OK button.
Locks
Press the
OK button.
Autounlock
Emergency Locking with the Key
Note: If the child safety locks are on and
you pull the interior handle, you only switch
off the emergency locking, not the child
safety lock. You can only open the doors
using the external door handle.
Note: When the doors have been unlocked
using this method, the doors must be locked
individually until the central locking function
has been repaired. If the central locking function does not
operate, lock the doors individually using
the key in the position shown.
65
2019 Transit Connect (CHC) Canada/United States of America, CG3739en enUSA, Edition date: 201804, First-Printing Doors and Locks
Page 71 of 493
KEYLESS ENTRY
General Information
The system will not function if:
•
The vehicle battery has no charge.
• The passive key battery has no charge.
• The passive key frequencies are
jammed.
• The door handle is not clean.
Note: If the system does not function, you
will need to use the key blade to lock and
unlock your vehicle.
The system allows you to operate your
vehicle without the use of a key or remote
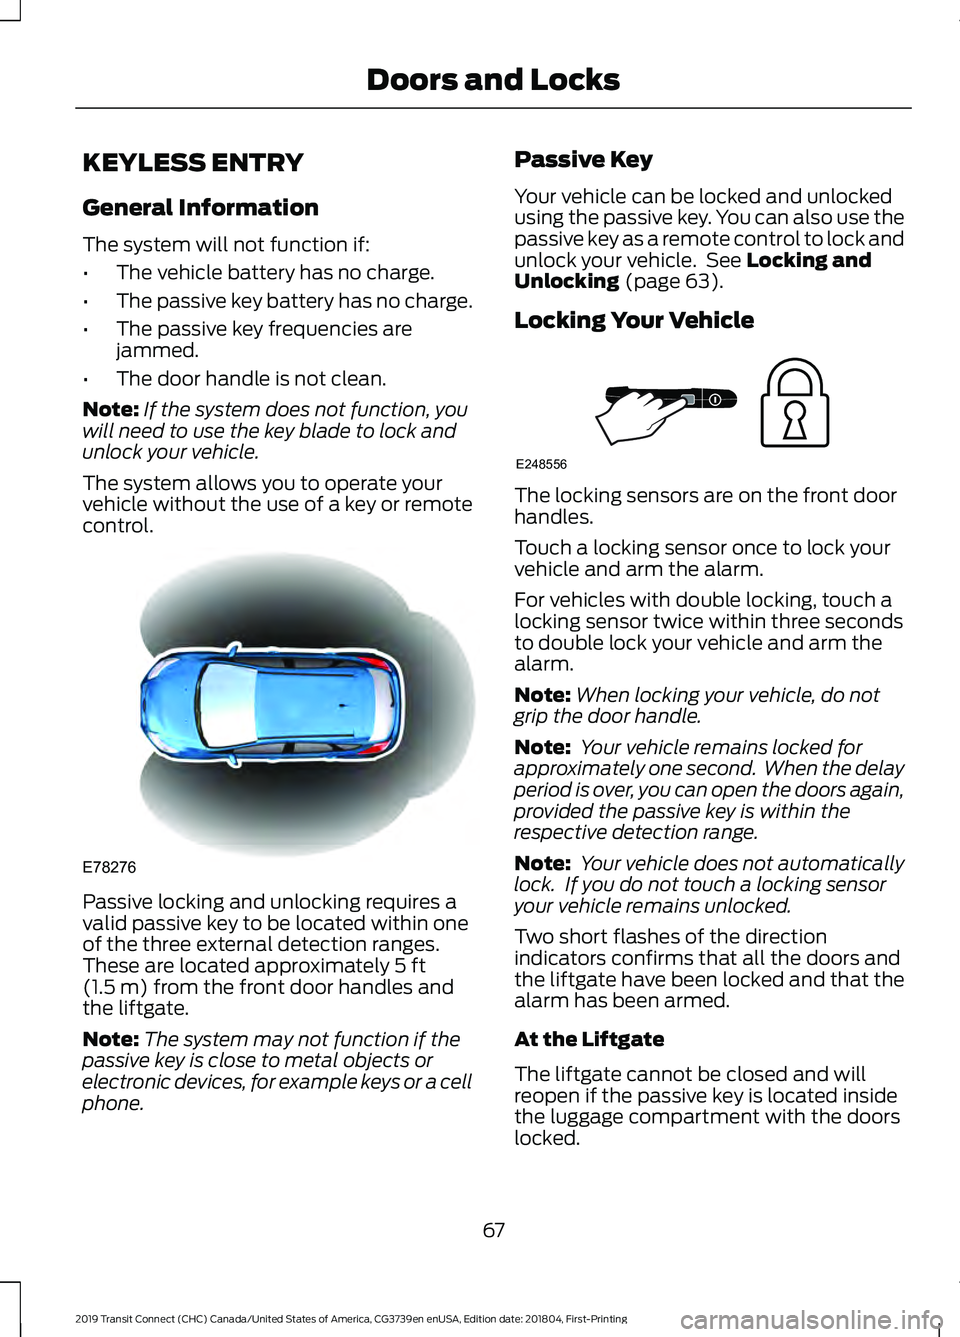
control. Passive locking and unlocking requires a
valid passive key to be located within one
of the three external detection ranges.
These are located approximately 5 ft
(1.5 m) from the front door handles and
the liftgate.
Note: The system may not function if the
passive key is close to metal objects or
electronic devices, for example keys or a cell
phone. Passive Key
Your vehicle can be locked and unlocked
using the passive key. You can also use the
passive key as a remote control to lock and
unlock your vehicle. See
Locking and
Unlocking (page 63).
Locking Your Vehicle The locking sensors are on the front door
handles.
Touch a locking sensor once to lock your
vehicle and arm the alarm.
For vehicles with double locking, touch a
locking sensor twice within three seconds
to double lock your vehicle and arm the
alarm.
Note:
When locking your vehicle, do not
grip the door handle.
Note: Your vehicle remains locked for
approximately one second. When the delay
period is over, you can open the doors again,
provided the passive key is within the
respective detection range.
Note: Your vehicle does not automatically
lock. If you do not touch a locking sensor
your vehicle remains unlocked.
Two short flashes of the direction
indicators confirms that all the doors and
the liftgate have been locked and that the
alarm has been armed.
At the Liftgate
The liftgate cannot be closed and will
reopen if the passive key is located inside
the luggage compartment with the doors
locked.
67
2019 Transit Connect (CHC) Canada/United States of America, CG3739en enUSA, Edition date: 201804, First-Printing Doors and LocksE78276 E248556
Page 74 of 493
PASSIVE ANTI-THEFT
SYSTEM
Note:
The system is not compatible with
non-Ford aftermarket remote start systems.
Use of these systems may result in vehicle
starting problems and a loss of security
protection.
Note: Metallic objects, electronic devices
or a second programmed key on the same
key chain may cause vehicle starting
problems if they are too close to the key
when starting the engine. Prevent these
objects from touching the programmed key
while starting the engine. Switch the ignition
off, move all objects on the key chain away
from the programmed key and restart the
engine if a problem occurs.
Note: Do not leave a duplicate
programmed key in your vehicle. Always
take your keys and lock all doors when
leaving your vehicle.
SecuriLock®
The system is an engine immobilization
system. It is designed to help prevent the
engine from being started unless a
programmed key for your vehicle is used.
Using an incorrectly programmed key may
prevent the engine from starting. A
message may appear in the information
display.
If you are unable to start the engine with a
programmed key, a malfunction has
happened and a message may appear in
the information display.
Automatic Arming
The engine immobilization system arms
immediately after you switch the ignition
off. Automatic Disarming
Switching the ignition on with a
programmed key disarms the engine
immobilization system.
Replacement Keys
If your keys are lost or stolen and you do
not have a spare programmed key, you will
need to have your vehicle towed to an
authorized dealer. You need to erase the
programmed keys from your vehicle and
program new keys.
Store an extra programmed key away from
your vehicle in a safe place to help prevent
any inconveniences. We recommend that
you contact an authorized dealer to
purchase additional spare or replacement
keys.
Note:
Your vehicle comes with two keys.
Programming a Remote Flip Key
The procedure programs both the vehicle
immobilizer keycode and the remote entry
portion of the remote control to your
vehicle.
To program a new key, you require two
programmed keys and one unprogrammed
key with you in your vehicle.
We recommend that you contact an
authorized dealer to have the key
programmed if you do not have two
programmed keys.
Make sure that you complete the
procedure within 30 seconds.
Stop and wait for at least one minute
before you start again if you miss a step.
Note: You can program a maximum of six
keys to your vehicle.
Read the entire procedure before you
begin.
1. Close all the doors.
70
2019 Transit Connect (CHC) Canada/United States of America, CG3739en enUSA, Edition date: 201804, First-Printing Security
Page 84 of 493
HEADLAMP EXIT DELAY
After you switch the ignition off, you can
switch the headlamps on by pulling the
direction indicator lever toward you. You
will hear a short tone. The headlamps will
switch off automatically after three
minutes with any door open or 30 seconds
after the last door has been closed. You
can cancel this feature by pulling the
direction indicator toward you again or
switching the ignition on.
AUTOMATIC HIGH BEAM
CONTROL
WARNING: The system does not
relieve you of your responsibility to drive
with due care and attention. You may need
to override the system if it does not turn
the high beams on or off.
The system turns on high beams if it is dark
enough and no other traffic is present. If it
detects an approaching vehicle ’s
headlamps or tail lamps, or street lighting
ahead, the system turns off high beams
before they can distract other road users.
Low beams remain on.
Note: The system may not operate properly
if the sensor is blocked. Keep the windshield
free from obstruction or damage.
Note: The system may not operate properly
in cold or inclement conditions. You can
switch on the high beams by overriding the
system.
Note: If the system detects a blockage, for
example bird droppings, bug splatter, snow
or ice, the system goes into low beam mode
until you clear the blockage. A message may
appear in the information display if the
camera is blocked. Note:
Using much larger tires or equipping
vehicle accessories such as snowplows can
modify your vehicle's ride height and
degrade automatic high beam control
performance.
A camera sensor, centrally mounted
behind the windshield of your vehicle,
continuously monitors conditions to turn
the high beams on and off.
Once the system is active, the high beams
turn on if:
• The ambient light level is low enough.
• There is no traffic in front of your
vehicle.
• The vehicle speed is greater than
approximately
32 mph (51 km/h).
The system turns the high beams off if:
• The ambient light level is high enough
that high beams are not required.
• The system detects an approaching
vehicle's headlamps or tail lamps.
• The vehicle speed falls below
approximately
27 mph (44 km/h).
• The system detects severe rain, snow
or fog.
• The camera is blocked.
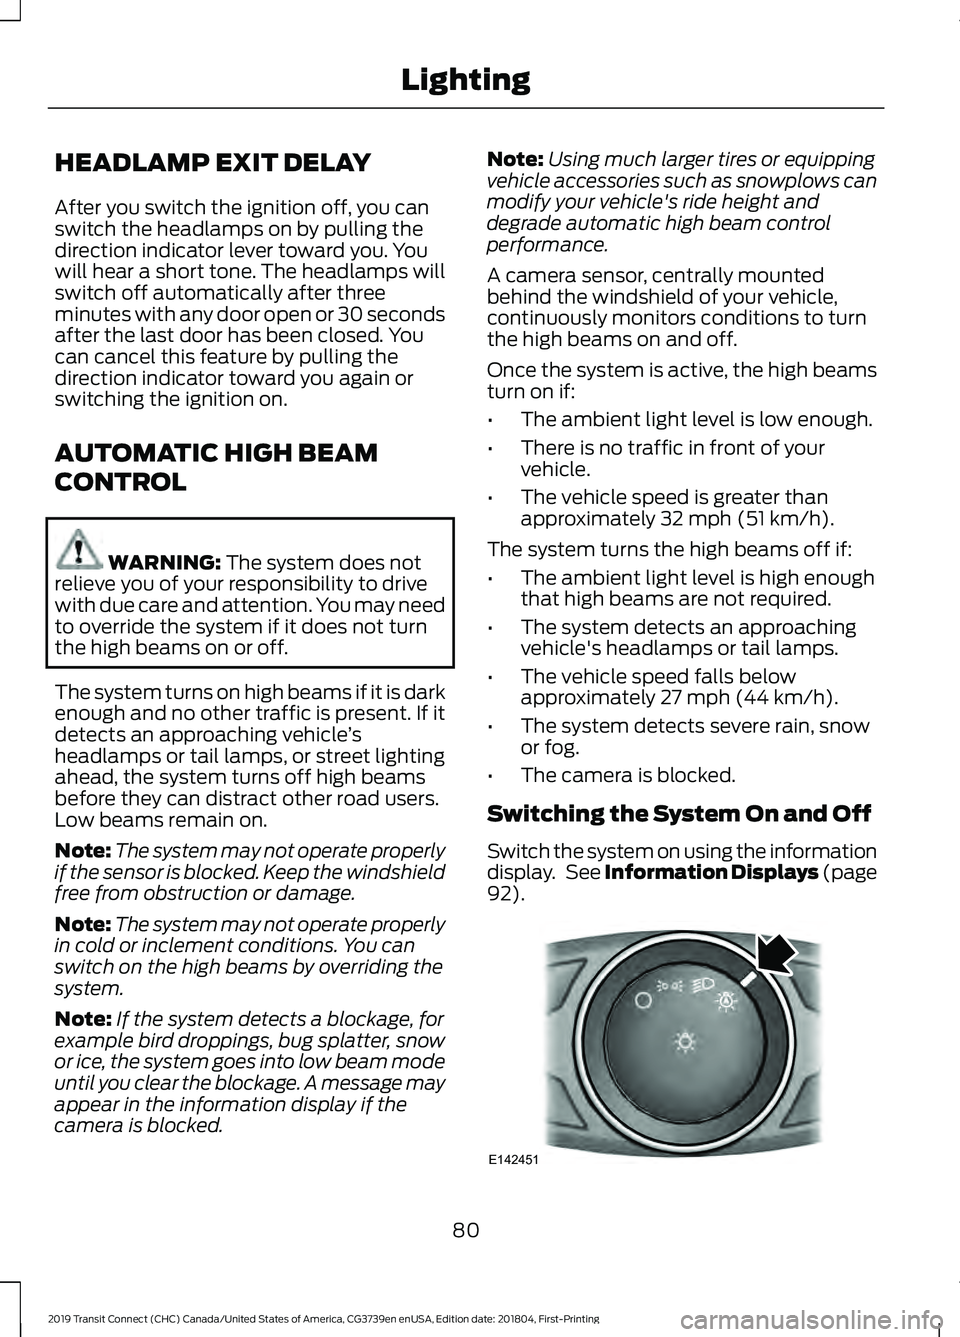
Switching the System On and Off
Switch the system on using the information
display. See Information Displays (page
92
). 80
2019 Transit Connect (CHC) Canada/United States of America, CG3739en enUSA, Edition date: 201804, First-Printing LightingE142451
Page 86 of 493
DIRECTION INDICATORS
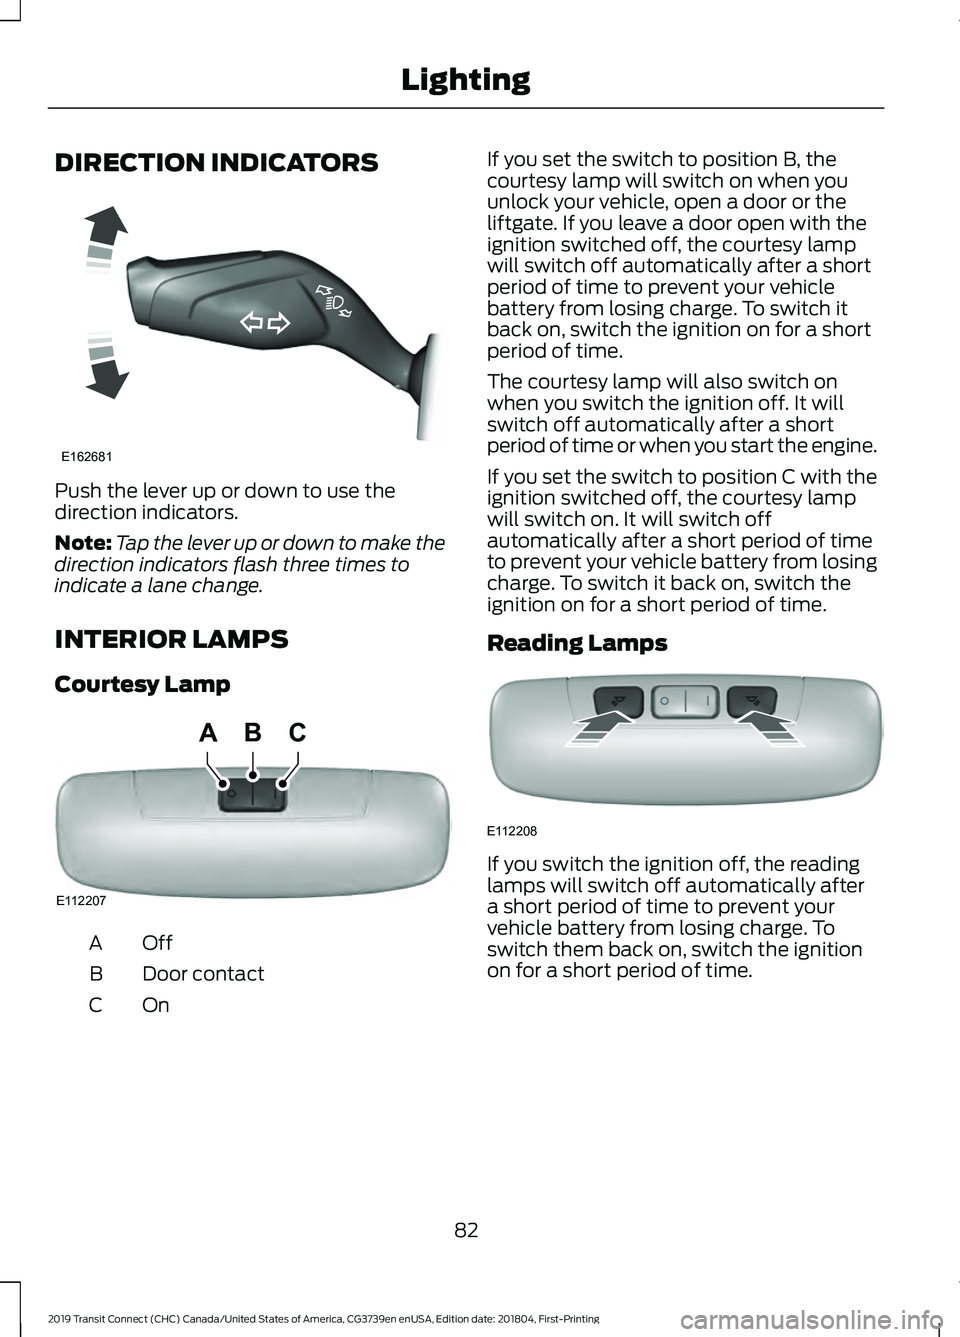
Push the lever up or down to use the
direction indicators.
Note:
Tap the lever up or down to make the
direction indicators flash three times to
indicate a lane change.
INTERIOR LAMPS
Courtesy Lamp OffA
Door contact
B
OnC If you set the switch to position B, the
courtesy lamp will switch on when you
unlock your vehicle, open a door or the
liftgate. If you leave a door open with the
ignition switched off, the courtesy lamp
will switch off automatically after a short
period of time to prevent your vehicle
battery from losing charge. To switch it
back on, switch the ignition on for a short
period of time.
The courtesy lamp will also switch on
when you switch the ignition off. It will
switch off automatically after a short
period of time or when you start the engine.
If you set the switch to position C with the
ignition switched off, the courtesy lamp
will switch on. It will switch off
automatically after a short period of time
to prevent your vehicle battery from losing
charge. To switch it back on, switch the
ignition on for a short period of time.
Reading Lamps
If you switch the ignition off, the reading
lamps will switch off automatically after
a short period of time to prevent your
vehicle battery from losing charge. To
switch them back on, switch the ignition
on for a short period of time.
82
2019 Transit Connect (CHC) Canada/United States of America, CG3739en enUSA, Edition date: 201804, First-Printing LightingE162681 E112207
BCA E112208
Page 263 of 493
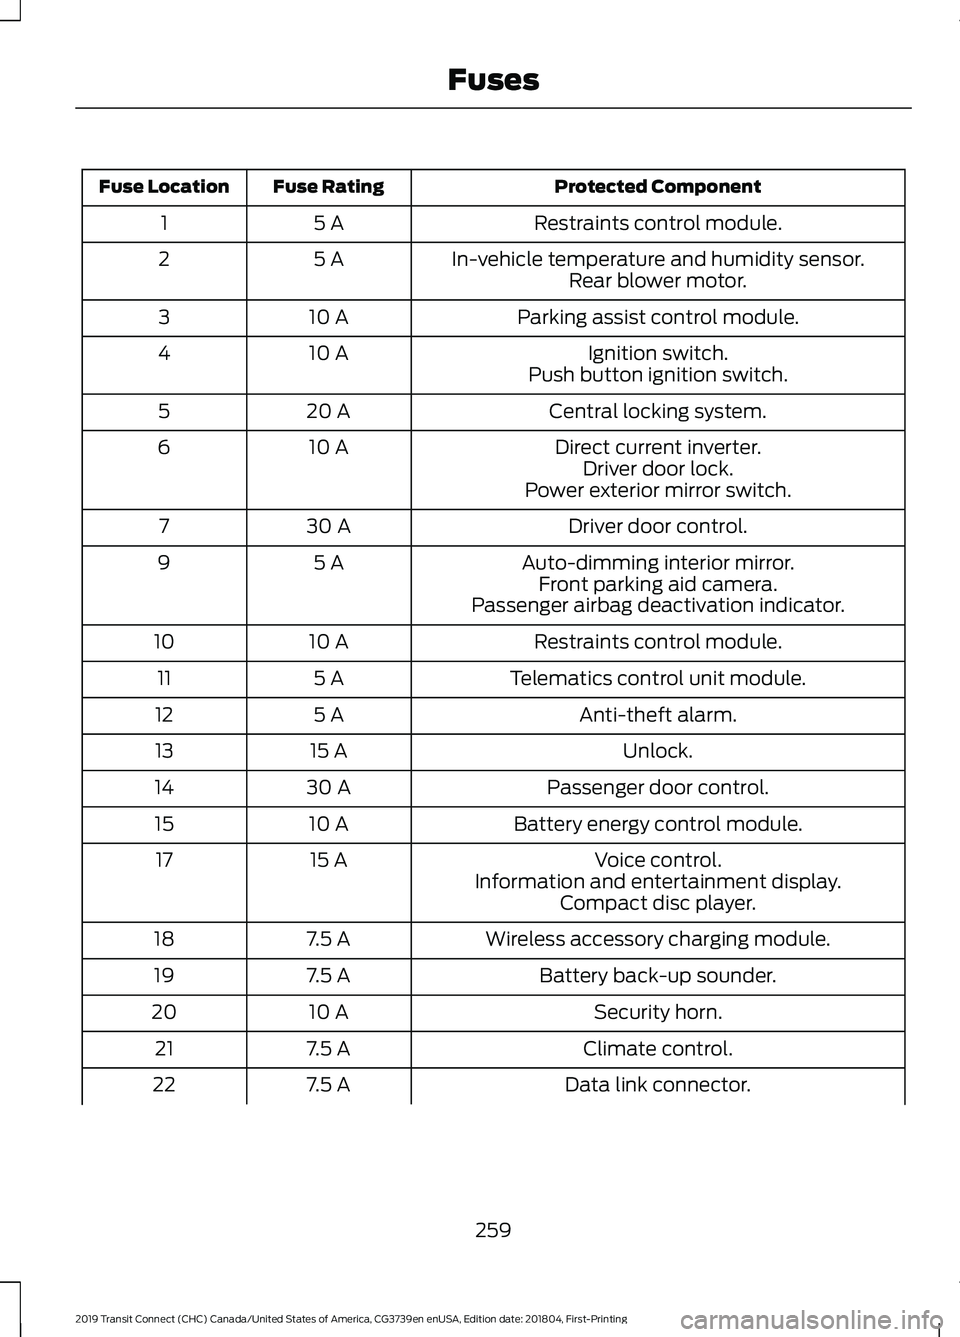
Protected Component
Fuse Rating
Fuse Location
Restraints control module.
5 A
1
In-vehicle temperature and humidity sensor.
5 A
2
Rear blower motor.
Parking assist control module.
10 A
3
Ignition switch.
10 A
4
Push button ignition switch.
Central locking system.
20 A
5
Direct current inverter.
10 A
6
Driver door lock.
Power exterior mirror switch.
Driver door control.
30 A
7
Auto-dimming interior mirror.
5 A
9
Front parking aid camera.
Passenger airbag deactivation indicator.
Restraints control module.
10 A
10
Telematics control unit module.
5 A
11
Anti-theft alarm.
5 A
12
Unlock.
15 A
13
Passenger door control.
30 A
14
Battery energy control module.
10 A
15
Voice control.
15 A
17
Information and entertainment display.Compact disc player.
Wireless accessory charging module.
7.5 A
18
Battery back-up sounder.
7.5 A
19
Security horn.
10 A
20
Climate control.
7.5 A
21
Data link connector.
7.5 A
22
259
2019 Transit Connect (CHC) Canada/United States of America, CG3739en enUSA, Edition date: 201804, First-Printing Fuses
Page 479 of 493
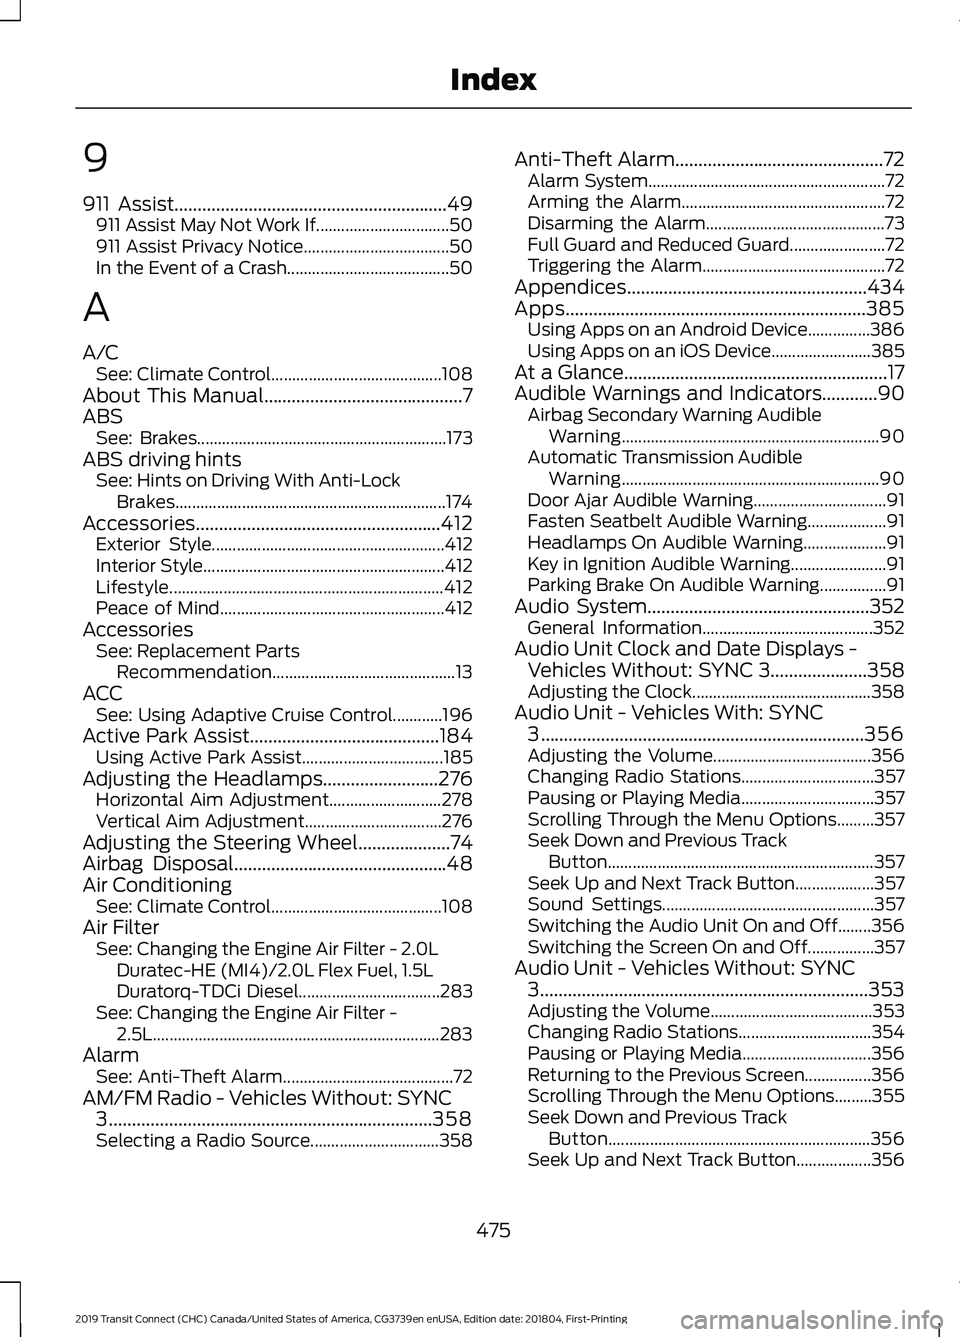
9
911 Assist...........................................................49
911 Assist May Not Work If................................ 50
911 Assist Privacy Notice................................... 50
In the Event of a Crash....................................... 50
A
A/C See: Climate Control......................................... 108
About This Manual
...........................................7
ABS See: Brakes............................................................ 173
ABS driving hints See: Hints on Driving With Anti-Lock
Brakes................................................................. 174
Accessories.....................................................412 Exterior Style........................................................ 412
Interior Style.......................................................... 412
Lifestyle.................................................................. 412
Peace of Mind...................................................... 412
Accessories See: Replacement Parts
Recommendation............................................ 13
ACC See: Using Adaptive Cruise Control............196
Active Park Assist.........................................184 Using Active Park Assist.................................. 185
Adjusting the Headlamps.........................276 Horizontal Aim Adjustment........................... 278
Vertical Aim Adjustment................................. 276
Adjusting the Steering Wheel....................74
Airbag Disposal..............................................48
Air Conditioning See: Climate Control......................................... 108
Air Filter See: Changing the Engine Air Filter - 2.0L
Duratec-HE (MI4)/2.0L Flex Fuel, 1.5L
Duratorq-TDCi Diesel.................................. 283
See: Changing the Engine Air Filter - 2.5L..................................................................... 283
Alarm See: Anti-Theft Alarm......................................... 72
AM/FM Radio - Vehicles Without: SYNC 3
......................................................................358
Selecting a Radio Source............................... 358Anti-Theft Alarm
.............................................72
Alarm System......................................................... 72
Arming the Alarm................................................. 72
Disarming the Alarm........................................... 73
Full Guard and Reduced Guard....................... 72
Triggering the Alarm............................................ 72
Appendices
....................................................434
Apps.................................................................385 Using Apps on an Android Device...............386
Using Apps on an iOS Device........................ 385
At a Glance
.........................................................17
Audible Warnings and Indicators............90 Airbag Secondary Warning Audible
Warning.............................................................. 90
Automatic Transmission Audible Warning.............................................................. 90
Door Ajar Audible Warning................................ 91
Fasten Seatbelt Audible Warning................... 91
Headlamps On Audible Warning.................... 91
Key in Ignition Audible Warning....................... 91
Parking Brake On Audible Warning................91
Audio System
................................................352
General Information......................................... 352
Audio Unit Clock and Date Displays - Vehicles Without: SYNC 3
.....................358
Adjusting the Clock........................................... 358
Audio Unit - Vehicles With: SYNC 3
......................................................................356
Adjusting the Volume...................................... 356
Changing Radio Stations................................ 357
Pausing or Playing Media................................ 357
Scrolling Through the Menu Options.........357
Seek Down and Previous Track Button................................................................ 357
Seek Up and Next Track Button................... 357
Sound Settings................................................... 357
Switching the Audio Unit On and Off........356
Switching the Screen On and Off................357
Audio Unit - Vehicles Without: SYNC 3.......................................................................353
Adjusting the Volume....................................... 353
Changing Radio Stations................................ 354
Pausing or Playing Media............................... 356
Returning to the Previous Screen................356
Scrolling Through the Menu Options.........355
Seek Down and Previous Track Button............................................................... 356
Seek Up and Next Track Button.................. 356
475
2019 Transit Connect (CHC) Canada/United States of America, CG3739en enUSA, Edition date: 201804, First-Printing Index