belt FORD WINDSTAR 1999 2.G Owners Manual
[x] Cancel search | Manufacturer: FORD, Model Year: 1999, Model line: WINDSTAR, Model: FORD WINDSTAR 1999 2.GPages: 248, PDF Size: 2.28 MB
Page 7 of 248
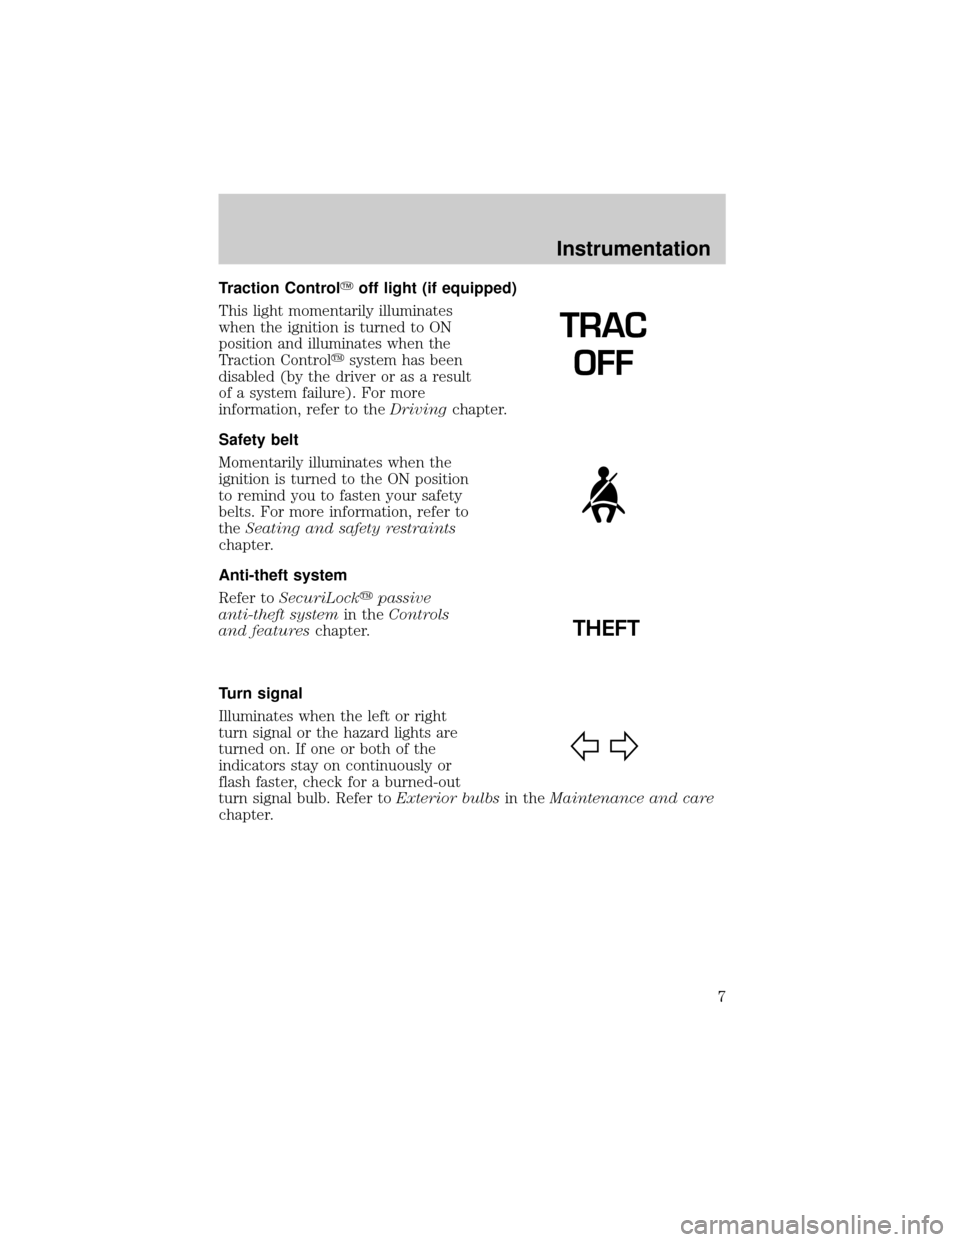
Traction ControlYoff light (if equipped)
This light momentarily illuminates
when the ignition is turned to ON
position and illuminates when the
Traction Controlysystem has been
disabled (by the driver or as a result
of a system failure). For more
information, refer to theDrivingchapter.
Safety belt
Momentarily illuminates when the
ignition is turned to the ON position
to remind you to fasten your safety
belts. For more information, refer to
theSeating and safety restraints
chapter.
Anti-theft system
Refer toSecuriLockypassive
anti-theft systemin theControls
and featureschapter.
Turn signal
Illuminates when the left or right
turn signal or the hazard lights are
turned on. If one or both of the
indicators stay on continuously or
flash faster, check for a burned-out
turn signal bulb. Refer toExterior bulbsin theMaintenance and care
chapter.
TRAC
OFF
THEFT
Instrumentation
7
Page 11 of 248
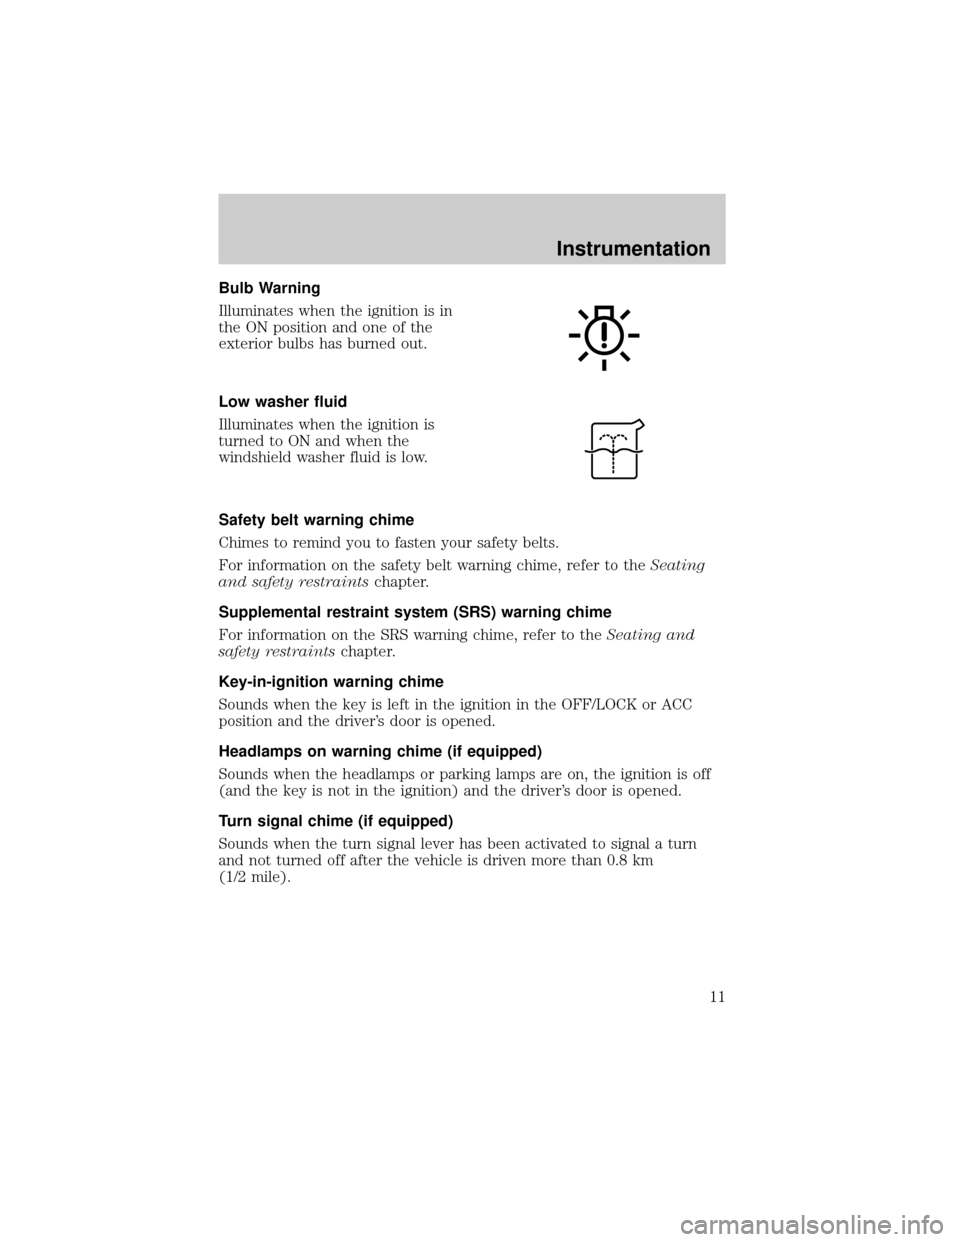
Bulb Warning
Illuminates when the ignition is in
the ON position and one of the
exterior bulbs has burned out.
Low washer fluid
Illuminates when the ignition is
turned to ON and when the
windshield washer fluid is low.
Safety belt warning chime
Chimes to remind you to fasten your safety belts.
For information on the safety belt warning chime, refer to theSeating
and safety restraintschapter.
Supplemental restraint system (SRS) warning chime
For information on the SRS warning chime, refer to theSeating and
safety restraintschapter.
Key-in-ignition warning chime
Sounds when the key is left in the ignition in the OFF/LOCK or ACC
position and the driver's door is opened.
Headlamps on warning chime (if equipped)
Sounds when the headlamps or parking lamps are on, the ignition is off
(and the key is not in the ignition) and the driver's door is opened.
Turn signal chime (if equipped)
Sounds when the turn signal lever has been activated to signal a turn
and not turned off after the vehicle is driven more than 0.8 km
(1/2 mile).
Instrumentation
11
Page 106 of 248
Always drive and ride with your seatback upright and the lap
belt snug and low across the hips.
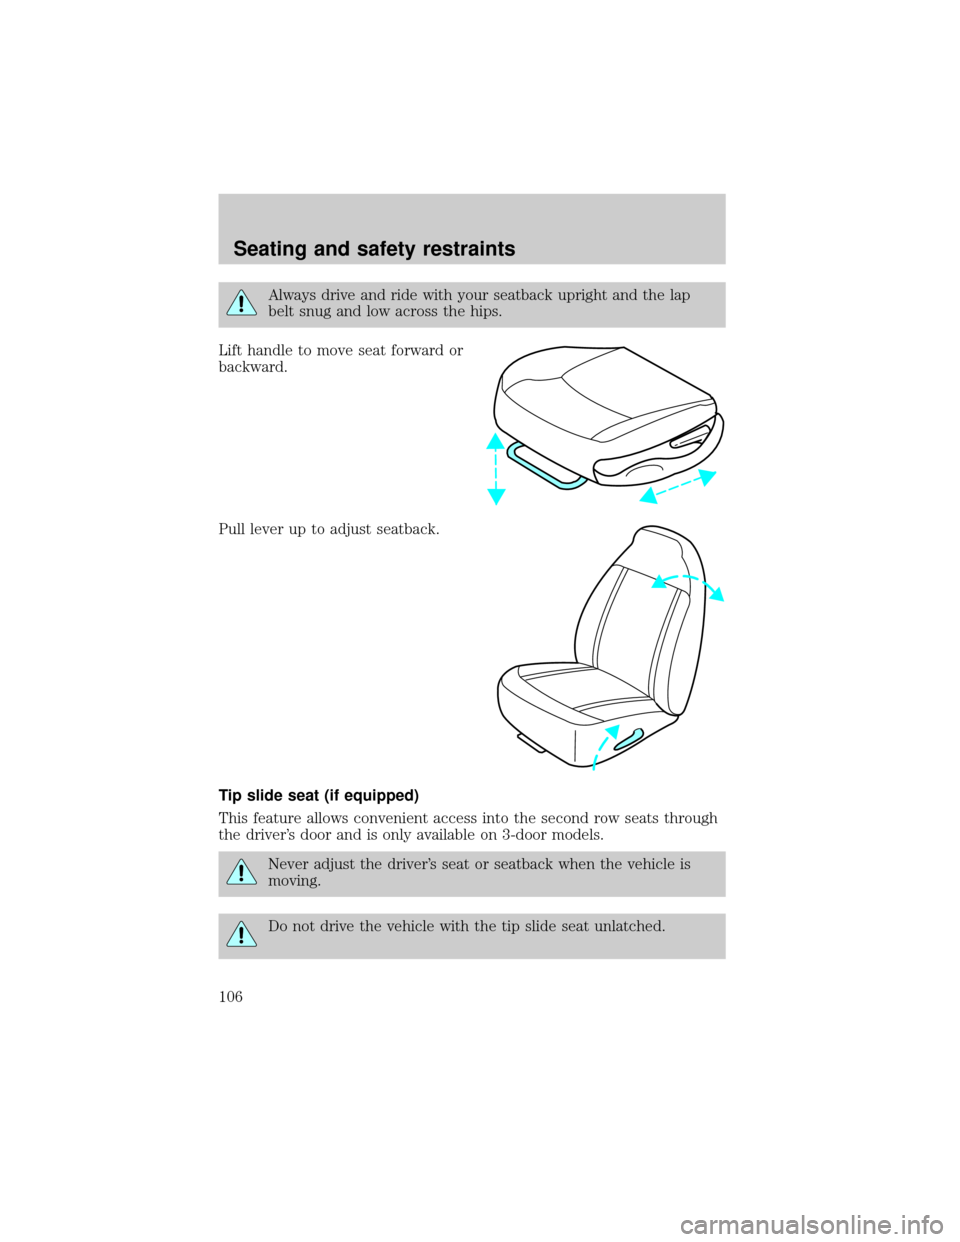
Lift handle to move seat forward or
backward.
Pull lever up to adjust seatback.
Tip slide seat (if equipped)
This feature allows convenient access into the second row seats through
the driver's door and is only available on 3-door models.
Never adjust the driver's seat or seatback when the vehicle is
moving.
Do not drive the vehicle with the tip slide seat unlatched.
Seating and safety restraints
106
Page 113 of 248
Bench seat
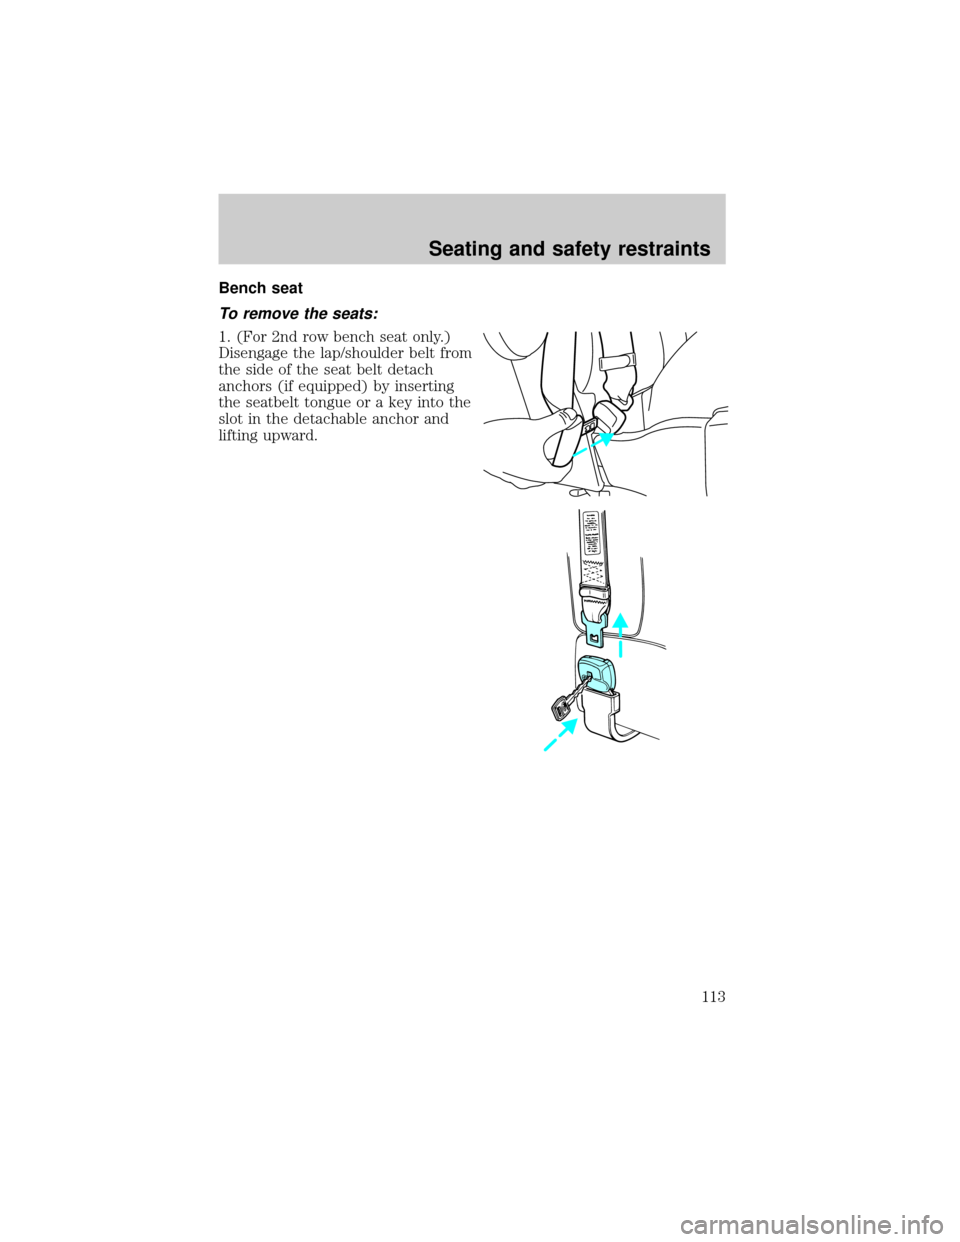
To remove the seats:
1. (For 2nd row bench seat only.)
Disengage the lap/shoulder belt from
the side of the seat belt detach
anchors (if equipped) by inserting
the seatbelt tongue or a key into the
slot in the detachable anchor and
lifting upward.
Seating and safety restraints
113
Page 114 of 248
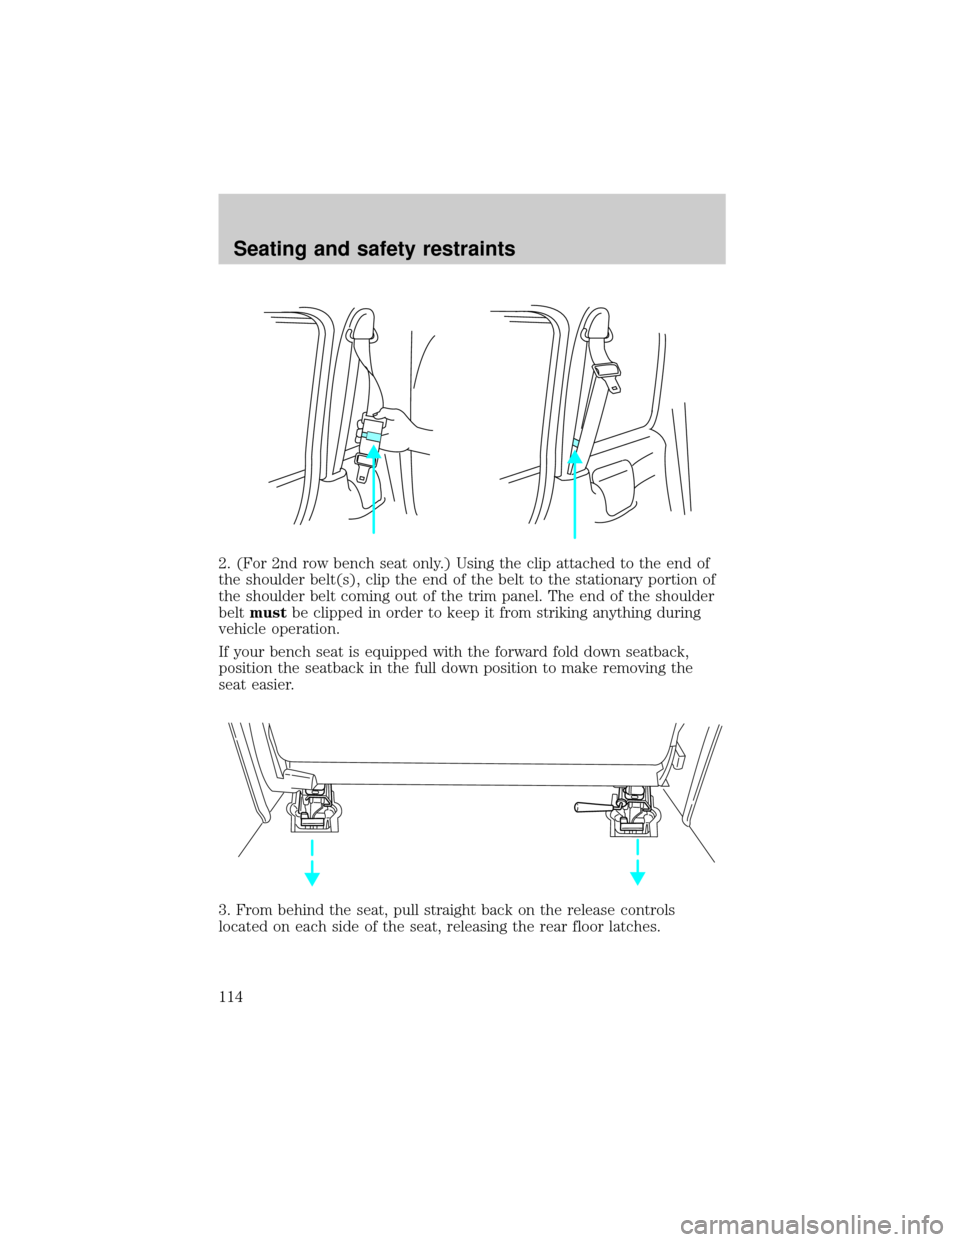
2. (For 2nd row bench seat only.) Using the clip attached to the end of
the shoulder belt(s), clip the end of the belt to the stationary portion of
the shoulder belt coming out of the trim panel. The end of the shoulder
beltmustbe clipped in order to keep it from striking anything during
vehicle operation.
If your bench seat is equipped with the forward fold down seatback,
position the seatback in the full down position to make removing the
seat easier.
3. From behind the seat, pull straight back on the release controls
located on each side of the seat, releasing the rear floor latches.
Seating and safety restraints
114
Page 116 of 248
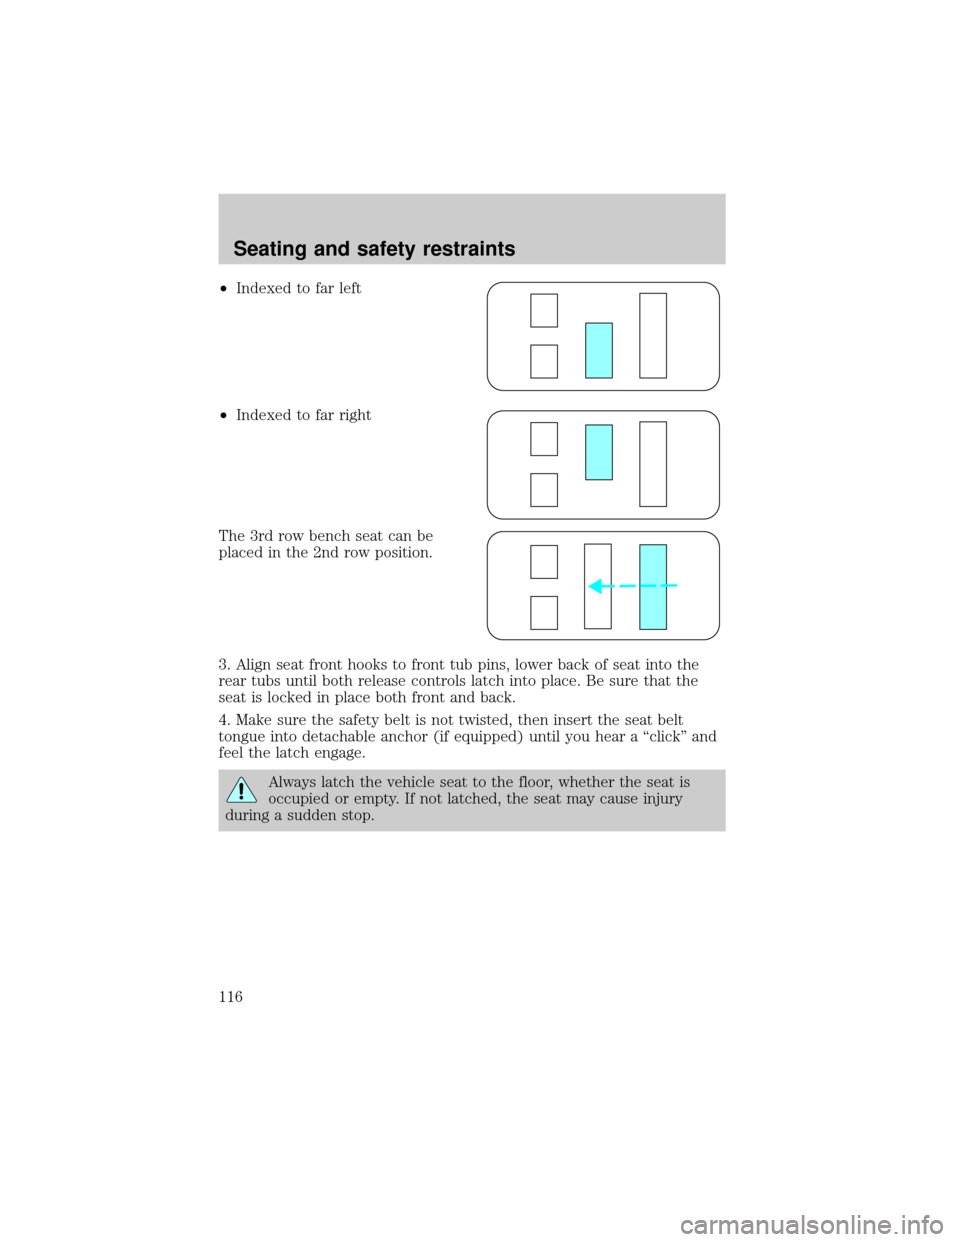
²Indexed to far left
²Indexed to far right
The 3rd row bench seat can be
placed in the 2nd row position.
3. Align seat front hooks to front tub pins, lower back of seat into the
rear tubs until both release controls latch into place. Be sure that the
seat is locked in place both front and back.
4. Make sure the safety belt is not twisted, then insert the seat belt
tongue into detachable anchor (if equipped) until you hear a ªclickº and
feel the latch engage.
Always latch the vehicle seat to the floor, whether the seat is
occupied or empty. If not latched, the seat may cause injury
during a sudden stop.
Seating and safety restraints
116
Page 117 of 248
Bucket seats
To remove the seat(s):
Position the seatback in the full down position to make removing the
seat easier.
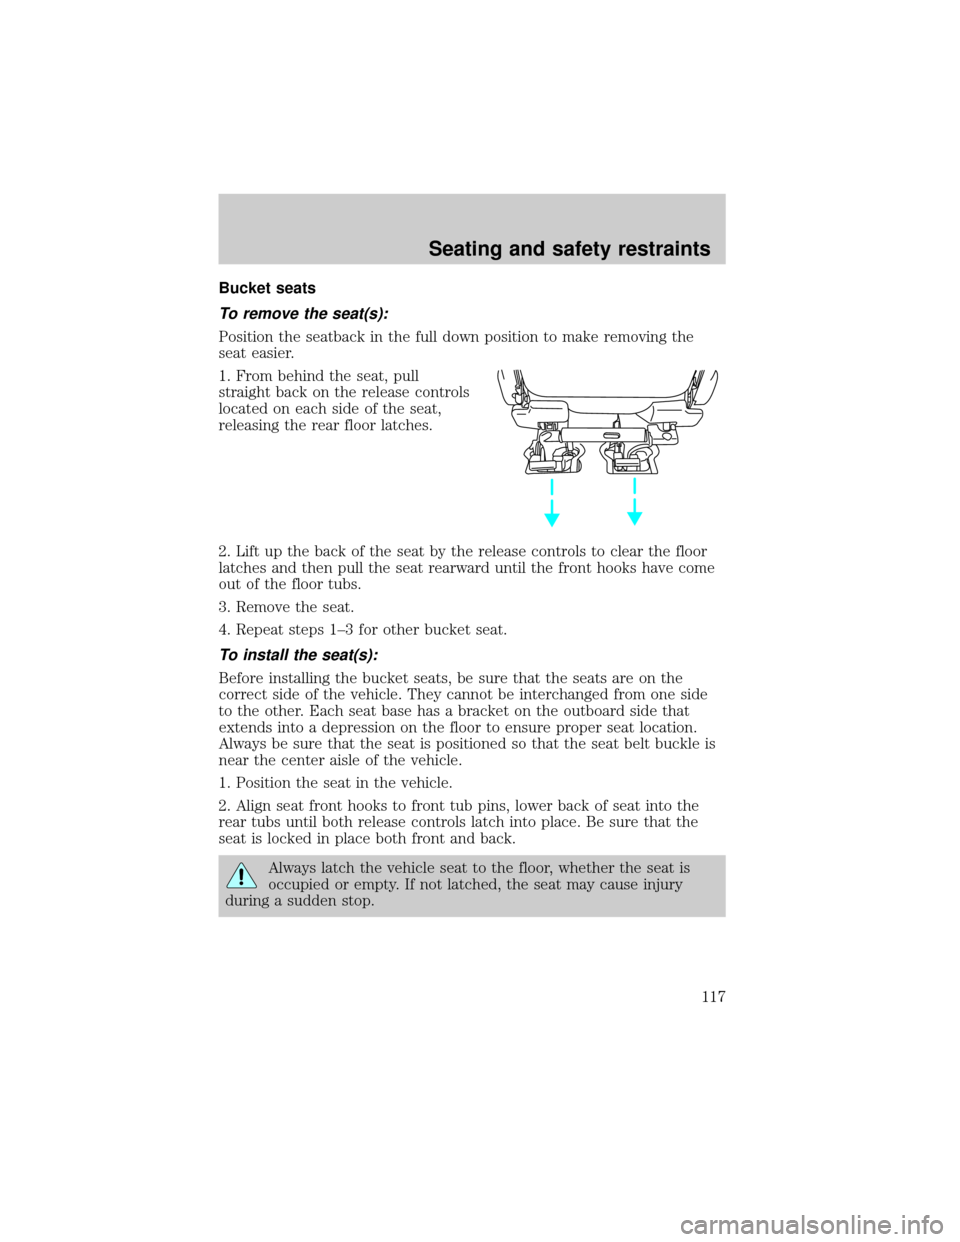
1. From behind the seat, pull
straight back on the release controls
located on each side of the seat,
releasing the rear floor latches.
2. Lift up the back of the seat by the release controls to clear the floor
latches and then pull the seat rearward until the front hooks have come
out of the floor tubs.
3. Remove the seat.
4. Repeat steps 1±3 for other bucket seat.
To install the seat(s):
Before installing the bucket seats, be sure that the seats are on the
correct side of the vehicle. They cannot be interchanged from one side
to the other. Each seat base has a bracket on the outboard side that
extends into a depression on the floor to ensure proper seat location.
Always be sure that the seat is positioned so that the seat belt buckle is
near the center aisle of the vehicle.
1. Position the seat in the vehicle.
2. Align seat front hooks to front tub pins, lower back of seat into the
rear tubs until both release controls latch into place. Be sure that the
seat is locked in place both front and back.
Always latch the vehicle seat to the floor, whether the seat is
occupied or empty. If not latched, the seat may cause injury
during a sudden stop.
Seating and safety restraints
117
Page 118 of 248
SAFETY RESTRAINTS
Safety restraints precautions
Always drive and ride with your seatback upright and the lap
belt snug and low across the hips.
To prevent the risk of injury, make sure children sit where they
can be properly restrained.
Never let a passenger hold a child on his or her lap while the
vehicle is moving. The passenger cannot protect the child from
injury in a collision.
All occupants of the vehicle, including the driver, should always
properly wear their safety belts, even when an air bag SRS is
provided.
It is extremely dangerous to ride in a cargo area, inside or
outside of a vehicle. In a collision, people riding in these areas
are more likely to be seriously injured or killed. Do not allow people to
ride in any area of your vehicle that is not equipped with seats and
safety belts. Be sure everyone in your vehicle is in a seat and using a
safety belt properly.
Each seating position in your vehicle has a specific safety belt
assembly which is made up of one buckle and one tongue that
are designed to be used as a pair. 1) Use the shoulder belt on the
outside shoulder only. Never wear the shoulder belt under the arm.
2) Never swing the safety belt around your neck over the inside
shoulder. 3) Never use a single belt for more than one person.
Seating and safety restraints
118
Page 119 of 248
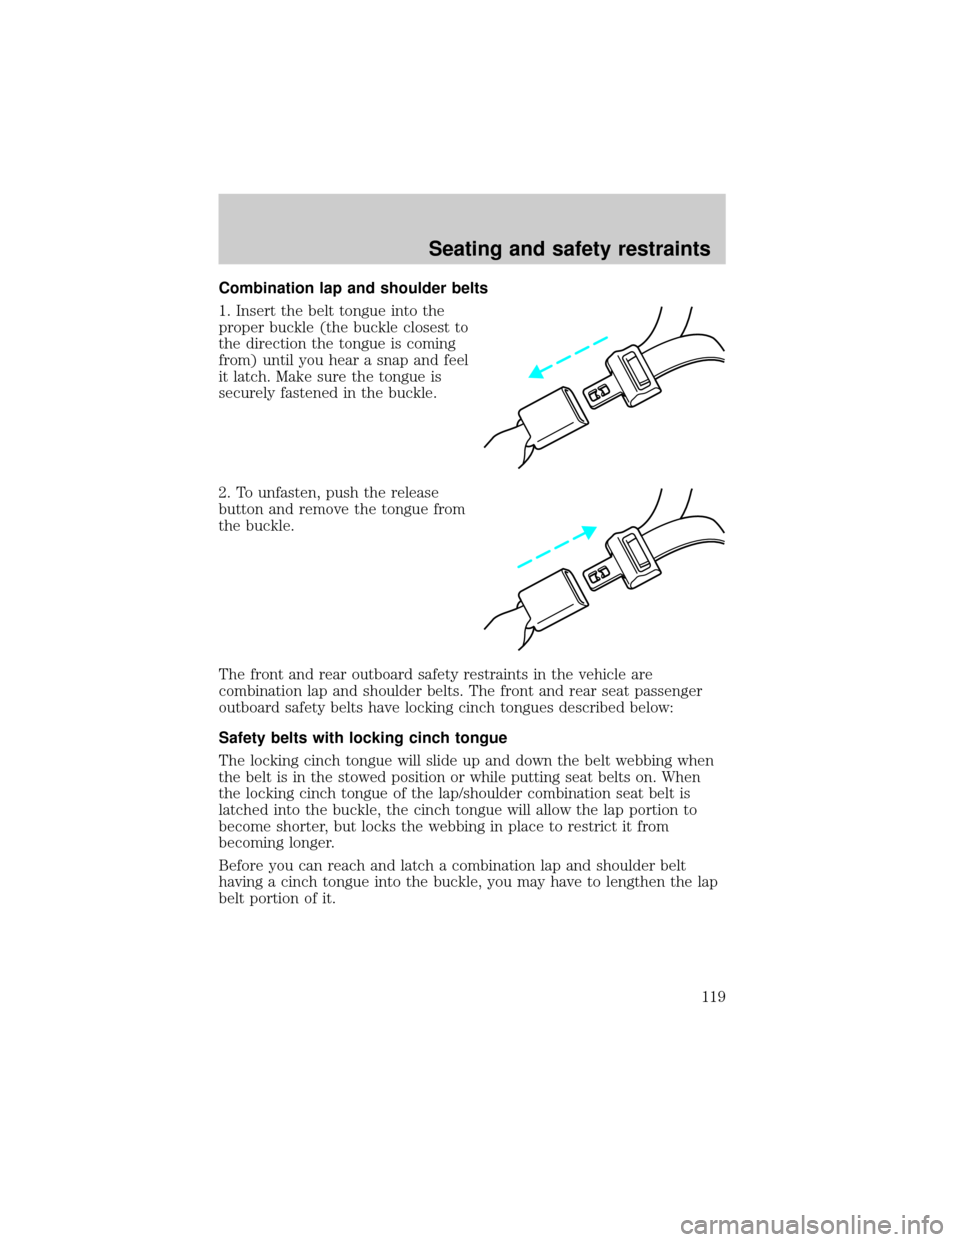
Combination lap and shoulder belts
1. Insert the belt tongue into the
proper buckle (the buckle closest to
the direction the tongue is coming
from) until you hear a snap and feel
it latch. Make sure the tongue is
securely fastened in the buckle.
2. To unfasten, push the release
button and remove the tongue from
the buckle.
The front and rear outboard safety restraints in the vehicle are
combination lap and shoulder belts. The front and rear seat passenger
outboard safety belts have locking cinch tongues described below:
Safety belts with locking cinch tongue
The locking cinch tongue will slide up and down the belt webbing when
the belt is in the stowed position or while putting seat belts on. When
the locking cinch tongue of the lap/shoulder combination seat belt is
latched into the buckle, the cinch tongue will allow the lap portion to
become shorter, but locks the webbing in place to restrict it from
becoming longer.
Before you can reach and latch a combination lap and shoulder belt
having a cinch tongue into the buckle, you may have to lengthen the lap
belt portion of it.
Seating and safety restraints
119
Page 120 of 248
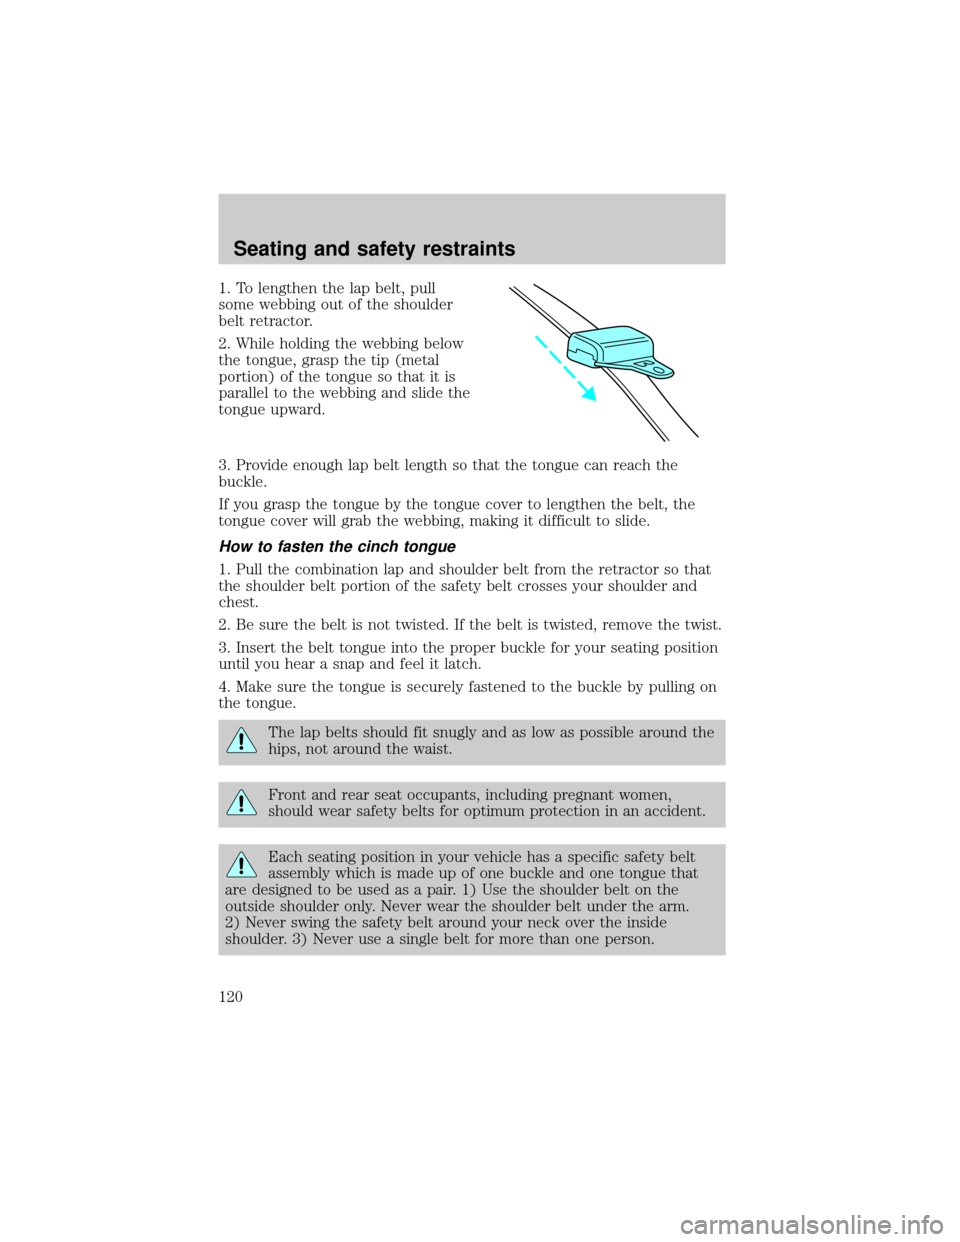
1. To lengthen the lap belt, pull
some webbing out of the shoulder
belt retractor.
2. While holding the webbing below
the tongue, grasp the tip (metal
portion) of the tongue so that it is
parallel to the webbing and slide the
tongue upward.
3. Provide enough lap belt length so that the tongue can reach the
buckle.
If you grasp the tongue by the tongue cover to lengthen the belt, the
tongue cover will grab the webbing, making it difficult to slide.
How to fasten the cinch tongue
1. Pull the combination lap and shoulder belt from the retractor so that
the shoulder belt portion of the safety belt crosses your shoulder and
chest.
2. Be sure the belt is not twisted. If the belt is twisted, remove the twist.
3. Insert the belt tongue into the proper buckle for your seating position
until you hear a snap and feel it latch.
4. Make sure the tongue is securely fastened to the buckle by pulling on
the tongue.
The lap belts should fit snugly and as low as possible around the
hips, not around the waist.
Front and rear seat occupants, including pregnant women,
should wear safety belts for optimum protection in an accident.
Each seating position in your vehicle has a specific safety belt
assembly which is made up of one buckle and one tongue that
are designed to be used as a pair. 1) Use the shoulder belt on the
outside shoulder only. Never wear the shoulder belt under the arm.
2) Never swing the safety belt around your neck over the inside
shoulder. 3) Never use a single belt for more than one person.
Seating and safety restraints
120