flat tire FORD WINDSTAR 2001 2.G Owners Manual
[x] Cancel search | Manufacturer: FORD, Model Year: 2001, Model line: WINDSTAR, Model: FORD WINDSTAR 2001 2.GPages: 288, PDF Size: 2.6 MB
Page 173 of 288
If you find yourself regularly experiencing AdvanceTracyevents,
you are driving too fast for conditions, you should reduce your
speed, and drive less aggressively. Speed Control should NOT be used
under these conditions. AdvanceTrac is limited by the laws of physics.
It is always possible to lose control of a vehicle due to inappropriate
driver inputs for the conditions. The occurrence of an AdvanceTracy
event is an indication that at least some of the tires have exceeded
their ability to grip the road; this may cause you to lose control of the
vehicle increasing the risk of severe personal injury or property
damage.
STEERING
Your vehicle is equipped with power steering. Power steering uses energy
from the engine to help steer the vehicle.
To prevent damage to the power steering pump:
²Never hold the steering wheel to the extreme right or the extreme left
for more than a few seconds when the engine is running.
²Do not operate the vehicle with a low power steering pump fluid level
(below the MIN mark on the reservoir).
If the power steering system breaks down (or if the engine is turned
off), you can steer the vehicle manually, but it takes more effort.
If the steering wanders or pulls, the condition could be caused by any of
the following:
²underinflated tire(s) on any wheel(s)
²uneven vehicle loading
²high crown in center of road
²high crosswinds
²wheels out of alignment
²loose or worn suspension components
AUTOMATIC TRANSAXLE OPERATION
Brake-shift interlock
This vehicle is equipped with a brake-shift interlock feature that prevents
the gearshift lever from being moved from P (Park) unless the brake
pedal is depressed.
Driving
173
Page 185 of 288

GETTING ROADSIDE ASSISTANCE
To fully assist you should you have a vehicle concern, Ford offers a
complimentary roadside assistance program. This program is separate
from the New Vehicle Limited Warranty. The service is available:
²24±hours, seven days a week
²for the Basic warranty period (Canada) or New Vehicle Limited
Warranty period (U.S.) of three years or 60 000 km (36 000 miles),
whichever comes first on Ford and Mercury vehicles, and four years or
80 000 km (50 000 miles) on Lincoln vehicles
Roadside assistance will cover:
²changing a flat tire
²jump-starts
²lock-out assistance
²fuel delivery
²towing of your disabled vehicle up to 56.3 kms (35 miles) from the
point of pickup (this can include to the nearest Ford dealership, or
your selling dealer if within the specified distance.) One tow per
disablement. Even non-warranty related tows, like accidents or getting
stuck in the mud or snow, are covered (some exclusions apply, such
as impound towing or repossession).
Using roadside assistance
Complete the roadside assistance identification card and place it in your
wallet for quick reference. In the United States, this card is found in the
Owner Guide portfolio in the glove compartment in Ford vehicles and is
mailed to you if you own a Mercury or Lincoln. In Canada, the card is
found in the Roadside Assistance book in the glove compartment.
To receive roadside assistance in the United States for Ford or Mercury
vehicles, call 1±800±241±3673 or if you own a Lincoln vehicle, call
1±800±521±4140. In Canada call 1±800±665±2006.
Should you need to arrange roadside assistance for yourself, Ford will
reimburse a reasonable amount. To obtain information about
reimbursement, call 1±800±241±3673 in the United States for Ford or
Mercury vehicles; or if you own a Lincoln vehicle, call 1±800±521±4140.
Call 1±800±665±2006 in Canada.
Roadside emergencies
185
Page 196 of 288
Fuse/Relay
LocationFuse Amp
RatingPower Distribution Box Description
201 Ð Not Used
202 Ð Front Wiper ON/OFF Relay
203 Ð Rear Wiper Relay
204 Ð A/C Clutch Relay
205 Ð Horn Relay
206 Ð Not Used
207 Ð Fuel Pump Relay
208 Ð Not Used
209 Ð Front Wiper Hi/Low Relay
301 Ð Low Speed Engine Cooling Fan Relay
302 Ð Starter Interrupt Relay
303 Ð High Speed Engine Cooling Fan Relay
304 Ð Powertrain Control Module Relay
401 Ð Not Used
501 Ð Powertrain Control Module Diode
502 Ð Not Used
503 Ð Not Used
* Mini Fuses ** Maxi Fuses
CHANGING THE TIRES
If you get a flat tire while driving, do not apply the brake heavily.
Instead, gradually decrease your speed. Hold the steering wheel firmly
and slowly move to a safe place on the side of the road. If your Low tire
warning light is on, refer toLow tire warningin theMaintenance and
carechapter.
Temporary spare tire information
Your vehicle may have a temporary spare tire. The temporary spare tire
for your vehicle is labeled as such. It is smaller than a regular tire and is
designed for emergency use only. Replace this tire with a full-size tire as
soon as possible.
Roadside emergencies
196
Page 199 of 288
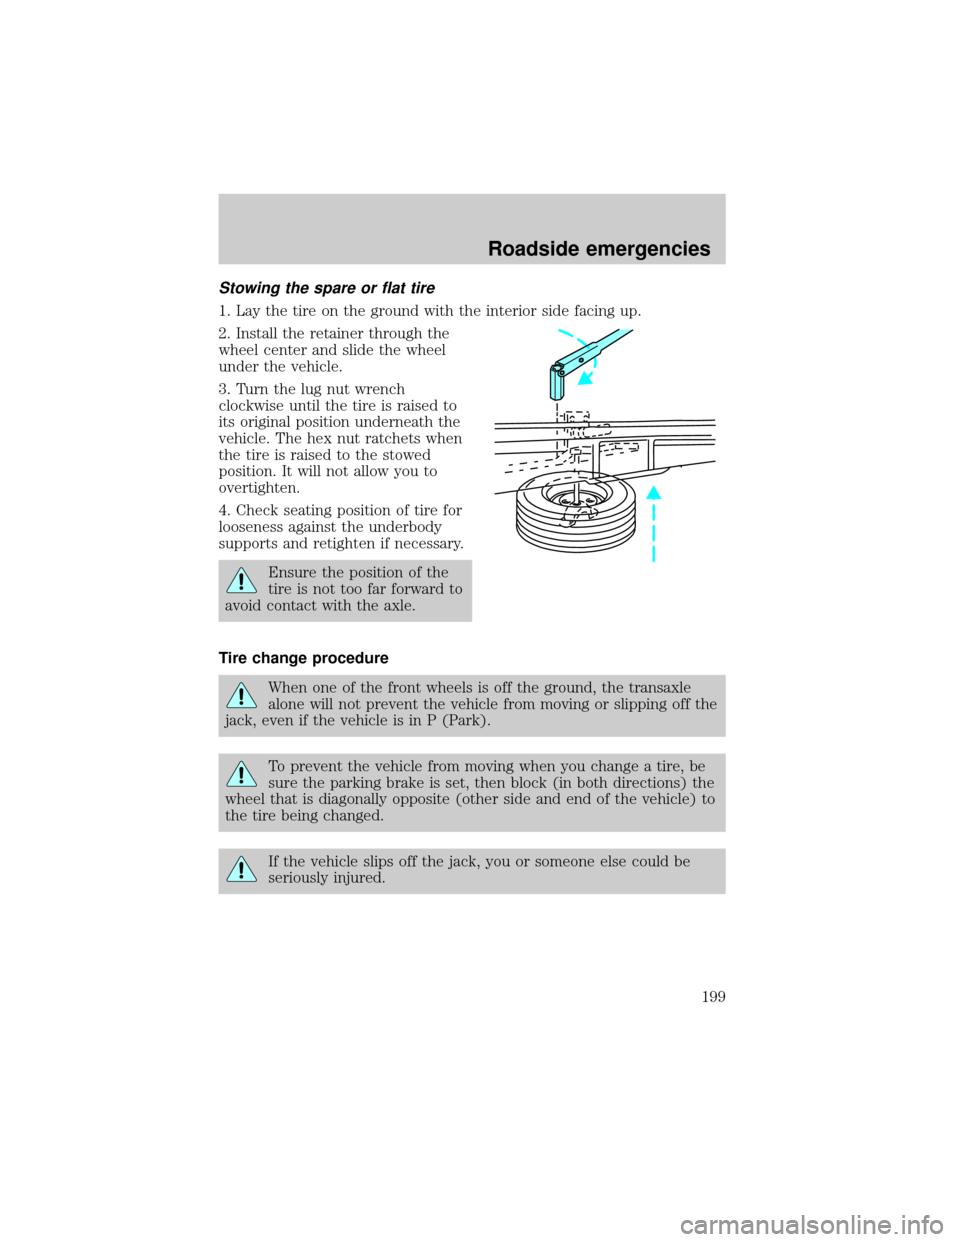
Stowing the spare or flat tire
1. Lay the tire on the ground with the interior side facing up.
2. Install the retainer through the
wheel center and slide the wheel
under the vehicle.
3. Turn the lug nut wrench
clockwise until the tire is raised to
its original position underneath the
vehicle. The hex nut ratchets when
the tire is raised to the stowed
position. It will not allow you to
overtighten.
4. Check seating position of tire for
looseness against the underbody
supports and retighten if necessary.
Ensure the position of the
tire is not too far forward to
avoid contact with the axle.
Tire change procedure
When one of the front wheels is off the ground, the transaxle
alone will not prevent the vehicle from moving or slipping off the
jack, even if the vehicle is in P (Park).
To prevent the vehicle from moving when you change a tire, be
sure the parking brake is set, then block (in both directions) the
wheel that is diagonally opposite (other side and end of the vehicle) to
the tire being changed.
If the vehicle slips off the jack, you or someone else could be
seriously injured.
Roadside emergencies
199
Page 201 of 288
If Ford Accessory Running Boards
have been installed, use the jack
adapters supplied with the running
boards as described on the inside of
the jack storage area.
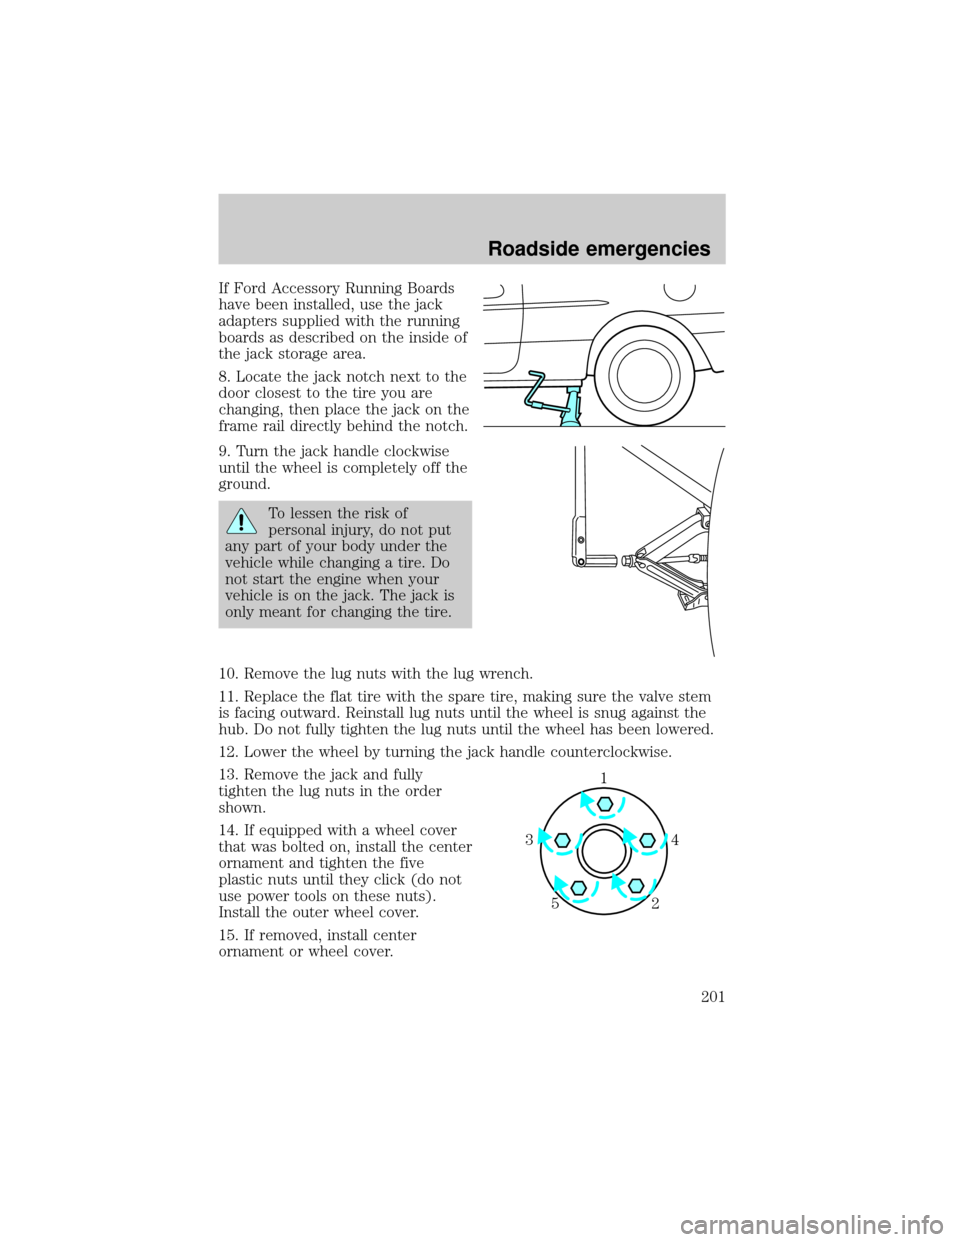
8. Locate the jack notch next to the
door closest to the tire you are
changing, then place the jack on the
frame rail directly behind the notch.
9. Turn the jack handle clockwise
until the wheel is completely off the
ground.
To lessen the risk of
personal injury, do not put
any part of your body under the
vehicle while changing a tire. Do
not start the engine when your
vehicle is on the jack. The jack is
only meant for changing the tire.
10. Remove the lug nuts with the lug wrench.
11. Replace the flat tire with the spare tire, making sure the valve stem
is facing outward. Reinstall lug nuts until the wheel is snug against the
hub. Do not fully tighten the lug nuts until the wheel has been lowered.
12. Lower the wheel by turning the jack handle counterclockwise.
13. Remove the jack and fully
tighten the lug nuts in the order
shown.
14. If equipped with a wheel cover
that was bolted on, install the center
ornament and tighten the five
plastic nuts until they click (do not
use power tools on these nuts).
Install the outer wheel cover.
15. If removed, install center
ornament or wheel cover.
1
4 3
2 5
Roadside emergencies
201
Page 202 of 288
16. Put flat tire, jack and lug wrench away in the proper stowage
locations.
JUMP STARTING YOUR VEHICLE
The gases around the battery can explode if exposed to flames,
sparks, or lit cigarettes. An explosion could result in injury or
vehicle damage.
Do not push start your vehicle. You could damage the catalytic
converter.
Batteries contain sulfuric acid which can burn skin, eyes, and
clothing, if contacted.
Do not attempt to push start your vehicle. Automatic
transmissions do not have push-start capability.
Preparing your vehicle
When the battery is disconnected or a new battery is installed, the
transmission must relearn its adaptive strategy. As a result of this, the
transmission may shift firmly. This operation is considered normal and
will not effect function or durability of the transmission. Over time, the
adaptive learning process will fully update transmission operation to its
optimum shift feel.
1.Use only a 12±volt supply to start your vehicle.
2. Do not disconnect the battery of the disabled vehicle as this could
damage the vehicle's electrical system.
3. Park the booster vehicle close to the hood of the disabled vehicle
making sure the two vehiclesdo nottouch. Set the parking brake on
both vehicles and stay clear of the engine cooling fan and other moving
parts.
4. Check all battery terminals and remove any excessive corrosion before
you attach the battery cables. Ensure that vent caps are tight and level.
5. Turn the heater fan on in both vehicles to protect any electrical
surges. Turn all other accessories off.
Roadside emergencies
202
Page 232 of 288
which all passenger car tires must meet under the Federal Motor Vehicle
Safety Standard No. 109. Grades B and A represent higher levels of
performance on the laboratory test wheel than the minimum required by
law.
The temperature grade for this tire is established for a tire that
is properly inflated and not overloaded. Excessive speed,
underinflation, or excessive loading, either separately or in
combination, can cause heat buildup and possible tire failure.
SERVICING YOUR TIRES
Low tire warning (if equipped)
The low tire warning system is designed to detect a significant loss of
inflation inany one of your tireson your vehicle. The system uses the
Anti-lock brake wheel speed sensors to detect a change in wheel speed
due to tire deflation.
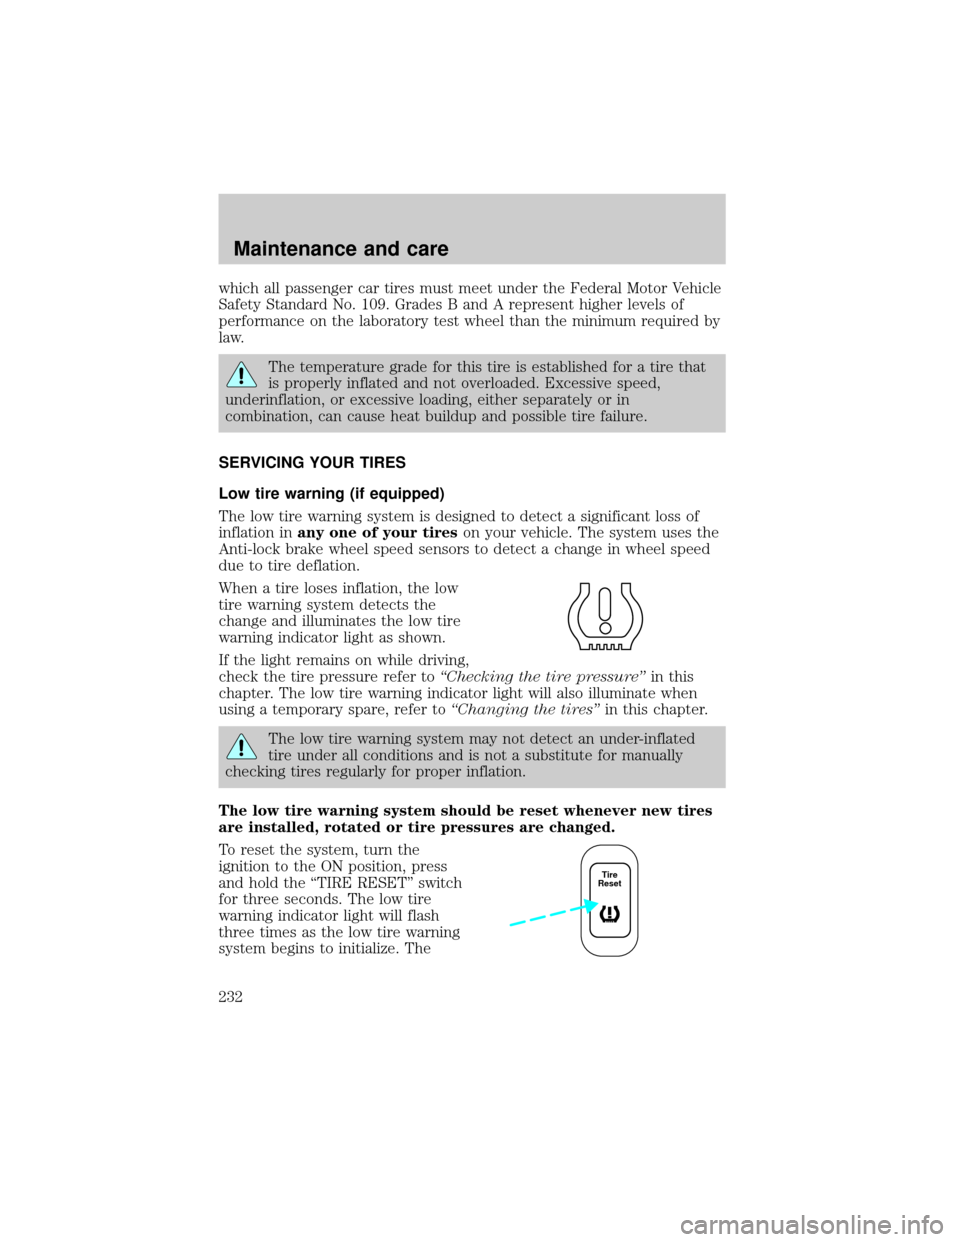
When a tire loses inflation, the low
tire warning system detects the
change and illuminates the low tire
warning indicator light as shown.
If the light remains on while driving,
check the tire pressure refer toªChecking the tire pressureºin this
chapter. The low tire warning indicator light will also illuminate when
using a temporary spare, refer toªChanging the tiresºin this chapter.
The low tire warning system may not detect an under-inflated
tire under all conditions and is not a substitute for manually
checking tires regularly for proper inflation.
The low tire warning system should be reset whenever new tires
are installed, rotated or tire pressures are changed.
To reset the system, turn the
ignition to the ON position, press
and hold the ªTIRE RESETº switch
for three seconds. The low tire
warning indicator light will flash
three times as the low tire warning
system begins to initialize. The
Tire
Reset
Maintenance and care
232
Page 233 of 288
initial adjustment is completed after driving over 65 km/h (40 mph) for
15 to 20 minutes.
This system may not function properly under the following conditions:
²Uneven tread wear.
²Driving on loose or low traction surfaces such as gravel, snow or slush.
²Using tire chains
²Initial tire pressures out of specified range.
²Two or more under inflated tires.
²Sudden loss of tire pressure.
²Vehicle speeds less than 30 km/h (20 mph), greater than 120 km/h (70
mph) or driving duration less than 10 miles.
²Transporting a heavy load or towing a trailer.
The low tire warning feature can be turned off by your dealer.
Checking the tire pressure
²Use an accurate tire pressure gauge.
²Check the tire pressure when tires are cold, after the vehicle has been
parked for at least one hour or has been driven less than 5 km (3
miles).
²Adjust tire pressure to recommended specifications found on the
Certification Label.
Improperly inflated tires can affect vehicle handling and can fail
suddenly, possibly resulting in loss of vehicle control.
Tire rotation
Because your vehicle's tires perform different jobs, they often wear
differently. To make sure your tires wear evenly and last longer, rotate
them as indicated in the scheduled maintenance guide. If you notice that
the tires wear unevenly, have them checked.
Maintenance and care
233
Page 242 of 288

Keep a record for at least one month and record the type of driving (city
or highway). This will provide an accurate estimate of the vehicle's fuel
economy under current driving conditions. Additionally, keeping records
during summer and winter will show how temperature impacts fuel
economy. In general, lower temperatures give lower fuel economy.
Driving style Ð good driving and fuel economy habits
Give consideration to the lists that follow and you may be able to change
a number of variables and improve your fuel economy.
Habits
²Smooth, moderate operation can yield up to 10% savings in fuel.
²Steady speeds without stopping will usually give the best fuel
economy.
²Idling for long periods of time (greater than one minute) may waste
fuel.
²Anticipate stopping; slowing down may eliminate the need to stop.
²Sudden or hard accelerations may reduce fuel economy.
²Slow down gradually.
²Driving at reasonable speeds (traveling at 88 km/h [55 mph] uses 15%
less fuel than traveling at 105 km/h [65 mph]).
²Revving the engine before turning it off may reduce fuel economy.
²Using the air conditioner or defroster may reduce fuel economy.
²You may want to turn off the speed control in hilly terrain if
unnecessary shifting between third and fourth gear occurs.
Unnecessary shifting of this type could result in reduced fuel
economy.
²Warming up a vehicle on cold mornings is not required and may
reduce fuel economy.
²Resting your foot on the brake pedal while driving may reduce fuel
economy.
²Combine errands and minimize stop-and-go driving.
Maintenance
²Keep tires properly inflated and use only recommended size.
²Operating a vehicle with the wheels out of alignment will reduce fuel
economy.
Maintenance and care
242