hood open FORD WINDSTAR 2001 2.G Owners Manual
[x] Cancel search | Manufacturer: FORD, Model Year: 2001, Model line: WINDSTAR, Model: FORD WINDSTAR 2001 2.GPages: 288, PDF Size: 2.6 MB
Page 103 of 288
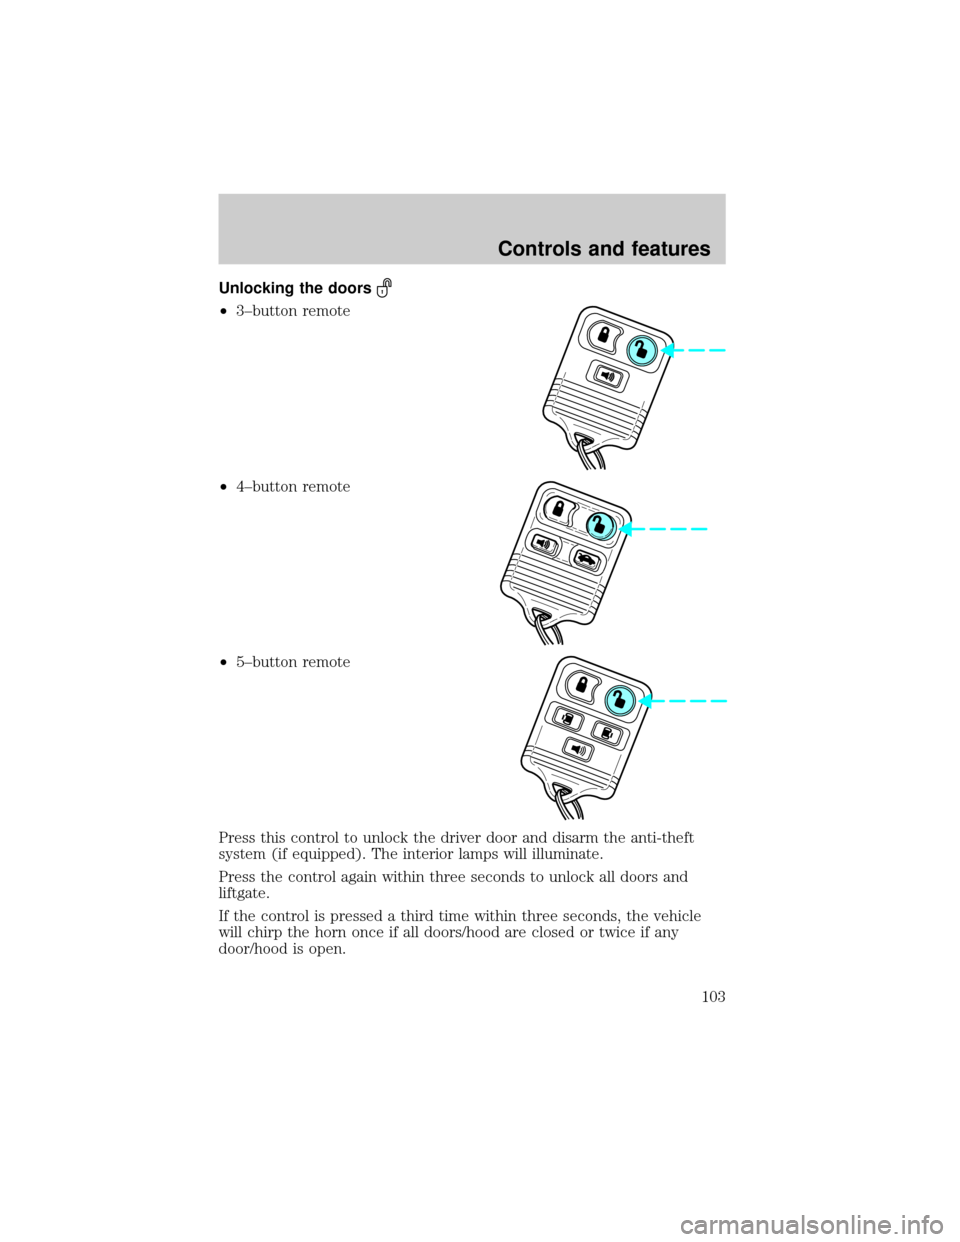
Unlocking the doors
²3±button remote
²4±button remote
²5±button remote
Press this control to unlock the driver door and disarm the anti-theft
system (if equipped). The interior lamps will illuminate.
Press the control again within three seconds to unlock all doors and
liftgate.
If the control is pressed a third time within three seconds, the vehicle
will chirp the horn once if all doors/hood are closed or twice if any
door/hood is open.
Controls and features
103
Page 105 of 288
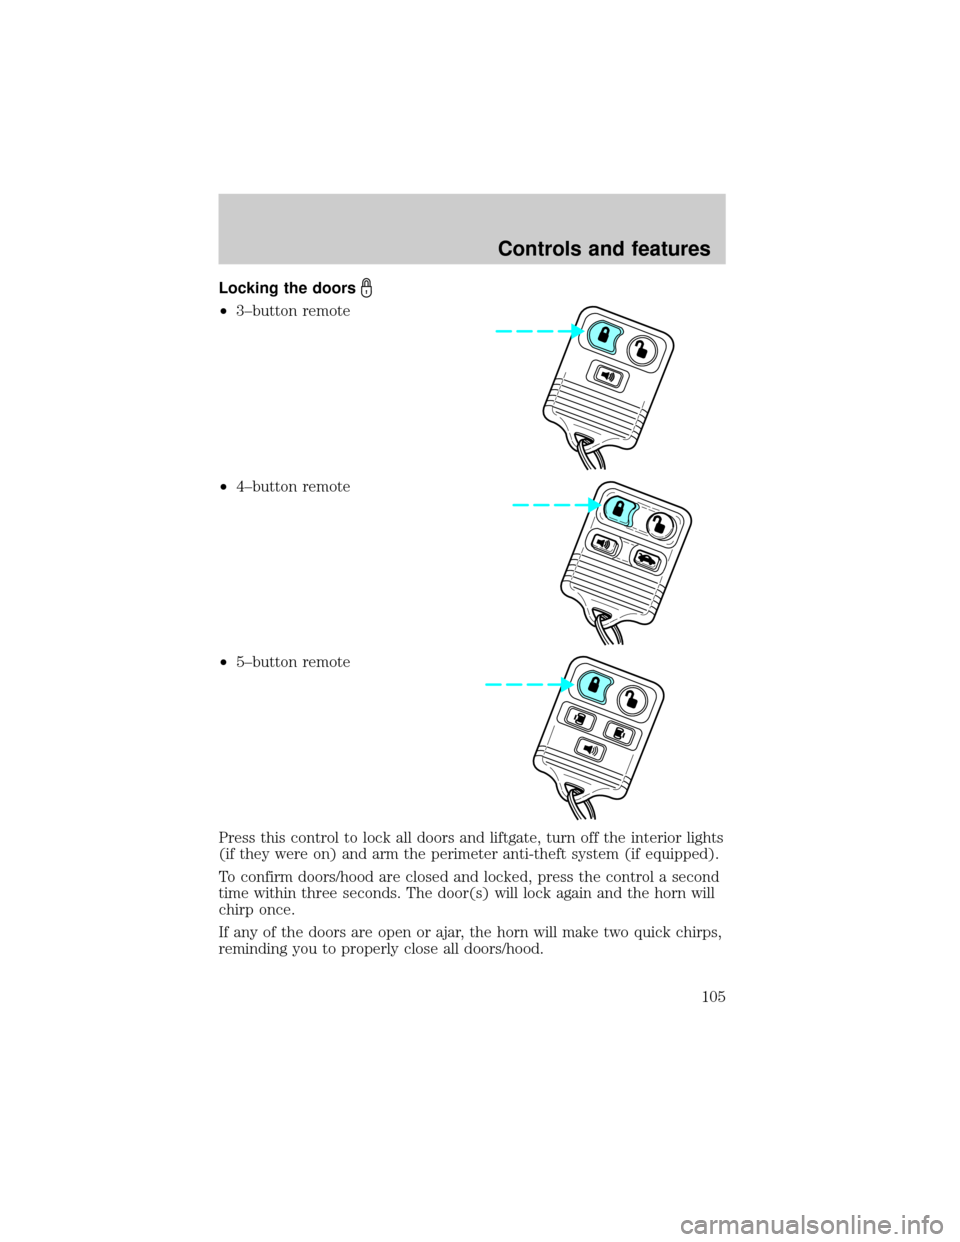
Locking the doors
²3±button remote
²4±button remote
²5±button remote
Press this control to lock all doors and liftgate, turn off the interior lights
(if they were on) and arm the perimeter anti-theft system (if equipped).
To confirm doors/hood are closed and locked, press the control a second
time within three seconds. The door(s) will lock again and the horn will
chirp once.
If any of the doors are open or ajar, the horn will make two quick chirps,
reminding you to properly close all doors/hood.
Controls and features
105
Page 113 of 288
The system is ready to arm whenever the key is removed from the
ignition. Any of the following actions will prearm the alarm system:
²Press the remote entry lock control
²Press the interior power door lock control while the door is open
Twenty seconds after one of the above events occurs, any door/hood that
is closed is armed.
Any door/hood that still open is prearmed and waiting for the door/hood
to be closed.
Once that input is closed, the input will arm in 20 seconds and the
exterior lamps may flash.
Disarming the system
You can disarm the system by any of the following actions:
²Press the transmitter unlock control.
²Unlock the doors with a key.
²Turn a programmed SecuriLock key to RUN /START.
SECURILOCKYPASSIVE ANTI-THEFT SYSTEM
SecuriLockypassive anti-theft system is an engine immobilization
system. This system prevents the engine from being started unless a
coded key programmed to your vehicleis used.
The SecuriLockypassive anti-theft system is not compatible with
non-Ford aftermarket remote start systems. Use of these systems may
result in vehicle starting problems and a loss of security protection.
Automatic arming
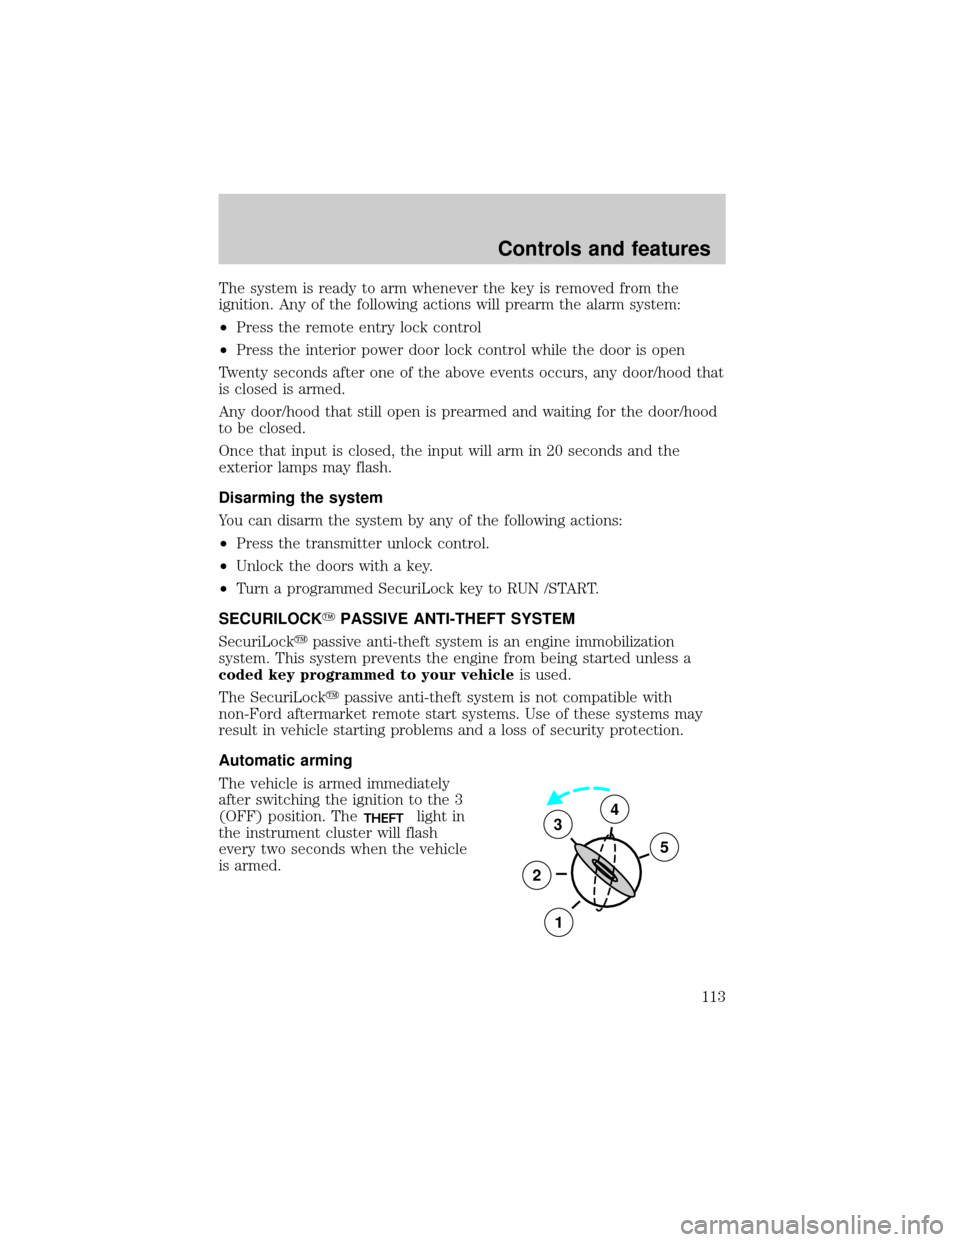
The vehicle is armed immediately
after switching the ignition to the 3
(OFF) position. The
THEFTlight in
the instrument cluster will flash
every two seconds when the vehicle
is armed.3
2
1
5
4
Controls and features
113
Page 209 of 288
Do not start your engine with the air cleaner removed and do
not remove it while the engine is running.
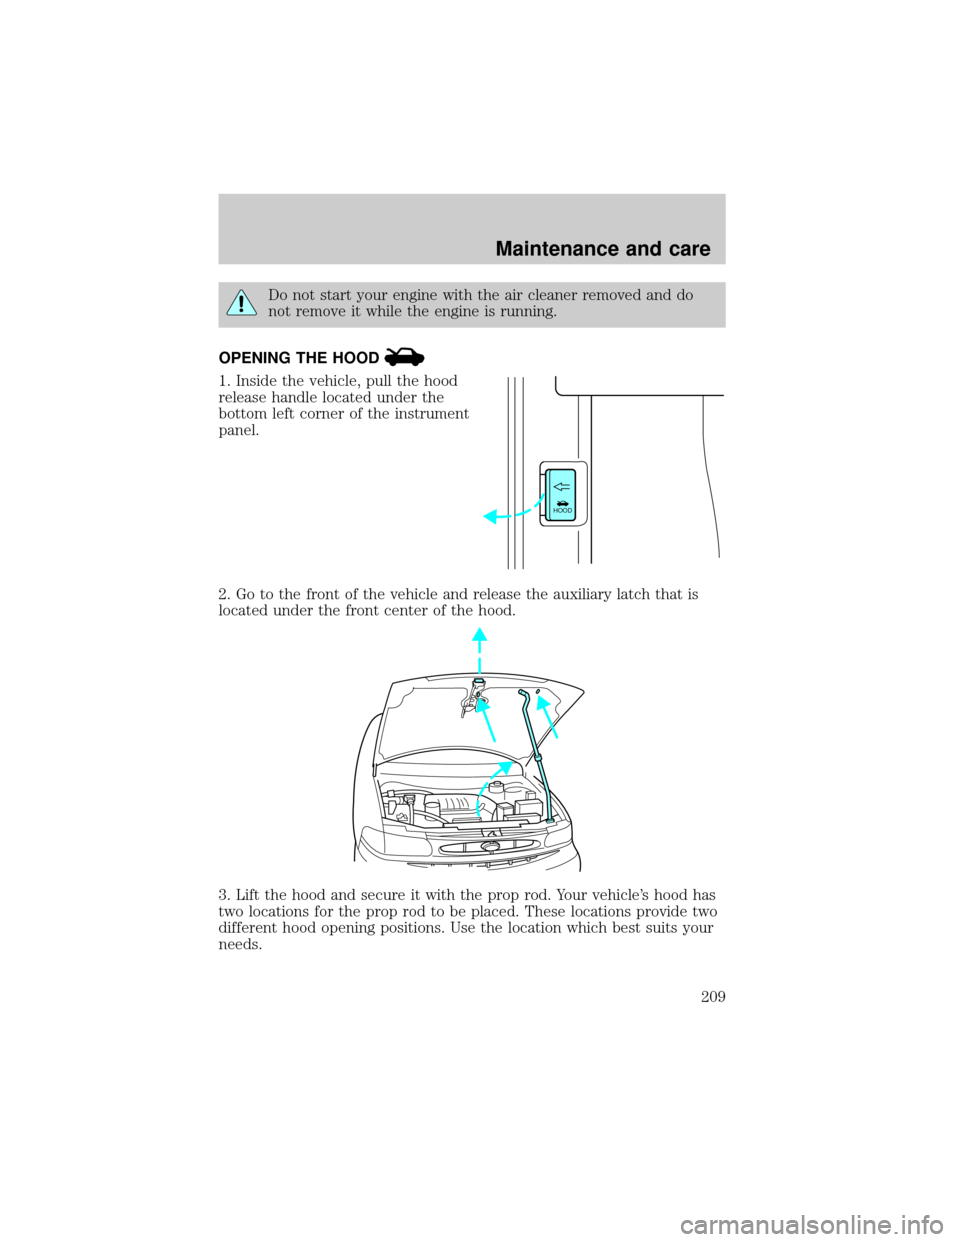
OPENING THE HOOD
1. Inside the vehicle, pull the hood
release handle located under the
bottom left corner of the instrument
panel.
2. Go to the front of the vehicle and release the auxiliary latch that is
located under the front center of the hood.
3. Lift the hood and secure it with the prop rod. Your vehicle's hood has
two locations for the prop rod to be placed. These locations provide two
different hood opening positions. Use the location which best suits your
needs.
HOOD
Maintenance and care
209
Page 211 of 288
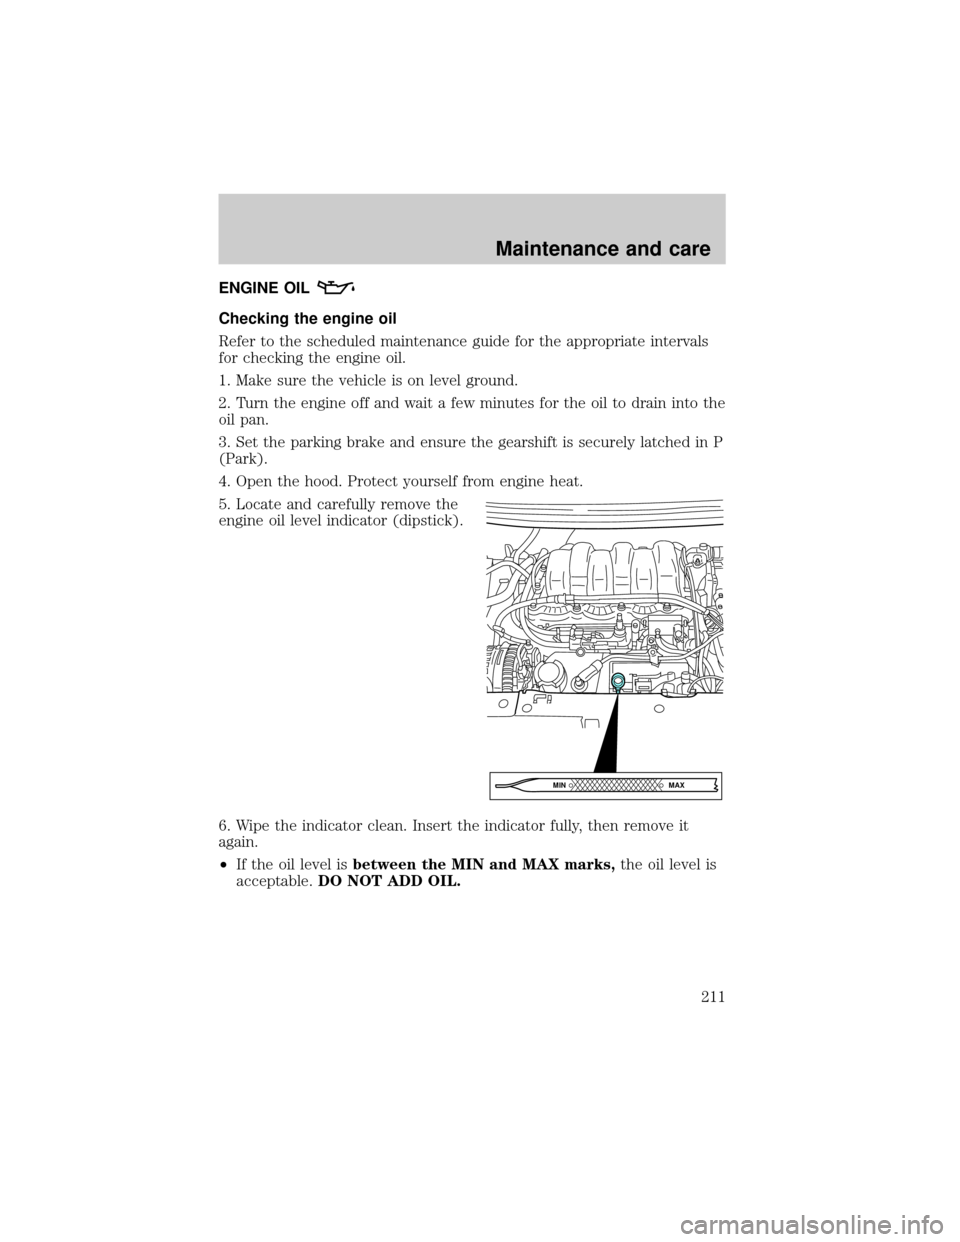
ENGINE OIL
Checking the engine oil
Refer to the scheduled maintenance guide for the appropriate intervals
for checking the engine oil.
1. Make sure the vehicle is on level ground.
2. Turn the engine off and wait a few minutes for the oil to drain into the
oil pan.
3. Set the parking brake and ensure the gearshift is securely latched in P
(Park).
4. Open the hood. Protect yourself from engine heat.
5. Locate and carefully remove the
engine oil level indicator (dipstick).
6. Wipe the indicator clean. Insert the indicator fully, then remove it
again.
²If the oil level isbetween the MIN and MAX marks,the oil level is
acceptable.DO NOT ADD OIL.
MAX MIN
Maintenance and care
211
Page 225 of 288
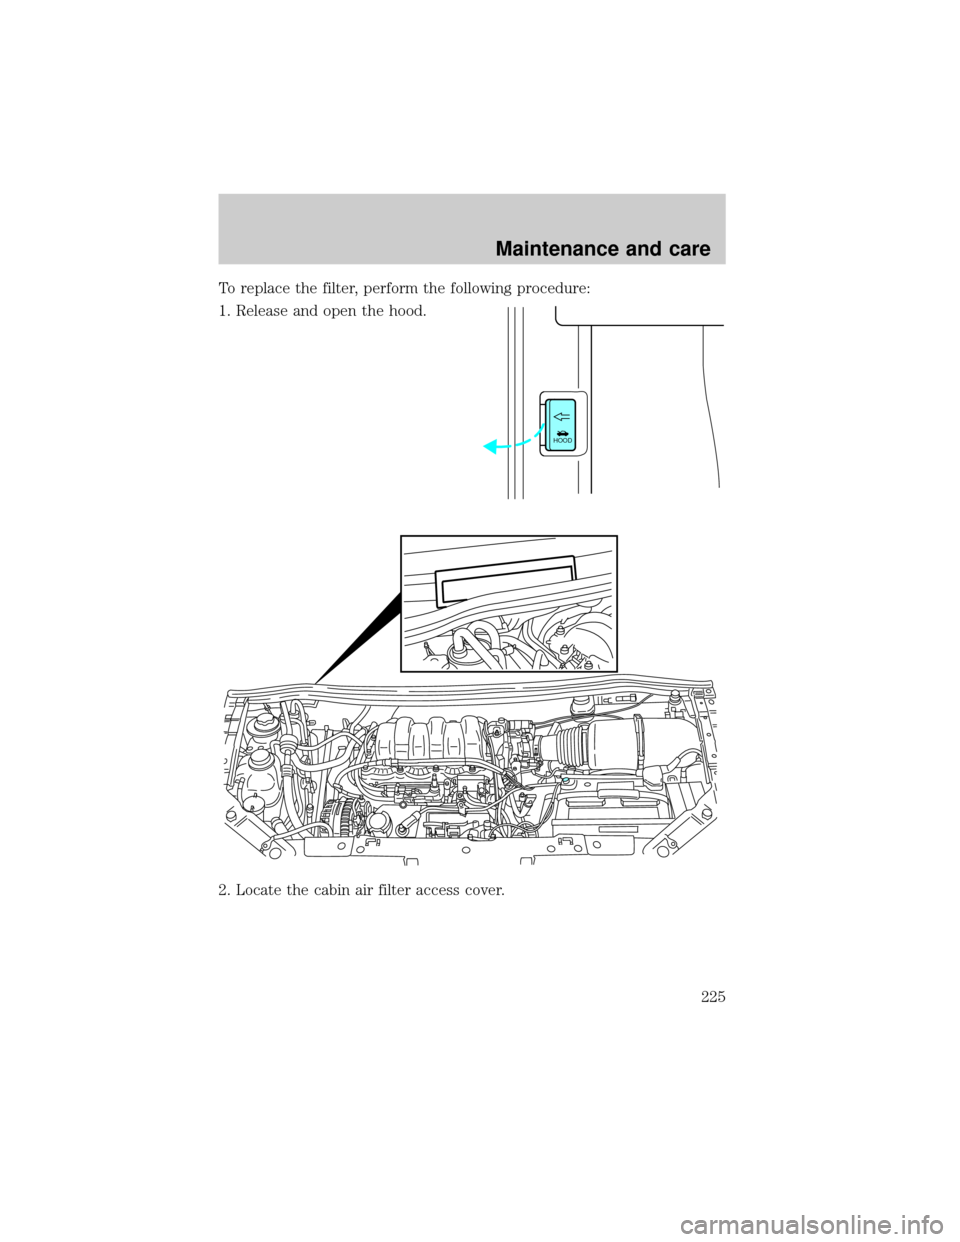
To replace the filter, perform the following procedure:
1. Release and open the hood.
2. Locate the cabin air filter access cover.
HOOD
Maintenance and care
225
Page 246 of 288
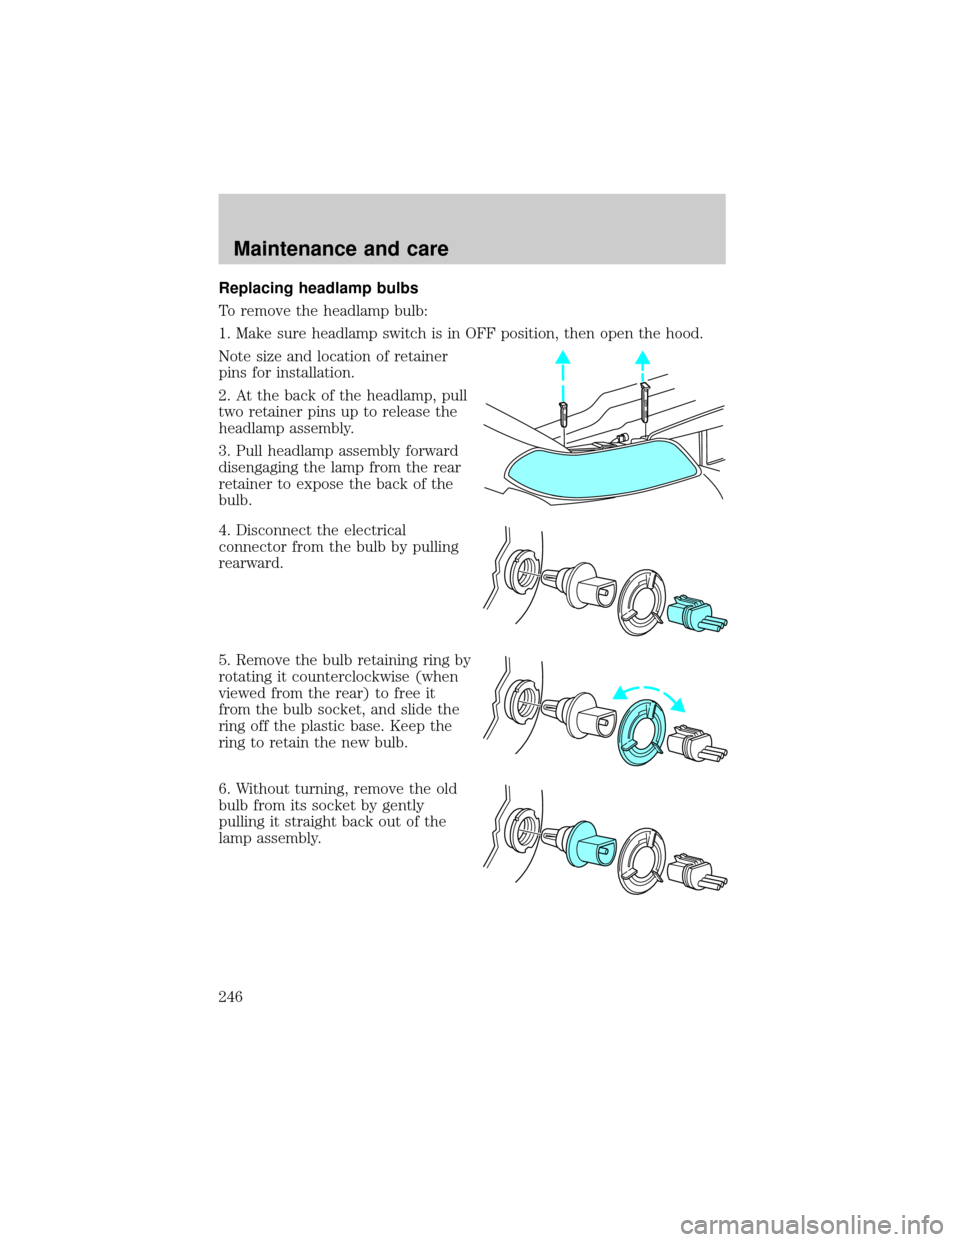
Replacing headlamp bulbs
To remove the headlamp bulb:
1. Make sure headlamp switch is in OFF position, then open the hood.
Note size and location of retainer
pins for installation.
2. At the back of the headlamp, pull
two retainer pins up to release the
headlamp assembly.
3. Pull headlamp assembly forward
disengaging the lamp from the rear
retainer to expose the back of the
bulb.
4. Disconnect the electrical
connector from the bulb by pulling
rearward.
5. Remove the bulb retaining ring by
rotating it counterclockwise (when
viewed from the rear) to free it
from the bulb socket, and slide the
ring off the plastic base. Keep the
ring to retain the new bulb.
6. Without turning, remove the old
bulb from its socket by gently
pulling it straight back out of the
lamp assembly.
Maintenance and care
246
Page 251 of 288
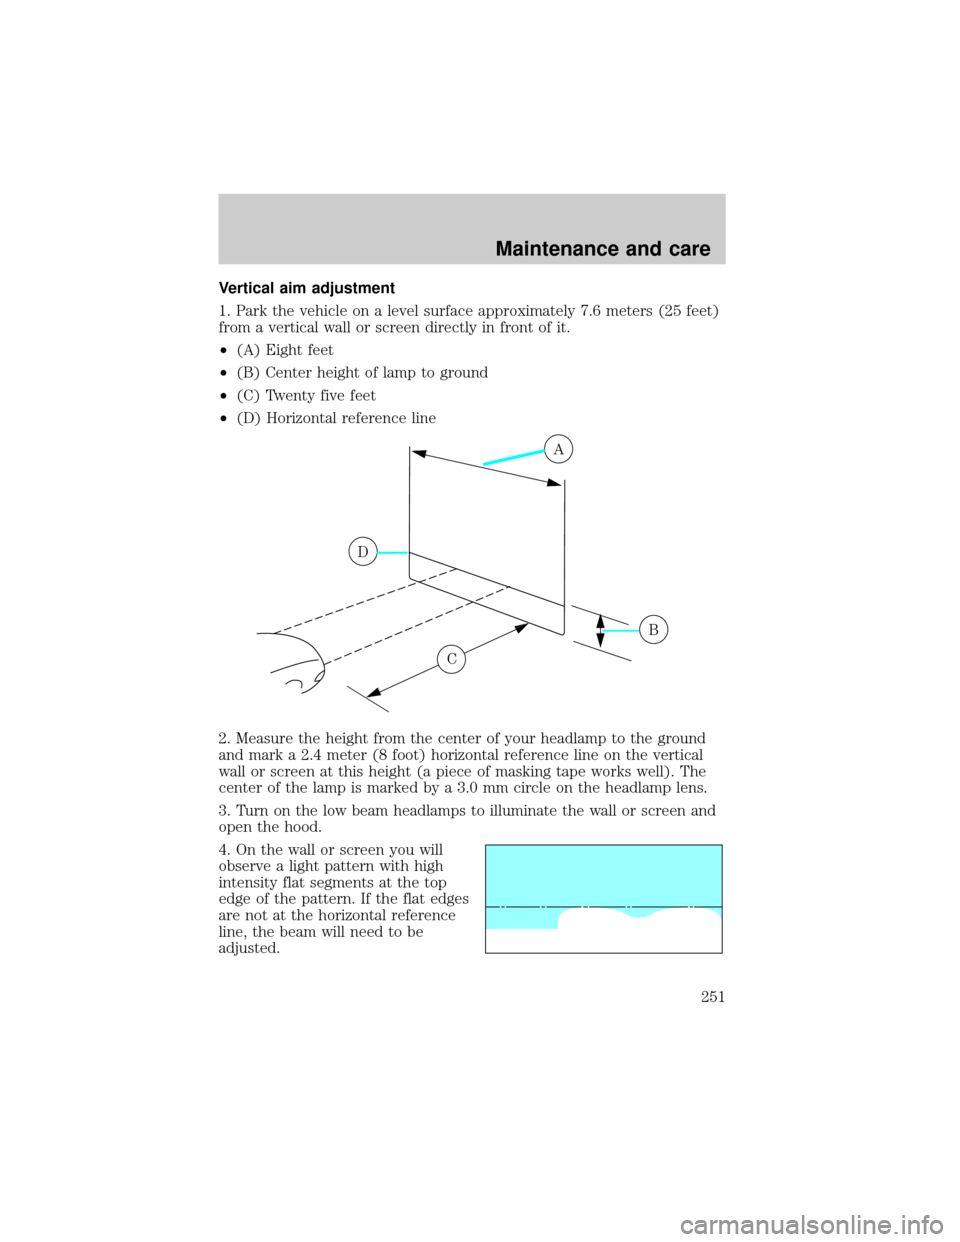
Vertical aim adjustment
1. Park the vehicle on a level surface approximately 7.6 meters (25 feet)
from a vertical wall or screen directly in front of it.
²(A) Eight feet
²(B) Center height of lamp to ground
²(C) Twenty five feet
²(D) Horizontal reference line
2. Measure the height from the center of your headlamp to the ground
and mark a 2.4 meter (8 foot) horizontal reference line on the vertical
wall or screen at this height (a piece of masking tape works well). The
center of the lamp is marked by a 3.0 mm circle on the headlamp lens.
3. Turn on the low beam headlamps to illuminate the wall or screen and
open the hood.
4. On the wall or screen you will
observe a light pattern with high
intensity flat segments at the top
edge of the pattern. If the flat edges
are not at the horizontal reference
line, the beam will need to be
adjusted.
A
D
B
C
Maintenance and care
251
Page 281 of 288

daytime running lights .............27
flash to pass ..............................28
high beam ...........................10, 27
replacing bulbs .......................246
turning on and off ....................27
warning chime ..........................14
Heating ........................................29
heater only system ...................29
rear seat controls .....................37
HomeLink universal
transceiver (see
Garage door opener) ......90, 92±94
Hood ..........................................209
I
Ignition .................................79, 261
Infant seats
(see Safety seats) .....................153
Inspection/maintenance
(I/M) testing ..............................245
Instrument panel
cleaning ...................................255
cluster ..................................8, 255
lighting up panel and interior .28
location of components ..............8
J
Jack ............................................196
positioning ...............................196
storage .....................................196
Jump-starting your vehicle ......202
K
Keyless entry system
autolock ...................................110
locking and unlocking doors ..112programming entry code .......111
Keys ...................................113±115
key in ignition chime ...............14
positions of the ignition ...........79
L
Lamps
autolamp system .......................29
bulb replacement
specifications chart ................250
cargo lamps ...............................28
daytime running light ...............27
headlamps .................................27
headlamps, flash to pass ..........28
instrument panel, dimming .....28
interior lamps .....................95±97
replacing bulbs ...............245±249
Lane change indicator
(see Turn signal) ........................82
Liftgate ..............................117±118
Lights, warning and indicator ......8
air bag ........................................10
anti-lock brakes (ABS) ....10, 168
anti-theft .....................................9
brake ..........................................10
charging system ..........................8
check engine .............................11
door ajar ....................................13
fuel cap light .............................12
fuel reset ...................................13
high beam ...........................10, 13
low fuel ........................................8
low washer fluid .......................13
oil pressure ...............................10
overdrive off ..............................11
safety belt ...................................9
traction control active ................8
traction control off .....................9
turn signal indicator ...................9
Index
281