AUX FORD WINDSTAR 2001 2.G Rear Seat Entertainment System Manual
[x] Cancel search | Manufacturer: FORD, Model Year: 2001, Model line: WINDSTAR, Model: FORD WINDSTAR 2001 2.GPages: 24, PDF Size: 0.27 MB
Page 3 of 24
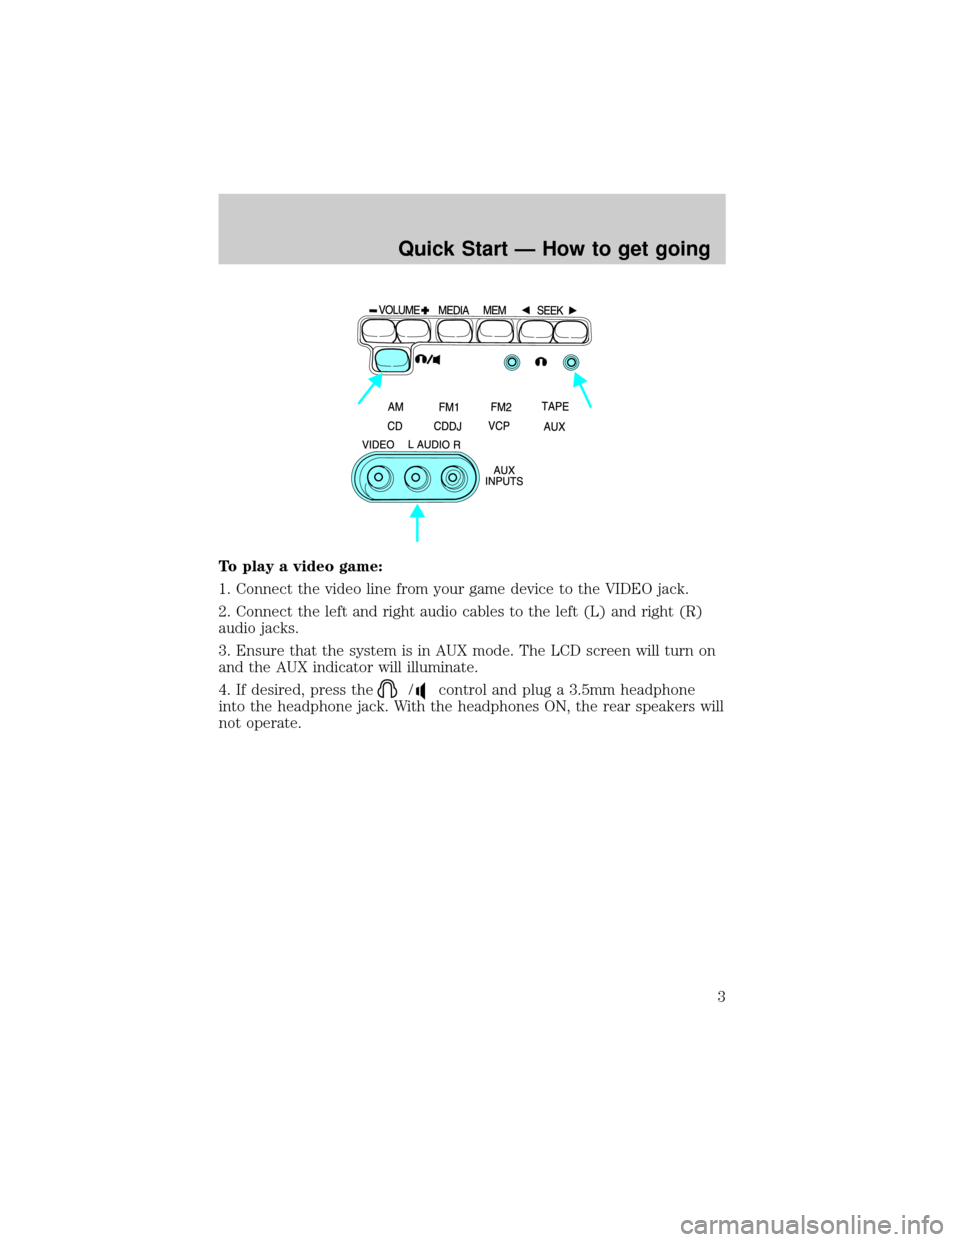
To play a video game:
1. Connect the video line from your game device to the VIDEO jack.
2. Connect the left and right audio cables to the left (L) and right (R)
audio jacks.
3. Ensure that the system is in AUX mode. The LCD screen will turn on
and the AUX indicator will illuminate.
4. If desired, press the
/control and plug a 3.5mm headphone
into the headphone jack. With the headphones ON, the rear speakers will
not operate.
Quick Start Ð How to get going
3
Page 4 of 24
Your AutoVisiontSystem allows you to watch movie rentals and your
favorite home videocassettes. It also allows you to plug in and play a
variety of standard video games. Please review this user manual to
become familiar with the AutoVisiontfeatures and controls as well as
the very important safety information.
Should you have any questions regarding your AutoVisiontSystem, please
feel free to call the toll free assistance hotline at 1 (877) 848±6434.
SAFETY INFORMATION
Read all of the safety and operating instructions before operating the
system and retain for future reference.
Do not attempt to service, repair or modify the AutoVisiontSystem. See
your Ford or Lincoln Mercury dealer.
Do not insert foreign objects into the videocassette player (VCP) tape
cassette compartment.
The front glass on the liquid crystal display may break when hit
with a hard surface. If the glass breaks, do not touch the liquid
crystalline material. In case of contact with skin, wash immediately
with soap and water.
The driver must not attempt to operate any function of the floor
console mounted VCP while the vehicle is in motion. Give full
attention to driving and to the road. Pull off the road and park in a
safe place before inserting or extracting video tapes from the VCP. A
remote control is included in the system to allow the rear seat
occupants to operate the VCP functions without distracting the driver.
Be sure to review User Manuals for video games and video game
equipment when used as auxiliary inputs for your AutoVisiontSystem.
Do not operate video games or video equipment if the power cords
and/or cables are broken, split or damaged. Carefully place cords and/or
cables where they will not be stepped on or interfere with the operation
of seats and/or compartments.
Disconnect video games and video equipment power cords and/or cables
when not in use.
Avoid touching auxiliary input jacks with your fingers. Do not blow on
them or allow them to get wet or dirty.
Introduction
4
Page 12 of 24
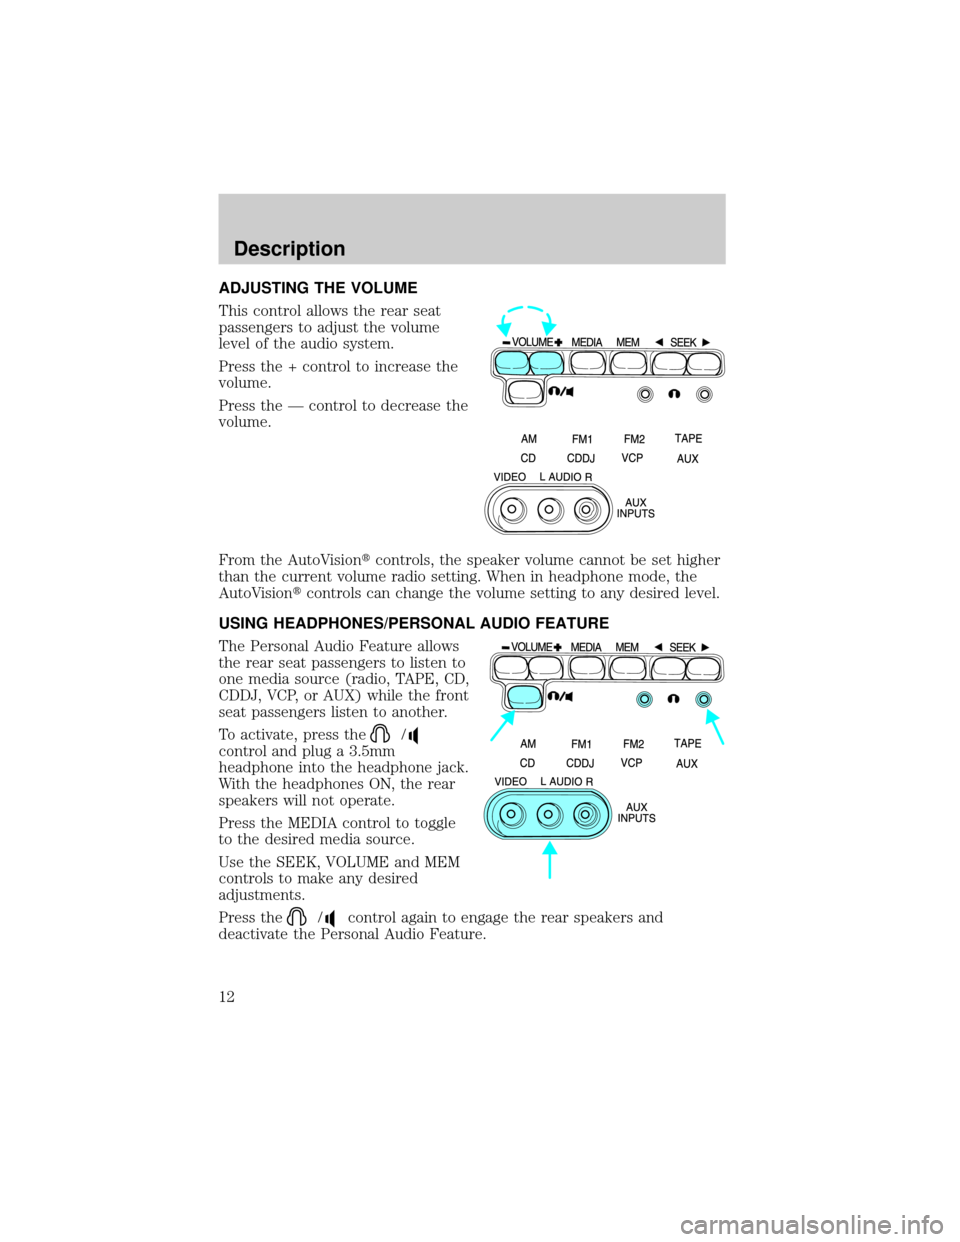
ADJUSTING THE VOLUME
This control allows the rear seat
passengers to adjust the volume
level of the audio system.
Press the + control to increase the
volume.
Press the Ð control to decrease the
volume.
From the AutoVisiontcontrols, the speaker volume cannot be set higher
than the current volume radio setting. When in headphone mode, the
AutoVisiontcontrols can change the volume setting to any desired level.
USING HEADPHONES/PERSONAL AUDIO FEATURE
The Personal Audio Feature allows
the rear seat passengers to listen to
one media source (radio, TAPE, CD,
CDDJ, VCP, or AUX) while the front
seat passengers listen to another.
To activate, press the
/
control and plug a 3.5mm
headphone into the headphone jack.
With the headphones ON, the rear
speakers will not operate.
Press the MEDIA control to toggle
to the desired media source.
Use the SEEK, VOLUME and MEM
controls to make any desired
adjustments.
Press the
/control again to engage the rear speakers and
deactivate the Personal Audio Feature.
Description
12
Page 13 of 24
SPEAKERS ON/OFF MODE
With the speakers ON, you can adjust the audio output to all system
speakers Ð front and rear together (headphones are disabled in this
mode). The rear seat passengers can not raise the volume of the system
above the level on the front radio bezel.
With the speakers OFF, the headphones are enabled. The rear seat
passengers have control over the desired volume levels.
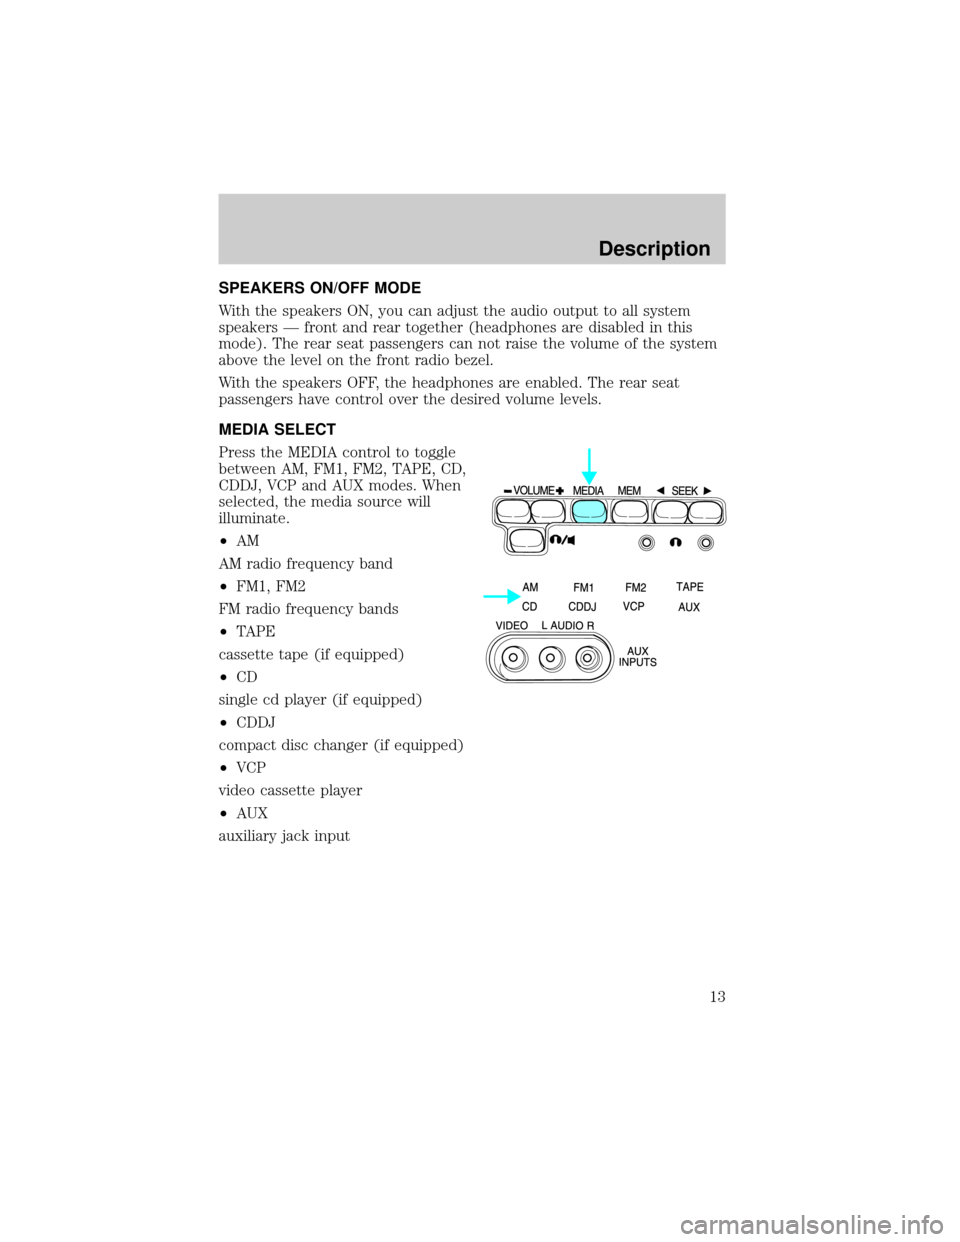
MEDIA SELECT
Press the MEDIA control to toggle
between AM, FM1, FM2, TAPE, CD,
CDDJ, VCP and AUX modes. When
selected, the media source will
illuminate.
²AM
AM radio frequency band
²FM1, FM2
FM radio frequency bands
²TAPE
cassette tape (if equipped)
²CD
single cd player (if equipped)
²CDDJ
compact disc changer (if equipped)
²VCP
video cassette player
²AUX
auxiliary jack input
Description
13
Page 17 of 24

To play a video game
1. Connect the video line from your video game device to the YELLOW
jack.
2. Connect the left and right audio cables to the WHITE and RED jacks
respectively.
3. Ensure that the system is in AUX mode. The LCD screen will turn on
and the AUX indicator will illuminate.
On-screen indicators
Playback operation
1. Press the POWER control on the VCP.
2. Insert a videocassette into the VCP.
3. The videocassette should automatically begin playback, and the
picture will appear within approximately nine seconds.
4. Press the STOP control to stop playback or press EJECT to remove
the cassette.
Fast-forward or rewind (no picture)
1. Press the FF/REW control on the VCP.
2. Press the STOP control to stop or press EJECT to remove the
cassette.
The tape will fast forward or rewind until it has reached the end or the
beginning.
Fast-forward or rewind (with picture)
1. While in playback mode, momentarily press the FF/REW key. The VCP
will search the playback direction five times faster than normal playback
mode.
2. Press the PLAY key to resume normal playback.
Operating Instructions
17
Page 18 of 24
Special effects playback
Still playback/ Frame-to-frame playback (on remote control)
1. Press the STILL/F.ADV key while in playback mode. The playback
picture becomes still.
2. Press the STILL/F.ADV key again. Each time the control is pressed,
the pictures are played back one frame at a time.
The still playback feature can also be used in REW (reverse) mode.
If still playback/or frame-to-frame playback is engaged for five minutes or
longer, the VCP will automatically begin playback to protect the tape.
Automatic tracking is automatically activated the moment the VCP is
turned ON or a cassette is inserted.
If a videocassette is in poor shape (i.e., badly recorded), any tracking
adjustment may result in failure. The VCP will eject the videocassette.
Encore (on remote control)
²Press the ENCORE control while in playback mode.
The VCP will reverse to the previous five seconds of the selection and
then operate at normal playback mode.
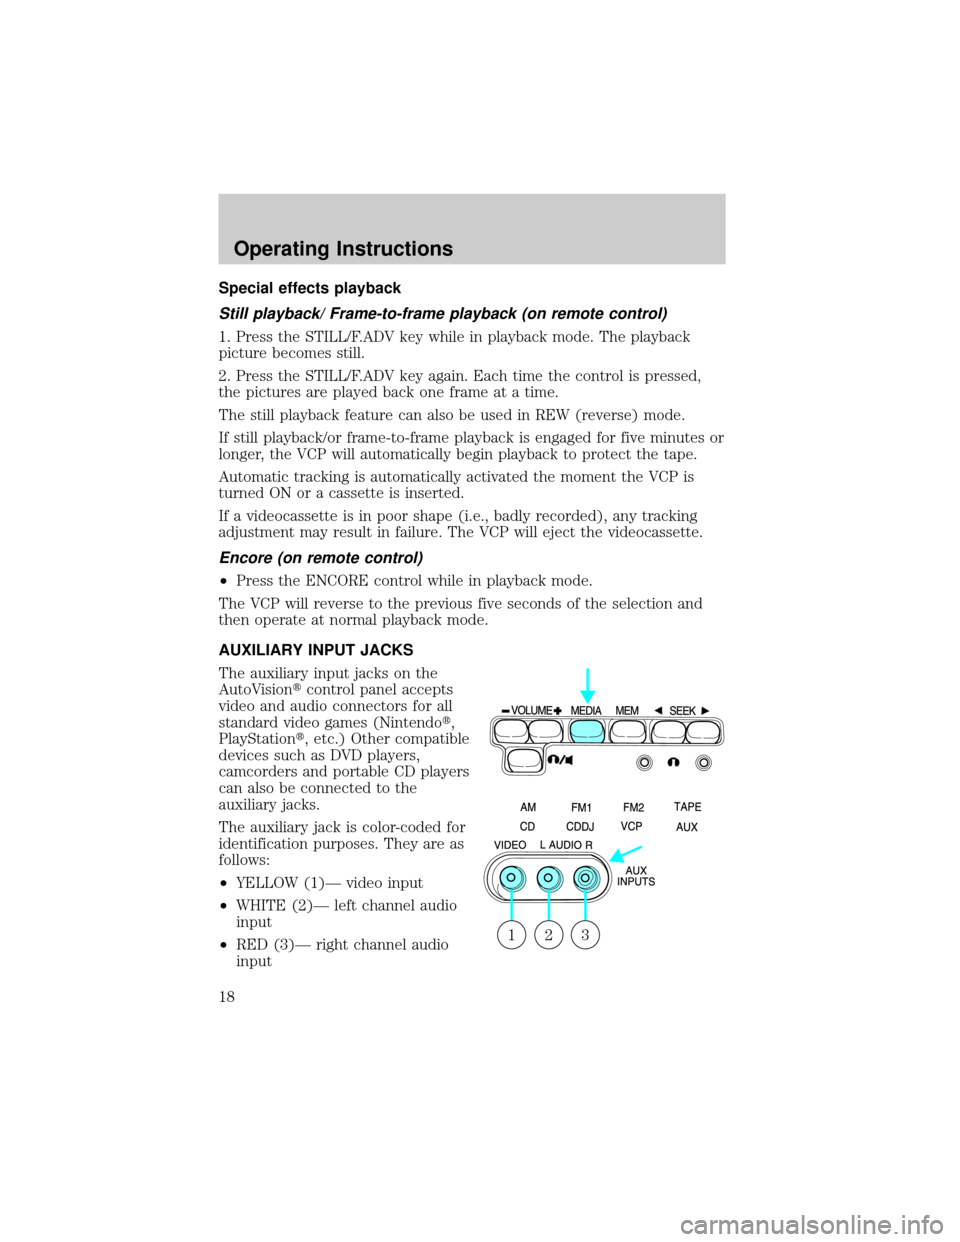
AUXILIARY INPUT JACKS
The auxiliary input jacks on the
AutoVisiontcontrol panel accepts
video and audio connectors for all
standard video games (Nintendot,
PlayStationt, etc.) Other compatible
devices such as DVD players,
camcorders and portable CD players
can also be connected to the
auxiliary jacks.
The auxiliary jack is color-coded for
identification purposes. They are as
follows:
²YELLOW (1)Ð video input
²WHITE (2)Ð left channel audio
input
²RED (3)Ð right channel audio
input
321
Operating Instructions
18
Page 19 of 24
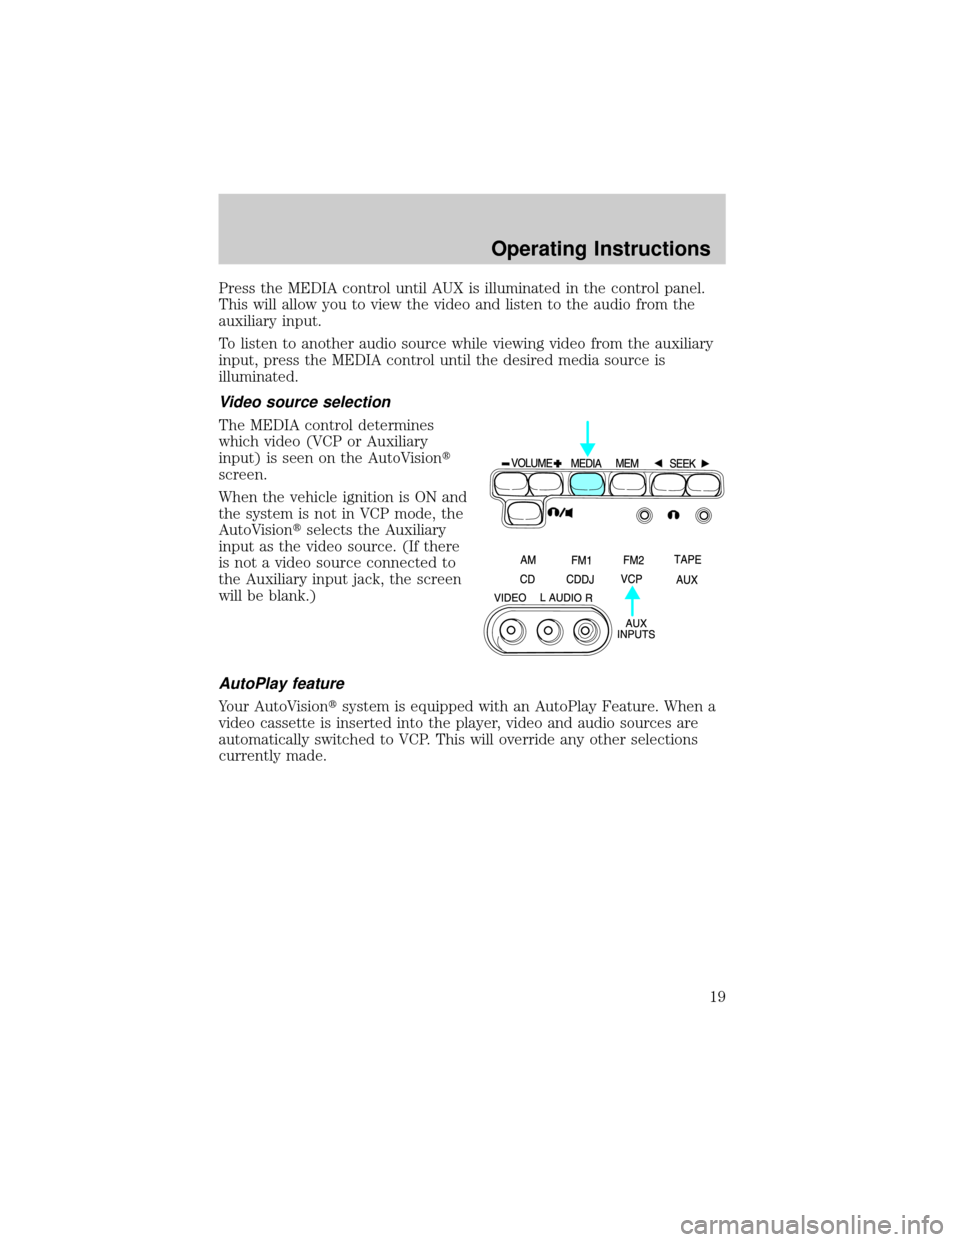
Press the MEDIA control until AUX is illuminated in the control panel.
This will allow you to view the video and listen to the audio from the
auxiliary input.
To listen to another audio source while viewing video from the auxiliary
input, press the MEDIA control until the desired media source is
illuminated.
Video source selection
The MEDIA control determines
which video (VCP or Auxiliary
input) is seen on the AutoVisiont
screen.
When the vehicle ignition is ON and
the system is not in VCP mode, the
AutoVisiontselects the Auxiliary
input as the video source. (If there
is not a video source connected to
the Auxiliary input jack, the screen
will be blank.)
AutoPlay feature
Your AutoVisiontsystem is equipped with an AutoPlay Feature. When a
video cassette is inserted into the player, video and audio sources are
automatically switched to VCP. This will override any other selections
currently made.
Operating Instructions
19
Page 23 of 24
IN-HOME USE
Your AutoVisiontsystem is UL registered for in-home use. This system
has the unique feature of also being a completely portable and able to be
used in your home.
To remove your AutoVisiontsystem from your vehicle, depress the lever
on the center console labeled VCP RELEASE. This will release the VCP
and enable you to remove the system from the vehicle. If pressing the
lever does not release your system, please contact your dealer.
To re-install the VCP in your vehicle, insert the VCP into the console and
push lightly until the VCP clicks into place.
To use the AutoVisiontsystem in your home, you will need:
²12 V DC power converter rated for 1.5 amps/min
²Patch cords with RCA style connectors
These parts are available in your local electronics store or call toll free
1 (877) 848±6434 for assistance.
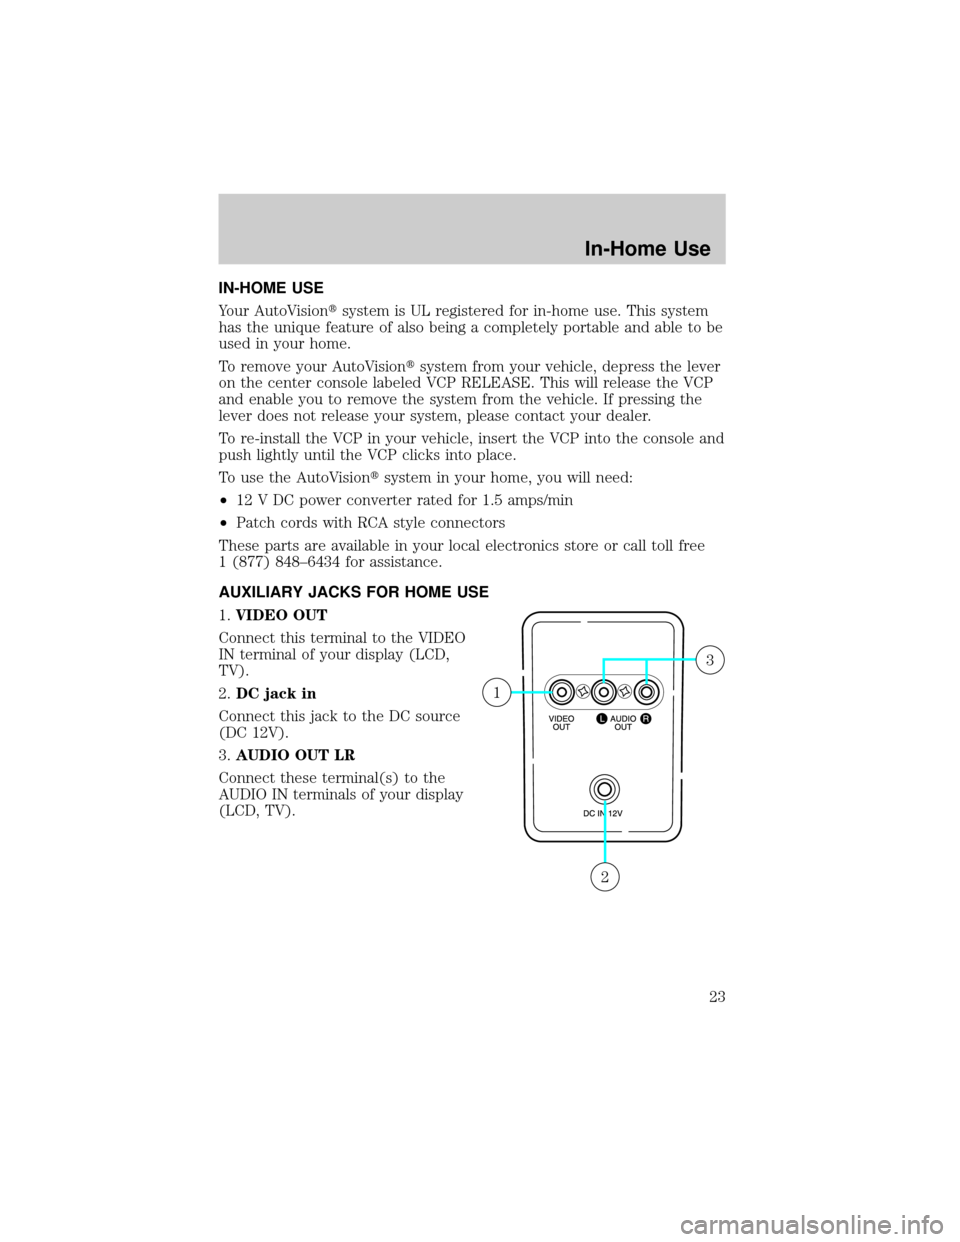
AUXILIARY JACKS FOR HOME USE
1.VIDEO OUT
Connect this terminal to the VIDEO
IN terminal of your display (LCD,
TV).
2.DC jack in
Connect this jack to the DC source
(DC 12V).
3.AUDIO OUT LR
Connect these terminal(s) to the
AUDIO IN terminals of your display
(LCD, TV).
2
1
3
In-Home Use
23