parking brake FORD WINDSTAR 2002 2.G User Guide
[x] Cancel search | Manufacturer: FORD, Model Year: 2002, Model line: WINDSTAR, Model: FORD WINDSTAR 2002 2.GPages: 296, PDF Size: 2.45 MB
Page 188 of 296
has been learned. The adaptive learning strategy is maintained by power
from the battery. When the battery is disconnected or a new battery is
installed, the transaxle must relearn its adaptive strategy. Optimal
shifting will resume within a few hundred kilometers (miles) of
operation.
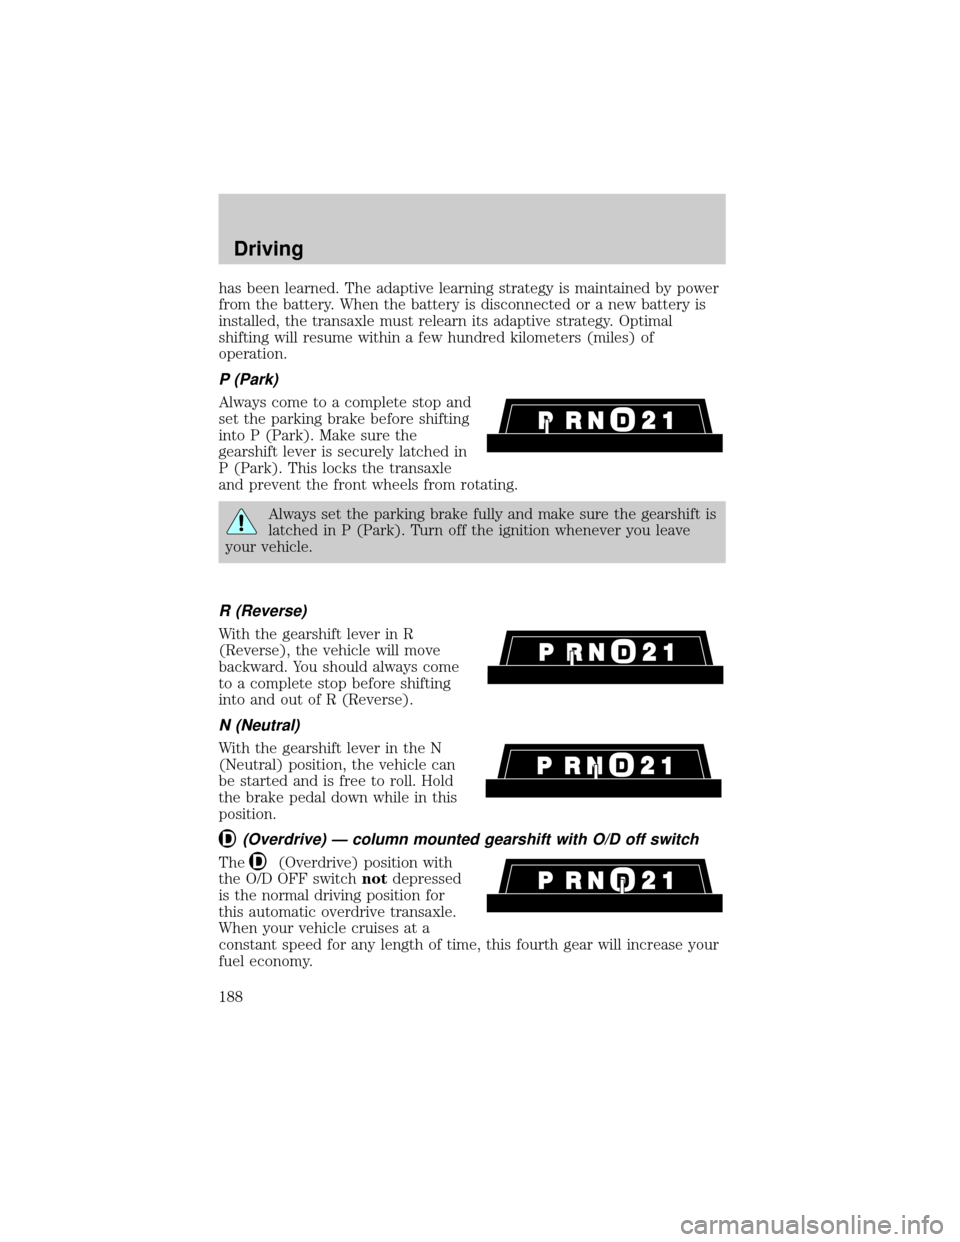
P (Park)
Always come to a complete stop and
set the parking brake before shifting
into P (Park). Make sure the
gearshift lever is securely latched in
P (Park). This locks the transaxle
and prevent the front wheels from rotating.
Always set the parking brake fully and make sure the gearshift is
latched in P (Park). Turn off the ignition whenever you leave
your vehicle.
R (Reverse)
With the gearshift lever in R
(Reverse), the vehicle will move
backward. You should always come
to a complete stop before shifting
into and out of R (Reverse).
N (Neutral)
With the gearshift lever in the N
(Neutral) position, the vehicle can
be started and is free to roll. Hold
the brake pedal down while in this
position.
(Overdrive) Ð column mounted gearshift with O/D off switch
The(Overdrive) position with
the O/D OFF switchnotdepressed
is the normal driving position for
this automatic overdrive transaxle.
When your vehicle cruises at a
constant speed for any length of time, this fourth gear will increase your
fuel economy.
Driving
188
Page 190 of 296
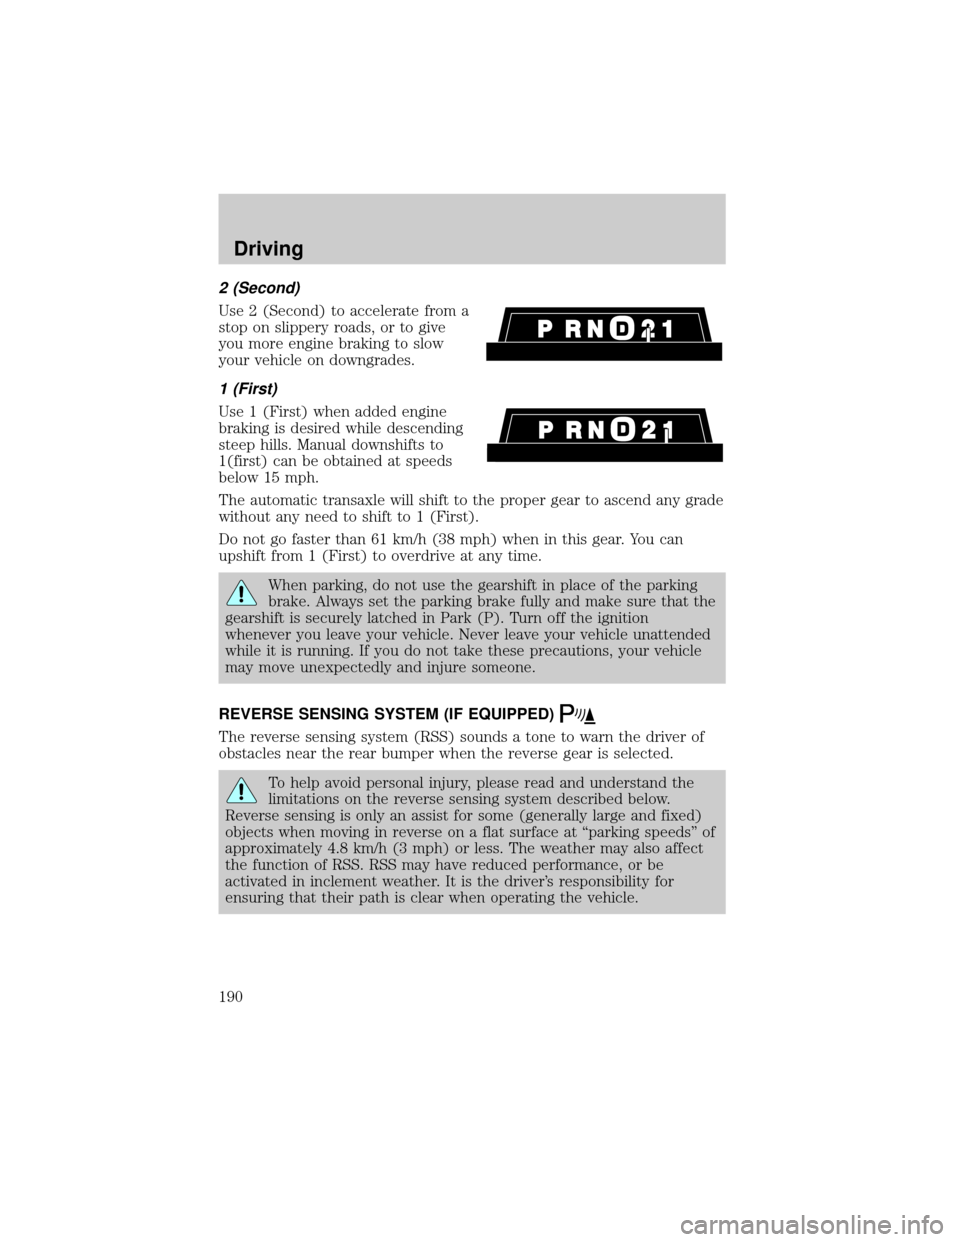
2 (Second)
Use 2 (Second) to accelerate from a
stop on slippery roads, or to give
you more engine braking to slow
your vehicle on downgrades.
1 (First)
Use 1 (First) when added engine
braking is desired while descending
steep hills. Manual downshifts to
1(first) can be obtained at speeds
below 15 mph.
The automatic transaxle will shift to the proper gear to ascend any grade
without any need to shift to 1 (First).
Do not go faster than 61 km/h (38 mph) when in this gear. You can
upshift from 1 (First) to overdrive at any time.
When parking, do not use the gearshift in place of the parking
brake. Always set the parking brake fully and make sure that the
gearshift is securely latched in Park (P). Turn off the ignition
whenever you leave your vehicle. Never leave your vehicle unattended
while it is running. If you do not take these precautions, your vehicle
may move unexpectedly and injure someone.
REVERSE SENSING SYSTEM (IF EQUIPPED)
The reverse sensing system (RSS) sounds a tone to warn the driver of
obstacles near the rear bumper when the reverse gear is selected.
To help avoid personal injury, please read and understand the
limitations on the reverse sensing system described below.
Reverse sensing is only an assist for some (generally large and fixed)
objects when moving in reverse on a flat surface at ªparking speedsº of
approximately 4.8 km/h (3 mph) or less. The weather may also affect
the function of RSS. RSS may have reduced performance, or be
activated in inclement weather. It is the driver's responsibility for
ensuring that their path is clear when operating the vehicle.
Driving
190
Page 215 of 296
Tire change procedure
When one of the front wheels is off the ground, the transaxle
alone will not prevent the vehicle from moving or slipping off the
jack, even if the vehicle is in P (Park).
To prevent the vehicle from moving when you change a tire, be
sure the parking brake is set, then block (in both directions) the
wheel that is diagonally opposite (other side and end of the vehicle) to
the tire being changed.
If the vehicle slips off the jack, you or someone else could be
seriously injured.
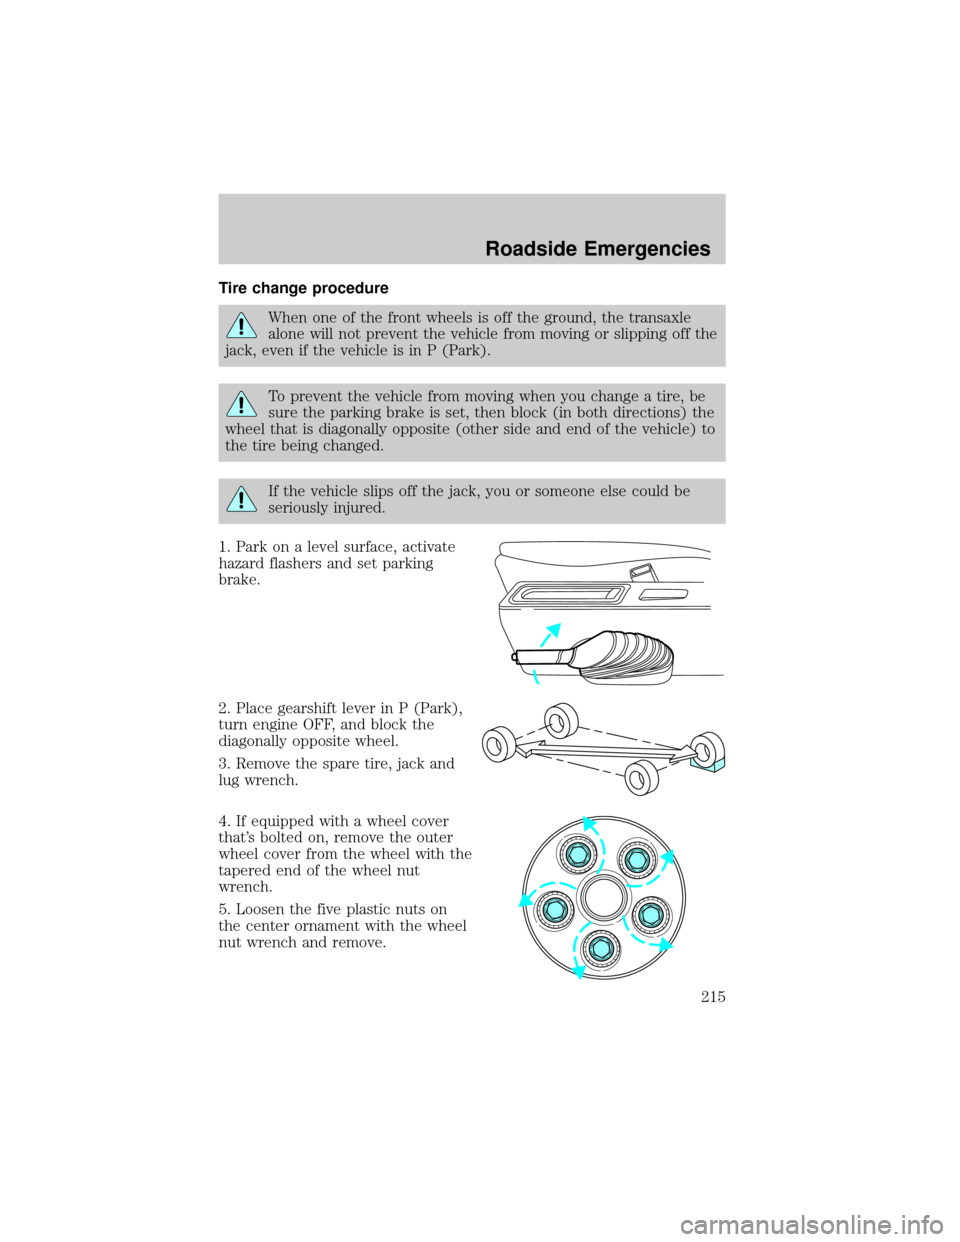
1. Park on a level surface, activate
hazard flashers and set parking
brake.
2. Place gearshift lever in P (Park),
turn engine OFF, and block the
diagonally opposite wheel.
3. Remove the spare tire, jack and
lug wrench.
4. If equipped with a wheel cover
that's bolted on, remove the outer
wheel cover from the wheel with the
tapered end of the wheel nut
wrench.
5. Loosen the five plastic nuts on
the center ornament with the wheel
nut wrench and remove.
Roadside Emergencies
215
Page 218 of 296
JUMP STARTING YOUR VEHICLE
The gases around the battery can explode if exposed to flames,
sparks, or lit cigarettes. An explosion could result in injury or
vehicle damage.
Batteries contain sulfuric acid which can burn skin, eyes, and
clothing, if contacted.
Do not attempt to push-start your vehicle. Automatic
transmissions do not have push-start capability; also, the
catalytic conveter may become damaged.
Preparing your vehicle
When the battery is disconnected or a new battery is installed, the
transmission must relearn its adaptive strategy. As a result of this, the
transmission may shift firmly. This operation is considered normal and
will not affect function or durability of the transmission. Over time, the
adaptive learning process will fully update transmission operation to its
optimum shift feel.
1.Use only a 12±volt supply to start your vehicle.
2. Do not disconnect the battery of the disabled vehicle as this could
damage the vehicle's electrical system.
3. Park the booster vehicle close to the hood of the disabled vehicle
making sure the two vehiclesdo nottouch. Set the parking brake on
both vehicles and stay clear of the engine cooling fan and other moving
parts.
4. Check all battery terminals and remove any excessive corrosion before
you attach the battery cables. Ensure that vent caps are tight and level.
5. Turn the heater fan on in both vehicles to protect any electrical
surges. Turn all other accessories off.
Roadside Emergencies
218
Page 242 of 296
SERVICE RECOMMENDATIONS
To help you service your vehicle:
²We highlight do-it-yourself items in the engine compartment for easy
location.
²We provide a scheduled maintenance guide which makes tracking
routine service easy.
If your vehicle requires professional service, your dealership can provide
the necessary parts and service. Check yourWarranty Guideto find out
which parts and services are covered.
Use only recommended fuels, lubricants, fluids and service parts
conforming to specifications. Motorcraft parts are designed and built to
provide the best performance in your vehicle.
PRECAUTIONS WHEN SERVICING YOUR VEHICLE
Be especially careful when inspecting or servicing your vehicle.
²Do not work on a hot engine.
²When the engine is running, make sure that loose clothing, jewelry or
long hair does not get caught up in moving parts.
²Do not work on a vehicle with the engine running in an enclosed
space, unless you are sure you have enough ventilation.
²Keep all lit cigarettes, open flames and other lit material away from
the battery and all fuel related parts.
If you disconnect the battery, the engine must ªrelearnº its idle
conditions before your vehicle will drive properly, as explained inBattery
in this chapter.
Working with the engine off
1. Set the parking brake and ensure the gearshift is securely latched in P
(Park).
2. Turn off the engine and remove the key.
3. Block the wheels to prevent the vehicle from moving unexpectedly.
Working with the engine on
1. Set the parking brake and ensure the gearshift is securely latched in P
(Park).
2. Block the wheels to prevent the vehicle from moving unexpectedly.
Maintenance and Specifications
242
Page 246 of 296
ENGINE OIL
Checking the engine oil
Refer to the scheduled maintenance guide for the appropriate intervals
for checking the engine oil.
1. Make sure the vehicle is on level ground.
2. Turn the engine off and wait a few minutes for the oil to drain into the
oil pan.
3. Set the parking brake and ensure the gearshift is securely latched in P
(Park).
4. Open the hood. Protect yourself from engine heat.
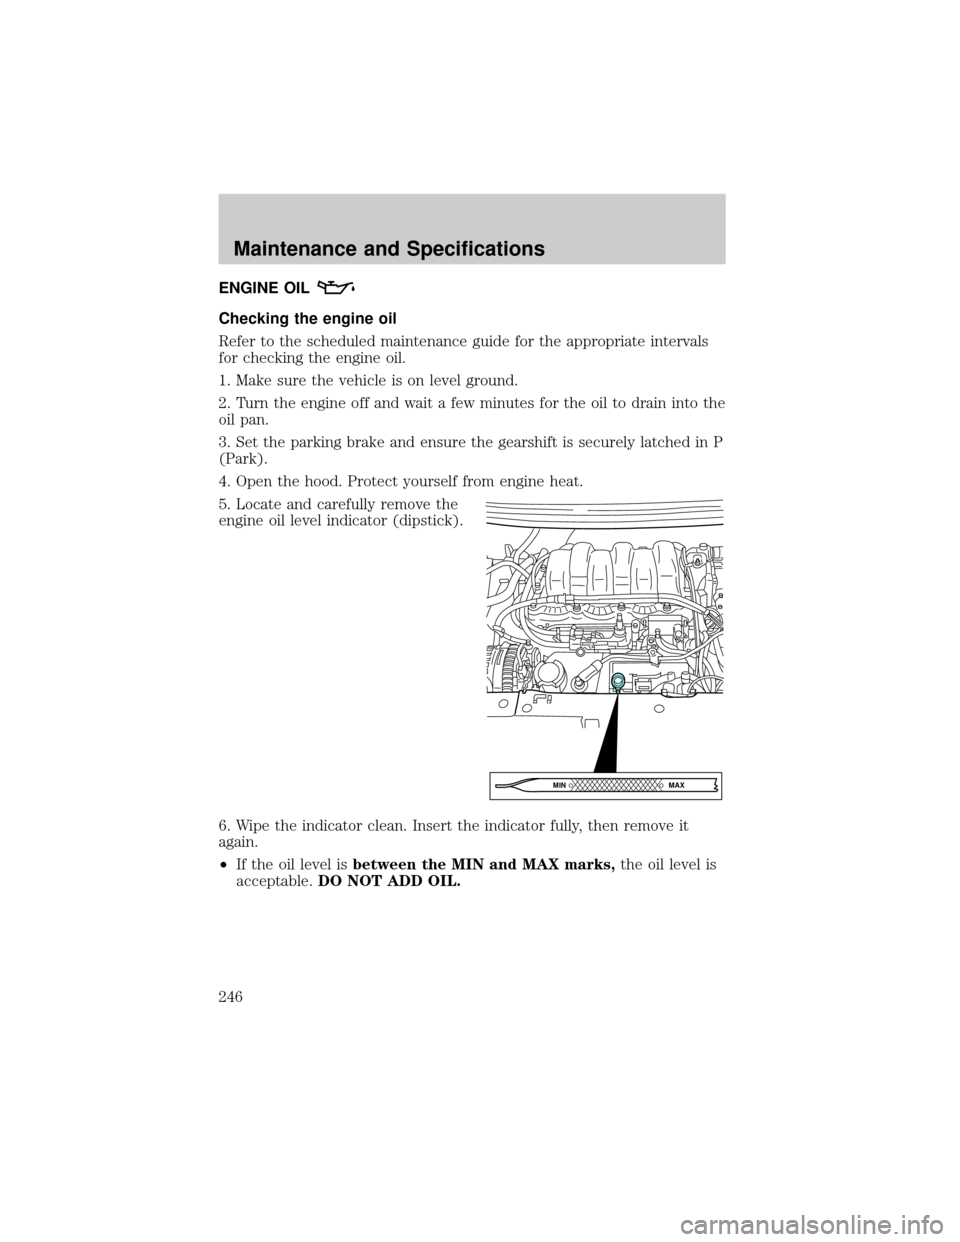
5. Locate and carefully remove the
engine oil level indicator (dipstick).
6. Wipe the indicator clean. Insert the indicator fully, then remove it
again.
²If the oil level isbetween the MIN and MAX marks,the oil level is
acceptable.DO NOT ADD OIL.
MAX MIN
Maintenance and Specifications
246
Page 251 of 296
Because your vehicle's engine is electronically controlled by a computer,
some control conditions are maintained by power from the battery. When
the battery is disconnected or a new battery is installed, the engine must
relearn its idle and fuel trim strategy for optimum driveability and
performance. To begin this process:
1. With the vehicle at a complete stop, set the parking brake.
2. Put the gearshift in P (Park), turn off all accessories and start the
engine.
3. Run the engine until it reaches normal operating temperature.
4. Allow the engine to idle for at least one minute.
5. Turn the A/C on and allow the engine to idle for at least one minute.
6. With your foot on the brake pedal and with the A/C on, put the
vehicle in D (Drive) and allow the engine to idle for at least one minute.
7. Drive the vehicle to complete the relearning process.
²The vehicle may need to be driven 16 km (10 miles) or more to
relearn the idle and fuel trim strategy.
²If you do not allow the engine to relearn its idle trim, the idle
quality of your vehicle may be adversely affected until the idle
trim is eventually relearned.
If the battery has been disconnected or a new battery has been installed,
the clock and the preset radio stations must be reset once the battery is
reconnected.
If the battery has been discharged, disconnected or a new battery has
been installed, the power sliding door may need to be reset. Refer to
Power Sliding Door-Resetting the PSDin theControls and Features
chapter.
²Always dispose of automotive
batteries in a responsible manner.
Follow your local authorized
standards for disposal. Call your
local authorized recycling center
to find out more about recycling
automotive batteries.
LEAD
RETURN
RECYCLE
Maintenance and Specifications
251
Page 269 of 296
specificationsin this chapter.DOT 3 fluid is recommended.
However, if DOT 3 is not available, DOT 4 fluid can be used.
Brake fluid is toxic. If brake fluid contacts the eyes, flush eyes
with running water for 15 minutes. Seek medical attention if
irritation persists. If taken internally, drink water and induce vomiting.
Seek medical attention immediately.
If you use DOT 5 or any other brake fluid that is not DOT 3 or
DOT 4, you will cause permanent damage to your brakes.
Do not let the fluid level in the reservoir for the master cylinder
fall below the MIN mark. If master cylinder runs dry, this may
cause the brakes to fail.
TRANSMISSION FLUID
Checking automatic transmission fluid
Refer to your scheduled maintenance guide for scheduled intervals for
fluid checks and changes. Your transaxle does not consume fluid.
However, the fluid level should be checked if the transaxle is not working
properly, i.e., if the transaxle slips or shifts slowly or if you notice some
sign of fluid leakage.
Automatic transmission fluid expands when warmed. To obtain an
accurate fluid check, drive the vehicle until it is warmed up
(approximately 30 km [20 miles]). If your vehicle has been
operated for an extended period at high speeds, in city traffic
during hot weather or pulling a trailer, the vehicle should be
turned off for about 30 minutes to allow fluid to cool before
checking.
1. Drive the vehicle 30 km (20 miles) or until it reaches normal operating
temperature.
2. Park the vehicle on a level surface and engage the parking brake.
3. With the parking brake engaged and your foot on the brake pedal,
start the engine and move the gearshift lever through all of the gear
ranges. Allow sufficient time for each gear to engage.
4. Latch the gearshift lever in P (Park) and leave the engine running.
Maintenance and Specifications
269
Page 287 of 296
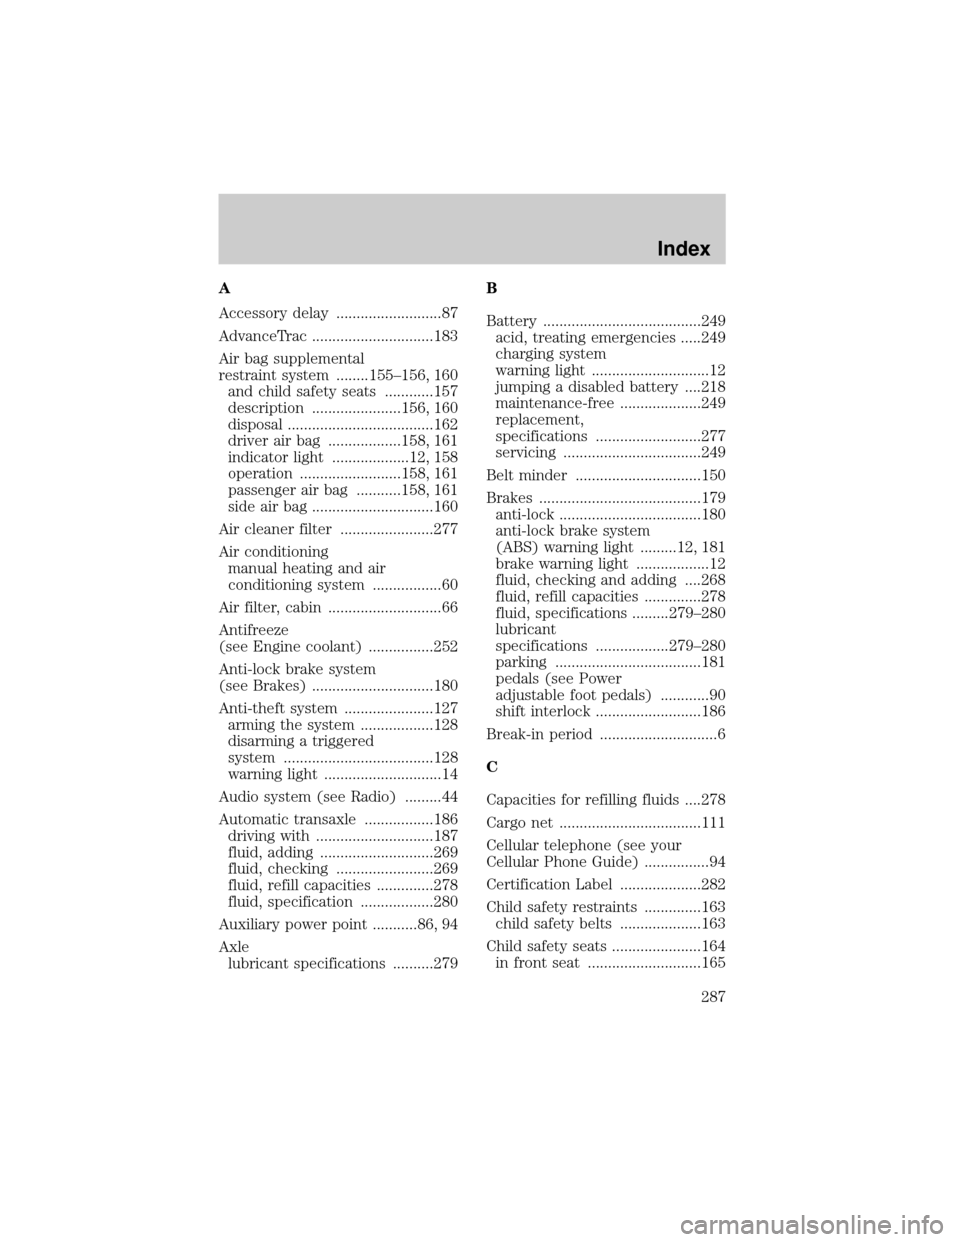
A
Accessory delay ..........................87
AdvanceTrac ..............................183
Air bag supplemental
restraint system ........155±156, 160
and child safety seats ............157
description ......................156, 160
disposal ....................................162
driver air bag ..................158, 161
indicator light ...................12, 158
operation .........................158, 161
passenger air bag ...........158, 161
side air bag ..............................160
Air cleaner filter .......................277
Air conditioning
manual heating and air
conditioning system .................60
Air filter, cabin ............................66
Antifreeze
(see Engine coolant) ................252
Anti-lock brake system
(see Brakes) ..............................180
Anti-theft system ......................127
arming the system ..................128
disarming a triggered
system .....................................128
warning light .............................14
Audio system (see Radio) .........44
Automatic transaxle .................186
driving with .............................187
fluid, adding ............................269
fluid, checking ........................269
fluid, refill capacities ..............278
fluid, specification ..................280
Auxiliary power point ...........86, 94
Axle
lubricant specifications ..........279B
Battery .......................................249
acid, treating emergencies .....249
charging system
warning light .............................12
jumping a disabled battery ....218
maintenance-free ....................249
replacement,
specifications ..........................277
servicing ..................................249
Belt minder ...............................150
Brakes ........................................179
anti-lock ...................................180
anti-lock brake system
(ABS) warning light .........12, 181
brake warning light ..................12
fluid, checking and adding ....268
fluid, refill capacities ..............278
fluid, specifications .........279±280
lubricant
specifications ..................279±280
parking ....................................181
pedals (see Power
adjustable foot pedals) ............90
shift interlock ..........................186
Break-in period .............................6
C
Capacities for refilling fluids ....278
Cargo net ...................................111
Cellular telephone (see your
Cellular Phone Guide) ................94
Certification Label ....................282
Child safety restraints ..............163
child safety belts ....................163
Child safety seats ......................164
in front seat ............................165
Index
287
Page 291 of 296

overdrive off ..............................14
safety belt .................................12
traction control active ..............13
traction control off ...................13
turn signal indicator .................15
Load limits .................................193
GAWR ......................................193
GVWR ......................................193
trailer towing ..........................193
Locks
autolock ...................................121
childproof ................................114
Low tire warning .......................272
Lubricant
specifications .....................279±280
Lumbar support, seats .............132
M
Message center .........................100
english/metric button .............101
system check button ..............101
warning messages ...................102
Mirrors .........................................81
automatic dimming rearview
mirror ........................................88
fold away ...................................89
heated ........................................89
side view mirrors (power) .......88
Motorcraft parts ................262, 277
O
Octane rating ............................260
Odometer .....................................17
Oil (see Engine oil) ..................246
Overdrive .............................93, 187P
Panic alarm feature,
remote entry system ................118
Parking brake ............................181
Parts
(see Motorcraft parts) ..............277
Passenger Occupant
Classification Sensor .................142
Pedals (see Power adjustable
foot pedals) .................................90
Power distribution box
(see Fuses) ...............................208
Power door locks ..............113, 121
Power steering ..........................185
fluid, checking and adding ....267
fluid, refill capacity ................278
fluid, specifications .........279±280
R
Rear window defroster ...............66
Relays ........................................203
Remote entry system .......114, 118
illuminated entry ......68, 121±122
locking/unlocking
doors ........................113, 115±117
panic alarm .............................118
replacement/additional
transmitters .............................120
replacing the batteries ...........119
Reverse sensing system ...........190
Roof rack ...................................112
Index
291