Wheel sensor GENESIS G70 2021 Owner's Manual
[x] Cancel search | Manufacturer: GENESIS, Model Year: 2021, Model line: G70, Model: GENESIS G70 2021Pages: 516, PDF Size: 12.84 MB
Page 250 of 516
Driving your vehicle
5
Before Driving ........................................................5-4
Before Entering the Vehicle ...........................................5-4
Before Starting ..................................................................5-4
Engine Start/Stop Button .....................................5-6
Engine Start/Stop button positions ..............................5-7
Starting the Engine ...........................................................5-9
Turning Off the Engine..................................................5-11
Manual Transmission ...........................................5-12
Manual Transmission Operation ..................................5-12
Good Driving Practices ..................................................5-15
Automatic Transmission ......................................5-16
Automatic Transmission Operation .............................5-16
Paddle Shifter (Manual Shift Mode) ..........................5-21
LCD Display Messages ...................................................5-22
Good Driving Practices ..................................................5-26
Braking System ....................................................5-28
Power Brakes ...................................................................5-28
High Performance Brake...............................................5-29
Disc Brakes Wear Indicator ..........................................5-29
Parking Brake...................................................................5-30
Electronic Parking Brake (EPB)...................................5-33
Auto Hold ..........................................................................5-38
Anti-lock Brake System (ABS) ....................................5-41
Electronic Stability Control (ESC)................................5-43
Vehicle Stability Management (VSM).........................5-47Hill-Start Assist Control (HAC) ....................................5-48
Good Braking Practices .................................................5-48
All Wheel Drive (AWD) ........................................5-49
Using All Wheel Drive (AWD) .......................................5-49
Emergency precautions .................................................5-51
Limited slip differential .......................................5-53
Electronic Control Suspension (ECS) ................5-54
Launch Control .....................................................5-55
Prerequisite for Activation ...........................................5-55
Launch Control Activation.............................................5-55
Limited Use of Launch Control ....................................5-56
ECO Coasting ........................................................5-57
ECO Coasting Activation Condition .............................5-57
ECO Coasting Deactivation Condition.........................5-58
Setting ECO Coasting Function....................................5-58
ECO Coasting Activation Indicator ..............................5-59
ISG (Idle Stop and Go) System ..........................5-60
To Activate the ISG System ..........................................5-60
To Deactivate the ISG System......................................5-63
ISG System Malfunction ................................................5-63
The Battery Sensor Deactivation ................................5-64
Drive Mode Integrated Control System ............5-65
Drive Mode (with Manual Transmission)...................5-65
Drive Mode (with Automatic Transmission)..............5-68
Smart shift on trip computer .......................................5-72
Page 309 of 516
5-60
Driving your vehicle
The ISG system is to help reduce the
fuel consumption by automatically
shutting down the engine, when the
vehicle is at a standstill (i.e. red stop
light, stop sign, and traffic jam).
The engine is automatically started
upon satisfying the starting condi-
tions.
The ISG system is always active,
when the engine is running.
Information
When the engine is automatically
started by the ISG system, some warn-
ing lights (i.e. ABS, ESC, ESC OFF,
EPS, and parking brake warning
light) may illuminate for a few sec-
onds due to the low battery voltage.
However, it does not indicate a mal-
function with the ISG system.
To Activate the ISG System
Prerequisite for activation
The ISG system operates in the fol-
lowing situations.
• The driver's seatbelt is fastened
• The driver's door and hood are
closed
• The brake vacuum pressure is
adequate
• The battery sensor is activated and
the battery is sufficiently charged
• Outside temperature is not too low
or too high
• The vehicle is driven over a con-
stant speed and stops
• The climate control system satis-
fies the conditions
• The vehicle is sufficiently warmed
up
• The incline is gradual
• The steering wheel is turned less
than 180 degrees and then the
vehicle stops
Information
The ISG system is not
activated, when the pre-
requisites to activate the
ISG system are unsatis-
fied. In this case, the ISG OFF but-
ton indicator illuminates, and the
auto stop indicator ( ) illuminates
in yellow on the instrument cluster.
• When the above indicator remains
illuminated on the instrument clus-
ter, we recommend that you have
the IGS system checked by an
authorized retailer of Genesis
Branded products.
i
i
ISG (IDLE STOP AND GO) SYSTEM (IF EQUIPPED)
•
Page 346 of 516

5-97
Driving your vehicle
5
The color of indicator will
change depending on the
condition of LKA system.
- White :Sensor does not detect
lane lines or vehicle speed
is under 40mph (64 km/h).
- Green : Sensor detects lane lines
and the system is able to
control vehicle steering.
Information
If the indicator (white) is activated
from the previous ignition cycle, the
system will turn ON without any addi-
tional control. If you press the LKA
switch again, the indicator on the clus-
ter goes off.
LKA system activation
• To see the LKA system screen on
the LCD display in the cluster,
select Assist mode ( ).For more
details, refer to "LCD Display
Modes" in chapter 3.
• When both lane lines are detected
and all the conditions to activate
the LKA system are satisfied, a
green steering wheel indicator will
illuminate and the LKA system
indicator light will change from
white to green. This indicates that
the LKA system is in the
ENABLED state and the steering
wheel will be able to be controlled.
i
The Lane Keeping Assist (LKA)
system is a system to help pre-
vent the driver from leaving the
lane. However, the driver should
not solely rely on the system
but always check the road con-
ditions when driving.
WARNING
OIK057114L
Page 366 of 516
5-117
Driving your vehicle
5
Smart Cruise Control set speed
will be temporarily canceled
when:
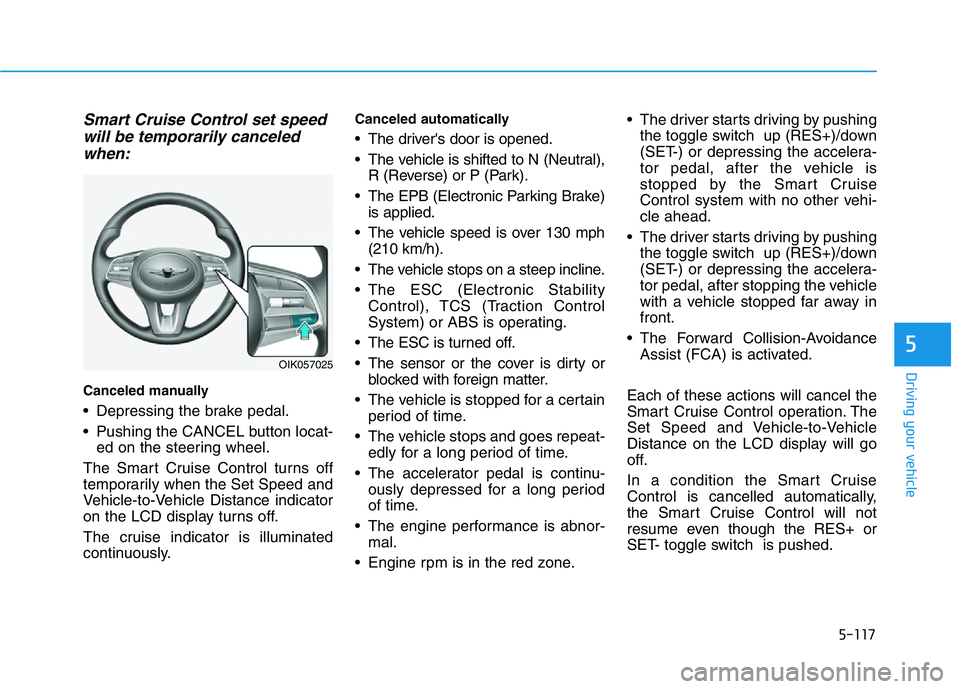
Canceled manually
• Depressing the brake pedal.
• Pushing the CANCEL button locat-
ed on the steering wheel.
The Smart Cruise Control turns off
temporarily when the Set Speed and
Vehicle-to-Vehicle Distance indicator
on the LCD display turns off.
The cruise indicator is illuminated
continuously.
Canceled automatically
• The driver's door is opened.
• The vehicle is shifted to N (Neutral),
R (Reverse) or P (Park).
• The EPB (Electronic Parking Brake)
is applied.
• The vehicle speed is over 130 mph
(210 km/h).
• The vehicle stops on a steep incline.
• The ESC (Electronic Stability
Control), TCS (Traction Control
System) or ABS is operating.
• The ESC is turned off.
• The sensor or the cover is dirty or
blocked with foreign matter.
• The vehicle is stopped for a certain
period of time.
• The vehicle stops and goes repeat-
edly for a long period of time.
• The accelerator pedal is continu-
ously depressed for a long period
of time.
• The engine performance is abnor-
mal.
• Engine rpm is in the red zone.• The driver starts driving by pushing
the toggle switch up (RES+)/down
(SET-) or depressing the accelera-
tor pedal, after the vehicle is
stopped by the Smart Cruise
Control system with no other vehi-
cle ahead.
• The driver starts driving by pushing
the toggle switch up (RES+)/down
(SET-) or depressing the accelera-
tor pedal, after stopping the vehicle
with a vehicle stopped far away in
front.
• The Forward Collision-Avoidance
Assist (FCA) is activated.
Each of these actions will cancel the
Smart Cruise Control operation. The
Set Speed and Vehicle-to-Vehicle
Distance on the LCD display will go
off.
In a condition the Smart Cruise
Control is cancelled automatically,
the Smart Cruise Control will not
resume even though the RES+ or
SET- toggle switch is pushed.
OIK057025
Page 375 of 516
5-126
Driving your vehicle
Detecting vehicles
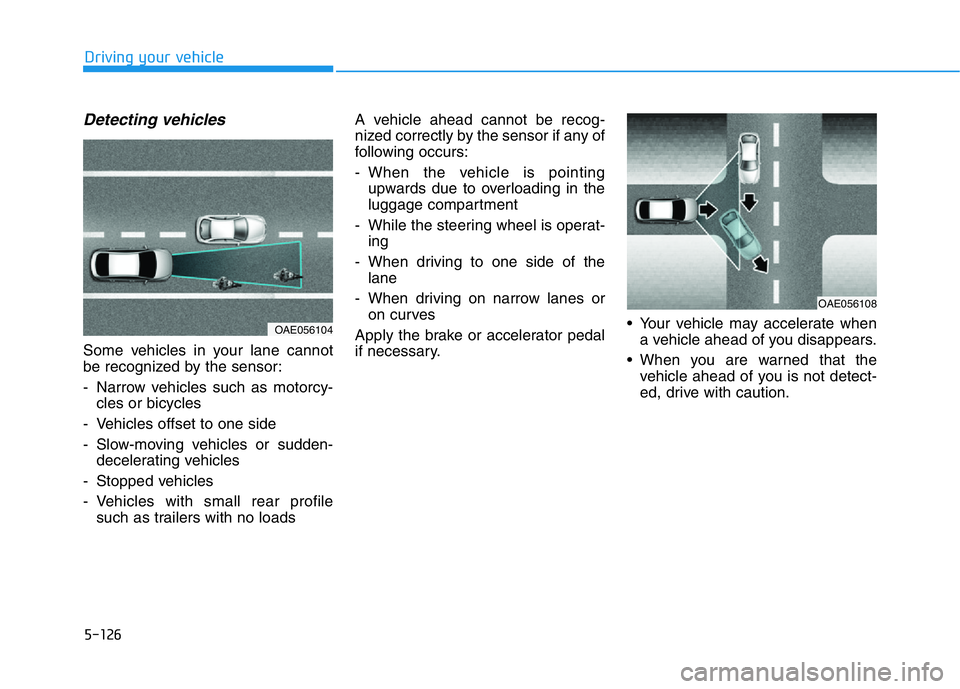
Some vehicles in your lane cannot
be recognized by the sensor:
- Narrow vehicles such as motorcy-
cles or bicycles
- Vehicles offset to one side
- Slow-moving vehicles or sudden-
decelerating vehicles
- Stopped vehicles
- Vehicles with small rear profile
such as trailers with no loadsA vehicle ahead cannot be recog-
nized correctly by the sensor if any of
following occurs:
- When the vehicle is pointing
upwards due to overloading in the
luggage compartment
- While the steering wheel is operat-
ing
- When driving to one side of the
lane
- When driving on narrow lanes or
on curves
Apply the brake or accelerator pedal
if necessary.• Your vehicle may accelerate when
a vehicle ahead of you disappears.
• When you are warned that the
vehicle ahead of you is not detect-
ed, drive with caution.
OAE056104
OAE056108
Page 405 of 516
6-12
What to do in an emergency
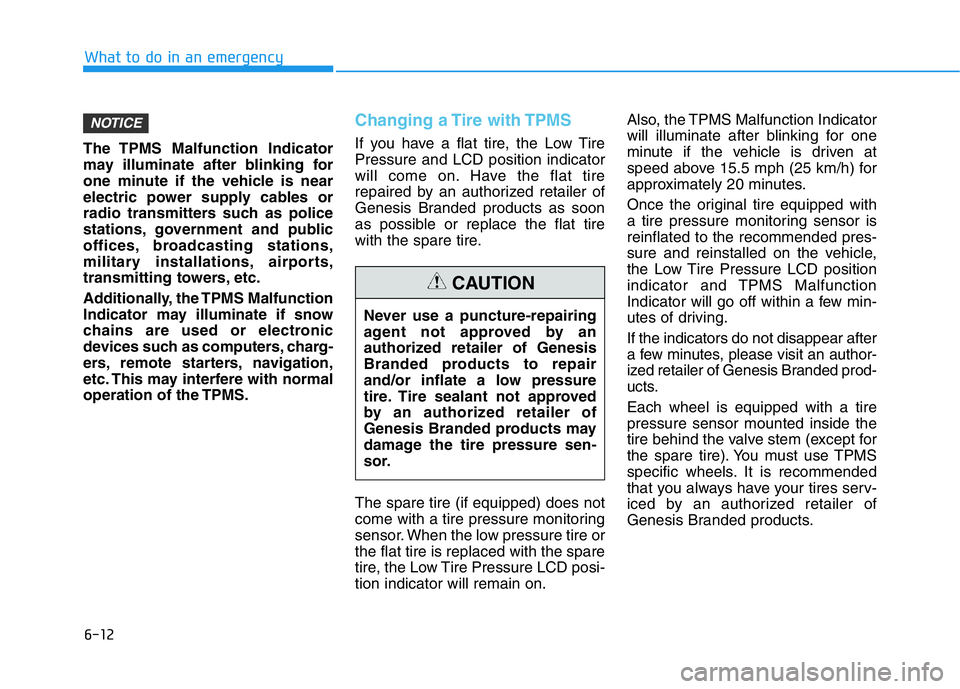
The TPMS Malfunction Indicator
may illuminate after blinking for
one minute if the vehicle is near
electric power supply cables or
radio transmitters such as police
stations, government and public
offices, broadcasting stations,
military installations, airports,
transmitting towers, etc.
Additionally, the TPMS Malfunction
Indicator may illuminate if snow
chains are used or electronic
devices such as computers, charg-
ers, remote starters, navigation,
etc. This may interfere with normal
operation of the TPMS.
Changing a Tire with TPMS
If you have a flat tire, the Low Tire
Pressure and LCD position indicator
will come on. Have the flat tire
repaired by an authorized retailer of
Genesis Branded products as soon
as possible or replace the flat tire
with the spare tire.
The spare tire (if equipped) does not
come with a tire pressure monitoring
sensor. When the low pressure tire or
the flat tire is replaced with the spare
tire, the Low Tire Pressure LCD posi-
tion indicator will remain on.Also, the TPMS Malfunction Indicator
will illuminate after blinking for one
minute if the vehicle is driven at
speed above 15.5 mph (25 km/h) for
approximately 20 minutes.
Once the original tire equipped with
a tire pressure monitoring sensor is
reinflated to the recommended pres-
sure and reinstalled on the vehicle,
the Low Tire Pressure LCD position
indicator and TPMS Malfunction
Indicator will go off within a few min-
utes of driving.
If the indicators do not disappear after
a few minutes, please visit an author-
ized retailer of Genesis Branded prod-
ucts.
Each wheel is equipped with a tire
pressure sensor mounted inside the
tire behind the valve stem (except for
the spare tire). You must use TPMS
specific wheels. It is recommended
that you always have your tires serv-
iced by an authorized retailer of
Genesis Branded products.
NOTICE
Never use a puncture-repairing
agent not approved by an
authorized retailer of Genesis
Branded products to repair
and/or inflate a low pressure
tire. Tire sealant not approved
by an authorized retailer of
Genesis Branded products may
damage the tire pressure sen-
sor.
CAUTION
Page 418 of 516

6-25
What to do in an emergency
5. Plug the compressor power cord
(4) into the vehicle power outlet.
6. With the Engine Start/Stop button
in the ON position, switch on the
compressor and let it run for
approximately 5~7 minutes to fill
the sealant up to proper pressure.
(refer to the Tire and Wheels,
chapter 8). The inflation pressure
of the tire after filling is unimpor-
tant and will be checked/corrected
later.
Be careful not to overinflate the
tire and stay away from the tire
when filling it.7. Switch off the compressor.
8. Detach the hoses from the sealant
bottle connector and from the tire
valve.
Return the Tire Mobility Kit to its stor-
age location in the vehicle.
Distributing the sealant
9. Immediately drive approximately
4~6miles (7~10km or about 10
minutes) to evenly distribute the
sealant in the tire.
Do not exceed a speed of 50 mph
(80 km/h). If possible, do not fall
below a speed of 12 mph (20 km/h).
While driving, if you experience any
unusual vibration, ride disturbance or
noise, reduce your speed and drive
with caution until you can safely pull
off of the side of the road.
Call for road side service or towing.
When you use the Tire Mobility Kit,
the tire pressure sensors and wheel
may be damaged by sealant, have it
inspected at an authorized retailer of
Genesis Branded products.
6
OIK069010
Do not attempt to drive your
vehicle if the tire pressure is
below 29 psi (200 kpa). This
could result in an accident due
to sudden tire failure.
CAUTION
Do not leave your vehicle run-
ning in a poorly ventilated area
for extended periods of time.
Carbon monoxide poisoning
and suffocation can occur.
WARNING
Page 420 of 516

6-27
What to do in an emergency
6Information
When reinstalling the repaired or
replaced tire and wheel on the vehicle,
tighten the wheel lug nut to 79~94
lbf·ft (11~13 kgf·m).
Towing Service
If emergency towing is necessary,
we recommend having it done by an
authorized retailer of Genesis
Branded products or a commercial
tow-truck service. Proper lifting and
towing procedures are necessary to
prevent damage to the vehicle. The
use of wheel dollies or flatbed is rec-
ommended.When towing the vehicle by flatbed
equipment, secure wheels by using
chocks and tie-down straps (or soft
belts).
Do not place straps over body panels
or through the wheels.
Do not lift the vehicle by the tow
fitting or body and chassis parts.
Otherwise the vehicle may be
damaged.NOTICE
i
TOWING
OIK067011dolly dolly
When you use the Tire Mobility
Kit including sealant not
approved by Genesis Branded
Vehicle, the tire pressure sen-
sors may be damaged by
sealant. The sealant on the tire
pressure sensor and wheel
should be removed when you
replace the tire with a new one
and inspect the tire pressure
sensors at an authorized retail-
er of Genesis Branded prod-
ucts.
CAUTION
OIK067012
Page 421 of 516

6-28
What to do in an emergency
On AWD vehicles, your vehicle must
be towed with a wheel lift and dollies
or flatbed equipment with all the
wheels off the ground.
The AWD vehicle should never be
towed with the wheels on the
ground. This can cause serious
damage to the transmission or the
AWD system.
On 2WD vehicles, it is acceptable to
tow the vehicle with the front wheels
on the ground (without dollies) and
the rear wheels off the ground.
If any of the loaded wheels or sus-
pension components are damaged
or the vehicle is being towed with the
rear wheels on the ground, use a
towing dolly under the rear wheels.
When being towed by a commercial
tow truck and wheel dollies are not
used, the rear of the vehicle should
always be lifted, not the front.• Do not tow the vehicle with the
front wheels on the ground as
this may cause damage to the
vehicle.
• Do not tow with sling-type
equipment. Use a wheel lift or
flatbed equipment.When towing your vehicle in an
emergency without wheel dollies:
1. Place the shift lever in N (Neutral).
2. Release the parking brake.
Failure to place the shift lever in N
(Neutral) when being towed with
the front wheels on the ground
can cause internal damage to the
transmission.
NOTICE
NOTICE
NOTICE
If your vehicle is equipped with
a rollover sensor, press the
Engine Start/Stop button to the
OFF or ACC position when the
vehicle is being towed. The side
impact and curtain air bag may
deploy if the sensor detects the
situation as a rollover.
WARNING
OIK067014
OIK067013