wheel GENESIS G90 2017 Owner's Guide
[x] Cancel search | Manufacturer: GENESIS, Model Year: 2017, Model line: G90, Model: GENESIS G90 2017Pages: 524, PDF Size: 19.3 MB
Page 172 of 524

Automatic EmergencyBraking (AEB) Warninglight
This warning light illuminates :
When the AEB system is turned off.
When the radar sensor or cover is
blocked with dirt or snow. Check
the sensor and cover and clean
them by using a soft cloth.
When there is a malfunction with AEB. In this case, have your vehi-
cle inspected by an authorized
Dealer of Genesis Brand Products.
Adaptive Front LightingSystem (AFLS)Warning Light
This warning light illuminates :
Once you place the Engine Start/
Stop Button to the ON position.
- It illuminates for approximately 3seconds and then goes off.
When there is a malfunction with the AFLS.
If there is a malfunction with the
AFLS:
1. Drive carefully to the nearest safe location and stop your vehicle.
2. Turn the engine off and restart the engine. If the warning light remains
on, have your vehicle inspected by
an authorized Dealer of Genesis
Brand Products.
All Wheel Drive (AWD)Warning Light (if equipped)
This warning light illuminates:
Once you place the Engine Start/
Stop button to the ON position.
- It illuminates for approximately 3seconds and then goes off.
When there is a malfunction with the AWD system.
In this case, have your vehicle
inspected by an authorized Dealer of
Genesis Brand Products.
3-70
Convenient features of your vehicle
Page 180 of 524
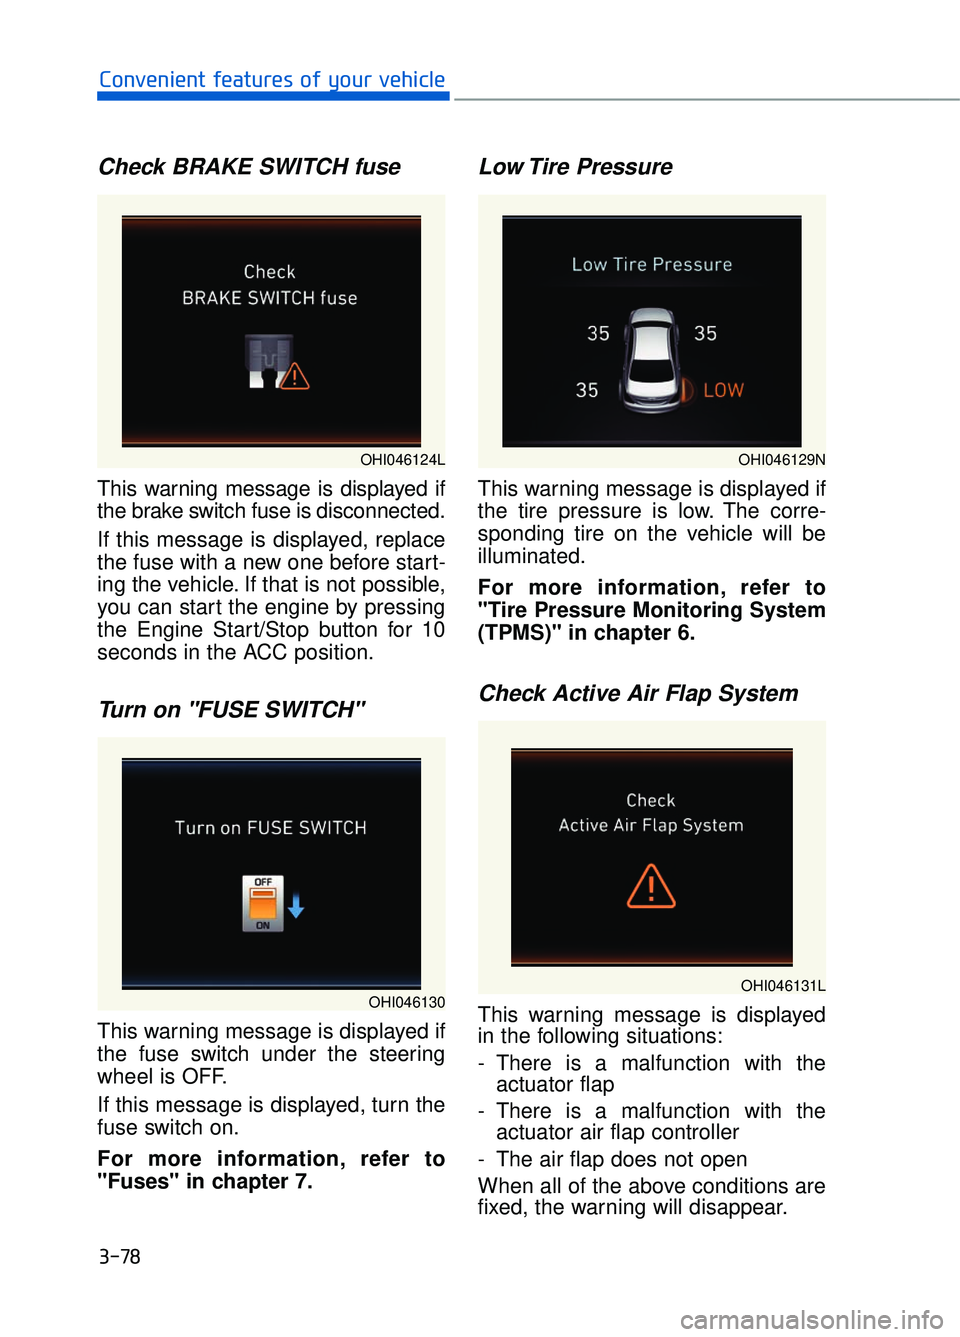
Check BRAKE SWITCH fuse
This warning message is displayed if
the brake switch fuse is disconnected.
If this message is displayed, replace
the fuse with a new one before start-
ing the vehicle. If that is not possible,
you can start the engine by pressing
the Engine Start/Stop button for 10
seconds in the ACC position.
Turn on "FUSE SWITCH"
This warning message is displayed if
the fuse switch under the steering
wheel is OFF.
If this message is displayed, turn the
fuse switch on.
For more information, refer to
"Fuses" in chapter 7.
Low Tire Pressure
This warning message is displayed if
the tire pressure is low. The corre-
sponding tire on the vehicle will be
illuminated.
For more information, refer to
"Tire Pressure Monitoring System
(TPMS)" in chapter 6.
Check Active Air Flap System
This warning message is displayed
in the following situations:
- There is a malfunction with theactuator flap
- There is a malfunction with the actuator air flap controller
- The air flap does not open
When all of the above conditions are
fixed, the warning will disappear.
3-78
Convenient features of your vehicle
OHI046130
OHI046129N
OHI046131L
OHI046124L
Page 184 of 524
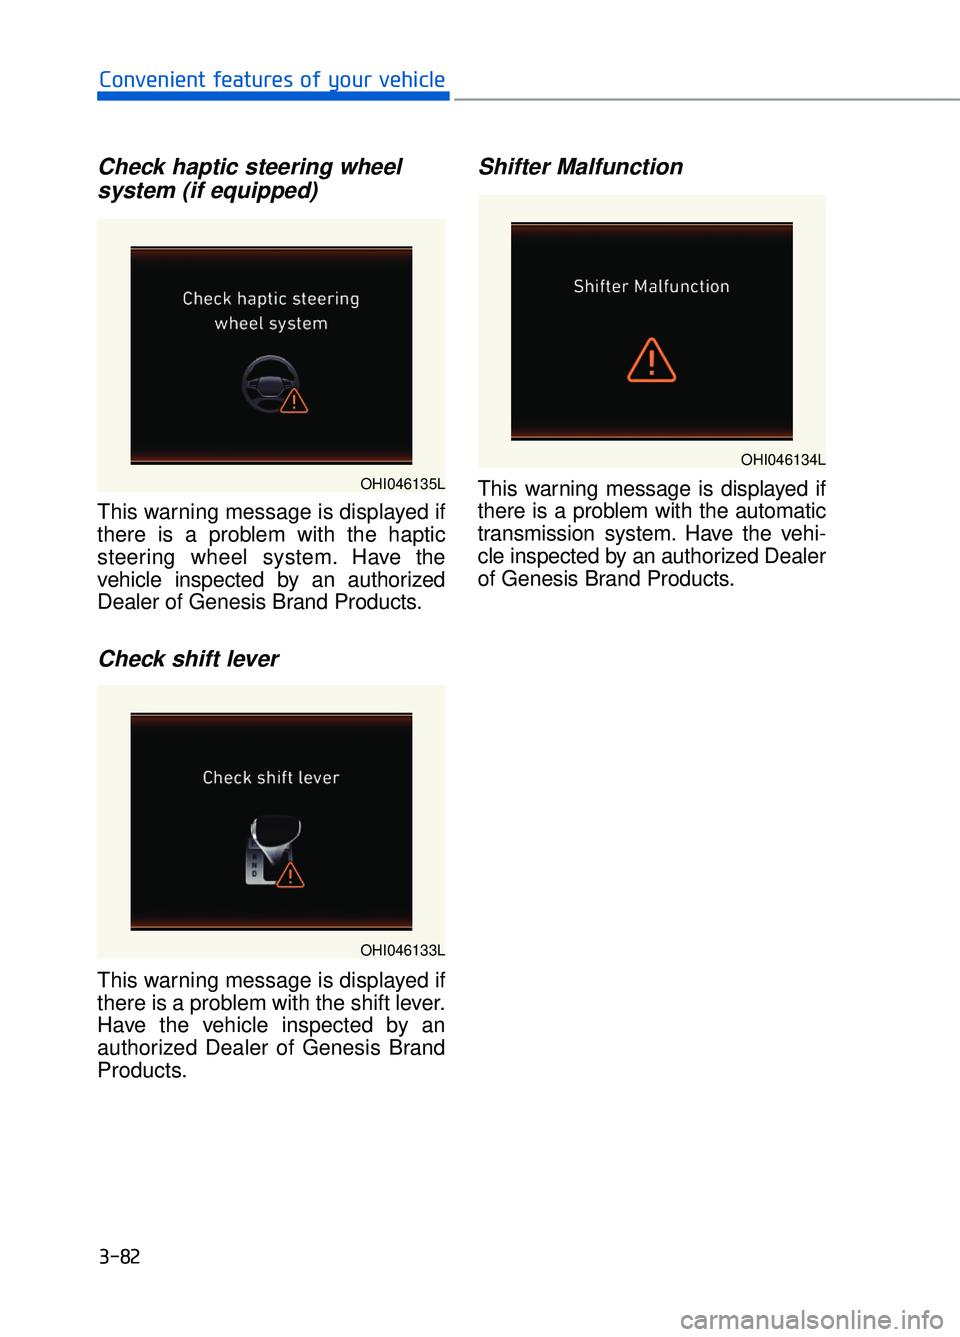
Check haptic steering wheelsystem (if equipped)
This warning message is displayed if
there is a problem with the haptic
steering wheel system. Have the
vehicle inspected by an authorized
Dealer of Genesis Brand Products.
Check shift lever
This warning message is displayed if
there is a problem with the shift lever.
Have the vehicle inspected by an
authorized Dealer of Genesis Brand
Products.
Shifter Malfunction
This warning message is displayed if
there is a problem with the automatic
transmission system. Have the vehi-
cle inspected by an authorized Dealer
of Genesis Brand Products.
3-82
Convenient features of your vehicle
OHI046135L
OHI046133L
OHI046134L
Page 188 of 524
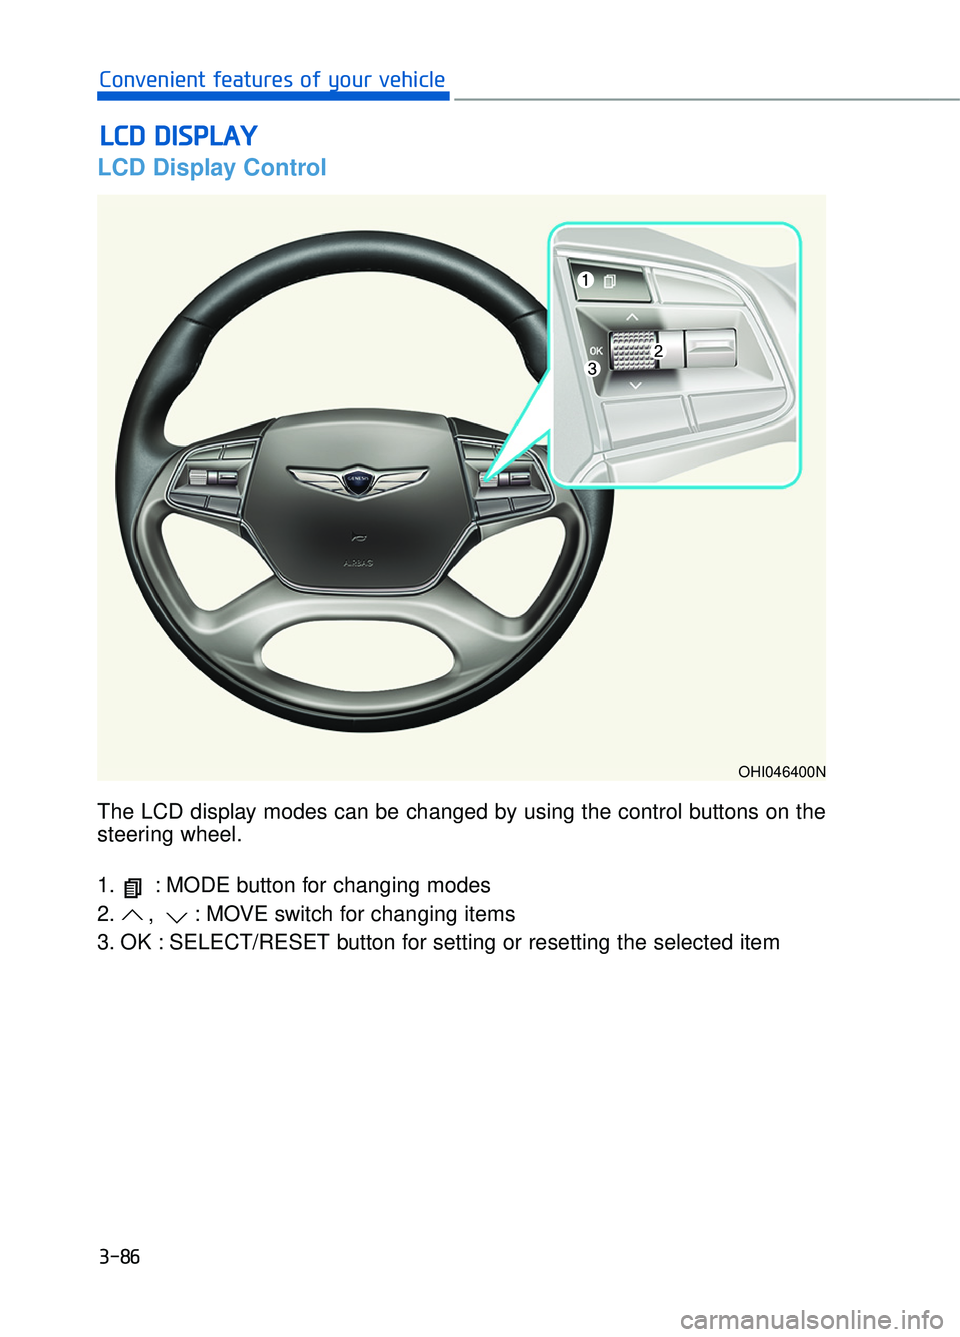
The LCD display modes can be changed by using the control buttons on the
steering wheel.
1. : MODE button for changing modes
2. , : MOVE switch for changing items
3. OK : SELECT/RESET button for setting or resetting the selected item
LCD Display Control
L
LC
C D
D
D
D I
IS
S P
P L
LA
A Y
Y
3-86
Convenient features of your vehicle
OHI046400N
Page 195 of 524
To activate or deactivate the head-
lamp delay function.
For more information, refer to
"Light" in this chapter
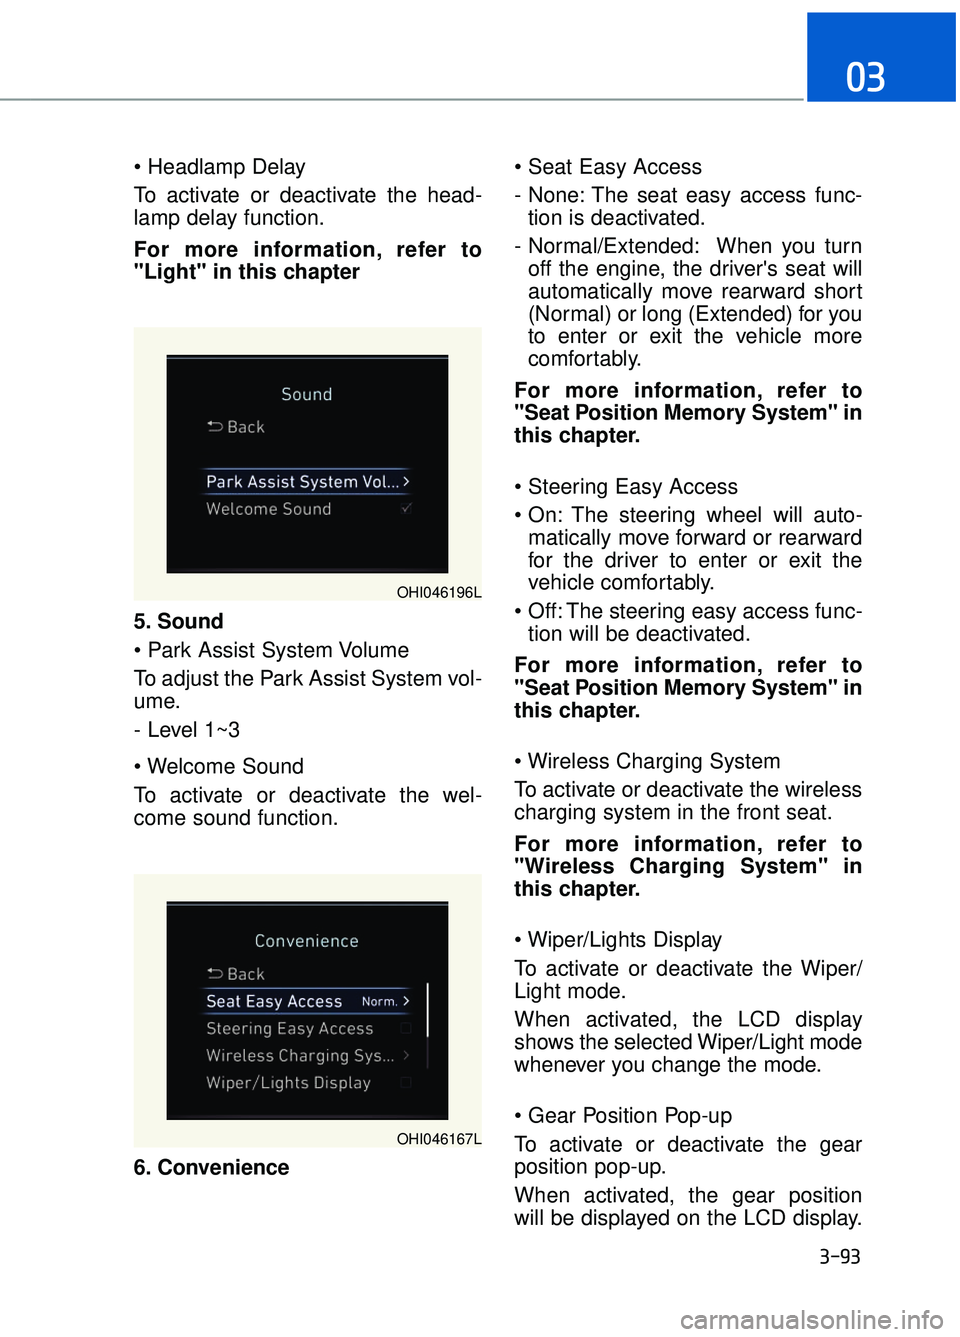
5. Sound
To adjust the Park Assist System vol-
ume.
- Level 1~3
To activate or deactivate the wel-
come sound function.
6. Convenience
- None: The seat easy access func-
tion is deactivated.
- Normal/Extended: When you turn off the engine, the driver's seat will
automatically move rearward short
(Normal) or long (Extended) for you
to enter or exit the vehicle more
comfortably.
For more information, refer to
"Seat Position Memory System" in
this chapter.
The steering wheel will auto- matically move forward or rearward
for the driver to enter or exit the
vehicle comfortably.
The steering easy access func- tion will be deactivated.
For more information, refer to
"Seat Position Memory System" in
this chapter.
To activate or deactivate the wireless
charging system in the front seat.
For more information, refer to
"Wireless Charging System" in
this chapter.
To activate or deactivate the Wiper/
Light mode.
When activated, the LCD display
shows the selected Wiper/Light mode
whenever you change the mode.
To activate or deactivate the gear
position pop-up.
When activated, the gear position
will be displayed on the LCD display.
3-93
03
OHI046196L
OHI046167L
Page 197 of 524
3-95
03
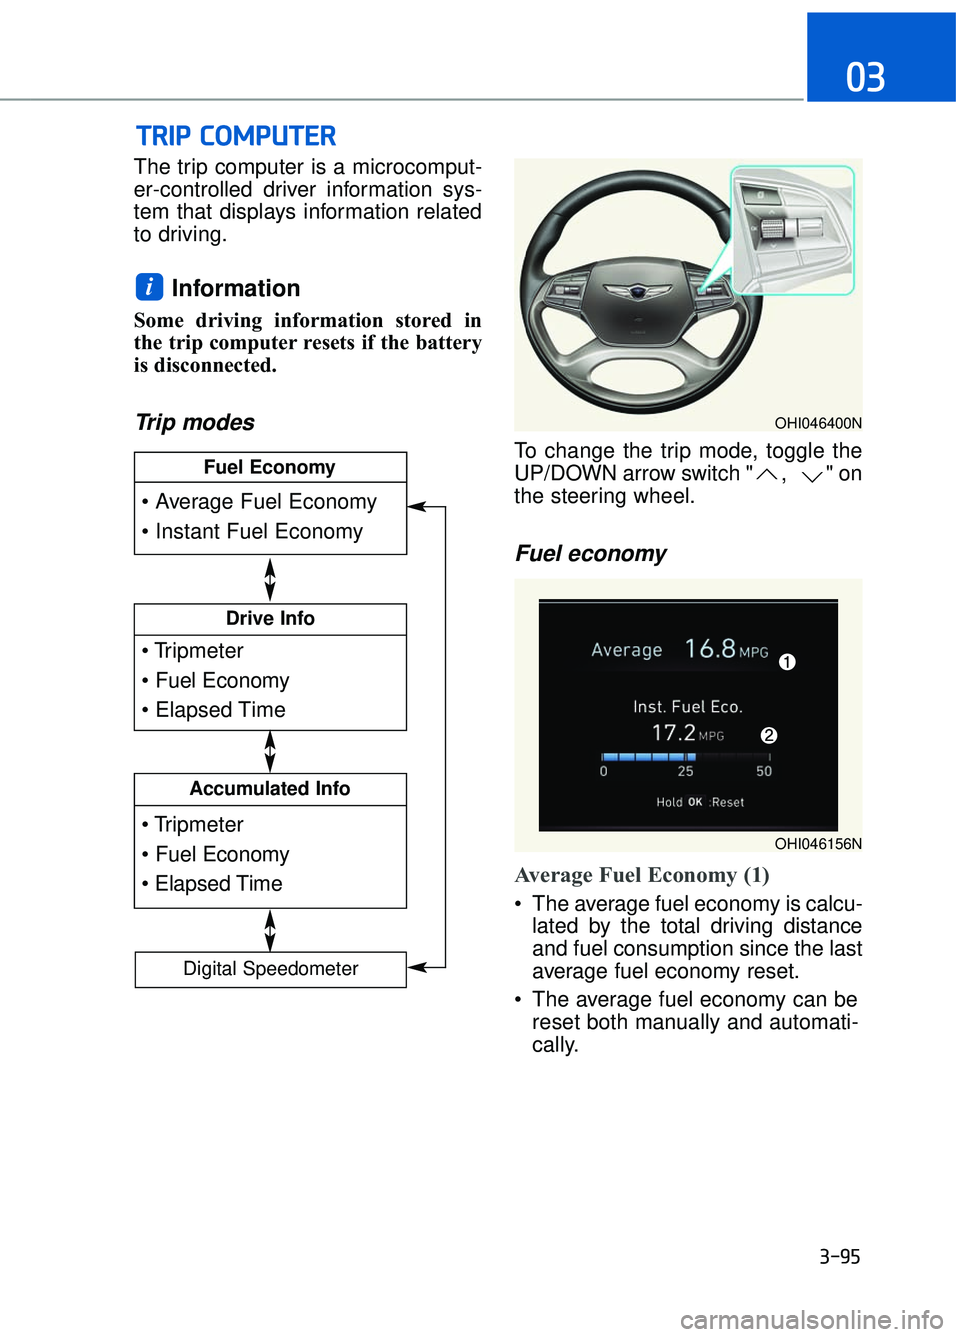
The trip computer is a microcomput-
er-controlled driver information sys-
tem that displays information related
to driving.
Information
Some driving information stored in
the trip computer resets if the battery
is disconnected.
Trip modes
To change the trip mode, toggle the
UP/DOWN arrow switch " , " on
the steering wheel.
Fuel economy
Average Fuel Economy (1)
The average fuel economy is calcu-lated by the total driving distance
and fuel consumption since the last
average fuel economy reset.
The average fuel economy can be reset both manually and automati-
cally.
i
T
TR
R I
IP
P
C
C O
O M
M P
PU
U T
TE
ER
R
Drive Info
Accumulated Info
Fuel Economy
Digital Speedometer
OHI046400N
OHI046156N
Page 198 of 524

3-96
Convenient features of your vehicle
Manual reset
To clear the average fuel economy
manually, press the OK button on the
steering wheel for more than 1 sec-
ond when the average fuel economy
is displayed.
For more information on the OK
button, refer to the "LCD Display
Control" in this chapter.
Automatic reset
To reset the average fuel economy
automatically whenever refueling,
select the "After refueling" menu in
User Settings mode of the LCD dis-
play (Refer to "LCD Display" ).
Under "After refueling" menu, the
average fuel economy will be cleared
to zero (----) when the vehicle speed
exceeds 1 mph (1 km/h) after refuel-
ing more than 2 gallons (6 liters).
Information
The vehicle must be driven for a min-
imum of 0.19 mile (0.3 km) since the
last ignition key cycle before the aver-
age fuel economy will be recalculated.
Instant Fuel Economy (2)
This mode displays the instanta-
neous fuel economy while driving
when the vehicle speed is greater
than 5 mph (8 km/h).
Driving Info display
This display shows the trip distance
(1), the average fuel economy (2),
and the total driving time (3).
The information is calculated for each
ignition cycle. The driving information
data gets initialized, when it has
passed 4 hours after turning OFF the
engine. In other words, the last driv-
ing information is available 4 hours
after you have turned on the engine.
To manually reset the information,
press and hold the OK button when
viewing the Driving info. The trip dis-
tance, the average fuel economy, and
total driving time will reset simultane-
ously.
The driving information will continue to
be counted while the engine is still run-
ning (for example, when the vehicle is
in traffic or stopped at a stop light.)
Information
The vehicle must be driven for a mini-
mum of 0.19 miles (300 meters) since the
last ignition key cycle before the average
fuel economy will be recalculated.
i
i
OHI046171N
Page 230 of 524
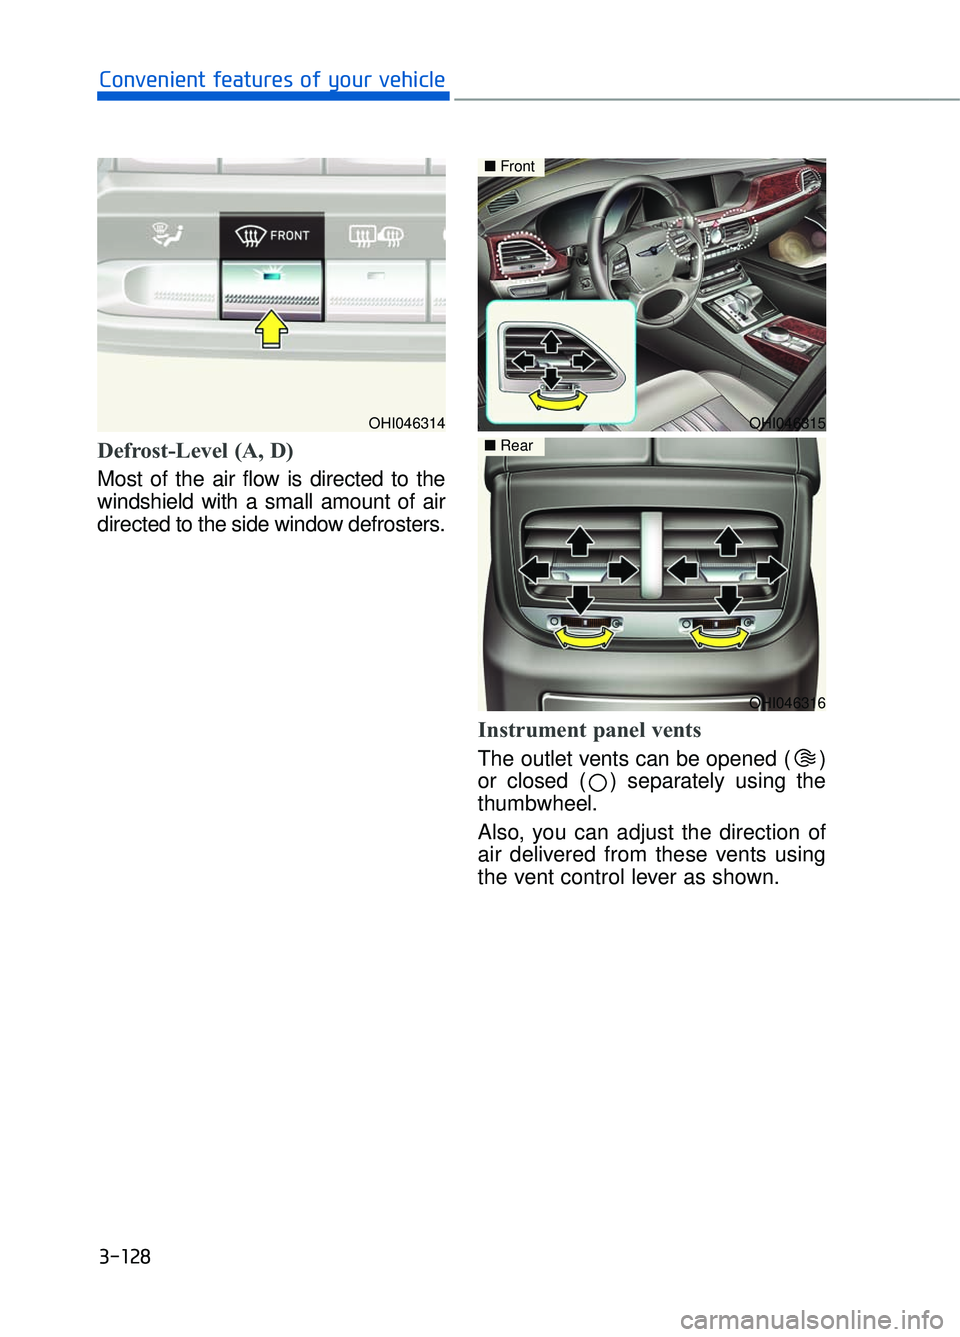
Defrost-Level (A, D)
Most of the air flow is directed to the
windshield with a small amount of air
directed to the side window defrosters.
Instrument panel vents
The outlet vents can be opened ( )
or closed ( ) separately using the
thumbwheel.
Also, you can adjust the direction of
air delivered from these vents using
the vent control lever as shown.
3-128
Convenient features of your vehicle
OHI046315
■Front
OHI046316
■Rear
OHI046314
Page 258 of 524
M
Mu
ul
lt
t i
im
m e
ed
d i
ia
a
s
s y
y s
st
te
e m
m
4
Multimedia system .......................................................................4\
-2
AUX, USB and iPod®Port ........................................................................\
..4-2
Antenna ........................................................................\
..................................4-2
Steering Wheel Audio Control ..................................................................4-3
DIS Navigation System........................................................................\
........4-4
Bluetooth®Wireless Technology Hands-Free .....................................4-4
Page 260 of 524
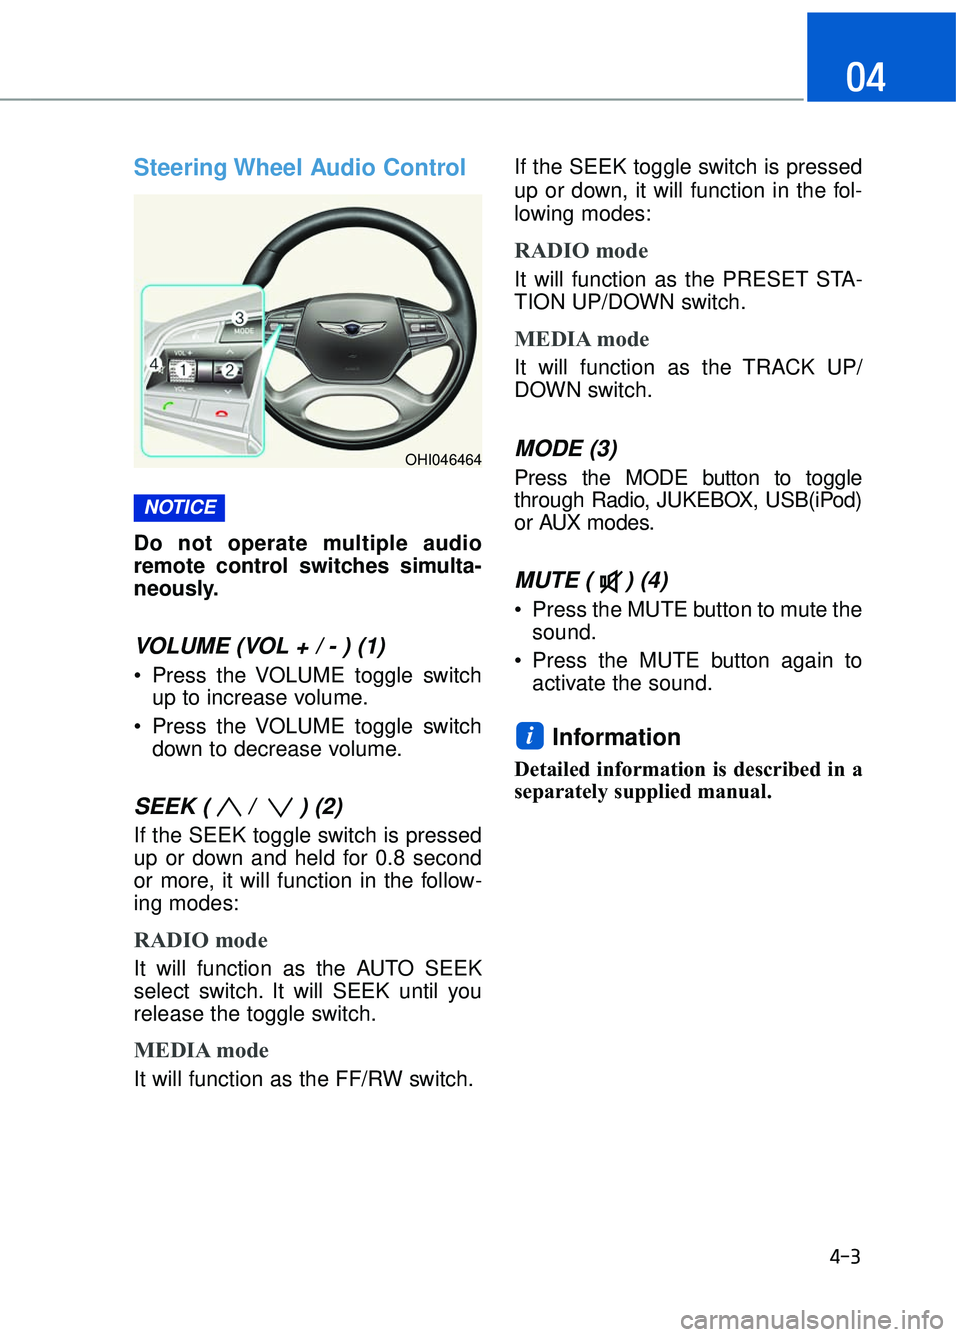
Steering Wheel Audio Control
Do not operate multiple audio
remote control switches simulta-
neously.
VOLUME (VOL + / - ) (1)
Press the VOLUME toggle switchup to increase volume.
Press the VOLUME toggle switch down to decrease volume.
SEEK ( / ) (2)
If the SEEK toggle switch is pressed
up or down and held for 0.8 second
or more, it will function in the follow-
ing modes:
RADIO mode
It will function as the AUTO SEEK
select switch. It will SEEK until you
release the toggle switch.
MEDIA mode
It will function as the FF/RW switch. If the SEEK toggle switch is pressed
up or down, it will function in the fol-
lowing modes:
RADIO mode
It will function as the PRESET STA-
TION UP/DOWN switch.
MEDIA mode
It will function as the TRACK UP/
DOWN switch.
MODE (3)
Press the MODE button to toggle
through Radio, JUKEBOX, USB(iPod)
or AUX modes.
MUTE ( ) (4)
Press the MUTE button to mute the
sound.
Press the MUTE button again to activate the sound.
Information
Detailed information is described in a
separately supplied manual.
i
NOTICE
4-3
04
OHI046464