ECO mode GENESIS G90 2018 Owner's Guide
[x] Cancel search | Manufacturer: GENESIS, Model Year: 2018, Model line: G90, Model: GENESIS G90 2018Pages: 519, PDF Size: 19.52 MB
Page 213 of 519
3-111
03
Escort light
When the Engine Start/Stop button
is in the OFF position and the driver's
door is opened, the puddle lamp will
come on for 30 seconds. If the dri-
ver's door is closed within the 30
seconds, the puddle lamp will turn off
after 15 seconds. If the driver's door
is closed and locked, the puddle
lamp will turn off immediately.
The Puddle Lamp Escort Light will
turn on only the first time the driver's
door is opened after the engine is
turned off.
Welcome System
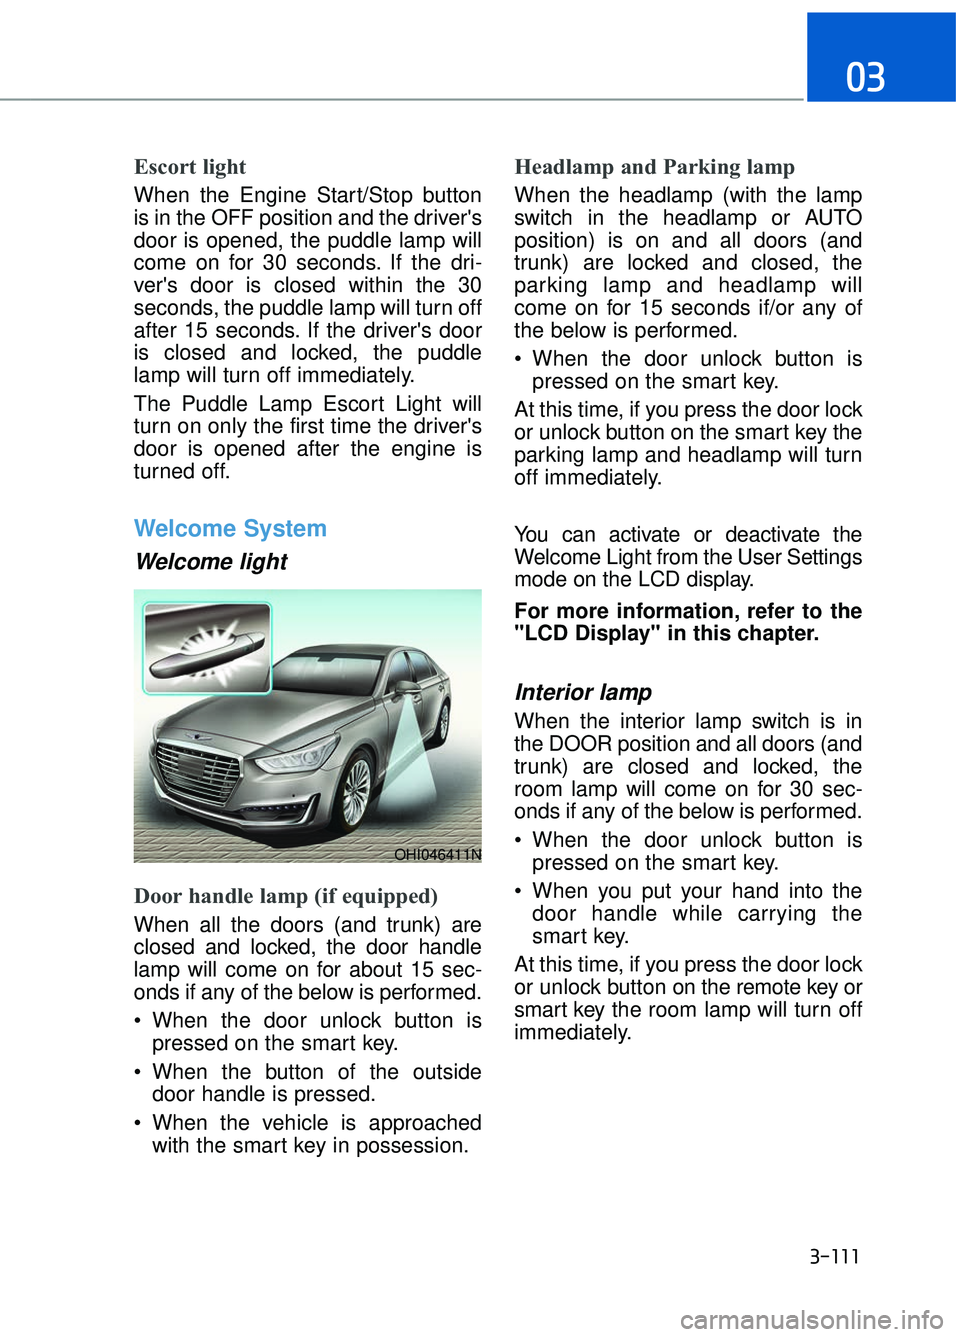
Welcome light
Door handle lamp (if equipped)
When all the doors (and trunk) are
closed and locked, the door handle
lamp will come on for about 15 sec-
onds if any of the below is performed.
When the door unlock button ispressed on the smart key.
When the button of the outside door handle is pressed.
When the vehicle is approached with the smart key in possession.
Headlamp and Parking lamp
When the headlamp (with the lamp
switch in the headlamp or AUTO
position) is on and all doors (and
trunk) are locked and closed, the
parking lamp and headlamp will
come on for 15 seconds if/or any of
the below is performed.
When the door unlock button ispressed on the smart key.
At this time, if you press the door lock
or unlock button on the smart key the
parking lamp and headlamp will turn
off immediately.
You can activate or deactivate the
Welcome Light from the User Settings
mode on the LCD display.
For more information, refer to the
"LCD Display" in this chapter.
Interior lamp
When the interior lamp switch is in
the DOOR position and all doors (and
trunk) are closed and locked, the
room lamp will come on for 30 sec-
onds if any of the below is performed.
When the door unlock button is pressed on the smart key.
When you put your hand into the door handle while carrying the
smart key.
At this time, if you press the door lock
or unlock button on the remote key or
smart key the room lamp will turn off
immediately.
OHI046411N
Page 229 of 519
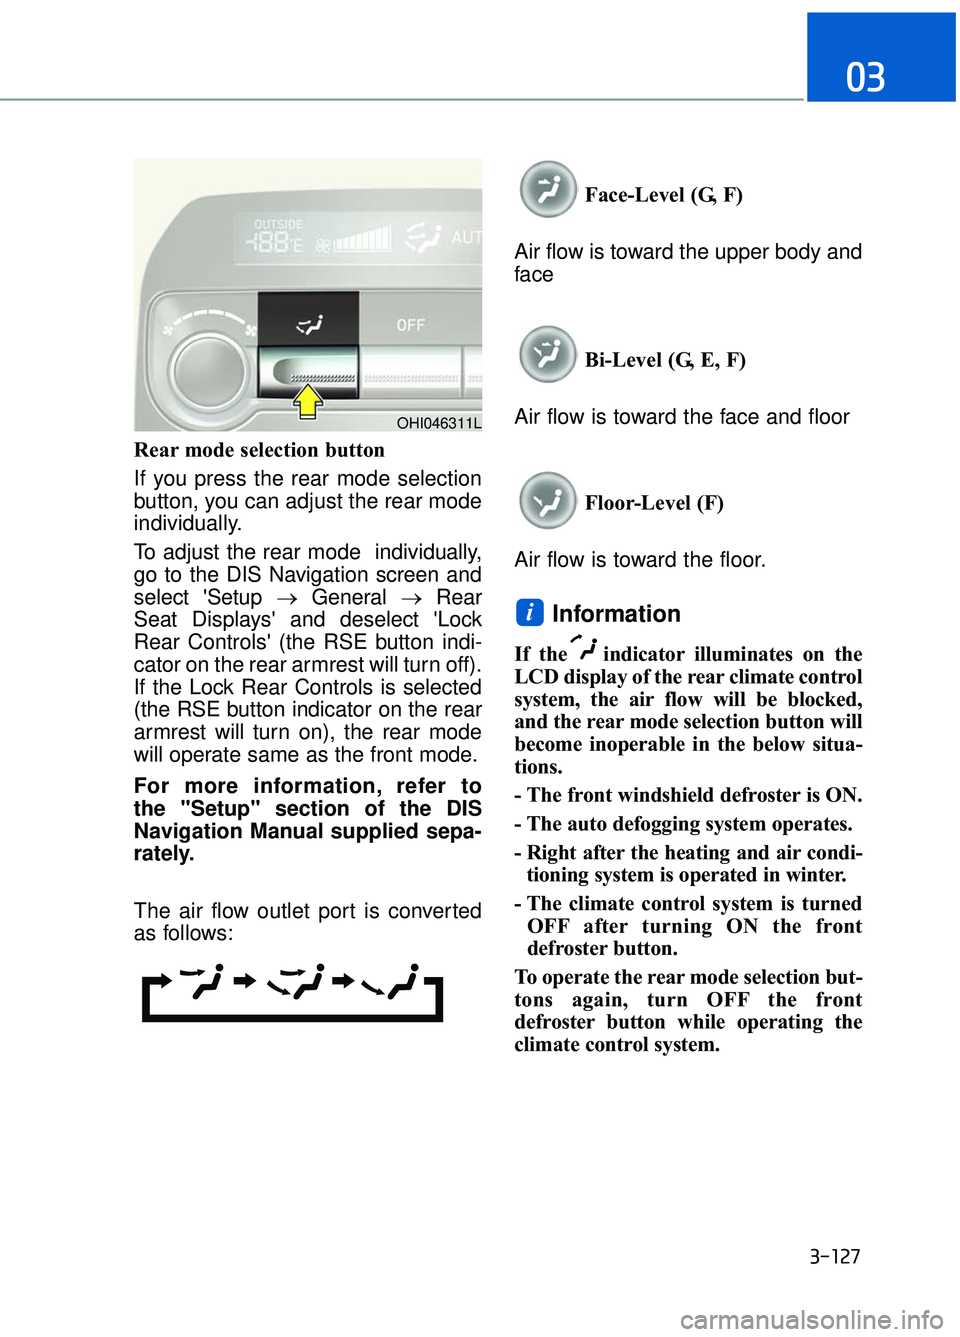
Rear mode selection button
If you press the rear mode selection
button, you can adjust the rear mode
individually.
To adjust the rear mode individually,
go to the DIS Navigation screen and
select 'Setup →General →Rear
Seat Displays' and deselect 'Lock
Rear Controls' (the RSE button indi-
cator on the rear armrest will turn off).
If the Lock Rear Controls is selected
(the RSE button indicator on the rear
armrest will turn on), the rear mode
will operate same as the front mode.
For more information, refer to
the "Setup" section of the DIS
Navigation Manual supplied sepa-
rately.
The air flow outlet port is converted
as follows: Face-Level (G, F)
Air flow is toward the upper body and
face
Bi-Level (G, E, F)
Air flow is toward the face and floor
Floor-Level (F)
Air flow is toward the floor.
Information
If the indicator illuminates on the
LCD display of the rear climate control
system, the air flow will be blocked,
and the rear mode selection button will
become inoperable in the below situa-
tions.
- The front windshield defroster is ON.
- The auto defogging system operates.
- Right after the heating and air condi- tioning system is operated in winter.
- The climate control system is turned OFF after turning ON the front
defroster button.
To operate the rear mode selection but-
tons again, turn OFF the front
defroster button while operating the
climate control system.
i
3-127
03
OHI046311L
Page 231 of 519
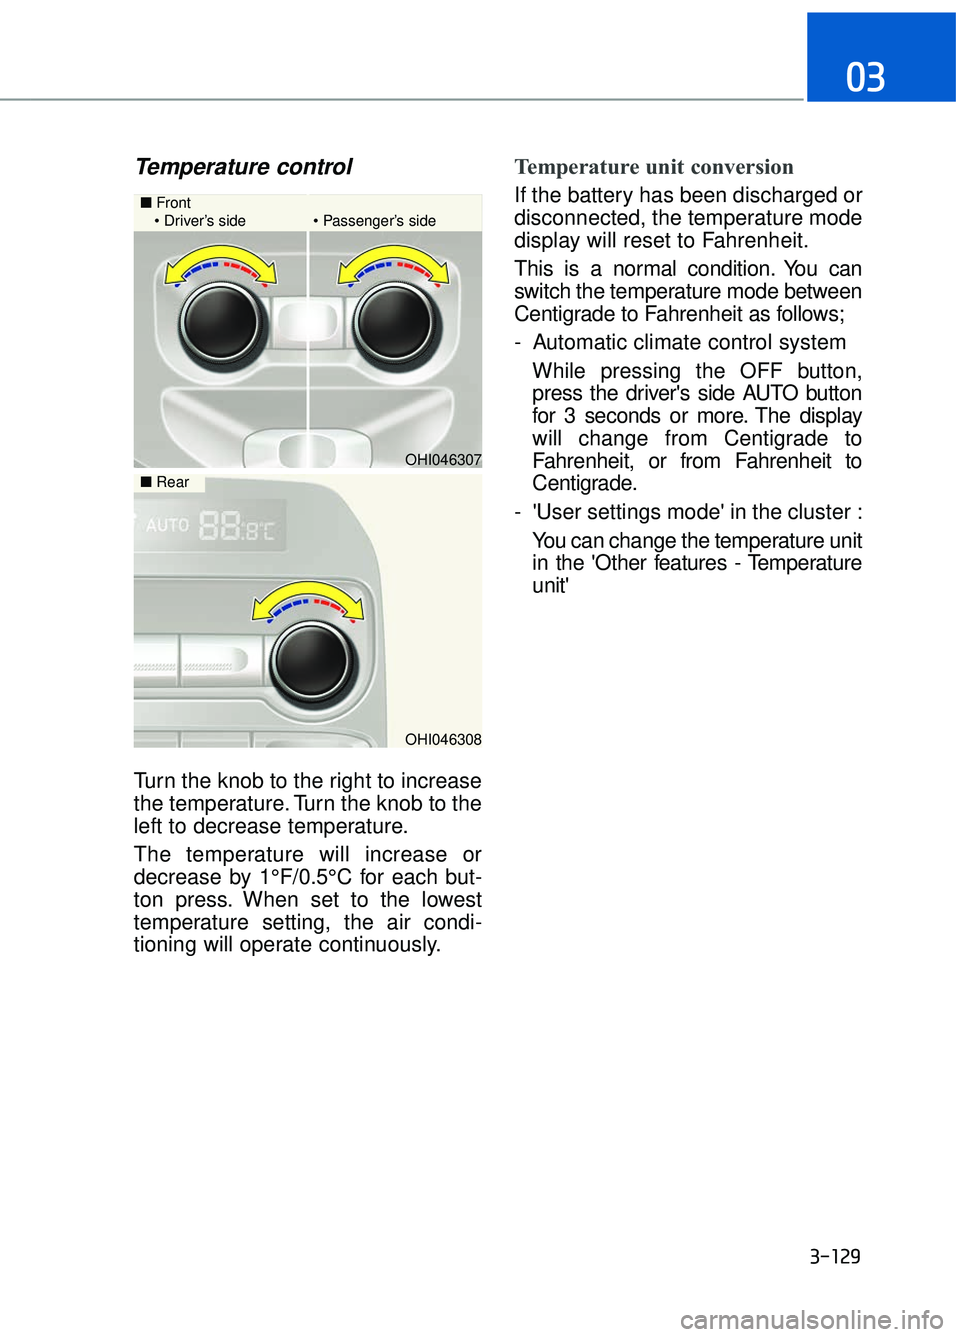
Temperature control
Turn the knob to the right to increase
the temperature. Turn the knob to the
left to decrease temperature.
The temperature will increase or
decrease by 1°F/0.5°C for each but-
ton press. When set to the lowest
temperature setting, the air condi-
tioning will operate continuously.
Temperature unit conversion
If the battery has been discharged or
disconnected, the temperature mode
display will reset to Fahrenheit.
This is a normal condition. You can
switch the temperature mode between
Centigrade to Fahrenheit as follows;
- Automatic climate control systemWhile pressing the OFF button,
press the driver's side AUTO button
for 3 seconds or more. The display
will change from Centigrade to
Fahrenheit, or from Fahrenheit to
Centigrade.
- 'User settings mode' in the cluster : You can change the temperature unit
in the 'Other features - Temperature
unit'
3-129
03
OHI046307
■ Front
Driver’s side Passenger’s side
OHI046308
■ Rear
Page 234 of 519
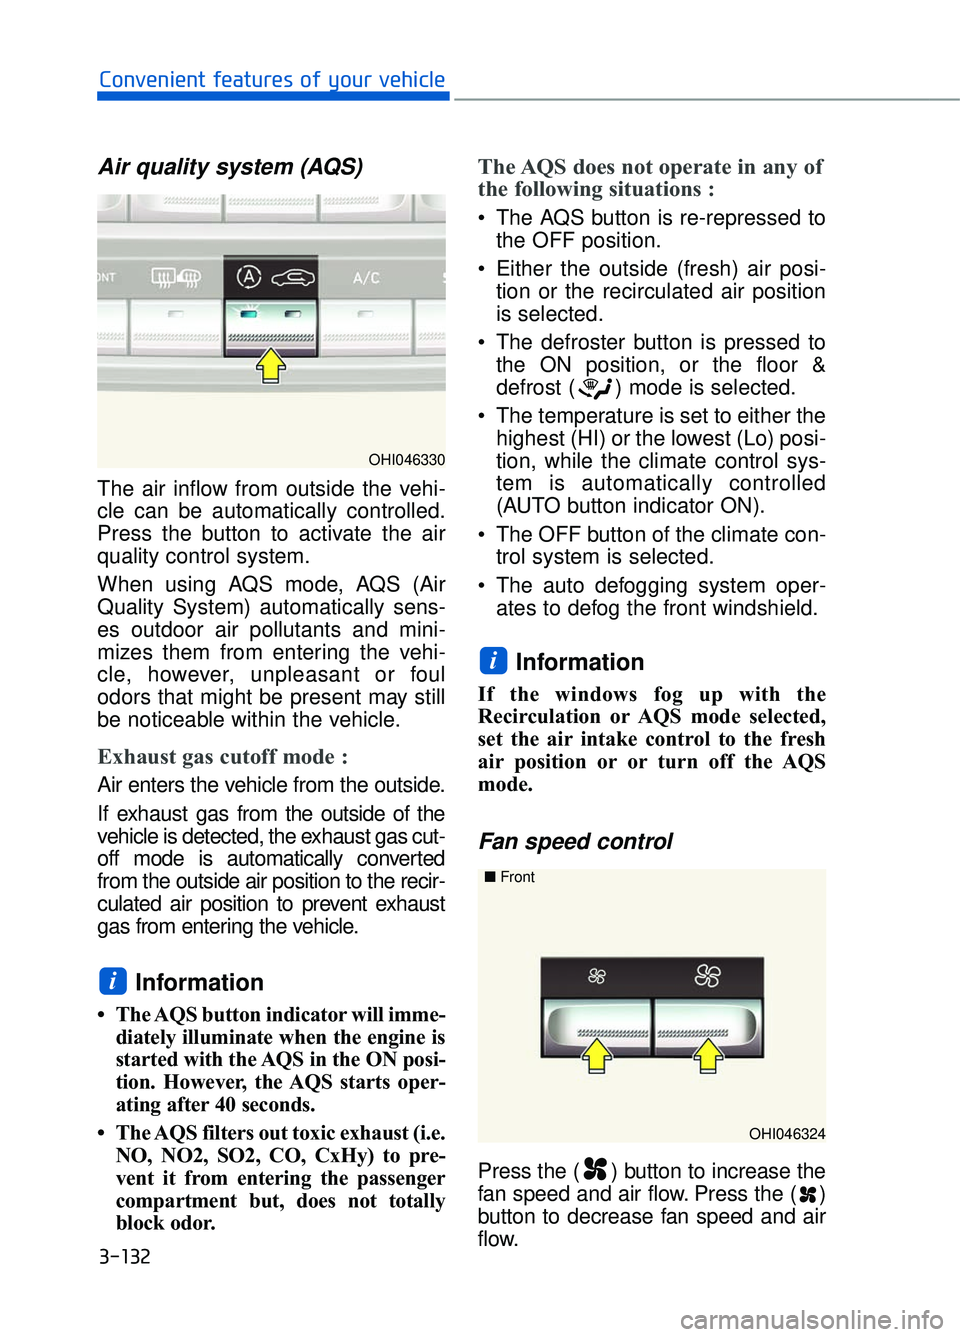
Air quality system (AQS)
The air inflow from outside the vehi-
cle can be automatically controlled.
Press the button to activate the air
quality control system.
When using AQS mode, AQS (Air
Quality System) automatically sens-
es outdoor air pollutants and mini-
mizes them from entering the vehi-
cle, however, unpleasant or foul
odors that might be present may still
be noticeable within the vehicle.
Exhaust gas cutoff mode :
Air enters the vehicle from the outside.
If exhaust gas from the outside of the
vehicle is detected, the exhaust gas cut-
off mode is automatically converted
from the outside air position to the recir-
culated air position to prevent exhaust
gas from entering the vehicle.
Information
• The AQS button indicator will imme-diately illuminate when the engine is
started with the AQS in the ON posi-
tion. However, the AQS starts oper-
ating after 40 seconds.
• The AQS filters out toxic exhaust (i.e. NO, NO2, SO2, CO, CxHy) to pre-
vent it from entering the passenger
compartment but, does not totally
block odor.
The AQS does not operate in any of
the following situations :
The AQS button is re-repressed tothe OFF position.
Either the outside (fresh) air posi- tion or the recirculated air position
is selected.
The defroster button is pressed to the ON position, or the floor &
defrost ( ) mode is selected.
The temperature is set to either the highest (HI) or the lowest (Lo) posi-
tion, while the climate control sys-
tem is automatically controlled
(AUTO button indicator ON).
The OFF button of the climate con- trol system is selected.
The auto defogging system oper- ates to defog the front windshield.
Information
If the windows fog up with the
Recirculation or AQS mode selected,
set the air intake control to the fresh
air position or or turn off the AQS
mode.
Fan speed control
Press the ( ) button to increase the
fan speed and air flow. Press the ( )
button to decrease fan speed and air
flow.
i
i
3-132
Convenient features of your vehicle
OHI046330
OHI046324
■
Front
Page 239 of 519

3-137
03
W
WI
IN
N D
DS
SH
H I
IE
E L
LD
D
D
D E
EF
FR
R O
O S
ST
T I
IN
N G
G
A
A N
N D
D
D
D E
EF
FO
O G
GG
GI
IN
N G
G
For maximum defrosting, set the
temperature control to the extreme
right/hot position and the fan speed
control to the highest speed.
If warm air to the floor is desired while defrosting or defogging, set the
mode to the floor-defrost position.
Before driving, clear all snow and ice from the windshield, rear win-
dow, side view mirrors, and all side
windows.
Clear all snow and ice from the hood and air inlet in the cowl grill to
improve heater and defroster effi-
ciency and to reduce the probability
of fogging up the inside of the wind-
shield.
If the engine temperature is still
cold after starting, then a brief
engine warm up period may be
required for the vented air flow to
become warm or hot.
To defog inside windshield
1. Set the fan speed to the desired position.
2. Select desired temperature.
3. Press the defroster button ( ).
4. The air conditioning will turn on according to the detected ambient
temperature and outside (fresh)
air position will be selected auto-
matically.
If the air conditioning and outside
(fresh) air position are not selected
automatically, adjust the correspon-
ding button manually. If the posi-
tion is selected, lower fan speed is
adjusted to a higher fan speed.
NOTICE
Windshield heating
Do not use the or posi-
tion during cooling operation in
extremely humid weather. The
difference between the temper-
ature of the outside air and that
of the windshield could cause
the outer surface of the wind-
shield to fog up, causing loss of
visibility could cause an acci-
dent resulting in serious injury
or death. In this case, set the
mode selection knob or button
to the position and fan
speed control knob or button to
a lower speed.
WARNING
OHI046335N
Page 242 of 519
3-140
Convenient features of your vehicle
Clean Air
When the Engine Start/Stop button
is in the ON position, the clean air
function turns on automatically.
Also, the clean air function turns off
automatically, when the Engine
Start/Stop button is in the OFF posi-
tion.
Automatic Ventilation
The system automatically selects the
outside (fresh) air position when the
climate control system operates over a
certain period of time (approximately
30 minutes) in low temperature with
the recirculated air position selected.
To cancel or reactivate the Automatic Ventilation
When the air conditioning system is
on, select Face Level mode and
press the recirculated air position
button for more than 3 seconds.
When the automatic ventilation is
canceled, the indicator blinks 3
times. When the automatic ventila-
tion is activated, the indicator blinks
6 times.
Sunroof Inside Air Recirculation
The outside (fresh) air position is auto-
matically selected, when the sunroof
is opened while operating the heat-
ing/air conditioning system.
When you select the recirculated air
position, the system maintains the
recirculated air position for 3 minutes
and then automatically converts to the
outside (fresh) air position.
When the sunroof is closed, the air
intake position will return to the origi-
nal position that was selected.
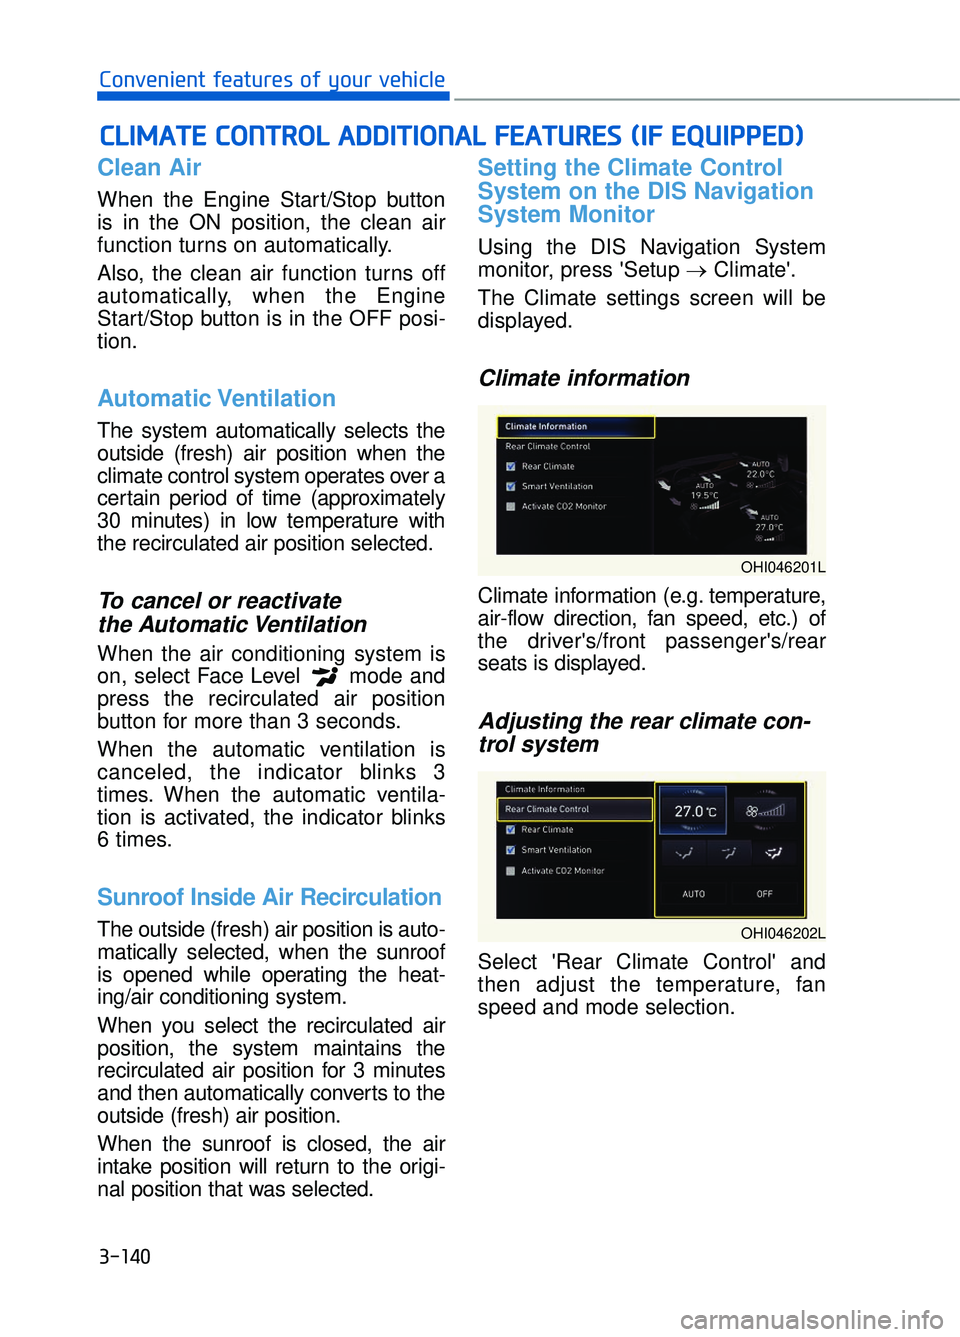
Setting the Climate Control
System on the DIS Navigation
System Monitor
Using the DIS Navigation System
monitor, press 'Setup →Climate'.
The Climate settings screen will be
displayed.
Climate information
Climate information (e.g. temperature,
air-flow direction, fan speed, etc.) of
the driver's/front passenger's/rear
seats is displayed.
Adjusting the rear climate con- trol system
Select 'Rear Climate Control' and
then adjust the temperature, fan
speed and mode selection.
C
C L
LI
IM
M A
AT
TE
E
C
C O
O N
NT
TR
R O
O L
L
A
A D
DD
DI
IT
T I
IO
O N
NA
AL
L
F
F E
E A
A T
TU
U R
RE
ES
S
(
( I
IF
F
E
E Q
Q U
UI
IP
P P
PE
ED
D )
)
OHI046201L
OHI046202L
Page 259 of 519

Steering Wheel Audio Control
Do not operate multiple audio
remote control switches simulta-
neously.
VOLUME (VOL + / - ) (1)
Press the VOLUME toggle switchup to increase volume.
Press the VOLUME toggle switch down to decrease volume.
SEEK ( / ) (2)
If the SEEK toggle switch is pressed
up or down and held for 0.8 second
or more, it will function in the follow-
ing modes:
RADIO mode
It will function as the AUTO SEEK
select switch. It will SEEK until you
release the toggle switch.
MEDIA mode
It will function as the FF/RW switch. If the SEEK toggle switch is pressed
up or down, it will function in the fol-
lowing modes:
RADIO mode
It will function as the PRESET STA-
TION UP/DOWN switch.
MEDIA mode
It will function as the TRACK UP/
DOWN switch.
MODE (3)
Press the MODE button to toggle
through Radio, JUKEBOX, USB(iPod)
or AUX modes.
MUTE ( ) (4)
Press the MUTE button to mute the
sound.
Press the MUTE button again to activate the sound.
Information
Detailed information is described in a
separately supplied manual.
i
NOTICE
4-3
04
OHI046464
Page 270 of 519

Information
If you press the Engine Start/Stop but-
ton without depressing the brake
pedal, the engine does not start and
the Engine Start/Stop button changes
as follows:
OFF→ →
ACC →
→
ON →
→
OFF
However, the engine may start if you
depress the brake pedal within 0.5 sec-
ond after pressing the Engine Start/
Stop button from the OFF position.
Starting the engine
Information
• The engine will start by pressing the Engine Start/Stop button, only when
the smart key is in the vehicle.
• Even if the smart key is in the vehi- cle, if it is far away from the driver,
the engine may not start.
• When the Engine Start/Stop button is in the ACC or ON position, if any
door is open, the system checks for
the smart key. If the smart key is not
in the vehicle, the warning "Key not
in vehicle" will come on and if all
doors are closed, the chime will also
sound for about 5 seconds. Keep the
smart key in the vehicle when using
the ACC position or if the vehicle
engine is ON.
1. Always carry the smart key with you.
2. Make sure the parking brake is applied.
3. Make sure the shift lever is in P (Park).
4. Depress the brake pedal.
5. Press the Engine Start/Stop but- ton.
Information
• Do not wait for the engine to warmup while the vehicle remains station-
ary. Start driving at moderate
engine speeds. (Rapid accelerating
and decelerating should be avoid-
ed.)
• Always start the vehicle with your foot on the brake pedal. Do not
depress the accelerator while start-
ing the vehicle. Do not race the
engine while warming it up.
i
ii
5-9
05
Always wear appropriate shoeswhen operating your vehicle.
Unsuitable shoes, such as
high heels, ski boots, sandals,
flip-flops, etc., may interfere
with your ability to use the
brake and accelerator pedals.
Do not start the vehicle with the accelerator pedal depressed.
The vehicle can move and lead
to an accident.
Wait until the engine rpm is normal. The vehicle may sud-
denly move if the brake pedal
is released when the rpm is
high.
WARNING
Page 276 of 519
![GENESIS G90 2018 Owners Guide 5-15
05
Paddle shifter (Manual mode)
The paddle shifter is available when
the shift lever is in the D (Drive) posi-
tion.
Pull the [+] or [-] paddle shifter once
to shift up or down one gear and the
s GENESIS G90 2018 Owners Guide 5-15
05
Paddle shifter (Manual mode)
The paddle shifter is available when
the shift lever is in the D (Drive) posi-
tion.
Pull the [+] or [-] paddle shifter once
to shift up or down one gear and the
s](/img/46/35643/w960_35643-275.png)
5-15
05
Paddle shifter (Manual mode)
The paddle shifter is available when
the shift lever is in the D (Drive) posi-
tion.
Pull the [+] or [-] paddle shifter once
to shift up or down one gear and the
system changes from automatic
mode to manual mode.
To change back to the automatic
mode from manual mode, do one of
the following:
Move the shift lever down.
Depress the accelerator pedal formore than 5 seconds.
Drive the vehicle under 4 mph (7 km/h).
Pull and hold the right side paddle shifter.
Information
If the [+] and [-] paddle shifters are
pulled at the same time, gear change
may not occur.
Shift-lock system
For your safety, the automatic trans-
mission has a shift-lock system
which prevents shifting the transmis-
sion from P (Park) into R (Reverse)
or D (Drive) unless the [UNLOCK]
button is pressed while depressing
the brake pedal.
To shift the transmission from P
(Park) into R (Reverse) or D (Drive) :
1. Depress and hold the brake pedal.
2. Start the engine or place the Engine Start/Stop button in the
ON position.
3. Move the shift lever to R (Reverse) or D (Drive) while pressing the
[UNLOCK] button.
i
OHI056018
Page 280 of 519
5-19
05
Good Driving Practices
Never move the shift lever from P(Park) or N (Neutral) to any other
position with the accelerator pedal
depressed.
Never move the shift lever into P (Park) when the vehicle is in
motion.
Be sure the vehicle is completely
stopped before you attempt to shift
into R (Reverse) or D (Drive).
Do not move the shift lever to N (Neutral) when driving. Doing so
may result in an accident because
of a loss of engine braking and the
transmission could be damaged.
Do not drive with your foot resting on the brake pedal. Even light, but
consistent pedal pressure can
result in the brakes overheating,
brake wear and possibly even
brake failure.
When driving in Manual mode with the paddle shifter, slow down
before shifting to a lower gear.
Otherwise, the lower gear may not
be engaged if the engine rpms are
outside of the allowable range.
Depressing both accelerator and brake pedals at the same time can
trigger logic for engine power
reduction to assure vehicle decel-
eration. Vehicle acceleration will
resume after the brake pedal is
released.
Always apply the parking brake when leaving the vehicle. Do not
depend on placing the transmis-
sion in P (Park) to keep the vehicle
from moving. Exercise extreme caution when
driving on a slippery surface. Be
especially careful when braking,
accelerating or shifting gears. On a
slippery surface, an abrupt change
in vehicle speed can cause the
drive wheels to lose traction and
may cause loss of vehicle control
resulting in an accident.
Optimum vehicle performance and economy is obtained by smoothly
depressing and releasing the
accelerator.