warning GENESIS G90 2018 Workshop Manual
[x] Cancel search | Manufacturer: GENESIS, Model Year: 2018, Model line: G90, Model: GENESIS G90 2018Pages: 519, PDF Size: 19.52 MB
Page 92 of 519
2-72
Safety system of your vehicle
OHI036124
OHI036126
OHI036125
OHI036127
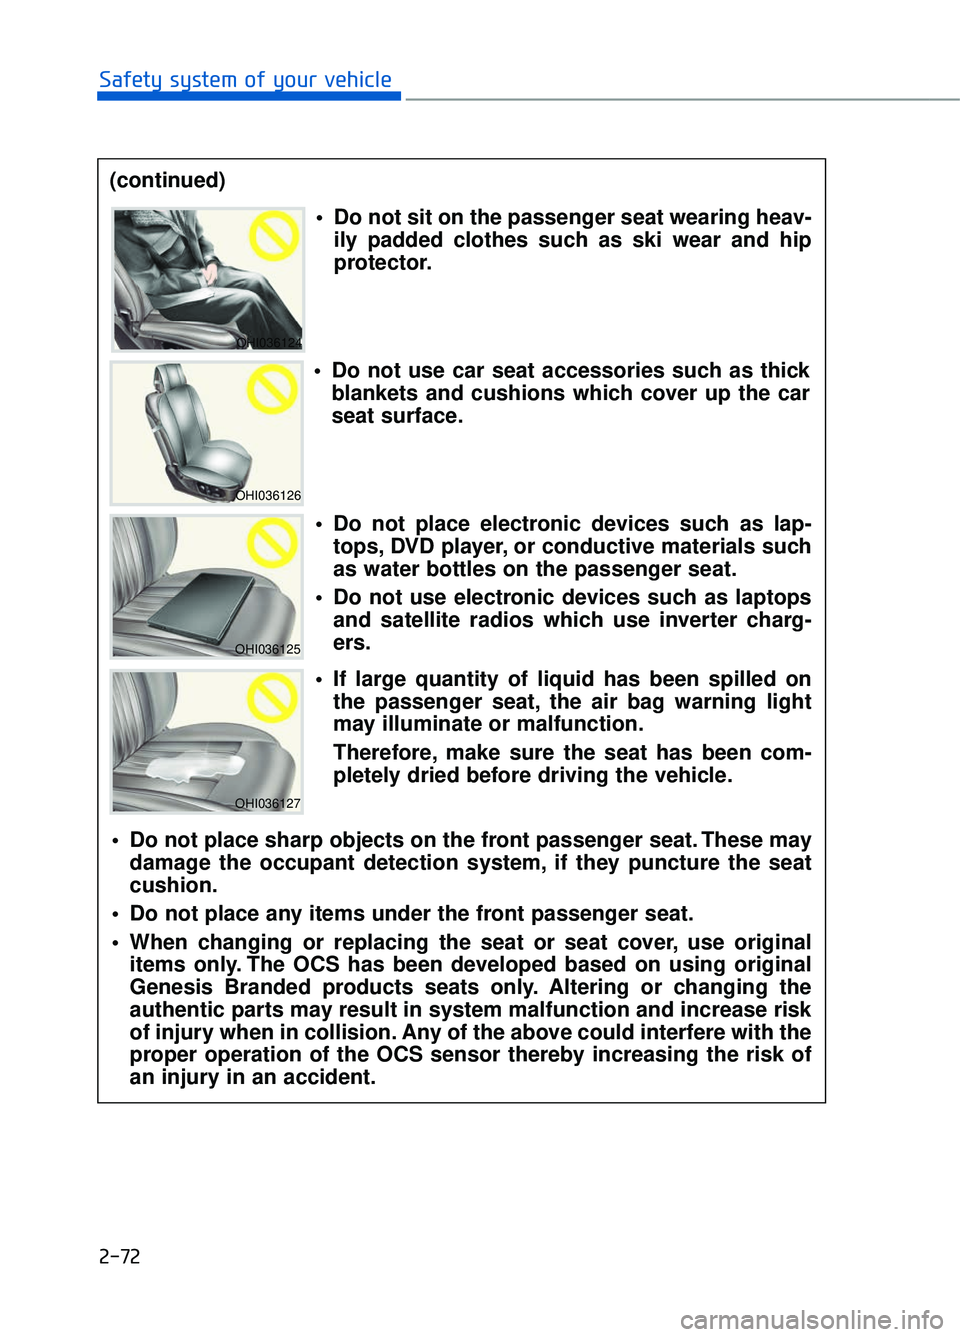
Do not sit on the passenger seat wearing heav-ily padded clothes such as ski wear and hip
protector.
Do not use car seat accessories such as thick blankets and cushions which cover up the car
seat surface.
Do not place electronic devices such as lap- tops, DVD player, or conductive materials such
as water bottles on the passenger seat.
Do not use electronic devices such as laptops and satellite radios which use inverter charg-
ers.
If large quantity of liquid has been spilled on the passenger seat, the air bag warning light
may illuminate or malfunction.
Therefore, make sure the seat has been com-
pletely dried before driving the vehicle.
Do not place sharp objects on the front passenger seat. These may damage the occupant detection system, if they puncture the seat
cushion.
Do not place any items under the front passenger seat.
When changing or replacing the seat or seat cover, use original items only. The OCS has been developed based on using original
Genesis Branded products seats only. Altering or changing the
authentic parts may result in system malfunction and increase risk
of injury when in collision. Any of the above could interfere with the
proper operation of the OCS sensor thereby increasing the risk of
an injury in an accident.
(continued)
Page 93 of 519
2-73
02
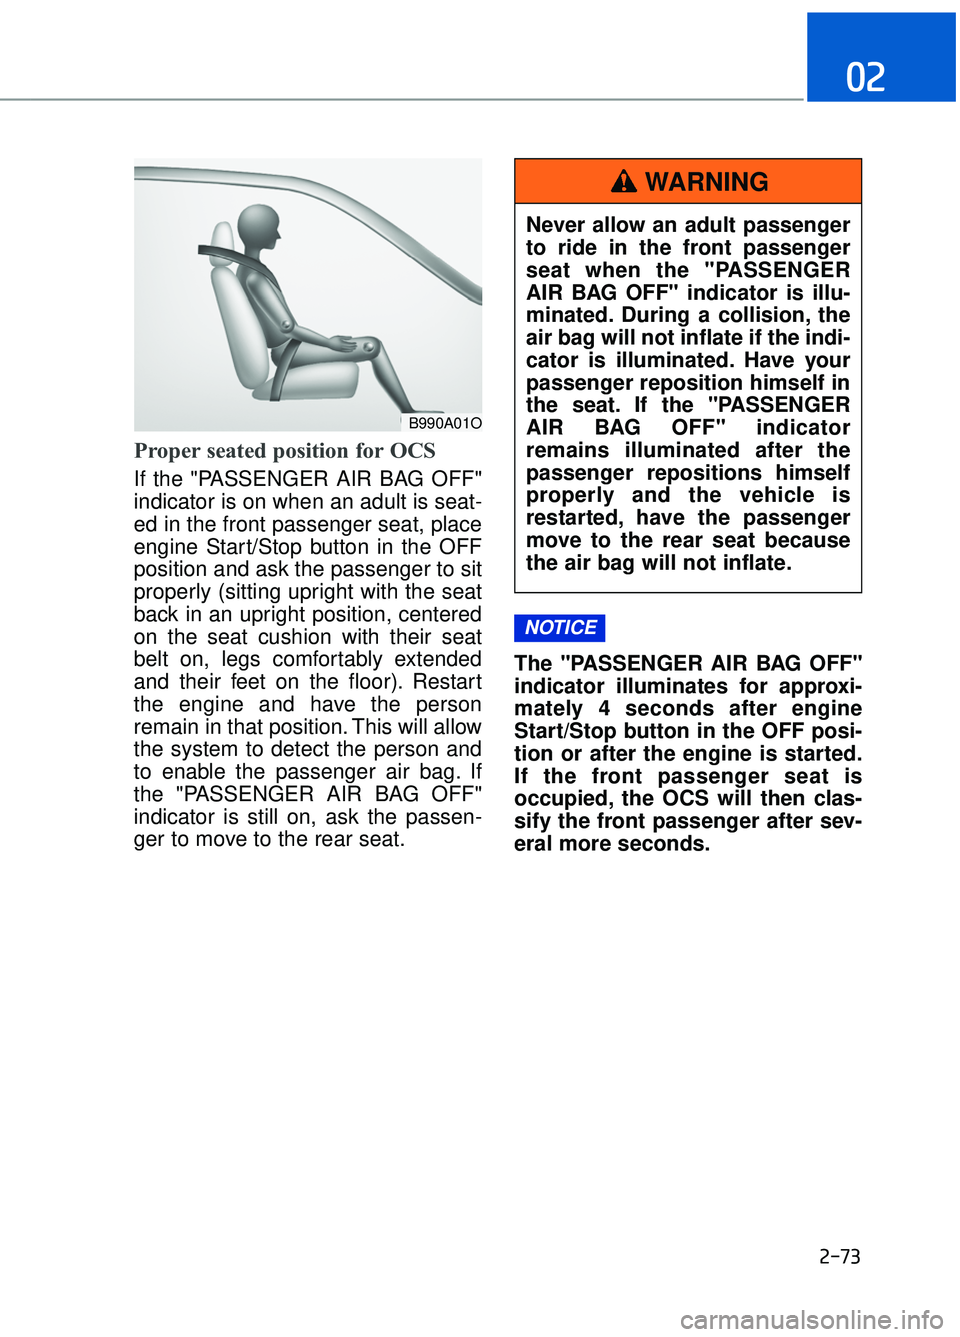
Proper seated position for OCS
If the "PASSENGER AIR BAG OFF"
indicator is on when an adult is seat-
ed in the front passenger seat, place
engine Start/Stop button in the OFF
position and ask the passenger to sit
properly (sitting upright with the seat
back in an upright position, centered
on the seat cushion with their seat
belt on, legs comfortably extended
and their feet on the floor). Restart
the engine and have the person
remain in that position. This will allow
the system to detect the person and
to enable the passenger air bag. If
the "PASSENGER AIR BAG OFF"
indicator is still on, ask the passen-
ger to move to the rear seat.The "PASSENGER AIR BAG OFF"
indicator illuminates for approxi-
mately 4 seconds after engine
Start/Stop button in the OFF posi-
tion or after the engine is started.
If the front passenger seat is
occupied, the OCS will then clas-
sify the front passenger after sev-
eral more seconds.
NOTICE
Never allow an adult passenger
to ride in the front passenger
seat when the "PASSENGER
AIR BAG OFF" indicator is illu-
minated. During a collision, the
air bag will not inflate if the indi-
cator is illuminated. Have your
passenger reposition himself in
the seat. If the "PASSENGER
AIR BAG OFF" indicator
remains illuminated after the
passenger repositions himself
properly and the vehicle is
restarted, have the passenger
move to the rear seat because
the air bag will not inflate.
WARNING
B990A01O
Page 94 of 519

2-74
Safety system of your vehicle
Do Not Install a Child Restraintin the Front Passenger's Seat
Even though your vehicle is
equipped with the OCS, never install
a child restraint in the front passen-
ger’s seat. An inflating air bag can
forcefully strike a child or child
restraint resulting in serious or fatal
injury.
Why Didn't My Air Bag Go Off
in a Collision?
Air bags are not designed to inflate in
every collision. There are certain
types of accidents in which the air
bag would not be expected to pro-
vide additional protection. These
include rear impacts, second or third
collisions in multiple impact acci-
dents, as well as low speed impacts.
Damage to the vehicle indicates a
collision energy absorption, and is
not an indicator of whether or not an
air bag should have inflated.
NEVER place a rear-facing or front-facing child restraint in
the front passenger’s seat of
the vehicle.
An inflating frontal air bag could forcefully strike a child
resulting in serious injury or
death.
Always properly restrain chil- dren in an appropriate child
restraint in the rear seat of the
vehicle.
WARNING
1JBH3051
Page 96 of 519
2-76
Safety system of your vehicle
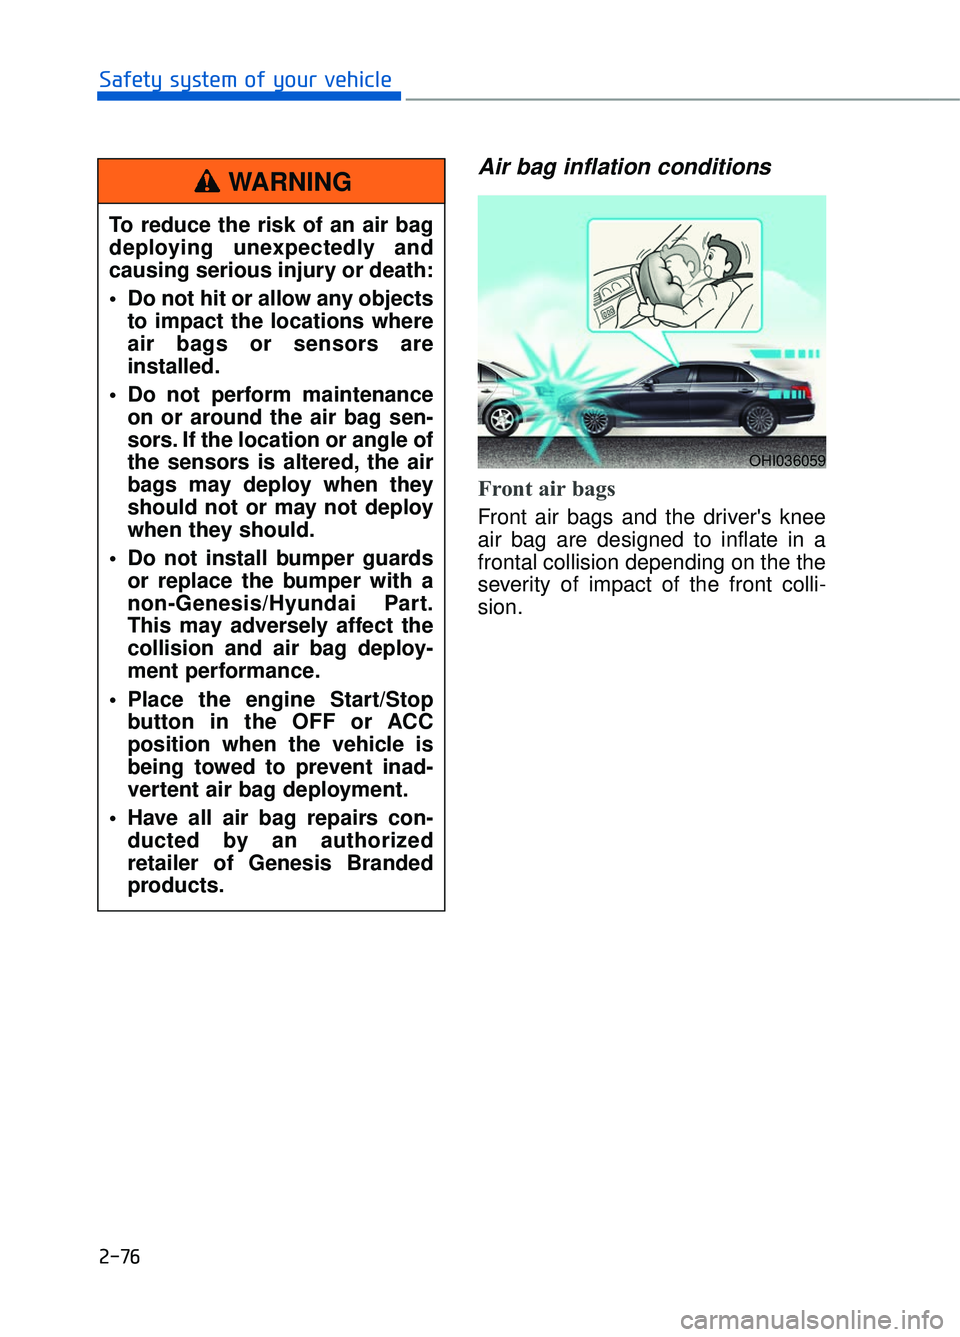
Air bag inflation conditions
Front air bags
Front air bags and the driver's knee
air bag are designed to inflate in a
frontal collision depending on the the
severity of impact of the front colli-
sion.
OHI036059
To reduce the risk of an air bag
deploying unexpectedly and
causing serious injury or death:
Do not hit or allow any objectsto impact the locations where
air bags or sensors are
installed.
Do not perform maintenance on or around the air bag sen-
sors. If the location or angle of
the sensors is altered, the air
bags may deploy when they
should not or may not deploy
when they should.
Do not install bumper guards or replace the bumper with a
non-Genesis/Hyundai Part.
This may adversely affect the
collision and air bag deploy-
ment performance.
Place the engine Start/Stop button in the OFF or ACC
position when the vehicle is
being towed to prevent inad-
vertent air bag deployment.
Have all air bag repairs con- ducted by an authorized
retailer of Genesis Branded
products.
WARNING
Page 100 of 519
2-80
Safety system of your vehicle
SRS Care
The SRS is virtually maintenance-free
and there are no parts you can safely
service by yourself. If the SRS air bag
warning light does not illuminate
when the Engine Start/Stop button is
in the ON position, or continuously
remains on, have your vehicle imme-
diately inspected by an authorized
retailer of Genesis Branded products.
Any work on the SRS system, such
as removing, installing, repairing, or
any work on the steering wheel, the
front passenger's panel, front seats
and roof rails must be performed by
an authorized retailer of Genesis
Branded products. Improper han-
dling of the SRS system may result
in serious personal injury.To reduce the risk of serious
injury or death, take the follow-
ing precautions:
Do not attempt to modify or disconnect the SRS compo-
nents or wiring, including the
addition of any kind of badges
to the pad covers or modifica-
tions to the body structure.
Do not place objects over or near the air bag modules on
the steering wheel, instrument
panel, or the front passen-
ger’s panel above the glove
box.
Clean the air bag pad covers with a soft cloth moistened
with plain water. Solvents or
cleaners could adversely
affect the air bag covers and
proper deployment of the sys-
tem.
(Continued)
WARNING
(Continued)
Always have inflated air bagsreplaced by an authorized
retailer of Genesis Branded
products.
If components of the air bag system must be discarded, or
if the vehicle must be
scrapped, certain safety pre-
cautions must be observed.
Consult an authorized retailer
of Genesis Branded products
for the necessary information.
Failure to follow these precau-
tions could increase the risk
of personal injury.
Page 102 of 519

2-82
Safety system of your vehicle
Air Bag Warning Labels
Air bag warning labels, required by the U.S. National Highway Traffic Safety
Administration (NHTSA), are attached to alert the driver and passengers of
potential risks of the air bag system. Be sure to read all of the information
about the air bags that are installed on your vehicle in this Owners Manual.
OHI036067N/OHI036068N/OHI036069/OHI036070
Page 104 of 519
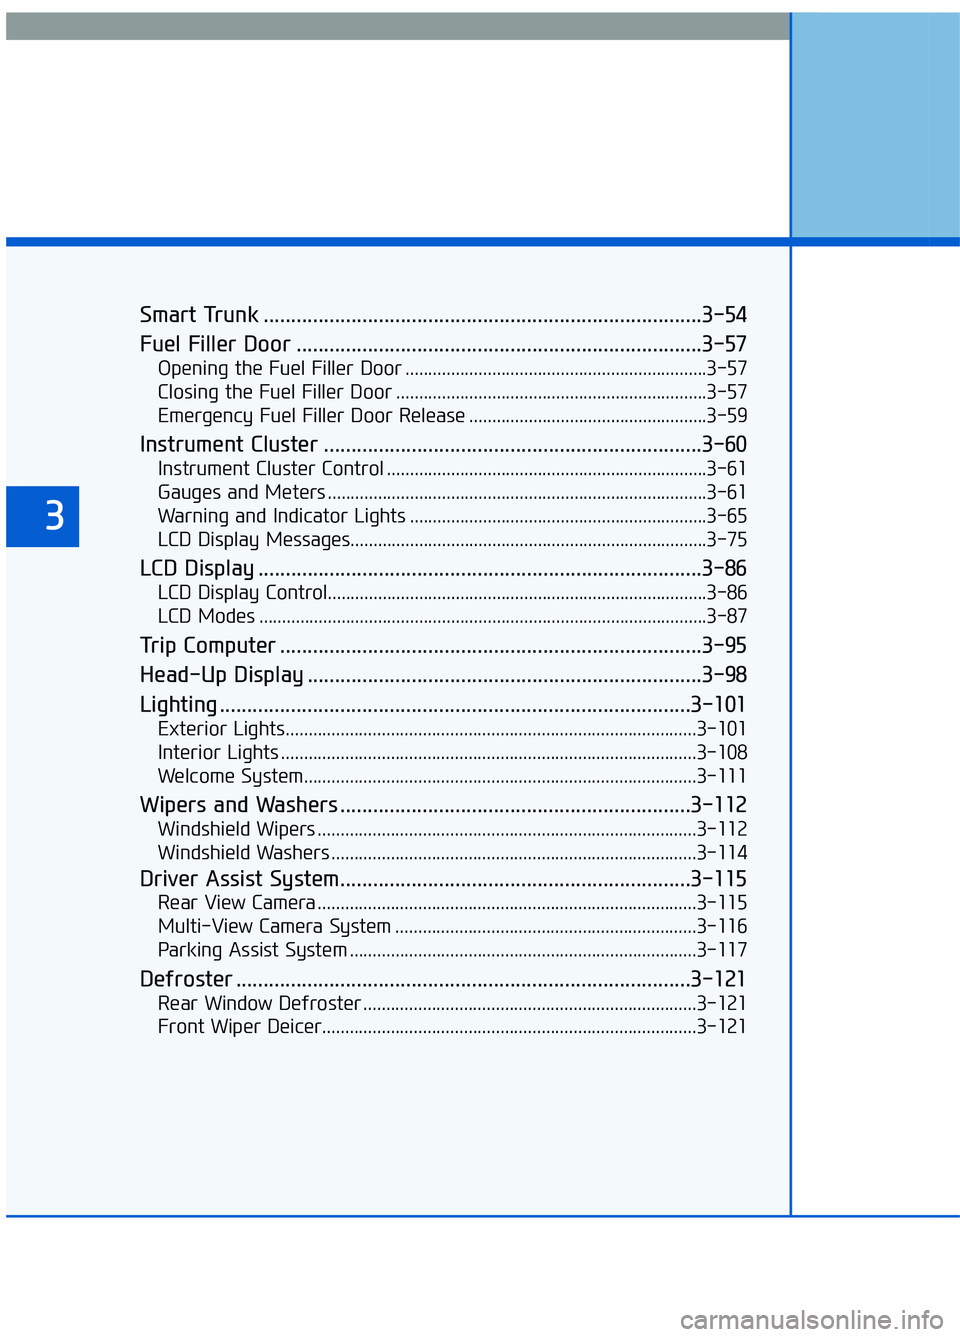
Smart Trunk ........................................................................\
........3-54
Fuel Filler Door ........................................................................\
..3-57
Opening the Fuel Filler Door ..................................................................3-57
Closing the Fuel Filler Door ....................................................................3-57\
Emergency Fuel Filler Door Release ....................................................3-59
Instrument Cluster .....................................................................3-6\
0
Instrument Cluster Control ......................................................................3-\
61
Gauges and Meters ........................................................................\
...........3-61
Warning and Indicator Lights .................................................................3-65
LCD Display Messages........................................................................\
......3-75
LCD Display ........................................................................\
.........3-86
LCD Display Control......................................................................\
.............3-86
LCD Modes ........................................................................\
..........................3-87
Trip Computer ........................................................................\
.....3-95
Head-Up Display ........................................................................\
3-98
Lighting ........................................................................\
..............3-101
Exterior Lights........................................................................\
..................3-101
Interior Lights ........................................................................\
...................3-108
Welcome System........................................................................\
..............3-111
Wipers and Washers ................................................................3-112
Windshield Wipers ........................................................................\
...........3-112
Windshield Washers ........................................................................\
........3-114
Driver Assist System................................................................3-115
Rear View Camera ........................................................................\
...........3-115
Multi-View Camera System ..................................................................3-116
Parking Assist System ........................................................................\
....3-117
Defroster ........................................................................\
...........3-121
Rear Window Defroster ........................................................................\
.3-121
Front Wiper Deicer........................................................................\
..........3-121
3
Page 106 of 519
Smart Key
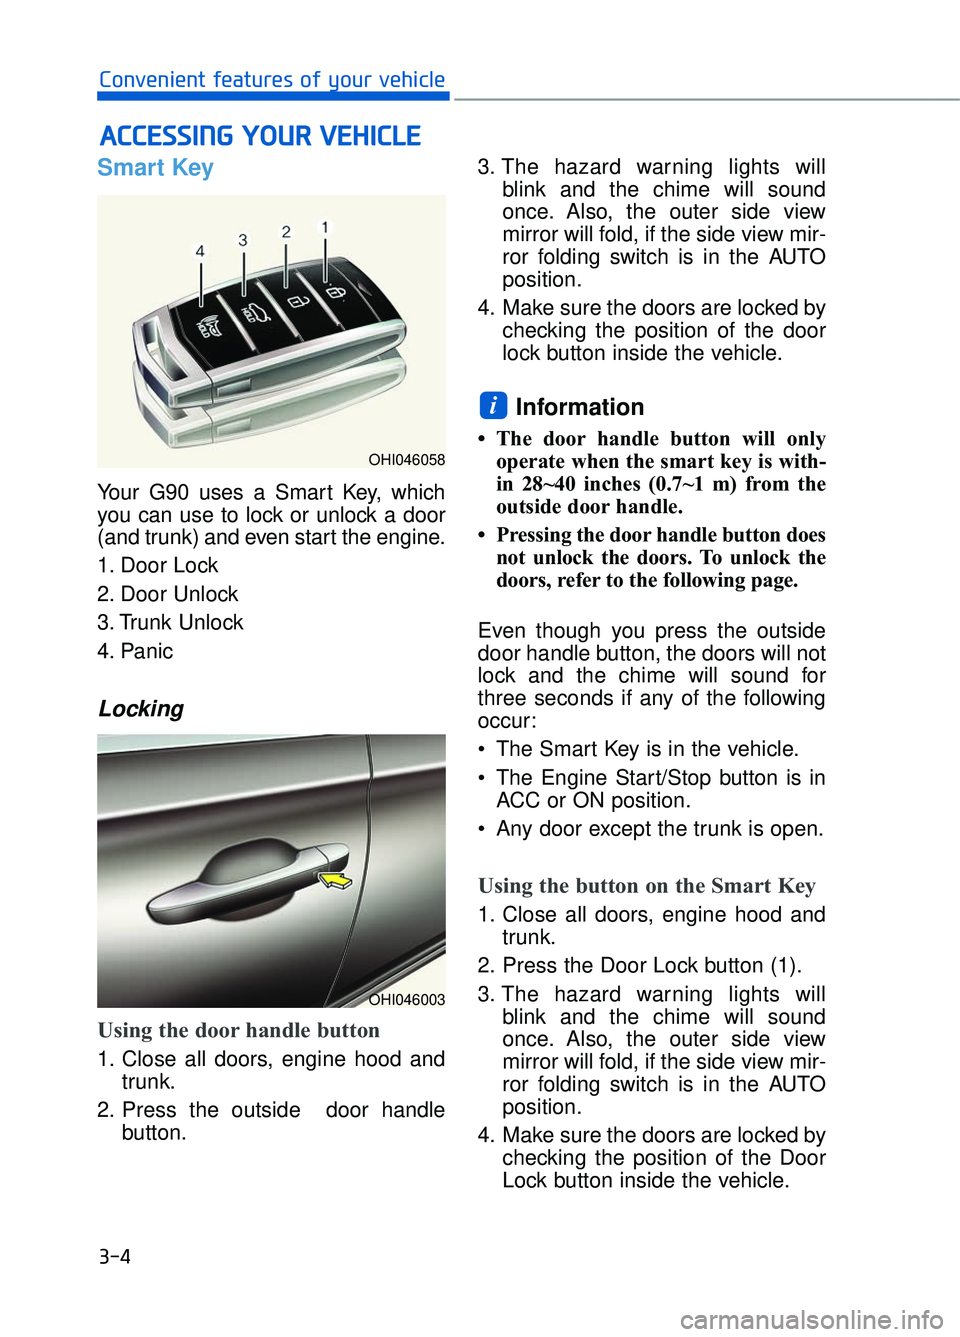
Your G90 uses a Smart Key, which
you can use to lock or unlock a door
(and trunk) and even start the engine.
1. Door Lock
2. Door Unlock
3. Trunk Unlock
4. Panic
Locking
Using the door handle button
1. Close all doors, engine hood andtrunk.
2. Press the outside door handle button. 3. The hazard warning lights will
blink and the chime will sound
once. Also, the outer side view
mirror will fold, if the side view mir-
ror folding switch is in the AUTO
position.
4. Make sure the doors are locked by checking the position of the door
lock button inside the vehicle.
Information
• The door handle button will onlyoperate when the smart key is with-
in 28~40 inches (0.7~1 m) from the
outside door handle.
• Pressing the door handle button does not unlock the doors. To unlock the
doors, refer to the following page.
Even though you press the outside
door handle button, the doors will not
lock and the chime will sound for
three seconds if any of the following
occur:
• The Smart Key is in the vehicle.
The Engine Start/Stop button is in ACC or ON position.
Any door except the trunk is open.
Using the button on the Smart Key
1. Close all doors, engine hood and trunk.
2. Press the Door Lock button (1).
3. The hazard warning lights will blink and the chime will sound
once. Also, the outer side view
mirror will fold, if the side view mir-
ror folding switch is in the AUTO
position.
4. Make sure the doors are locked by checking the position of the Door
Lock button inside the vehicle.
i
A AC
CC
CE
E S
SS
SI
IN
N G
G
Y
Y O
O U
UR
R
V
V E
EH
H I
IC
C L
LE
E
3-4
Convenient features of your vehicle
OHI046058
OHI046003
Page 107 of 519
Unlocking
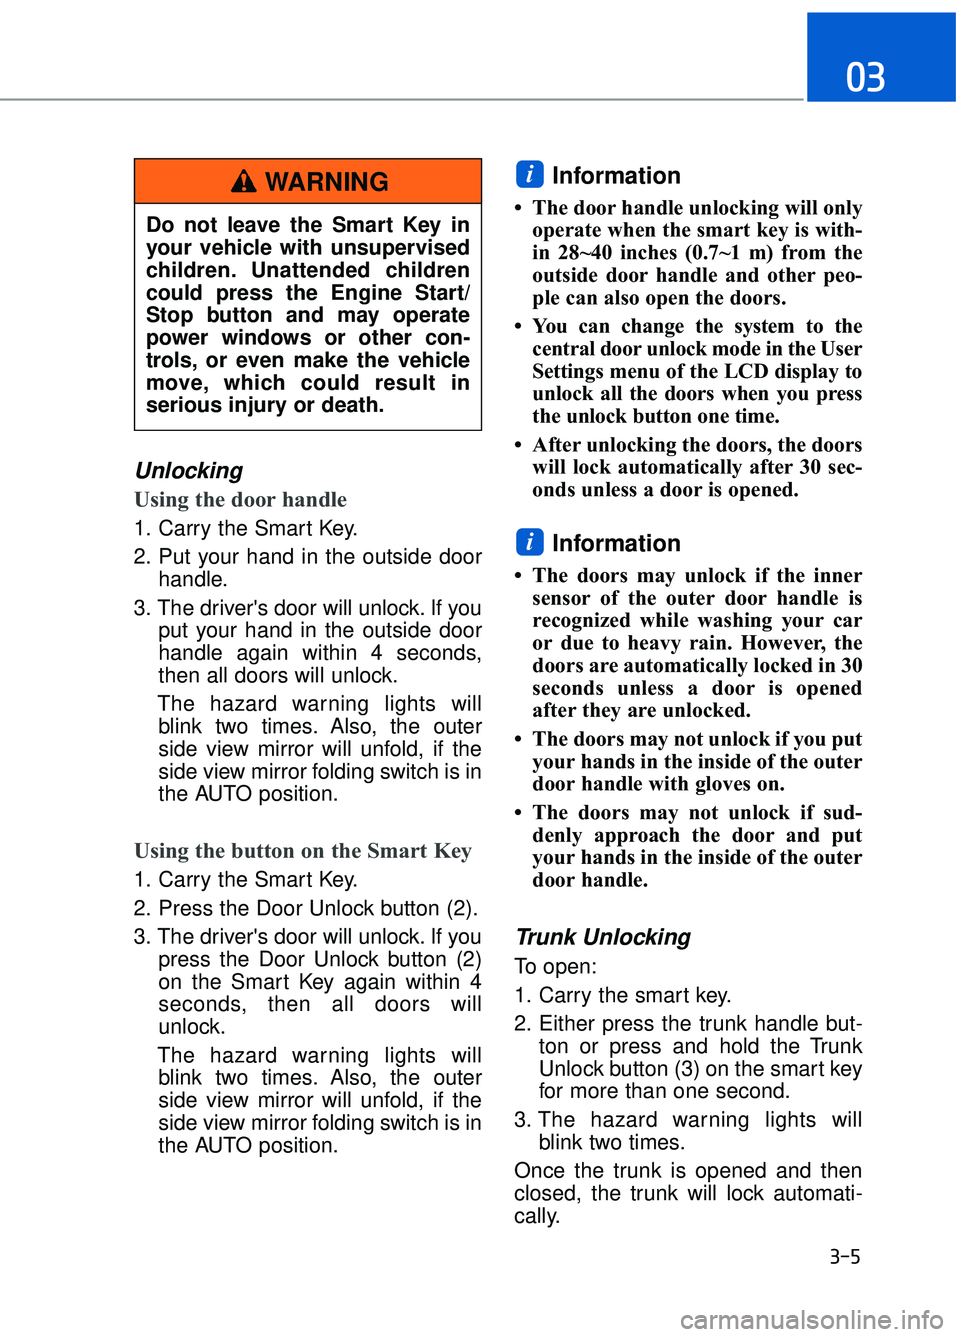
Using the door handle
1. Carry the Smart Key.
2. Put your hand in the outside doorhandle.
3. The driver's door will unlock. If you put your hand in the outside door
handle again within 4 seconds,
then all doors will unlock.
The hazard warning lights will blink two times. Also, the outer
side view mirror will unfold, if the
side view mirror folding switch is in
the AUTO position.
Using the button on the Smart Key
1. Carry the Smart Key.
2. Press the Door Unlock button (2).
3. The driver's door will unlock. If you press the Door Unlock button (2)
on the Smart Key again within 4
seconds, then all doors will
unlock.
The hazard warning lights will blink two times. Also, the outer
side view mirror will unfold, if the
side view mirror folding switch is in
the AUTO position.
Information
• The door handle unlocking will only operate when the smart key is with-
in 28~40 inches (0.7~1 m) from the
outside door handle and other peo-
ple can also open the doors.
• You can change the system to the central door unlock mode in the User
Settings menu of the LCD display to
unlock all the doors when you press
the unlock button one time.
• After unlocking the doors, the doors will lock automatically after 30 sec-
onds unless a door is opened.
Information
• The doors may unlock if the innersensor of the outer door handle is
recognized while washing your car
or due to heavy rain. However, the
doors are automatically locked in 30
seconds unless a door is opened
after they are unlocked.
• The doors may not unlock if you put your hands in the inside of the outer
door handle with gloves on.
• The doors may not unlock if sud- denly approach the door and put
your hands in the inside of the outer
door handle.
Trunk Unlocking
To open:
1. Carry the smart key.
2. Either press the trunk handle but- ton or press and hold the Trunk
Unlock button (3) on the smart key
for more than one second.
3. The hazard warning lights will blink two times.
Once the trunk is opened and then
closed, the trunk will lock automati-
cally.
i
i
03
3-5
Do not leave the Smart Key in
your vehicle with unsupervised
children. Unattended children
could press the Engine Start/
Stop button and may operate
power windows or other con-
trols, or even make the vehicle
move, which could result in
serious injury or death.
WARNING
Page 108 of 519
Information
The trunk handle button will only oper-
ate when the smart key is within 28
inches (0.7 m) from the trunk handle.
Information
The power trunk (if equipped) can be
operated when the engine is not run-
ning. However, the power trunk con-
sumes large amounts of vehicle elec-
tric power. To prevent the battery
from being discharged, do not operate
consecutively (more than approxi-
mately 10 times).
Panic button
Press and hold the Panic button (4)
for more than one second. The horn
sounds and hazard warning lights
blink for about 30 seconds. To cancel
the panic mode, press any button on
the Smart Key.
Start-up
You can start the engine without
inserting the key.
For more information, refer to the
"Engine Start/Stop Button" section
in chapter 5.To prevent damaging the smart key:
• Keep the smart key away from
any liquid or fire. Internal circuits
may malfunction if the inside of
the smart key gets damp (from
liquids or moisture) or if it is heat-
ed. This can exclude the smart
key from warranty coverage.
Avoid dropping or throwing the smart key.
Protect the smart key from extreme temperatures.
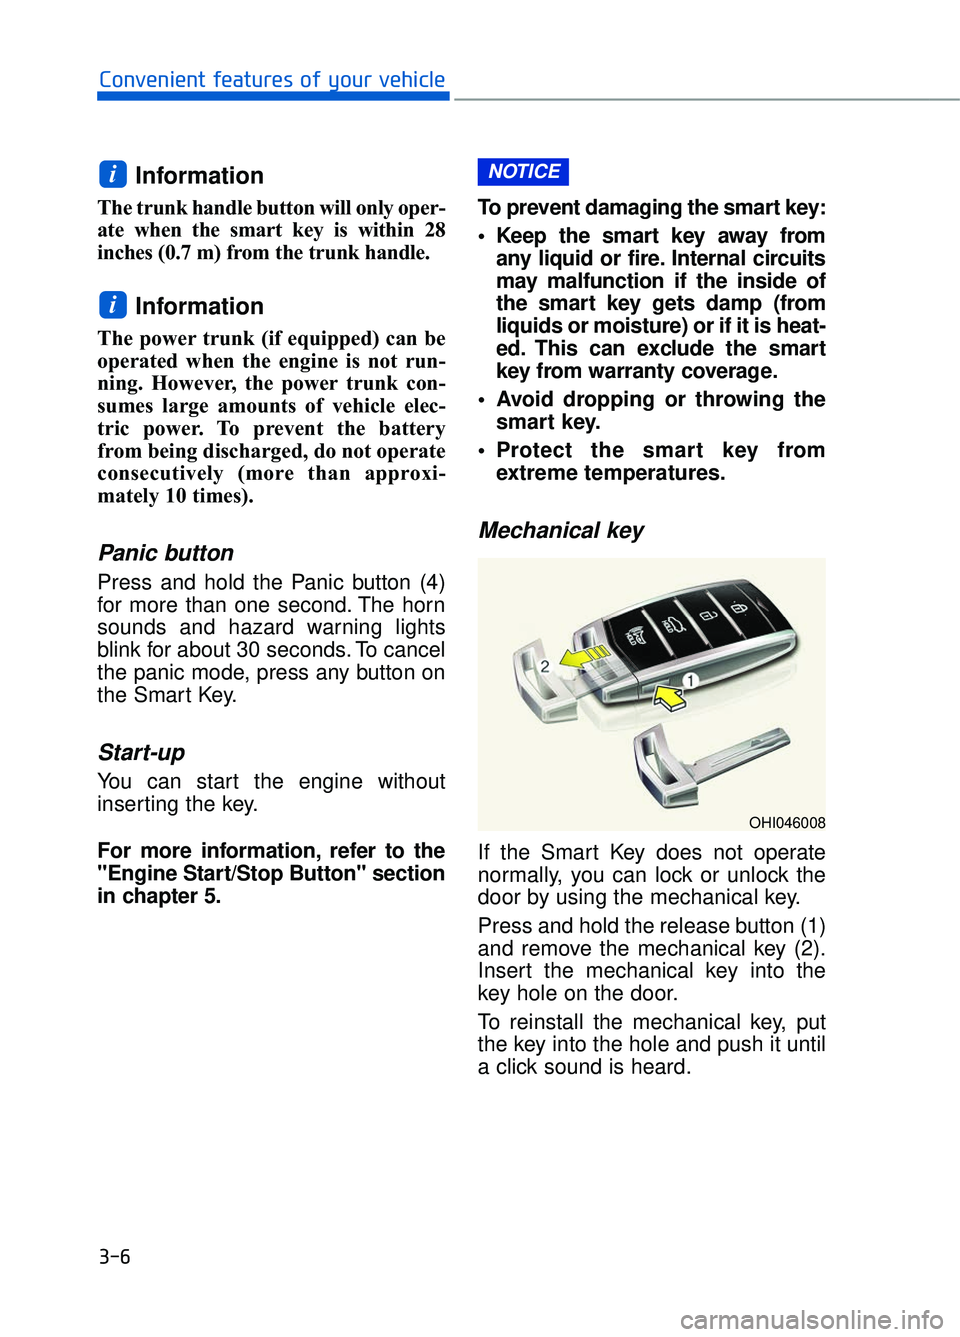
Mechanical key
If the Smart Key does not operate
normally, you can lock or unlock the
door by using the mechanical key.
Press and hold the release button (1)
and remove the mechanical key (2).
Insert the mechanical key into the
key hole on the door.
To reinstall the mechanical key, put
the key into the hole and push it until
a click sound is heard.
NOTICE
i
i
3-6
Convenient features of your vehicle
OHI046008