warning light GENESIS G90 2021 Owner's Manual
[x] Cancel search | Manufacturer: GENESIS, Model Year: 2021, Model line: G90, Model: GENESIS G90 2021Pages: 538, PDF Size: 13.02 MB
Page 402 of 538
5-150
Driving your vehicle
Hazardous Driving Conditions
When hazardous driving elements
are encountered such as water,
snow, ice, mud and sand, take the
below suggestions:
• Drive cautiously and keep a longer
braking distance.
• Avoid abrupt braking or steering.
• When your vehicle is stuck in snow,
mud, or sand, use second gear.
Accelerate slowly to avoid unnec-
essary wheel spin.
• Put sand, rock salt, tire chains or
other non-slip materials under the
wheels to provide additional trac-
tion while the vehicle becomes
stuck in ice, snow, or mud.
Rocking the Vehicle
If it is necessary to rock the vehicle
to free it from snow, sand, or mud,
first turn the steering wheel right and
left to clear the area around your
front wheels. Then, shift back and
forth between R (Reverse) and a for-
ward gear.
Try to avoid spinning the wheels, and
do not race the engine.
To prevent transmission wear, wait
until the wheels stop spinning before
shifting gears. Release the accelera-
tor pedal while shifting, and press
lightly on the accelerator pedal while
the transmission is in gear. Slowly
spinning the wheels in forward and
reverse directions causes a rocking
motion that may free the vehicle.
SPECIAL DRIVING CONDITIONS
Downshifting with an automatic
transmission while driving on
slippery surfaces can cause an
accident. The sudden change in
tire speed could cause the tires
to skid. Be careful when down-
shifting on slippery surfaces.
WARNING
If the vehicle is stuck and
excessive wheel spin occurs,
the temperature in the tires can
increase very quickly. If the tires
become damaged, a tire blow
out or tire explosion can occur.
This condition is dangerous -
you and others may be injured.
Do not attempt this procedure if
people or objects are anywhere
near the vehicle.
If you attempt to free the vehi-
cle, the vehicle can overheat
quickly, possibly causing an
engine compartment fire or
other damage. Try to avoid spin-
ning the wheels as much as
possible to prevent overheating
of either the tires or the engine.
DO NOT allow the vehicle to
spin the wheels above 35 mph
(56 km/h).
WARNING
Page 416 of 538
6-2
What to do in an emergency
The hazard warning flasher serves
as a warning to other drivers to exer-
cise extreme caution when approach-
ing, overtaking, or passing your vehi-
cle.
It should be used whenever emer-
gency repairs are being made or
when the vehicle is stopped near the
edge of a roadway.
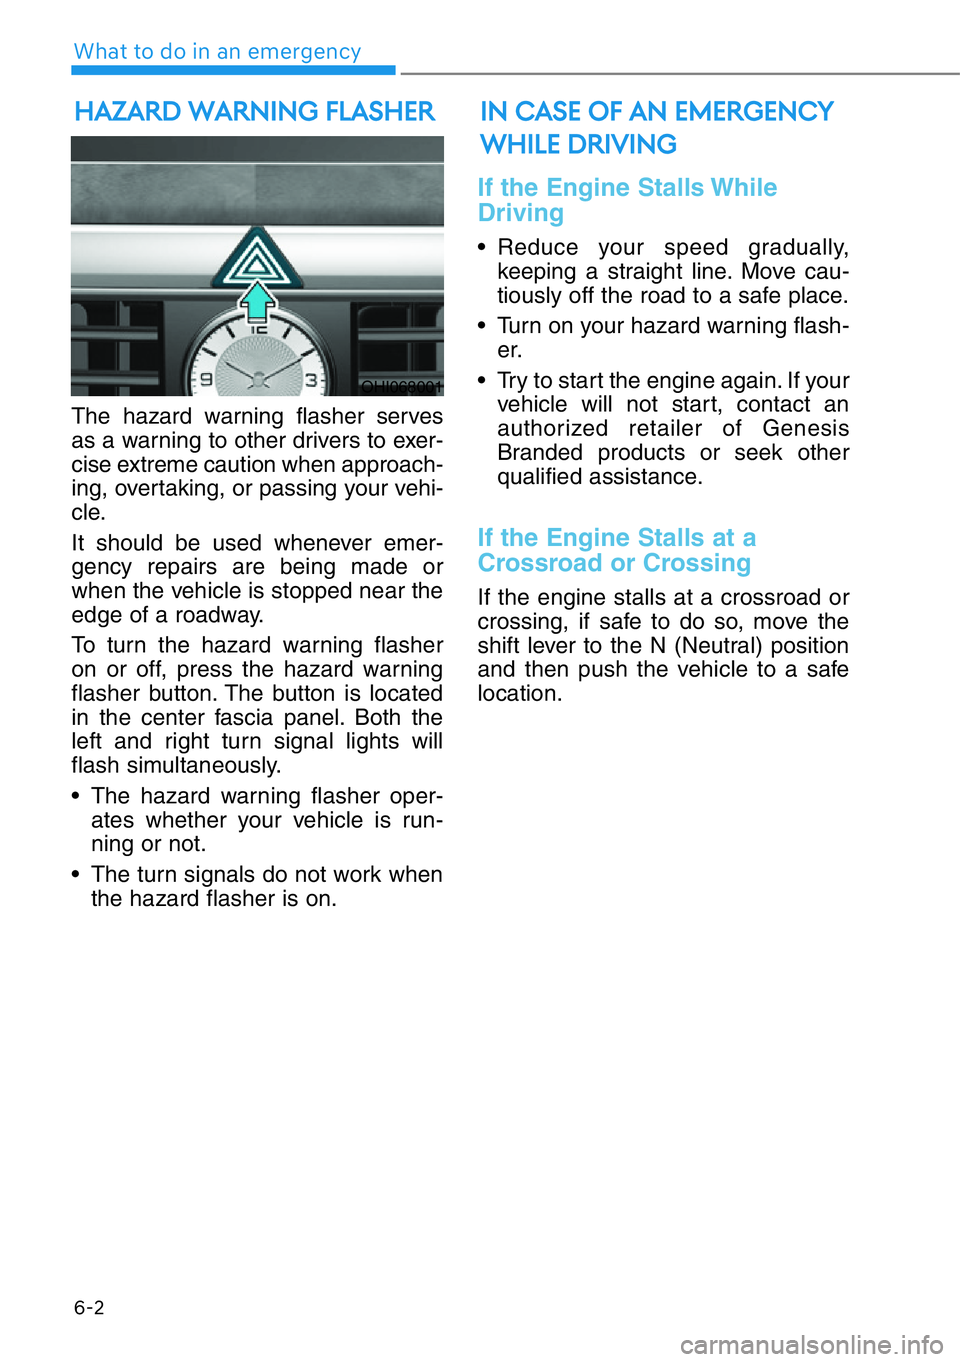
To turn the hazard warning flasher
on or off, press the hazard warning
flasher button. The button is located
in the center fascia panel. Both the
left and right turn signal lights will
flash simultaneously.
• The hazard warning flasher oper-
ates whether your vehicle is run-
ning or not.
• The turn signals do not work when
the hazard flasher is on.
If the Engine Stalls While
Driving
• Reduce your speed gradually,
keeping a straight line. Move cau-
tiously off the road to a safe place.
• Turn on your hazard warning flash-
er.
• Try to start the engine again. If your
vehicle will not start, contact an
authorized retailer of Genesis
Branded products or seek other
qualified assistance.
If the Engine Stalls at a
Crossroad or Crossing
If the engine stalls at a crossroad or
crossing, if safe to do so, move the
shift lever to the N (Neutral) position
and then push the vehicle to a safe
location.
HAZARD WARNING FLASHER
OHI068001
IN CASE OF AN EMERGENCY
WHILE DRIVING
Page 417 of 538
6-3
06
If you Have a Flat Tire While
Driving
If a tire goes flat while you are driv-
ing:
• Take your foot off the accelerator
pedal and let the vehicle slow
down while driving straight ahead.
Do not apply the brakes immedi-
ately or attempt to pull off the road
as this may cause loss of vehicle
control resulting in an accident.
When the vehicle has slowed to
such a speed that it is safe to do
so, brake carefully and pull off the
road. Drive off the road as far as
possible and park on firm, level
ground. If you are on a divided
highway, do not park in the median
area between the two traffic lanes.
• When the vehicle is stopped, press
the hazard warning flasher button,
shift the gear to P (Park), apply the
parking brake, and press the
Engine Start/Stop button to the
OFF position.
• Have all passengers get out of the
vehicle. Be sure they all get out on
the side of the vehicle that is away
from traffic.
• When changing a flat tire, follow
the instructions provided later in
this chapter.If the Engine Doesn't Turn
Over or Turns Over Slowly
• Be sure to shift the gear to N
(Neutral) or P (Park). The engine
starts only when the gear is in N
(Neutral) or P (Park).
• Turn on the interior light. If the light
dims or goes out when you operate
the starter, the battery is drained.
Do not push or pull the vehicle to
start it. This could cause damage to
your vehicle.See instructions for
"Jump Starting" provided in this
chapter.
Push or pull starting the vehicle
may cause the catalytic converter
to overload which can lead to
damage to the emission control
system.
If the Engine Turns Over
Normally but Doesn't Start
Check the fuel level and add fuel if
necessary.
If the engine still does not start, have
your vehicle checked by an author-
ized retailer of Genesis Branded
products.
NOTICE
IF THE ENGINE WILL NOT
START
Page 425 of 538
6-11
06
Information
If any of the below happens, have the
system checked by an authorized
retailer of Genesis Branded products.
1. The Low Tire Pressure Telltale/
TPMS Malfunction Indicator does
not illuminate for 3 seconds when
the Engine Start/Stop button is
pressed to the ON position or engine
is running.
2. The TPMS Malfunction Indicator
remains illuminated after blinking
for approximately 1 minute.
3. The Low Tire Pressure Position
Telltale remains illuminated.
Low Tire Pressure
Telltale
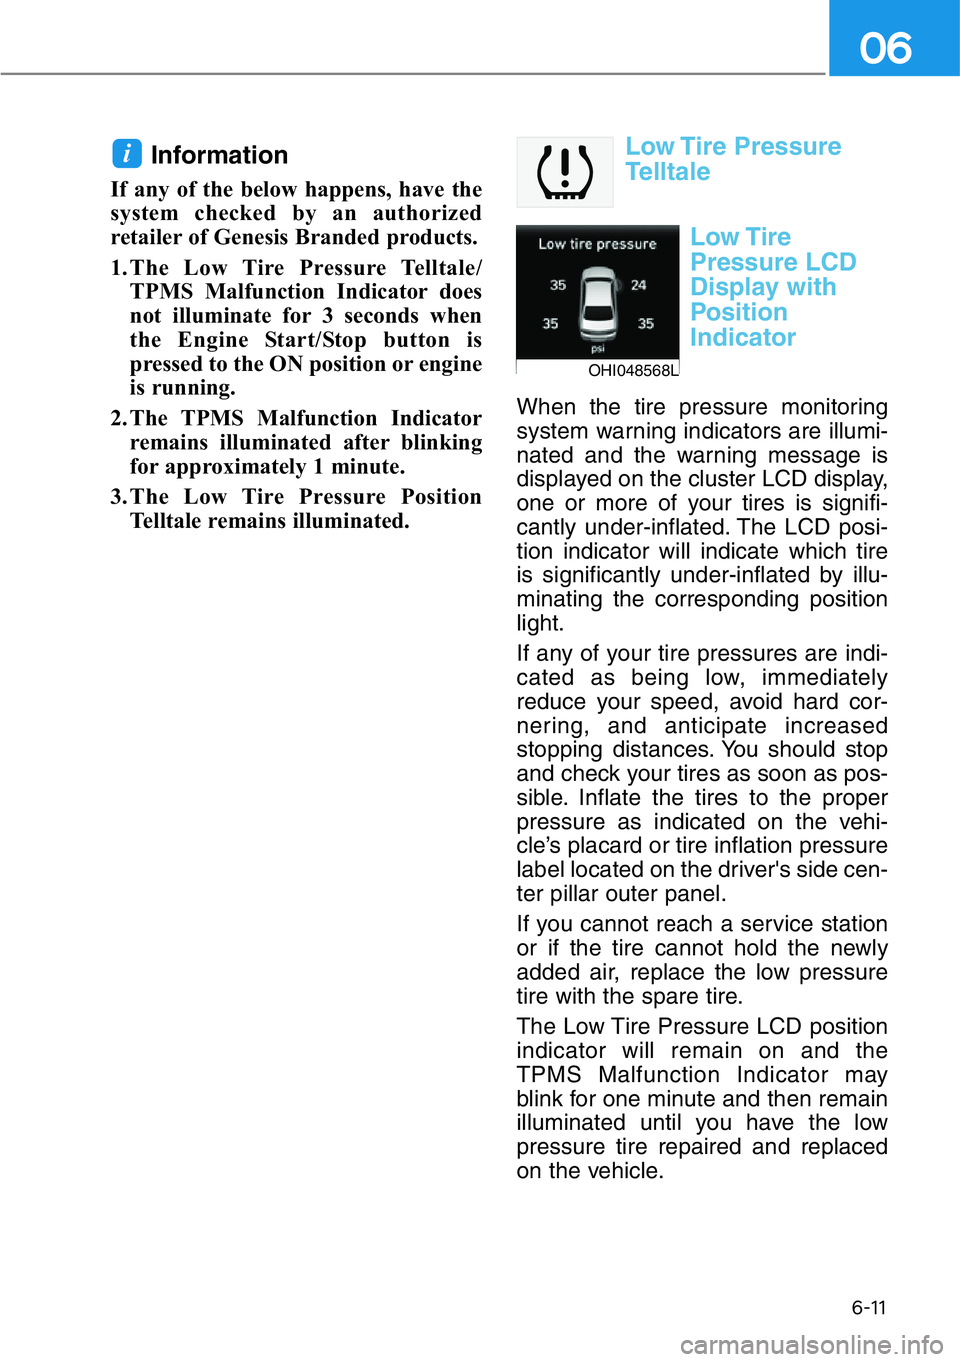
Low Tire
Pressure LCD
Display with
Position
Indicator
When the tire pressure monitoring
system warning indicators are illumi-
nated and the warning message is
displayed on the cluster LCD display,
one or more of your tires is signifi-
cantly under-inflated. The LCD posi-
tion indicator will indicate which tire
is significantly under-inflated by illu-
minating the corresponding position
light.
If any of your tire pressures are indi-
cated as being low, immediately
reduce your speed, avoid hard cor-
nering, and anticipate increased
stopping distances. You should stop
and check your tires as soon as pos-
sible. Inflate the tires to the proper
pressure as indicated on the vehi-
cle’s placard or tire inflation pressure
label located on the driver's side cen-
ter pillar outer panel.
If you cannot reach a service station
or if the tire cannot hold the newly
added air, replace the low pressure
tire with the spare tire.
The Low Tire Pressure LCD position
indicator will remain on and the
TPMS Malfunction Indicator may
blink for one minute and then remain
illuminated until you have the low
pressure tire repaired and replaced
on the vehicle.
i
OHI048568L
Page 427 of 538
6-13
06
Changing a Tire with TPMS
If you have a flat tire, the Low Tire
Pressure and LCD position indicator
will come on. Have the flat tire
repaired by an authorized retailer of
Genesis Branded products as soon
as possible or replace the flat tire
with the spare tire.
Never use a puncture-repairing
agent not approved by authorized
retailer of Genesis Branded prod-
ucts to repair and/or inflate a low
pressure tire. Tire sealant not
approved by authorized retailer of
Genesis Branded products may
damage the tire pressure sensor.
The spare tire does not come with a
tire pressure monitoring sensor.
When the low pressure tire or the flat
tire is replaced with the spare tire,
the Low Tire Pressure LCD position
indicator will remain on. Also, the
TPMS Malfunction Indicator will illu-
minate after blinking for one minute if
the vehicle is driven at speed above
15.5 mph (25 km/h) for approximate-
ly 20 minutes.
Once the original tire equipped with
a tire pressure monitoring sensor is
reinflated to the recommended pres-
sure and reinstalled on the vehicle,
the Low Tire Pressure LCD position
indicator and TPMS Malfunction
Indicator will go off within a few min-
utes of driving.
If the indicators do not disappear
after a few minutes, please visit an
authorized retailer of Genesis
Branded products.Each wheel is equipped with a tire
pressure sensor mounted inside the
tire behind the valve stem (except for
the spare tire). You must use TPMS
specific wheels. It is recommended
that you always have your tires serv-
iced by an authorized retailer of
Genesis Branded products.
You may not be able identify a tire
with low pressure by simply looking
at it. Always use a good quality tire
pressure gage to measure the tire's
inflation pressure. Please note that a
tire that is hot (from being driven) will
have a higher pressure measure-
ment than a tire that is cold.
A cold tire means the vehicle has
been sitting for 3 hours and driven for
less than 1 mile (1.6 km) in that 3
hour period.
Allow the tire to cool before measur-
ing the inflation pressure. Always be
sure the tire is cold before inflating to
the recommended pressure.
NOTICE
• The TPMS cannot alert you to
severe and sudden tire dam-
age caused by external fac-
tors such as nails or road
debris.
• If you feel any vehicle instabil-
ity, immediately take your foot
off the accelerator, apply the
brakes gradually with light
force, and slowly move to a
safe position off the road.
WARNING
Page 447 of 538

7-7
07
Owner Maintenance Schedule
When you stop for fuel:
• Check the engine oil level.
• Check the coolant level in the
engine coolant reservoir.
• Check the windshield washer fluid
level.
• Check the tire for low or under-
inflated tires.
While operating your vehicle:
• Note any changes in the sound of
the exhaust or any smell of exhaust
fumes in the vehicle.
• Check for vibrations in the steering
wheel. Notice if there is any
increased steering effort or loose-
ness in the steering wheel, or
change in its straight-ahead posi-
tion.
• Notice if your vehicle constantly
turns slightly or "pulls" to one side
when traveling on smooth, level
road.
• When stopping, listen and check
for unusual sounds, pulling to one
side, increased brake pedal travel
or "hard-to-push" brake pedal.
• If any slipping or changes in the
operation of your transmission
occurs, check the transmission
fluid level.
• Check the automatic transmission
P (Park) function.
• Check the parking brake.
• Check for fluid leaks under your
vehicle (water dripping from the air
conditioning system during or after
use is normal).
At least monthly:
• Check coolant level in the engine
coolant reservoir.
• Check the operation of all exterior
lights, including the brake lights,
turn signals and hazard warning
flashers.
• Check the inflation pressures of all
tires including the spare for tires
that are worn, show uneven wear,
or are damaged.
• Check for loose wheel lug nuts. Be careful when checking your
engine coolant level when the
engine is hot. This may result in
coolant being blown out of the
opening and cause serious
burns and other injuries.
WARNING
Page 475 of 538
7-35
07
Battery Recharging
By battery charger
Your vehicle has a maintenance-free,
calcium-based battery.
• If the battery becomes discharged
in a short time (because, for exam-
ple, the headlights or interior lights
were left on while the vehicle was
not in use), recharge it by slow
charging (trickle) for 10 hours.
• If the battery gradually discharges
because of high electric load while
the vehicle is being used, recharge
it at 20-30A for two hours.
AGM battery
• Absorbent Glass Matt (AGM)
batteries are maintenance-free
and we recommend that the
AGM battery be serviced by an
authorized retailer of Genesis
Branded products. For charging
your AGM battery, use only fully
automatic battery chargers that
are specially developed for AGM
batteries.
• When replacing the AGM bat-
tery, we recommend that you
use parts for replacement from
an authorized retailer of Genesis
Branded products.
• Do not open or remove the cap
on top of the battery. This may
cause leaks of internal elec-
trolyte that could result in
severe injury.
NOTICE
Always follow these instruc-
tions when recharging your
vehicle's battery to avoid the
risk of SERIOUS INJURY or
DEATH from explosions or acid
burns:
• Before performing mainte-
nance or recharging the bat-
tery, turn off all accessories
and press the Engine Start/
Stop button to the OFF posi-
tion.
• Keep all flames, sparks, or
smoking materials away from
the battery.
• Always work outdoors or in an
area with plenty of ventilation.
• Wear eye protection when
checking the battery during
charging.
• The battery must be removed
from the vehicle and placed in
a well ventilated area.
• Watch the battery during
charging, and stop or reduce
the charging rate if the battery
cells begin boiling violently.
WARNING
Page 492 of 538
7-52
Maintenance
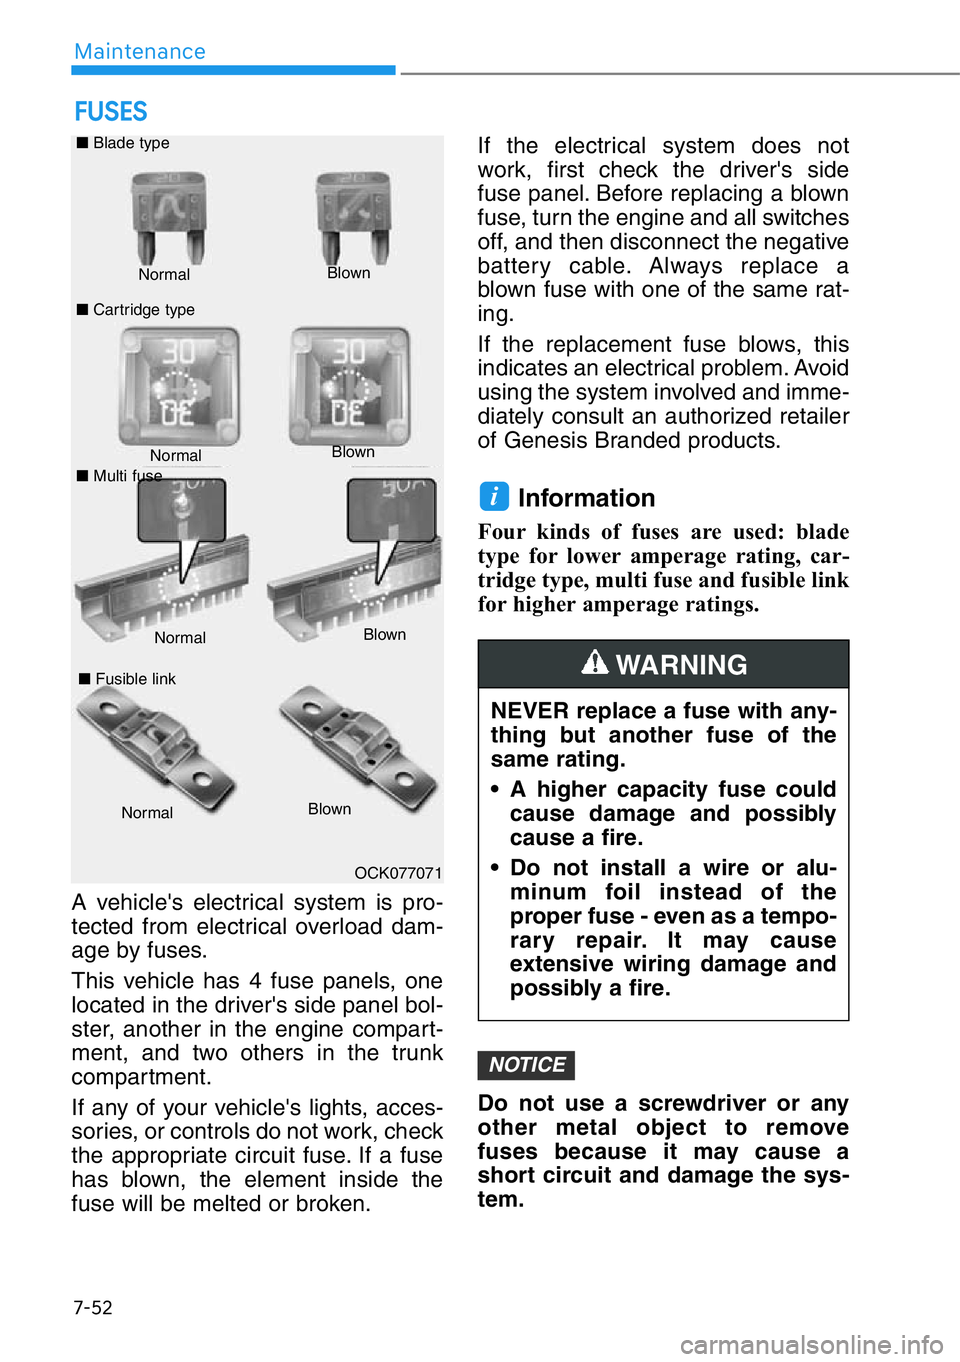
A vehicle's electrical system is pro-
tected from electrical overload dam-
age by fuses.
This vehicle has 4 fuse panels, one
located in the driver's side panel bol-
ster, another in the engine compart-
ment, and two others in the trunk
compartment.
If any of your vehicle's lights, acces-
sories, or controls do not work, check
the appropriate circuit fuse. If a fuse
has blown, the element inside the
fuse will be melted or broken.If the electrical system does not
work, first check the driver's side
fuse panel. Before replacing a blown
fuse, turn the engine and all switches
off, and then disconnect the negative
battery cable. Always replace a
blown fuse with one of the same rat-
ing.
If the replacement fuse blows, this
indicates an electrical problem. Avoid
using the system involved and imme-
diately consult an authorized retailer
of Genesis Branded products.
Information
Four kinds of fuses are used: blade
type for lower amperage rating, car-
tridge type, multi fuse and fusible link
for higher amperage ratings.
Do not use a screwdriver or any
other metal object to remove
fuses because it may cause a
short circuit and damage the sys-
tem.
NOTICE
i
FUSES
Normal Normal ■Blade type
■Cartridge typeBlown
Blown
■Fusible link
NormalBlown
OCK077071
NEVER replace a fuse with any-
thing but another fuse of the
same rating.
• A higher capacity fuse could
cause damage and possibly
cause a fire.
• Do not install a wire or alu-
minum foil instead of the
proper fuse - even as a tempo-
rary repair. It may cause
extensive wiring damage and
possibly a fire.
WARNING
■Multi fuse
NormalBlown
Page 509 of 538

7-69
07
Consult an authorized retailer of
Genesis Branded products to
replace most vehicle light bulbs. It is
difficult to replace vehicle light bulbs
because other parts of the vehicle
must be removed before you can get
to the bulb. This is especially true for
removing the headlamp assembly to
get to the bulb(s).
Removing/installing the headlamp
assembly can result in damage to
the vehicle.
Information
The headlamp and tail lamp lenses
could appear frosty if the vehicle is
washed after driving or the vehicle is
driven at night in wet weather. This
condition is caused by temperature
difference between the lamp inside and
outside and, it does not indicate a
problem with your vehicle. When
moisture condenses in the lamp, it will
be removed after driving with the
headlamp on. The removable level
may differ depending on lamp size,
lamp position and environmental con-
dition. However, if moisture is not
removed, we recommend that your
vehicle is inspected by an authorized
retailer of Genesis Branded products.Light replacement
Be sure to replace the burned out
bulb with one of the same wattage
rating. Otherwise, it may cause
damage to the fuse or electric
wiring system.
To prevent damage, do not clean
the headlamp with chemical sol-
vents or strong detergents.Information
• A normally functioning lamp may
flicker momentarily to stabilize the
vehicle's electrical control system.
However, if the lamp goes out after
flickering momentarily, or contin-
ues to flicker, have the system
checked by an authorized retailer of
Genesis Branded products.
• The parking lamp may not turn on
when the parking lamp switch is
turned on, but the parking lamp
and headlamp switch may turn on
when the headlamp switch is turned
on. This may be caused by network
failure or vehicle electrical control
system malfunction. If this occurs,
have the system checked by an
authorized retailer of Genesis
Branded products.
i
NOTICE
NOTICE
i
LIGHT BULBS
• Prior to replacing a lamp,
depress the foot brake, shift
the gear to P (Park) apply the
parking brake, place the
Engine Start/Stop button to
the OFF position, and take the
key with you when leaving the
vehicle to avoid sudden
movement of the vehicle and
to prevent possible electric
shock.
• Be aware the bulbs may be hot
and may burn your fingers.
WARNING
Page 514 of 538

7-74
Maintenance
Exterior Care
Exterior general caution
It is very important to follow the label
directions when using any chemical
cleaner or polish. Read all warning
and caution statements that appear
on the label.
High-pressure washing
• When using high-pressure wash-
ers, make sure to maintain suffi-
cient distance from the vehicle.
Insufficient clearance or excessive
pressure can lead to component
damage or water penetration.
• Do not spray the camera, sensors
or its surrounding area directly with
a high pressure washer. Shock
applied from high pressure water
may cause the device to not oper-
ate normally.
• Do not bring the nozzle tip close to
boots (rubber or plastic covers)or
connectors as they may be dam-
aged if they come into contact with
high pressure water.
• Do not use any high-pressure noz-
zles, which induce either one-direct
water stream or water swirling.
Finish maintenance
Washing
To help protect your vehicle’s finish
from rust and deterioration, wash it
thoroughly and frequently at least
once a month with lukewarm or cold
water.
If you use your vehicle for off-road
driving, you should wash it after each
off-road trip. Pay special attention to
the removal of any accumulation of
salt, dirt, mud, and other foreign
materials. Make sure the drain holes
in the lower edges of the doors and
rocker panels are kept clear and
clean.
Insects, tar, tree sap, bird droppings,
industrial pollution and similar
deposits can damage your vehicle’s
finish if not removed immediately.
Even prompt washing with plain
water may not completely remove all
these deposits. A mild soap, safe for
use on painted surfaces, should be
used.
After washing, rinse the vehicle thor-
oughly with lukewarm or cold water.
Do not allow soap to dry on the finish.
APPEARANCE CARE
After washing the vehicle, test
the brakes while driving slowly
to see if they have been affected
by water before getting on the
road. If braking performance is
impaired, dry the brakes by
applying them lightly while
maintaining a slow forward
speed.
WARNING