check engine GENESIS GV80 2021 User Guide
[x] Cancel search | Manufacturer: GENESIS, Model Year: 2021, Model line: GV80, Model: GENESIS GV80 2021Pages: 632, PDF Size: 9.37 MB
Page 131 of 632
Instrument Cluster
4-26
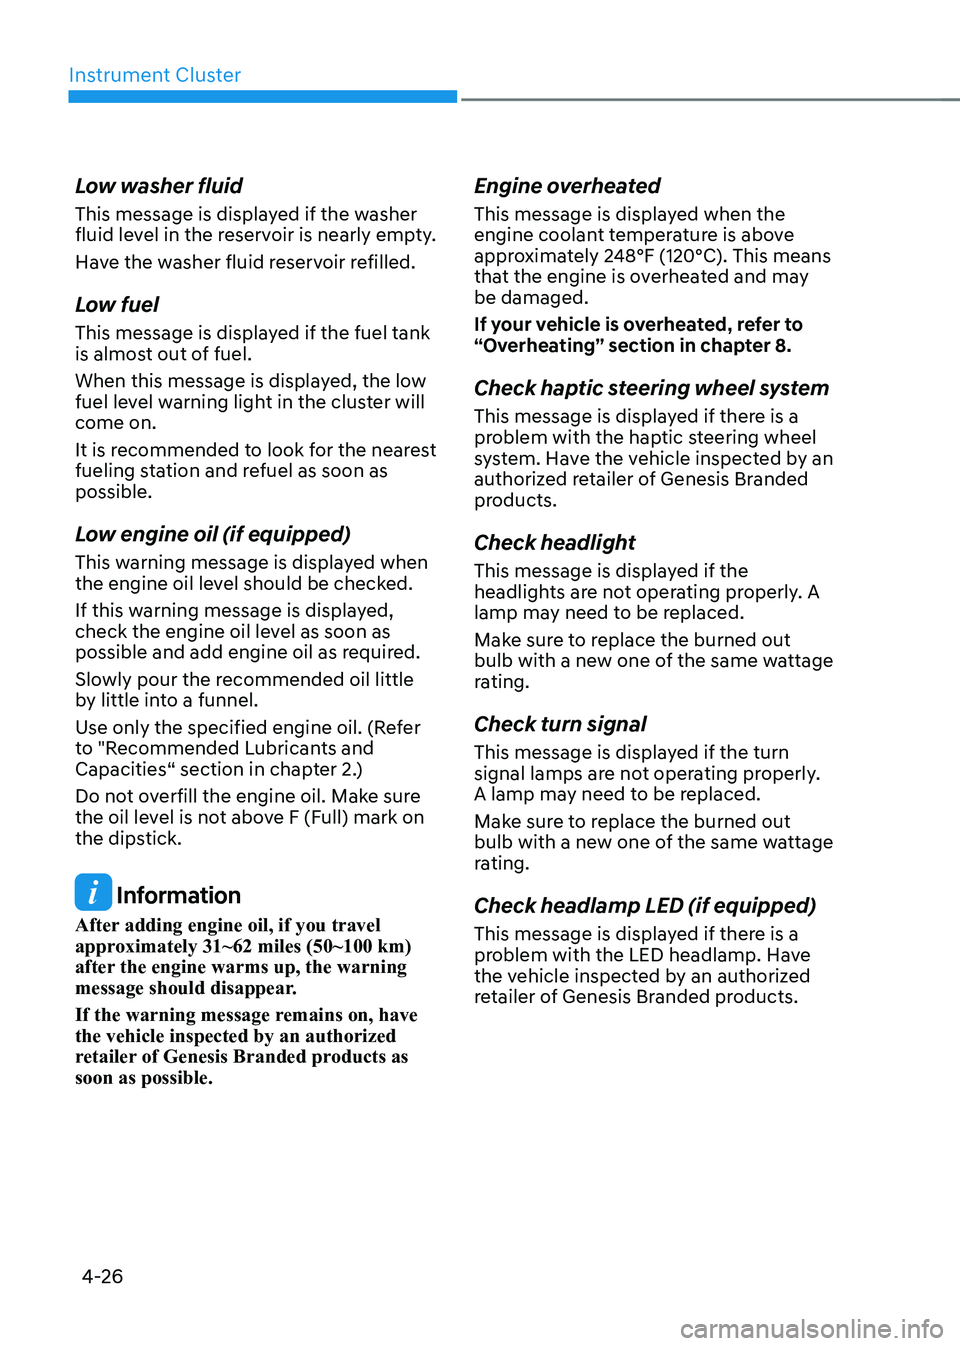
Low washer fluid
This message is displayed if the washer
fluid level in the reservoir is nearly empty.
Have the washer fluid reservoir refilled.
Low fuel
This message is displayed if the fuel tank
is almost out of fuel.
When this message is displayed, the low
fuel level warning light in the cluster will
come on.
It is recommended to look for the nearest
fueling station and refuel as soon as
possible.
Low engine oil (if equipped)
This warning message is displayed when
the engine oil level should be checked.
If this warning message is displayed,
check the engine oil level as soon as
possible and add engine oil as required.
Slowly pour the recommended oil little
by little into a funnel.
Use only the specified engine oil. (Refer
to "Recommended Lubricants and
Capacities“ section in chapter 2.)
Do not overfill the engine oil. Make sure
the oil level is not above F (Full) mark on
the dipstick.
Information
After adding engine oil, if you travel
approximately 31~62 miles (50~100 km)
after the engine warms up, the warning
message should disappear.
If the warning message remains on, have
the vehicle inspected by an authorized
retailer of Genesis Branded products as
soon as possible.
Engine overheated
This message is displayed when the
engine coolant temperature is above
approximately 248°F (120°C). This means
that the engine is overheated and may
be damaged.
If your vehicle is overheated, refer to
“Overheating” section in chapter 8.
Check haptic steering wheel system
This message is displayed if there is a
problem with the haptic steering wheel
system. Have the vehicle inspected by an
authorized retailer of Genesis Branded
products.
Check headlight
This message is displayed if the
headlights are not operating properly. A
lamp may need to be replaced.
Make sure to replace the burned out
bulb with a new one of the same wattage
rating.
Check turn signal
This message is displayed if the turn
signal lamps are not operating properly.
A lamp may need to be replaced.
Make sure to replace the burned out
bulb with a new one of the same wattage
rating.
Check headlamp LED (if equipped)
This message is displayed if there is a
problem with the LED headlamp. Have
the vehicle inspected by an authorized
retailer of Genesis Branded products.
Page 134 of 632
04
4-29
• Manual reset
To clear the average fuel economy
manually, press the OK switch on the
steering wheel for more than 1 second
when the Average Fuel Economy is
displayed.
• Automatic reset
To automatically reset the average
fuel economy, select between ‘After
Ignition’ or ‘After Refueling’ from the
Settings menu in the infotainment
system.
-After Ignition: When the engine has
been OFF for 4 hours or longer the
average fuel economy will reset
automatically.
-After Refueling: The average fuel
economy will reset automatically
after adding 2.4 gallons (9 liters) of
fuel or more and after driving speed
exceeds 1 mph (1 km/h).
à For 12.3-inch 3D instrument cluster,
you can check the fuel economy in
the center bottom of the cluster.
OJX1040076NOJX1040076N
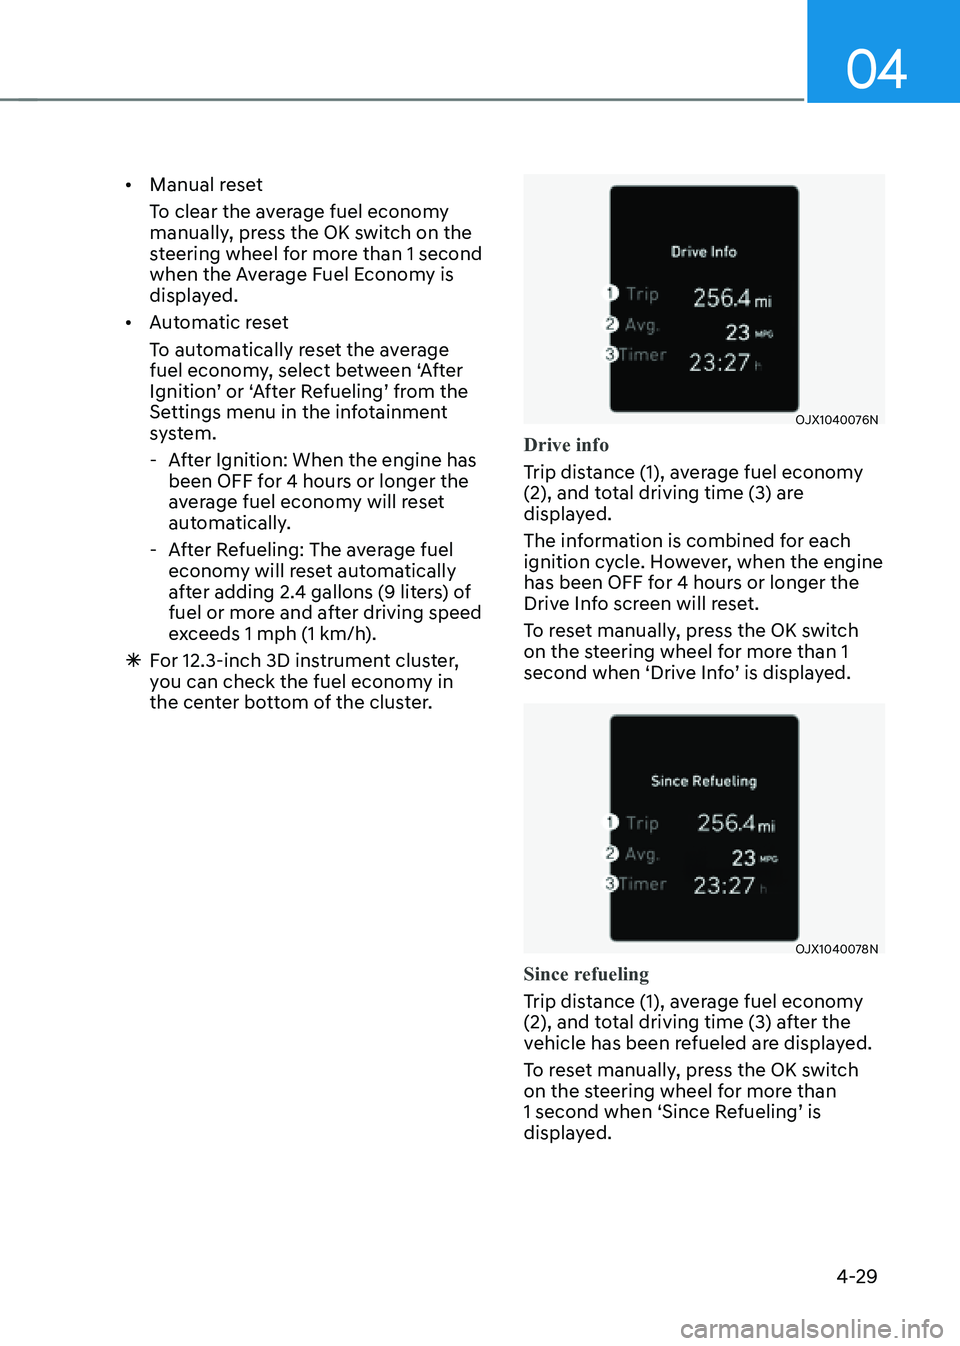
Drive info
Trip distance (1), average fuel economy
(2), and total driving time (3) are
displayed.
The information is combined for each
ignition cycle. However, when the engine
has been OFF for 4 hours or longer the
Drive Info screen will reset.
To reset manually, press the OK switch
on the steering wheel for more than 1
second when ‘Drive Info’ is displayed.
OJX1040078NOJX1040078N
Since refueling
Trip distance (1), average fuel economy
(2), and total driving time (3) after the
vehicle has been refueled are displayed.
To reset manually, press the OK switch
on the steering wheel for more than
1 second when ‘Since Refueling’ is
displayed.
Page 136 of 632
04
4-31
OJX1049015LOJX1049015L
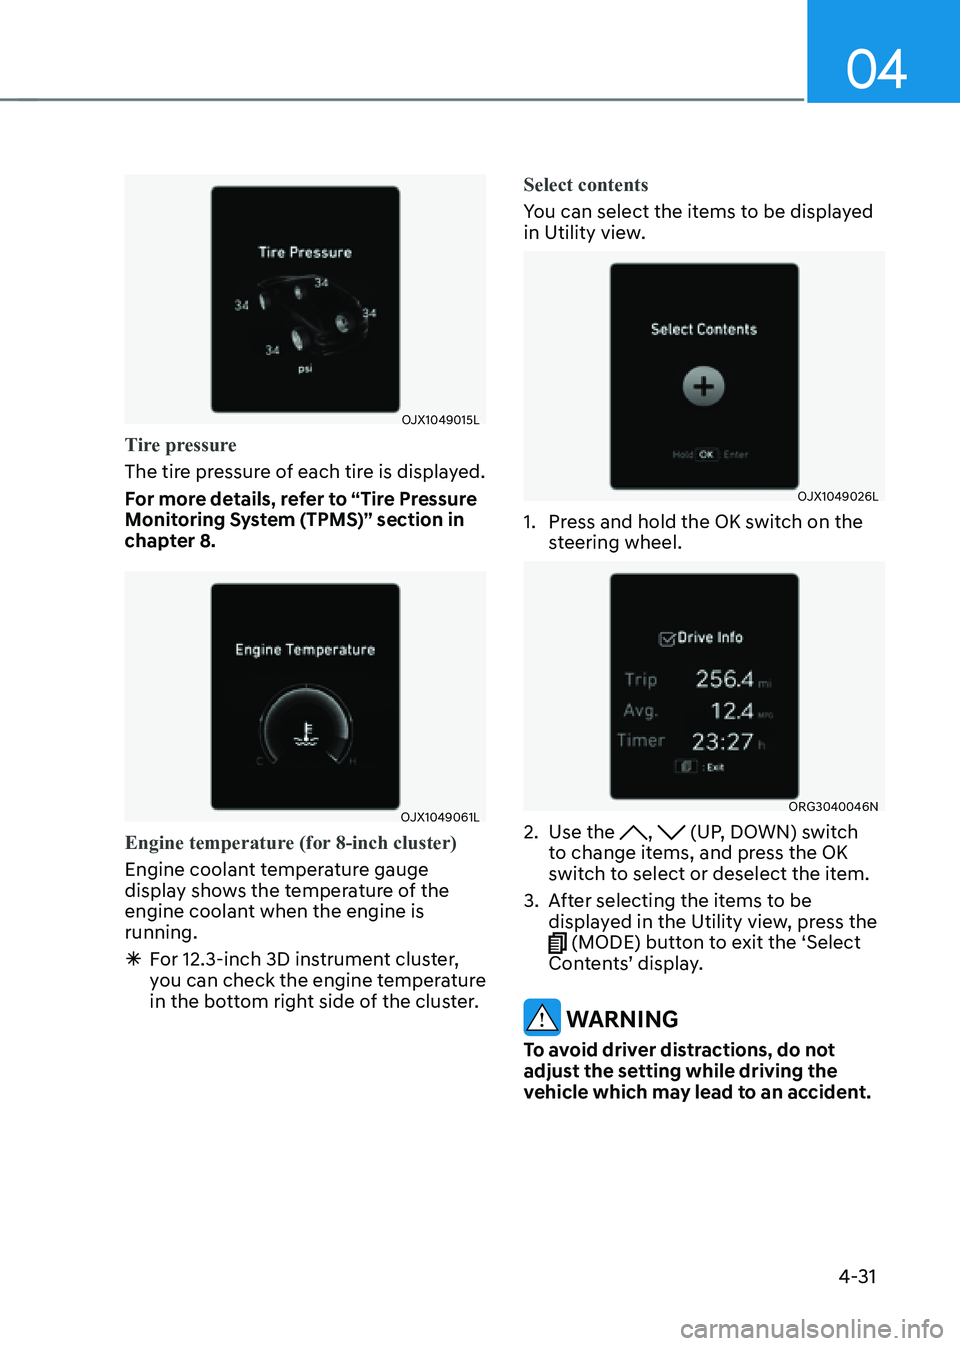
Tire pressure
The tire pressure of each tire is displayed.
For more details, refer to “Tire Pressure
Monitoring System (TPMS)” section in
chapter 8.
OJX1049061LOJX1049061L
Engine temperature (for 8-inch cluster)
Engine coolant temperature gauge
display shows the temperature of the
engine coolant when the engine is
running.
ÃFor 12.3-inch 3D instrument cluster,
you can check the engine temperature
in the bottom right side of the cluster. Select contents
You can select the items to be displayed
in Utility view.
OJX1049026LOJX1049026L
1. Press and hold the OK switch on the
steering wheel.
ORG3040046NORG3040046N
2. Use the , (UP, DOWN) switch
to change items, and press the OK
switch to select or deselect the item.
3. After selecting the items to be
displayed in the Utility view, press the
(MODE) button to exit the ‘Select
Contents’ display.
WARNING
To avoid driver distractions, do not
adjust the setting while driving the
vehicle which may lead to an accident.
Page 137 of 632
Instrument Cluster
4-32
Additional information display
OJX1040079NOJX1040079N
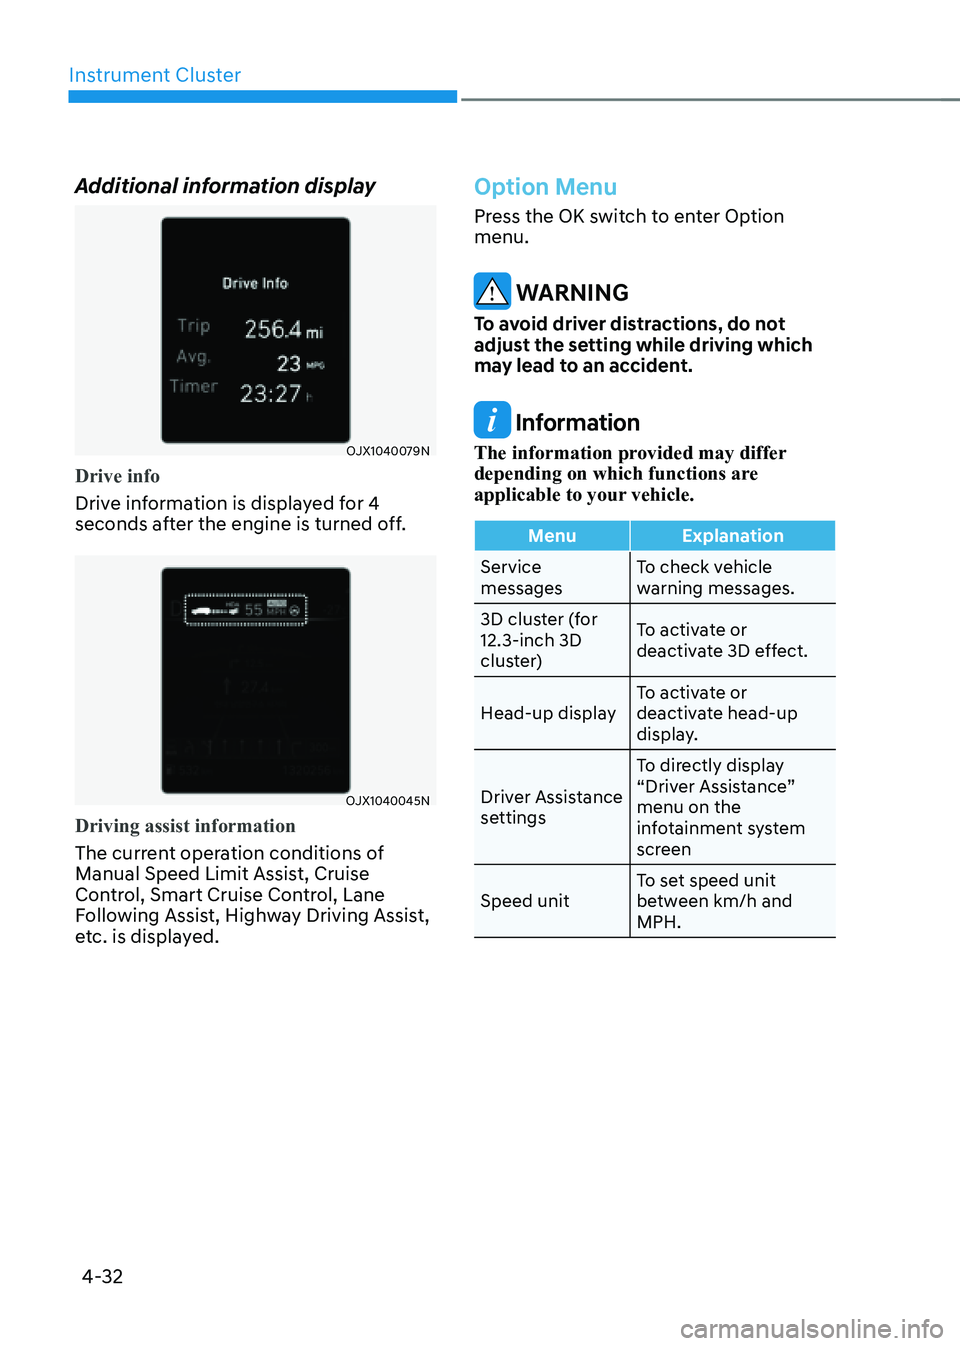
Drive info
Drive information is displayed for 4
seconds after the engine is turned off.
OJX1040045NOJX1040045N
Driving assist information
The current operation conditions of
Manual Speed Limit Assist, Cruise
Control, Smart Cruise Control, Lane
Following Assist, Highway Driving Assist,
etc. is displayed.
Option Menu
Press the OK switch to enter Option
menu.
WARNING
To avoid driver distractions, do not
adjust the setting while driving which
may lead to an accident.
Information
The information provided may differ
depending on which functions are
applicable to your vehicle.
MenuExplanation
Service
messages To check vehicle
warning messages.
3D cluster (for
12.3-inch 3D
cluster) To activate or
deactivate 3D effect.
Head-up display To activate or
deactivate head-up
display.
Driver Assistance
settings To directly display
“Driver Assistance”
menu on the
infotainment system
screen
Speed unit To set speed unit
between km/h and
MPH.
Page 176 of 632
Convenient Features
5-34
This system helps to protect your vehicle
and valuables. The horn will sound and
the hazard warning lights will blink
continuously if any of the following
occur:
-A door is opened without using the
smart key.
-The liftgate is opened without using
the smart key.
-The engine hood is opened.
The alarm continues for 30 seconds, then
the system resets. To turn off the alarm,
unlock the doors with the smart key.
The Theft Alarm System automatically
sets 30 seconds after you lock the
doors and the liftgate. For the system to
activate, you must lock the doors and
the liftgate from outside the vehicle with
the smart key or by touching the touch
sensor on the outside of the door handle
with the smart key in your possession.
The hazard warning lights will blink and
the chime will sound once to indicate the
system is armed.
Once the security system is set, opening
any door, the liftgate, or the hood
without using the smart key will cause
the alarm to activate.
The Theft Alarm System will not set if the
hood, the liftgate, or any door is not fully
closed. If the system will not set, check
the hood, the liftgate, or the doors are
fully closed.
Do not attempt to alter this system or
add other devices to it.
Information
• Do not lock the doors until all
passengers have left the vehicle. If the
remaining passenger leaves the vehicle
when the system is armed, the alarm
will be activated.
• If the vehicle is not disarmed with the
smart key, open the doors by using the
mechanical key and start the engine by
directly pressing the Engine Start/Stop
button with the smart key.
• If the system is disarmed by unlocking
the vehicle, but neither a door or the
liftgate is opened within 30 seconds, the
doors will re-lock and the system will
rearm automatically.
• It is not recommended to install any
secondary aftermarket theft-alarm
systems into the vehicle factory
electrical system.
THEFT-ALARM SYSTEM
Page 180 of 632

Convenient Features
5-38
The Smart Posture Care system
automatically provides a healthy posture
(position) for the driver’s back, and sets
the steering wheel, side view mirrors,
head-up display positions according to
the driver’s body measurements.
Information
If the Seat Posture Care system does
not operate normally, have the system
checked by an authorized retailer of
Genesis Branded products.
OJX1079170LOJX1079170L
1. Check that the gear is in P (Park) while
the Engine Start/Stop button is in the
ON position.
2. Select ‘Setup → Vehicle Settings → Seat
→ Smart Posture Care → Enter Driver’s
Information’ from the Settings menu
in the infotainment system screen.
3. Enter information (Height, Sitting
height, Weight) in the infotainment
system screen.
4. After entering the driver’s information,
press ‘Posture Analysis → Adjust
Posture → Save Current Posture’. The
driver’s seat, steering wheel, side view
mirror and head-up display will be
adjusted.
5. Save the adjusted seat position in
‘Settings 1’ or ‘Settings 2’.
See additional information in
supplied Infotainment Manual.
SMART POSTURE CARE SYSTEM (IF EQUIPPED)
Page 181 of 632
05
5-39
Electric Power Steering (EPS)
The system assists you with steering the
vehicle. If the vehicle is turned off or
if the power steering system becomes
inoperative, you may still steer the
vehicle, but it will require increased
steering effort.
Should you notice any change in the
effort required to steer during normal
vehicle operation, have the system
checked by an authorized retailer of
Genesis Branded products.
CAUTION
If Electric Power Steering does not
operate normally, the warning light and the message ‘Check motor driven
power steering’ will illuminate on the
instrument cluster. You may steer the
vehicle, but it will require increased
steering efforts. Take the vehicle to an
authorized retailer of Genesis Branded
products and have the system checked
as soon as possible.
Information
The following symptoms may occur during
normal vehicle operation:
• The steering effort may be high
immediately after pressing the Engine
Start/Stop button to the ON position.
This happens as the system performs
the EPS system diagnostics. When the
diagnostics are completed, the steering
wheel effort will return to its normal
condition.
• When the battery voltage is low, you
may have to put more steering effort.
However, it is a temporary condition so
that it will return to normal condition
after charging the battery.
• A click noise may be heard from the
EPS relay after the Engine Start/Stop
button is in the ON or OFF position.
• Motor noise may be heard when the
vehicle is at a stop or at a low driving
speed.
• When you operate the steering wheel
in low temperatures, abnormal noise
may occur. If the temperature rises, the
noise will disappear. This is a normal
condition.
• When an error is detected from EPS,
the steering effort assist function will
not be activated in order to prevent
accidents. Instrument cluster warning
lights may be on or the steering effort
may be high. If these symptoms occur,
drive the vehicle to a safe area as soon
as it is safe to do so. Have the system
checked by an authorized retailer of
Genesis Branded products as soon as
possible.
STEERING WHEEL
Page 202 of 632
Convenient Features
5-60
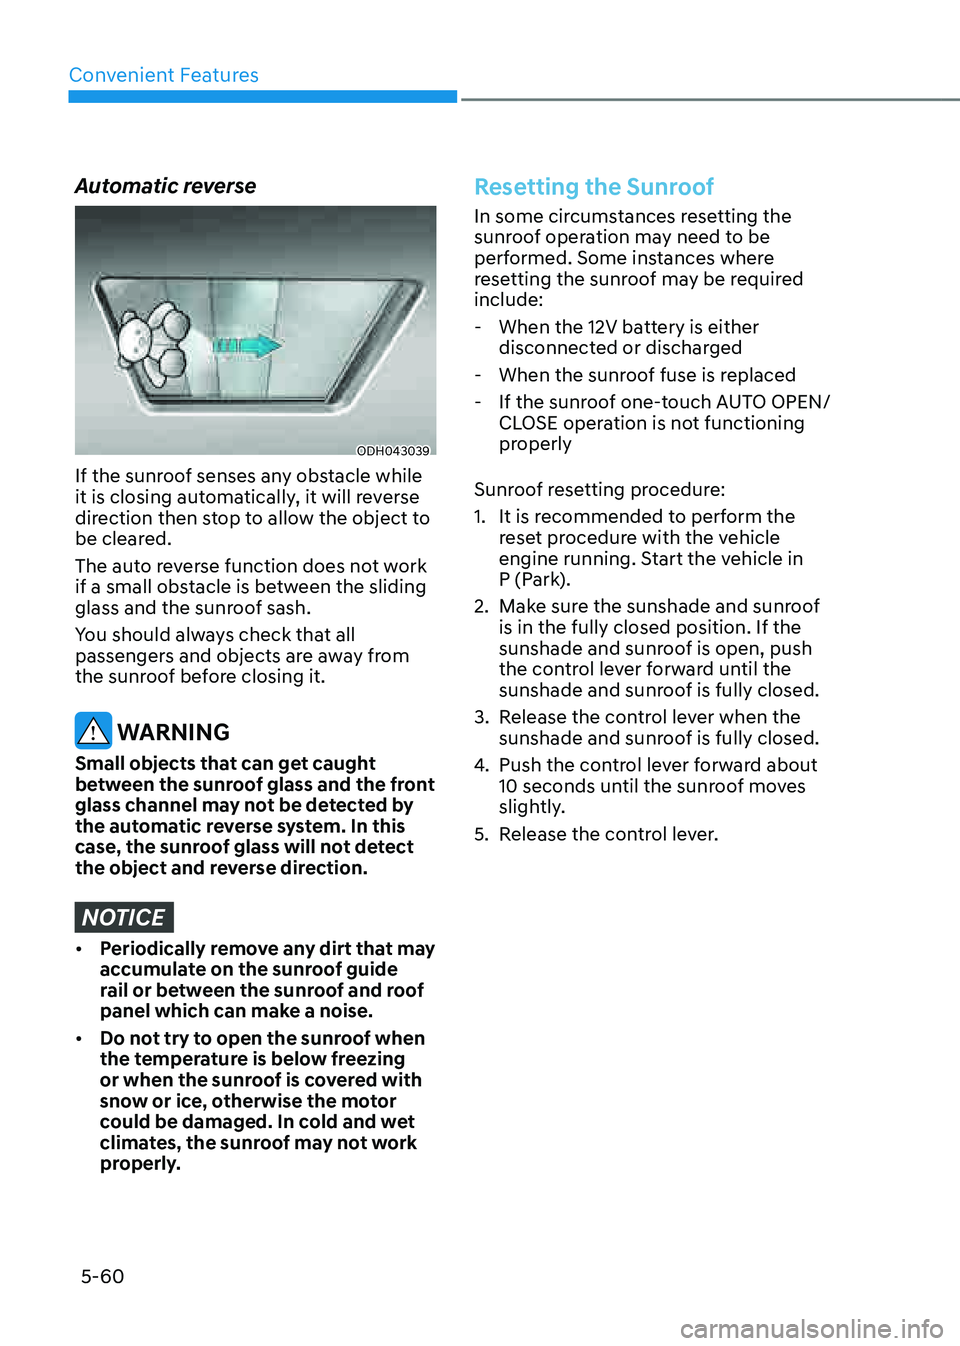
Automatic reverse
ODH043039ODH043039
If the sunroof senses any obstacle while
it is closing automatically, it will reverse
direction then stop to allow the object to
be cleared.
The auto reverse function does not work
if a small obstacle is between the sliding
glass and the sunroof sash.
You should always check that all
passengers and objects are away from
the sunroof before closing it.
WARNING
Small objects that can get caught
between the sunroof glass and the front
glass channel may not be detected by
the automatic reverse system. In this
case, the sunroof glass will not detect
the object and reverse direction.
NOTICE
• Periodically remove any dirt that may
accumulate on the sunroof guide
rail or between the sunroof and roof
panel which can make a noise.
• Do not try to open the sunroof when
the temperature is below freezing
or when the sunroof is covered with
snow or ice, otherwise the motor
could be damaged. In cold and wet
climates, the sunroof may not work
properly.
Resetting the Sunroof
In some circumstances resetting the
sunroof operation may need to be
performed. Some instances where
resetting the sunroof may be required
include:
-When the 12V battery is either
disconnected or discharged
-When the sunroof fuse is replaced
-If the sunroof one-touch AUTO OPEN/
CLOSE operation is not functioning
properly
Sunroof resetting procedure:
1. It is recommended to perform the
reset procedure with the vehicle
engine running. Start the vehicle in
P (Park).
2. Make sure the sunshade and sunroof
is in the fully closed position. If the
sunshade and sunroof is open, push
the control lever forward until the
sunshade and sunroof is fully closed.
3. Release the control lever when the
sunshade and sunroof is fully closed.
4. Push the control lever forward about
10 seconds until the sunroof moves
slightly.
5. Release the control lever.
Page 204 of 632
Convenient Features
5-62
Hood
Opening the hood
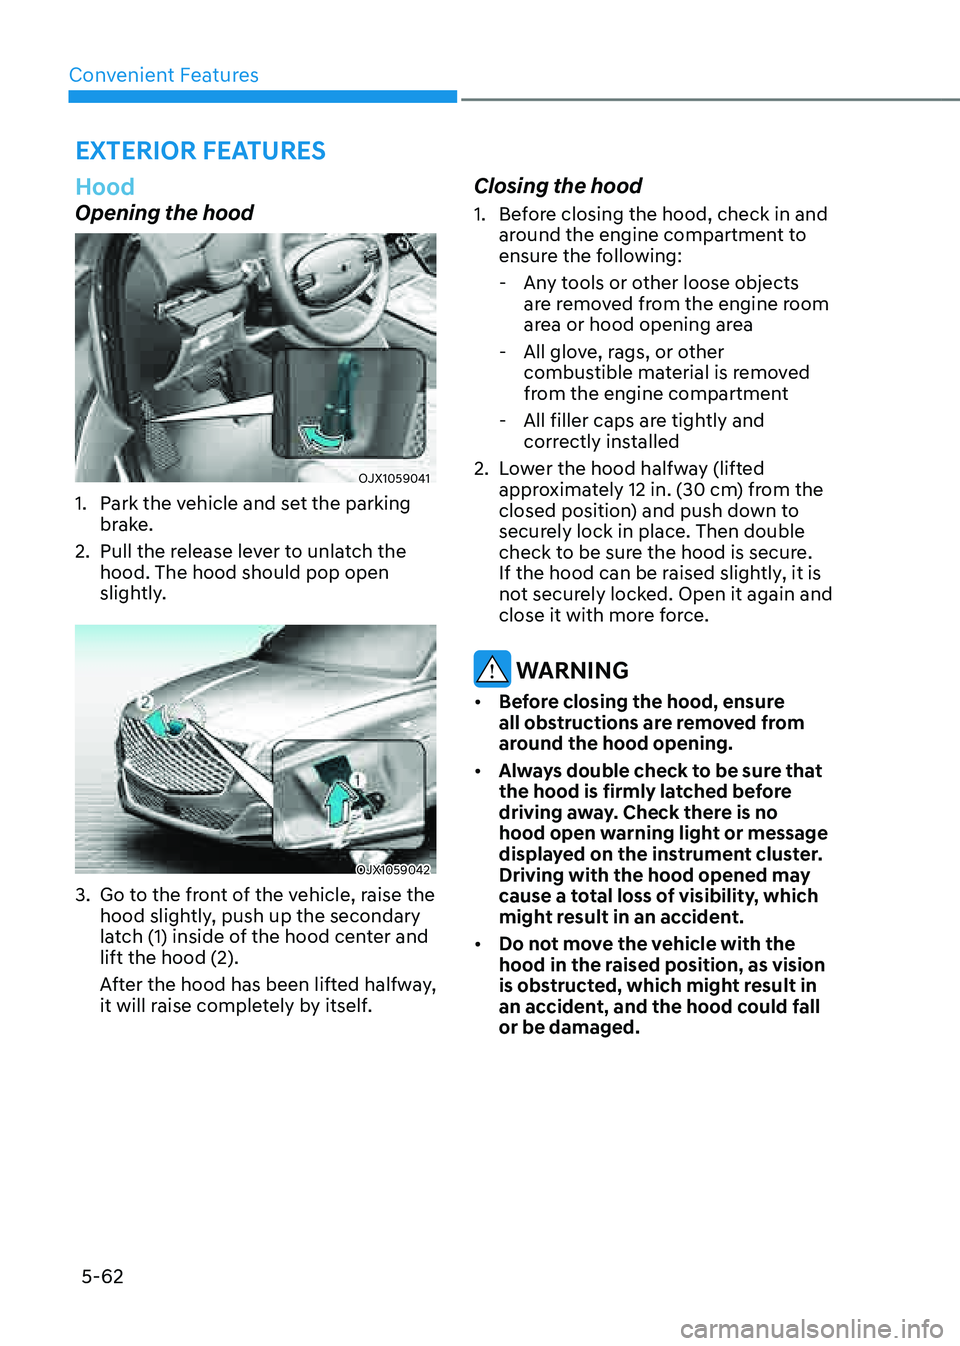
OJX1059041 OJX1059041
1. Park the vehicle and set the parking
brake.
2. Pull the release lever to unlatch the
hood. The hood should pop open
slightly.
OJX1059042 OJX1059042
3. Go to the front of the vehicle, raise the
hood slightly, push up the secondary
latch (1) inside of the hood center and
lift the hood (2).
After the hood has been lifted halfway,
it will raise completely by itself.
Closing the hood
1. Before closing the hood, check in and
around the engine compartment to
ensure the following:
-Any tools or other loose objects
are removed from the engine room
area or hood opening area
-All glove, rags, or other
combustible material is removed
from the engine compartment
-All filler caps are tightly and
correctly installed
2. Lower the hood halfway (lifted
approximately 12 in. (30 cm) from the
closed position) and push down to
securely lock in place. Then double
check to be sure the hood is secure.
If the hood can be raised slightly, it is
not securely locked. Open it again and
close it with more force.
WARNING
• Before closing the hood, ensure
all obstructions are removed from
around the hood opening.
• Always double check to be sure that
the hood is firmly latched before
driving away. Check there is no
hood open warning light or message
displayed on the instrument cluster.
Driving with the hood opened may
cause a total loss of visibility, which
might result in an accident.
• Do not move the vehicle with the
hood in the raised position, as vision
is obstructed, which might result in
an accident, and the hood could fall
or be damaged.
EXTERIOR FEATURES
Page 215 of 632
05
5-73
• When using an approved portable
fuel container, be sure to place the
container on the ground prior to
refueling. Static electricity discharge
from the container can ignite fuel
vapors causing a fire.
Once refueling has begun, contact
between your bare hand and the
vehicle should be maintained until
the filling is complete.
• Use only approved portable plastic
fuel containers designed to carry and
store gasoline.
• When refueling, always shift the
gear to the P (Park) position, set
the parking brake, and press the
Engine Start/Stop button to the
OFF position. Sparks produced by
electrical components related to the
engine can ignite fuel vapors causing
a fire.
• Do not use matches or a lighter and
do not smoke or leave a lit cigarette
in your vehicle while at a gas station,
especially during refueling.
• Do not over-fill or top-off your
vehicle tank, which can cause
gasoline spillage.
• If a fire breaks out during refueling,
leave the vicinity of the vehicle, and
immediately contact the manager
of the gas station and then contact
the local fire department. Follow any
safety instructions they provide.
• If pressurized fuel sprays out, it can
cover your clothes or skin and thus
subject you to the risk of fire and
burns. Always remove the fuel cap
carefully and slowly. If the cap is
venting fuel or if you hear a hissing
sound, wait until the condition stops
before completely removing the cap.
• Always check that the fuel cap is
installed securely to prevent fuel
spillage in the event of an accident.
Information
Make sure to refuel your vehicle according
to the “Fuel Requirements” section in
suggested in chapter 1.
NOTICE
• Do not spill fuel on the exterior
surfaces of the vehicle. Any type of
fuel spilled on painted surfaces may
damage the paint.
• If the fuel filler cap requires
replacement, use only a genuine
Genesis cap or the equivalent
specified for your vehicle. An
incorrect fuel filler cap can result
in a serious malfunction of the fuel
system or emission control system.