headlamp GENESIS GV80 2021 User Guide
[x] Cancel search | Manufacturer: GENESIS, Model Year: 2021, Model line: GV80, Model: GENESIS GV80 2021Pages: 632, PDF Size: 9.37 MB
Page 220 of 632
Convenient Features
5-78
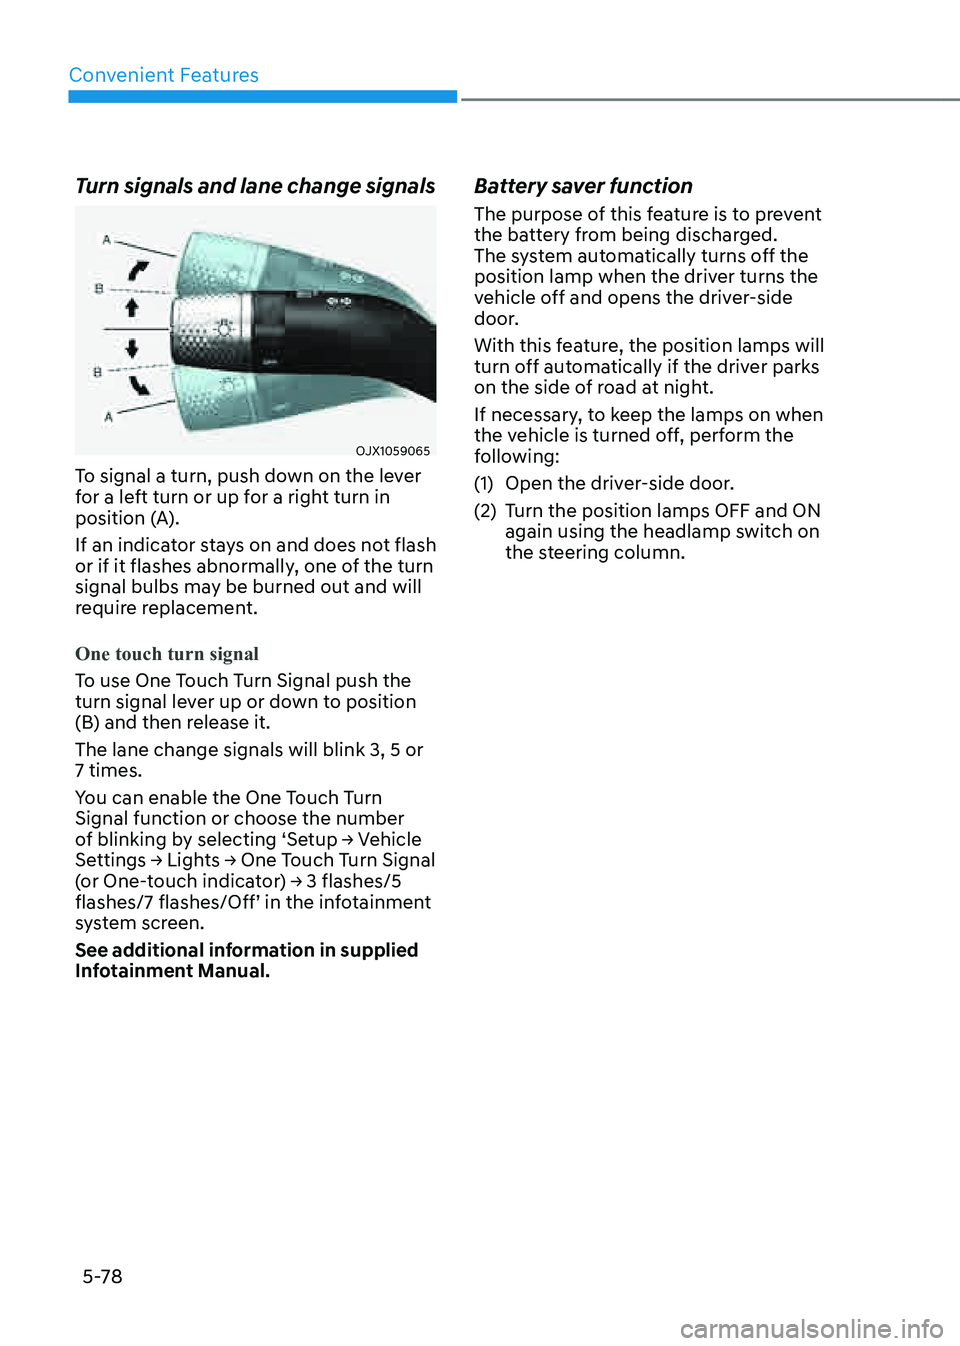
Turn signals and lane change signals
OJX1059065OJX1059065
To signal a turn, push down on the lever
for a left turn or up for a right turn in
position (A).
If an indicator stays on and does not flash
or if it flashes abnormally, one of the turn
signal bulbs may be burned out and will
require replacement.
One touch turn signal
To use One Touch Turn Signal push the
turn signal lever up or down to position
(B) and then release it.
The lane change signals will blink 3, 5 or
7 times.
You can enable the One Touch Turn
Signal function or choose the number
of blinking by selecting ‘Setup → Vehicle
Settings → Lights → One Touch Turn Signal
(or One-touch indicator) → 3 flashes/5
flashes/7 flashes/Off’ in the infotainment
system screen.
See additional information in supplied
Infotainment Manual.
Battery saver function
The purpose of this feature is to prevent
the battery from being discharged.
The system automatically turns off the
position lamp when the driver turns the
vehicle off and opens the driver-side
door.
With this feature, the position lamps will
turn off automatically if the driver parks
on the side of road at night.
If necessary, to keep the lamps on when
the vehicle is turned off, perform the
following:
(1) Open the driver-side door.
(2) Turn the position lamps OFF and ON
again using the headlamp switch on
the steering column.
Page 221 of 632
05
5-79
Headlamp delay function
If the Engine Start/Stop button is in the
ACC position or the OFF position with
the headlamps ON, the headlamps (and/
or position lamps) remain on for about
5 minutes. However, if the driver’s door
is opened and closed, the headlamps
are turned off after 15 seconds. Also,
with the vehicle off if the driver’s door is
opened and closed, the headlamps (and/
or position lamps) are turned off after 15
seconds.
The headlamps (and/or position lamps)
can be turned off by pressing the lock
button on the smart key twice or turning
the headlamp switch to the OFF or AUTO
position.
You can enable the headlamp delay
function by selecting ‘Setup → Vehicle
Settings → Lights → Headlight Delay (or
Headlight time-out)’ in the infotainment
system screen.
See additional information in supplied
Infotainment Manual.
NOTICE
If the driver exits the vehicle through
another door besides the driver
door, the battery saver function
does not operate and the headlamp
delay function does not turn OFF
automatically.
This may cause the battery to
discharge. To avoid battery discharge,
turn OFF the headlamps manually from
the headlamp switch before exiting the
vehicle.
Headlamp moisture removal
function
Moisture may temporarily build up inside
of the headlamp when the headlamps
are on; the fan inside the headlamp will
begin to circulate air inside to remove
the moisture. If moisture is not removed,
have the vehicle inspected by an
authorized retailer of Genesis Branded
products.
Interior Lights
WARNING
Do not use the interior lights when
driving in the dark. The interior lights
may obscure your view and cause an
accident.
NOTICE
Do not use the interior lights for
extended periods when the vehicle is
turned off or the battery will discharge.
Interior lamp AUTO cut
The interior lamps will automatically go
off approximately 20 minutes after the
vehicle is turned off and the doors are
closed. If a door is opened, the lamp
will go off 25 minutes after the vehicle
is turned off. If the doors are locked by
the smart key and the vehicle enters the
armed stage of the theft alarm system,
the lamps will go off five seconds later.
Page 225 of 632
05
5-83
Welcome System
OJX1059056OJX1059056
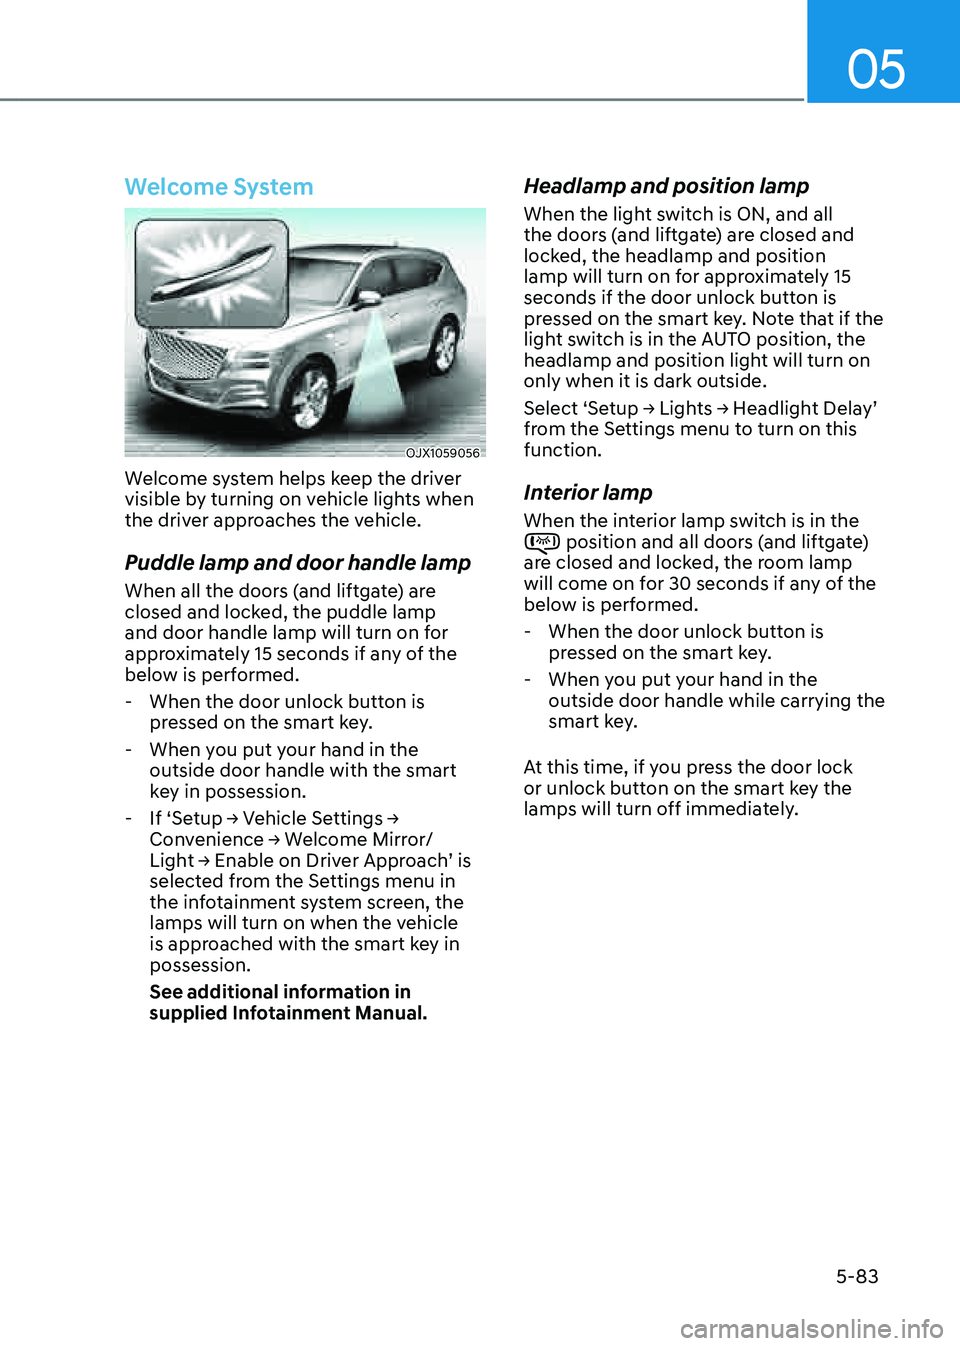
Welcome system helps keep the driver
visible by turning on vehicle lights when
the driver approaches the vehicle.
Puddle lamp and door handle lamp
When all the doors (and liftgate) are
closed and locked, the puddle lamp
and door handle lamp will turn on for
approximately 15 seconds if any of the
below is performed.
-When the door unlock button is
pressed on the smart key.
-When you put your hand in the
outside door handle with the smart
key in possession.
-If ‘Setup → Vehicle Settings →
Convenience → Welcome Mirror/
Light → Enable on Driver Approach’ is
selected from the Settings menu in
the infotainment system screen, the
lamps will turn on when the vehicle
is approached with the smart key in
possession.
See additional information in
supplied Infotainment Manual.
Headlamp and position lamp
When the light switch is ON, and all
the doors (and liftgate) are closed and
locked, the headlamp and position
lamp will turn on for approximately 15
seconds if the door unlock button is
pressed on the smart key. Note that if the
light switch is in the AUTO position, the
headlamp and position light will turn on
only when it is dark outside.
Select ‘Setup → Lights → Headlight Delay’
from the Settings menu to turn on this
function.
Interior lamp
When the interior lamp switch is in the position and all doors (and liftgate) are closed and locked, the room lamp
will come on for 30 seconds if any of the
below is performed.
-When the door unlock button is
pressed on the smart key.
-When you put your hand in the
outside door handle while carrying the
smart key.
At this time, if you press the door lock
or unlock button on the smart key the
lamps will turn off immediately.
Page 226 of 632
Convenient Features
5-84
OJX1059063OJX1059063
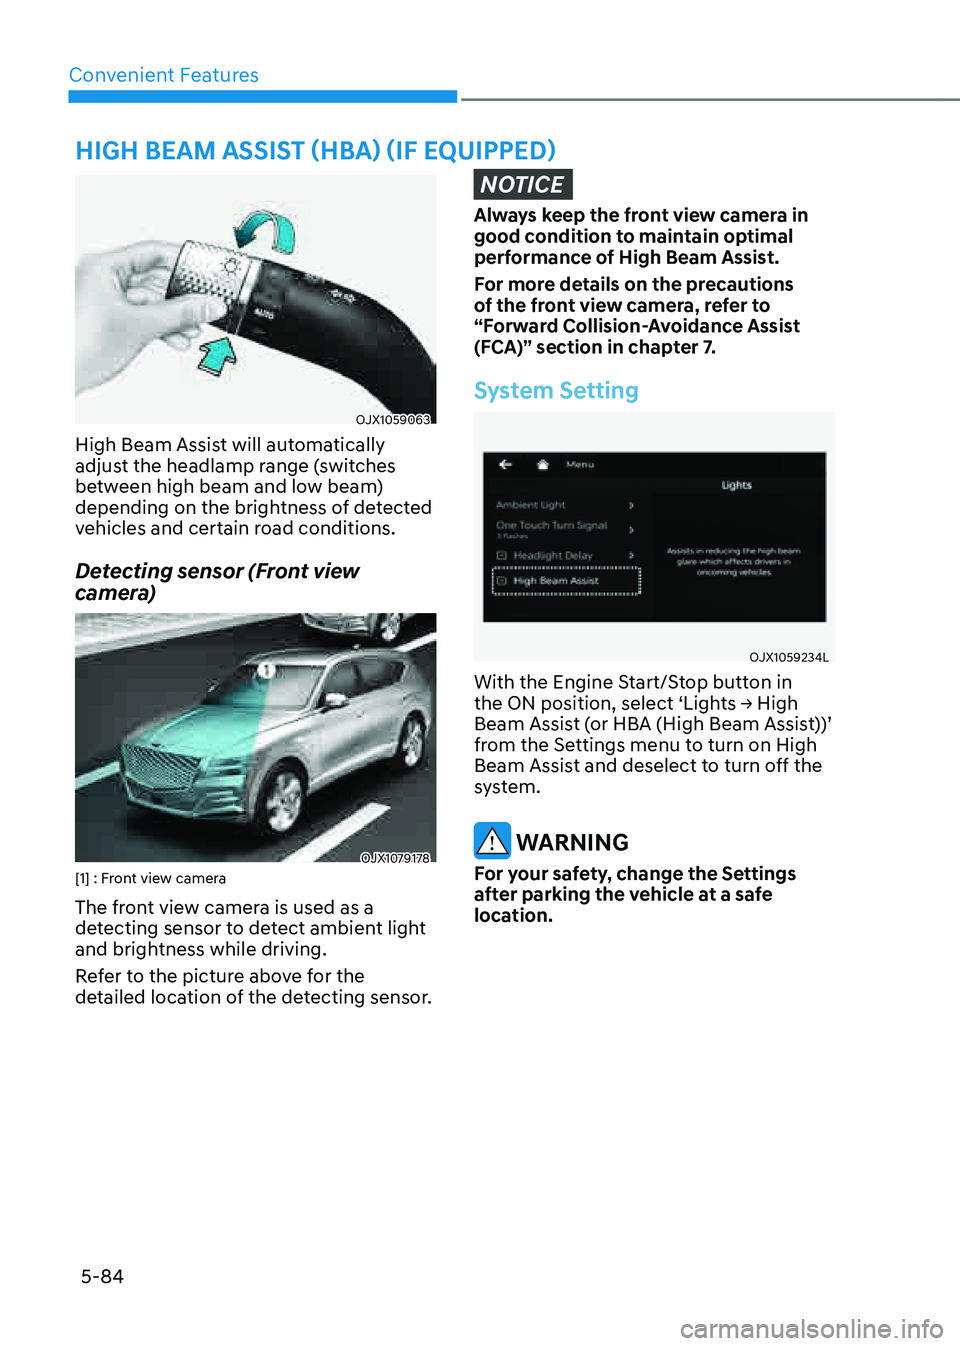
High Beam Assist will automatically
adjust the headlamp range (switches
between high beam and low beam)
depending on the brightness of detected
vehicles and certain road conditions.
Detecting sensor (Front view
camera)
OJX1079178OJX1079178[1] : Front view camera
The front view camera is used as a
detecting sensor to detect ambient light
and brightness while driving.
Refer to the picture above for the
detailed location of the detecting sensor.
NOTICE
Always keep the front view camera in
good condition to maintain optimal
performance of High Beam Assist.
For more details on the precautions
of the front view camera, refer to
“Forward Collision-Avoidance Assist
(FCA)” section in chapter 7.
System Setting
OJX1059234LOJX1059234L
With the Engine Start/Stop button in
the ON position, select ‘Lights → High
Beam Assist (or HBA (High Beam Assist))’
from the Settings menu to turn on High
Beam Assist and deselect to turn off the
system.
WARNING
For your safety, change the Settings
after parking the vehicle at a safe
location.
HIGH BEAM ASSIST (HBA) (IF EQUIPPED)
Page 227 of 632

05
5-85
System Operation
Display and control
• After selecting ‘High Beam Assist’
in the Settings menu, High Beam
Assist will operate by following the
procedure below.
-Place the headlamp switch in
the AUTO position and push
the headlamp lever towards the
instrument cluster. The High Beam
Assist (
) indicator light will
illuminate on the cluster and the
system will be enabled.
- When the system is enabled, high
beam will turn on when vehicle
speed is above 25 mph (40 km/h).
When vehicle speed is below
15 mph (25 km/h), high beam will not turn on.
-The High Beam () indicator light
will illuminate on the cluster when
high beam is on.
• When High Beam Assist is operating, if
the headlamp lever or switch is used,
the system operates as follow:
- If the headlamp lever is pulled
towards you when the high beam
is off, the high beam will turn on
without High Beam Assist canceled.
When you let go of the headlamp
lever, the lever will move to the
middle and the high beam will turn
off.
-If the headlamp lever is pulled
towards you when the high beam is
on by High Beam Assist, low beam
will be on and the system will turn
off.
-If the headlamp switch is placed
from AUTO to another position
(headlamp/position/off), High
Beam Assist will turn off and the
corresponding lamp will turn on.
• When High Beam Assist is operating,
high beam switches to low beam if
any of the following conditions occur:
-When the headlamp of an
oncoming vehicle is detected.
-When the tail lamp of a vehicle in
front is detected.
-When the headlamp or tail lamp of a
motorcycle or a bicycle is detected.
-When the surrounding ambient light
is bright enough that high beams
are not required.
-When streetlights or other lights are
detected.
System Malfunction and
Limitations
System malfunction
OJX1059235LOJX1059235L
When High Beam Assist is not working
properly, the ‘Check High Beam Assist
(HBA) system’ warning message
will appear and
warning light will
illuminate on the cluster. Have the
system inspected by an authorized
retailer of Genesis Branded products.
Page 228 of 632

Convenient Features
5-86
Limitations of the system
High Beam Assist may not work properly
in the following situations:
• Light from a vehicle is not detected
because of lamp damage, or because
it is hidden from sight, etc.
• Headlamp of a vehicle is covered with
dust, snow or water
• A vehicle’s headlamps are off but the
fog lamps are on and etc.
• There is a lamp that has a similar
shape as a vehicle’s lamp
• Headlamps have been damaged or
not repaired properly
• Headlamps are not aimed properly
• Driving on a narrow curved road,
rough road, uphill or downhill
• Vehicle in front is partially visible on a
crossroad or curved road
• There is a traffic light, reflecting sign,
flashing sign or mirror ahead
• There is a temporary reflector or flash
ahead (construction area)
• The road conditions are bad such as
being wet, iced or covered with snow
• A vehicle suddenly appears from a
curve
• The vehicle is tilted from a flat tire or
is being towed
• Light from a vehicle is not detected
because of exhaust fume, smoke, fog,
snow, etc.
NOTICE
For more details on the limitations
of the front view camera, refer to
“Forward Collision-Avoidance Assist
(FCA)” section in chapter 7.
WARNING
• At times, High Beam Assist may
not work properly. The system is
for your convenience only. It is the
responsibility of the driver for safe
driving practices and always check
the road conditions for your safety.
• When High Beam Assist does
not operate normally, change
the headlamp position manually
between high beam and low beam.
Page 279 of 632

06
6 -7
Engine Stop/Start Button Positions
Button PositionAction Notes
OFF To turn off the engine, press the
Engine Start/Stop button with the
vehicle shifted to P (Park).
Note if the Engine Start/Stop
button is pressed with the vehicle
shifted to D (Drive) or R (Reverse),
the gear will automatically shift to
P (Park).
If the Engine Start/Stop button is
pressed with the gear shifted to
N (Neutral), the Engine Start/Stop
button will change to the ACC
position.
ACC Press the Engine Start/Stop button
when the button is in the OFF
position without depressing the
brake pedal.
Some of the electrical accessories
are usable. If you leave the Engine Start/Stop
button in the ACC position for
more than one hour, the battery
power will turn off automatically
to prevent the battery from
discharging.
ON Press the Engine Start/Stop button
while it is in the ACC position
without depressing the brake
pedal.
The warning lights can be checked
before the engine is started. Do not leave the Engine Start/Stop
button in the ON position when the
engine is not running to prevent
the battery from discharging.
START To start the engine, depress the
brake pedal and press the Engine
Start/ Stop button with the gear
shifted to the P (Park) or the N
(Neutral) position.
For your safety, start the engine
with the gear shifted to the P
(Park) position. If you press the Engine Start/Stop
button without depressing the
brake pedal, the engine does not
start and the Engine Start/Stop
button changes as follows:
OFF → ACC → ON → OFF or ACC
Ã
To prevent vehicle battery discharge, the Engine Start/Stop button changes to the
OFF position when the Engine Start/Stop button is in the ACC or ON position with
the gear in P (Park) for a certain period of time. When the function operates, the tail
lamps will turn off. To use the tail lamps again, turn the headlamp switch located on
the steering column to the OFF and ON position again.
Page 330 of 632
Driving Your Vehicle
6-58
Driving at Night
Night driving presents more hazards than
driving in the daylight. Here are some
important tips to remember:
• Slow down and keep more distance
between you and other vehicles, as it
may be more difficult to see at night,
especially in areas where there may
not be any street lights.
• Adjust your mirrors to reduce the glare
from other drivers’ headlamps.
• Keep your headlamps clean and
properly aimed. Dirty or improperly
aimed headlamps will make it much
more difficult to see at night.
• Avoid staring directly at the
headlamps of oncoming vehicles. You
could be temporarily blinded, and it
will take several seconds for your eyes
to readjust to the darkness.
Driving in the Rain
Rain and wet roads can make driving
dangerous. Here are a few things to
consider when driving in the rain or on
slick pavement:
• Slow down and allow extra following
distance. A heavy rainfall makes
it harder to see and increases the
distance needed to stop your vehicle.
• Turn OFF your Cruise Control. (if
equipped)
• Replace your windshield wiper blades
when they show signs of streaking or
missing areas on the windshield.
• Be sure your tires have enough tread.
If your tires do not have enough tread,
making a quick stop on wet pavement
can cause a skid and possibly lead to
an accident. See “Tire Tread” section
in chapter 9.
• Turn on your headlamps to make it
easier for others to see you.
• Driving too fast through large puddles
can affect your brakes. If you must go
through puddles, try to drive through
them slowly.
• If you believe your brakes may be wet,
apply them lightly while driving until
normal braking operation returns.
Hydroplaning
If the road is wet enough and you are
going fast enough, your vehicle may
have little or no contact with the road
surface and actually ride on the water.
The best advice is SLOW DOWN when
the road is wet.
The risk of hydroplaning increases as
the depth of tire tread decreases, refer
to “Tire Tread” section in chapter 9.
Page 367 of 632

07
7-19
• Your vehicle is being towed
• The surrounding is very bright
• The surrounding is very dark, such as
in a tunnel, etc.
• The brightness changes suddenly, for
example when entering or exiting a
tunnel
• The brightness outside is low, and the
headlamps are not on or are not bright
• Driving through steam, smoke or
shadow
• Only part of the vehicle, pedestrian or
cyclist is detected
• The vehicle in front is a bus, heavy
truck, truck with a unusually shaped
luggage, trailer, etc.
• The vehicle in front has no tail lights,
tail lights are located unusually, etc.
• The brightness outside is low, and the
tail lamps are not on or are not bright
• The rear of the front vehicle is small
or the vehicle does not look normal,
such as when the vehicle is tilted,
overturned, or the side of the vehicle
is visible, etc.
• The front vehicle’s ground clearance is
low or high
• A vehicle, pedestrian or cyclist
suddenly cuts in front
• The bumper around the front radar is
impacted, damaged or the front radar
is out of position
• The temperature around the front
radar is high or low
• Driving through a tunnel or iron bridge
• Driving in large areas where there are
few vehicles or structures (i.e. desert,
meadow, suburb, etc.)
• Driving near areas containing metal
substances, such as a construction
zone, railroad, etc.
• A material is near that reflects very
well on the front radar, such as a
guardrail, nearby vehicle, etc.
• The cyclist in front is on a bicycle
made of material that does not reflect
on the front radar
• The vehicle in front is detected late
• The vehicle in front is suddenly
blocked by a obstacle
• The vehicle in front suddenly changes
lane or suddenly reduces speed
• The vehicle in front is bent out of
shape
• The front vehicle’s speed is fast or
slow
• The vehicle in front steers in the
opposite direction of your vehicle to
avoid a collision
• With a vehicle in front, your vehicle
changes lane at low speed
• The vehicle in front is covered with
snow
• You are departing or returning to the
lane
• Unstable driving
• You are on a roundabout and the
vehicle in front is not detected
• You are continuously driving in a circle
• The vehicle in front has an unusual
shape
• The vehicle in front is driving uphill or
downhill
Page 430 of 632
Driver Assistance System
7-82
System disabled
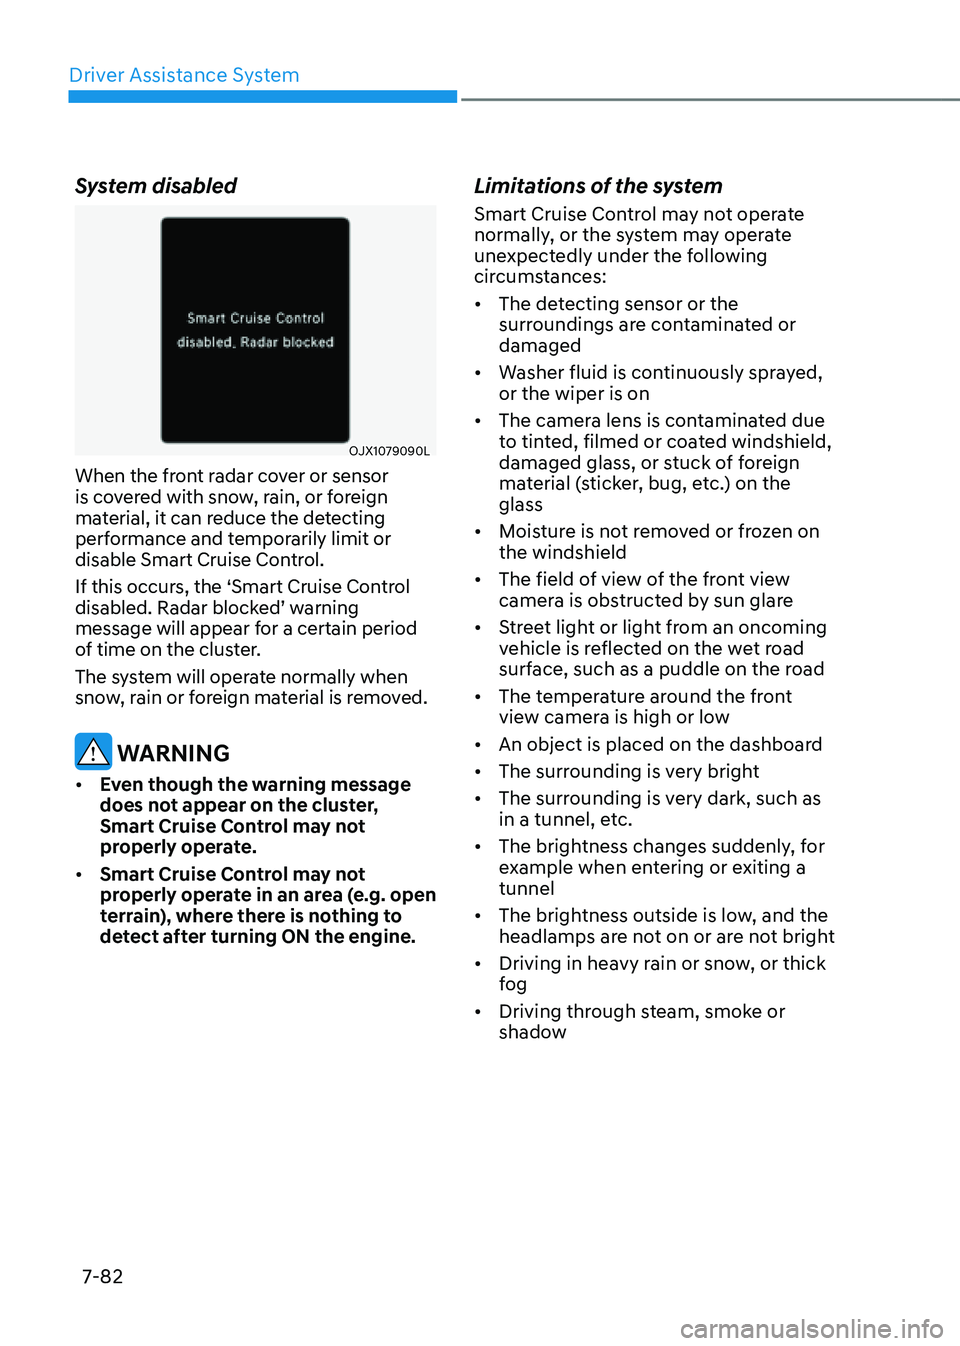
OJX1079090L OJX1079090L
When the front radar cover or sensor
is covered with snow, rain, or foreign
material, it can reduce the detecting
performance and temporarily limit or
disable Smart Cruise Control.
If this occurs, the ‘Smart Cruise Control
disabled. Radar blocked’ warning
message will appear for a certain period
of time on the cluster.
The system will operate normally when
snow, rain or foreign material is removed.
WARNING
• Even though the warning message
does not appear on the cluster,
Smart Cruise Control may not
properly operate.
• Smart Cruise Control may not
properly operate in an area (e.g. open
terrain), where there is nothing to
detect after turning ON the engine.
Limitations of the system
Smart Cruise Control may not operate
normally, or the system may operate
unexpectedly under the following
circumstances:
• The detecting sensor or the
surroundings are contaminated or
damaged
• Washer fluid is continuously sprayed,
or the wiper is on
• The camera lens is contaminated due
to tinted, filmed or coated windshield,
damaged glass, or stuck of foreign
material (sticker, bug, etc.) on the
glass
• Moisture is not removed or frozen on
the windshield
• The field of view of the front view
camera is obstructed by sun glare
• Street light or light from an oncoming
vehicle is reflected on the wet road
surface, such as a puddle on the road
• The temperature around the front
view camera is high or low
• An object is placed on the dashboard
• The surrounding is very bright
• The surrounding is very dark, such as
in a tunnel, etc.
• The brightness changes suddenly, for
example when entering or exiting a
tunnel
• The brightness outside is low, and the
headlamps are not on or are not bright
• Driving in heavy rain or snow, or thick
fog
• Driving through steam, smoke or
shadow