rear door GENESIS GV80 2021 Owner's Guide
[x] Cancel search | Manufacturer: GENESIS, Model Year: 2021, Model line: GV80, Model: GENESIS GV80 2021Pages: 632, PDF Size: 9.37 MB
Page 191 of 632

05
5-49
Recalling Garage Door Status
Homelink mirror with two way
communication provides a way to view
the last stored message from the garage
door opener. In order to recall the last
known status of the last activated device,
press the buttons “1 and 2” OR “2 and 3”
simultaneously.
• If the indicator (4) is ON continuously
in Green, it indicates that the last
activated device was “closed” properly.
• If the indicator (6) is ON continuously
in Green, it indicates that the last
activated device was “open” properly.
Information
Two way communication range distance
between “vehicle” and “garage door
opener” is 328 feet (100 m).
The range may be reduced or increased
a little due to obstacle conditions around
the garage door opener, such as houses or
trees.
Side View Mirrors
OJX1059027OJX1059027
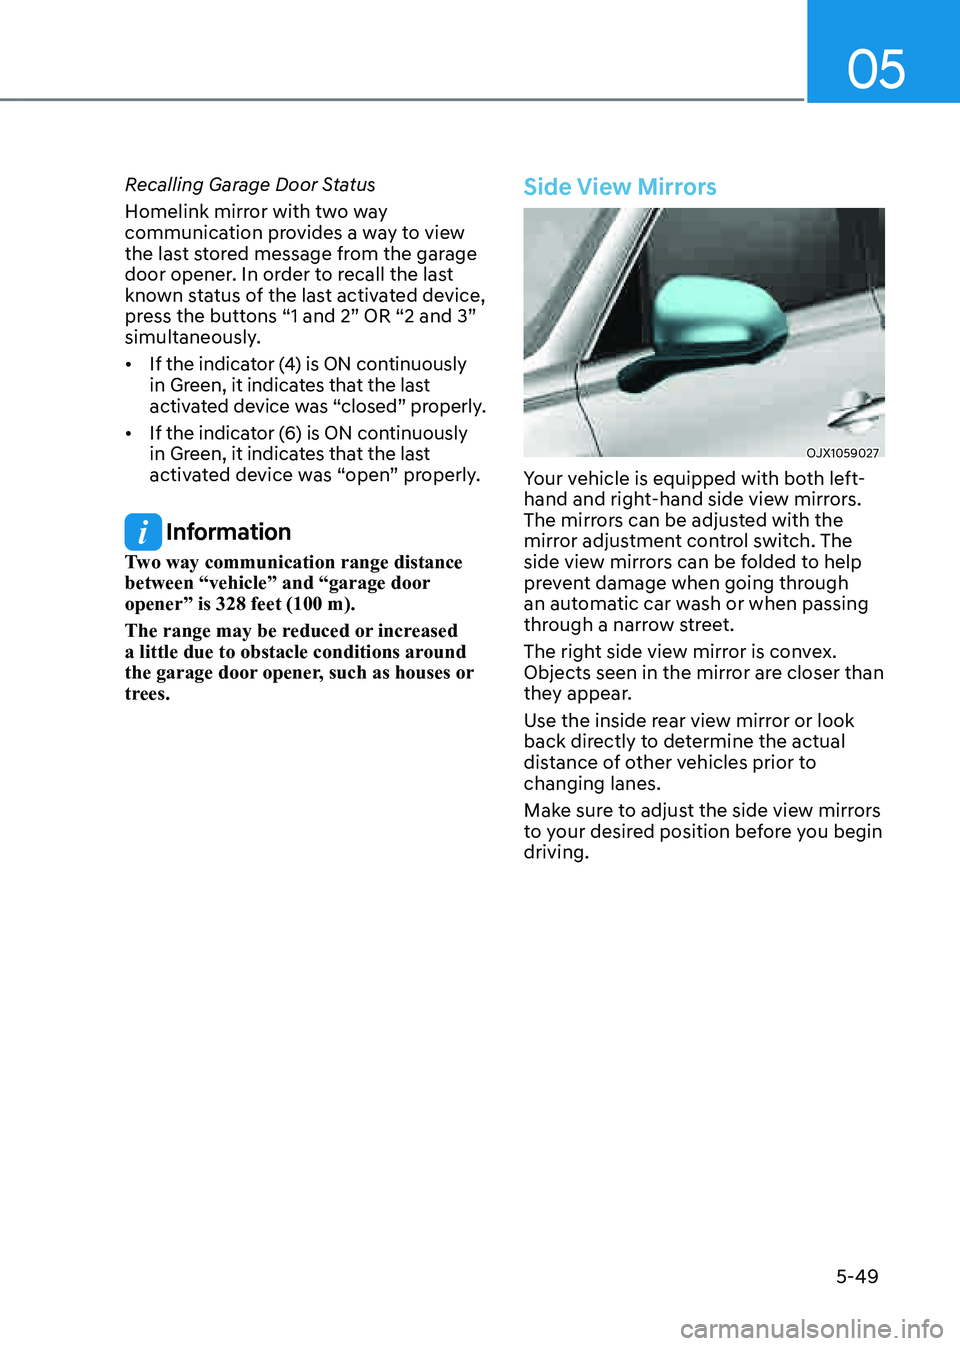
Your vehicle is equipped with both left-
hand and right-hand side view mirrors.
The mirrors can be adjusted with the
mirror adjustment control switch. The
side view mirrors can be folded to help
prevent damage when going through
an automatic car wash or when passing
through a narrow street.
The right side view mirror is convex.
Objects seen in the mirror are closer than
they appear.
Use the inside rear view mirror or look
back directly to determine the actual
distance of other vehicles prior to
changing lanes.
Make sure to adjust the side view mirrors
to your desired position before you begin
driving.
Page 195 of 632

05
5-53
OJX1059030LOJX1059030L
WINDOWS
(1) Driver’s door power window switch
(2) Front passenger’s door power
window switch
(3) Rear door (left) power window switch
(4) Rear door (right) power window
switch
(5) Window opening and closing
(6) Automatic power window
(7) Power window lock switch
Page 197 of 632

05
5-55
Automatic reverse
OJX1059032OJX1059032
If a window senses any obstacle while
it is closing automatically, it will stop
and lower approximately 1 in. (2.5 cm) to
allow the object to be cleared.
If the window detects the resistance
while the power window switch is
pulled up continuously, the window
will stop upward movement then lower
approximately 12 in. (30 cm).
If the power window switch is pulled
up continuously again within 5 seconds
after the window is lowered by the
automatic window reverse feature,
the automatic window reverse will not
operate.
Information
The automatic reverse feature is only
active when the “Auto Up” feature is used
by fully pulling up the switch to the second
detent.
WARNING
Make sure body parts or other objects
are safely out of the way before closing
the windows to avoid injuries or vehicle
damage.
Objects less than 0.16 in. (4 mm) in
diameter caught between the window
glass and the upper window channel
may not be detected by the automatic
reverse window and the window will
not stop and reverse direction.
Power window lock button
OJX1059033LOJX1059033L
The driver can disable the power window
switches on the rear passenger doors by
pressing the power window lock button.
When the power window lock button is
pressed:
• The rear passenger control will not
be able to operate the rear passenger
power window.
• Note that the front passenger control
is still able to operate the front
passenger window, and that the driver
master control can still operate all the
power windows.
Page 222 of 632

Convenient Features
5-80
Front lamps
OJX1050201NOJX1050201N
Front map lamp ():
Touch either icons to turn the map lamp
on or off. This light produces a spot
beam for convenient use as a map lamp
at night or as a personal lamp for the
driver and the front passenger.
Door lamp (
):
The front or rear room lamps come on
when the front or rear doors are opened.
When doors are unlocked by the smart
key, the front and rear lamps come on
for approximately 30 seconds as long as
any door is not opened. The front and
rear room lamps go out gradually after
approximately 30 seconds when the
door is closed. However, if the Engine
Start/Stop button is in the ON position
or all doors are locked, the front and rear
lamps will turn off. If a door is opened
with the Engine Start/Stop button in
the ACC position or the OFF position,
the front and rear lamps will stay on for
about 5 minutes.
Room lamp (
)
Press the button to turn ON the room
lamp for the front/rear seats.
Rear lamps
�
Page 223 of 632

05
5-81
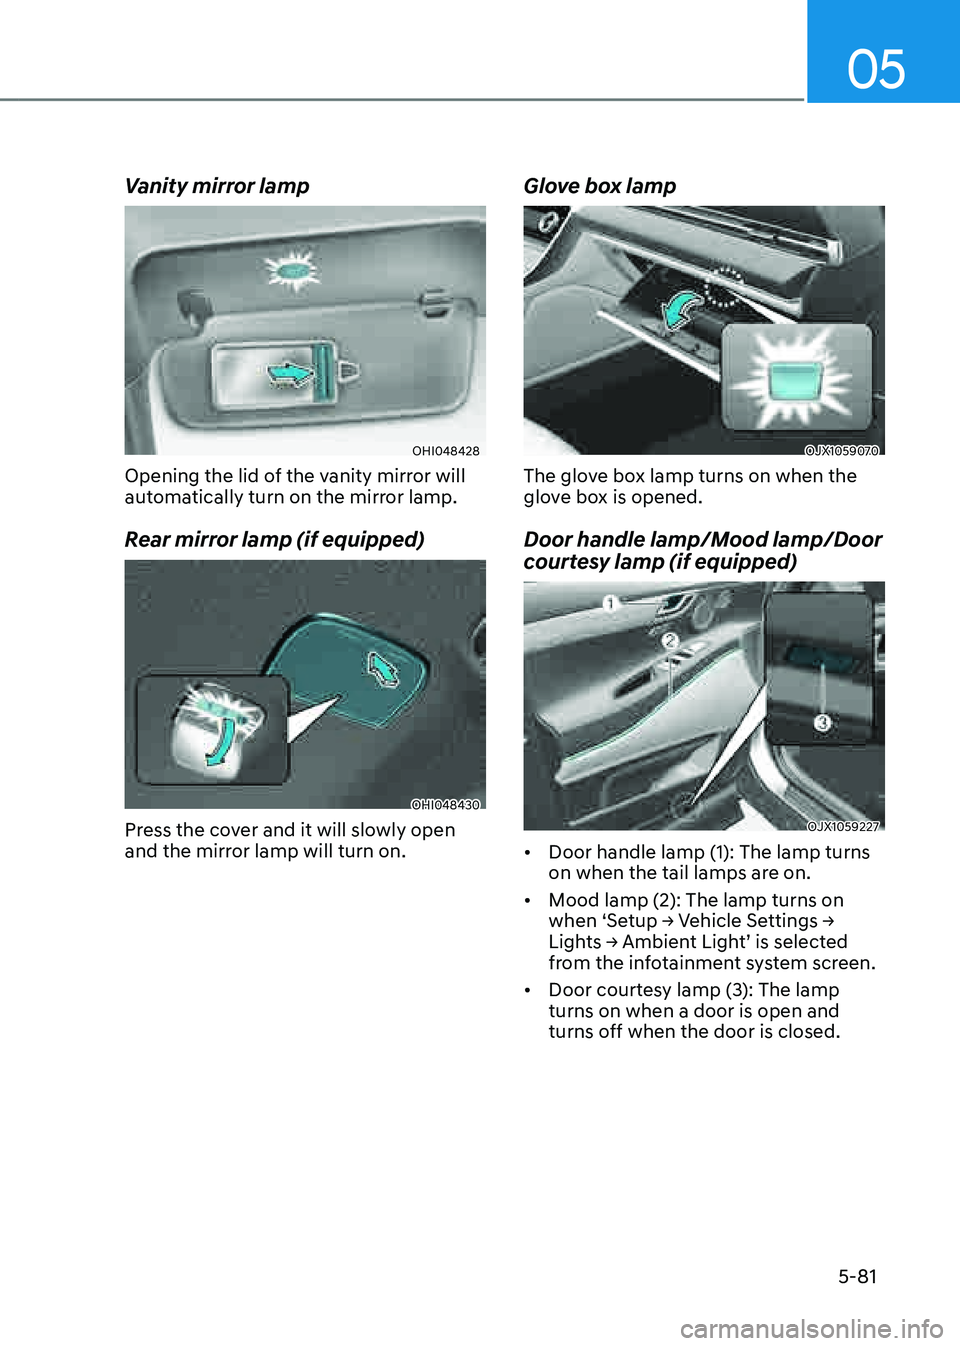
Vanity mirror lamp
OHI048428OHI048428
Opening the lid of the vanity mirror will
automatically turn on the mirror lamp.
Rear mirror lamp (if equipped)
OHI048430OHI048430
Press the cover and it will slowly open
and the mirror lamp will turn on.
Glove box lamp
OJX1059070OJX1059070
The glove box lamp turns on when the
glove box is opened.
Door handle lamp/Mood lamp/Door
courtesy lamp (if equipped)
OJX1059227OJX1059227
• Door handle lamp (1): The lamp turns
on when the tail lamps are on.
• Mood lamp (2): The lamp turns on
when ‘Setup → Vehicle Settings →
Lights → Ambient Light’ is selected
from the infotainment system screen.
• Door courtesy lamp (3): The lamp
turns on when a door is open and
turns off when the door is closed.
Page 265 of 632

05
5-123
Rear Side Window Sunshades
(if equipped)
Use the rear side window sunshade to
block external light coming through the
rear window glass.
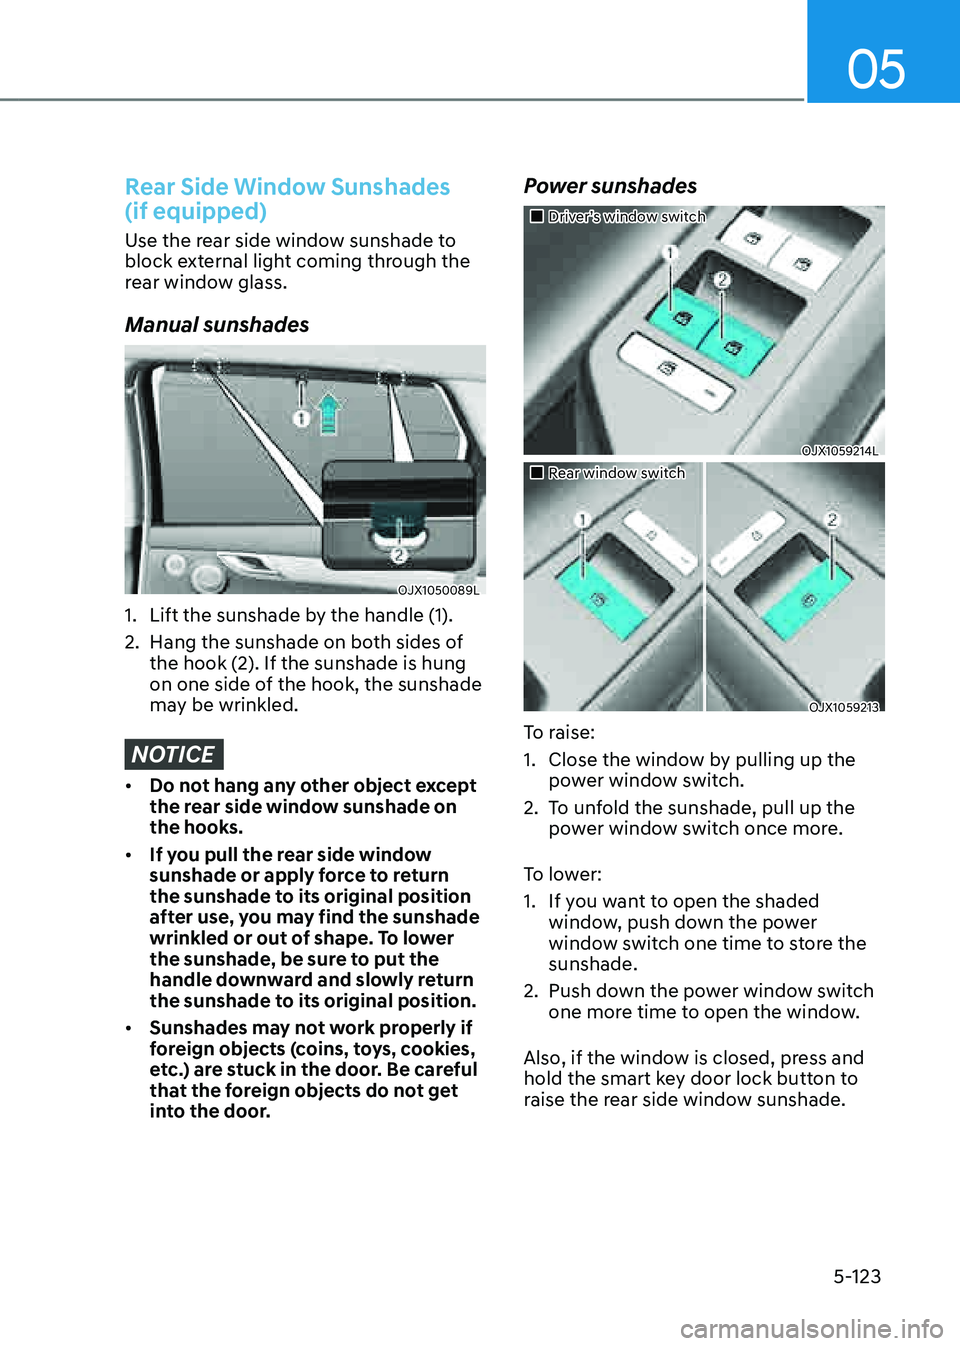
Manual sunshades
OJX1050089LOJX1050089L
1. Lift the sunshade by the handle (1).
2. Hang the sunshade on both sides of
the hook (2). If the sunshade is hung
on one side of the hook, the sunshade
may be wrinkled.
NOTICE
• Do not hang any other object except
the rear side window sunshade on
the hooks.
• If you pull the rear side window
sunshade or apply force to return
the sunshade to its original position
after use, you may find the sunshade
wrinkled or out of shape. To lower
the sunshade, be sure to put the
handle downward and slowly return
the sunshade to its original position.
• Sunshades may not work properly if
foreign objects (coins, toys, cookies,
etc.) are stuck in the door. Be careful
that the foreign objects do not get
into the door.
Power sunshades
�
Page 285 of 632

06
6-13
Automatic gear shift to P (Park)
The gear is shifted to P (Park)
automatically for safety reasons under
the following conditions:
-When the engine is turned off with
the gear in R (Reverse), D (Drive) or N
(Neutral).
-When the driver’s door is opened with
the gear in D (Drive) or R (Reverse)
with the seat belt unfastened and the
vehicle is at a standstill.
-When the driver’s door is opened with
the gear in N (Neutral) and the vehicle
is turned off.
In situations the gear must be in P (Park),
always check if the gear is shifted to P
(Park) by checking the cluster.
R (Reverse)
Use this position to drive the vehicle
rearward.
OJX1069005LOJX1069005L
To shift the gear to R (Rear), rotate
the shift dial counterclockwise while
depressing the brake pedal.
When the vehicle is stopped in the
R (Reverse) position, if you open
the driver's door with the seat belt
unfastened, the gear will automatically
shift to P (Park).
However, if the vehicle is in motion, the
gear may not automatically shift to P
(Park) to prevent automatic transmission
damage.
NOTICE
Always come to a complete stop before
shifting into or out of R (Reverse); you
may damage the transmission if you
shift into R (Reverse) while the vehicle is
in motion.
Page 343 of 632

06
6-71
Two labels on your driver’s door sill show
how much weight your vehicle was
designed to carry: the Tire and Loading
Information Label and the Certification
Label.
Before loading your vehicle, familiarize
yourself with the following terms for
determining your vehicle’s weight
ratings, from the vehicle’s specifications
and the Certification Label:
Base curb weight
This is the weight of the vehicle
including a full tank of fuel and all
standard equipment. It does not
include passengers, cargo, or optional
equipment.
Vehicle curb weight
This is the weight of your new vehicle
when you picked it up from your dealer
plus any aftermarket equipment.
Cargo weight
This figure includes all weight added to
the Base Curb Weight, including cargo
and optional equipment.
GAW (Gross Axle Weight)
This is the total weight placed on each
axle (front and rear) - including vehicle
curb weight and all payload.
GAWR (Gross Axle Weight Rating)
This is the maximum allowable weight
that can be carried by a single axle (front
or rear). These numbers are shown on
the Certification Label. The total load on
each axle must never exceed its GAWR.
GVW (Gross Vehicle Weight)
This is the Base Curb Weight plus actual
Cargo Weight plus passengers.
GVWR (Gross Vehicle Weight Rating)
This is the maximum allowable weight
of the fully loaded vehicle (including
all options, equipment, passengers
and cargo). The GVWR is shown on the
Certification Label located on the driver’s
door sill.
VEHICLE LOAD LIMIT
Page 348 of 632

Driving Your Vehicle
6 -76
Certification label
OBH059070OBH059070
The certification label is located on the
driver's door sill at the center pillar and
shows the maximum allowable weight of
the fully loaded vehicle. This is called the
GVWR (Gross Vehicle Weight Rating). The
GVWR includes the weight of the vehicle,
all occupants, fuel and cargo.
This label also tells you the maximum
weight that can be supported by the
front and rear axles, called Gross Axle
Weight Rating (GAWR).
The total weight of the vehicle, including
all occupants, accessories, cargo, and
trailer tongue load must not exceed the
Gross Vehicle Weight Rating (GVWR) or
the Gross Axle Weight Rating (GAWR).
To find out the actual loads on your front
and rear axles, you need to go to a weigh
station and weigh your vehicle. Be sure
to spread out your load equally on both
sides of the centerline.
WARNING
Overloading
• Never exceed the GVWR for your
vehicle, the GAWR for either the front
or rear axle and vehicle capacity
weight. Exceeding these ratings
can affect your vehicle's handling
and braking ability, and cause an
accident.
• Do not overload your vehicle.
Overloading your vehicle can cause
heat buildup in your vehicle's tires
and possible tire failure, increased
stopping distances and poor vehicle
handling-all of which may result in a
crash.
NOTICE
Overloading your vehicle may cause
damage. Repairs would not be covered
by your warranty. Do not overload your
vehicle.
WARNING
If you carry items inside your vehicle
(e.g., suitcases, tools, packages, or
anything else), they are moving as fast
as the vehicle. If you have to stop or
turn quickly, or if there is a crash, the
items will keep going and can cause
an injury if they strike the driver or a
passenger.
• Put items in the cargo area of your
vehicle. Try to spread the weight
evenly.
• Do not stack items, like suitcases,
inside the vehicle above the tops of
the seats.
• Do not leave an unsecured child
restraint in your vehicle.
• When you carry something inside the
vehicle, secure it.
Page 393 of 632

07
7-45
SAFE EXIT WARNING (SEW) (FOR CANADA, IF EQUIPPED)
OJX1070063LOJX1070063L
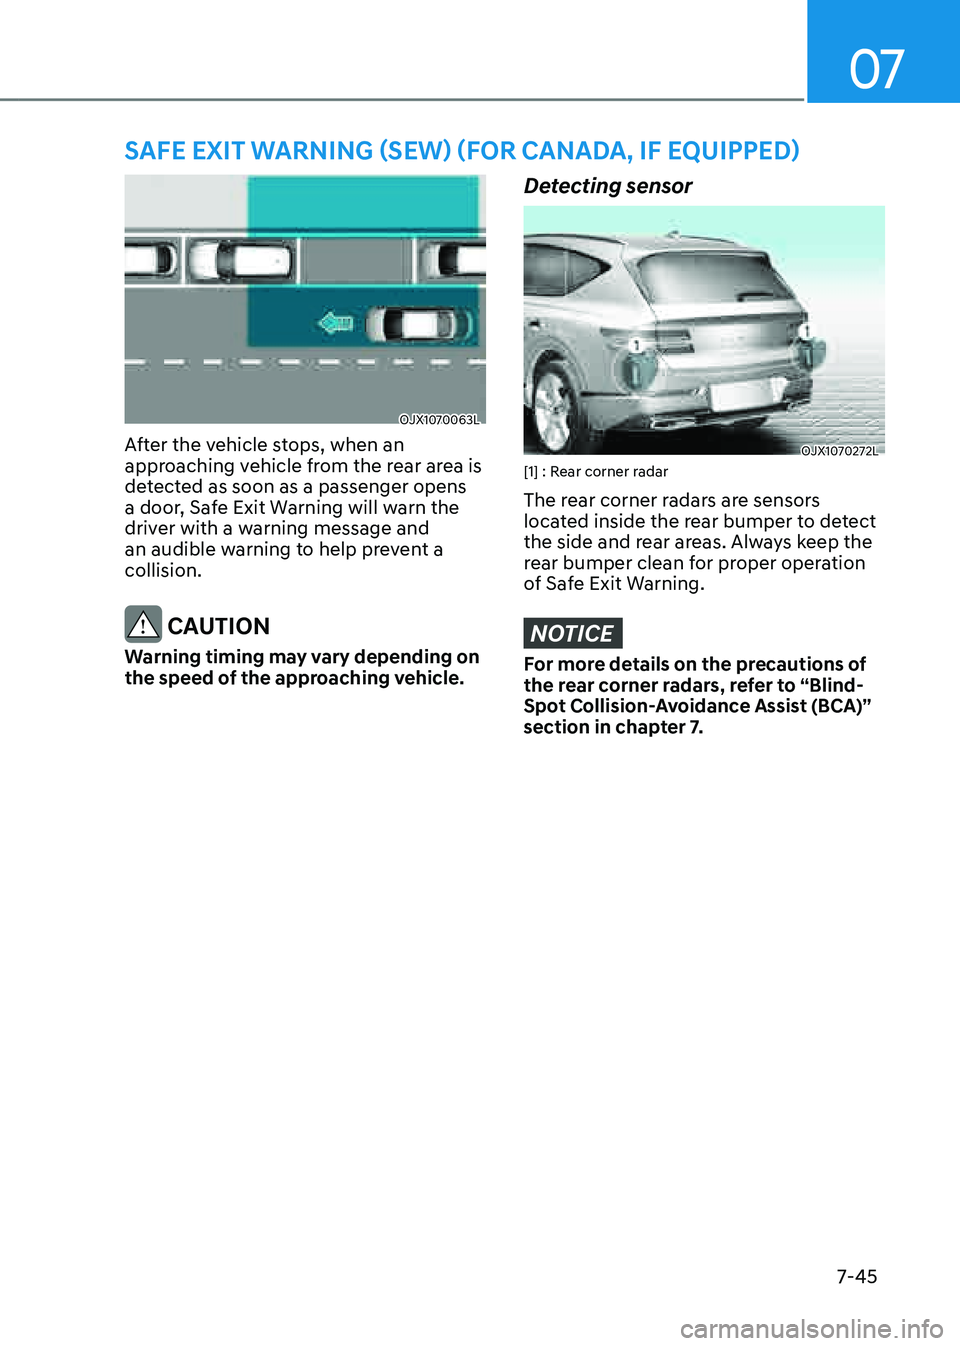
After the vehicle stops, when an
approaching vehicle from the rear area is
detected as soon as a passenger opens
a door, Safe Exit Warning will warn the
driver with a warning message and
an audible warning to help prevent a
collision.
CAUTION
Warning timing may vary depending on
the speed of the approaching vehicle.
Detecting sensor
OJX1070272LOJX1070272L[1] : Rear corner radar
The rear corner radars are sensors
located inside the rear bumper to detect
the side and rear areas. Always keep the
rear bumper clean for proper operation
of Safe Exit Warning.
NOTICE
For more details on the precautions of
the rear corner radars, refer to “Blind-
Spot Collision-Avoidance Assist (BCA)”
section in chapter 7.