warning light GENESIS GV80 2021 Owner's Guide
[x] Cancel search | Manufacturer: GENESIS, Model Year: 2021, Model line: GV80, Model: GENESIS GV80 2021Pages: 632, PDF Size: 9.37 MB
Page 121 of 632
Instrument Cluster
4-16
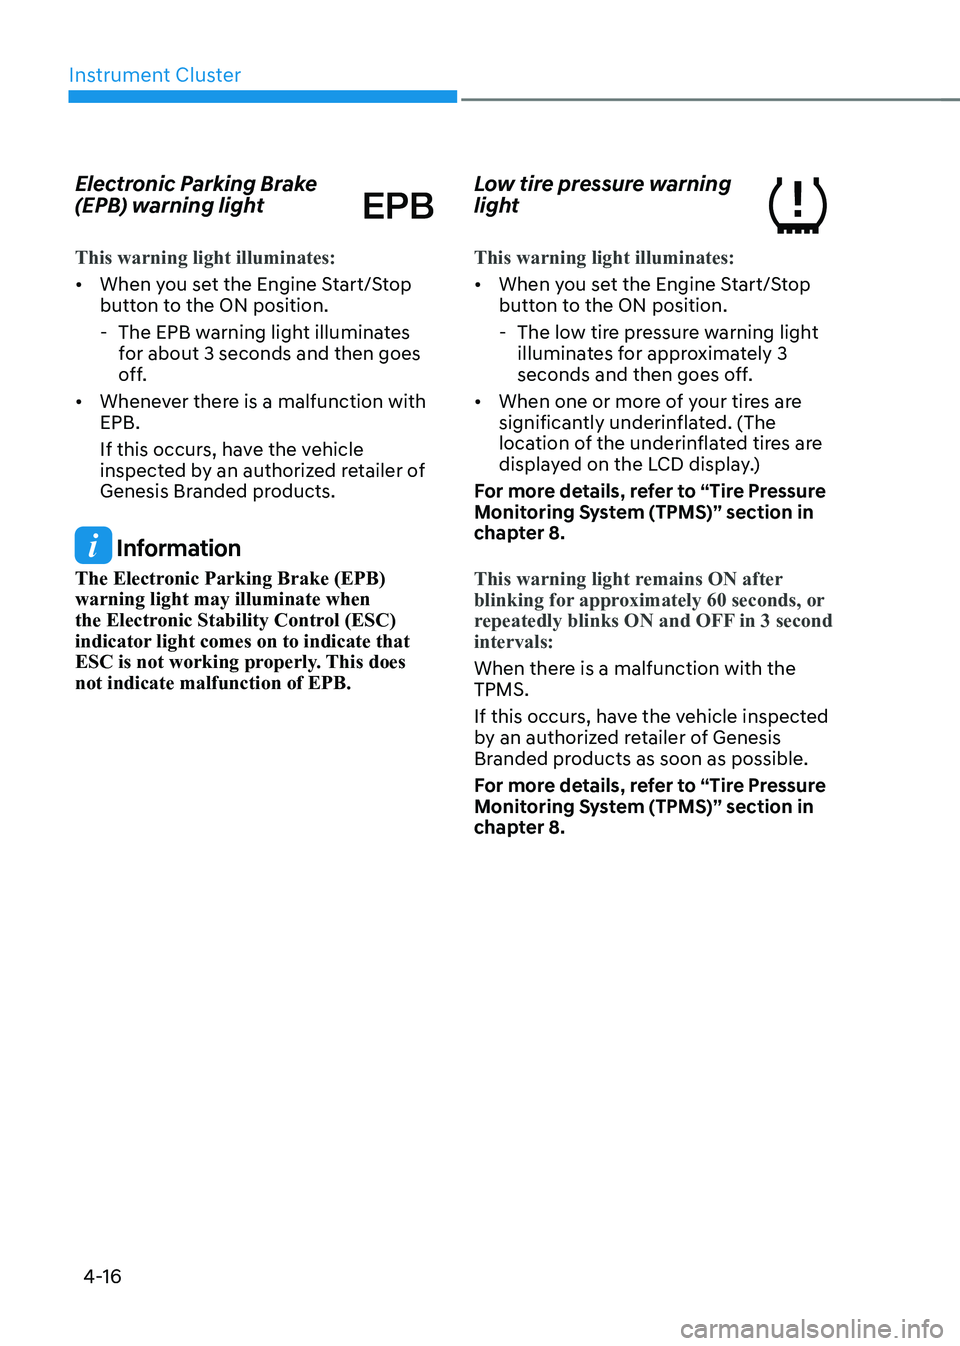
Electronic Parking Brake
(EPB) warning light
This warning light illuminates:
• When you set the Engine Start/Stop
button to the ON position.
-The EPB warning light illuminates
for about 3 seconds and then goes
off.
• Whenever there is a malfunction with
EPB.
If this occurs, have the vehicle
inspected by an authorized retailer of
Genesis Branded products.
Information
The Electronic Parking Brake (EPB)
warning light may illuminate when
the Electronic Stability Control (ESC)
indicator light comes on to indicate that
ESC is not working properly. This does
not indicate malfunction of EPB.
Low tire pressure warning
light
This warning light illuminates:
• When you set the Engine Start/Stop
button to the ON position.
-The low tire pressure warning light
illuminates for approximately 3
seconds and then goes off.
• When one or more of your tires are
significantly underinflated. (The
location of the underinflated tires are
displayed on the LCD display.)
For more details, refer to “Tire Pressure
Monitoring System (TPMS)” section in
chapter 8.
This warning light remains ON after
blinking for approximately 60 seconds, or
repeatedly blinks ON and OFF in 3 second
intervals:
When there is a malfunction with the
TPMS.
If this occurs, have the vehicle inspected
by an authorized retailer of Genesis
Branded products as soon as possible.
For more details, refer to “Tire Pressure
Monitoring System (TPMS)” section in
chapter 8.
Page 122 of 632
04
4-17
WARNING
Safe Stopping
• The TPMS cannot alert you to severe
and sudden tire damage caused by
external factors.
• If you notice any vehicle instability,
immediately take your foot off the
accelerator pedal, apply the brakes
gradually with light force, and slowly
move to a safe position off the road.
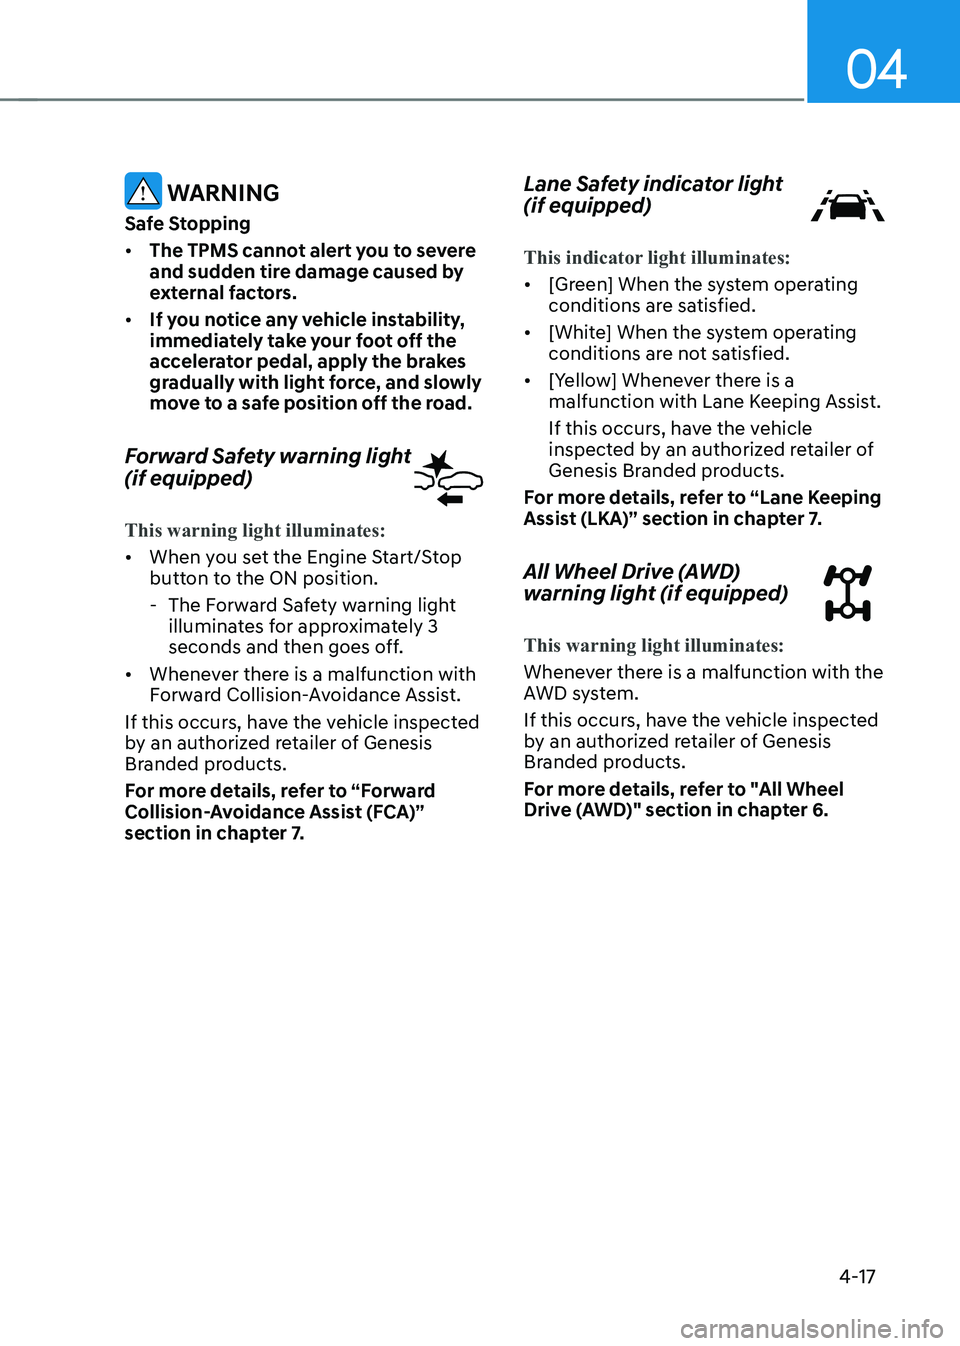
Forward Safety warning light
(if equipped)
This warning light illuminates:
• When you set the Engine Start/Stop
button to the ON position.
- The Forward Safety warning light
illuminates for approximately 3
seconds and then goes off.
• Whenever there is a malfunction with
Forward Collision-Avoidance Assist.
If this occurs, have the vehicle inspected
by an authorized retailer of Genesis
Branded products.
For more details, refer to “Forward
Collision-Avoidance Assist (FCA)”
section in chapter 7.
Lane Safety indicator light
(if equipped)
This indicator light illuminates:
• [Green] When the system operating
conditions are satisfied.
• [White] When the system operating
conditions are not satisfied.
• [Yellow] Whenever there is a
malfunction with Lane Keeping Assist.
If this occurs, have the vehicle
inspected by an authorized retailer of
Genesis Branded products.
For more details, refer to “Lane Keeping
Assist (LKA)” section in chapter 7.
All Wheel Drive (AWD)
warning light (if equipped)
This warning light illuminates:
Whenever there is a malfunction with the
AWD system.
If this occurs, have the vehicle inspected
by an authorized retailer of Genesis
Branded products.
For more details, refer to "All Wheel
Drive (AWD)" section in chapter 6.
Page 123 of 632
Instrument Cluster
4-18
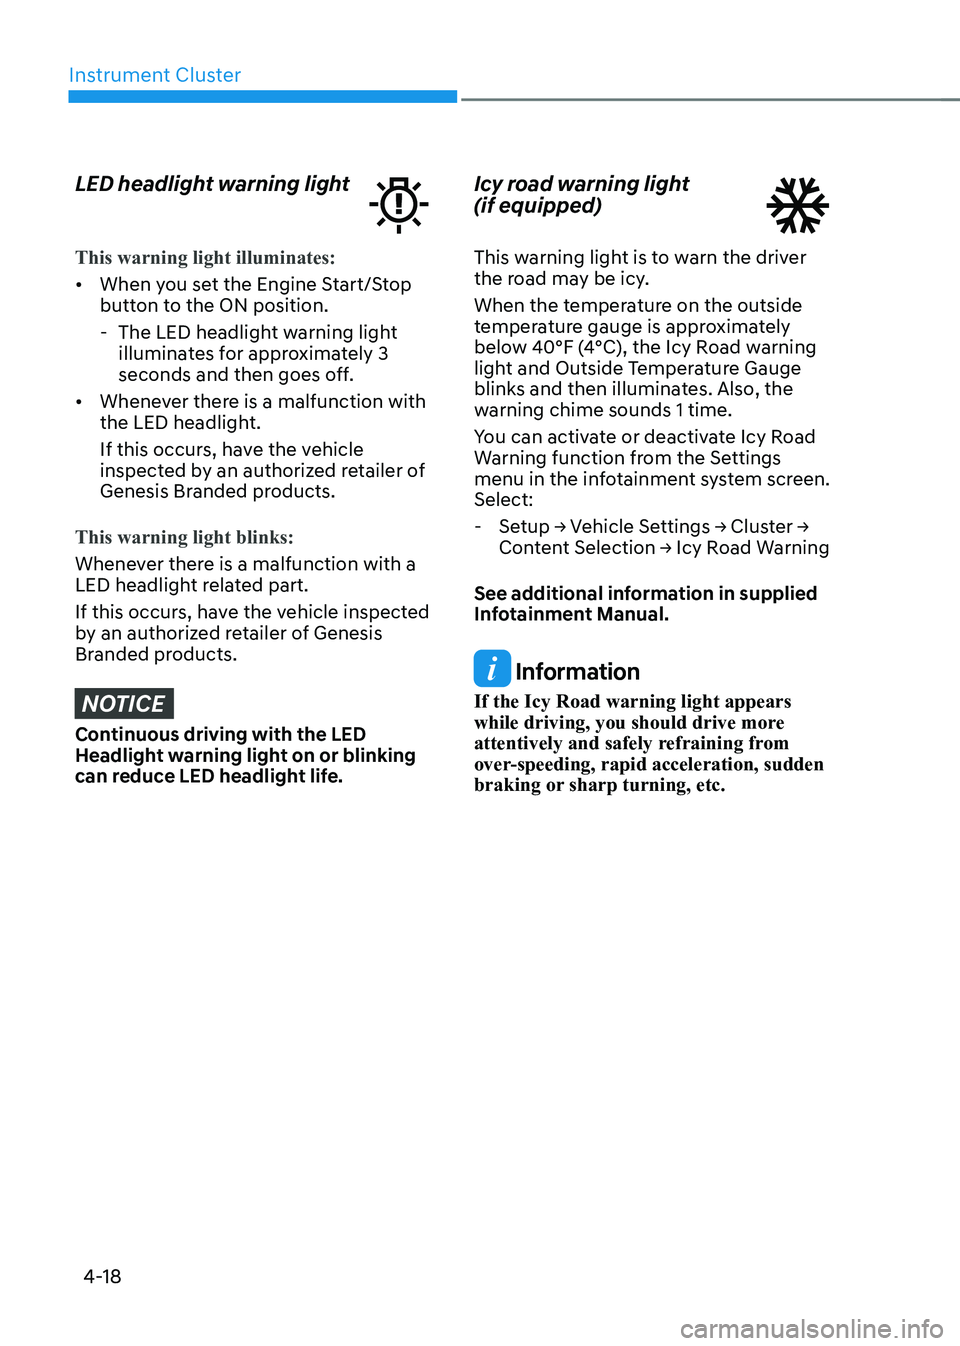
LED headlight warning light
This warning light illuminates:
• When you set the Engine Start/Stop
button to the ON position.
-The LED headlight warning light
illuminates for approximately 3
seconds and then goes off.
• Whenever there is a malfunction with
the LED headlight.
If this occurs, have the vehicle
inspected by an authorized retailer of
Genesis Branded products.
This warning light blinks:
Whenever there is a malfunction with a
LED headlight related part.
If this occurs, have the vehicle inspected
by an authorized retailer of Genesis
Branded products.
NOTICE
Continuous driving with the LED
Headlight warning light on or blinking
can reduce LED headlight life.
Icy road warning light
(if equipped)
This warning light is to warn the driver
the road may be icy.
When the temperature on the outside
temperature gauge is approximately
below 40°F (4°C), the Icy Road warning
light and Outside Temperature Gauge
blinks and then illuminates. Also, the
warning chime sounds 1 time.
You can activate or deactivate Icy Road
Warning function from the Settings
menu in the infotainment system screen.
Select:
- Setup → Vehicle Settings → Cluster →
Content Selection → Icy Road Warning
See additional information in supplied
Infotainment Manual.
Information
If the Icy Road warning light appears
while driving, you should drive more
attentively and safely refraining from
over-speeding, rapid acceleration, sudden
braking or sharp turning, etc.
Page 126 of 632
04
4-21
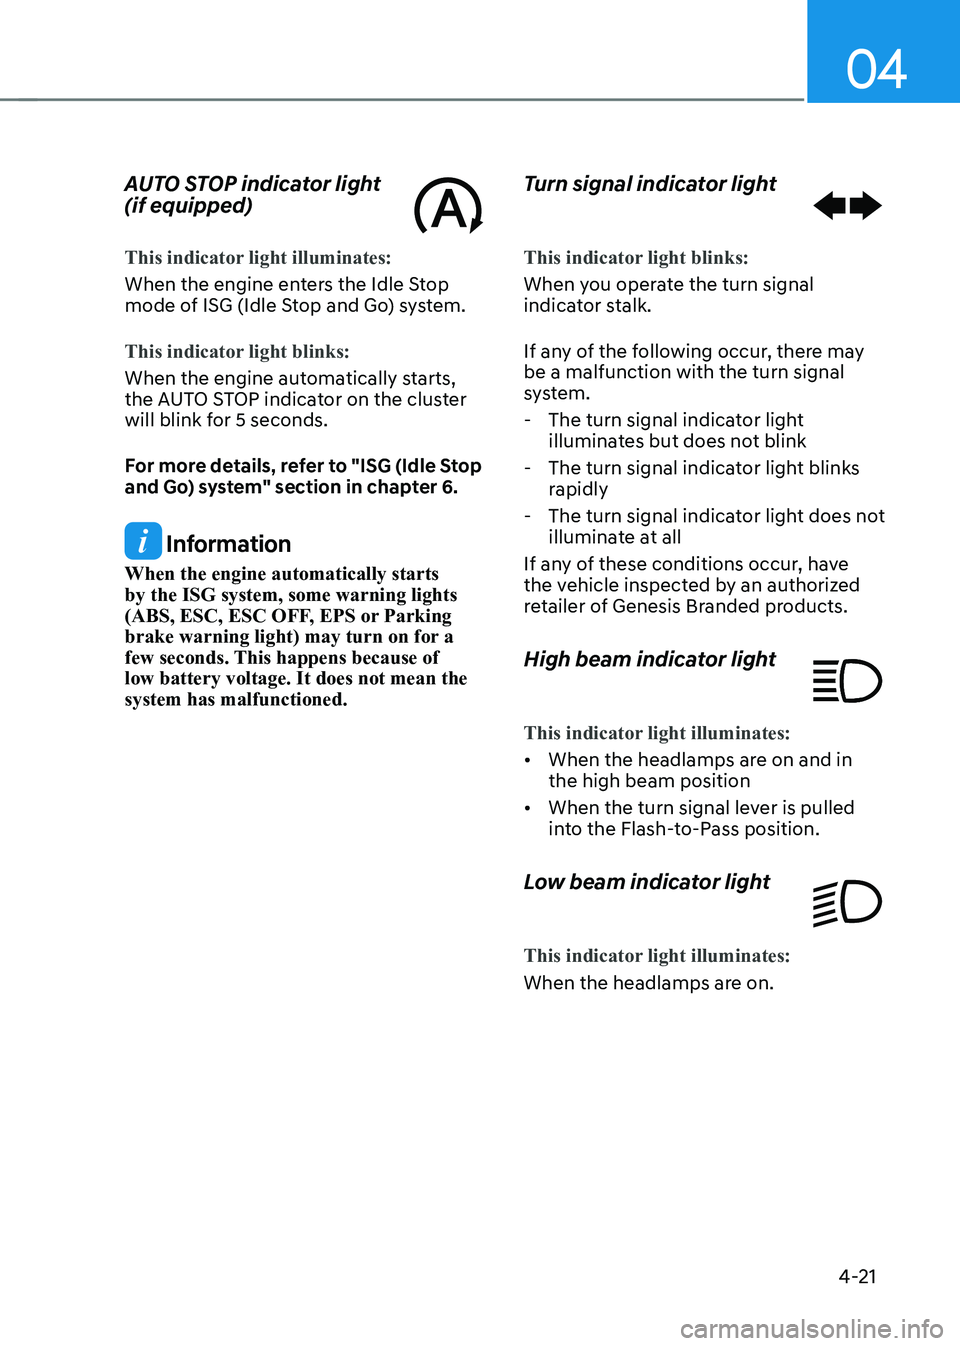
AUTO STOP indicator light
(if equipped)
This indicator light illuminates:
When the engine enters the Idle Stop
mode of ISG (Idle Stop and Go) system.
This indicator light blinks:
When the engine automatically starts,
the AUTO STOP indicator on the cluster
will blink for 5 seconds.
For more details, refer to "ISG (Idle Stop
and Go) system" section in chapter 6.
Information
When the engine automatically starts
by the ISG system, some warning lights
(ABS, ESC, ESC OFF, EPS or Parking
brake warning light) may turn on for a
few seconds. This happens because of
low battery voltage. It does not mean the
system has malfunctioned.
Turn signal indicator light
This indicator light blinks:
When you operate the turn signal
indicator stalk.
If any of the following occur, there may
be a malfunction with the turn signal
system.
-The turn signal indicator light
illuminates but does not blink
-The turn signal indicator light blinks
rapidly
-The turn signal indicator light does not
illuminate at all
If any of these conditions occur, have
the vehicle inspected by an authorized
retailer of Genesis Branded products.
High beam indicator light
This indicator light illuminates:
• When the headlamps are on and in
the high beam position
• When the turn signal lever is pulled
into the Flash-to-Pass position.
Low beam indicator light
This indicator light illuminates:
When the headlamps are on.
Page 128 of 632
04
4-23
Press brake pedal to start engine
This message is displayed if the Engine
Start/Stop button changes to the ACC
position twice by pressing the button
repeatedly without depressing the brake
pedal.
You can start the vehicle by depressing
the brake pedal and then pressing the
Engine Start/Stop button.
Key not in vehicle
This message is displayed if the smart
key is not in the vehicle when you leave
the vehicle with the Engine Start/Stop
button in the ON or Start position.
Always turn off the engine before leaving
your vehicle.
Key not detected
This message is displayed if the smart
key is not detected when you press the
Engine Start/Stop button.
Press START button again
This message is displayed if you were
unable to start the vehicle when the
Engine Start/Stop button was pressed.
If this occurs, attempt to start the engine
by pressing the Engine Start/ Stop button
again.
If the warning message appears each
time you press the Engine Start/Stop
button, have the vehicle inspected by an
authorized retailer of Genesis Branded
products.
Press START button with key
This message is displayed if you press
the Engine Start/Stop button while the
warning message “Key not detected” is
displayed.
At this time, the immobilizer indicator
light blinks.
Check BRAKE SWITCH fuse
This message is displayed if the brake
switch fuse is disconnected.
You need to replace the fuse with a new
one before starting the engine.
If that is not possible, you can start the
engine by pressing the Engine Start/
Stop button for 10 seconds in the ACC
position.
Shift to P or N to start engine
This message is displayed if you try to
start the engine in any other position
except P (Park) or N (Neutral).
Information
You can start the engine with the gear
in N (Neutral). But, for your safety, we
recommend that you start the engine with
the gear shifted to P (Park).
Page 131 of 632
Instrument Cluster
4-26
Low washer fluid
This message is displayed if the washer
fluid level in the reservoir is nearly empty.
Have the washer fluid reservoir refilled.
Low fuel
This message is displayed if the fuel tank
is almost out of fuel.
When this message is displayed, the low
fuel level warning light in the cluster will
come on.
It is recommended to look for the nearest
fueling station and refuel as soon as
possible.
Low engine oil (if equipped)
This warning message is displayed when
the engine oil level should be checked.
If this warning message is displayed,
check the engine oil level as soon as
possible and add engine oil as required.
Slowly pour the recommended oil little
by little into a funnel.
Use only the specified engine oil. (Refer
to "Recommended Lubricants and
Capacities“ section in chapter 2.)
Do not overfill the engine oil. Make sure
the oil level is not above F (Full) mark on
the dipstick.
Information
After adding engine oil, if you travel
approximately 31~62 miles (50~100 km)
after the engine warms up, the warning
message should disappear.
If the warning message remains on, have
the vehicle inspected by an authorized
retailer of Genesis Branded products as
soon as possible.
Engine overheated
This message is displayed when the
engine coolant temperature is above
approximately 248°F (120°C). This means
that the engine is overheated and may
be damaged.
If your vehicle is overheated, refer to
“Overheating” section in chapter 8.
Check haptic steering wheel system
This message is displayed if there is a
problem with the haptic steering wheel
system. Have the vehicle inspected by an
authorized retailer of Genesis Branded
products.
Check headlight
This message is displayed if the
headlights are not operating properly. A
lamp may need to be replaced.
Make sure to replace the burned out
bulb with a new one of the same wattage
rating.
Check turn signal
This message is displayed if the turn
signal lamps are not operating properly.
A lamp may need to be replaced.
Make sure to replace the burned out
bulb with a new one of the same wattage
rating.
Check headlamp LED (if equipped)
This message is displayed if there is a
problem with the LED headlamp. Have
the vehicle inspected by an authorized
retailer of Genesis Branded products.
Page 141 of 632
Instrument Cluster
4-36
WARNING
• You should not use the 3D cluster if
you or any of your family members
or relatives has a history of epilepsy,
convulsions, etc. Flashing or
flickering lights or specific or regular
patterns shown on the cluster may
stimulate epilepsy, convulsions, etc.
• You should not use the 3D effect
immediately if you feel any of the
following symptoms:
Haziness, unconsciousness,
disorientation, nausea, headache,
fatigue, dizziness, etc.
NOTICE
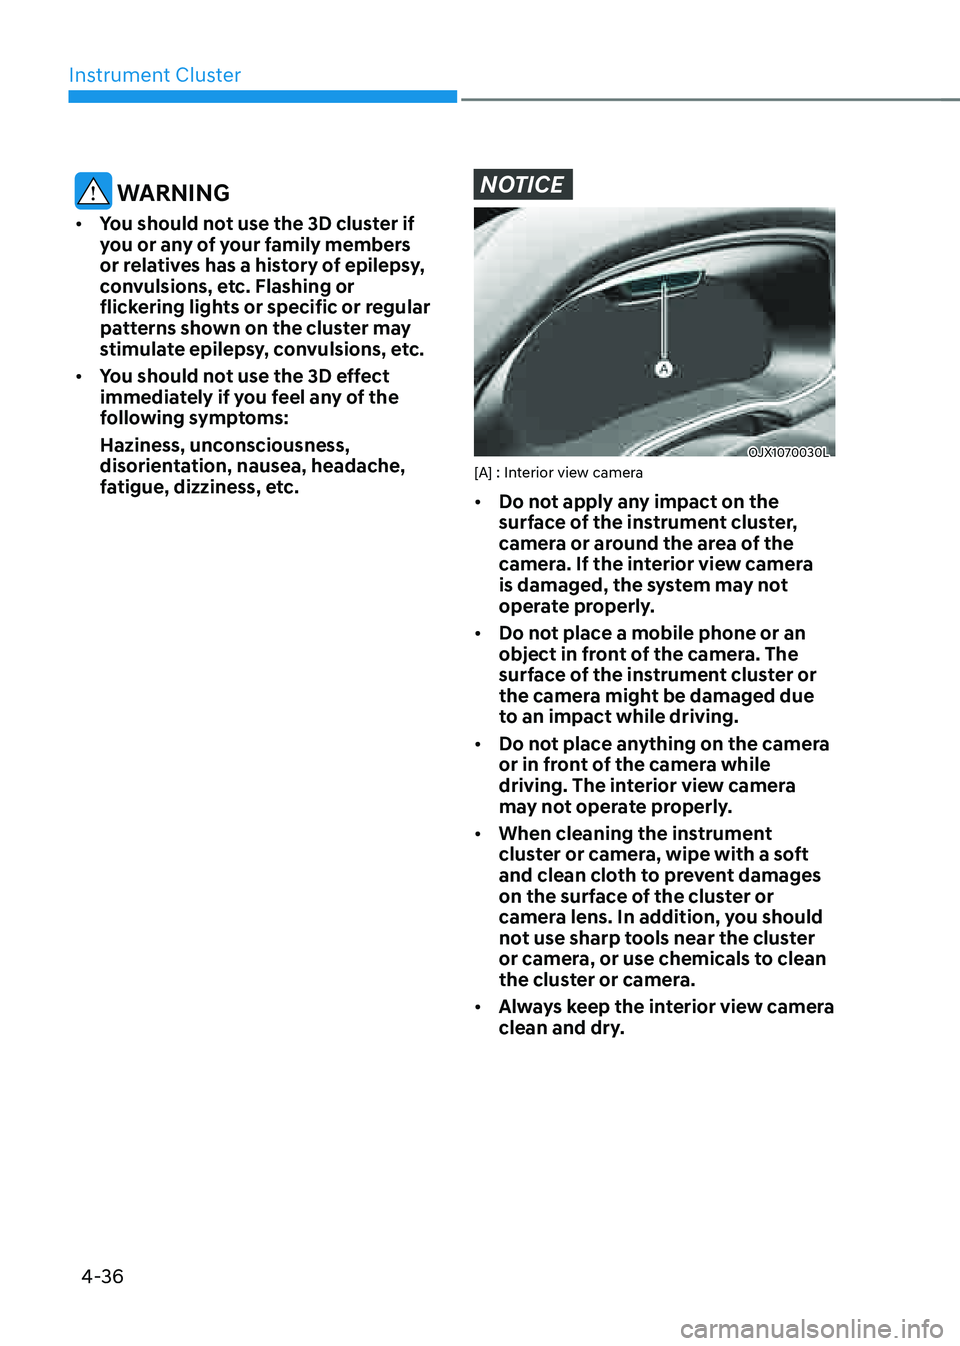
OJX1070030LOJX1070030L[A] : Interior view camera
• Do not apply any impact on the
surface of the instrument cluster,
camera or around the area of the
camera. If the interior view camera
is damaged, the system may not
operate properly.
• Do not place a mobile phone or an
object in front of the camera. The
surface of the instrument cluster or
the camera might be damaged due
to an impact while driving.
• Do not place anything on the camera
or in front of the camera while
driving. The interior view camera
may not operate properly.
• When cleaning the instrument
cluster or camera, wipe with a soft
and clean cloth to prevent damages
on the surface of the cluster or
camera lens. In addition, you should
not use sharp tools near the cluster
or camera, or use chemicals to clean
the cluster or camera.
• Always keep the interior view camera
clean and dry.
Page 142 of 632
04
4-37
VEHICLE SETTINGS (INFOTAINMENT SYSTEM)
OJX1050236NOJX1050236N
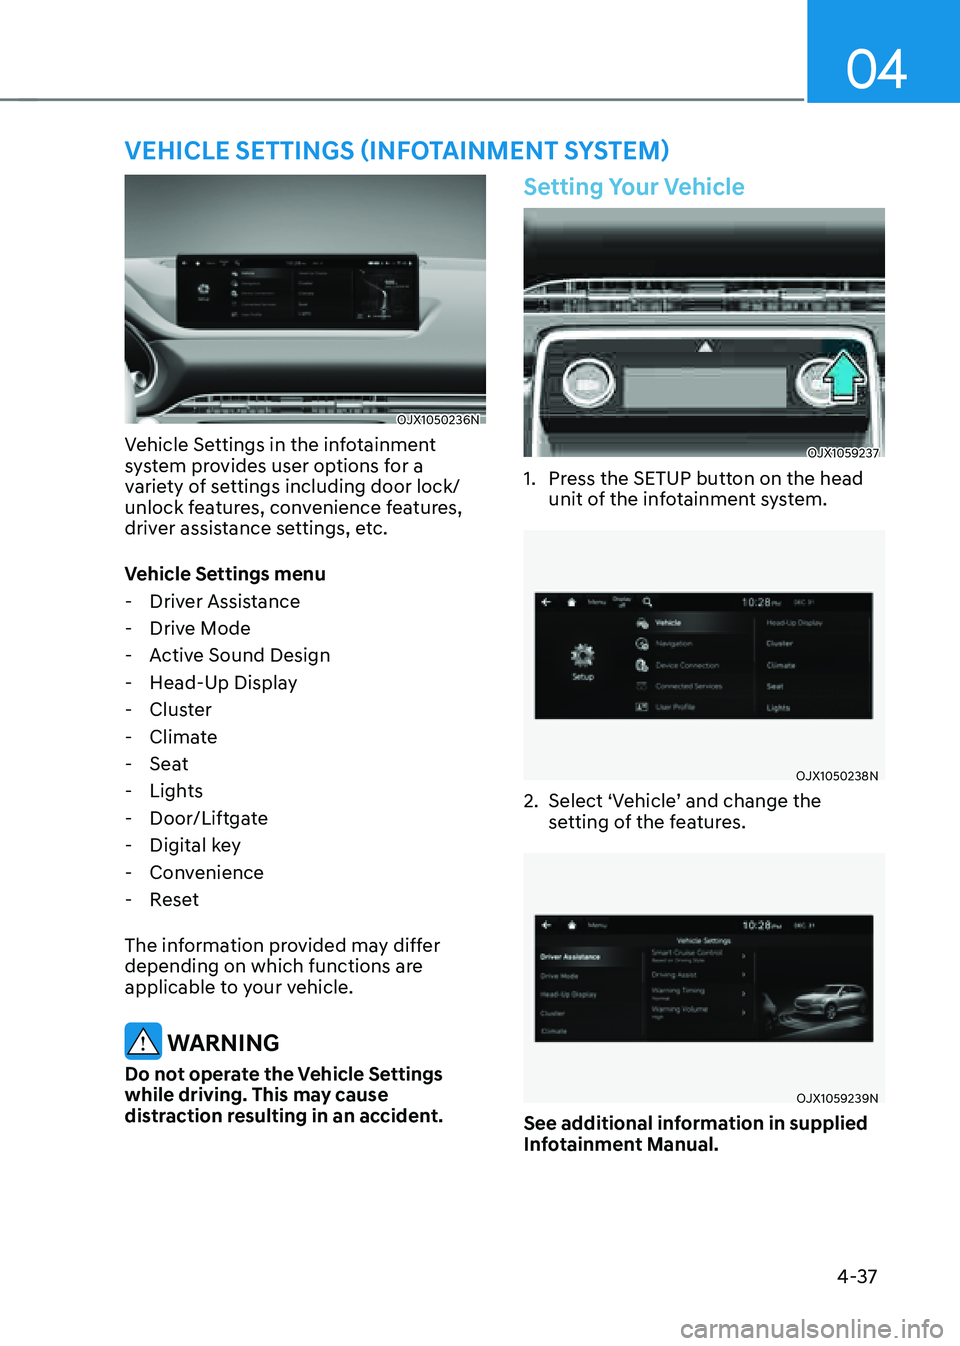
Vehicle Settings in the infotainment
system provides user options for a
variety of settings including door lock/
unlock features, convenience features,
driver assistance settings, etc.
Vehicle Settings menu
-Driver Assistance
-Drive Mode
-Active Sound Design
-Head-Up Display
-Cluster
-Climate
-Seat
-Lights
-Door/Liftgate
-Digital key
-Convenience
-Reset
The information provided may differ
depending on which functions are
applicable to your vehicle.
WARNING
Do not operate the Vehicle Settings
while driving. This may cause
distraction resulting in an accident.
Setting Your Vehicle
OJX1059237OJX1059237
1. Press the SETUP button on the head
unit of the infotainment system.
OJX1050238NOJX1050238N
2. Select ‘Vehicle’ and change the
setting of the features.
OJX1059239NOJX1059239N
See additional information in supplied
Infotainment Manual.
Page 144 of 632
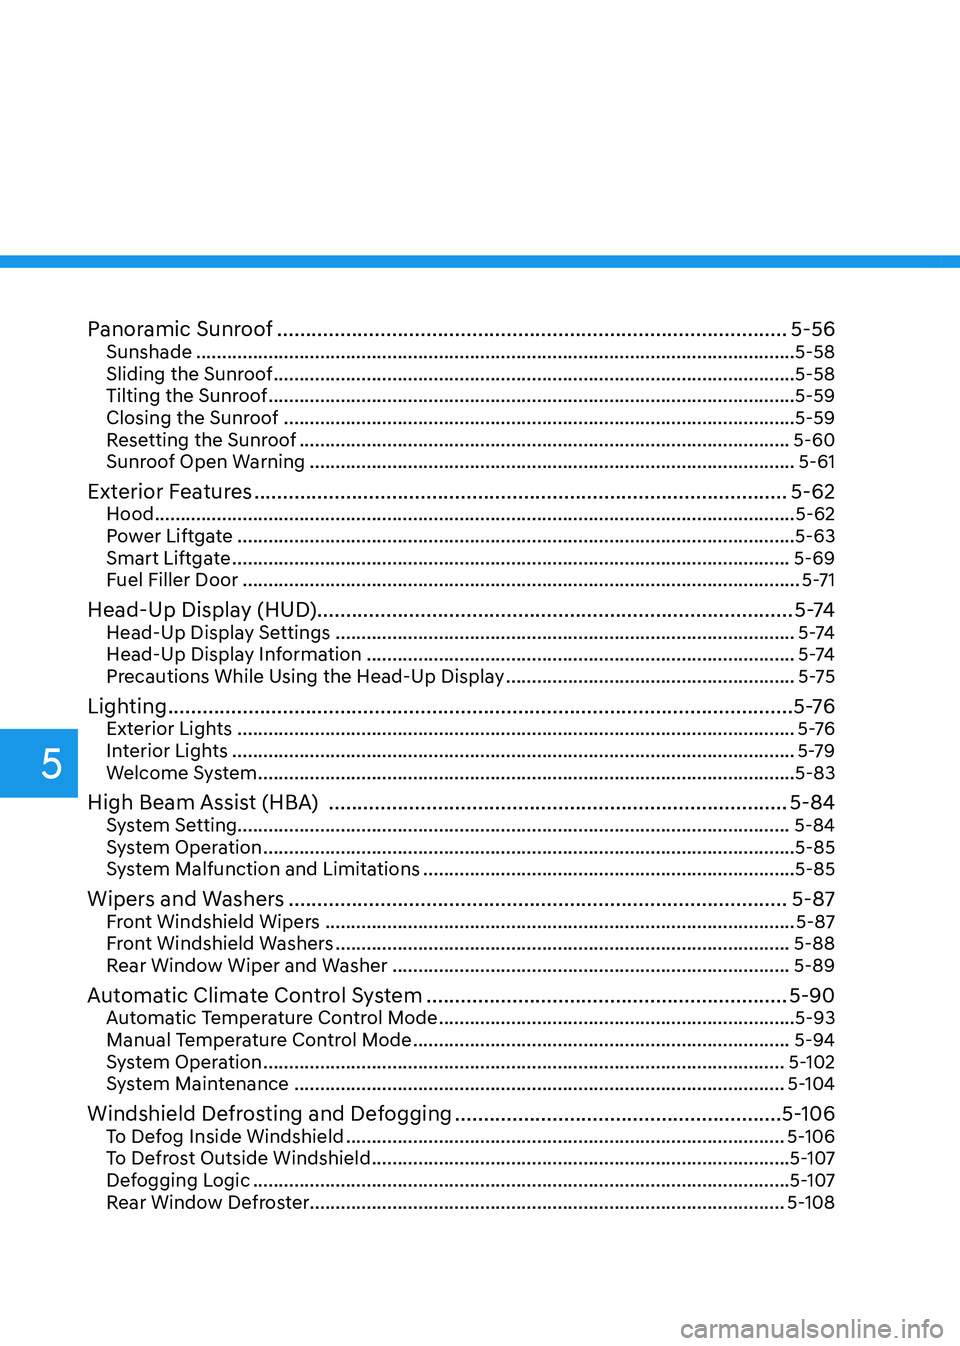
Panoramic Sunroof ........................................................................\
.................5-56Sunshade ........................................................................\
............................................5-58
Sliding the Sunroof ........................................................................\
.............................5-58
Tilting the Sunroof ........................................................................\
..............................5-59
Closing the Sunroof ........................................................................\
...........................5-59
Resetting the Sunroof ........................................................................\
.......................5-60
Sunroof Open Warning ........................................................................\
......................5-61
Exterior Features ........................................................................\
.....................5-62Hood ........................................................................\
....................................................5-62
Power Liftgate ........................................................................\
....................................5-63
Smart Liftgate ........................................................................\
....................................5-69
Fuel Filler Door ........................................................................\
....................................5-71
Head-Up Display (HUD) ........................................................................\
........... 5 -74Head-Up Display Settings ........................................................................\
.................5 -74
Head-Up Display Information ........................................................................\
...........5 -74
Precautions While Using the Head-Up Display ........................................................5-75
Lighting ........................................................................\
.....................................5 -76Exterior Lights ........................................................................\
....................................5 -76
Interior Lights ........................................................................\
.....................................5-79
Welcome System ........................................................................\
................................5-83
High Beam Assist (HBA) ........................................................................\
........5-84System Setting ........................................................................\
................................... 5-84
System Operation ........................................................................\
...............................5-85
System Malfunction and Limitations ........................................................................\
5-85
Wipers and Washers ........................................................................\
...............5-87Front Windshield Wipers ........................................................................\
...................5-87
Front Windshield Washers ........................................................................\
................5-88
Rear Window Wiper and Washer ........................................................................\
.....5-89
Automatic Climate Control System ...............................................................5-90Automatic Temperature Control Mode .....................................................................5-93
Manual Temperature Control Mode ........................................................................\
.5-94
System Operation ........................................................................\
.............................5-102
System Maintenance ........................................................................\
.......................5-104
Windshield Defrosting and Defogging .........................................................5-106To Defog Inside Windshield ........................................................................\
.............5-106
To Defrost Outside Windshield ........................................................................\
.........5-107
Defogging Logic ........................................................................\
................................5-107
Rear Window Defroster ........................................................................\
.................... 5-108
5
Page 147 of 632
05
5-5
Note that you cannot lock your vehicle
using the door handle touch sensor if any
of the following occur:
• The Smart Key is in the vehicle.
• The Engine Start/Stop button is from
ACC or ON position.
• Any of the doors are open except for
the liftgate.
WARNING
Do not leave the Smart Key in your
vehicle with unsupervised children.
Unattended children could press the
Engine Start/ Stop button and may lock
the doors, operate power windows or
other controls, or even make the vehicle
move, which could result in serious
injury or death.
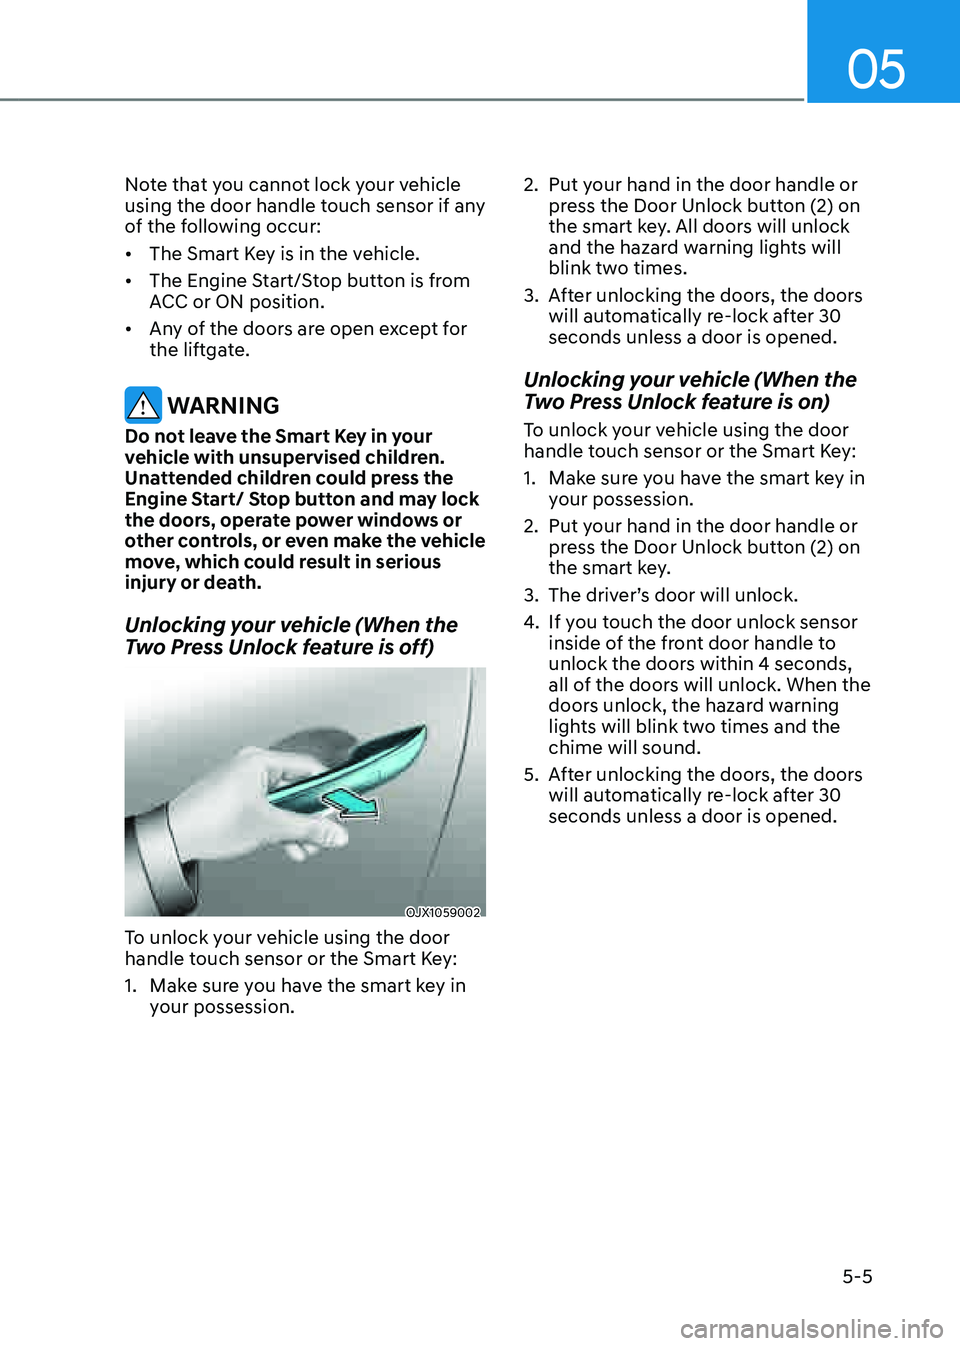
Unlocking your vehicle (When the
Two Press Unlock feature is off)
OJX1059002OJX1059002
To unlock your vehicle using the door
handle touch sensor or the Smart Key:
1. Make sure you have the smart key in
your possession.
2. Put your hand in the door handle or
press the Door Unlock button (2) on
the smart key. All doors will unlock
and the hazard warning lights will
blink two times.
3. After unlocking the doors, the doors
will automatically re-lock after 30
seconds unless a door is opened.
Unlocking your vehicle (When the
Two Press Unlock feature is on)
To unlock your vehicle using the door
handle touch sensor or the Smart Key:
1. Make sure you have the smart key in
your possession.
2. Put your hand in the door handle or
press the Door Unlock button (2) on
the smart key.
3. The driver’s door will unlock.
4. If you touch the door unlock sensor
inside of the front door handle to
unlock the doors within 4 seconds,
all of the doors will unlock. When the
doors unlock, the hazard warning
lights will blink two times and the
chime will sound.
5. After unlocking the doors, the doors
will automatically re-lock after 30
seconds unless a door is opened.