ECO mode GENESIS GV80 2021 Owner's Manual
[x] Cancel search | Manufacturer: GENESIS, Model Year: 2021, Model line: GV80, Model: GENESIS GV80 2021Pages: 632, PDF Size: 9.37 MB
Page 17 of 632
2-5
02
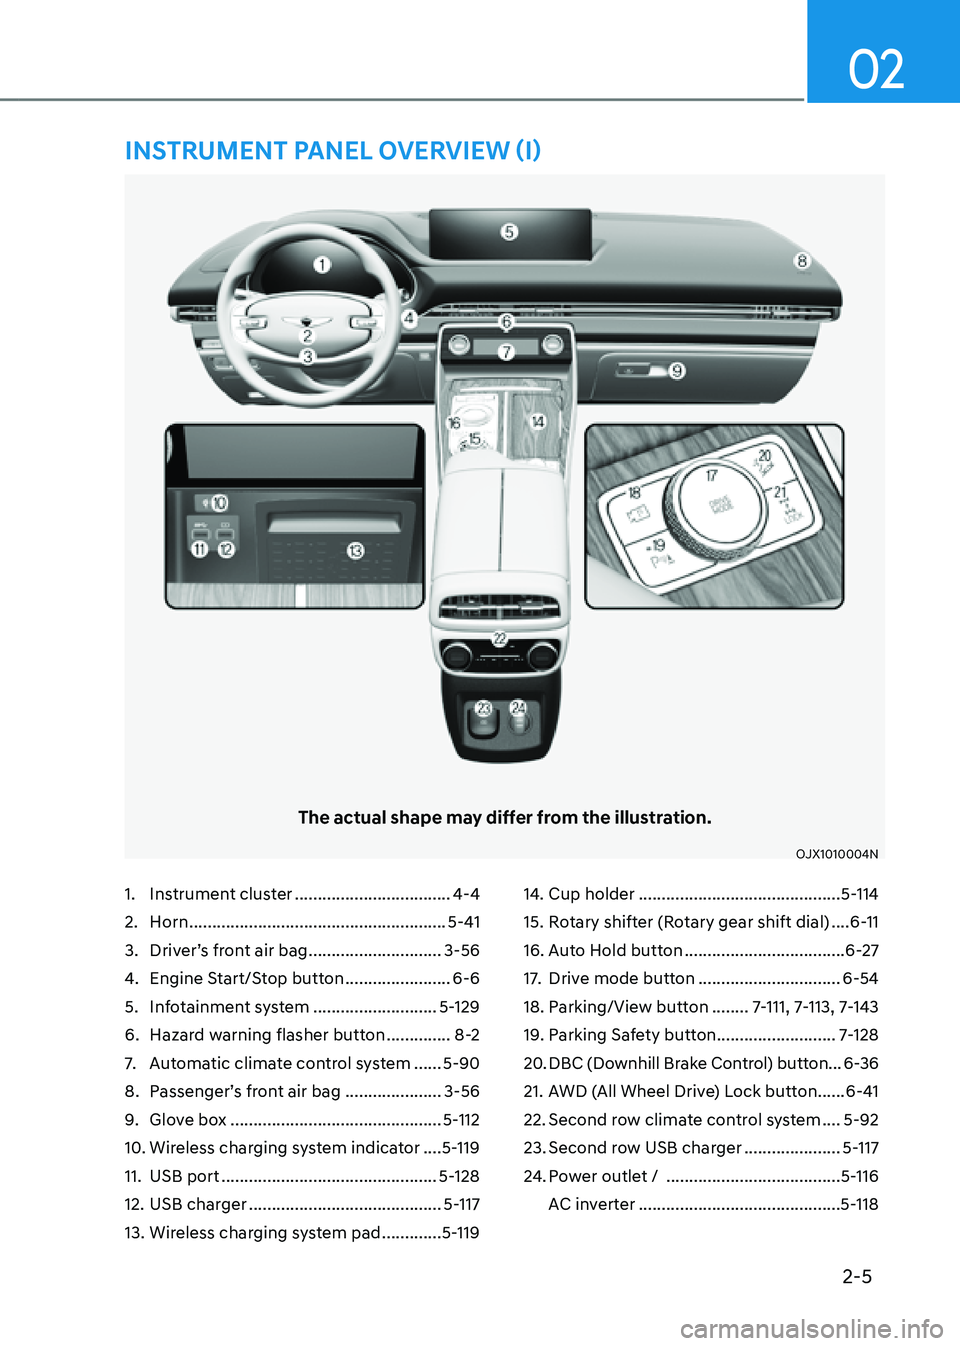
1. Instrument cluster ..................................4-4
2. Horn ........................................................5-41
3. Driver’s front air bag .............................3-56
4. Engine Start/Stop button .......................6-6
5. Infotainment system ...........................5-129
6. Hazard warning flasher button ..............8-2
7. Automatic climate control system ......5-90
8. Passenger’s front air bag .....................3-56
9. Glove box ..............................................5-112
10. Wireless charging system indicator ....5-119
11. USB port ...............................................5-128
12. USB charger ..........................................5-117
13. Wireless charging system pad .............5-119
14. Cup holder ............................................5-114
15. Rotary shifter (Rotary gear shift dial) ....6-11
16. Auto Hold button ...................................6-27
17. Drive mode button ...............................6-54
18. Parking/View button ........7-111, 7-113, 7-143
19. Parking Safety button ..........................7-128
20. DBC (Downhill Brake Control) button ...6-36
21. AWD (All Wheel Drive) Lock button ......6-41
22. Second row climate control system ....5-92
23. Second row USB charger .....................5-117
24. Power outlet / ......................................5-116
AC inverter
............................................5-118
The actual shape may differ from the illustration.
OJX1010004NOJX1010004N
INSTRUMENT PANEL OVERVIEW (I)
Page 35 of 632
Safety System
3-6
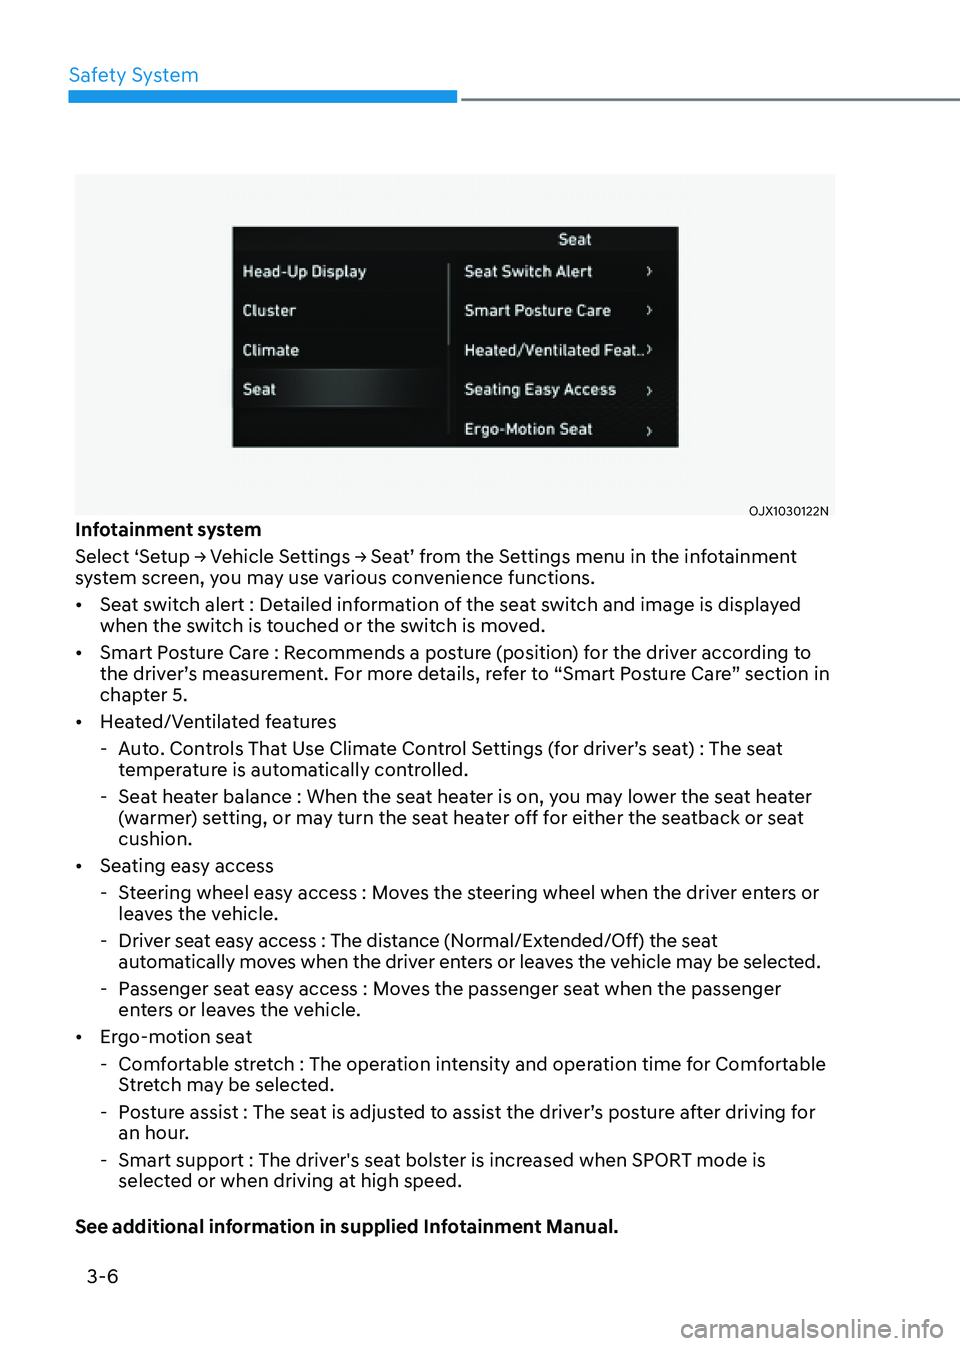
OJX1030122NOJX1030122NInfotainment system
Select ‘Setup -> Vehicle Settings -> Seat’ from the Settings menu in the infotainment
system screen, you may use various convenience functions.
• Seat switch alert : Detailed information of the seat switch and image is displayed
when the switch is touched or the switch is moved.
• Smart Posture Care : Recommends a posture (position) for the driver according to
the driver’s measurement. For more details, refer to “Smart Posture Care” section in
chapter 5.
• Heated/Ventilated features
-Auto. Controls That Use Climate Control Settings (for driver’s seat) : The seat
temperature is automatically controlled.
-Seat heater balance : When the seat heater is on, you may lower the seat heater
(warmer) setting, or may turn the seat heater off for either the seatback or seat
cushion.
• Seating easy access
-Steering wheel easy access : Moves the steering wheel when the driver enters or
leaves the vehicle.
-Driver seat easy access : The distance (Normal/Extended/Off) the seat
automatically moves when the driver enters or leaves the vehicle may be selected.
-Passenger seat easy access : Moves the passenger seat when the passenger
enters or leaves the vehicle.
• Ergo-motion seat
-Comfortable stretch : The operation intensity and operation time for Comfortable
Stretch may be selected.
-Posture assist : The seat is adjusted to assist the driver’s posture after driving for
an hour.
-Smart support : The driver's seat bolster is increased when SPORT mode is
selected or when driving at high speed.
See additional information in supplied Infotainment Manual.
Page 82 of 632
03
3-53
OHI038148OHI038148
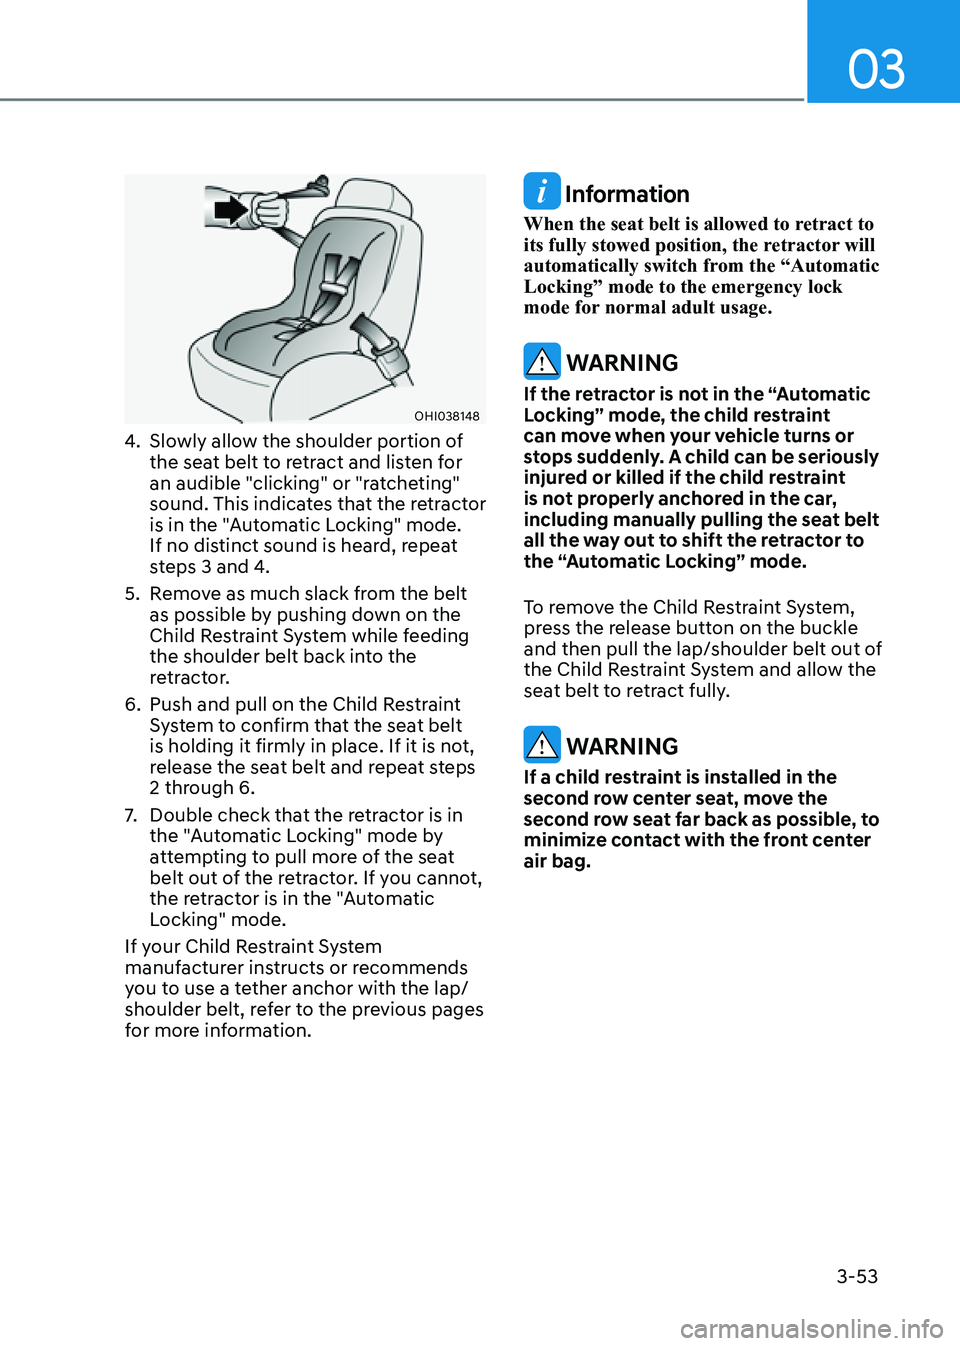
4. Slowly allow the shoulder portion of
the seat belt to retract and listen for
an audible "clicking" or "ratcheting"
sound. This indicates that the retractor
is in the "Automatic Locking" mode.
If no distinct sound is heard, repeat
steps 3 and 4.
5. Remove as much slack from the belt
as possible by pushing down on the
Child Restraint System while feeding
the shoulder belt back into the
retractor.
6. Push and pull on the Child Restraint
System to confirm that the seat belt
is holding it firmly in place. If it is not,
release the seat belt and repeat steps
2 through 6.
7. Double check that the retractor is in
the "Automatic Locking" mode by
attempting to pull more of the seat
belt out of the retractor. If you cannot,
the retractor is in the "Automatic
Locking" mode.
If your Child Restraint System
manufacturer instructs or recommends
you to use a tether anchor with the lap/
shoulder belt, refer to the previous pages
for more information.
Information
When the seat belt is allowed to retract to
its fully stowed position, the retractor will
automatically switch from the “Automatic
Locking” mode to the emergency lock
mode for normal adult usage.
WARNING
If the retractor is not in the “Automatic
Locking” mode, the child restraint
can move when your vehicle turns or
stops suddenly. A child can be seriously
injured or killed if the child restraint
is not properly anchored in the car,
including manually pulling the seat belt
all the way out to shift the retractor to
the “Automatic Locking” mode.
To remove the Child Restraint System,
press the release button on the buckle
and then pull the lap/shoulder belt out of
the Child Restraint System and allow the
seat belt to retract fully.
WARNING
If a child restraint is installed in the
second row center seat, move the
second row seat far back as possible, to
minimize contact with the front center
air bag.
Page 90 of 632
03
3-61
WARNING
If your SRS malfunctions, the air bag
may not inflate properly during an
accident increasing the risk of serious
injury or death.
If any of the following conditions occur,
your SRS is malfunctioning:
• The light does not turn on for
approximately three to six seconds
when the Engine Start/Stop button is
in the ON position.
• The light stays on after illuminating
for approximately three to six
seconds.
• The light comes on while the vehicle
is in motion.
• The light blinks when the engine is
running.
Have an authorized retailer of Genesis
Branded products inspect the SRS
as soon as possible if any of these
conditions occur. During a moderate to severe frontal
collision, sensors will detect the
vehicle’s rapid deceleration. If the rate of
deceleration is high enough, the control
unit will inflate the front air bags, at the
time and with the force needed.
The front air bags help protect the driver
and front passenger by responding to
frontal impacts in which seat belts alone
cannot provide adequate restraint. When
needed, the side air bags help provide
protection in the event of a side impact
or rollover by supporting the side upper
body area.
• Air bags are activated (able to
inflate if necessary) only when the
Engine Start/Stop button is in the
ON or START position, and it can be
activated within about 3 minutes after
the engine is turned off.
• Air bags inflate in the event of certain
frontal or side collisions to help
protect the occupants from serious
physical injury.
• There is no single speed at which the
air bags will inflate. Generally, air bags
are designed to inflate based upon the
severity of a collision and its direction.
These two factors determine whether
the sensors produce an electronic
deployment/inflation signal.
• The front air bags will completely
inflate and deflate in an instant. It is
virtually impossible for you to see the
air bags inflate during an accident. It is
much more likely that you will simply
see the deflated air bags hanging out
of their storage compartments after
the collision.
Page 108 of 632
4
4. Instrument Cluster
LCD Display ........................................................................\
..............................4-27LCD Display Control ........................................................................\
...........................4-27
View Modes ........................................................................\
........................................4-27
Driving Assist view ........................................................................\
...........................4-28
Turn By Turn (TBT) view ........................................................................\
...................4-28
Utility view ........................................................................\
........................................4-28
Additional information display ........................................................................\
........4-32
Option Menu ........................................................................\
.......................................4-32
Service messages ........................................................................\
............................4-33
3D cluster (for 12.3-inch 3D cluster) .......................................................................4-33
Head-up display ........................................................................\
...............................4-33
Driver Assistance settings ........................................................................\
...............4-33
Speed unit ........................................................................\
.......................................4-34
3D Instrument Cluster (for 12.3-Inch 3D Cluster) .....................................................4-34
3D cluster setting ........................................................................\
.............................4-34
Recommendations to optimize the 3D effect .......................................................4-34
Vehicle Settings (Infotainment System) ........................................................4-37Setting Your Vehicle ........................................................................\
..........................4-37
Page 115 of 632
Instrument Cluster
4-10
Information
• If the vehicle is not on level ground or
the battery power has been interrupted,
the distance to empty function may not
operate correctly.
• The distance to empty may differ
from the actual driving distance as it
is an estimate of the available driving
distance.
• The trip computer may not register
additional fuel if less than 2.4 gallons
(9 liters) of fuel are added to the vehicle.
• The distance to empty may vary
significantly based on driving
conditions, driving habits, and
condition of the vehicle.
Fuel economy (for 12.3-inch 3D
cluster)
OJX1040074NOJX1040074N
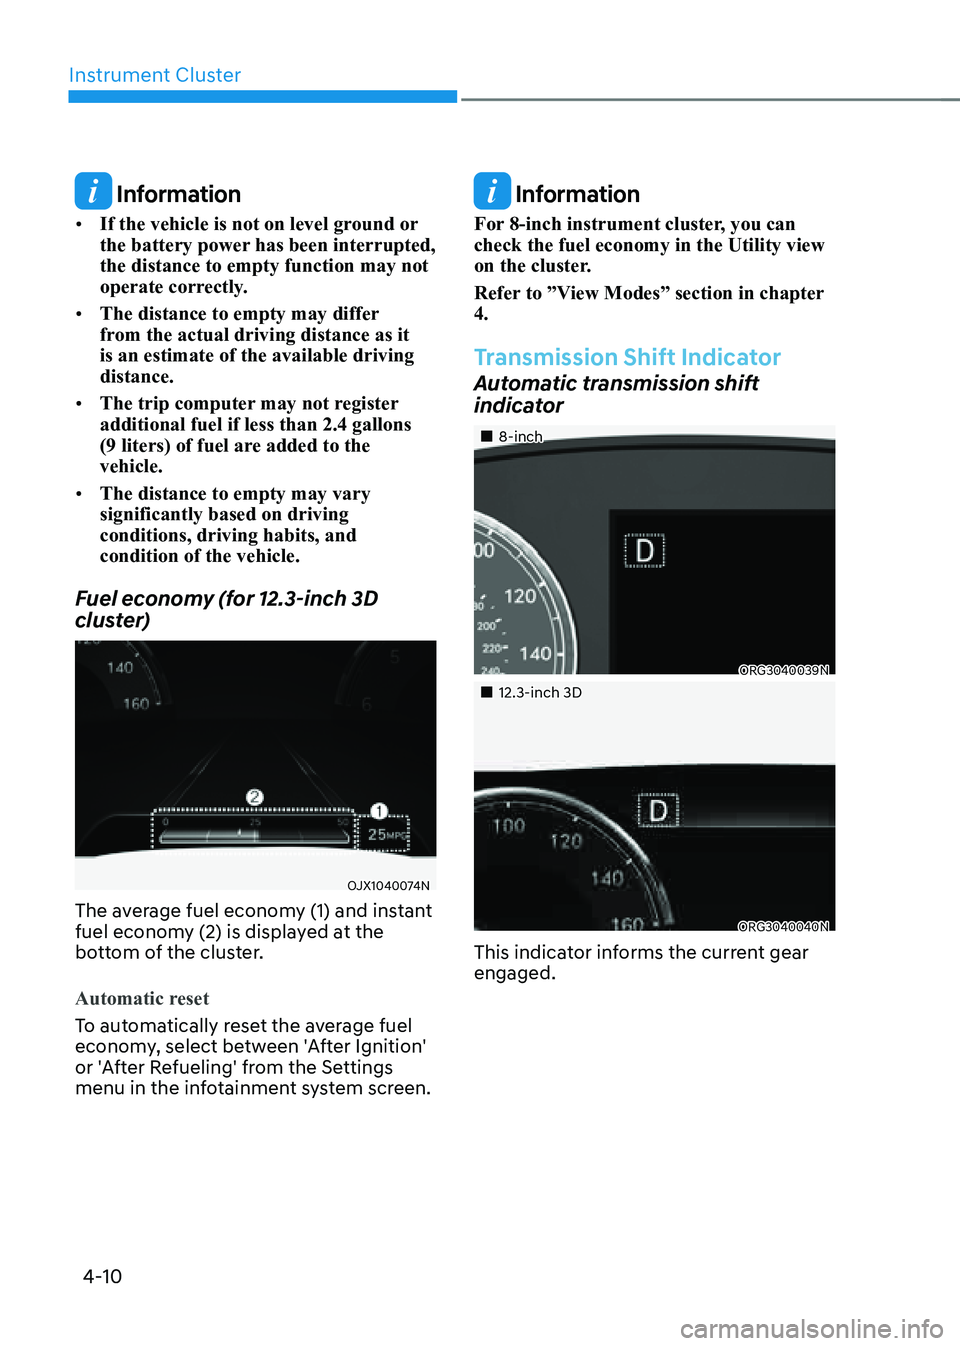
The average fuel economy (1) and instant
fuel economy (2) is displayed at the
bottom of the cluster.
Automatic reset
To automatically reset the average fuel
economy, select between 'After Ignition'
or 'After Refueling' from the Settings
menu in the infotainment system screen.
Information
For 8-inch instrument cluster, you can
check the fuel economy in the Utility view
on the cluster.
Refer to ”View Modes” section in chapter
4.
Transmission Shift Indicator
Automatic transmission shift
indicator
�
Page 125 of 632
Instrument Cluster
4-20
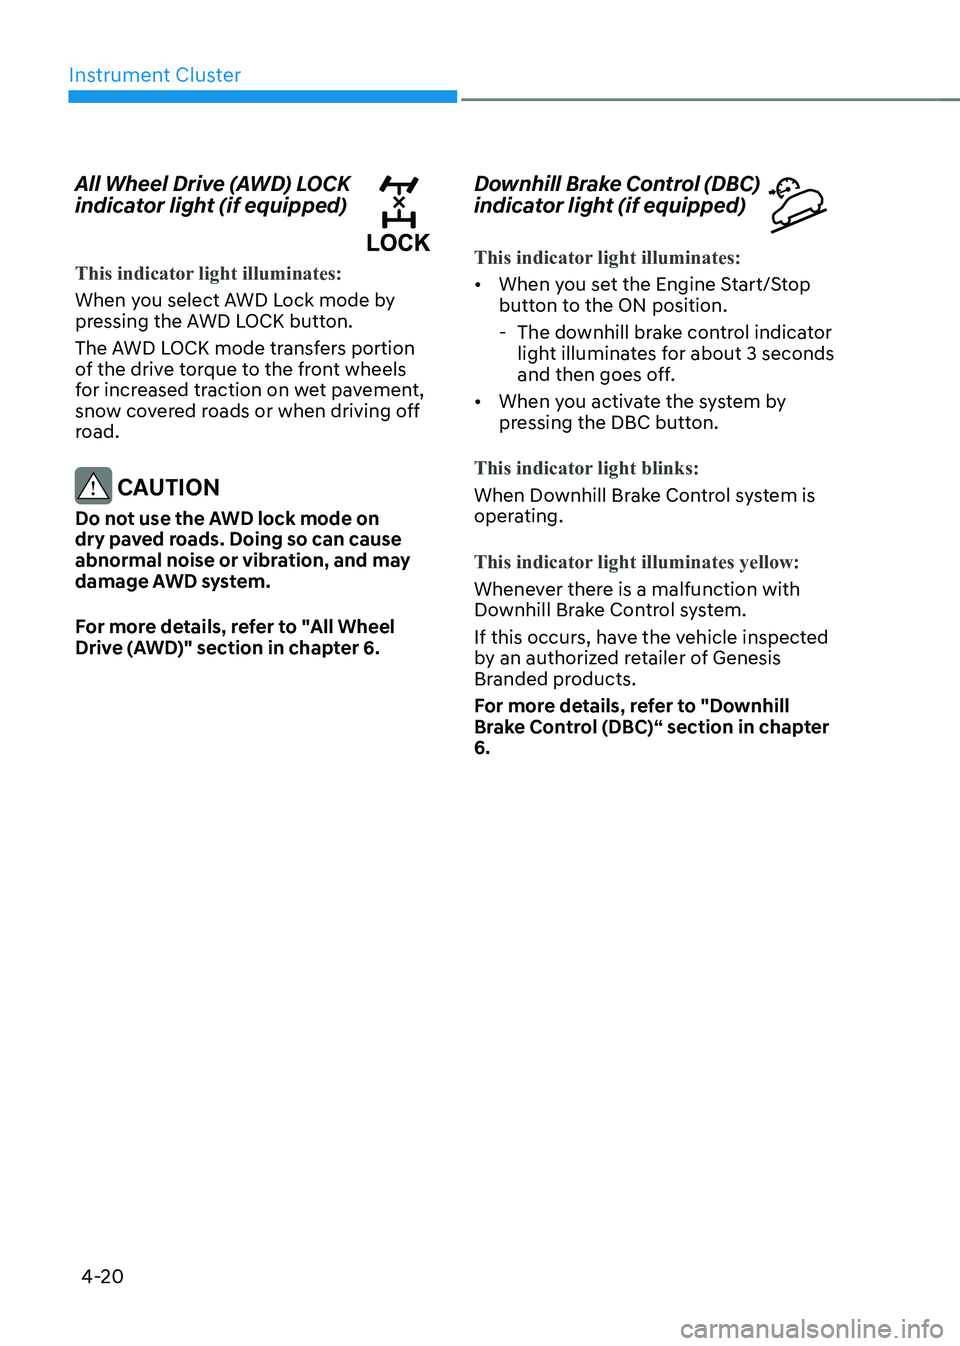
All Wheel Drive (AWD) LOCK
indicator light (if equipped)
This indicator light illuminates:
When you select AWD Lock mode by
pressing the AWD LOCK button.
The AWD LOCK mode transfers portion
of the drive torque to the front wheels
for increased traction on wet pavement,
snow covered roads or when driving off
road.
CAUTION
Do not use the AWD lock mode on
dry paved roads. Doing so can cause
abnormal noise or vibration, and may
damage AWD system.
For more details, refer to "All Wheel
Drive (AWD)" section in chapter 6.
Downhill Brake Control (DBC)
indicator light (if equipped)
This indicator light illuminates:
• When you set the Engine Start/Stop
button to the ON position.
-The downhill brake control indicator
light illuminates for about 3 seconds
and then goes off.
• When you activate the system by
pressing the DBC button.
This indicator light blinks:
When Downhill Brake Control system is
operating.
This indicator light illuminates yellow:
Whenever there is a malfunction with
Downhill Brake Control system.
If this occurs, have the vehicle inspected
by an authorized retailer of Genesis
Branded products.
For more details, refer to "Downhill
Brake Control (DBC)“ section in chapter
6.
Page 126 of 632
04
4-21
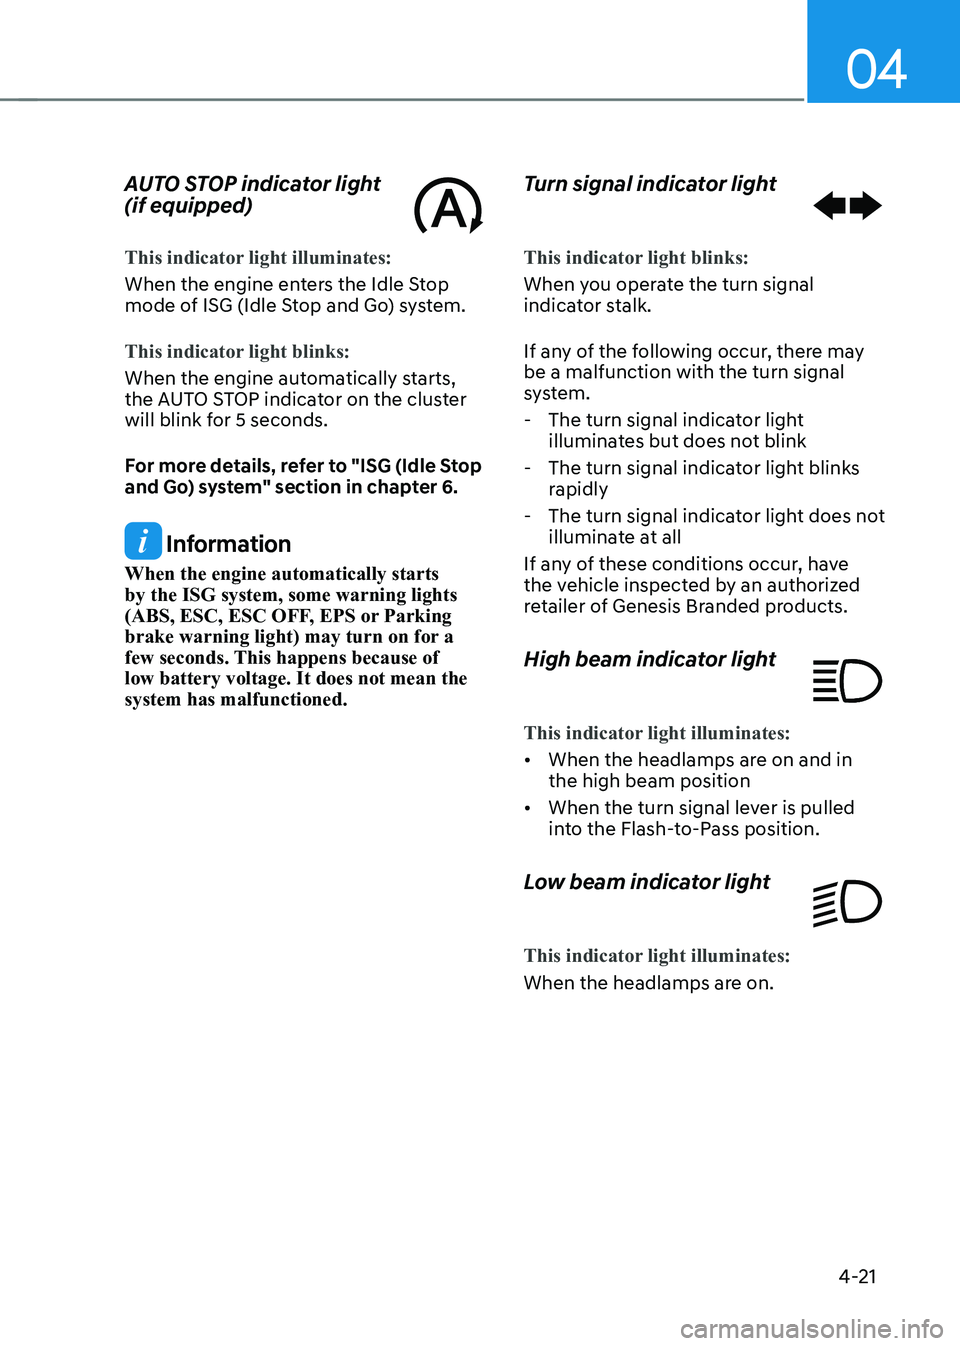
AUTO STOP indicator light
(if equipped)
This indicator light illuminates:
When the engine enters the Idle Stop
mode of ISG (Idle Stop and Go) system.
This indicator light blinks:
When the engine automatically starts,
the AUTO STOP indicator on the cluster
will blink for 5 seconds.
For more details, refer to "ISG (Idle Stop
and Go) system" section in chapter 6.
Information
When the engine automatically starts
by the ISG system, some warning lights
(ABS, ESC, ESC OFF, EPS or Parking
brake warning light) may turn on for a
few seconds. This happens because of
low battery voltage. It does not mean the
system has malfunctioned.
Turn signal indicator light
This indicator light blinks:
When you operate the turn signal
indicator stalk.
If any of the following occur, there may
be a malfunction with the turn signal
system.
-The turn signal indicator light
illuminates but does not blink
-The turn signal indicator light blinks
rapidly
-The turn signal indicator light does not
illuminate at all
If any of these conditions occur, have
the vehicle inspected by an authorized
retailer of Genesis Branded products.
High beam indicator light
This indicator light illuminates:
• When the headlamps are on and in
the high beam position
• When the turn signal lever is pulled
into the Flash-to-Pass position.
Low beam indicator light
This indicator light illuminates:
When the headlamps are on.
Page 132 of 632
04
4-27
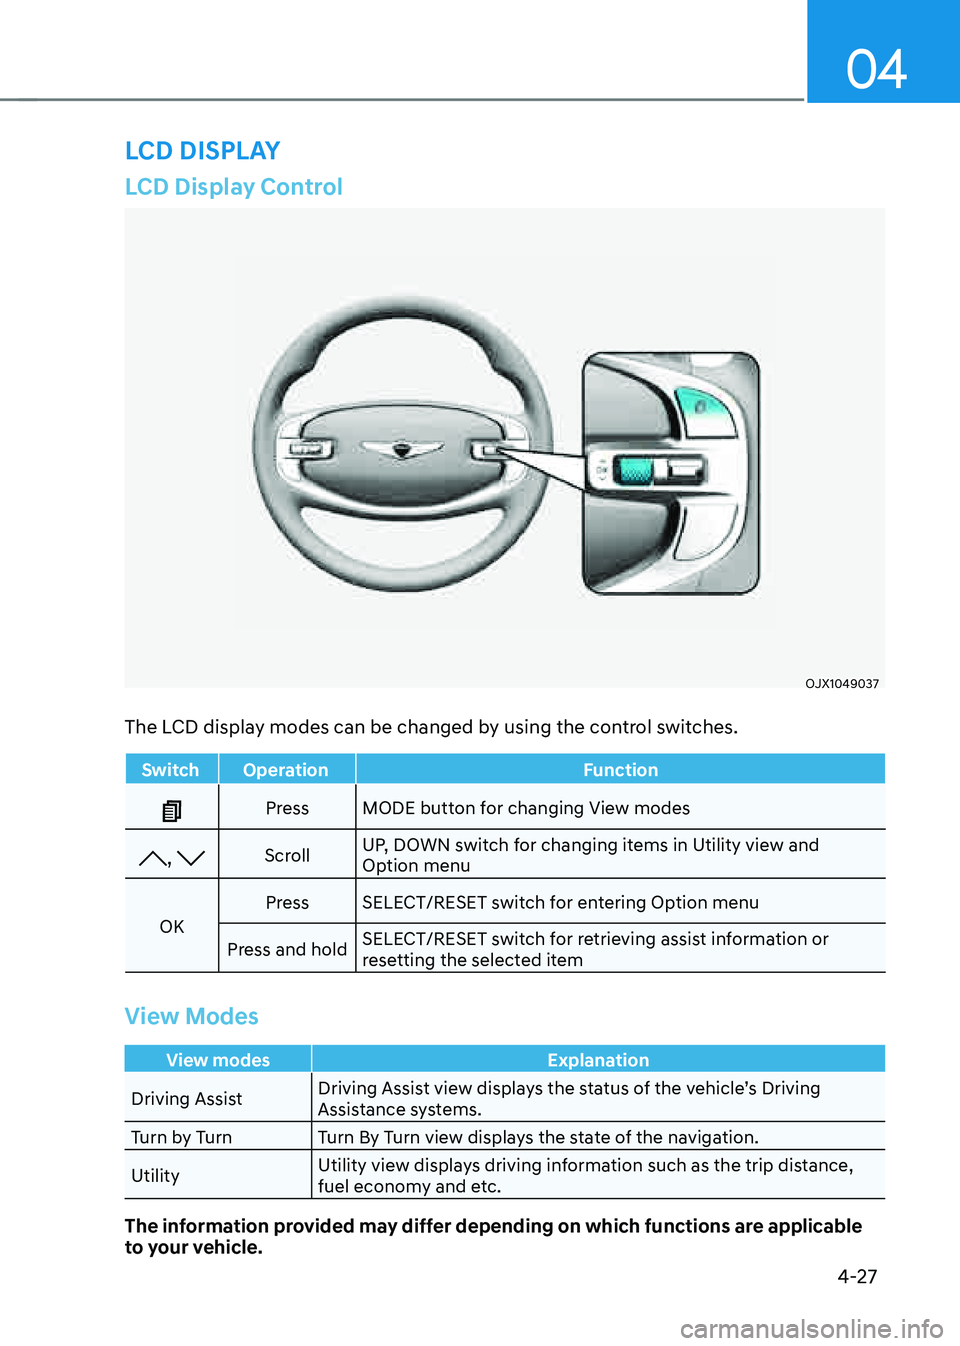
LCD Display Control
OJX1049037OJX1049037
The LCD display modes can be changed by using the control switches.
SwitchOperation Function
PressMODE button for changing View modes
, Scroll UP, DOWN switch for changing items in Utility view and
Option menu
OK Press
SELECT/RESET switch for entering Option menu
Press and hold SELECT/RESET switch for retrieving assist information or
resetting the selected item
View Modes
View modes
Explanation
Driving Assist Driving Assist view displays the status of the vehicle’s Driving
Assistance systems.
Turn by Turn Turn By Turn view displays the state of the navigation.
Utility Utility view displays driving information such as the trip distance,
fuel economy and etc.
The information provided may differ depending on which functions are applicable
to your vehicle.
LCD DISPLAY
Page 133 of 632
Instrument Cluster
4-28
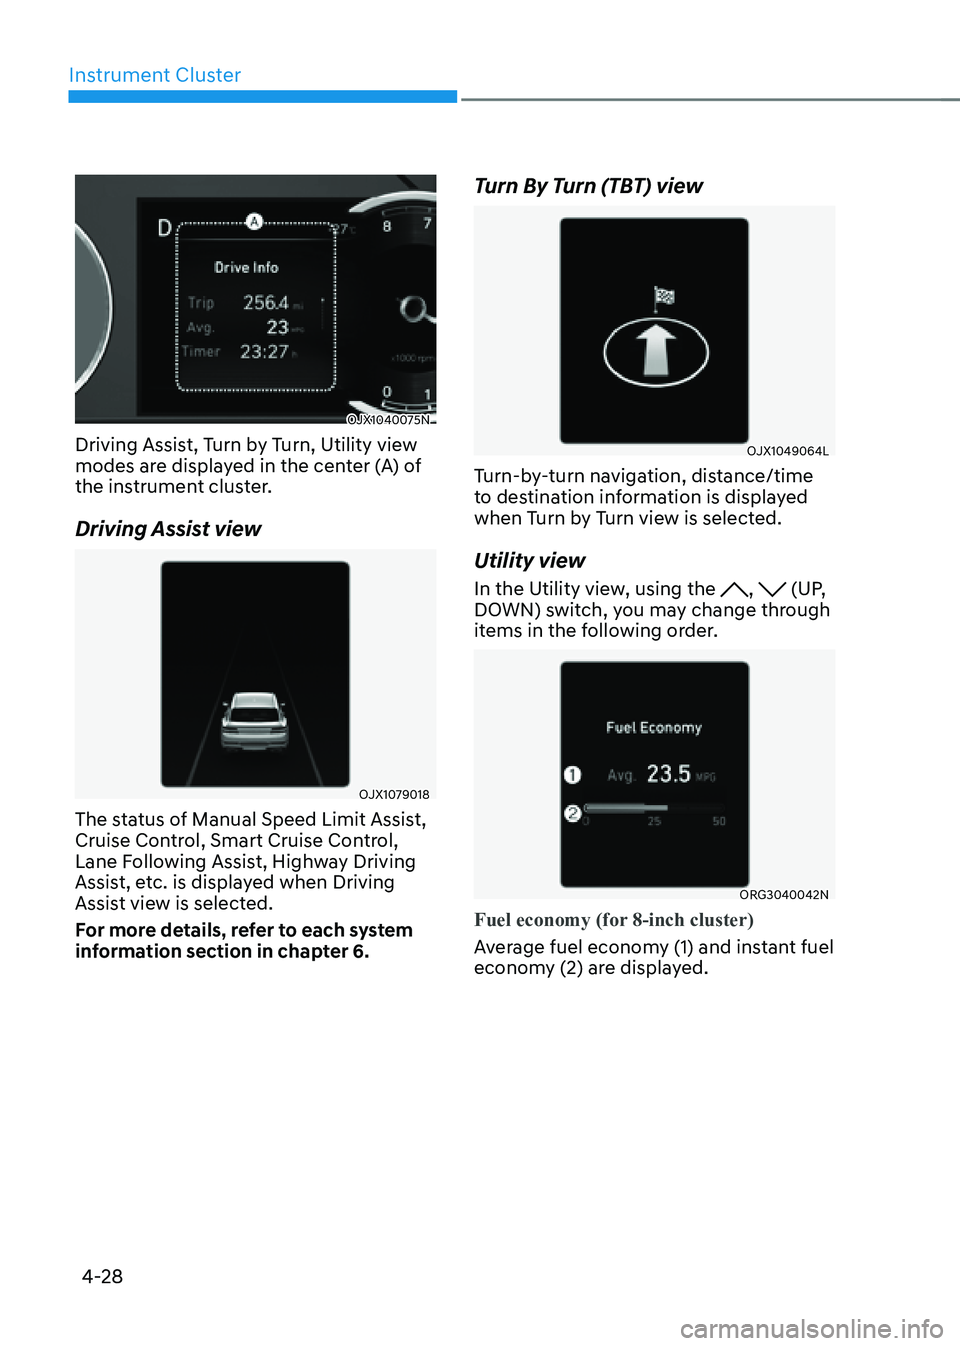
OJX1040075NOJX1040075N
Driving Assist, Turn by Turn, Utility view
modes are displayed in the center (A) of
the instrument cluster.
Driving Assist view
OJX1079018OJX1079018
The status of Manual Speed Limit Assist,
Cruise Control, Smart Cruise Control,
Lane Following Assist, Highway Driving
Assist, etc. is displayed when Driving
Assist view is selected.
For more details, refer to each system
information section in chapter 6.
Turn By Turn (TBT) view
OJX1049064LOJX1049064L
Turn-by-turn navigation, distance/time
to destination information is displayed
when Turn by Turn view is selected.
Utility view
In the Utility view, using the , (UP,
DOWN) switch, you may change through
items in the following order.
ORG3040042NORG3040042N
Fuel economy (for 8-inch cluster)
Average fuel economy (1) and instant fuel
economy (2) are displayed.