Time reset GENESIS GV80 2021 Owner's Manual
[x] Cancel search | Manufacturer: GENESIS, Model Year: 2021, Model line: GV80, Model: GENESIS GV80 2021Pages: 632, PDF Size: 9.37 MB
Page 134 of 632
04
4-29
• Manual reset
To clear the average fuel economy
manually, press the OK switch on the
steering wheel for more than 1 second
when the Average Fuel Economy is
displayed.
• Automatic reset
To automatically reset the average
fuel economy, select between ‘After
Ignition’ or ‘After Refueling’ from the
Settings menu in the infotainment
system.
-After Ignition: When the engine has
been OFF for 4 hours or longer the
average fuel economy will reset
automatically.
-After Refueling: The average fuel
economy will reset automatically
after adding 2.4 gallons (9 liters) of
fuel or more and after driving speed
exceeds 1 mph (1 km/h).
à For 12.3-inch 3D instrument cluster,
you can check the fuel economy in
the center bottom of the cluster.
OJX1040076NOJX1040076N
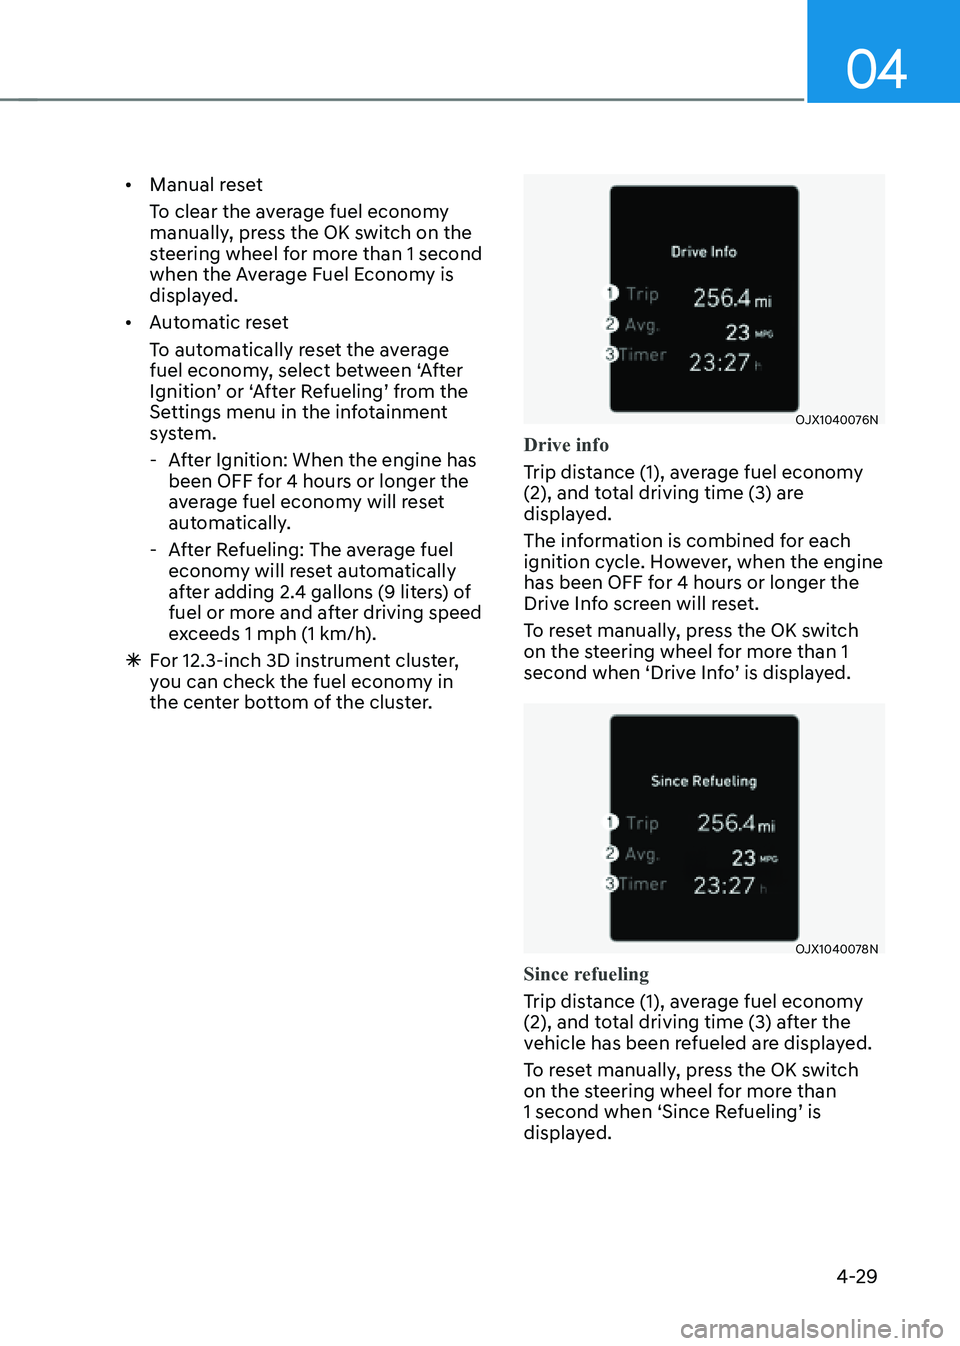
Drive info
Trip distance (1), average fuel economy
(2), and total driving time (3) are
displayed.
The information is combined for each
ignition cycle. However, when the engine
has been OFF for 4 hours or longer the
Drive Info screen will reset.
To reset manually, press the OK switch
on the steering wheel for more than 1
second when ‘Drive Info’ is displayed.
OJX1040078NOJX1040078N
Since refueling
Trip distance (1), average fuel economy
(2), and total driving time (3) after the
vehicle has been refueled are displayed.
To reset manually, press the OK switch
on the steering wheel for more than
1 second when ‘Since Refueling’ is
displayed.
Page 135 of 632
Instrument Cluster
4-30
OJX1040077NOJX1040077N
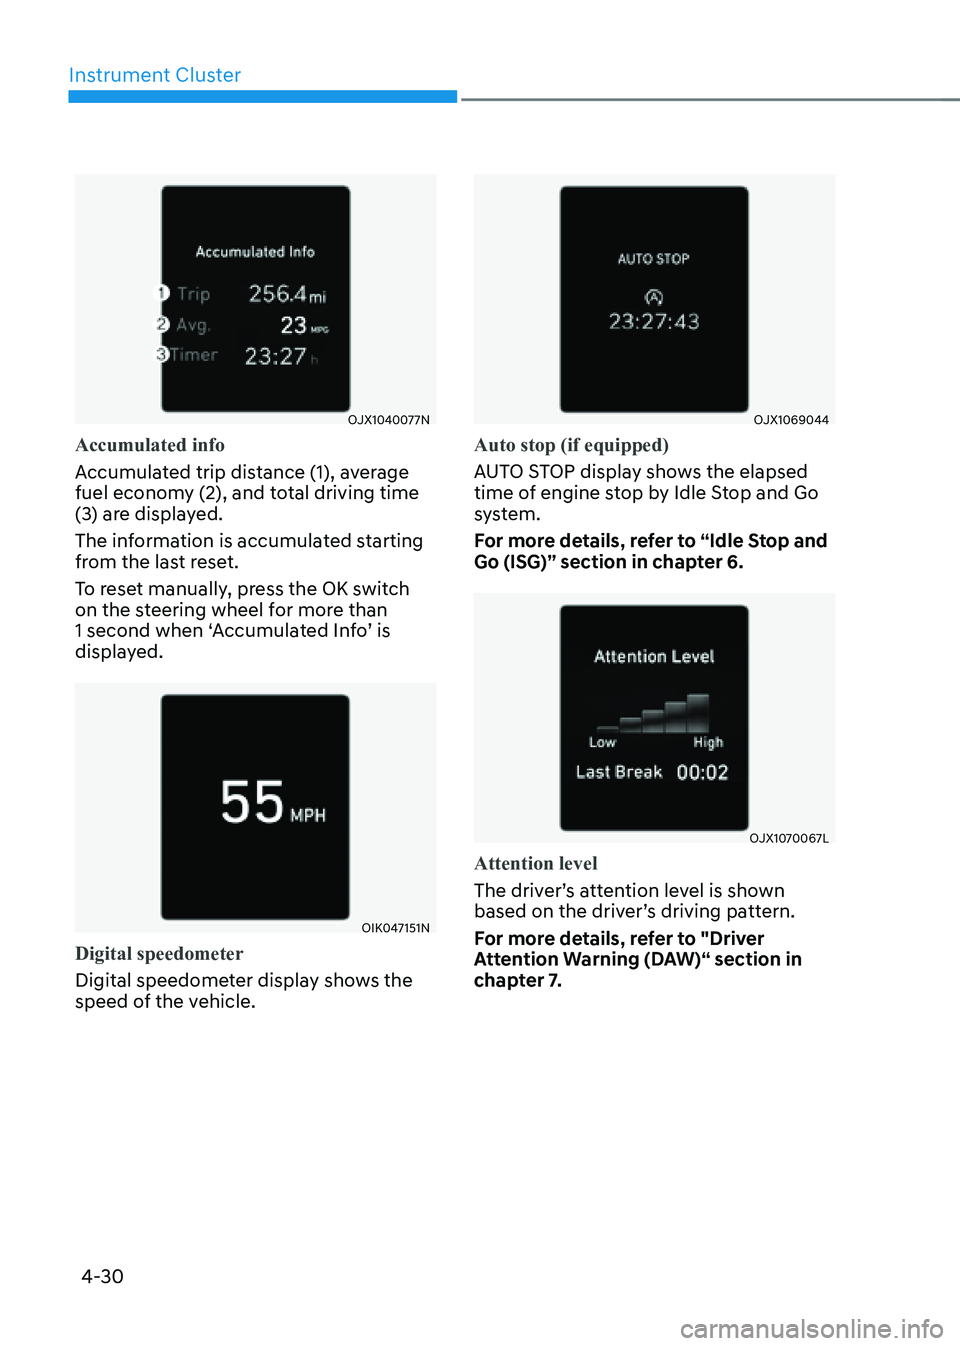
Accumulated info
Accumulated trip distance (1), average
fuel economy (2), and total driving time
(3) are displayed.
The information is accumulated starting
from the last reset.
To reset manually, press the OK switch
on the steering wheel for more than
1 second when ‘Accumulated Info’ is
displayed.
OIK047151NOIK047151N
Digital speedometer
Digital speedometer display shows the
speed of the vehicle.
OJX1069044OJX1069044
Auto stop (if equipped)
AUTO STOP display shows the elapsed
time of engine stop by Idle Stop and Go
system.
For more details, refer to “Idle Stop and
Go (ISG)” section in chapter 6.
OJX1070067LOJX1070067L
Attention level
The driver’s attention level is shown
based on the driver’s driving pattern.
For more details, refer to "Driver
Attention Warning (DAW)“ section in
chapter 7.
Page 166 of 632
Convenient Features
5-24
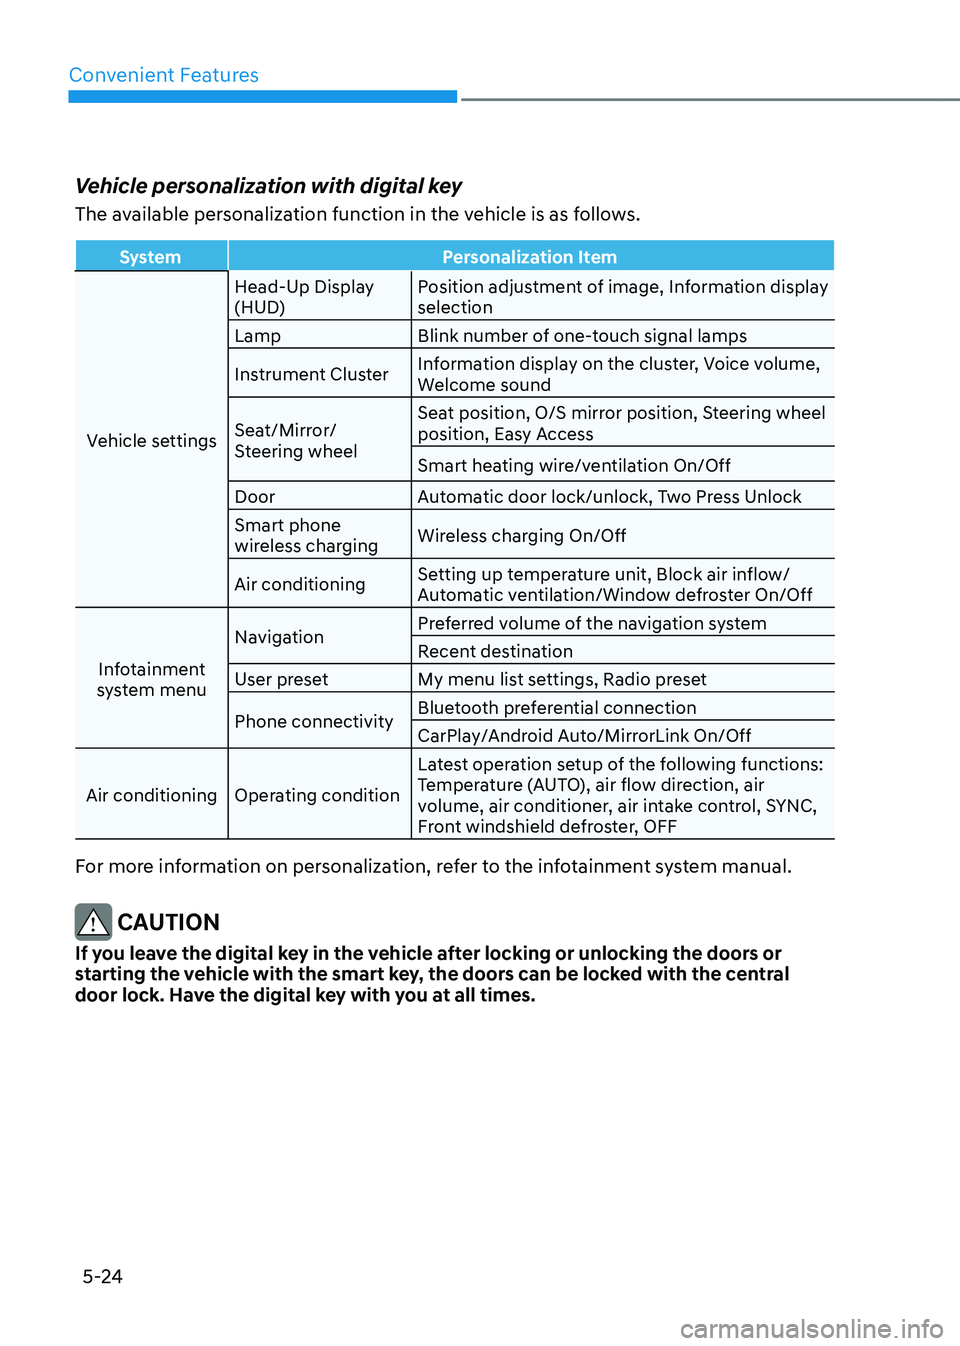
Vehicle personalization with digital key
The available personalization function in the vehicle is as follows.
SystemPersonalization Item
Vehicle settings Head-Up Display
(HUD)
Position adjustment of image, Information display
selection
Lamp Blink number of one-touch signal lamps
Instrument Cluster Information display on the cluster, Voice volume,
Welcome sound
Seat/Mirror/
Steering wheel Seat position, O/S mirror position, Steering wheel
position, Easy Access
Smart heating wire/ventilation On/Off
Door Automatic door lock/unlock, Two Press Unlock
Smart phone
wireless charging Wireless charging On/Off
Air conditioning Setting up temperature unit, Block air inflow/
Automatic ventilation/Window defroster On/Off
Infotainment
system menu Navigation
Preferred volume of the navigation system
Recent destination
User preset My menu list settings, Radio preset
Phone connectivity Bluetooth preferential connection
CarPlay/Android Auto/MirrorLink On/Off
Air conditioning Operating condition Latest operation setup of the following functions:
Temperature (AUTO), air flow direction, air
volume, air conditioner, air intake control, SYNC,
Front windshield defroster, OFF
For more information on personalization, refer to the infotainment system manual.
CAUTION
If you leave the digital key in the vehicle after locking or unlocking the doors or
starting the vehicle with the smart key, the doors can be locked with the central
door lock. Have the digital key with you at all times.
Page 169 of 632
05
5-27
Information
• In cold and wet climates, door lock
and door mechanisms may not work
properly due to freezing conditions.
• If the door is locked/unlocked multiple
times in rapid succession with either
the vehicle key or door lock switch, the
system may stop operating temporarily
in order to protect the circuit and
prevent damage to system components.
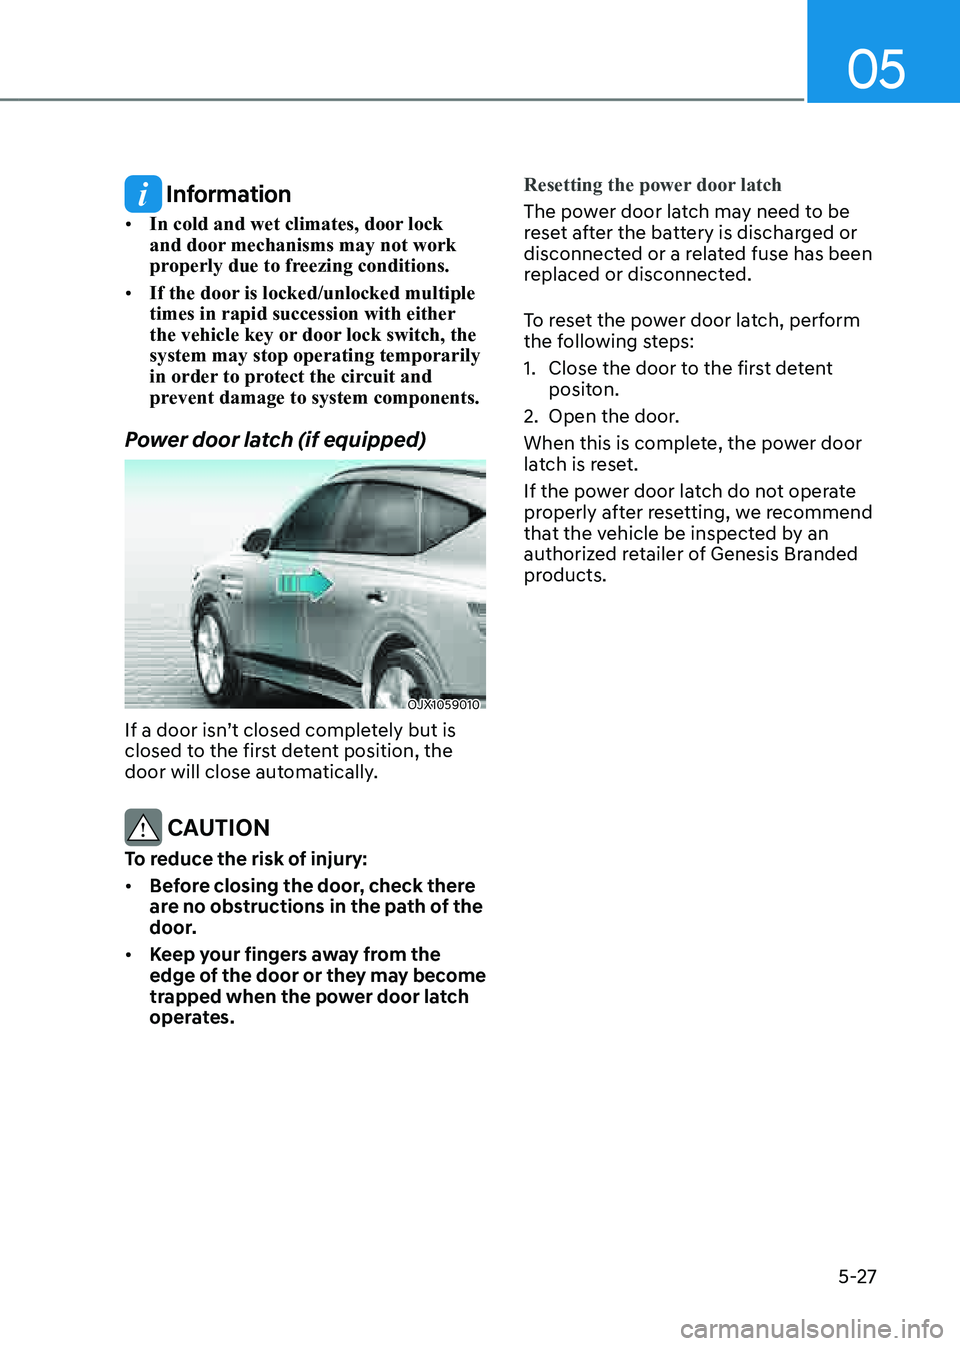
Power door latch (if equipped)
OJX1059010OJX1059010
If a door isn’t closed completely but is
closed to the first detent position, the
door will close automatically.
CAUTION
To reduce the risk of injury:
• Before closing the door, check there
are no obstructions in the path of the
door.
• Keep your fingers away from the
edge of the door or they may become
trapped when the power door latch
operates.Resetting the power door latch
The power door latch may need to be
reset after the battery is discharged or
disconnected or a related fuse has been
replaced or disconnected.
To reset the power door latch, perform
the following steps:
1. Close the door to the first detent
positon.
2. Open the door.
When this is complete, the power door
latch is reset.
If the power door latch do not operate
properly after resetting, we recommend
that the vehicle be inspected by an
authorized retailer of Genesis Branded
products.
Page 194 of 632
Convenient Features
5-52
Reverse parking aid user settings
mode
You may change the angle of the side
view mirror if it is difficult to see the rear
view with the basic downward mirror
angle provided when reversing.
When the vehicle is first delivered, the
set downward angle of the left and right
side view mirror are different to ensure
driver visibility.
1. Make sure the vehicle is stopped.
2. Depress the brake pedal and shift
the gear to R (Reverse). When L (Left)
or R (Right) button is pressed, both
side view mirror angle will move
downward to the basic set position.
3. Press either L or R button to select
the side view mirror you would like
to adjust. Then press “▼, ▲, ◄, ►”
switch to adjust the side view mirror
to the desired angle.
4. After adjusting the angle to save the
adjusted side view mirror angle, shift
the gear to another position other
than R (Reverse), or change the L and
R buttons to the neutral position (L
and R buttons are not pressed).
5. Set the other side view mirror
following the above procedure 1 to 4.
Resetting reverse parking aid user settings
mode
To change the side view mirror angle
back to the basic angle, shift the gear to
R (Reverse), and adjust the mirror angle
higher than when the gear is in P (Park),
N (Neutral) and D (Drive).
NOTICE
When changing the angle of both side
view mirrors, it is recommended to
change the angle one side at a time
following the procedure 1 to 4.
Page 209 of 632
05
5-67
Non-operating conditions of the
power liftgate
• The power liftgate does not open
when the vehicle is in motion.
The chime will sound if you drive with
the liftgate opened. Stop your vehicle
immediately at a safe place and check
if your liftgate is opened.
• Operating the power liftgate more
than 5 times continuously could
cause damage to the operating motor.
If this occurs, the power liftgate
system enters into thermal protection
mode to prevent the motor from
overheating. In thermal protection
mode, the power liftgate will not
operate. If any of the power liftgate
buttons are pressed to try to open the
liftgate, the chime will sound 3 times
but the liftgate will remain closed.
Allow the power liftgate system
to cool for about 1 minute before
operating the system again.
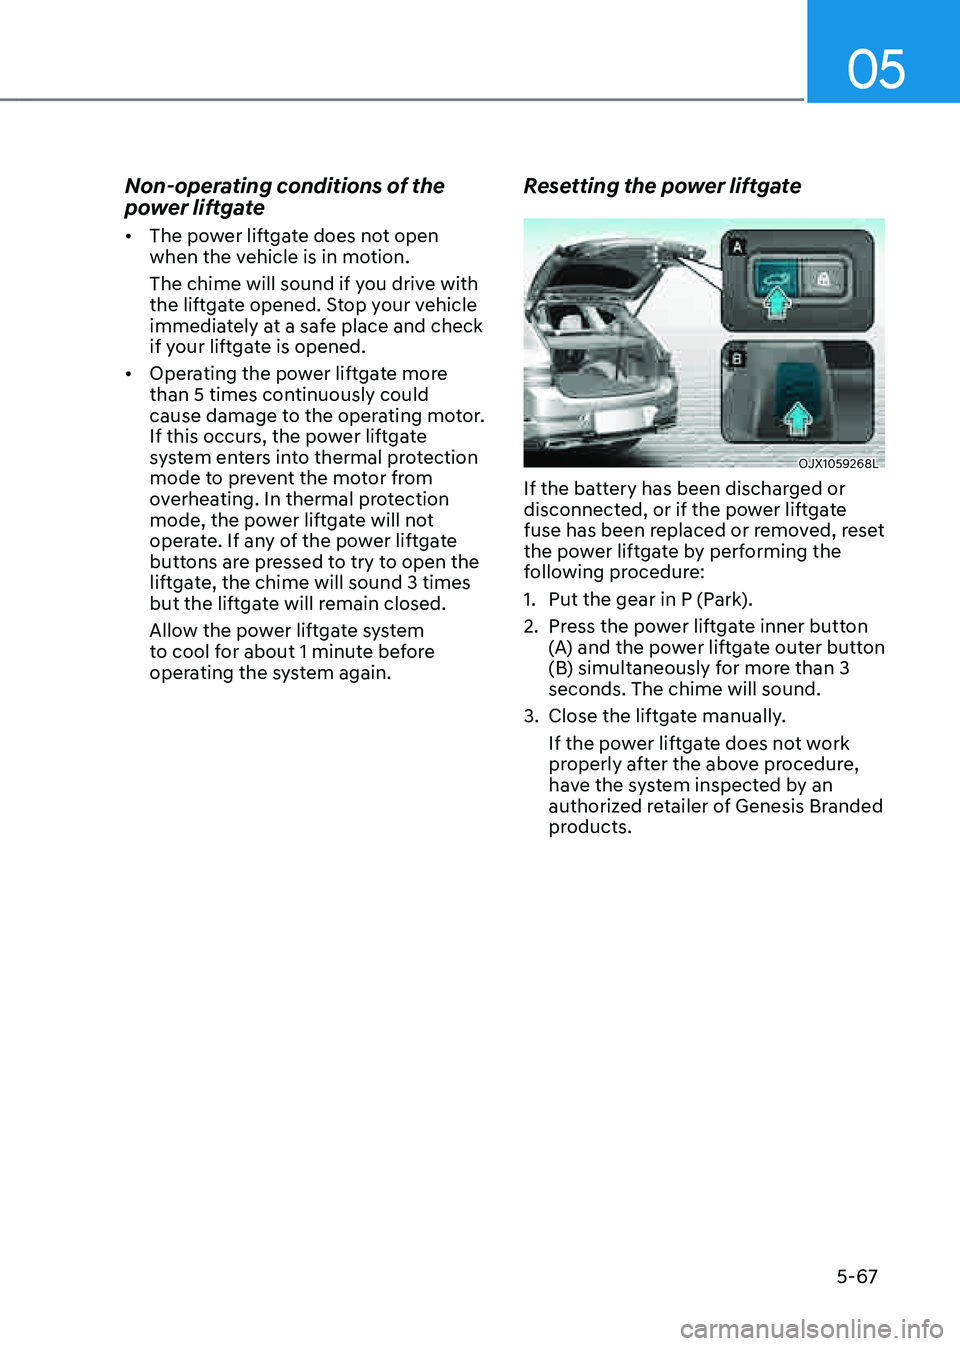
Resetting the power liftgate
OJX1059268LOJX1059268L
If the battery has been discharged or
disconnected, or if the power liftgate
fuse has been replaced or removed, reset
the power liftgate by performing the
following procedure:
1. Put the gear in P (Park).
2. Press the power liftgate inner button
(A) and the power liftgate outer button
(B) simultaneously for more than 3
seconds. The chime will sound.
3. Close the liftgate manually.
If the power liftgate does not work
properly after the above procedure,
have the system inspected by an
authorized retailer of Genesis Branded
products.
Page 249 of 632

05
5-107
To Defrost Outside Windshield
OJX1050179NOJX1050179N
1. Set the fan speed to the highest
(extreme right) position.
2. Set the temperature to the extreme
hot (HI) position.
3. Press the defroster button ().
4. Fresh mode will be selected
automatically.
Check to make sure the air intake control
is in Fresh mode. If the air intake control
indicator light is illuminated, press the
button once to enable Fresh mode
(indicator light OFF).
If the
position is selected, lower fan speed is adjusted to a higher fan speed.
Defogging Logic
To reduce the probability of fogging
up the inside of the windshield, the air
intake or air conditioning are controlled
automatically according to certain
conditions such as
positions. To cancel or reset the defogging logic, do
the following.
1. Press the Engine Start/Stop button to
the ON position.
2. Press the defroster button () or
().
3. While pressing the air conditioning
button (A/C), press the air intake
control button at least 5 times within
3 seconds.
The air intake control button indicator
will blink 3 times to indicate that the
defogging logic has been disabled.
Repeat the steps again to re-enable the
defogging logic.
If the battery has been discharged or
disconnected, it resets to the defog logic
status.
Page 407 of 632
07
7-59
• The driver’s attention level is displayed
on the scale of 1 to 5. The lower the
level is, the more inattentive the driver
is.
• The level decreases when the driver
does not take a break for a certain
period of time.
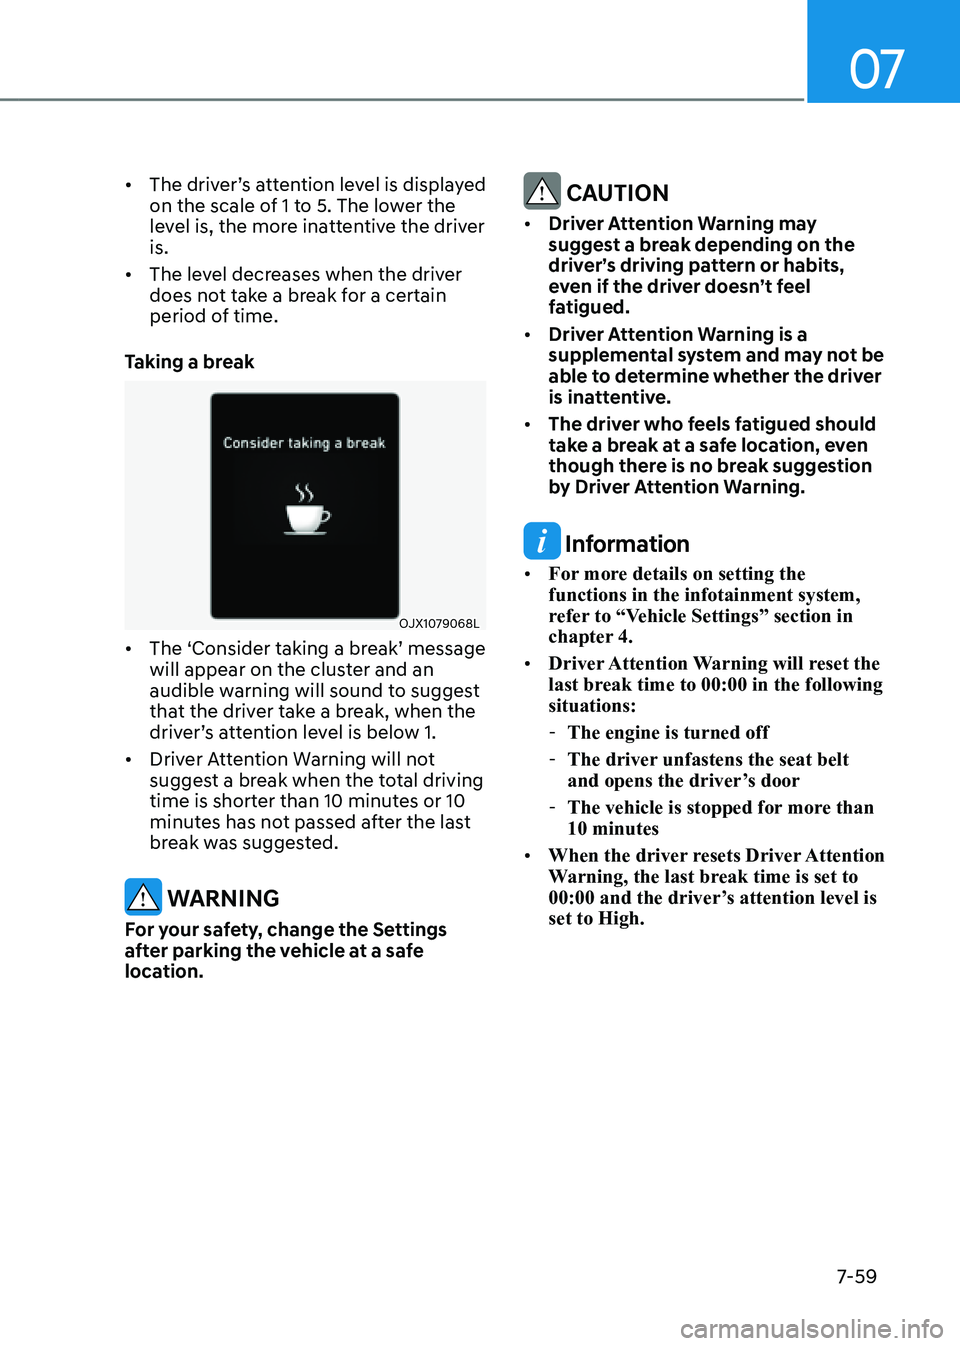
Taking a break
OJX1079068LOJX1079068L
• The ‘Consider taking a break’ message
will appear on the cluster and an
audible warning will sound to suggest
that the driver take a break, when the
driver’s attention level is below 1.
• Driver Attention Warning will not
suggest a break when the total driving
time is shorter than 10 minutes or 10
minutes has not passed after the last
break was suggested.
WARNING
For your safety, change the Settings
after parking the vehicle at a safe
location.
CAUTION
• Driver Attention Warning may
suggest a break depending on the
driver’s driving pattern or habits,
even if the driver doesn’t feel
fatigued.
• Driver Attention Warning is a
supplemental system and may not be
able to determine whether the driver
is inattentive.
• The driver who feels fatigued should
take a break at a safe location, even
though there is no break suggestion
by Driver Attention Warning.
Information
• For more details on setting the
functions in the infotainment system,
refer to “Vehicle Settings” section in
chapter 4.
• Driver Attention Warning will reset the
last break time to 00:00 in the following
situations:
- The engine is turned off
-The driver unfastens the seat belt
and opens the driver’s door
-The vehicle is stopped for more than
10 minutes
• When the driver resets Driver Attention
Warning, the last break time is set to
00:00 and the driver’s attention level is
set to High.
Page 439 of 632
07
7-91
Limitations of the System
Navigation-based Smart Cruise Control
may not operate normally under the
following circumstances:
• The navigation is not working properly
• Speed limit and road information in
the navigation is not updated
• The map information and the actual
road is different because of real-time
GPS data or map information error
• The infotainment system is overloaded
by simultaneously performing
functions such as route search, video
playback, voice recognition, etc.
• The navigation searches for a route
while driving
• GPS signals are blocked in areas such
as a tunnel
• The navigation is updated while
driving
• Map information is not transmitted
due to infotainment system's
abnormal operation
• A road that divides into two or more
roads and joins again
• The driver goes off course the route
set in the navigation
• The route to the destination is
changed or canceled by resetting the
navigation
• The vehicle enters a service station or
rest area
• The speed limit of some sections
changes according to the road
situations
• Android Auto or Car Play is operating
• The navigation is being updated while
driving
• The navigation is being restarted while
driving
• There is bad weather, such as heavy
rain, heavy snow, etc.
• Driving on a road under construction
• Driving on a road that is controlled
• Driving on a road that is sharply
curved
• Driving on roads with intersections,
roundabouts, straight entrances and
exits, etc.
Page 457 of 632
07
7-109
Limitations of the system
Highway Driving Assist and Highway
Lane Change function may not operate
normally, or may not operate under the
following circumstances:
• The map information and the
actual road is different because the
navigation is not updated
• The map information and the actual
road is different because of real-time
GPS data or map information error
• The infotainment system is overloaded
by simultaneously performing
functions such as route search, video
playback, voice recognition, etc.
• GPS signals are blocked in areas such
as a tunnel
• The driver goes off course or the
route to the destination is changed or
canceled by resetting the navigation
• The vehicle enters a service station or
rest area
• Android Auto or Car Play is operating
• The navigation cannot detect the
current vehicle position (ex: elevated
roads including overpass adjacent to
general roads or nearby roads exist in
a parallel way)
• White single dotted lane line or road
edge cannot be detected
• The road is temporarily controlled due
to construction, etc.
• There is no structure, such as a
medium strip, guardrails, etc., on the
road
• There is a changeable lane in the
direction of lane change
For more details on the limitations of
the front view camera, front radar, front
corner radar and rear corner radar, refer
to “Forward Collision-Avoidance Assist
(FCA)” section in chapter 7.
Information
This device complies with Part 15 of the
FCC rules.
Operation is subject to the following three
conditions:
1. This device may not cause harmful
interference, and
2. This device must accept any
interference received, including
interference that may cause undesired
operation.
3. Changes or modifications not expressly
approved by the party responsible
for compliance could void the user's
authority to operate the device.
Information
Radio frequency radiation exposure
information:
This equipment complies with FCC
radiation exposure limits set forth for an
uncontrolled environment.
This equipment should be installed and
operated with minimum distance of 8 in.
(20 cm) between the radiator (antenna)
and your body.
This transmitter must not be co-located or
operating in conjunction with any other
antenna or transmitter.