brake rotor GENESIS GV80 2021 Owner's Manual
[x] Cancel search | Manufacturer: GENESIS, Model Year: 2021, Model line: GV80, Model: GENESIS GV80 2021Pages: 632, PDF Size: 9.37 MB
Page 296 of 632

Driving Your Vehicle
6-24
Releasing the parking brake
OJX1069029OJX1069029
To release EPB (Electronic Parking
Brake):
1. Press the Engine Start/Stop button to
the ON or START position.
2. Press the EPB switch while depressing
the brake pedal.
Make sure the Parking Brake warning
light goes off.
To release EPB (Electronic Parking Brake)
automatically:
• Gear in P (Park)
With the engine running depress the
brake pedal and shift out of P (Park) to
R (Reverse) or D (Drive).
• Gear in N (Neutral)
With the engine running depress
the brake pedal and shift out of N
(Neutral) to R (Reverse) or D (Drive).
• Satisfy the following conditions
1. Ensure seat belts are fastened and
the doors, hood and liftgate are
closed.
2. With the engine running, depress
the brake pedal and shift out of P
(Park) to R (Reverse), D (Drive) or
Manual shift mode.
3. Depress the accelerator pedal.
Make sure the Parking Brake
warning light goes off.
Information
• For your safety, you can engage EPB
even though the Engine Stop/Start
button is in the OFF position (only if
battery power is available), but you
cannot release it.
• For your safety, depress the brake
pedal and release the parking brake
manually with the EPB switch when
you drive downhill or when backing up
the vehicle.
NOTICE
• If the Parking Brake warning light is
still on even though the EPB has been
released, have the system checked
by an authorized retailer of Genesis
Branded products.
• Do not drive your vehicle with EPB
applied. It may cause excessive brake
pad and brake rotor wear.
Page 552 of 632

09
9-11
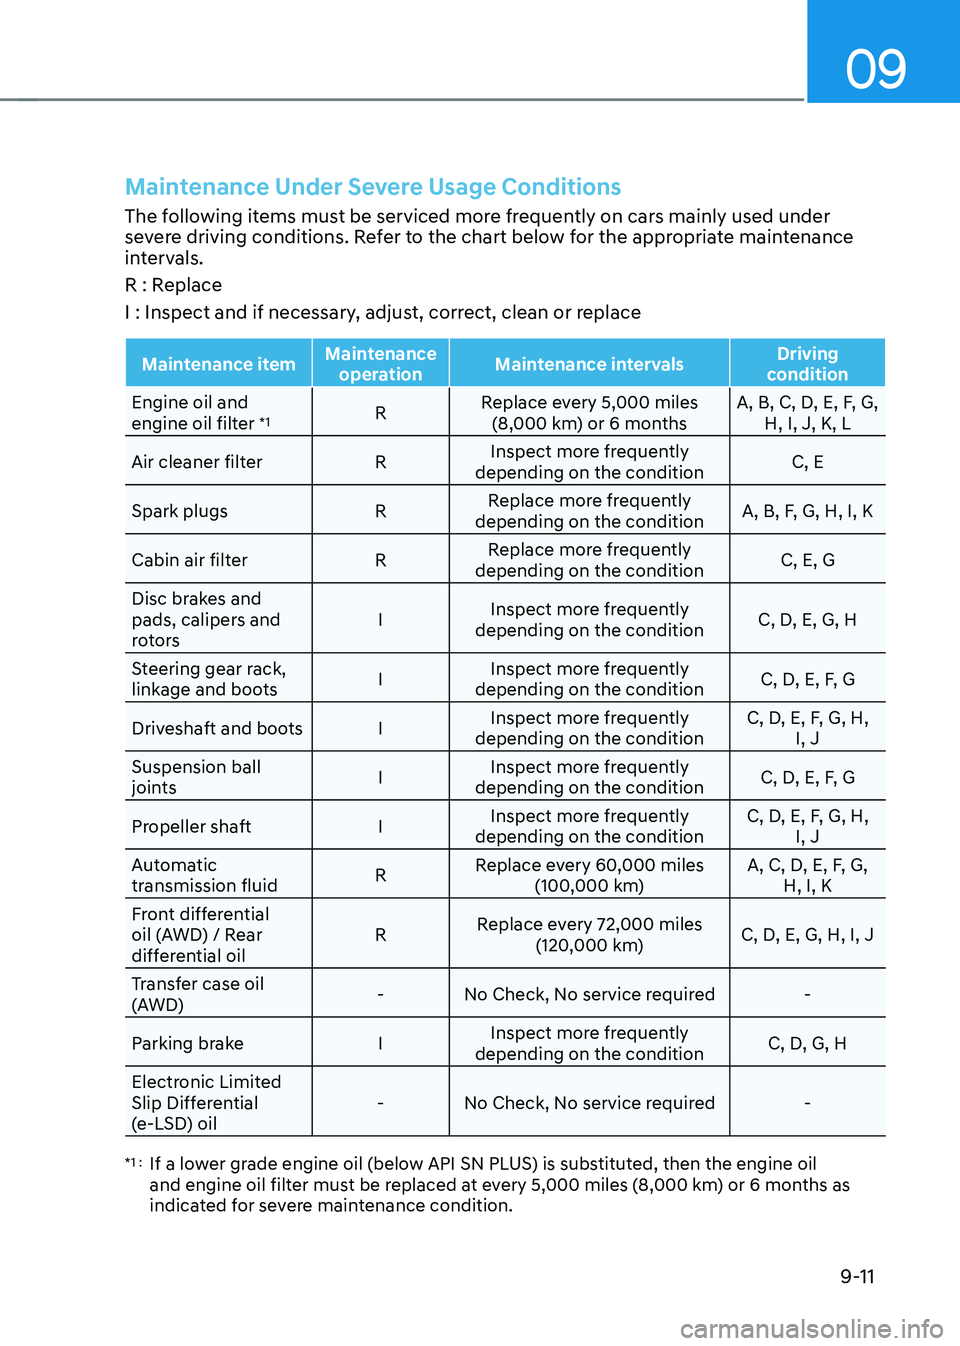
Maintenance Under Severe Usage Conditions
The following items must be serviced more frequently on cars mainly used under
severe driving conditions. Refer to the chart below for the appropriate maintenance
intervals.
R : Replace
I : Inspect and if necessary, adjust, correct, clean or replace
Maintenance itemMaintenance
operation Maintenance intervals Driving
condition
Engine oil and
engine oil filter
*1R Replace every 5,000 miles
(8,000 km) or 6 months A, B, C, D, E, F, G,
H, I, J, K, L
Air cleaner filter RInspect more frequently
depending on the condition C, E
Spark plugs RReplace more frequently
depending on the condition A, B, F, G, H, I, K
Cabin air filter RReplace more frequently
depending on the condition C, E, G
Disc brakes and
pads, calipers and
rotors I
Inspect more frequently
depending on the condition C, D, E, G, H
Steering gear rack,
linkage and boots IInspect more frequently
depending on the condition C, D, E, F, G
Driveshaft and boots IInspect more frequently
depending on the condition C, D, E, F, G, H,
I, J
Suspension ball
joints IInspect more frequently
depending on the condition C, D, E, F, G
Propeller shaft IInspect more frequently
depending on the condition C, D, E, F, G, H,
I, J
Automatic
transmission fluid RReplace every 60,000 miles
(100,000 km) A, C, D, E, F, G,
H, I, K
Front differential
oil (AWD) / Rear
differential oil R
Replace every 72,000 miles
(120,000 km) C, D, E, G, H, I, J
Transfer case oil
(AWD) -
No Check, No service required -
Parking brake IInspect more frequently
depending on the condition C, D, G, H
Electronic Limited
Slip Differential
(e-LSD) oil -
No Check, No service required -
*1 : If a lower grade engine oil (below API SN PLUS) is substituted, then the engine oil
and engine oil filter must be replaced at every 5,000 miles (8,000 km) or 6 months as
indicated for severe maintenance condition.
Page 555 of 632

Maintenance
9-14
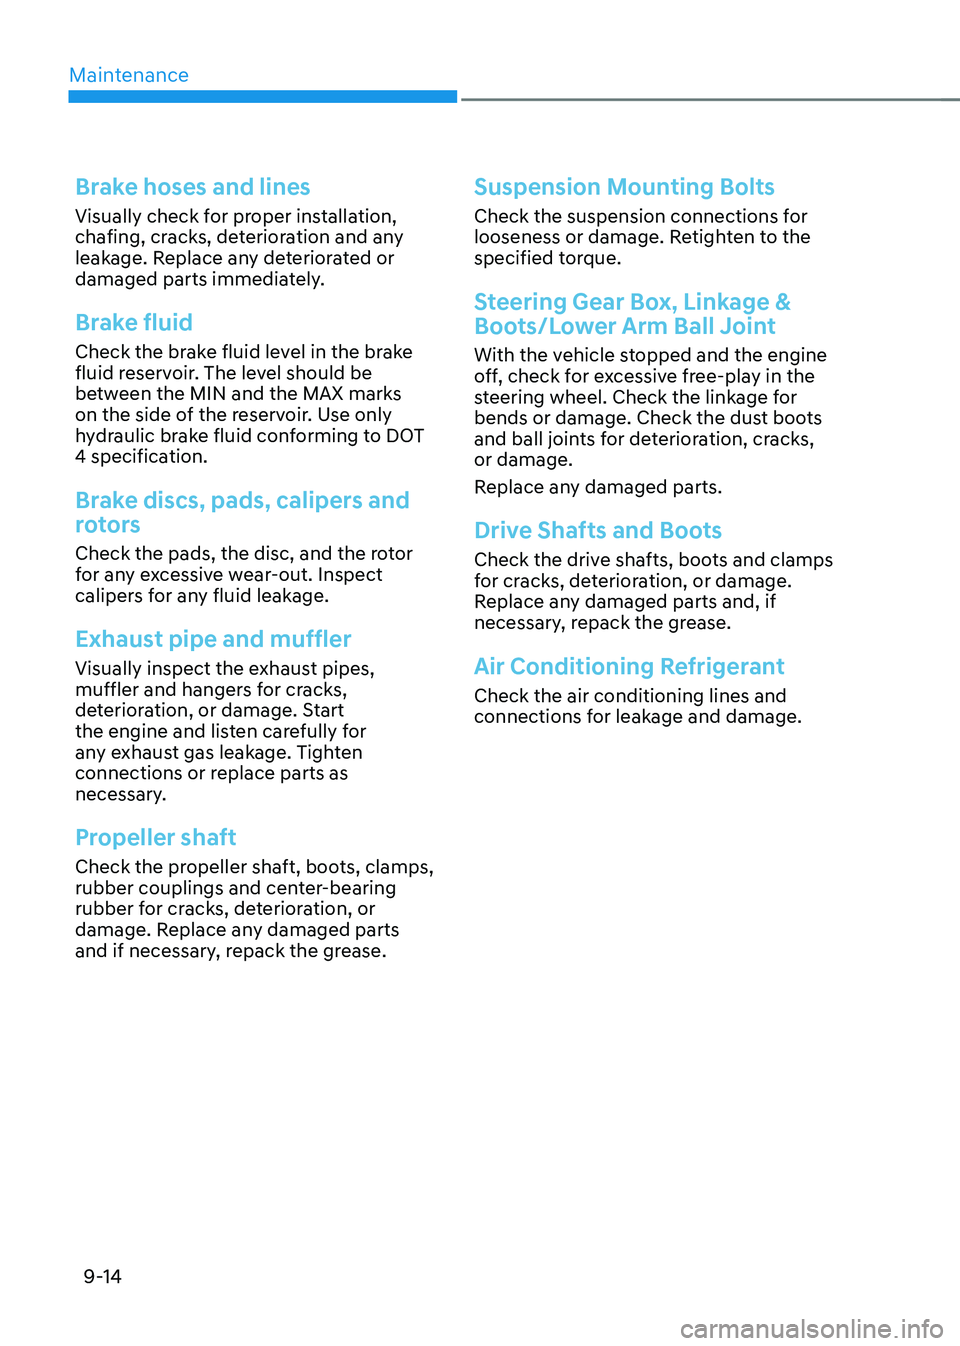
Brake hoses and lines
Visually check for proper installation,
chafing, cracks, deterioration and any
leakage. Replace any deteriorated or
damaged parts immediately.
Brake fluid
Check the brake fluid level in the brake
fluid reservoir. The level should be
between the MIN and the MAX marks
on the side of the reservoir. Use only
hydraulic brake fluid conforming to DOT
4 specification.
Brake discs, pads, calipers and
rotors
Check the pads, the disc, and the rotor
for any excessive wear-out. Inspect
calipers for any fluid leakage.
Exhaust pipe and muffler
Visually inspect the exhaust pipes,
muffler and hangers for cracks,
deterioration, or damage. Start
the engine and listen carefully for
any exhaust gas leakage. Tighten
connections or replace parts as
necessary.
Propeller shaft
Check the propeller shaft, boots, clamps,
rubber couplings and center-bearing
rubber for cracks, deterioration, or
damage. Replace any damaged parts
and if necessary, repack the grease.
Suspension Mounting Bolts
Check the suspension connections for
looseness or damage. Retighten to the
specified torque.
Steering Gear Box, Linkage &
Boots/Lower Arm Ball Joint
With the vehicle stopped and the engine
off, check for excessive free-play in the
steering wheel. Check the linkage for
bends or damage. Check the dust boots
and ball joints for deterioration, cracks,
or damage.
Replace any damaged parts.
Drive Shafts and Boots
Check the drive shafts, boots and clamps
for cracks, deterioration, or damage.
Replace any damaged parts and, if
necessary, repack the grease.
Air Conditioning Refrigerant
Check the air conditioning lines and
connections for leakage and damage.