key GMC ACADIA 2010 Owner's Guide
[x] Cancel search | Manufacturer: GMC, Model Year: 2010, Model line: ACADIA, Model: GMC ACADIA 2010Pages: 444, PDF Size: 2.58 MB
Page 54 of 444
3-4 Seats and Restraints
Move the seat forward or rearward
by sliding the power seat
adjustment control (A) forward or
rearward.
The vehicle may have additional
features to adjust the power seat:
.Raise or lower the entire seat by
moving the power seat
adjustment control (A) up
or down.
.Raise or lower the front part of
the seat cushion by moving the
front of the control up or down.
.Raise or lower the rear part of
the seat cushion by moving the
rear of the control up or down.
Memory Seat and Mirrors
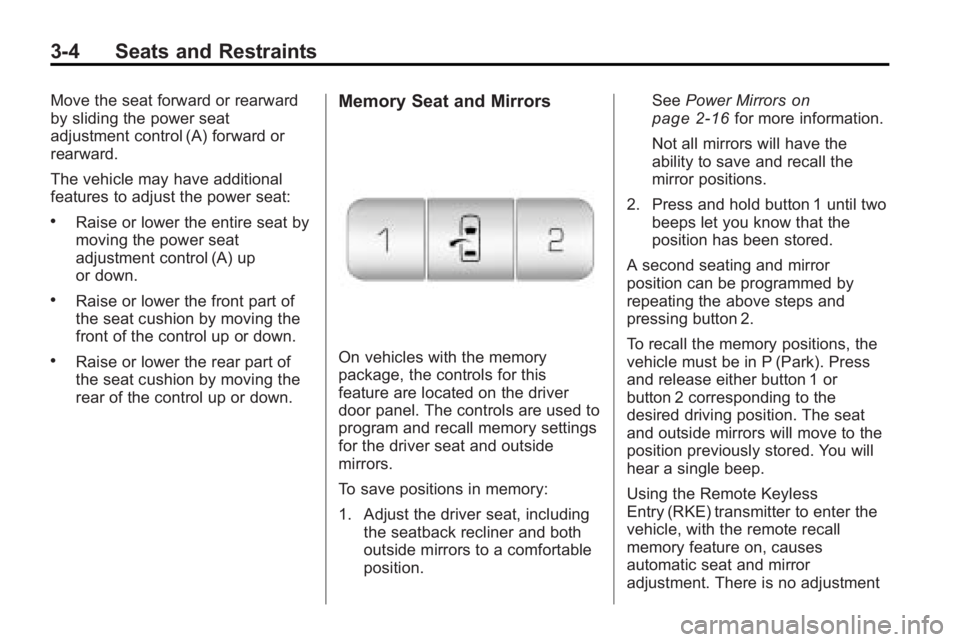
On vehicles with the memory
package, the controls for this
feature are located on the driver
door panel. The controls are used to
program and recall memory settings
for the driver seat and outside
mirrors.
To save positions in memory:
1. Adjust the driver seat, includingthe seatback recliner and both
outside mirrors to a comfortable
position. See
Power Mirrors
on
page 2‑16for more information.
Not all mirrors will have the
ability to save and recall the
mirror positions.
2. Press and hold button 1 until two beeps let you know that the
position has been stored.
A second seating and mirror
position can be programmed by
repeating the above steps and
pressing button 2.
To recall the memory positions, the
vehicle must be in P (Park). Press
and release either button 1 or
button 2 corresponding to the
desired driving position. The seat
and outside mirrors will move to the
position previously stored. You will
hear a single beep.
Using the Remote Keyless
Entry (RKE) transmitter to enter the
vehicle, with the remote recall
memory feature on, causes
automatic seat and mirror
adjustment. There is no adjustment
Page 55 of 444
Seats and Restraints 3-5
when the position has not been
changed by another seating position
or the easy exit feature. See
“MEMORY SEAT RECALL”under
Vehicle Personalization (With DIC
Buttons)
on page 5‑44for more
information.
To stop recall movement of the
memory feature at any time, press
one of the power seat controls,
memory buttons, or power mirror
buttons.
If something has blocked the driver
seat while recalling a memory
position, the driver seat recall may
stop working. If this happens, press
the appropriate control for the area
that is not recalling for two seconds,
after the obstruction is removed.
Then try recalling the memory
position again by pressing the
appropriate memory button. If the
memory position is still not being
recalled, see your dealer/retailer for
service.
Easy Exit Seat
The control for this feature is
located on the driver door panel
between buttons 1 and 2.
With the vehicle in P (Park), the exit
position can be recalled by pressing
the exit button. You will hear a
single beep. The driver seat will
move back.
If the easy exit seat feature is on in
the Driver Information Center (DIC),
automatic seat movement will occur
when the key is removed from the
ignition. See “EASY EXIT SEAT”
under Vehicle Personalization (With
DIC Buttons)
on page 5‑44for
more information.
Further programming for the
memory seat feature can be done
using the DIC. You can select or
cancel the following:
.The automatic easy exit seat
feature.
.The remote memory seat recall
feature. For programming information, see
Vehicle Personalization (With DIC
Buttons) on page 5‑44.
Lumbar Adjustment
Manual Lumbar
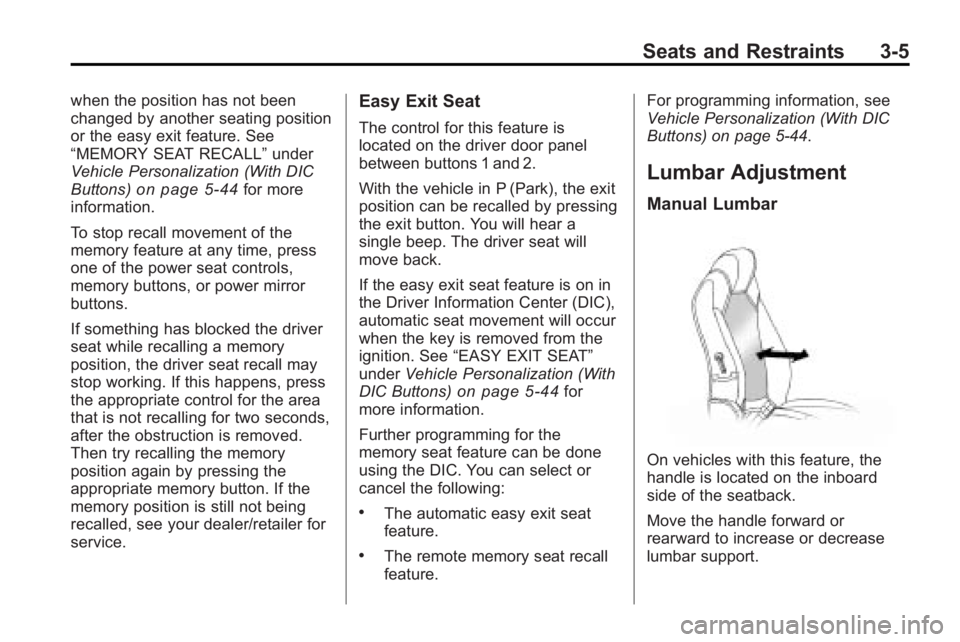
On vehicles with this feature, the
handle is located on the inboard
side of the seatback.
Move the handle forward or
rearward to increase or decrease
lumbar support.
Page 58 of 444
3-8 Seats and Restraints
Heated Front Seats
{WARNING
If you cannot feel temperature
change or pain to the skin, the
seat heater may cause burns
even at low temperatures. To
reduce the risk of burns, people
with such a condition should use
care when using the seat heater,
especially for long periods of
time. Do not place anything on
the seat that insulates against
heat, such as a blanket, cushion,
cover or similar item. This may
cause the seat heater to
overheat. An overheated seat
heater may cause a burn or may
damage the seat.On vehicles with heated front seats,
the controls are located on the
center console. To operate the
heated seats the engine must be
running.
I
(Heated Seatback): Press to
turn on the heated seatback.
J (Heated Seat and Seatback):
Press to turn on or off the heated
seat and seatback.
The light on the button will come on
to indicate that the feature is on.
Each time the button is pressed, the
temperature settings change from
high, to medium, to low, to off.
Indicator lights above the button will
show the level of heat selected:
three for high, two for medium, and
one for low. The passenger seat may take
longer to heat up.
If the vehicle has remote vehicle
start and is started using the RKE
transmitter, the front heated seats
will be turned on to the high setting
if it is cold outside. See
“Remote
Vehicle Start” underRemote
Keyless Entry (RKE) System
Operation
on page 2‑3. When the
ignition is turned on, the heated seat
feature will turn off. To turn the
heated seat feature back on, press
the desired button.
Page 62 of 444
3-12 Seats and Restraints
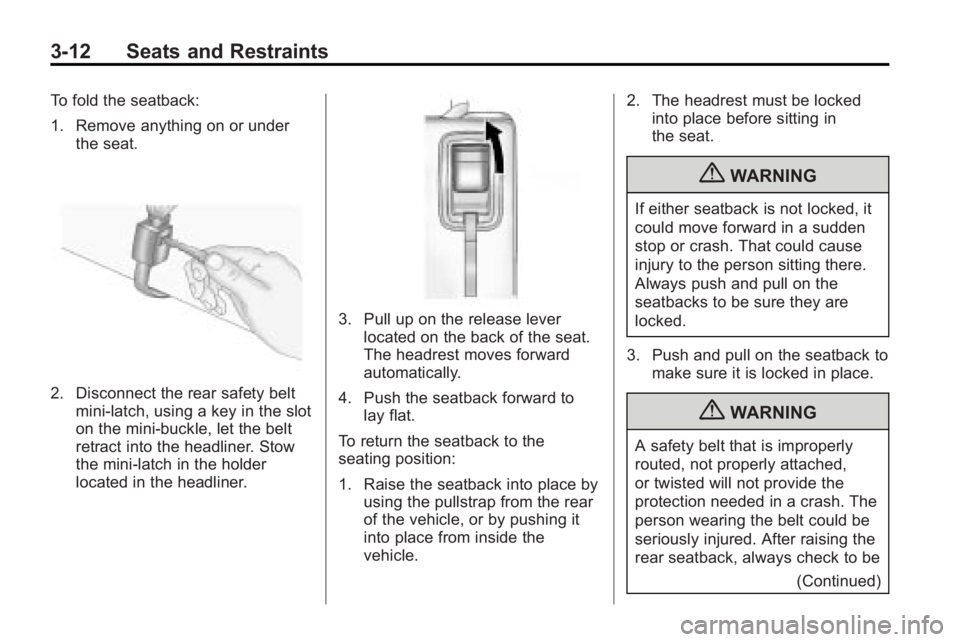
To fold the seatback:
1. Remove anything on or underthe seat.
2. Disconnect the rear safety beltmini-latch, using a key in the slot
on the mini-buckle, let the belt
retract into the headliner. Stow
the mini-latch in the holder
located in the headliner.
3. Pull up on the release leverlocated on the back of the seat.
The headrest moves forward
automatically.
4. Push the seatback forward to lay flat.
To return the seatback to the
seating position:
1. Raise the seatback into place by using the pullstrap from the rear
of the vehicle, or by pushing it
into place from inside the
vehicle. 2. The headrest must be locked
into place before sitting in
the seat.
{WARNING
If either seatback is not locked, it
could move forward in a sudden
stop or crash. That could cause
injury to the person sitting there.
Always push and pull on the
seatbacks to be sure they are
locked.
3. Push and pull on the seatback to make sure it is locked in place.
{WARNING
A safety belt that is improperly
routed, not properly attached,
or twisted will not provide the
protection needed in a crash. The
person wearing the belt could be
seriously injured. After raising the
rear seatback, always check to be
(Continued)
Page 78 of 444
3-28 Seats and Restraints
Safety Belt Use During
Pregnancy
Safety belts work for everyone,
including pregnant women. Like all
occupants, they are more likely to
be seriously injured if they do not
wear safety belts.
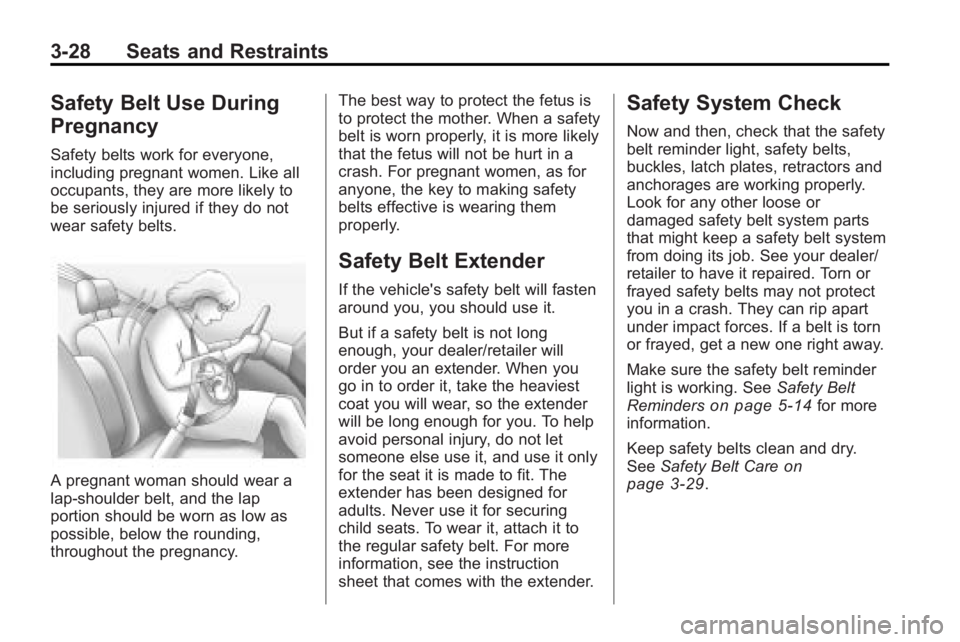
A pregnant woman should wear a
lap-shoulder belt, and the lap
portion should be worn as low as
possible, below the rounding,
throughout the pregnancy.The best way to protect the fetus is
to protect the mother. When a safety
belt is worn properly, it is more likely
that the fetus will not be hurt in a
crash. For pregnant women, as for
anyone, the key to making safety
belts effective is wearing them
properly.
Safety Belt Extender
If the vehicle's safety belt will fasten
around you, you should use it.
But if a safety belt is not long
enough, your dealer/retailer will
order you an extender. When you
go in to order it, take the heaviest
coat you will wear, so the extender
will be long enough for you. To help
avoid personal injury, do not let
someone else use it, and use it only
for the seat it is made to fit. The
extender has been designed for
adults. Never use it for securing
child seats. To wear it, attach it to
the regular safety belt. For more
information, see the instruction
sheet that comes with the extender.
Safety System Check
Now and then, check that the safety
belt reminder light, safety belts,
buckles, latch plates, retractors and
anchorages are working properly.
Look for any other loose or
damaged safety belt system parts
that might keep a safety belt system
from doing its job. See your dealer/
retailer to have it repaired. Torn or
frayed safety belts may not protect
you in a crash. They can rip apart
under impact forces. If a belt is torn
or frayed, get a new one right away.
Make sure the safety belt reminder
light is working. See
Safety Belt
Reminders
on page 5‑14for more
information.
Keep safety belts clean and dry.
See Safety Belt Care
on
page 3‑29.
Page 115 of 444
Storage 4-1
Storage
Storage Compartments
Instrument Panel Storage . . . . 4-1
Glove Box . . . . . . . . . . . . . . . . . . . . 4-1
Cupholders . . . . . . . . . . . . . . . . . . . 4-1
Armrest Storage . . . . . . . . . . . . . . 4-1
Center Console Storage . . . . . . 4-1
Floor Console Storage . . . . . . . . 4-2
Additional Storage Features
Cargo Cover . . . . . . . . . . . . . . . . . . 4-3
Cargo Tie Downs . . . . . . . . . . . . . 4-3
Cargo ManagementSystem . . . . . . . . . . . . . . . . . . . . . . 4-3
Convenience Net . . . . . . . . . . . . . 4-3
Roof Rack System
Roof Rack System . . . . . . . . . . . . 4-4
Storage
Compartments
Instrument Panel Storage
This vehicle has an instrument
panel storage area located above
the radio. To open the cover, press
the button.
Glove Box
Lift the glove box handle up to open
it. Use the key to lock and unlock
the glove box.
Cupholders
There are two cupholders, with
removable liners, located in front of
the center console. There may be
cupholders located in the second
row seat armrest. To access, pull
the armrest down. There are
additional cupholders located on
each side of the third row seat and
in each door. There may be cupholders located at the rear of the
center console. To access, pull the
handle down.
Armrest Storage
Vehicles with a rear seat armrest,
have two cupholders. Pull the
armrest down from the rear
seatback to access the cupholders.
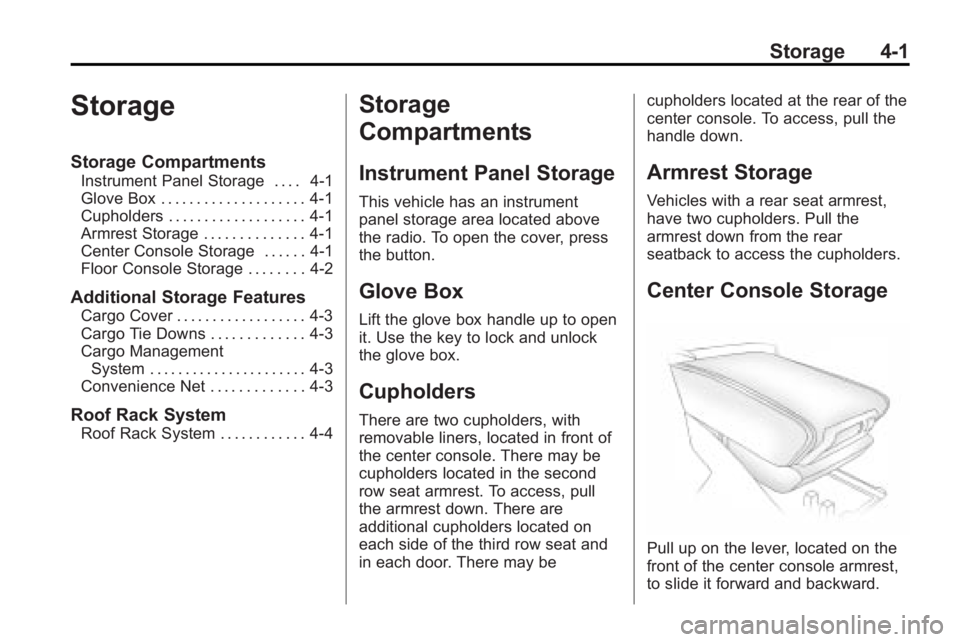
Center Console Storage
Pull up on the lever, located on the
front of the center console armrest,
to slide it forward and backward.
Page 120 of 444
5-2 Instruments and Controls
Engine Oil Messages . . . . . . . . 5-37
Engine Power Messages . . . . 5-38
Fuel System Messages . . . . . . 5-38
Key and Lock Messages . . . . . 5-39
Lamp Messages . . . . . . . . . . . . . 5-39
Object Detection SystemMessages . . . . . . . . . . . . . . . . . . 5-39
Ride Control System Messages . . . . . . . . . . . . . . . . . . 5-40
Airbag System Messages . . . . 5-40
Anti-Theft Alarm System Messages . . . . . . . . . . . . . . . . . . 5-40
Service Vehicle Messages . . . 5-41
Tire Messages . . . . . . . . . . . . . . . 5-41
Transmission Messages . . . . . 5-42
Vehicle Reminder Messages . . . . . . . . . . . . . . . . . . 5-43
Vehicle Speed Messages . . . . 5-43
Washer Fluid Messages . . . . . 5-43Vehicle Personalization
Vehicle Personalization (With DIC Buttons) . . . . . . . . 5-44
Universal Remote System
Universal Remote System . . . 5-51
Universal Remote SystemProgramming . . . . . . . . . . . . . . . 5-51
Universal Remote System Operation . . . . . . . . . . . . . . . . . . 5-55
Controls
Steering Wheel
Adjustment
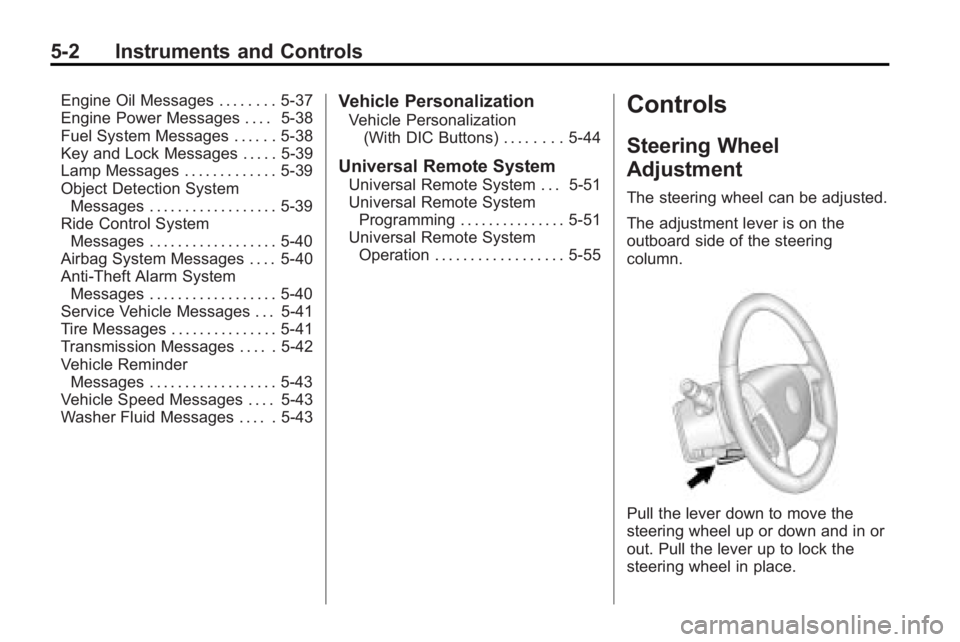
The steering wheel can be adjusted.
The adjustment lever is on the
outboard side of the steering
column.
Pull the lever down to move the
steering wheel up or down and in or
out. Pull the lever up to lock the
steering wheel in place.
Page 123 of 444
Instruments and Controls 5-5
2. To stop the SCAN function,press
¨again.
3. In CD/DVD, iPod, or AUX USB, press and hold to quickly move
forward through the tracks.
Release to stop on the desired
track.
+
e−e(Volume): Press to
increase or to decrease the volume.
Horn
Press near or on the horn symbols
on the steering wheel pad to sound
the horn.
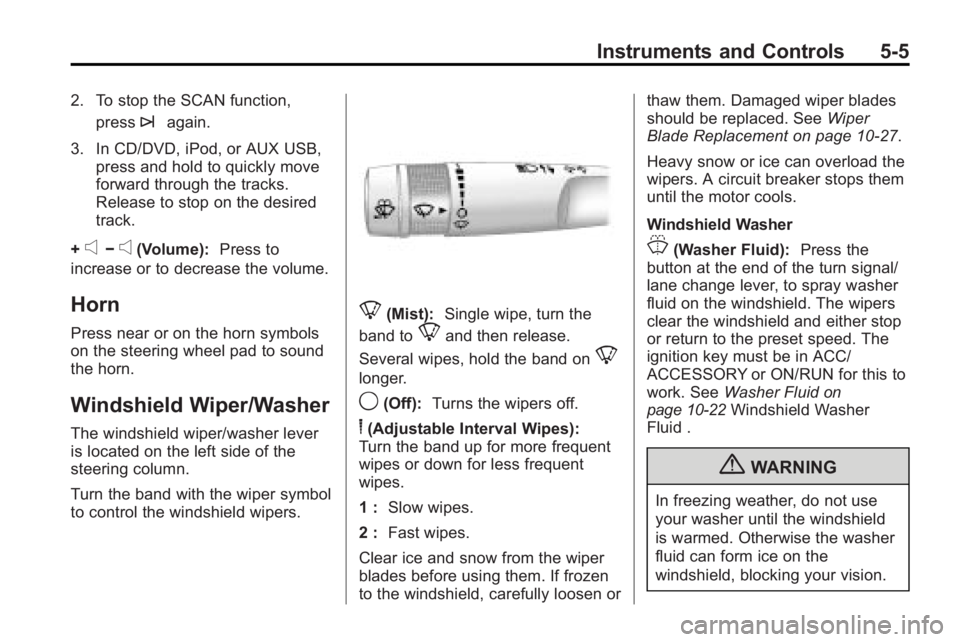
Windshield Wiper/Washer
The windshield wiper/washer lever
is located on the left side of the
steering column.
Turn the band with the wiper symbol
to control the windshield wipers.
8(Mist): Single wipe, turn the
band to
8and then release.
Several wipes, hold the band on
8
longer.
9(Off): Turns the wipers off.
6(Adjustable Interval Wipes):
Turn the band up for more frequent
wipes or down for less frequent
wipes.
1 : Slow wipes.
2 : Fast wipes.
Clear ice and snow from the wiper
blades before using them. If frozen
to the windshield, carefully loosen or thaw them. Damaged wiper blades
should be replaced. See
Wiper
Blade Replacement on page 10‑27.
Heavy snow or ice can overload the
wipers. A circuit breaker stops them
until the motor cools.
Windshield Washer
J(Washer Fluid): Press the
button at the end of the turn signal/
lane change lever, to spray washer
fluid on the windshield. The wipers
clear the windshield and either stop
or return to the preset speed. The
ignition key must be in ACC/
ACCESSORY or ON/RUN for this to
work. See Washer Fluid
on
page 10‑22Windshield Washer
Fluid .
{WARNING
In freezing weather, do not use
your washer until the windshield
is warmed. Otherwise the washer
fluid can form ice on the
windshield, blocking your vision.
Page 126 of 444
5-8 Instruments and Controls
4. The DIC will displayCALIBRATING: DRIVE IN
CIRCLES. Drive the vehicle in
tight circles at less than 5 mph
(8 km/h) to complete the
calibration. The DIC will display
CALIBRATION COMPLETE for a
few seconds when the
calibration is complete. The DIC
display will then return to the
previous menu.
Clock
To adjust the time and date:
1. Turn the ignition key to ACC/
ACCESSORY or ON/RUN, then
press
O, to turn the radio on.
2. Press
Gto display HR, MIN,
MM, DD, YYYY (hour, minute,
month, day, and year).
3. Press the pushbutton located under any one of the labels to be
changed. 4. To increase the time or date, do
one of the following:
.Press the pushbutton below
the selected label.
.Press¨SEEK.
.Press\FWD.
.Turnfclockwise.
5. To decrease the time or date, do one of the following:
.Press©SEEK.
.PresssREV.
.Turnfcounter-clockwise.
To change the time default setting
from 12 hour to 24 hour or to
change the date default setting from
month/day/year to day/month/year:
1. Press
Gand then the
pushbutton located under the
forward arrow that displays on
the radio screen until the time
12H (hour) and 24H (hour), and the date MM/DD (month and
day) and DD/MM (day and
month) displays.
2. Press the pushbutton located under the desired option.
3. Press
Gagain to apply the
selected default, or let the
screen time out.
Power Outlets
The vehicle has three 12-volt outlets
which can be used to plug in
electrical equipment, such as a
cellular telephone, a compact disc
player, etc.
The power outlets are located on
the instrument panel below the
climate controls, at the rear of the
center console, and in the rear
cargo area. Lift the cover to access
the outlet. Close the cover when not
using the outlet.
Notice: Leaving electrical
equipment plugged in for an
extended period of time while the
vehicle is off will drain the
Page 135 of 444
Instruments and Controls 5-17
If the check engine light comes on
and stays on, while the engine is
running, this indicates that there is
an OBD II problem and service is
required.
Malfunctions often are indicated by
the system before any problem is
apparent. Being aware of the light
can prevent more serious damage
to the vehicle. This system assists
the service technician in correctly
diagnosing any malfunction.
Notice:If the vehicle is
continually driven with this light
on, after a while, the emission
controls might not work as well,
the vehicle's fuel economy might
not be as good, and the engine
might not run as smoothly. This
could lead to costly repairs that
might not be covered by the
vehicle warranty.
Notice: Modifications made to the
engine, transmission, exhaust,
intake, or fuel system of the
vehicle or the replacement of the
original tires with other than those of the same Tire
Performance Criteria (TPC) can
affect the vehicle's emission
controls and can cause this light
to come on. Modifications to
these systems could lead to
costly repairs not covered by the
vehicle warranty. This could also
result in a failure to pass a
required Emission Inspection/
Maintenance test. See
Accessories and Modifications
on
page 10‑3.
This light comes on during a
malfunction in one of two ways:
Light Flashing: A misfire condition
has been detected. A misfire
increases vehicle emissions and
could damage the emission control
system on the vehicle. Diagnosis
and service might be required.
The following can prevent more
serious damage to the vehicle:
.Reduce vehicle speed.
.Avoid hard accelerations.
.Avoid steep uphill grades.
.If towing a trailer, reduce the
amount of cargo being hauled as
soon as it is possible.
If the light continues to flash, when
it is safe to do so, stop the vehicle.
Find a safe place to park the
vehicle. Turn the key off, wait at
least 10 seconds, and restart the
engine. If the light is still flashing,
follow the previous steps and see
your dealer/retailer for service as
soon as possible.
Light On Steady: An emission
control system malfunction has
been detected on the vehicle.
Diagnosis and service might be
required.
An emission system malfunction
might be corrected.
.Make sure the fuel cap is fully
installed. See Filling the Tankon
page 9‑42. The diagnostic
system can determine if the fuel
cap has been left off or
improperly installed. A loose or
missing fuel cap allows fuel to
evaporate into the atmosphere.