turn GMC ACADIA 2010 Owner's Guide
[x] Cancel search | Manufacturer: GMC, Model Year: 2010, Model line: ACADIA, Model: GMC ACADIA 2010Pages: 444, PDF Size: 2.58 MB
Page 60 of 444
3-10 Seats and Restraints
Entering and Exiting the
Third Row
{WARNING
Using the third row seating
position while the second row is
folded, or folded and tumbled,
could cause injury in a sudden
stop or crash. Be sure to return
the seat to the passenger seating
position. Push and pull on the
seat to make sure it is locked into
place.
Notice: Folding a rear seat with
the safety belts still fastened may
cause damage to the seat or the
safety belts. Always unbuckle the
safety belts and return them to
their normal stowed position
before folding a rear seat.
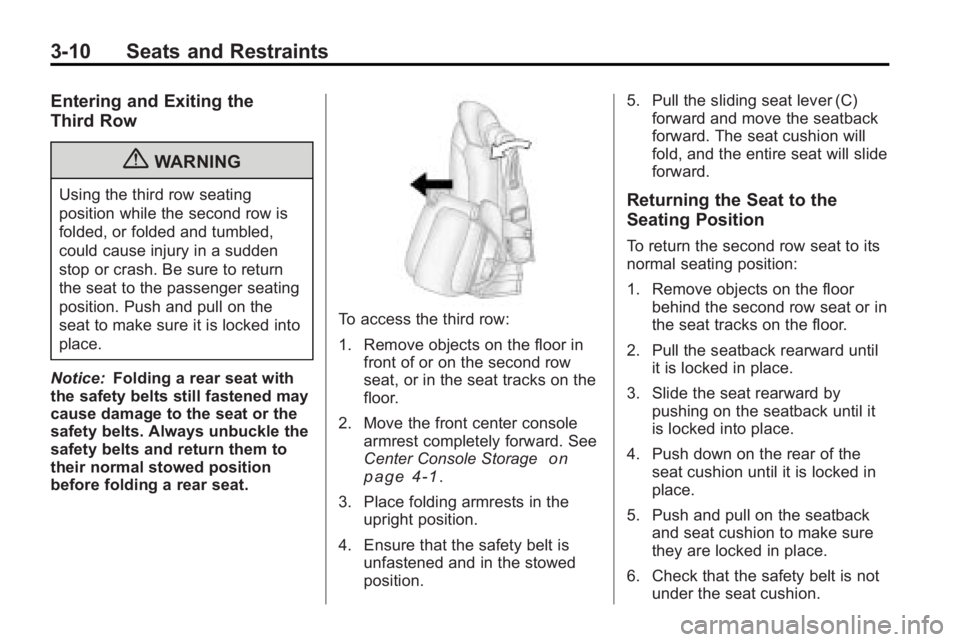
To access the third row:
1. Remove objects on the floor in front of or on the second row
seat, or in the seat tracks on the
floor.
2. Move the front center console armrest completely forward. See
Center Console Storage
on
page 4‑1.
3. Place folding armrests in the upright position.
4. Ensure that the safety belt is unfastened and in the stowed
position. 5. Pull the sliding seat lever (C)
forward and move the seatback
forward. The seat cushion will
fold, and the entire seat will slide
forward.
Returning the Seat to the
Seating Position
To return the second row seat to its
normal seating position:
1. Remove objects on the floor
behind the second row seat or in
the seat tracks on the floor.
2. Pull the seatback rearward until it is locked in place.
3. Slide the seat rearward by pushing on the seatback until it
is locked into place.
4. Push down on the rear of the seat cushion until it is locked in
place.
5. Push and pull on the seatback and seat cushion to make sure
they are locked in place.
6. Check that the safety belt is not under the seat cushion.
Page 61 of 444
Seats and Restraints 3-11
Reclining the Seatbacks
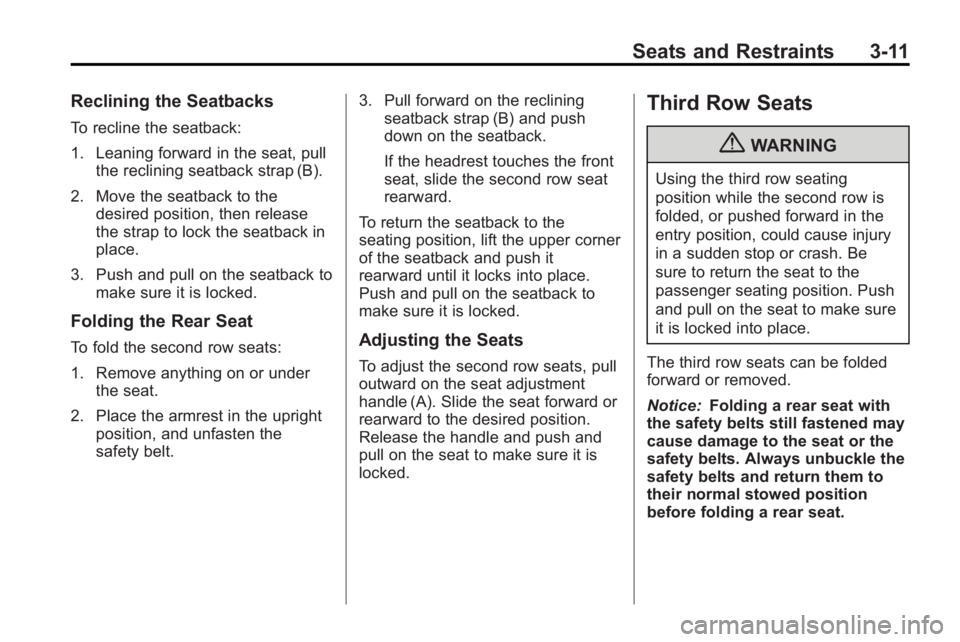
To recline the seatback:
1. Leaning forward in the seat, pullthe reclining seatback strap (B).
2. Move the seatback to the desired position, then release
the strap to lock the seatback in
place.
3. Push and pull on the seatback to make sure it is locked.
Folding the Rear Seat
To fold the second row seats:
1. Remove anything on or underthe seat.
2. Place the armrest in the upright position, and unfasten the
safety belt. 3. Pull forward on the reclining
seatback strap (B) and push
down on the seatback.
If the headrest touches the front
seat, slide the second row seat
rearward.
To return the seatback to the
seating position, lift the upper corner
of the seatback and push it
rearward until it locks into place.
Push and pull on the seatback to
make sure it is locked.Adjusting the Seats
To adjust the second row seats, pull
outward on the seat adjustment
handle (A). Slide the seat forward or
rearward to the desired position.
Release the handle and push and
pull on the seat to make sure it is
locked.
Third Row Seats
{WARNING
Using the third row seating
position while the second row is
folded, or pushed forward in the
entry position, could cause injury
in a sudden stop or crash. Be
sure to return the seat to the
passenger seating position. Push
and pull on the seat to make sure
it is locked into place.
The third row seats can be folded
forward or removed.
Notice: Folding a rear seat with
the safety belts still fastened may
cause damage to the seat or the
safety belts. Always unbuckle the
safety belts and return them to
their normal stowed position
before folding a rear seat.
Page 62 of 444
3-12 Seats and Restraints
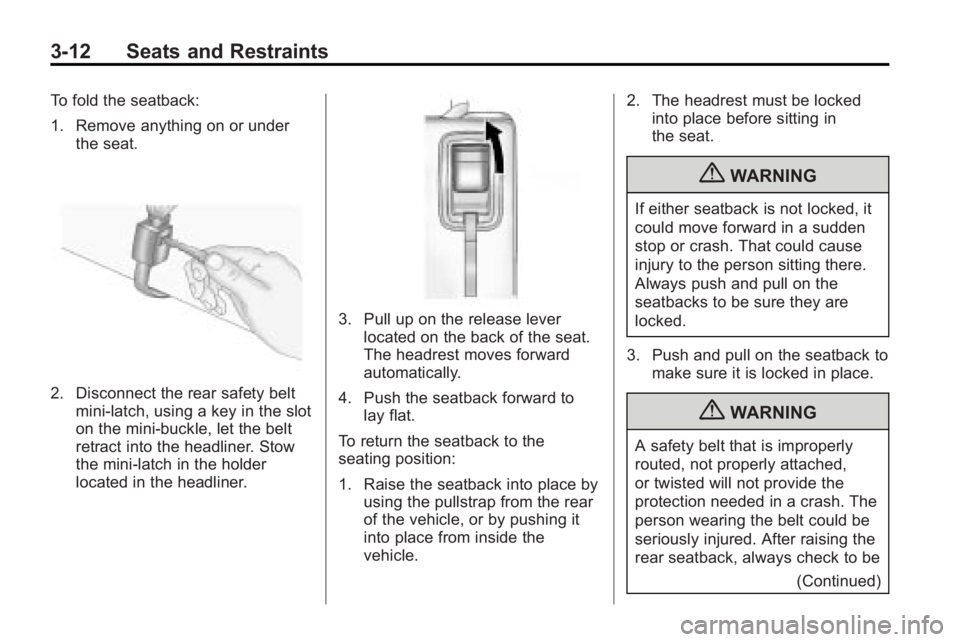
To fold the seatback:
1. Remove anything on or underthe seat.
2. Disconnect the rear safety beltmini-latch, using a key in the slot
on the mini-buckle, let the belt
retract into the headliner. Stow
the mini-latch in the holder
located in the headliner.
3. Pull up on the release leverlocated on the back of the seat.
The headrest moves forward
automatically.
4. Push the seatback forward to lay flat.
To return the seatback to the
seating position:
1. Raise the seatback into place by using the pullstrap from the rear
of the vehicle, or by pushing it
into place from inside the
vehicle. 2. The headrest must be locked
into place before sitting in
the seat.
{WARNING
If either seatback is not locked, it
could move forward in a sudden
stop or crash. That could cause
injury to the person sitting there.
Always push and pull on the
seatbacks to be sure they are
locked.
3. Push and pull on the seatback to make sure it is locked in place.
{WARNING
A safety belt that is improperly
routed, not properly attached,
or twisted will not provide the
protection needed in a crash. The
person wearing the belt could be
seriously injured. After raising the
rear seatback, always check to be
(Continued)
Page 63 of 444
Seats and Restraints 3-13
WARNING (Continued)
sure that the safety belts are
properly routed and attached, and
are not twisted.
4. Reconnect the center safety belt mini-latch to the mini-buckle. Do
not let it twist.
5. Pull on the safety belt to be sure the mini-latch is secure.
Removing the Third Row Seats
1. Remove the cargo managementsystem, if it is in the vehicle. See
Cargo Management System
on
page 4‑3.
2. Remove anything on or under the seat.
Notice: Folding a rear seat with
the safety belts still fastened may
cause damage to the seat or the
safety belts. Always unbuckle the
safety belts and return them to
their normal stowed position
before folding a rear seat. 3. Fold the seatback down. See
“Folding the Seatback” earlier in
this section.
4. Remove the rear bolts located on the floor on each side of
the seat.
5. Remove the seat by tilting it slightly upward, and then pulling
it out of the rear of the vehicle in
one motion.
6. Replace the bolts in the floor holes for storage.
Installing the Third Row Seats
1. Before installing the seat theseatback must be folded
forward. See “Folding the
Seatback” earlier in this section.
The seats must be placed in the
proper locations to attach
correctly. The wider seat must
be installed on the driver side
and the narrower seat on the
passenger side. Remove the
bolts from the holes in the floor
before installing the seats. 2. Place the seat on the vehicle
floor so that the front seat hooks
are on the vehicle bars.
3. Reinstall the bolts, and torque to 55Y (41 lb ft). Pull up on the
seat to make sure it is locked in
place.
4. Raise the seatback to its upright position. Push and pull on the
seatback to make sure it is
locked into place.
5. Push the headrest up into position. Push and pull on the
headrest to make sure it is
locked into place.
6. Reconnect the center safety belt mini-latch to the mini-buckle. Do
not let it twist.
Page 74 of 444
3-24 Seats and Restraints
5. If equipped with a shoulder beltheight adjuster, move it to the
height that is right for you. See
“Shoulder Belt Height
Adjustment” later in this section
for instructions on use and
important safety information.
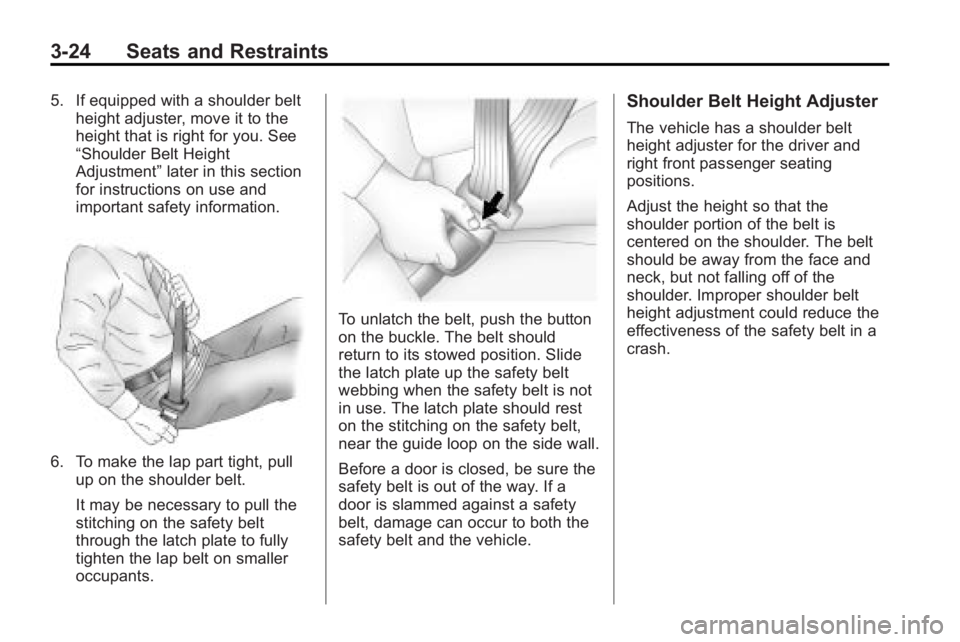
6. To make the lap part tight, pull
up on the shoulder belt.
It may be necessary to pull the
stitching on the safety belt
through the latch plate to fully
tighten the lap belt on smaller
occupants.
To unlatch the belt, push the button
on the buckle. The belt should
return to its stowed position. Slide
the latch plate up the safety belt
webbing when the safety belt is not
in use. The latch plate should rest
on the stitching on the safety belt,
near the guide loop on the side wall.
Before a door is closed, be sure the
safety belt is out of the way. If a
door is slammed against a safety
belt, damage can occur to both the
safety belt and the vehicle.
Shoulder Belt Height Adjuster
The vehicle has a shoulder belt
height adjuster for the driver and
right front passenger seating
positions.
Adjust the height so that the
shoulder portion of the belt is
centered on the shoulder. The belt
should be away from the face and
neck, but not falling off of the
shoulder. Improper shoulder belt
height adjustment could reduce the
effectiveness of the safety belt in a
crash.
Page 76 of 444
3-26 Seats and Restraints
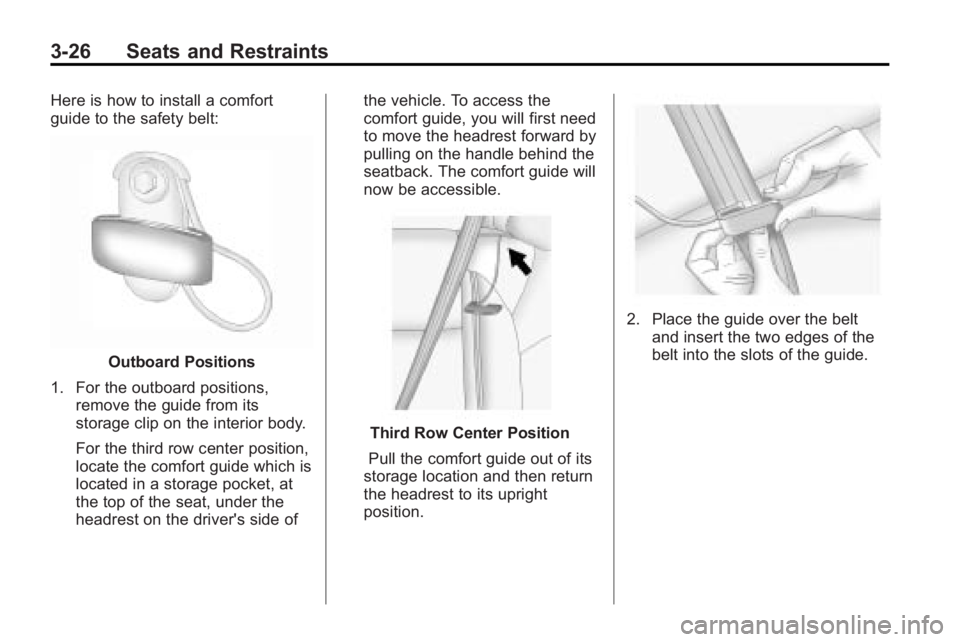
Here is how to install a comfort
guide to the safety belt:
Outboard Positions
1. For the outboard positions, remove the guide from its
storage clip on the interior body.
For the third row center position,
locate the comfort guide which is
located in a storage pocket, at
the top of the seat, under the
headrest on the driver's side of the vehicle. To access the
comfort guide, you will first need
to move the headrest forward by
pulling on the handle behind the
seatback. The comfort guide will
now be accessible.
Third Row Center Position
Pull the comfort guide out of its
storage location and then return
the headrest to its upright
position.
2. Place the guide over the belt and insert the two edges of the
belt into the slots of the guide.
Page 86 of 444
3-36 Seats and Restraints
Rollover capable roof-rail airbags
are designed to help contain the
head and chest of occupants in the
outboard seating positions in the
first and second rows. The rollover
capable roof-rail airbags are
designed to help reduce the risk of
full or partial ejection in rollover
events, although no system can
prevent all such ejections.
But airbags would not help in many
types of collisions, primarily
because the occupant's motion is
not toward those airbags. SeeWhen
Should an Airbag Inflate?
on
page 3‑33for more information.
Airbags should never be regarded
as anything more than a supplement
to safety belts.
What Will You See After
an Airbag Inflates?
After the frontal airbags and
seat-mounted side impact airbags
inflate, they quickly deflate, so
quickly that some people may not
even realize an airbag inflated.
Roof-rail airbags may still be at least
partially inflated for some time after
they deploy. Some components of
the airbag module may be hot for
several minutes. For location of the
airbag modules, see What Makes
an Airbag Inflate? on page 3‑35.
The parts of the airbag that come
into contact with you may be warm,
but not too hot to touch. There may
be some smoke and dust coming
from the vents in the deflated
airbags. Airbag inflation does not
prevent the driver from seeing out of
the windshield or being able to steer
the vehicle, nor does it prevent
people from leaving the vehicle.
{WARNING
When an airbag inflates, there
may be dust in the air. This dust
could cause breathing problems
for people with a history of
asthma or other breathing trouble.
To avoid this, everyone in the
vehicle should get out as soon as
it is safe to do so. If you have
breathing problems but cannot
get out of the vehicle after an
airbag inflates, then get fresh air
by opening a window or a door.
If you experience breathing
problems following an airbag
deployment, you should seek
medical attention.
The vehicle has a feature that may
automatically unlock the doors, turn
on the interior lamps and hazard
warning flashers, and shut off the
fuel system after the airbags inflate.
Page 87 of 444
Seats and Restraints 3-37
You can lock the doors, turn off the
interior lamps and hazard warning
flashers by using the controls for
those features.
{WARNING
A crash severe enough to inflate
the airbags may have also
damaged important functions in
the vehicle, such as the fuel
system, brake and steering
systems, etc. Even if the vehicle
appears to be drivable after a
moderate crash, there may be
concealed damage that could
make it difficult to safely operate
the vehicle.
Use caution if you should attempt
to restart the engine after a crash
has occurred.In many crashes severe enough to
inflate the airbag, windshields are
broken by vehicle deformation.
Additional windshield breakage may
also occur from the right front
passenger airbag..Airbags are designed to inflate
only once. After an airbag
inflates, you will need some new
parts for the airbag system.
If you do not get them, the
airbag system will not be there
to help protect you in another
crash. A new system will include
airbag modules and possibly
other parts. The service manual
for your vehicle covers the need
to replace other parts.
.The vehicle has a crash sensing
and diagnostic module which
records information after a
crash. See
Vehicle Data
Recording and Privacy
on
page 13‑14and Event Data
Recorders on page 13‑15.
.Let only qualified technicians
work on the airbag systems.
Improper service can mean that
an airbag system will not work
properly. See your dealer/retailer
for service.
Page 88 of 444
3-38 Seats and Restraints
Passenger Sensing
System
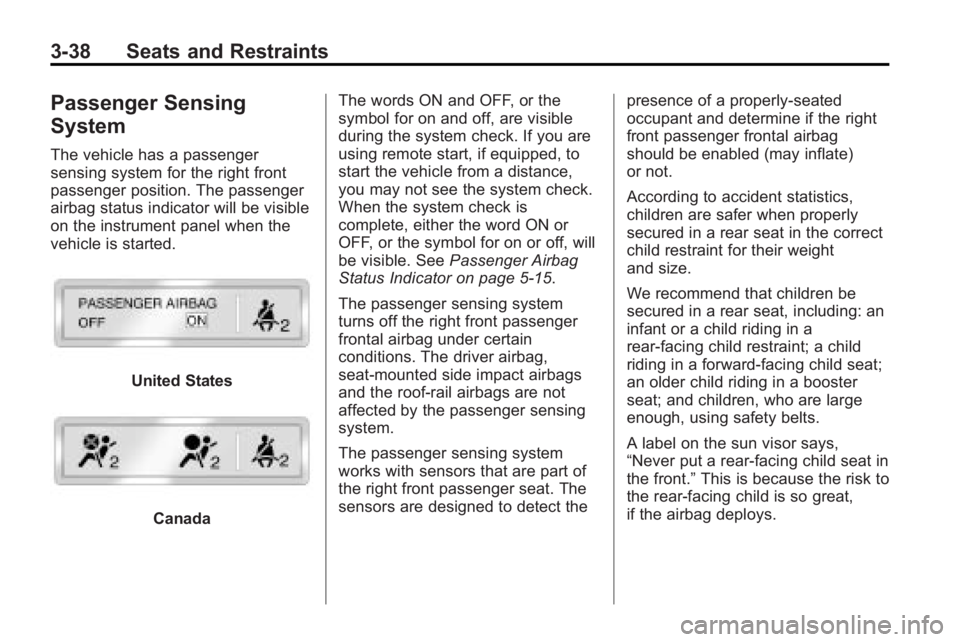
The vehicle has a passenger
sensing system for the right front
passenger position. The passenger
airbag status indicator will be visible
on the instrument panel when the
vehicle is started.
United States
CanadaThe words ON and OFF, or the
symbol for on and off, are visible
during the system check. If you are
using remote start, if equipped, to
start the vehicle from a distance,
you may not see the system check.
When the system check is
complete, either the word ON or
OFF, or the symbol for on or off, will
be visible. See
Passenger Airbag
Status Indicator on page 5‑15.
The passenger sensing system
turns off the right front passenger
frontal airbag under certain
conditions. The driver airbag,
seat-mounted side impact airbags
and the roof-rail airbags are not
affected by the passenger sensing
system.
The passenger sensing system
works with sensors that are part of
the right front passenger seat. The
sensors are designed to detect the presence of a properly-seated
occupant and determine if the right
front passenger frontal airbag
should be enabled (may inflate)
or not.
According to accident statistics,
children are safer when properly
secured in a rear seat in the correct
child restraint for their weight
and size.
We recommend that children be
secured in a rear seat, including: an
infant or a child riding in a
rear-facing child restraint; a child
riding in a forward-facing child seat;
an older child riding in a booster
seat; and children, who are large
enough, using safety belts.
A label on the sun visor says,
“Never put a rear-facing child seat in
the front.”
This is because the risk to
the rear-facing child is so great,
if the airbag deploys.
Page 89 of 444
Seats and Restraints 3-39
{WARNING
A child in a rear-facing child
restraint can be seriously injured
or killed if the right front
passenger airbag inflates. This is
because the back of the
rear-facing child restraint would
be very close to the inflating
airbag. A child in a forward-facing
child restraint can be seriously
injured or killed if the right front
passenger airbag inflates and the
passenger seat is in a forward
position.
Even if the passenger sensing
system has turned off the right
front passenger frontal airbag, no
system is fail-safe. No one can
guarantee that an airbag will not
deploy under some unusual
circumstance, even though the
airbag is turned off.(Continued)
WARNING (Continued)
Secure rear-facing child restraints
in a rear seat, even if the airbag
is off. If you secure a
forward-facing child restraint in
the right front seat, always move
the front passenger seat as far
back as it will go. It is better to
secure the child restraint in a
rear seat.
The passenger sensing system is
designed to turn off the right front
passenger frontal airbag if:
.The right front passenger seat is
unoccupied.
.The system determines that an
infant is present in a child
restraint.
.A right front passenger takes
his/her weight off of the seat for
a period of time.
.Or, if there is a critical problem
with the airbag system or the
passenger sensing system. When the passenger sensing
system has turned off the right front
passenger frontal airbag, the off
indicator will light and stay lit to
remind you that the airbag is off.
See
Passenger Airbag Status
Indicator on page 5‑15.
The passenger sensing system is
designed to turn on (may inflate) the
right front passenger frontal airbag
anytime the system senses that a
person of adult size is sitting
properly in the right front
passenger seat.
When the passenger sensing
system has allowed the airbag to be
enabled, the on indicator will light
and stay lit to remind you that the
airbag is active.
For some children, including
children in child restraints, and for
very small adults, the passenger
sensing system may or may not turn
off the right front passenger frontal
airbag, depending upon the