navigation system GMC ACADIA 2010 Owner's Manual
[x] Cancel search | Manufacturer: GMC, Model Year: 2010, Model line: ACADIA, Model: GMC ACADIA 2010Pages: 444, PDF Size: 2.58 MB
Page 7 of 444
In Brief 1-1
In Brief
Instrument Panel
Instrument Panel . . . . . . . . . . . . . . 1-2
Initial Drive Information
Initial Drive Information . . . . . . . . 1-4
Remote Keyless Entry (RKE)System . . . . . . . . . . . . . . . . . . . . . . 1-4
Remote Vehicle Start . . . . . . . . . 1-4
Door Locks . . . . . . . . . . . . . . . . . . . 1-5
Liftgate . . . . . . . . . . . . . . . . . . . . . . . . 1-5
Windows . . . . . . . . . . . . . . . . . . . . . . 1-6
Seat Adjustment . . . . . . . . . . . . . . 1-6
Second Row Seats . . . . . . . . . . . 1-7
Third Row Seats . . . . . . . . . . . . . . 1-7
Heated Seats . . . . . . . . . . . . . . . . . 1-8
Heated and Ventilated Seats . . . . . . . . . . . . . . . . . . . . . . . . 1-8
Head Restraint Adjustment . . . . 1-8
Safety Belt . . . . . . . . . . . . . . . . . . . . 1-8
Sensing System for Passenger Airbag . . . . . . . . . . . . . . . . . . . . . . . 1-9
Mirror Adjustment . . . . . . . . . . . . . 1-9
Steering Wheel Adjustment . . . . . . . . . . . . . . . . . 1-10
Interior Lighting . . . . . . . . . . . . . . 1-10 Exterior Lighting . . . . . . . . . . . . . 1-11
Windshield Wiper/Washer . . . . 1-11
Climate Controls . . . . . . . . . . . . . 1-12
Vehicle Features
Radio(s) . . . . . . . . . . . . . . . . . . . . . 1-14
Satellite Radio . . . . . . . . . . . . . . . 1-15
Portable Audio Devices . . . . . . 1-15
Bluetooth
®. . . . . . . . . . . . . . . . . . . 1-15
Steering Wheel Controls . . . . . 1-16
Navigation System . . . . . . . . . . . 1-16
Cruise Control . . . . . . . . . . . . . . . 1-17
Storage Compartments . . . . . . 1-17
Power Outlets . . . . . . . . . . . . . . . 1-18
Sunroof . . . . . . . . . . . . . . . . . . . . . . 1-18
Performance and Maintenance
StabiliTrak®. . . . . . . . . . . . . . . . . . 1-18
Tire Pressure Monitor . . . . . . . . 1-19
Tire Sealant and Compressor Kit . . . . . . . . . . . . . 1-19
Engine Oil Life System . . . . . . 1-19
Driving for Better Fuel Economy . . . . . . . . . . . . . . . . . . . 1-20
Roadside Assistance Program . . . . . . . . . . . . . . . . . . . . 1-20
OnStar
®. . . . . . . . . . . . . . . . . . . . . 1-21
Page 9 of 444
In Brief 1-3
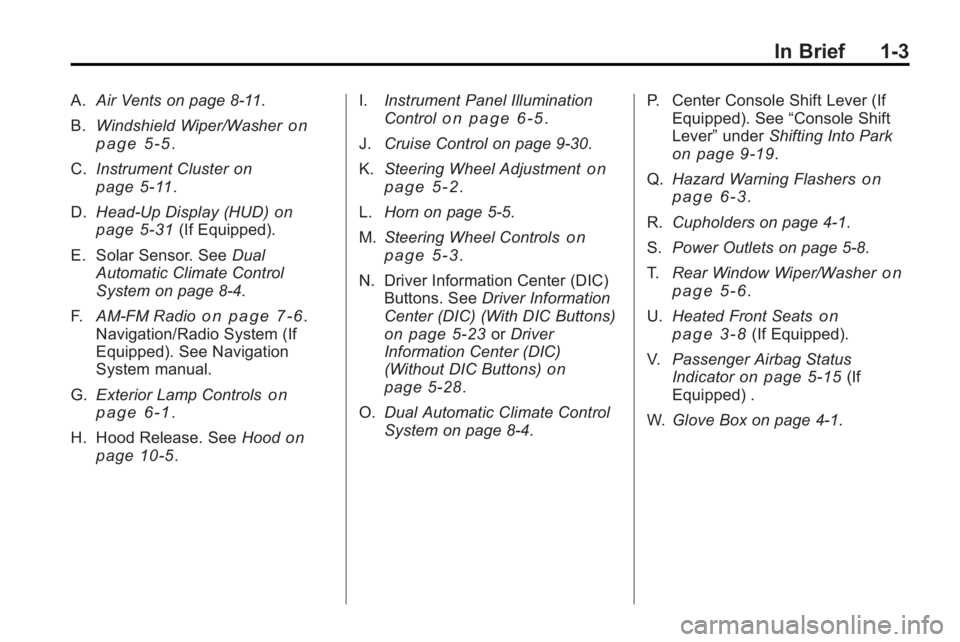
A.Air Vents on page 8‑11.
B. Windshield Wiper/Washer
on
page 5‑5.
C. Instrument Cluster
on
page 5‑11.
D. Head-Up Display (HUD)
on
page 5‑31(If Equipped).
E. Solar Sensor. See Dual
Automatic Climate Control
System on page 8‑4.
F. AM-FM Radio
on page 7‑6.
Navigation/Radio System (If
Equipped). See Navigation
System manual.
G. Exterior Lamp Controls
on
page 6‑1.
H. Hood Release. See Hood
on
page 10‑5. I.
Instrument Panel Illumination
Control
on page 6‑5.
J. Cruise Control on page 9‑30.
K. Steering Wheel Adjustment
on
page 5‑2.
L. Horn on page 5‑5.
M. Steering Wheel Controls
on
page 5‑3.
N. Driver Information Center (DIC) Buttons. See Driver Information
Center (DIC) (With DIC Buttons)
on page 5‑23or Driver
Information Center (DIC)
(Without DIC Buttons)
on
page 5‑28.
O. Dual Automatic Climate Control
System on page 8‑4. P. Center Console Shift Lever (If
Equipped). See “Console Shift
Lever” underShifting Into Park
on page 9‑19.
Q. Hazard Warning Flashers
on
page 6‑3.
R. Cupholders on page 4‑1.
S. Power Outlets on page 5‑8.
T. Rear Window Wiper/Washer
on
page 5‑6.
U. Heated Front Seats
on
page 3‑8(If Equipped).
V. Passenger Airbag Status
Indicator
on page 5‑15(If
Equipped) .
W. Glove Box on page 4‑1.
Page 22 of 444
1-16 In Brief
The Bluetooth-enabled cell phone
must be paired with the in-vehicle
Bluetooth system before it can be
used in the vehicle. Not all phones
will support all functions.
SeeBluetooth on page 7‑46.
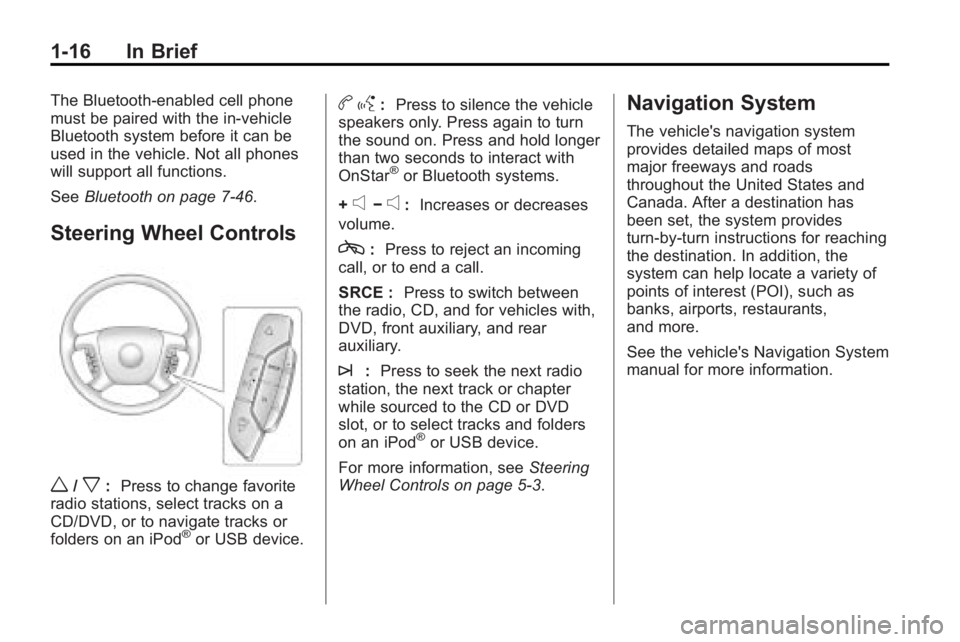
Steering Wheel Controls
w/x:Press to change favorite
radio stations, select tracks on a
CD/DVD, or to navigate tracks or
folders on an iPod
®or USB device.
b g: Press to silence the vehicle
speakers only. Press again to turn
the sound on. Press and hold longer
than two seconds to interact with
OnStar
®or Bluetooth systems.
+
e−e: Increases or decreases
volume.
c: Press to reject an incoming
call, or to end a call.
SRCE : Press to switch between
the radio, CD, and for vehicles with,
DVD, front auxiliary, and rear
auxiliary.
¨: Press to seek the next radio
station, the next track or chapter
while sourced to the CD or DVD
slot, or to select tracks and folders
on an iPod
®or USB device.
For more information, see Steering
Wheel Controls on page 5‑3.
Navigation System
The vehicle's navigation system
provides detailed maps of most
major freeways and roads
throughout the United States and
Canada. After a destination has
been set, the system provides
turn-by-turn instructions for reaching
the destination. In addition, the
system can help locate a variety of
points of interest (POI), such as
banks, airports, restaurants,
and more.
See the vehicle's Navigation System
manual for more information.
Page 27 of 444
In Brief 1-21
contact Roadside Assistance, and
relay exact location to get you the
help you need.
Online Owner Center
The Online Owner Center is a
complimentary service that includes
online service reminders, vehicle
maintenance tips, online owner
manual, special privileges
and more.
Sign up today at:
www.gmownercenter.com/gmc
(U.S.) orwww.gm.ca (Canada).
OnStar®
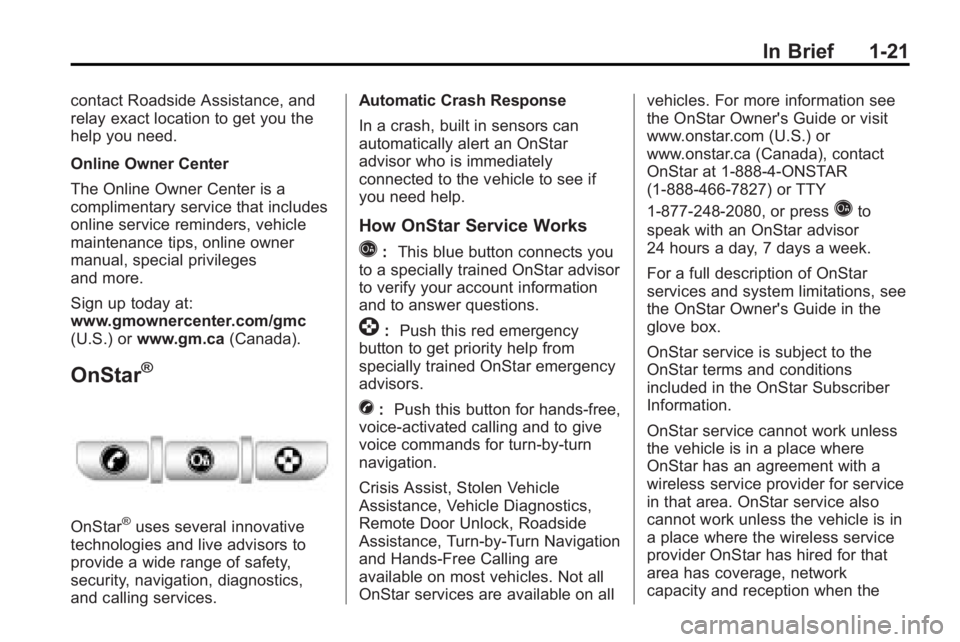
OnStar®uses several innovative
technologies and live advisors to
provide a wide range of safety,
security, navigation, diagnostics,
and calling services. Automatic Crash Response
In a crash, built in sensors can
automatically alert an OnStar
advisor who is immediately
connected to the vehicle to see if
you need help.
How OnStar Service Works
Q:
This blue button connects you
to a specially trained OnStar advisor
to verify your account information
and to answer questions.
]: Push this red emergency
button to get priority help from
specially trained OnStar emergency
advisors.
X: Push this button for hands-free,
voice-activated calling and to give
voice commands for turn-by-turn
navigation.
Crisis Assist, Stolen Vehicle
Assistance, Vehicle Diagnostics,
Remote Door Unlock, Roadside
Assistance, Turn-by-Turn Navigation
and Hands-Free Calling are
available on most vehicles. Not all
OnStar services are available on all vehicles. For more information see
the OnStar Owner's Guide or visit
www.onstar.com (U.S.) or
www.onstar.ca (Canada), contact
OnStar at 1-888-4-ONSTAR
(1-888-466-7827) or TTY
1-877-248-2080, or press
Qto
speak with an OnStar advisor
24 hours a day, 7 days a week.
For a full description of OnStar
services and system limitations, see
the OnStar Owner's Guide in the
glove box.
OnStar service is subject to the
OnStar terms and conditions
included in the OnStar Subscriber
Information.
OnStar service cannot work unless
the vehicle is in a place where
OnStar has an agreement with a
wireless service provider for service
in that area. OnStar service also
cannot work unless the vehicle is in
a place where the wireless service
provider OnStar has hired for that
area has coverage, network
capacity and reception when the
Page 121 of 444
Instruments and Controls 5-3
Do not adjust the steering wheel
while driving.
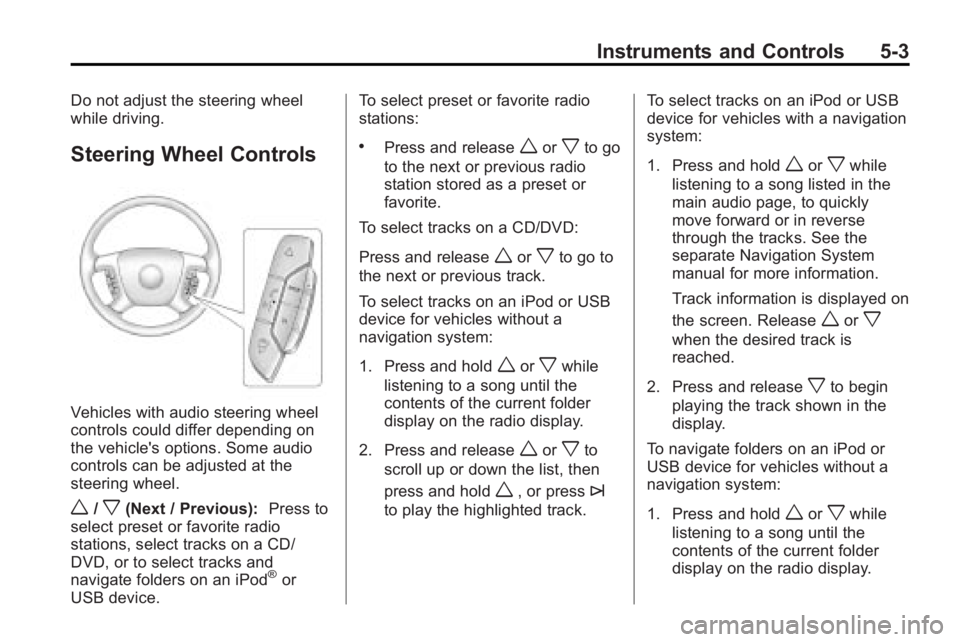
Steering Wheel Controls
Vehicles with audio steering wheel
controls could differ depending on
the vehicle's options. Some audio
controls can be adjusted at the
steering wheel.
w/x(Next / Previous):Press to
select preset or favorite radio
stations, select tracks on a CD/
DVD, or to select tracks and
navigate folders on an iPod
®or
USB device. To select preset or favorite radio
stations:
.Press and releaseworxto go
to the next or previous radio
station stored as a preset or
favorite.
To select tracks on a CD/DVD:
Press and release
worxto go to
the next or previous track.
To select tracks on an iPod or USB
device for vehicles without a
navigation system:
1. Press and hold
worxwhile
listening to a song until the
contents of the current folder
display on the radio display.
2. Press and release
worxto
scroll up or down the list, then
press and hold
w, or press¨
to play the highlighted track. To select tracks on an iPod or USB
device for vehicles with a navigation
system:
1. Press and hold
worxwhile
listening to a song listed in the
main audio page, to quickly
move forward or in reverse
through the tracks. See the
separate Navigation System
manual for more information.
Track information is displayed on
the screen. Release
worx
when the desired track is
reached.
2. Press and release
xto begin
playing the track shown in the
display.
To navigate folders on an iPod or
USB device for vehicles without a
navigation system:
1. Press and hold
worxwhile
listening to a song until the
contents of the current folder
display on the radio display.
Page 122 of 444
5-4 Instruments and Controls
2. Press and holdxto go back to
the previous folder list.
3. Press and release
worxto
scroll up or down the list.
.To select a folder, press
and hold
w, or press¨
when the folder is
highlighted.
.To go back further in the
folder list, press and
hold
x.
To navigate folders on an iPod or
USB device for vehicles with a
navigation system:
1. Go to the Music Navigator by first touching the center touch
screen folder button in the main
audio page.
2. While in Music Navigator, select the folder/artist/genre/category,
etc. using the touch screen. 3. Press and release
xto scroll
through the selected music list.
Touch the track label on the
touch screen to highlight and
begin playing the track from
that list.
4. Press and hold
xto quickly
scroll through the selected
music list
b g(Mute/Push to Talk): Press
to silence the vehicle speakers only.
Press again to turn the sound on.
For vehicles with Bluetooth or
OnStar
®systems, press and hold
for longer than two seconds to
interact with those systems. See
Bluetooth
on page 7‑46and the
OnStar Owner's Guide for more
information.
c(End): Press to reject an
incoming call, or end a current call.
SRCE (Source/Voice
Recognition): Press to switch
between the radio, CD, and for
vehicles with, DVD, front auxiliary,
and rear auxiliary. For vehicles with the navigation
system, press and hold this button
for longer than one second to
initiate voice recognition. See
“Voice
Recognition” in the Navigation
System manual for more
information.
¨(Seek): Press to go to the next
radio station while in AM,
FM, or XM™.
For vehicles with or without a
navigation system:
Press
¨to go to the next track or
chapter while sourced to the CD or
DVD slot.
Press
¨to select a track or a
folder when navigating folders on an
iPod or USB device.
For vehicles with a navigation
system:
1. Press and hold
¨until a beep
is heard, to place the radio into
SCAN mode, a station will play
for five seconds before moving
to the next station.
Page 150 of 444
5-32 Instruments and Controls
The following indicator lights come
on the instrument panel when
activated and also appear on
the HUD:
.Turn Signal Indicators
.High-Beam Indicator Symbol
The HUD temporarily displays
CHECK GAGES and ICE
POSSIBLE when these messages
are on the DIC trip computer.
The HUD also displays the following
messages on vehicles with these
systems, when they are active:
.TRACTION CONTROL ACTIVE
.STABILITRAK ACTIVE
Notice: If you try to use the HUD
image as a parking aid, you may
misjudge the distance and
damage your vehicle. Do not use
the HUD image as a parking aid.
When the HUD is on, the
speedometer reading is continually
displayed. The current radio station
or CD track number will display for a
short period of time after the radio or CD track status changes. This
happens whenever radio information
is changed. The speedometer size
is reduced when radio, CD
information, warnings,
or turn-by-turn navigation
information are displayed on
the HUD.
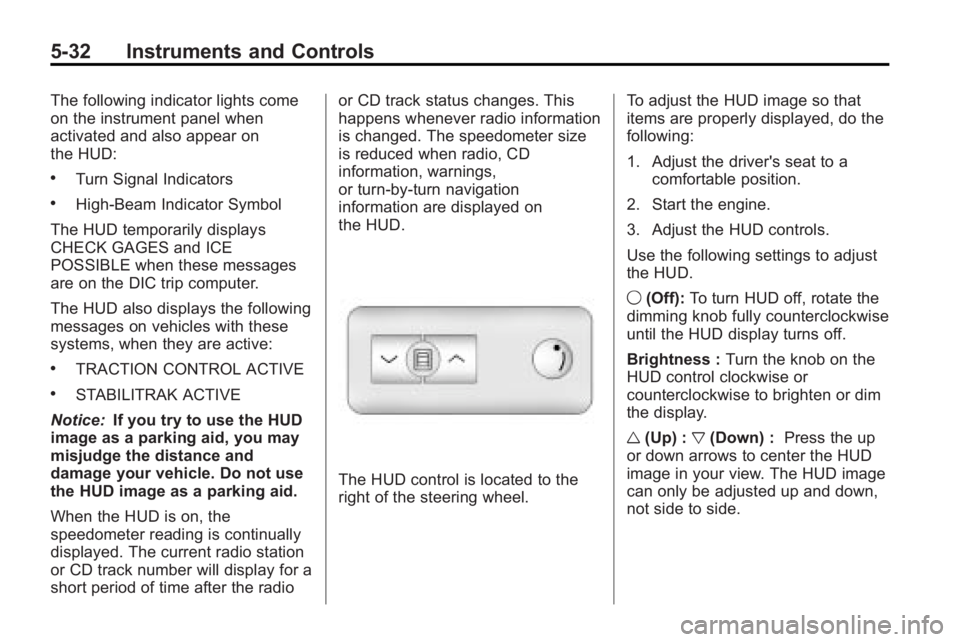
The HUD control is located to the
right of the steering wheel.
To adjust the HUD image so that
items are properly displayed, do the
following:
1. Adjust the driver's seat to a
comfortable position.
2. Start the engine.
3. Adjust the HUD controls.
Use the following settings to adjust
the HUD.
9 (Off): To turn HUD off, rotate the
dimming knob fully counterclockwise
until the HUD display turns off.
Brightness : Turn the knob on the
HUD control clockwise or
counterclockwise to brighten or dim
the display.
w (Up) : x(Down) : Press the up
or down arrows to center the HUD
image in your view. The HUD image
can only be adjusted up and down,
not side to side.
Page 184 of 444
7-2 Infotainment System
For more information, seeDefensive
Driving on page 9‑2.
The vehicle has Retained
Accessory Power (RAP). With RAP,
the audio system can be played
even after the ignition is turned off.
See Retained Accessory Power
(RAP)
on page 9‑17for more
information.
Navigation/Radio System
For vehicles with a navigation radio
system, see the separate Navigation
System manual.
Theft-Deterrent Feature
THEFTLOCK®is designed to
discourage theft of the vehicle's
radio by learning a portion of the
Vehicle Identification Number (VIN).
The radio does not operate if it is
stolen or moved to a different
vehicle.
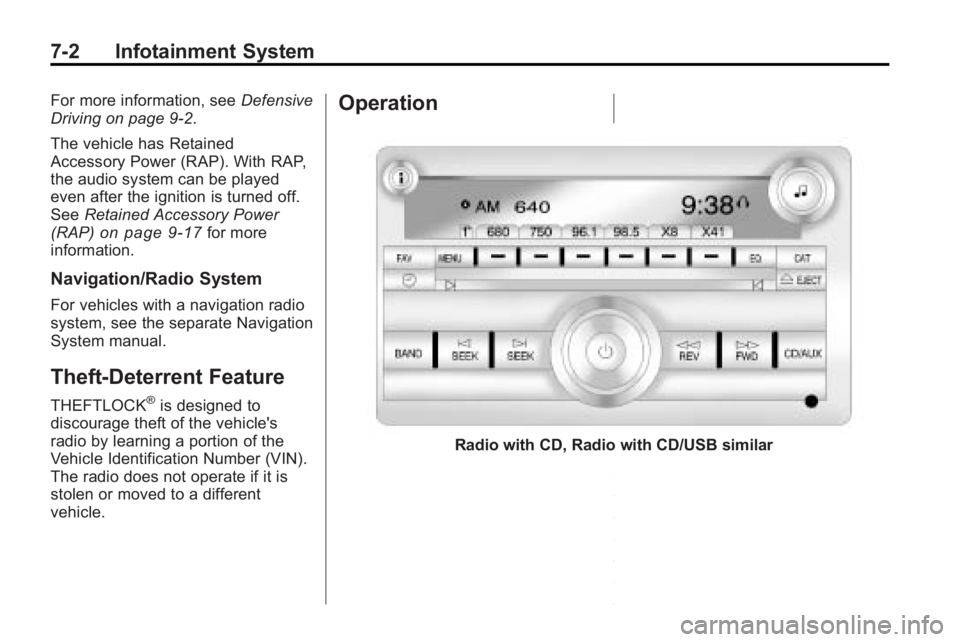
Operation
Radio with CD, Radio with CD/USB similar
Page 201 of 444
Infotainment System 7-19
If loading and reading of a DVD
cannot be completed, because of an
unknown format, etc., and the disc
fails to eject, press and hold for
more than five seconds to force the
disc to eject.
DVD-V (Video) Display Buttons
Once a DVD-V is inserted, the radio
display menu shows several icons.
Press the softkeys under any icon
during DVD playback. See the icon
list below for more information.
The rear seat passenger can
navigate the DVD-V menus and
controls through the remote control.
See“Remote Control”, under Rear
Seat Entertainment (RSE) System
on page 7‑36for more information.
The Video Screen automatically
turns on when the DVD-V is
inserted into the DVD slot.
r/j(Play/Pause): Press either
the play or pause icon displayed on
the radio system, to toggle between
pausing or restarting playback of
a DVD.
.If the forward arrow is showing
on display, the system is in
pause mode.
.If the pause icon is showing on
display, the system is in
playback mode.
.If the DVD screen is off, press
the play button to turn the
screen on.
Some DVDs begin playing after the
previews have finished, although
there could be a delay of up to
30 seconds. If the DVD does
not begin playing the movie
automatically, press the softkey
under the play/pause icon displayed
on the radio. If the DVD still does
not play, refer to the on-screen
instructions, if available.
c(Stop): Press to stop playing,
rewinding, or fast forwarding a DVD.
r(Enter): Press to select the
choices that are highlighted in
any menu.
y(Menu): Press to access the
DVD menu. The DVD menu is
different on every DVD. Use the
softkeys under the navigation
arrows to navigate the cursor
through the DVD menu. After
making a selection press this
button. This button only operates
when using a DVD.
Nav (Navigate): Press to display
directional arrows for navigating
through the menus.
q(Return): Press to exit the
current active menu and return to
the previous menu. This button
operates only when a DVD is
playing and a menu is active.
Page 202 of 444
7-20 Infotainment System
DVD-A (Audio) Display Buttons
Once a DVD-A is inserted, the radio
display menu shows several icons.
Press the softkeys under any icon
during DVD playback. See the icon
list below for more information.
The rear seat operator can navigate
the DVD-A menus and controls
through the remote control. See
“Remote Control”, underRear Seat
Entertainment (RSE) System
on
page 7‑36for more information.
The Video Screen does not
automatically power on when the
DVD-A is inserted into the DVD slot.
It must be manually turned on by
the rear seat occupant through the
remote control power button.
r/j(Play/Pause): Press either
the play or pause icon displayed on
the radio system, to toggle between
pausing or restarting playback of
a DVD.
.If the forward arrow is showing
on display, the system is in
pause mode.
.If the pause icon is showing on
display, the system is in
playback mode.
qGroupr: Press to cycle
through musical groupings on the
DVD-A disc.
Nav (Navigate): Press to display
directional arrows for navigating
through the menus.
e(Audio Stream): Press to cycle
through audio stream formats
located on the DVD-A disc. The
video screen shows the audio
stream changing. Inserting a Disc
To play a disc, gently insert the disc,
with the label side up, into the
loading slot. The DVD player might
not accept some paper labeled
media. The player starts loading the
disc into the system and shows
“Loading Disc”
on the radio display.
At the same time, the radio displays
a softkey menu of option(s). Some
discs automatically play the movie
while others default to the softkey
menu display, which requires the
Play, Enter, or Navigation softkeys
to be pressed; either by the softkey
on the radio or by the rear seat
passenger using the remote control.
It may take up to 30 seconds for a
DVD to begin playing.