audio GMC ACADIA 2013 Get To Know Guide
[x] Cancel search | Manufacturer: GMC, Model Year: 2013, Model line: ACADIA, Model: GMC ACADIA 2013Pages: 16, PDF Size: 3.52 MB
Page 2 of 16
2
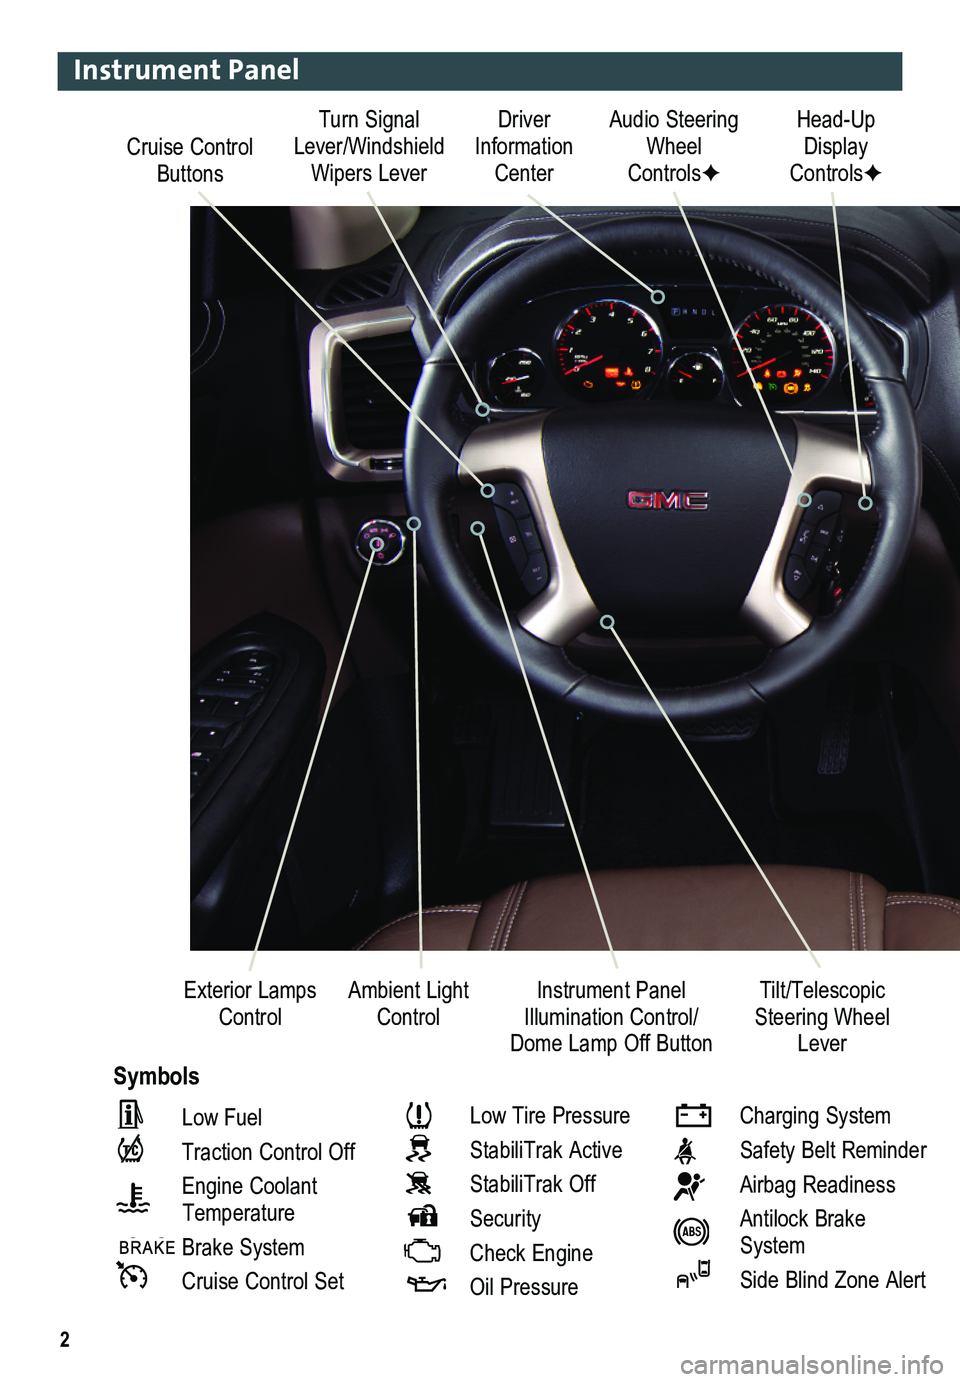
Cruise Control Buttons
Driver Information Center
Audio Steering Wheel ControlsF
Head-Up Display ControlsF
Ambient Light ControlInstrument Panel Illumination Control/Dome Lamp Off Button
Exterior Lamps ControlTilt/Telescopic Steering Wheel Lever
Symbols
Turn Signal Lever/Windshield Wipers Lever
Instrument Panel
Low Fuel
Traction Control Off
Engine Coolant
Temperature
Brake System
Cruise Control Set
Low Tire Pressure
StabiliTrak Active
StabiliTrak Off
Security
Check Engine
Oil Pressure
Charging System
Safety Belt Reminder
Airbag Readiness
Antilock Brake System
Side Blind Zone Alert
Page 3 of 16
3
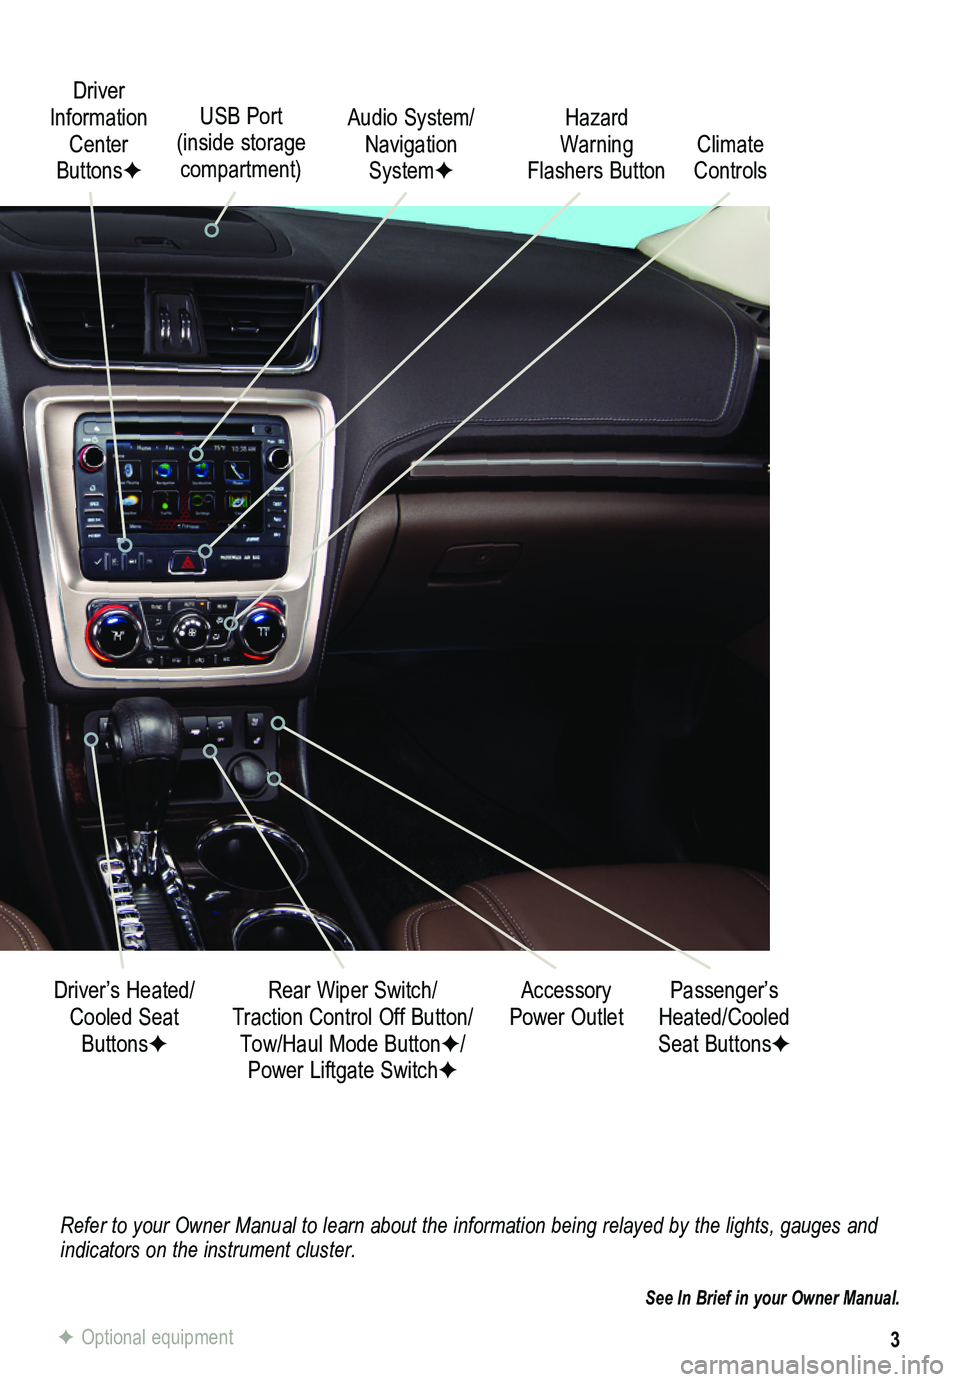
Refer to your Owner Manual to learn about the information being relayed \
by the lights, gauges and indicators on the instrument cluster.
See In Brief in your Owner Manual.
Driver Information Center ButtonsF
Audio System/ Navigation SystemF
Accessory Power Outlet
Driver’s Heated/Cooled Seat ButtonsF
Rear Wiper Switch/ Traction Control Off Button/
Tow/Haul Mode ButtonF/ Power Liftgate SwitchF
Climate Controls
Hazard Warning Flashers Button
Passenger’s Heated/Cooled Seat ButtonsF
USB Port (inside storage compartment)
F Optional equipment
Page 7 of 16
7
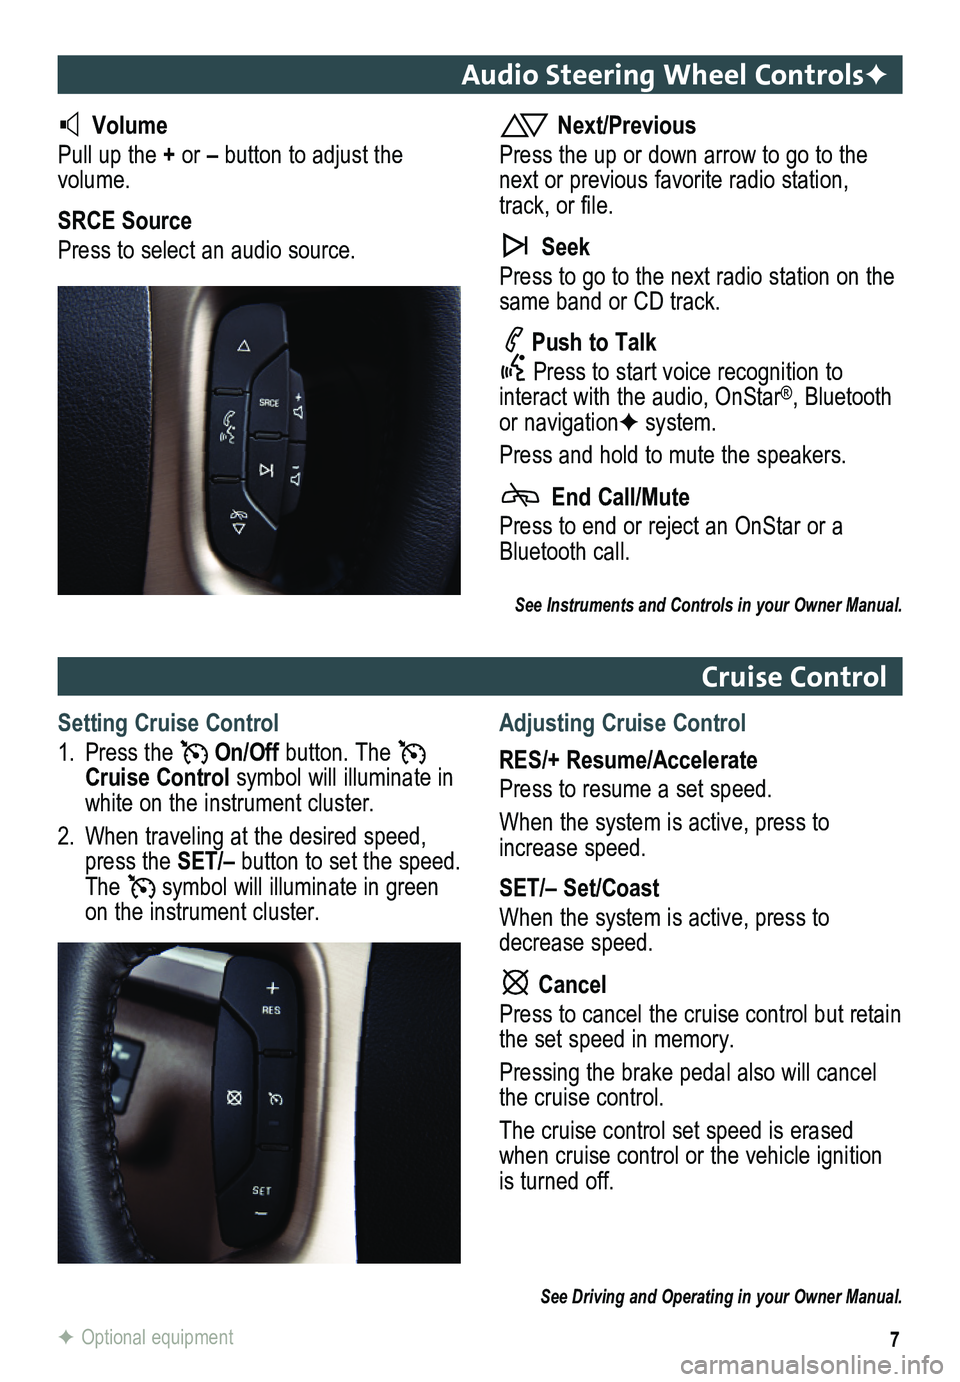
Audio Steering Wheel ControlsF
Volume
Pull up the + or – button to adjust the volume.
SRCE Source
Press to select an audio source.
Next/Previous
Press the up or down arrow to go to the next or previous favorite radio station, track, or file.
Seek
Press to go to the next radio station on the same band or CD track.
Push to Talk
Press to start voice recognition to interact with the audio, OnStar®, Bluetooth or navigationF system.
Press and hold to mute the speakers.
End Call/Mute
Press to end or reject an OnStar or a Bluetooth call.
Cruise Control
Setting Cruise Control
1. Press the On/Off button. The Cruise Control symbol will illuminate in white on the instrument cluster.
2. When traveling at the desired speed, press the SET/– button to set the speed. The symbol will illuminate in green on the instrument cluster.
Adjusting Cruise Control
RES/+ Resume/Accelerate
Press to resume a set speed.
When the system is active, press to increase speed.
SET/– Set/Coast
When the system is active, press to decrease speed.
Cancel
Press to cancel the cruise control but retain the set speed in memory.
Pressing the brake pedal also will cancel the cruise control.
The cruise control set speed is erased when cruise control or the vehicle ignition is turned off.
See Driving and Operating in your Owner Manual.
F Optional equipment
See Instruments and Controls in your Owner Manual.
Page 8 of 16
8
Infotainment System
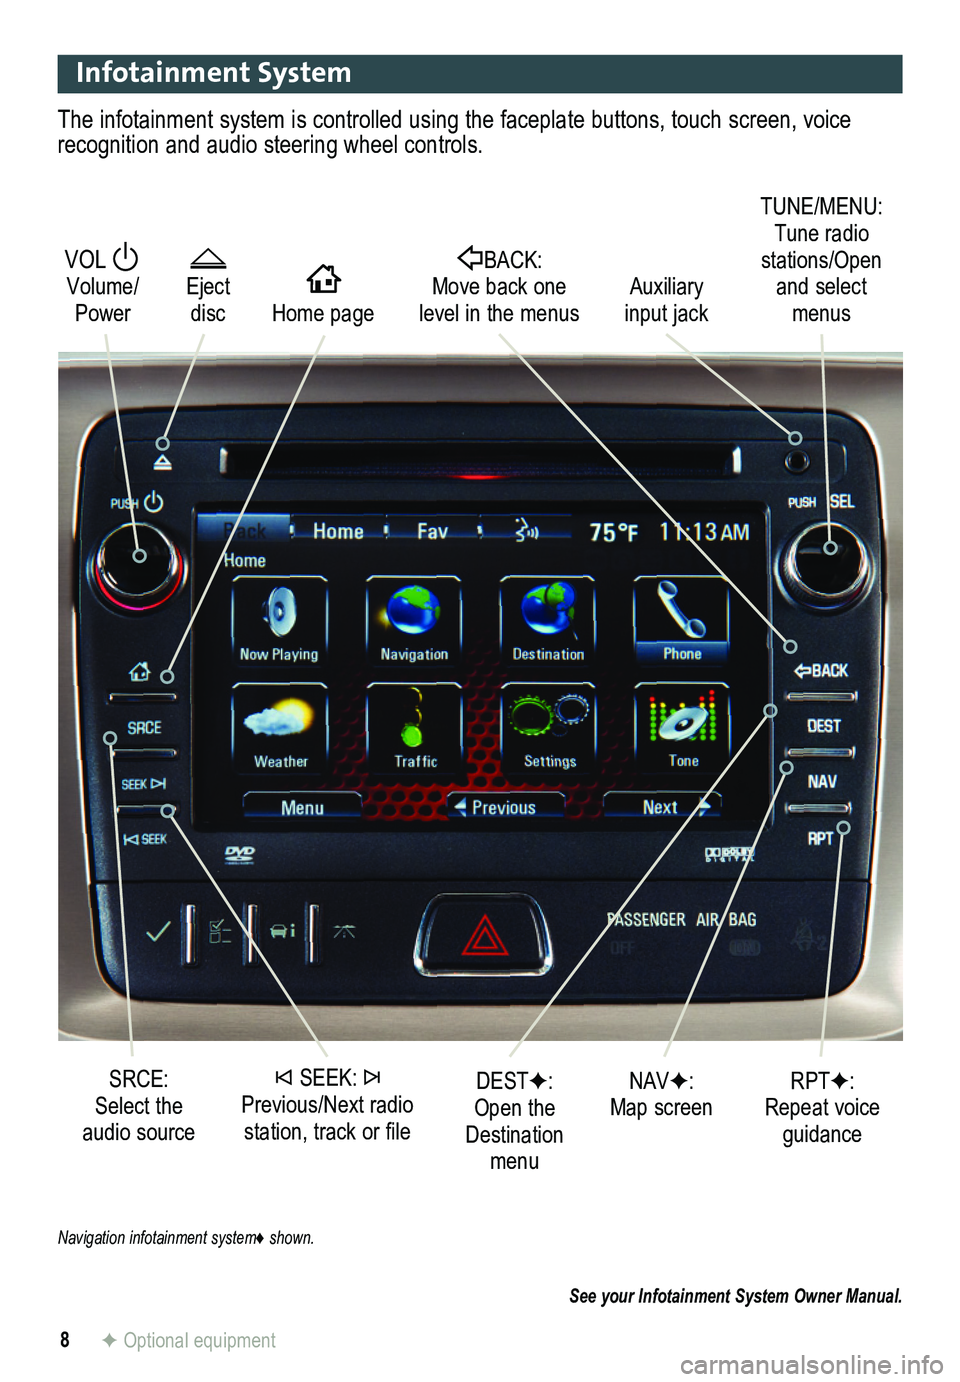
The infotainment system is controlled using the faceplate buttons, touch screen, voice recognition and audio steering wheel controls.
See your Infotainment System Owner Manual.
VOL Volume/ PowerHOME Home page
BACK: Move back one level in the menus
Eject disc
TUNE/MENU: Tune radio stations/Open and select menus
SRCE: Select the audio source
DESTF: Open the Destination menu
NAVF: Map screenRPTF: Repeat voice guidance
SEEK: Previous/Next radio station, track or file
Navigation infotainment system♦ shown.
Auxiliary input jack
F Optional equipment
Page 9 of 16
9
Infotainment System
See Infotainment System in your Owner Manual.
Refer to your Owner Manual for important safety information about using \
the infotainment system while driving.
Setting the Time
1. Touch the Time Display on the touch screen.
2. Touch the desired down or up screen button to adjust the time.
3. Touch the OK screen button to confirm the setting.
Storing Favorite Stations
Radio stations from all bands (AM, FM or XMF) can be stored, in any order, on up to six pages of favorites.
1. Tune in the desired radio station.
2. Press and hold one of the six preset screen buttons until a beep is hear\
d.
3. Repeat the steps for each desired station.
Home Page
Adding Home Page Screen Buttons
1. Press theHOMEHome button.
2. Touch the Menu screen button.
3. Touch Customize.
4. Touch a button to add or remove. Up to eight screen buttons can be displayed.
5. Touch Done.
Moving Home Page Screen Buttons
1. Press theHOMEHome button.
2. Touch the Menu screen button.
3. Touch Sort.
4. Touch the screen button to be moved and the screen button for the new location.
5. Touch Done.
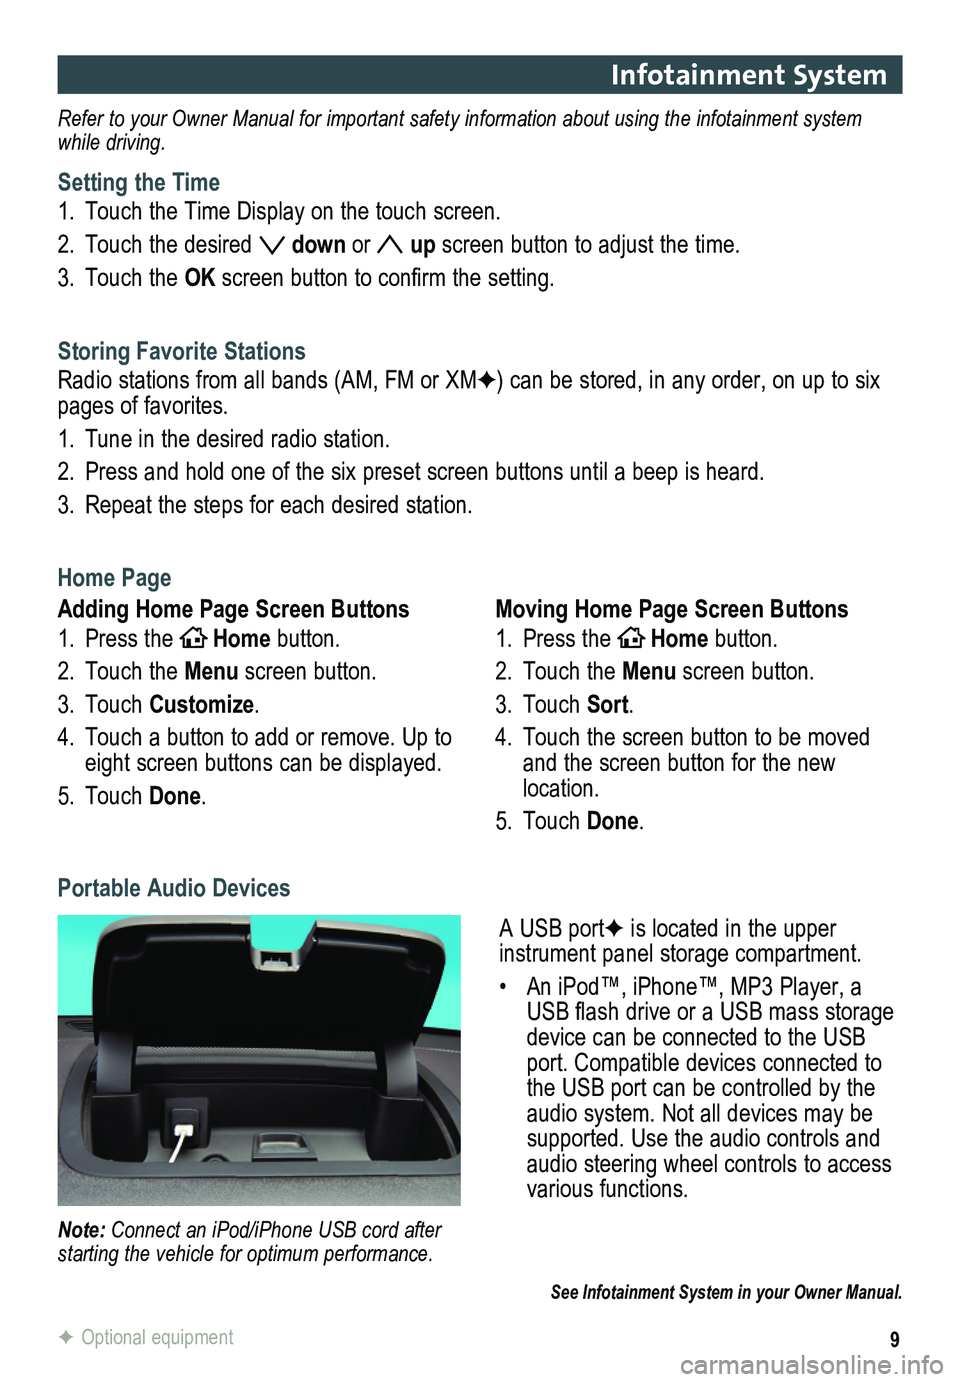
A USB portF is located in the upper
instrument panel storage compartment.
• An iPod™, iPhone™, MP3 Player, a USB flash drive or a USB mass storage device can be connected to the USB port. Compatible devices connected to the USB port can be controlled by the audio system. Not all devices may be supported. Use the audio controls and audio steering wheel controls to access various functions.
Portable Audio Devices
Note: Connect an iPod/iPhone USB cord after starting the vehicle for optimum performance.
F Optional equipment
Page 10 of 16
10
Bluetooth® System
GMC IntelliLinkF
Before using a Bluetooth-enabled device in the vehicle, it must be paired with the
in-vehicle Bluetooth system. Not all devices will support all functions. Bluetooth streaming audio is available with the IntelliLink system.F For more information, visit www.gm.com/bluetooth.
Pair a Phone
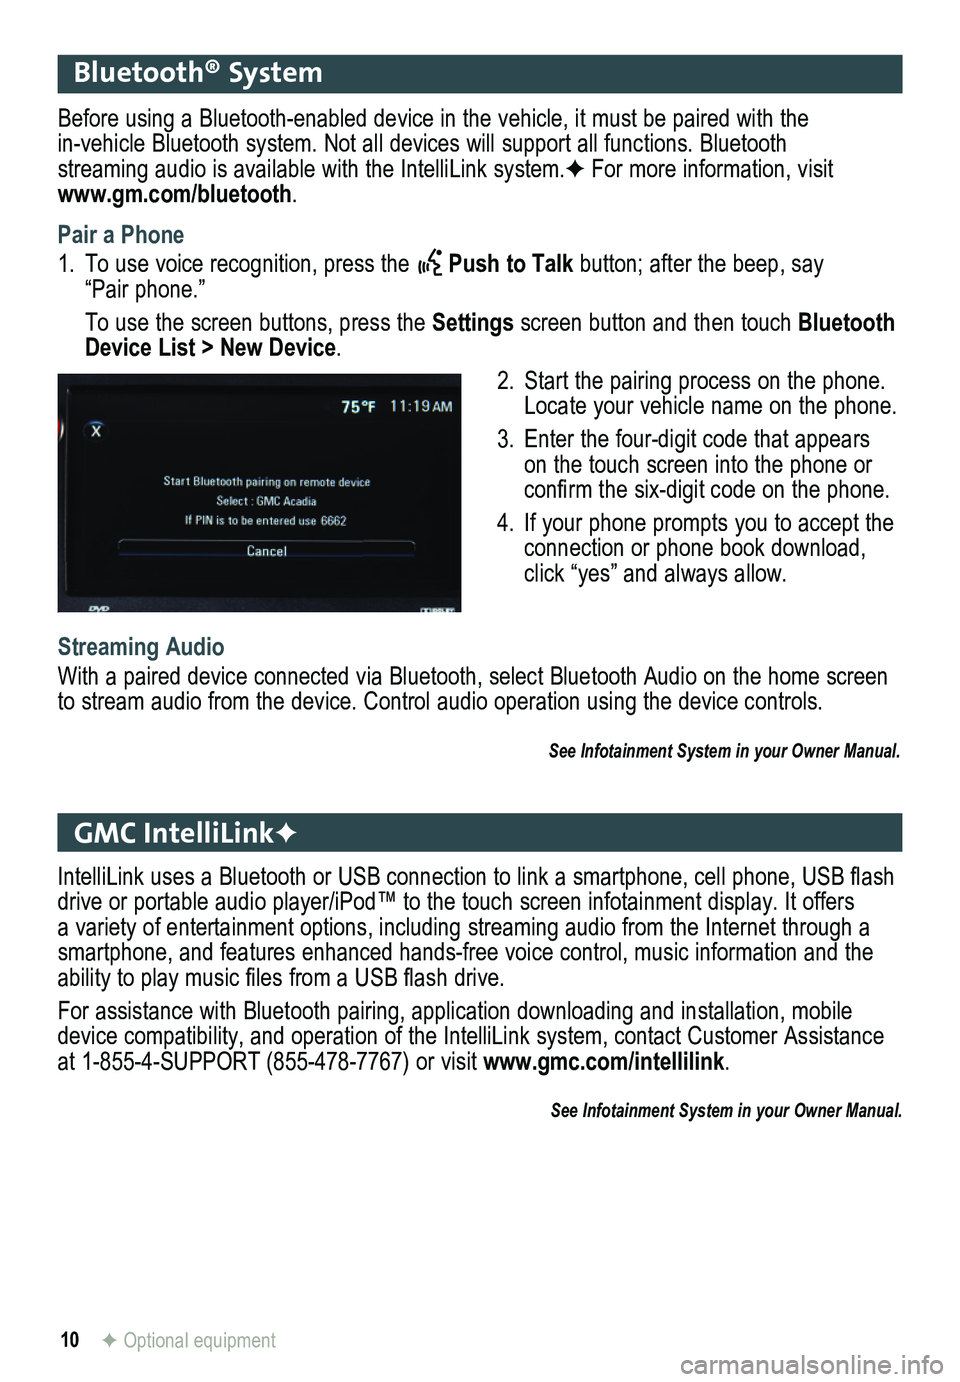
1. To use voice recognition, press the Push to Talk button; after the beep, say “Pair phone.”
To use the screen buttons, press the Settings screen button and then touch Bluetooth Device List > New Device.
2. Start the pairing process on the phone. Locate your vehicle name on the phone.
3. Enter the four-digit code that appears on the touch screen into the phone or confirm the six-digit code on the phone.
4. If your phone prompts you to accept the connection or phone book download, click “yes” and always allow.
Streaming Audio
With a paired device connected via Bluetooth, select Bluetooth Audio on \
the home screen to stream audio from the device. Control audio operation using the devic\
e controls.
See Infotainment System in your Owner Manual.
IntelliLink uses a Bluetooth or USB connection to link a smartphone, cell phone, USB flash drive or portable audio player/iPod™ to the touch screen infotainment display. It offers a variety of entertainment options, including streaming audio from the Internet through a smartphone, and features enhanced hands-free voice control, music inform\
ation and the ability to play music files from a USB flash drive.
For assistance with Bluetooth pairing, application downloading and installation, mobile device compatibility, and operation of the IntelliLink system, contact Customer Assistance at 1-855-4-SUPPORT (855-478-7767) or visit www.gmc.com/intellilink.
See Infotainment System in your Owner Manual.
F Optional equipment
Page 13 of 16
13
Rear Seat Climate Controls
Front Controls
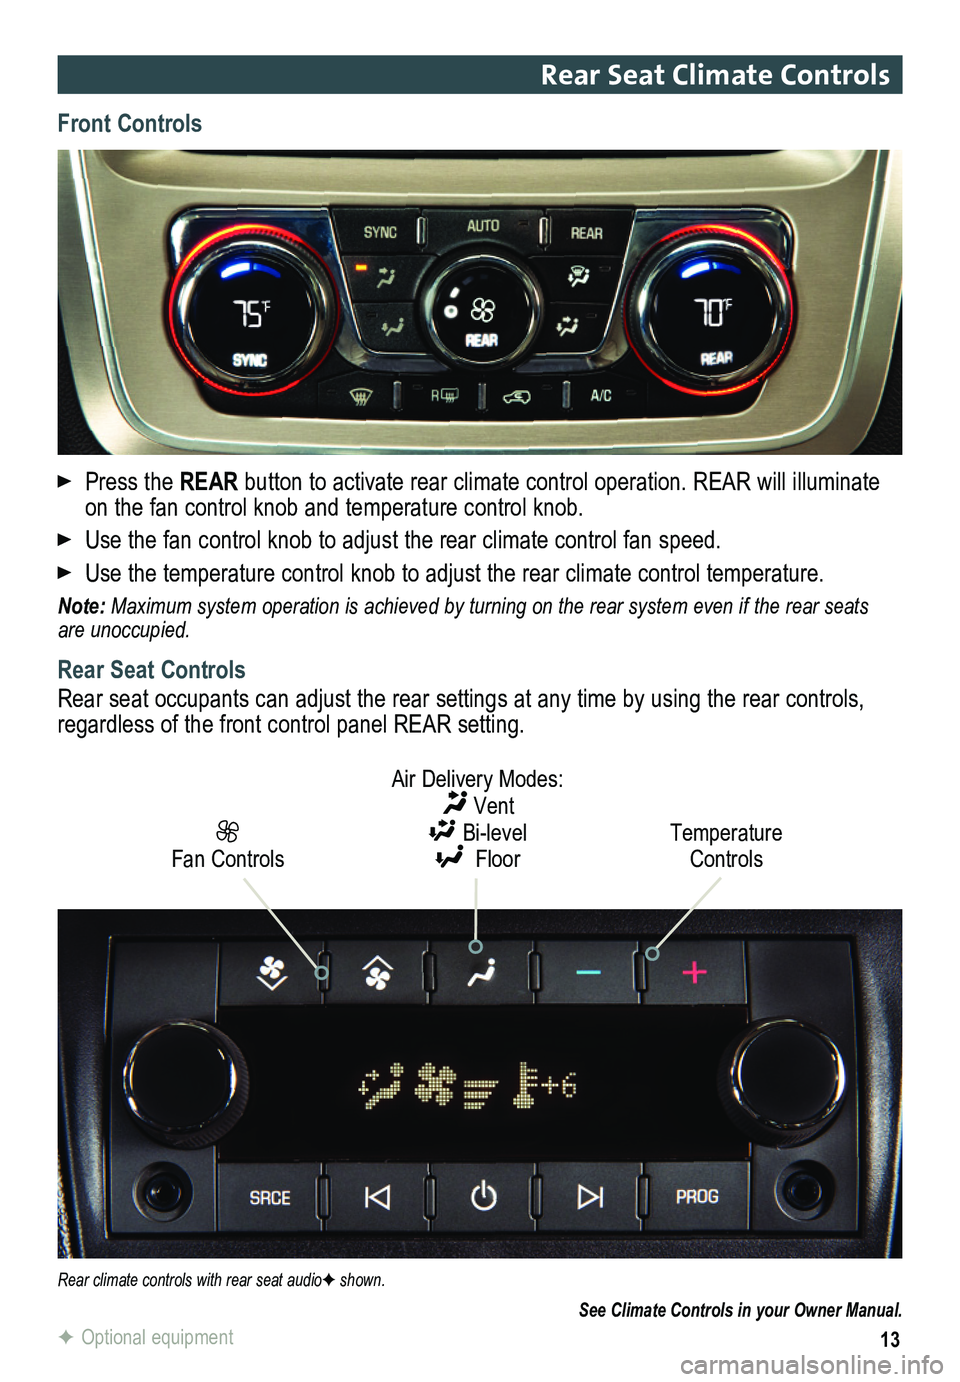
Press the REAR button to activate rear climate control operation. REAR will illuminate on the fan control knob and temperature control knob.
Use the fan control knob to adjust the rear climate control fan speed.
Use the temperature control knob to adjust the rear climate control temp\
erature.
Note: Maximum system operation is achieved by turning on the rear system even\
if the rear seats are unoccupied.
Rear Seat Controls
Rear seat occupants can adjust the rear settings at any time by using the rear controls, regardless of the front control panel REAR setting.
Temperature Controls
Air Delivery Modes: Vent Bi-level Floor Fan Controls
Rear climate controls with rear seat audioF shown.
See Climate Controls in your Owner Manual.
F Optional equipment