display GMC ACADIA 2013 Get To Know Guide
[x] Cancel search | Manufacturer: GMC, Model Year: 2013, Model line: ACADIA, Model: GMC ACADIA 2013Pages: 16, PDF Size: 3.52 MB
Page 2 of 16

2
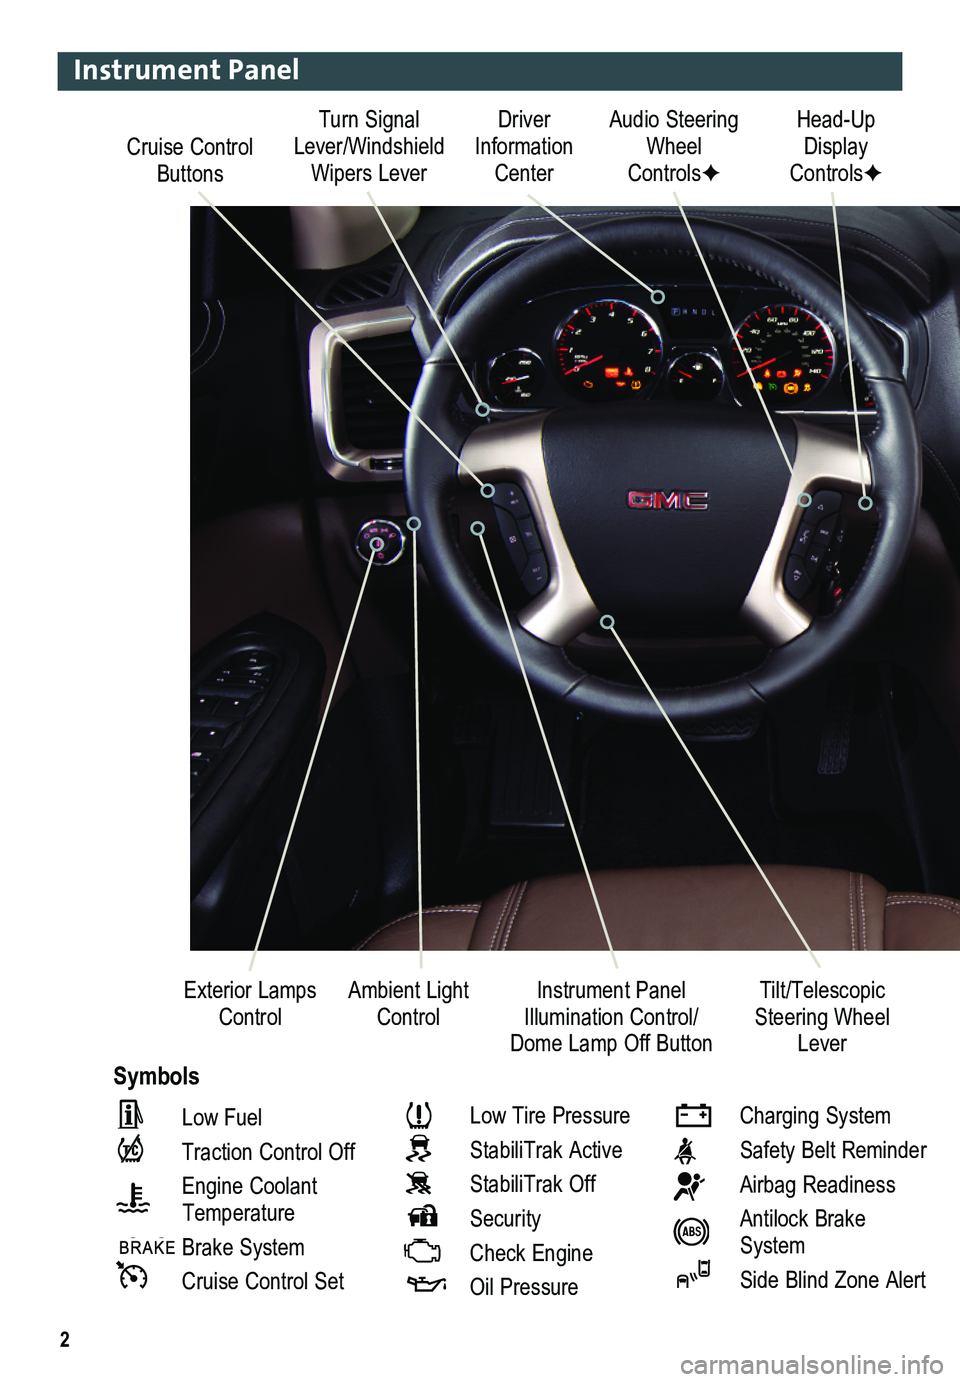
Cruise Control Buttons
Driver Information Center
Audio Steering Wheel ControlsF
Head-Up Display ControlsF
Ambient Light ControlInstrument Panel Illumination Control/Dome Lamp Off Button
Exterior Lamps ControlTilt/Telescopic Steering Wheel Lever
Symbols
Turn Signal Lever/Windshield Wipers Lever
Instrument Panel
Low Fuel
Traction Control Off
Engine Coolant
Temperature
Brake System
Cruise Control Set
Low Tire Pressure
StabiliTrak Active
StabiliTrak Off
Security
Check Engine
Oil Pressure
Charging System
Safety Belt Reminder
Airbag Readiness
Antilock Brake System
Side Blind Zone Alert
Page 9 of 16

9
Infotainment System
See Infotainment System in your Owner Manual.
Refer to your Owner Manual for important safety information about using \
the infotainment system while driving.
Setting the Time
1. Touch the Time Display on the touch screen.
2. Touch the desired down or up screen button to adjust the time.
3. Touch the OK screen button to confirm the setting.
Storing Favorite Stations
Radio stations from all bands (AM, FM or XMF) can be stored, in any order, on up to six pages of favorites.
1. Tune in the desired radio station.
2. Press and hold one of the six preset screen buttons until a beep is hear\
d.
3. Repeat the steps for each desired station.
Home Page
Adding Home Page Screen Buttons
1. Press theHOMEHome button.
2. Touch the Menu screen button.
3. Touch Customize.
4. Touch a button to add or remove. Up to eight screen buttons can be displayed.
5. Touch Done.
Moving Home Page Screen Buttons
1. Press theHOMEHome button.
2. Touch the Menu screen button.
3. Touch Sort.
4. Touch the screen button to be moved and the screen button for the new location.
5. Touch Done.
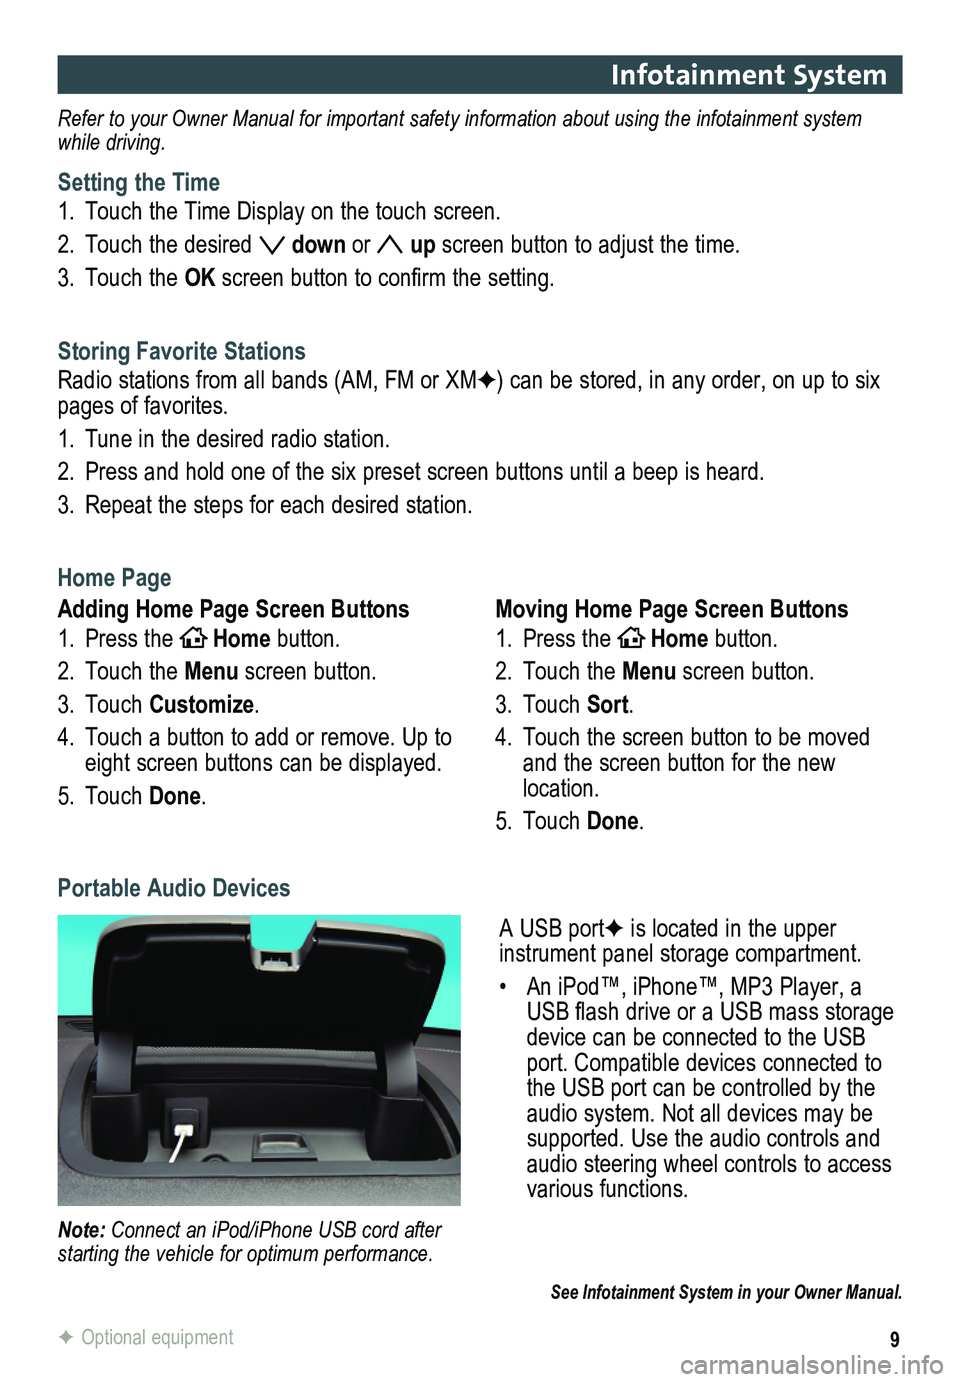
A USB portF is located in the upper
instrument panel storage compartment.
• An iPod™, iPhone™, MP3 Player, a USB flash drive or a USB mass storage device can be connected to the USB port. Compatible devices connected to the USB port can be controlled by the audio system. Not all devices may be supported. Use the audio controls and audio steering wheel controls to access various functions.
Portable Audio Devices
Note: Connect an iPod/iPhone USB cord after starting the vehicle for optimum performance.
F Optional equipment
Page 10 of 16

10
Bluetooth® System
GMC IntelliLinkF
Before using a Bluetooth-enabled device in the vehicle, it must be paired with the
in-vehicle Bluetooth system. Not all devices will support all functions. Bluetooth streaming audio is available with the IntelliLink system.F For more information, visit www.gm.com/bluetooth.
Pair a Phone
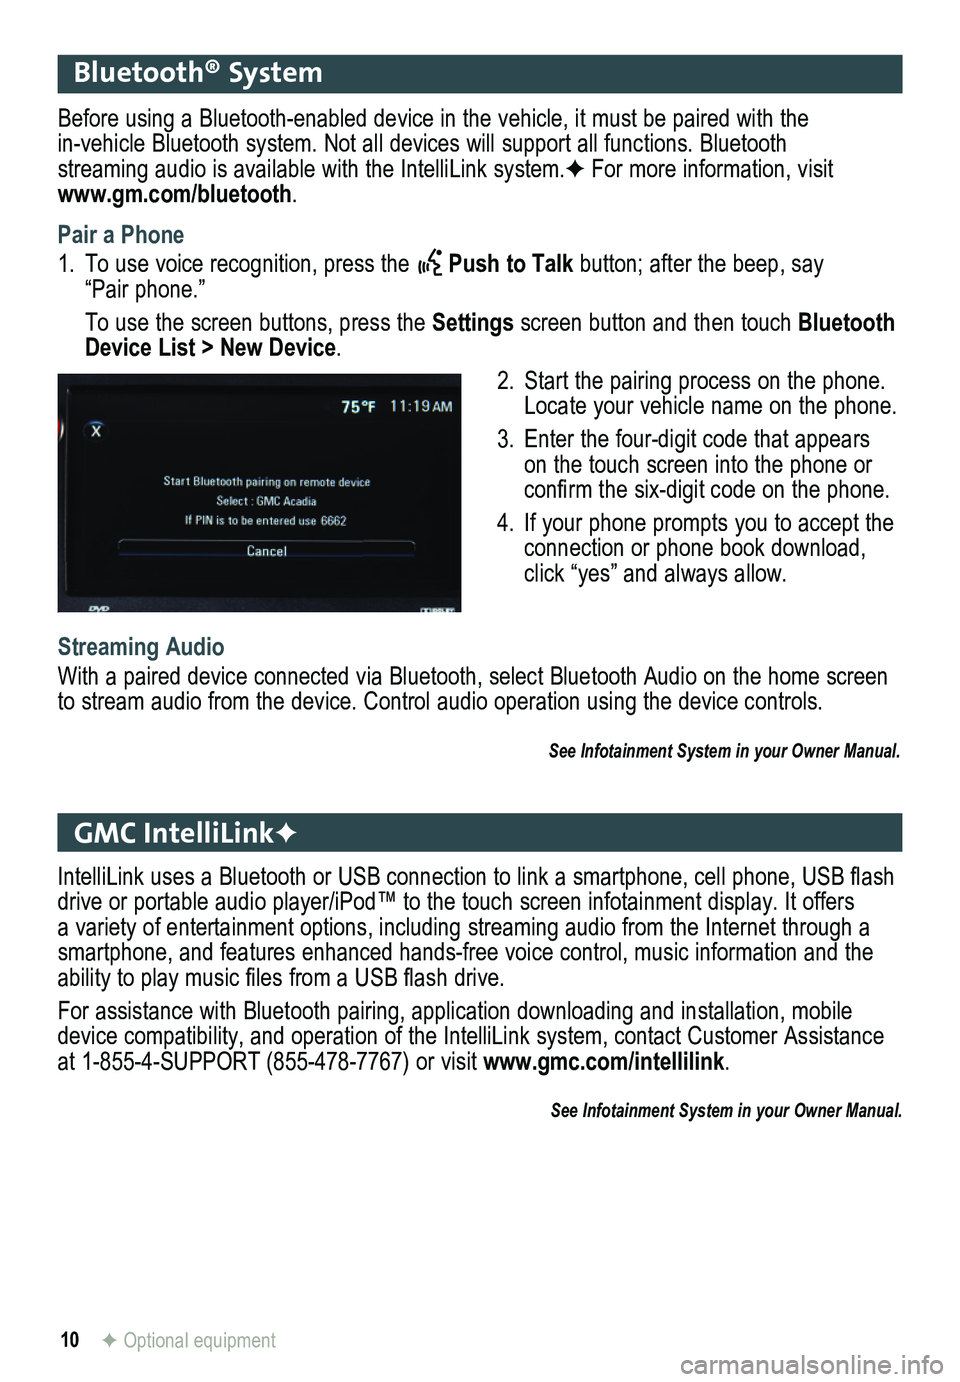
1. To use voice recognition, press the Push to Talk button; after the beep, say “Pair phone.”
To use the screen buttons, press the Settings screen button and then touch Bluetooth Device List > New Device.
2. Start the pairing process on the phone. Locate your vehicle name on the phone.
3. Enter the four-digit code that appears on the touch screen into the phone or confirm the six-digit code on the phone.
4. If your phone prompts you to accept the connection or phone book download, click “yes” and always allow.
Streaming Audio
With a paired device connected via Bluetooth, select Bluetooth Audio on \
the home screen to stream audio from the device. Control audio operation using the devic\
e controls.
See Infotainment System in your Owner Manual.
IntelliLink uses a Bluetooth or USB connection to link a smartphone, cell phone, USB flash drive or portable audio player/iPod™ to the touch screen infotainment display. It offers a variety of entertainment options, including streaming audio from the Internet through a smartphone, and features enhanced hands-free voice control, music inform\
ation and the ability to play music files from a USB flash drive.
For assistance with Bluetooth pairing, application downloading and installation, mobile device compatibility, and operation of the IntelliLink system, contact Customer Assistance at 1-855-4-SUPPORT (855-478-7767) or visit www.gmc.com/intellilink.
See Infotainment System in your Owner Manual.
F Optional equipment
Page 14 of 16

14
Rear Wiper/Washer
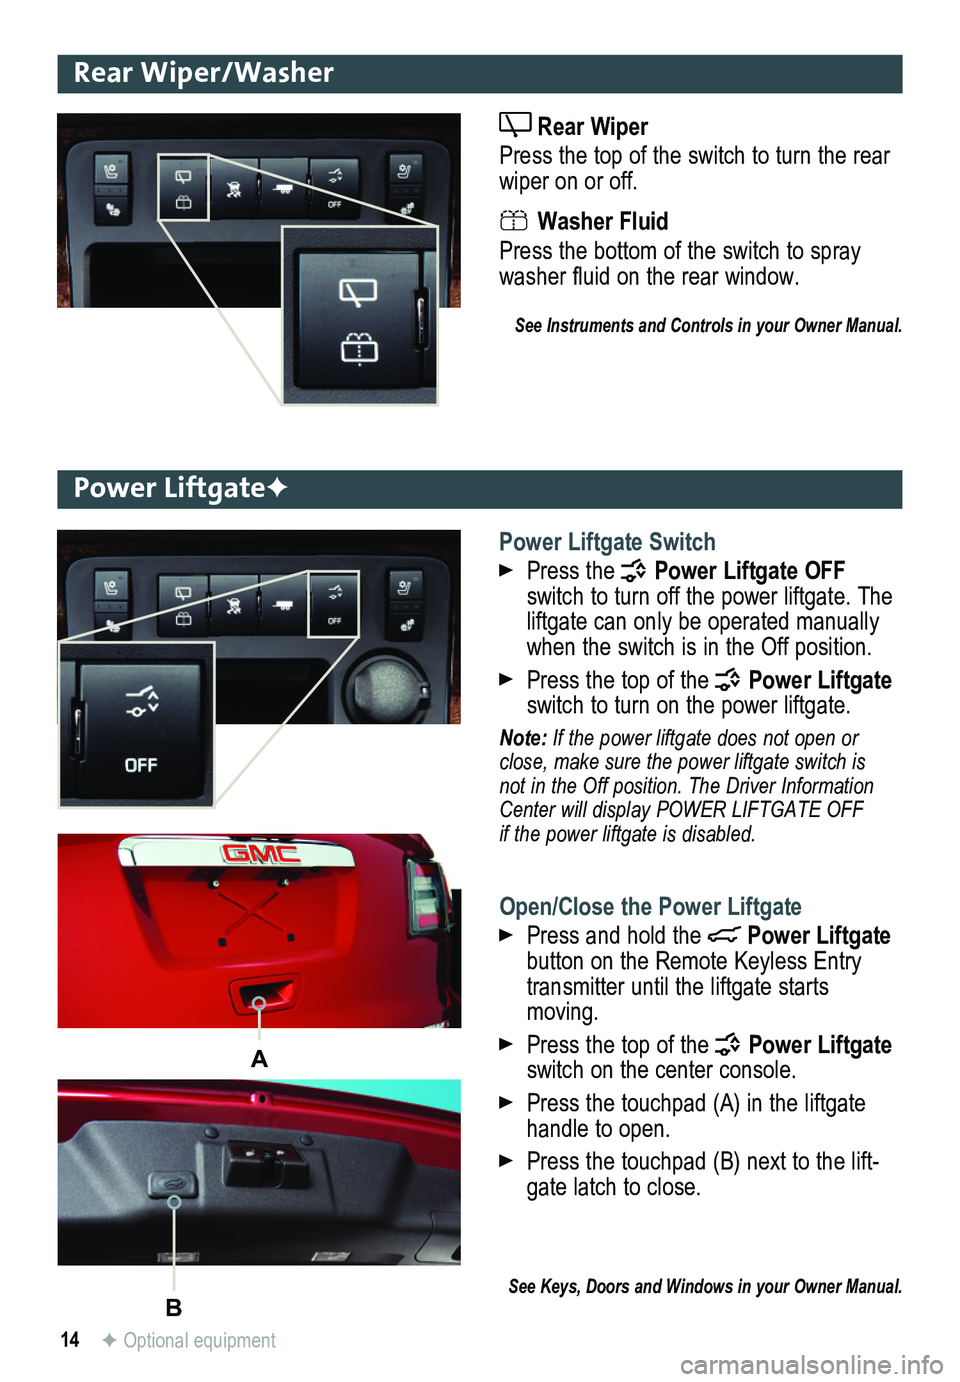
Rear Wiper
Press the top of the switch to turn the rear wiper on or off.
Washer Fluid
Press the bottom of the switch to spray washer fluid on the rear window.
See Instruments and Controls in your Owner Manual.
Power LiftgateF
Power Liftgate Switch
Press the Power Liftgate OFF switch to turn off the power liftgate. The liftgate can only be operated manually when the switch is in the Off position.
Press the top of the Power Liftgate switch to turn on the power liftgate.
Note: If the power liftgate does not open or close, make sure the power liftgate switch is not in the Off position. The Driver Information Center will display POWER LIFTGATE OFF if the power liftgate is disabled.
Open/Close the Power Liftgate
Press and hold the Power Liftgate button on the Remote Keyless Entry transmitter until the liftgate starts moving.
Press the top of the Power Liftgate switch on the center console.
Press the touchpad (A) in the liftgate handle to open.
Press the touchpad (B) next to the lift-gate latch to close.
See Keys, Doors and Windows in your Owner Manual.
F Optional equipment
A
B