washer fluid GMC ACADIA 2013 Owner's Manual
[x] Cancel search | Manufacturer: GMC, Model Year: 2013, Model line: ACADIA, Model: GMC ACADIA 2013Pages: 410, PDF Size: 5.46 MB
Page 5 of 410
Black plate (5,1)Acadia/Acadia Denali Owner Manual - 2013 - crc2 - 12/11/12
Introduction v
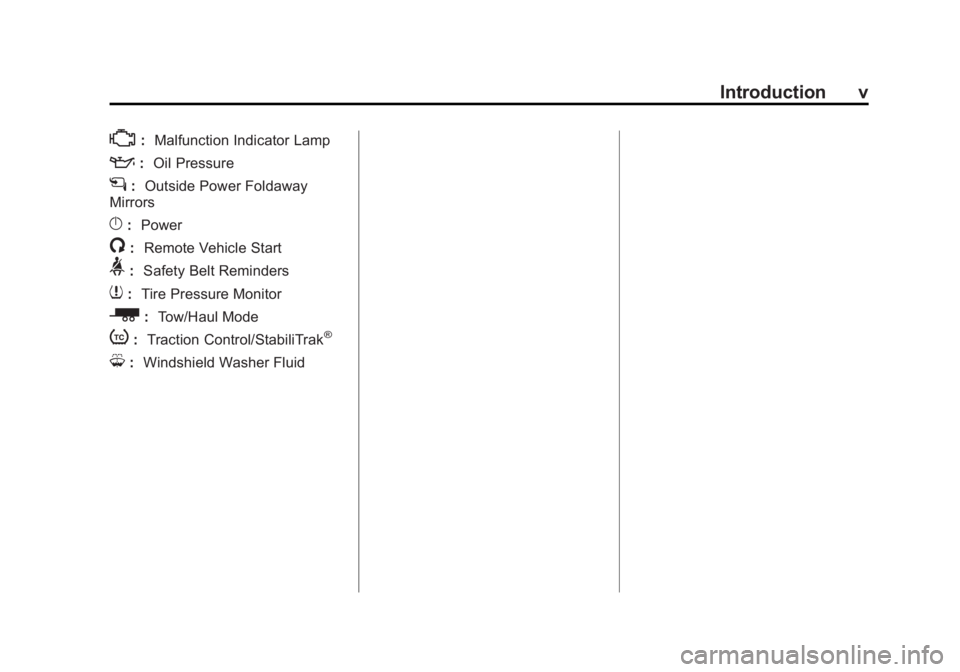
*:Malfunction Indicator Lamp
::Oil Pressure
g:Outside Power Foldaway
Mirrors
}: Power
/:Remote Vehicle Start
>:Safety Belt Reminders
7:Tire Pressure Monitor
_: Tow/Haul Mode
t:Traction Control/StabiliTrak®
M:Windshield Washer Fluid
Page 20 of 410
Black plate (14,1)Acadia/Acadia Denali Owner Manual - 2013 - crc2 - 12/11/12
1-14 In Brief
Windshield Washer
JFRONT :Press the button at
the end of the lever to spray washer
fluid on the windshield.
Rear Window Wiper/Washer
The rear wiper and rear wash button
is located on the instrument panel
below the climate control system.
Z: Press to turn the rear wiper on
and off. The wiper speed cannot be
changed.
Y: Press to spray washer fluid on
the rear window. The window wiper
will also come on.
See Windshield Wiper/Washer on
page 5‑3 andRear Window Wiper/
Washer on page 5‑4.
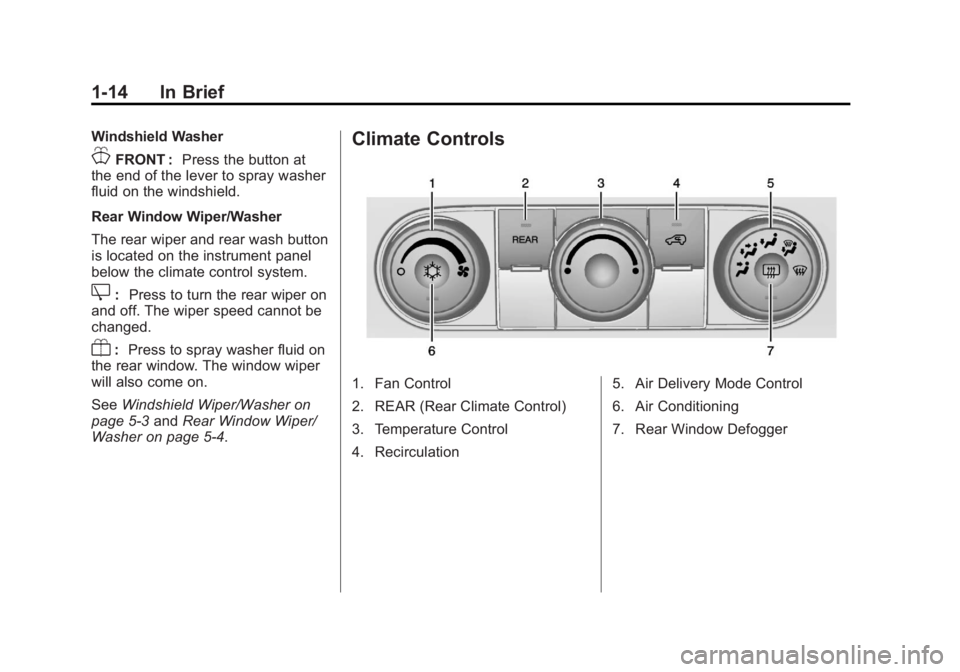
Climate Controls
1. Fan Control
2. REAR (Rear Climate Control)
3. Temperature Control
4. Recirculation 5. Air Delivery Mode Control
6. Air Conditioning
7. Rear Window Defogger
Page 115 of 410
Black plate (1,1)Acadia/Acadia Denali Owner Manual - 2013 - crc2 - 12/11/12
Instruments and Controls 5-1
Instruments and
Controls
Controls
Steering Wheel Adjustment . . . 5-2
Steering Wheel Controls . . . . . . 5-2
Horn . . . . . . . . . . . . . . . . . . . . . . . . . . 5-3
Windshield Wiper/Washer . . . . . 5-3
Rear Window Wiper/Washer . . . . . . . . . . . . . . . . . . . . . . 5-4
Compass . . . . . . . . . . . . . . . . . . . . . 5-4
Clock . . . . . . . . . . . . . . . . . . . . . . . . . 5-6
Power Outlets . . . . . . . . . . . . . . . . . 5-7
Warning Lights, Gauges, and
Indicators
Warning Lights, Gauges, and Indicators . . . . . . . . . . . . . . . . . . . . 5-9
Instrument Cluster . . . . . . . . . . . 5-10
Speedometer . . . . . . . . . . . . . . . . 5-11
Odometer . . . . . . . . . . . . . . . . . . . . 5-11
Tachometer . . . . . . . . . . . . . . . . . . 5-11
Fuel Gauge . . . . . . . . . . . . . . . . . . 5-11
Engine Coolant Temperature Gauge . . . . . . . . . . . . . . . . . . . . . . 5-12
Voltmeter Gauge . . . . . . . . . . . . . 5-13
Safety Belt Reminders . . . . . . . 5-13 Airbag Readiness Light . . . . . . 5-14
Passenger Airbag Status
Indicator . . . . . . . . . . . . . . . . . . . . 5-15
Charging System Light . . . . . . 5-15
Malfunction Indicator Lamp . . . . . . . . . . . . . 5-16
Brake System Warning Light . . . . . . . . . . . . . . . . . . . . . . . 5-18
Antilock Brake System (ABS) Warning Light . . . . . . . . . . . . . . 5-19
Tow/Haul Mode Light . . . . . . . . 5-20
StabiliTrak
®Indicator Light . . . 5-20
Engine Coolant Temperature Warning Light . . . . . . . . . . . . . . 5-20
Tire Pressure Light . . . . . . . . . . 5-21
Engine Oil Pressure Light . . . . 5-21
Security Light . . . . . . . . . . . . . . . . 5-21
High-Beam On Light . . . . . . . . . 5-22
Front Fog Lamp Light . . . . . . . . 5-22
Cruise Control Light . . . . . . . . . 5-22
Information Displays
Driver Information Center (DIC) . . . . . . . . . . . . . . . 5-23
Head-Up Display (HUD) . . . . . 5-28
Vehicle Messages
Vehicle Messages . . . . . . . . . . . 5-31
Battery Voltage and Charging Messages . . . . . . . . . . . . . . . . . . 5-32
Brake System Messages . . . . 5-32
Cruise Control Messages . . . . 5-32
Door Ajar Messages . . . . . . . . . 5-32
Engine Cooling System Messages . . . . . . . . . . . . . . . . . . 5-33
Engine Oil Messages . . . . . . . . 5-34
Engine Power Messages . . . . 5-35
Fuel System Messages . . . . . . 5-35
Key and Lock Messages . . . . . 5-36
Lamp Messages . . . . . . . . . . . . . 5-36
Object Detection System Messages . . . . . . . . . . . . . . . . . . 5-36
Ride Control System Messages . . . . . . . . . . . . . . . . . . 5-37
Airbag System Messages . . . . 5-38
Security Messages . . . . . . . . . . 5-38
Service Vehicle Messages . . . 5-38
Tire Messages . . . . . . . . . . . . . . . 5-39
Transmission Messages . . . . . 5-40
Vehicle Reminder Messages . . . . . . . . . . . . . . . . . . 5-41
Vehicle Speed Messages . . . . 5-41
Washer Fluid Messages . . . . . 5-41
Page 118 of 410
Black plate (4,1)Acadia/Acadia Denali Owner Manual - 2013 - crc2 - 12/11/12
5-4 Instruments and Controls
Clear ice and snow from the wiper
blades before using them. If frozen
to the windshield, carefully loosen or
thaw them. Damaged wiper blades
should be replaced. SeeWiper
Blade Replacement on page 10‑24.
Heavy snow or ice can overload the
wipers. A circuit breaker stops them
until the motor cools.
Windshield Washer
JFRONT (Washer Fluid): Press
the button at the end of the lever, to
spray washer fluid on the
windshield. The wipers clear the
windshield and either stop or return
to the preset speed. The ignition key
must be in ACC/ACCESSORY or
ON/RUN for this to work. See
Washer Fluid on page 10‑18.
{WARNING
In freezing weather, do not use
the washer until the windshield is
warmed. Otherwise the washer
fluid can form ice on the
windshield, blocking your vision.
WASHER FLUID LOW ADD FLUID
is displayed on the Driver
Information Center (DIC) when the
washer fluid is low. See Washer
Fluid Messages on page 5‑41.
Rear Window Wiper/
Washer
The rear wiper and rear wash button
is located on the instrument panel
below the climate control system.
Z(Rear Wiper): Press to turn the
rear wiper on and off. The wiper
speed cannot be changed.
Y(Wash): Press to spray washer
fluid on the rear window. The
window wiper will also come on. Release the button when enough
fluid has been sprayed on the
window. The rear wiper will run a
few more cycles after it is released.
If the rear wiper function was
already on prior to pressing the
wash button, it stays on until the
wiper button is pressed again.
The rear window washer uses the
same fluid that is in the windshield
washer reservoir. See
Washer Fluid
on page 10‑18.
Compass
Your vehicle may have a compass
in the Driver Information Center
(DIC). See Driver Information
Center (DIC) on page 5‑23 for more
information about the DIC.
Compass Zone
The zone is set to zone eight upon
leaving the factory. Your dealer will
set the correct zone for your
location.
Page 155 of 410
Black plate (41,1)Acadia/Acadia Denali Owner Manual - 2013 - crc2 - 12/11/12
Instruments and Controls 5-41
Vehicle Reminder
Messages
ICE POSSIBLE DRIVE
WITH CARE
This message displays when the
outside air temperature is cold
enough to create icy road
conditions. Adjust your driving
accordingly.
Vehicle Speed Messages
SPEED LIMITED TO XXX MPH
(KM/H)
This message displays when your
vehicle speed is limited to 128 km/h
(80 mph) because the vehicle
detects a problem in the speed
variable assist steering system.
Have your vehicle serviced by your
dealer.
Washer Fluid Messages
WASHER FLUID LOW ADD
FLUID
This message displays when the
windshield washer fluid is low. Fill
the windshield washer fluid reservoir
as soon as possible. SeeEngine
Compartment Overview on
page 10‑5 for the location of the
windshield washer fluid reservoir.
Also, see Washer Fluid on
page 10‑18 for more information.
Vehicle
Personalization
Your vehicle may have
customization capabilities that allow
you to program certain features to
one preferred setting. Customization
features can only be programmed to
one setting on the vehicle and
cannot be programmed to a
preferred setting for two different
drivers.
All of the customization options may
not be available on your vehicle.
Only the options available will be
displayed on the DIC.
The default settings for the
customization features were set
when your vehicle left the factory,
but may have been changed from
their default state since then.
The customization preferences are
automatically recalled.
To change customization
preferences, use the following
procedure.
Page 222 of 410
Black plate (6,1)Acadia/Acadia Denali Owner Manual - 2013 - crc2 - 12/11/12
9-6 Driving and Operating
WARNING (Continued)
Flowing or rushing water creates
strong forces. Driving through
flowing water could cause the
vehicle to be carried away. If this
happens, you and other vehicle
occupants could drown. Do not
ignore police warnings and be
very cautious about trying to drive
through flowing water.
Hydroplaning
Hydroplaning is dangerous. Water
can build up under the vehicle's
tires so they actually ride on the
water. This can happen if the road is
wet enough and you are going fast
enough. When the vehicle is
hydroplaning, it has little or no
contact with the road.
There is no hard and fast rule about
hydroplaning. The best advice is to
slow down when the road is wet.
Other Rainy Weather Tips
Besides slowing down, other wet
weather driving tips include:
.Allow extra following distance.
.Pass with caution.
.Keep windshield wiping
equipment in good shape.
.Keep the windshield washer fluid
reservoir filled.
.Have good tires with proper
tread depth. SeeTires on
page 10‑37.
.Turn off cruise control.
Highway Hypnosis
Always be alert and pay attention to
your surroundings while driving.
If you become tired or sleepy, find a
safe place to park the vehicle
and rest. Other driving tips include:
.Keep the vehicle well ventilated.
.Keep the interior
temperature cool.
.Keep your eyes moving
—scan
the road ahead and to the sides.
.Check the rearview mirror and
vehicle instruments often.
Hill and Mountain Roads
Driving on steep hills or through
mountains is different than driving
on flat or rolling terrain. Tips for
driving in these conditions include:
.Keep the vehicle serviced and in
good shape.
.Check all fluid levels and brakes,
tires, cooling system, and
transmission.
.Shift to a lower gear when going
down steep or long hills.
Page 233 of 410
Black plate (17,1)Acadia/Acadia Denali Owner Manual - 2013 - crc2 - 12/11/12
Driving and Operating 9-17
after 15 seconds to prevent
cranking motor damage. To
prevent gear damage, this
system also prevents cranking if
the engine is already running.
Engine cranking can be stopped
by turning the ignition switch to
the ACC/ACCESSORY or
LOCK/OFF position.
Notice: Cranking the engine for
long periods of time, by returning
the key to the START position
immediately after cranking has
ended, can overheat and damage
the cranking motor, and drain the
battery. Wait at least 15 seconds
between each try, to let the
cranking motor cool down.
2. If the engine does not start after five to 10 seconds, especially in
very cold weather (below −18°C
or 0°F), it could be flooded with
too much gasoline. Try pushing
the accelerator pedal all the way
to the floor and holding it there
as you hold the key in START
for up to a maximum of
15 seconds. Wait at least 15 seconds between each try, to
allow the cranking motor to cool
down. When the engine starts,
let go of the key and accelerator.
If the vehicle starts briefly but
then stops again, repeat these
steps. This clears the extra
gasoline from the engine. Do not
race the engine immediately
after starting it. Operate the
engine and transmission gently
until the oil warms up and
lubricates all moving parts.
Notice: The engine is designed to
work with the electronics in the
vehicle. If you add electrical parts
or accessories, you could change
the way the engine operates.
Before adding electrical
equipment, check with your
dealer. If you do not, the engine
might not perform properly. Any
resulting damage would not be
covered by the vehicle warranty.Engine Heater
The engine coolant heater can
provide easier starting and better
fuel economy during engine
warm-up in cold weather conditions
at or below 0°F (−18°C). Vehicles
with an engine coolant heater
should be plugged in at least four
hours before starting. Some models
may have an internal thermostat in
the cord which will prevent engine
coolant heater operation at
temperatures above 0°F (−18°C).
To Use the Engine Coolant
Heater
1. Turn off the engine.
2. Open the hood and unwrap the electrical cord. The bundled cord
is located on the driver side of
the engine compartment,
between the engine air cleaner
and the windshield washer fluid
reservoir. See Engine
Compartment Overview on
page 10‑5.
Page 267 of 410
Black plate (1,1)Acadia/Acadia Denali Owner Manual - 2013 - crc2 - 12/11/12
Vehicle Care 10-1
Vehicle Care
General Information
General Information . . . . . . . . . . 10-2
California Proposition65 Warning . . . . . . . . . . . . . . . . . 10-2
California Perchlorate Materials Requirements . . . . 10-2
Accessories and Modifications . . . . . . . . . . . . . . . 10-2
Vehicle Checks
Doing Your OwnService Work . . . . . . . . . . . . . . . 10-3
Hood . . . . . . . . . . . . . . . . . . . . . . . . 10-4
Engine Compartment Overview . . . . . . . . . . . . . . . . . . . 10-5
Engine Cover . . . . . . . . . . . . . . . . 10-6
Engine Oil . . . . . . . . . . . . . . . . . . . 10-7
Engine Oil Life System . . . . . . 10-9
Automatic Transmission Fluid . . . . . . . . . . . . . . . . . . . . . . 10-10
Engine Air Cleaner/Filter . . . . 10-11
Cooling System . . . . . . . . . . . . 10-12
Engine Coolant . . . . . . . . . . . . . 10-12
Engine Overheating . . . . . . . . 10-16 Overheated Engine
Protection
Operating Mode . . . . . . . . . . . 10-17
Power Steering Fluid . . . . . . . 10-18
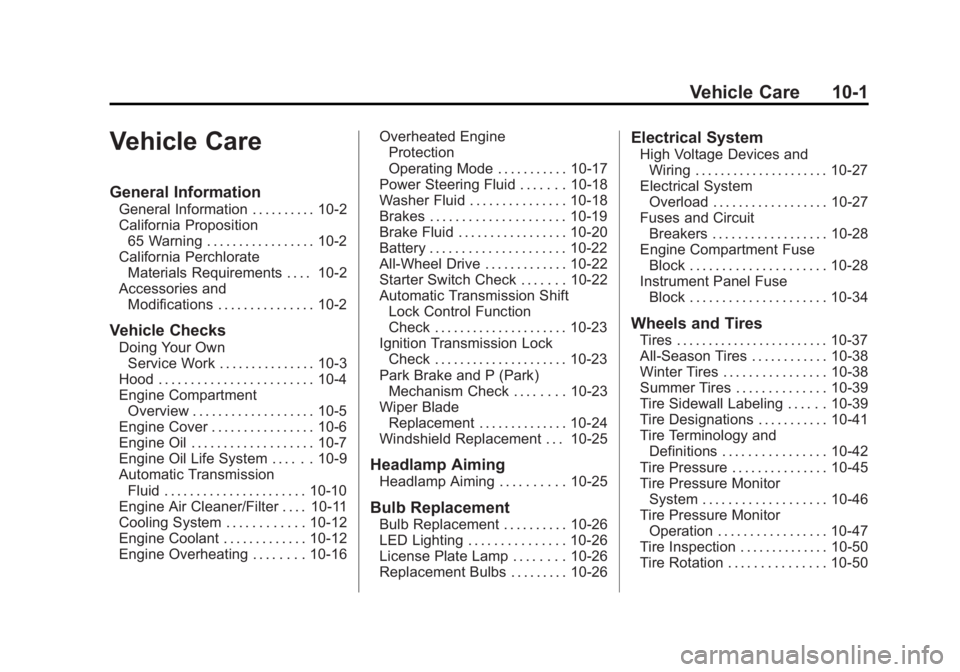
Washer Fluid . . . . . . . . . . . . . . . 10-18
Brakes . . . . . . . . . . . . . . . . . . . . . 10-19
Brake Fluid . . . . . . . . . . . . . . . . . 10-20
Battery . . . . . . . . . . . . . . . . . . . . . 10-22
All-Wheel Drive . . . . . . . . . . . . . 10-22
Starter Switch Check . . . . . . . 10-22
Automatic Transmission Shift Lock Control Function
Check . . . . . . . . . . . . . . . . . . . . . 10-23
Ignition Transmission Lock Check . . . . . . . . . . . . . . . . . . . . . 10-23
Park Brake and P (Park) Mechanism Check . . . . . . . . 10-23
Wiper Blade Replacement . . . . . . . . . . . . . . 10-24
Windshield Replacement . . . 10-25
Headlamp Aiming
Headlamp Aiming . . . . . . . . . . 10-25
Bulb Replacement
Bulb Replacement . . . . . . . . . . 10-26
LED Lighting . . . . . . . . . . . . . . . 10-26
License Plate Lamp . . . . . . . . 10-26
Replacement Bulbs . . . . . . . . . 10-26
Electrical System
High Voltage Devices and Wiring . . . . . . . . . . . . . . . . . . . . . 10-27
Electrical System Overload . . . . . . . . . . . . . . . . . . 10-27
Fuses and Circuit
Breakers . . . . . . . . . . . . . . . . . . 10-28
Engine Compartment Fuse Block . . . . . . . . . . . . . . . . . . . . . 10-28
Instrument Panel Fuse Block . . . . . . . . . . . . . . . . . . . . . 10-34
Wheels and Tires
Tires . . . . . . . . . . . . . . . . . . . . . . . . 10-37
All-Season Tires . . . . . . . . . . . . 10-38
Winter Tires . . . . . . . . . . . . . . . . 10-38
Summer Tires . . . . . . . . . . . . . . 10-39
Tire Sidewall Labeling . . . . . . 10-39
Tire Designations . . . . . . . . . . . 10-41
Tire Terminology andDefinitions . . . . . . . . . . . . . . . . 10-42
Tire Pressure . . . . . . . . . . . . . . . 10-45
Tire Pressure Monitor System . . . . . . . . . . . . . . . . . . . 10-46
Tire Pressure Monitor Operation . . . . . . . . . . . . . . . . . 10-47
Tire Inspection . . . . . . . . . . . . . . 10-50
Tire Rotation . . . . . . . . . . . . . . . 10-50
Page 272 of 410
Black plate (6,1)Acadia/Acadia Denali Owner Manual - 2013 - crc2 - 12/11/12
10-6 Vehicle Care
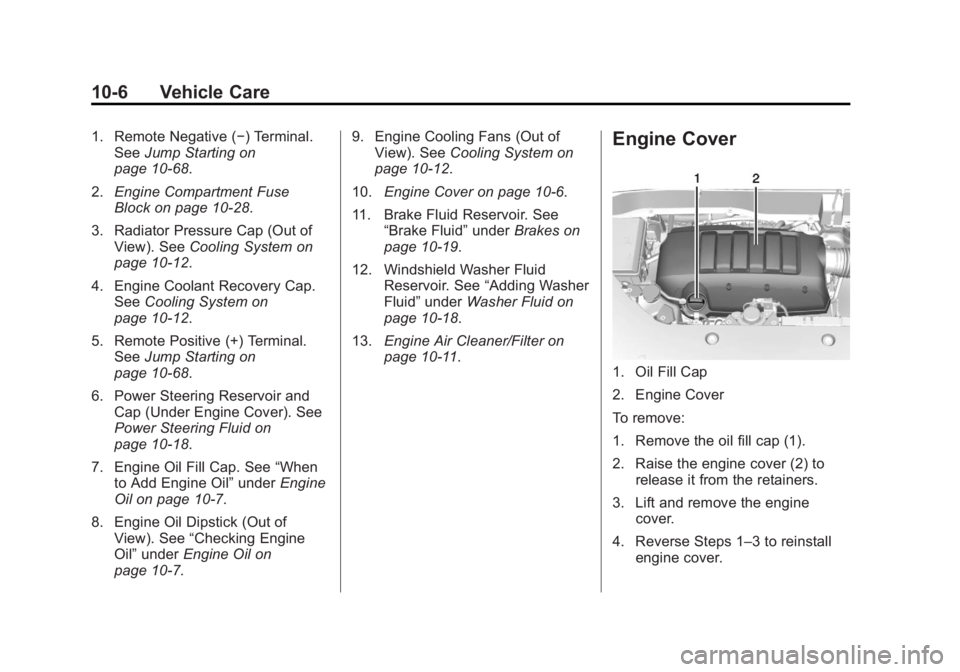
1. Remote Negative (−) Terminal.See Jump Starting on
page 10‑68.
2. Engine Compartment Fuse
Block on page 10‑28.
3. Radiator Pressure Cap (Out of View). See Cooling System on
page 10‑12.
4. Engine Coolant Recovery Cap. See Cooling System on
page 10‑12.
5. Remote Positive (+) Terminal. See Jump Starting on
page 10‑68.
6. Power Steering Reservoir and Cap (Under Engine Cover). See
Power Steering Fluid on
page 10‑18.
7. Engine Oil Fill Cap. See “When
to Add Engine Oil” underEngine
Oil on page 10‑7.
8. Engine Oil Dipstick (Out of View). See “Checking Engine
Oil” under Engine Oil on
page 10‑7. 9. Engine Cooling Fans (Out of
View). See Cooling System on
page 10‑12.
10. Engine Cover on page 10‑6.
11. Brake Fluid Reservoir. See “Brake Fluid” underBrakes on
page 10‑19.
12. Windshield Washer Fluid Reservoir. See “Adding Washer
Fluid” under Washer Fluid on
page 10‑18.
13. Engine Air Cleaner/Filter on
page 10‑11.Engine Cover
1. Oil Fill Cap
2. Engine Cover
To remove:
1. Remove the oil fill cap (1).
2. Raise the engine cover (2) to
release it from the retainers.
3. Lift and remove the engine cover.
4. Reverse Steps 1–3 to reinstall engine cover.
Page 284 of 410
Black plate (18,1)Acadia/Acadia Denali Owner Manual - 2013 - crc2 - 12/11/12
10-18 Vehicle Care
Notice:After driving in the
overheated engine protection
operating mode, to avoid engine
damage, allow the engine to cool
before attempting any repair. The
engine oil will be severely
degraded. Repair the cause of
coolant loss, change the oil and
reset the oil life system. See
Engine Oil on page 10‑7.
Power Steering Fluid
The power steering fluid reservoir is
located under the engine cover on
the passenger side of the vehicle.
See Engine Compartment Overview
on page 10‑5 for reservoir location.
When to Check Power Steering
Fluid
It is not necessary to regularly
check power steering fluid unless
you suspect there is a leak in the
system or you hear an unusual
noise. A fluid loss in this system
could indicate a problem. Have the
system inspected and repaired.
How to Check Power Steering
Fluid
To check the power steering fluid:
1. Turn the key off and let the
engine compartment cool down.
2. Remove the engine cover. See Engine Cover on page 10‑6.
3. Wipe the cap and the top of the reservoir clean.
4. Unscrew the cap and wipe the dipstick with a clean rag.
5. Replace the cap and completely tighten it.
6. Remove the cap again and look at the fluid level on the dipstick. The fluid level should be
somewhere between the MAX and
MIN line on the dipstick in room
temperature. If the fluid is on or
below the MIN line, add fluid close
to the MAX Line.
What to Use
To determine what kind of fluid to
use, see
Recommended Fluids and
Lubricants on page 11‑12. Always
use the proper fluid.
Notice: Use of the incorrect fluid
may damage the vehicle and the
damages may not be covered by
the vehicle's warranty. Always
use the correct fluid listed in
Recommended Fluids and
Lubricants on page 11‑12.
Washer Fluid
What to Use
When adding windshield washer
fluid, be sure to read the
manufacturer's instructions before
use. If the vehicle will be operating
in an area where the temperature