key battery GMC ACADIA 2016 Owner's Manual
[x] Cancel search | Manufacturer: GMC, Model Year: 2016, Model line: ACADIA, Model: GMC ACADIA 2016Pages: 371, PDF Size: 5.28 MB
Page 30 of 371
GMC Acadia/Acadia Denali Owner Manual (GMNA-Localizing-U.S./Canada/
Mexico-9159268) - 2016 - crc - 7/31/15
Keys, Doors, and Windows 29
If locked out of the vehicle, call
Roadside Assistance. SeeRoadside
Assistance Program 0340.
If equipped, with an active OnStar
subscription, an OnStar Advisor
may remotely unlock the vehicle.
See “OnStar,” if equipped.
Remote Keyless Entry
(RKE) System
SeeRadio Frequency Statement
0 346.
If there is a decrease in the RKE
operating range:
. Check the distance. The
transmitter may be too far from
the vehicle.
. Check the location. Other
vehicles or objects may be
blocking the signal.
. Check the transmitter's battery.
See “Battery Replacement” later
in this section.
. If the transmitter is still not
working correctly, see your
dealer or a qualified technician
for service.
Remote Keyless Entry
(RKE) System Operation
The RKE transmitter functions work
up to 60 m (195 ft) away from the
vehicle.
Other conditions can affect the
performance of the transmitter. See
Remote Keyless Entry (RKE)
System 029.
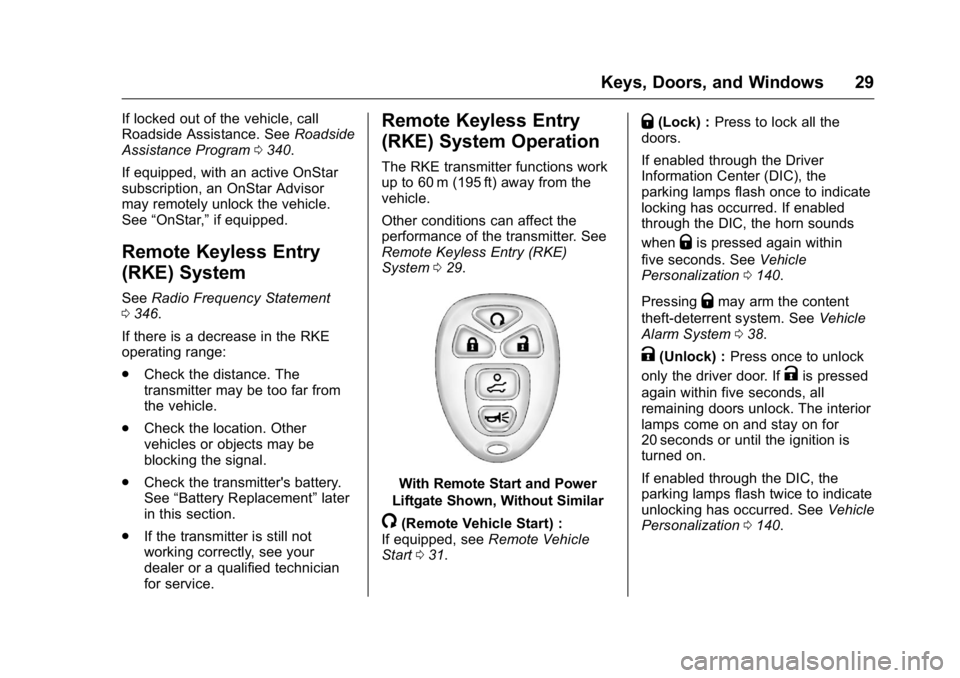
With Remote Start and Power
Liftgate Shown, Without Similar
/(Remote Vehicle Start) :
If equipped, see Remote Vehicle
Start 031.
Q(Lock) : Press to lock all the
doors.
If enabled through the Driver
Information Center (DIC), the
parking lamps flash once to indicate
locking has occurred. If enabled
through the DIC, the horn sounds
when
Qis pressed again within
five seconds. See Vehicle
Personalization 0140.
Pressing
Qmay arm the content
theft-deterrent system. See Vehicle
Alarm System 038.
K(Unlock) : Press once to unlock
only the driver door. If
Kis pressed
again within five seconds, all
remaining doors unlock. The interior
lamps come on and stay on for
20 seconds or until the ignition is
turned on.
If enabled through the DIC, the
parking lamps flash twice to indicate
unlocking has occurred. See Vehicle
Personalization 0140.
Page 31 of 371
GMC Acadia/Acadia Denali Owner Manual (GMNA-Localizing-U.S./Canada/
Mexico-9159268) - 2016 - crc - 7/31/15
30 Keys, Doors, and Windows
PressingKon the RKE transmitter
disarms the content theft-deterrent
system. See Vehicle Alarm System
0 38.
8(Power Liftgate) : Press and
hold until the liftgate begins to move
to open or close the liftgate. The
taillamps flash and a chime sounds
to indicate when the liftgate is
opening or closing.
L(Vehicle Locator/Panic
Alarm) : Press and release to
locate the vehicle. The parking
lamps flash and the horn sounds
three times.
Press and hold
Lfor more than
two seconds to activate the panic
alarm. The parking lamps flash and
the horn sounds repeatedly for
30 seconds. The alarm turns off
when the ignition is moved to ON/
RUN or
Lis pressed again. The
ignition must be in LOCK/OFF for
the panic alarm to work.
Programming Transmitters to
the Vehicle
Only RKE transmitters programmed
to this vehicle will work. If a
transmitter is lost or stolen, a
replacement can be purchased and
programmed through your dealer.
When the replacement transmitter is
programmed to this vehicle, all
remaining transmitters must also be
reprogrammed. Any lost or stolen
transmitters will no longer work
once the new transmitter is
programmed. Each vehicle can
have up to eight transmitters
programmed to it. See your dealer
to program transmitters to this
vehicle.
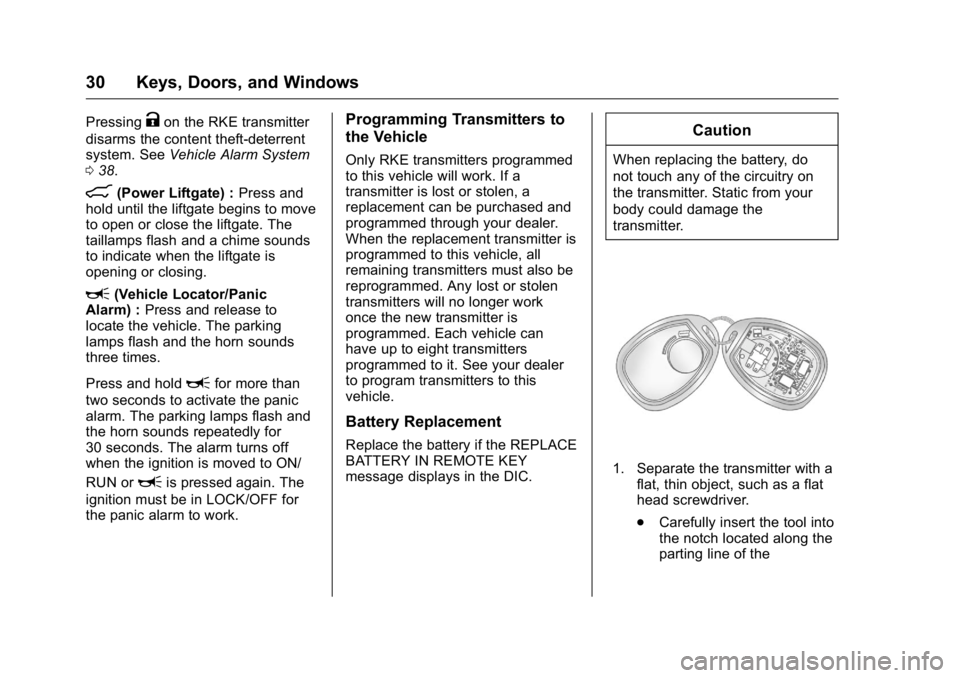
Battery Replacement
Replace the battery if the REPLACE
BATTERY IN REMOTE KEY
message displays in the DIC.
Caution
When replacing the battery, do
not touch any of the circuitry on
the transmitter. Static from your
body could damage the
transmitter.
1. Separate the transmitter with a flat, thin object, such as a flat
head screwdriver.
.Carefully insert the tool into
the notch located along the
parting line of the
Page 32 of 371
GMC Acadia/Acadia Denali Owner Manual (GMNA-Localizing-U.S./Canada/
Mexico-9159268) - 2016 - crc - 7/31/15
Keys, Doors, and Windows 31
transmitter. Do not insert
the tool too far. Stop as
soon as resistance is felt.
. Twist the tool until the
transmitter is separated.
2. Remove the old battery. Do not use a metal object.
3. Insert the new battery, positive side facing down. Replace with
a CR2032 or equivalent
battery.
4. Snap the transmitter back together.
Remote Vehicle Start
This vehicle may have a remote
starting feature that starts the
engine from outside of the vehicle.
/(Remote Start) : This button is
on the RKE transmitter if the vehicle
has remote start.
Laws in some communities may
restrict the use of remote starters.
For example, some laws may
require a person using the remote
start to have the vehicle in view when doing so. Check local
regulations for any requirements on
remote starting of vehicles.
Do not use the remote start feature
if the vehicle is low on fuel. The
vehicle could run out of fuel.
If the vehicle has the remote start
feature, the RKE transmitter range
may be less while the vehicle is
running.
Other conditions can affect the
performance of the transmitter. See
Remote Keyless Entry (RKE)
System
029.
Starting the Engine Using
Remote Start
To start the vehicle:
1. Press and release
Qon the
RKE transmitter.
2. Immediately after completing Step 1, press and hold
/until
the parking lamps flash. If the
vehicle's lights cannot be seen,
press and hold
/for at least
four seconds. When the vehicle starts, the parking
lamps will turn on and remain on as
long as the engine is running. The
doors will be locked and the climate
control system will operate
automatically if the vehicle has the
automatic system, or at the same
setting as when the vehicle was last
turned off.
If the vehicle has an automatic
climate control system and heated
seats, the heated seats turn on
during colder outside temperatures
and shut off when the key is turned
to ON/RUN. See
Heated and
Cooled Front Seats 053.
The rear window defogger and
heated mirrors, if the vehicle has
them, turn on during colder outside
temperatures and turn off when the
key is turned to ON/RUN.
After entering the vehicle during a
remote start, insert and turn the key
to the ON/RUN position to drive the
vehicle.
If the vehicle is left running it
automatically shuts off after
10 minutes unless a time extension
has been done.
Page 36 of 371
GMC Acadia/Acadia Denali Owner Manual (GMNA-Localizing-U.S./Canada/
Mexico-9159268) - 2016 - crc - 7/31/15
Keys, Doors, and Windows 35
Doors
Liftgate
{Warning
Exhaust gases can enter the
vehicle if it is driven with the
liftgate or trunk/hatch open,
or with any objects that pass
through the seal between the
body and the trunk/hatch or
liftgate. Engine exhaust contains
carbon monoxide (CO) which
cannot be seen or smelled. It can
cause unconsciousness and even
death.
If the vehicle must be driven with
the liftgate or trunk/hatch open:. Close all of the windows.
. Fully open the air outlets on
or under the instrument
panel.
. Adjust the climate control
system to a setting that
brings in only outside air
(Continued)
Warning (Continued)
and set the fan speed to the
highest setting. See
“Climate Control Systems”
in the Index.
. If the vehicle is equipped
with a power liftgate, disable
the power liftgate function.
See Engine Exhaust 0210.
Caution
To avoid damage to the liftgate or
liftgate glass, make sure the area
above and behind the liftgate is
clear before opening it.
Manual Liftgate
To unlock the liftgate, press the
power door lock switch or press
K
on the Remote Keyless Entry
(RKE) transmitter twice. See
Remote Keyless Entry (RKE)
System Operation 029.
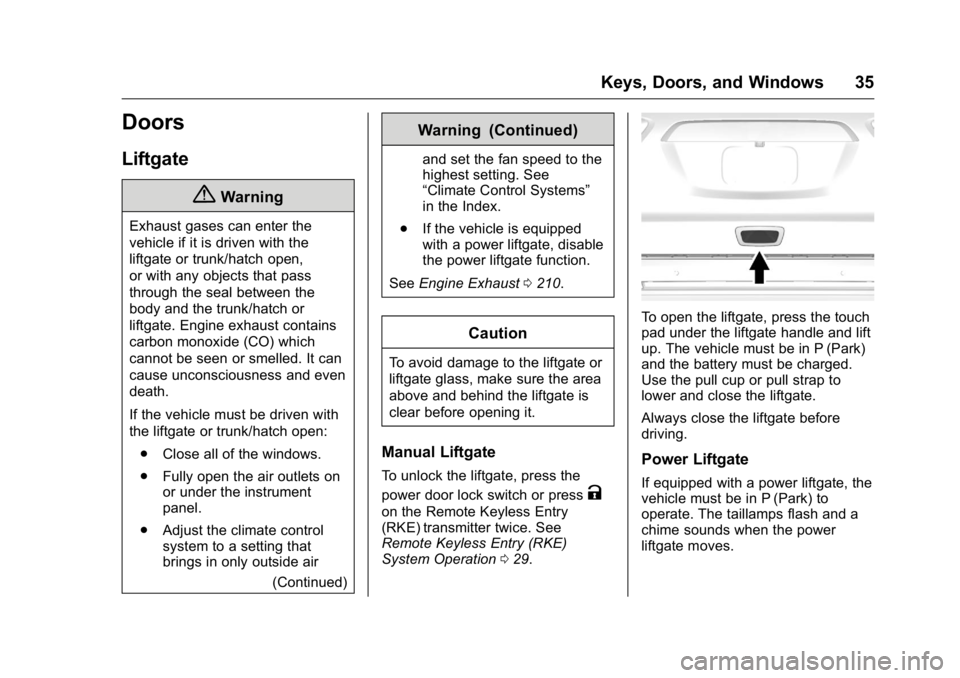
To open the liftgate, press the touch
pad under the liftgate handle and lift
up. The vehicle must be in P (Park)
and the battery must be charged.
Use the pull cup or pull strap to
lower and close the liftgate.
Always close the liftgate before
driving.
Power Liftgate
If equipped with a power liftgate, the
vehicle must be in P (Park) to
operate. The taillamps flash and a
chime sounds when the power
liftgate moves.
Page 37 of 371
GMC Acadia/Acadia Denali Owner Manual (GMNA-Localizing-U.S./Canada/
Mexico-9159268) - 2016 - crc - 7/31/15
36 Keys, Doors, and Windows
{Warning
You, or others, could be injured if
caught in the path of the power
liftgate. Make sure there is no one
in the way of the liftgate as it is
opening and closing.
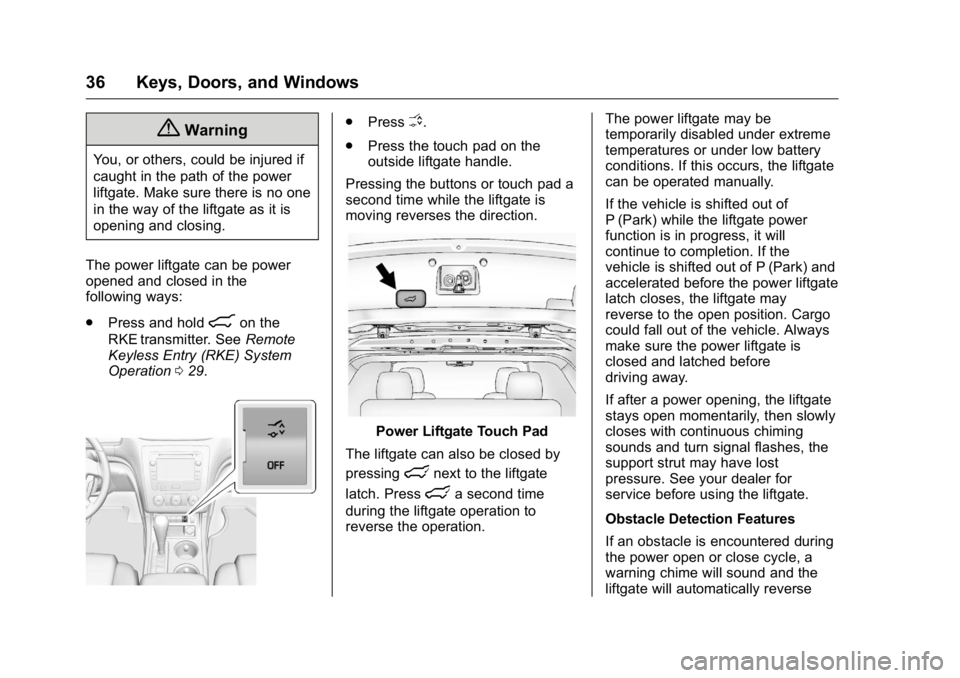
The power liftgate can be power
opened and closed in the
following ways:
. Press and hold
8on the
RKE transmitter. See Remote
Keyless Entry (RKE) System
Operation 029.
.
PressO.
. Press the touch pad on the
outside liftgate handle.
Pressing the buttons or touch pad a
second time while the liftgate is
moving reverses the direction.
Power Liftgate Touch Pad
The liftgate can also be closed by
pressing
lnext to the liftgate
latch. Press
la second time
during the liftgate operation to
reverse the operation. The power liftgate may be
temporarily disabled under extreme
temperatures or under low battery
conditions. If this occurs, the liftgate
can be operated manually.
If the vehicle is shifted out of
P (Park) while the liftgate power
function is in progress, it will
continue to completion. If the
vehicle is shifted out of P (Park) and
accelerated before the power liftgate
latch closes, the liftgate may
reverse to the open position. Cargo
could fall out of the vehicle. Always
make sure the power liftgate is
closed and latched before
driving away.
If after a power opening, the liftgate
stays open momentarily, then slowly
closes with continuous chiming
sounds and turn signal flashes, the
support strut may have lost
pressure. See your dealer for
service before using the liftgate.
Obstacle Detection Features
If an obstacle is encountered during
the power open or close cycle, a
warning chime will sound and the
liftgate will automatically reverse
Page 45 of 371
GMC Acadia/Acadia Denali Owner Manual (GMNA-Localizing-U.S./Canada/
Mexico-9159268) - 2016 - crc - 7/31/15
44 Keys, Doors, and Windows
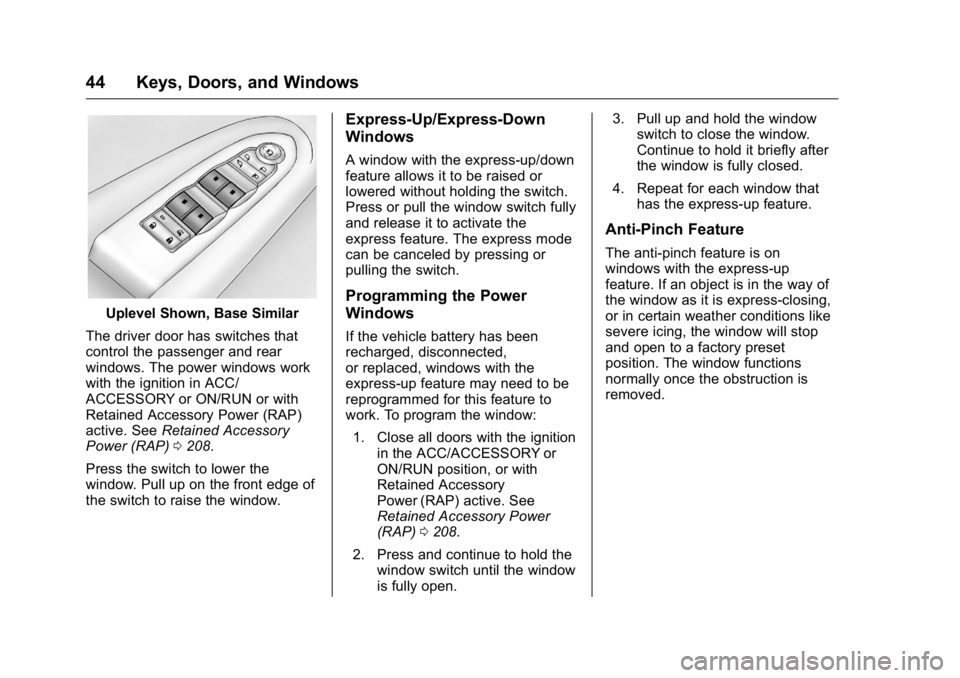
Uplevel Shown, Base Similar
The driver door has switches that
control the passenger and rear
windows. The power windows work
with the ignition in ACC/
ACCESSORY or ON/RUN or with
Retained Accessory Power (RAP)
active. See Retained Accessory
Power (RAP) 0208.
Press the switch to lower the
window. Pull up on the front edge of
the switch to raise the window.
Express-Up/Express-Down
Windows
A window with the express-up/down
feature allows it to be raised or
lowered without holding the switch.
Press or pull the window switch fully
and release it to activate the
express feature. The express mode
can be canceled by pressing or
pulling the switch.
Programming the Power
Windows
If the vehicle battery has been
recharged, disconnected,
or replaced, windows with the
express-up feature may need to be
reprogrammed for this feature to
work. To program the window: 1. Close all doors with the ignition in the ACC/ACCESSORY or
ON/RUN position, or with
Retained Accessory
Power (RAP) active. See
Retained Accessory Power
(RAP) 0208.
2. Press and continue to hold the window switch until the window
is fully open. 3. Pull up and hold the window
switch to close the window.
Continue to hold it briefly after
the window is fully closed.
4. Repeat for each window that has the express-up feature.
Anti-Pinch Feature
The anti-pinch feature is on
windows with the express-up
feature. If an object is in the way of
the window as it is express-closing,
or in certain weather conditions like
severe icing, the window will stop
and open to a factory preset
position. The window functions
normally once the obstruction is
removed.
Page 104 of 371
GMC Acadia/Acadia Denali Owner Manual (GMNA-Localizing-U.S./Canada/
Mexico-9159268) - 2016 - crc - 7/31/15
Instruments and Controls 103
Instruments and
Controls
Controls
Steering Wheel Adjustment . . . 104
Steering Wheel Controls . . . . . . 105
Horn . . . . . . . . . . . . . . . . . . . . . . . . . . 105
Windshield Wiper/Washer . . . . 105
Rear Window Wiper/Washer . . . . . . . . . . . . . . . . . . . . . 106
Compass . . . . . . . . . . . . . . . . . . . . . 106
Clock . . . . . . . . . . . . . . . . . . . . . . . . . 108
Power Outlets . . . . . . . . . . . . . . . . 108
Warning Lights, Gauges, and
Indicators
Warning Lights, Gauges, and Indicators . . . . . . . . . . . . . . . . . . . 110
Instrument Cluster . . . . . . . . . . . . 111
Speedometer . . . . . . . . . . . . . . . . . 112
Odometer . . . . . . . . . . . . . . . . . . . . . 112
Tachometer . . . . . . . . . . . . . . . . . . . 112
Fuel Gauge . . . . . . . . . . . . . . . . . . . 112
Engine Coolant Temperature Gauge . . . . . . . . . . . . . . . . . . . . . . 113
Voltmeter Gauge . . . . . . . . . . . . . . 114
Safety Belt Reminders . . . . . . . . 114
Airbag Readiness Light . . . . . . . 115 Passenger Airbag Status
Indicator . . . . . . . . . . . . . . . . . . . . . 115
Charging System Light . . . . . . . 116
Malfunction Indicator Lamp (Check Engine Light) . . . . . . . . 117
Brake System Warning Light . . . . . . . . . . . . . . . . . . . . . . . . 118
Antilock Brake System (ABS) Warning Light . . . . . . . . . . . . . . . 119
Tow/Haul Mode Light . . . . . . . . . 120
Lane Departure Warning (LDW) Light . . . . . . . . . . . . . . . . . 120
Vehicle Ahead Indicator . . . . . . 120
StabiliTrak
®Indicator Light . . . 120
Engine Coolant Temperature Warning Light . . . . . . . . . . . . . . . 121
Tire Pressure Light . . . . . . . . . . . 121
Engine Oil Pressure Light . . . . 121
Security Light . . . . . . . . . . . . . . . . . 122
High-Beam On Light . . . . . . . . . . 122
Front Fog Lamp Light . . . . . . . . . 122
Cruise Control Light . . . . . . . . . . 123
Information Displays
Driver Information Center (DIC) . . . . . . . . . . . . . . . . 123
Head-Up Display (HUD) . . . . . . 127
Vehicle Messages
Vehicle Messages . . . . . . . . . . . . 131 Battery Voltage and Charging
Messages . . . . . . . . . . . . . . . . . . . 131
Brake System Messages . . . . . 131
Cruise Control Messages . . . . . 132
Door Ajar Messages . . . . . . . . . . 132
Engine Cooling System Messages . . . . . . . . . . . . . . . . . . . 132
Engine Oil Messages . . . . . . . . . 133
Engine Power Messages . . . . . 133
Fuel System Messages . . . . . . . 134
Key and Lock Messages . . . . . 134
Lamp Messages . . . . . . . . . . . . . . 134
Object Detection System Messages . . . . . . . . . . . . . . . . . . . 135
Ride Control System Messages . . . . . . . . . . . . . . . . . . . 136
Airbag System Messages . . . . 137
Security Messages . . . . . . . . . . . 137
Service Vehicle Messages . . . . 137
Tire Messages . . . . . . . . . . . . . . . . 137
Transmission Messages . . . . . . 138
Vehicle Reminder Messages . . . . . . . . . . . . . . . . . . . 139
Vehicle Speed Messages . . . . . 139
Washer Fluid Messages . . . . . . 139
Vehicle Personalization
Vehicle Personalization . . . . . . . 140
Universal Remote System
Universal Remote System . . . . 146
Page 135 of 371
GMC Acadia/Acadia Denali Owner Manual (GMNA-Localizing-U.S./Canada/
Mexico-9159268) - 2016 - crc - 7/31/15
134 Instruments and Controls
This message also displays when
the vehicle's engine power is
reduced. Reduced engine power
can affect the vehicle's ability to
accelerate. If this message is on,
but there is no reduction in
performance, proceed to your
destination. The performance may
be reduced the next time the vehicle
is driven. The vehicle may be driven
at a reduced speed while this
message is on, but acceleration and
speed may be reduced. Anytime
this message stays on, the vehicle
should be taken to your dealer for
service as soon as possible.
Fuel System Messages
FUEL LEVEL LOW
This message displays and a chime
sounds if the fuel level is low. Refuel
as soon as possible. SeeFuel
Gauge 0112 and Fuel 0229 for
more information.
TIGHTEN GAS CAP
This message may display along
with the check engine light on the
instrument cluster if the vehicle's fuel cap is not tightened properly.
See
Malfunction Indicator Lamp
(Check Engine Light) 0117.
Reinstall the fuel cap fully. See
Filling the Tank 0231. The
diagnostic system can determine if
the fuel cap has been left off or
improperly installed. A loose or
missing fuel cap allows fuel to
evaporate into the atmosphere.
A few driving trips with the cap
properly installed should turn this
light and message off.
Key and Lock Messages
REPLACE BATTERY IN
REMOTE KEY
This message displays if a Remote
Keyless Entry (RKE) transmitter
battery is low. The battery needs to
be replaced in the transmitter. See
“Battery Replacement” under
Remote Keyless Entry (RKE)
System Operation 029.
Lamp Messages
AUTOMATIC LIGHT
CONTROL OFF
This message displays when the
automatic headlamps are turned off.
This message clears itself after
10 seconds.
AUTOMATIC LIGHT
CONTROL ON
This message displays when the
automatic headlamps are turned on.
This message clears itself after
10 seconds.
TURN SIGNAL ON
This message displays and a chime
sounds if a turn signal is left on for
1.2 km (0.75 mi). Move the turn
signal lever to the off position.
Page 156 of 371
GMC Acadia/Acadia Denali Owner Manual (GMNA-Localizing-U.S./Canada/
Mexico-9159268) - 2016 - crc - 7/31/15
Lighting 155
When the ignition is on, illuminated
entry is inactive, which means the
courtesy lamps will not come on
unless a door is opened.
Delayed Entry Lighting
Delayed entry lighting illuminates
the interior for a period of time after
all the doors have been closed.
The ignition must be off for delayed
entry lighting to work. Immediately
after all the doors have been closed,
the delayed entry lighting feature
continues to work until one of the
following occurs:
.The ignition is in ON/RUN.
. The doors are locked.
. An illumination period of about
25 seconds has elapsed.
If during the illumination period a
door is opened, the timed
illumination period is canceled and
the interior lamps remain on.
Delayed Exit Lighting
Delayed exit lighting illuminates the
interior for a period of time after the
key is removed from the ignition.
The ignition must be off for delayed
exit lighting to work. When the key
is removed, interior illumination
activates and remains on until one
of the following occurs:
. The ignition is in ON/RUN.
. The power door locks are
activated.
. An illumination period of
20 seconds has elapsed.
If during the illumination period a
door is opened, the timed
illumination period will be canceled
and the interior lamps will remain on
because a door is open.
Parade Dimming
This feature automatically prohibits
the dimming of the instrument panel
displays in daylight while the
headlamps are on so that the
displays are still able to be seen.
Battery Load
Management
The vehicle has Electric Power
Management (EPM) that estimates
the battery's temperature and state
of charge. It then adjusts the voltage
for best performance and extended
life of the battery.
When the battery's state of charge
is low, the voltage is raised slightly
to quickly bring the charge back up.
When the state of charge is high,
the voltage is lowered slightly to
prevent overcharging. If the vehicle
has a voltmeter gauge or a voltage
display on the Driver Information
Center (DIC), you may see the
voltage move up or down. This is
normal. If there is a problem, an
alert will be displayed.
The battery can be discharged at
idle if the electrical loads are very
high. This is true for all vehicles.
This is because the generator
(alternator) may not be spinning fast
enough at idle to produce all of the
power needed for very high
electrical loads.
Page 206 of 371
GMC Acadia/Acadia Denali Owner Manual (GMNA-Localizing-U.S./Canada/
Mexico-9159268) - 2016 - crc - 7/31/15
Driving and Operating 205
The steering can bind with the
wheels turned off center. If this
happens, move the steering wheel
from right to left while turning the
key to ACC/ACCESSORY. If this
does not work, then the vehicle
needs service.
Do not turn the engine off when the
vehicle is moving. This will cause a
loss of power assist in the brake
and steering systems and disable
the airbags.
If the vehicle must be shut off in an
emergency:1. Brake using a firm and steady pressure. Do not pump the
brakes repeatedly. This may
deplete power assist, requiring
increased brake pedal force.
2. Shift the vehicle to N (Neutral). This can be done while the
vehicle is moving. After shifting
to N (Neutral), firmly apply the
brakes and steer the vehicle to
a safe location.
3. Come to a complete stop, shift to P (Park), and turn the
ignition to LOCK/OFF. On vehicles with an automatic
transmission, the shift lever
must be in P (Park) to turn the
ignition switch to the LOCK/
OFF position.
4. Set the parking brake. See Parking Brake 0216.
{Warning
Turning off the vehicle while
moving may cause loss of power
assist in the brake and steering
systems and disable the airbags.
While driving, only shut the
vehicle off in an emergency.
If the vehicle cannot be pulled over,
and must be shut off while driving,
turn the ignition to ACC/
ACCESSORY.
ACC (ACC/ACCESSORY) : This is
the position in which you can
operate the electrical accessories or
items plugged into the accessory
power outlets. This position unlocks
the ignition and steering wheel. Use
this position if the vehicle must be
pushed or towed.
R(ON/RUN) : This position can be
used to operate the electrical
accessories and to display some
instrument panel warning and
indicator lights. This position can
also be used for service and
diagnostics, and to verify the proper
operation of the malfunction
indicator lamp as may be required
for emission inspection purposes.
The switch stays in this position
when the engine is running. The
transmission is also unlocked in this
position. If you leave the key in the
ACC/ACCESSORY or ON/RUN
position with the engine off, the
battery could be drained. You may
not be able to start the vehicle if the
battery is allowed to drain for an
extended period of time.
/(START) : This is the position
that starts the engine. When the
engine starts, release the key. The
ignition switch will return to ON/RUN
for driving.