flat tire GMC ACADIA 2017 Owner's Manual
[x] Cancel search | Manufacturer: GMC, Model Year: 2017, Model line: ACADIA, Model: GMC ACADIA 2017Pages: 419, PDF Size: 5.89 MB
Page 27 of 419
GMC Acadia/Acadia Denali Owner Manual (GMNA-Localizing-U.S./Canada/
Mexico-9803770) - 2017 - crc - 7/12/16
26 In Brief
instrument cluster. The
appropriate DIC message
displays. SeeRide Control
System Messages 0154.
. Press and release
gagain to
turn on both systems.
See Traction Control/Electronic
Stability Control 0240.
Tire Pressure Monitor
This vehicle may have a Tire
Pressure Monitor System (TPMS).
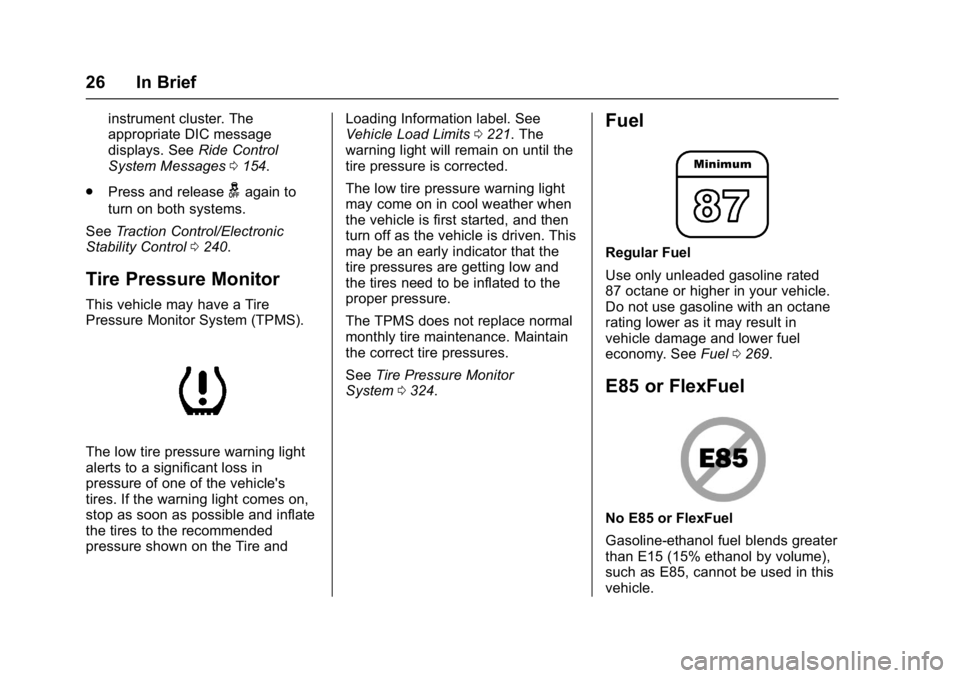
The low tire pressure warning light
alerts to a significant loss in
pressure of one of the vehicle's
tires. If the warning light comes on,
stop as soon as possible and inflate
the tires to the recommended
pressure shown on the Tire and Loading Information label. See
Vehicle Load Limits
0221. The
warning light will remain on until the
tire pressure is corrected.
The low tire pressure warning light
may come on in cool weather when
the vehicle is first started, and then
turn off as the vehicle is driven. This
may be an early indicator that the
tire pressures are getting low and
the tires need to be inflated to the
proper pressure.
The TPMS does not replace normal
monthly tire maintenance. Maintain
the correct tire pressures.
See Tire Pressure Monitor
System 0324.
Fuel
Regular Fuel
Use only unleaded gasoline rated
87 octane or higher in your vehicle.
Do not use gasoline with an octane
rating lower as it may result in
vehicle damage and lower fuel
economy. See Fuel0269.
E85 or FlexFuel
No E85 or FlexFuel
Gasoline-ethanol fuel blends greater
than E15 (15% ethanol by volume),
such as E85, cannot be used in this
vehicle.
Page 28 of 419
GMC Acadia/Acadia Denali Owner Manual (GMNA-Localizing-U.S./Canada/
Mexico-9803770) - 2017 - crc - 7/12/16
In Brief 27
Engine Oil Life System
The engine oil life system calculates
engine oil life based on vehicle use
and displays the CHANGE ENGINE
OIL SOON message when it is time
to change the engine oil and filter.
The oil life system should be reset
to 100% only following an oil
change.
Resetting the Oil Life System1. Display the REMAINING OIL LIFE on the DIC. See Driver
Information Center (DIC) (Base
and Midlevel) 0141 orDriver
Information Center (DIC)
(Uplevel) 0144.
2. Press and hold
Von the DIC
while the Oil Life display is
active. The oil life will change
to 100%.
See Engine Oil Life System 0290.
Driving for Better Fuel
Economy
Driving habits can affect fuel
mileage. Here are some driving tips
to get the best fuel economy
possible.
.
On AWD vehicles, use FWD
Mode when conditions permit.
. Avoid fast starts and accelerate
smoothly.
. Brake gradually and avoid
abrupt stops.
. Avoid idling the engine for long
periods of time.
. When road and weather
conditions are appropriate, use
cruise control.
. Always follow posted speed
limits or drive more slowly when
conditions require.
. Keep vehicle tires properly
inflated.
. Combine several trips into a
single trip. .
Replace the vehicle's tires with
the same TPC Spec number
molded into the tire's sidewall
near the size.
. Follow recommended scheduled
maintenance.
Roadside Assistance
Program
U.S.: 1-888-881-3302
TTY Users (U.S. Only):
1-888-889-2438
Canada: 1-800-268-6800
New GMC owners are automatically
enrolled in the Roadside Assistance
Program.
See Roadside Assistance
Program 0388.
Page 87 of 419
GMC Acadia/Acadia Denali Owner Manual (GMNA-Localizing-U.S./Canada/
Mexico-9803770) - 2017 - crc - 7/12/16
86 Seats and Restraints
Warning (Continued)
are close to an airbag when it
inflates. Avoid yellow connectors.
They are probably part of the
airbag system. Be sure to follow
proper service procedures, and
make sure the person performing
work for you is qualified to do so.
Adding Equipment to the
Airbag-Equipped Vehicle
Adding accessories that change the
vehicle's frame, bumper system,
height, front end, or side sheet
metal may keep the airbag system
from working properly.
The operation of the airbag system
can also be affected by changing
any parts of the front seats, safety
belts, airbag sensing and diagnostic
module, steering wheel, instrument
panel, any of the airbag modules,
ceiling or pillar garnish trim,
overhead console, front sensors,
side impact sensors, airbag wiring,
or front center console.Your dealer and the service manual
have information about the location
of the airbag sensors, sensing and
diagnostic module, and airbag
wiring.
In addition, the vehicle has a
passenger sensing system for the
front outboard passenger position,
which includes sensors that are part
of the passenger's seat. The
passenger sensing system may not
operate properly if the original seat
trim is replaced with non-GM
covers, upholstery, or trim, or with
GM covers, upholstery, or trim
designed for a different vehicle. Any
object, such as an aftermarket seat
heater or a comfort enhancing pad
or device, installed under or on top
of the seat fabric, could also
interfere with the operation of the
passenger sensing system. This
could either prevent proper
deployment of the passenger
airbag(s) or prevent the passenger
sensing system from properly
turning off the passenger airbag(s).
See
Passenger Sensing
System 081. If the vehicle has rollover roof-rail
airbags, see
Different Size Tires
and Wheels 0332 for additional
important information.
If you have to modify your vehicle
because you have a disability and
you have questions about whether
the modifications will affect the
vehicle's airbag system, or if you
have questions about whether the
airbag system will be affected if the
vehicle is modified for any other
reason, call Customer Assistance.
See Customer Assistance
Offices 0386.
Airbag System Check
The airbag system does not need
regularly scheduled maintenance or
replacement. Make sure the airbag
readiness light is working. See
Airbag Readiness Light 0131.
Caution
If an airbag covering is damaged,
opened, or broken, the airbag
may not work properly. Do not
(Continued)
Page 139 of 419
GMC Acadia/Acadia Denali Owner Manual (GMNA-Localizing-U.S./Canada/
Mexico-9803770) - 2017 - crc - 7/12/16
138 Instruments and Controls
Traction Control System
(TCS)/StabiliTrak®Light
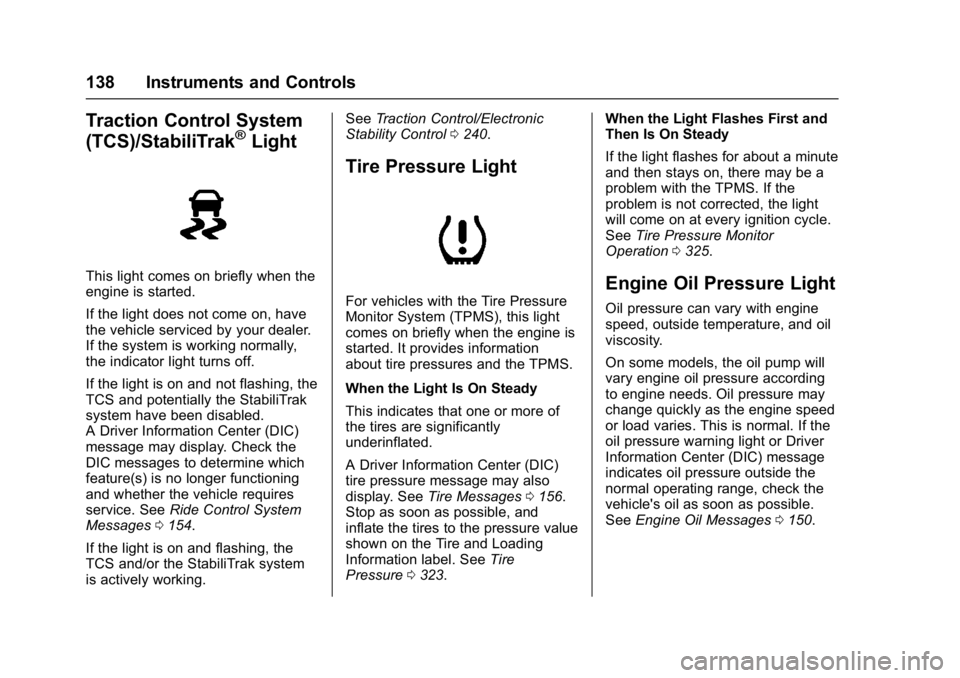
This light comes on briefly when the
engine is started.
If the light does not come on, have
the vehicle serviced by your dealer.
If the system is working normally,
the indicator light turns off.
If the light is on and not flashing, the
TCS and potentially the StabiliTrak
system have been disabled.
A Driver Information Center (DIC)
message may display. Check the
DIC messages to determine which
feature(s) is no longer functioning
and whether the vehicle requires
service. SeeRide Control System
Messages 0154.
If the light is on and flashing, the
TCS and/or the StabiliTrak system
is actively working. See
Traction Control/Electronic
Stability Control 0240.
Tire Pressure Light
For vehicles with the Tire Pressure
Monitor System (TPMS), this light
comes on briefly when the engine is
started. It provides information
about tire pressures and the TPMS.
When the Light Is On Steady
This indicates that one or more of
the tires are significantly
underinflated.
A Driver Information Center (DIC)
tire pressure message may also
display. See Tire Messages 0156.
Stop as soon as possible, and
inflate the tires to the pressure value
shown on the Tire and Loading
Information label. See Tire
Pressure 0323. When the Light Flashes First and
Then Is On Steady
If the light flashes for about a minute
and then stays on, there may be a
problem with the TPMS. If the
problem is not corrected, the light
will come on at every ignition cycle.
See
Tire Pressure Monitor
Operation 0325.
Engine Oil Pressure Light
Oil pressure can vary with engine
speed, outside temperature, and oil
viscosity.
On some models, the oil pump will
vary engine oil pressure according
to engine needs. Oil pressure may
change quickly as the engine speed
or load varies. This is normal. If the
oil pressure warning light or Driver
Information Center (DIC) message
indicates oil pressure outside the
normal operating range, check the
vehicle's oil as soon as possible.
See Engine Oil Messages 0150.
Page 215 of 419
GMC Acadia/Acadia Denali Owner Manual (GMNA-Localizing-U.S./Canada/
Mexico-9803770) - 2017 - crc - 7/12/16
214 Driving and Operating
Before Driving Off-Road
.Have all necessary maintenance
and service work completed.
. Fuel the vehicle, fill fluid levels,
and check inflation pressure in
all tires, including the spare,
if equipped.
. Read all the information about
all-wheel-drive vehicles in this
manual.
. Make sure all underbody
shields, if equipped, are properly
attached.
. Know the local laws that apply to
off-road driving.
To gain more ground clearance if
needed, it may be necessary to
remove the front fascia lower air
dam. However, driving without the
air dam reduces fuel economy.
Caution
Operating the vehicle for
extended periods without the front
fascia lower air dam installed can (Continued)
Caution (Continued)
cause improper airflow to the
engine. Reattach the front fascia
air dam after off-road driving.
Loading the Vehicle for
Off-Road Driving
{Warning
.Unsecured cargo on the
load floor can be tossed
about when driving over
rough terrain. You or your
passengers can be struck
by flying objects. Secure the
cargo properly.
. Keep cargo in the cargo
area as far forward and as
low as possible. The
heaviest things should be
on the floor, forward of the
rear axle.
. Heavy loads on the roof
raise the vehicle's center of
gravity, making it more likely
(Continued)
Warning (Continued)
to roll over. You can be
seriously or fatally injured if
the vehicle rolls over. Put
heavy loads inside the
cargo area, not on the roof.
For more information about loading
the vehicle, see Vehicle Load
Limits 0221.
Environmental Concerns
.
Always use established trails,
roads, and areas that have been
set aside for public off-road
recreational driving and obey all
posted regulations.
. Do not damage shrubs, flowers,
trees, or grasses or disturb
wildlife.
. Do not park over things that
burn. See Parking over Things
That Burn 0231.
Page 219 of 419
GMC Acadia/Acadia Denali Owner Manual (GMNA-Localizing-U.S./Canada/
Mexico-9803770) - 2017 - crc - 7/12/16
218 Driving and Operating
Driving on Wet Roads
Rain and wet roads can reduce
vehicle traction and affect your
ability to stop and accelerate.
Always drive slower in these types
of driving conditions and avoid
driving through large puddles and
deep-standing or flowing water.
{Warning
Wet brakes can cause crashes.
They might not work as well in a
quick stop and could cause
pulling to one side. You could
lose control of the vehicle.
After driving through a large
puddle of water or a car/vehicle
wash, lightly apply the brake
pedal until the brakes work
normally.
Flowing or rushing water creates
strong forces. Driving through
flowing water could cause the
vehicle to be carried away. If this
happens, you and other vehicle(Continued)
Warning (Continued)
occupants could drown. Do not
ignore police warnings and be
very cautious about trying to drive
through flowing water.
Hydroplaning
Hydroplaning is dangerous. Water
can build up under the vehicle's
tires so they actually ride on the
water. This can happen if the road is
wet enough and you are going fast
enough. When the vehicle is
hydroplaning, it has little or no
contact with the road.
There is no hard and fast rule about
hydroplaning. The best advice is to
slow down when the road is wet.
Other Rainy Weather Tips
Besides slowing down, other wet
weather driving tips include:
.Allow extra following distance.
. Pass with caution.
. Keep windshield wiping
equipment in good shape. .
Keep the windshield washer fluid
reservoir filled.
. Have good tires with proper
tread depth. See Tires0315.
. Turn off cruise control.
. Activate All-Wheel Drive (AWD)
mode. See Driver Mode
Control 0242.
Hill and Mountain Roads
Driving on steep hills or through
mountains is different than driving
on flat or rolling terrain. Tips include:
.
Keep the vehicle serviced and in
good shape.
. Check all fluid levels and brakes,
tires, cooling system, and
transmission.
. Shift to a lower gear when going
down steep or long hills.
Page 223 of 419
GMC Acadia/Acadia Denali Owner Manual (GMNA-Localizing-U.S./Canada/
Mexico-9803770) - 2017 - crc - 7/12/16
222 Driving and Operating
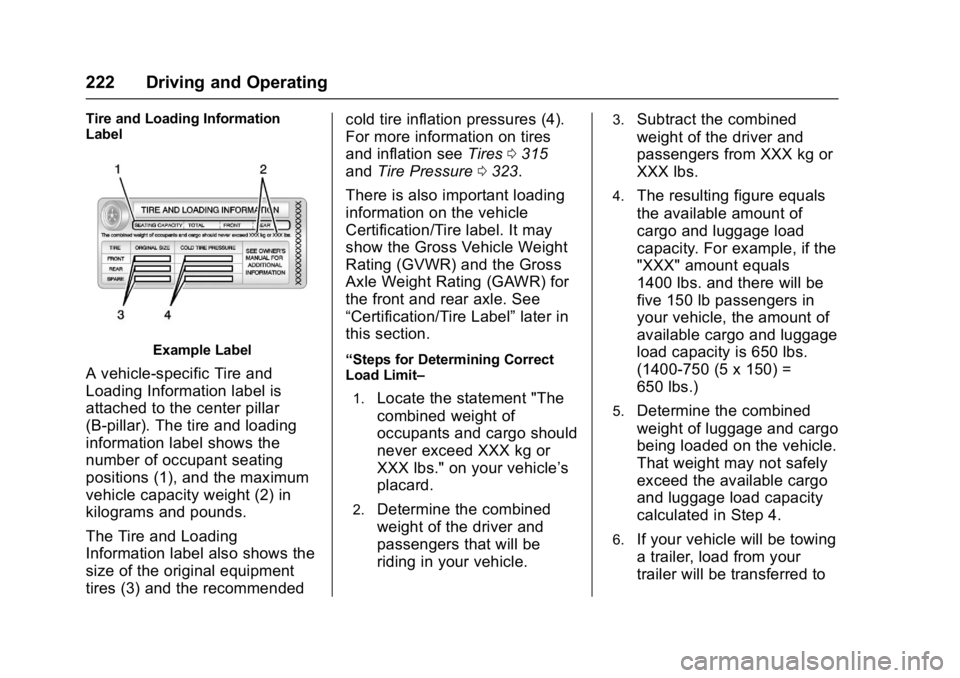
Tire and Loading Information
Label
Example Label
A vehicle-specific Tire and
Loading Information label is
attached to the center pillar
(B-pillar). The tire and loading
information label shows the
number of occupant seating
positions (1), and the maximum
vehicle capacity weight (2) in
kilograms and pounds.
The Tire and Loading
Information label also shows the
size of the original equipment
tires (3) and the recommendedcold tire inflation pressures (4).
For more information on tires
and inflation see
Tires0315
and Tire Pressure 0323.
There is also important loading
information on the vehicle
Certification/Tire label. It may
show the Gross Vehicle Weight
Rating (GVWR) and the Gross
Axle Weight Rating (GAWR) for
the front and rear axle. See
“Certification/Tire Label” later in
this section.“Steps for Determining Correct
Load Limit–
1.
Locate the statement "The
combined weight of
occupants and cargo should
never exceed XXX kg or
XXX lbs." on your vehicle’s
placard.
2.Determine the combined
weight of the driver and
passengers that will be
riding in your vehicle.
3.Subtract the combined
weight of the driver and
passengers from XXX kg or
XXX lbs.
4.The resulting figure equals
the available amount of
cargo and luggage load
capacity. For example, if the
"XXX" amount equals
1400 lbs. and there will be
five 150 lb passengers in
your vehicle, the amount of
available cargo and luggage
load capacity is 650 lbs.
(1400-750 (5 x 150) =
650 lbs.)
5.Determine the combined
weight of luggage and cargo
being loaded on the vehicle.
That weight may not safely
exceed the available cargo
and luggage load capacity
calculated in Step 4.
6.If your vehicle will be towing
a trailer, load from your
trailer will be transferred to
Page 225 of 419
GMC Acadia/Acadia Denali Owner Manual (GMNA-Localizing-U.S./Canada/
Mexico-9803770) - 2017 - crc - 7/12/16
224 Driving and Operating
weight of the driver, passengers,
and cargo should never exceed
the vehicle's capacity weight.
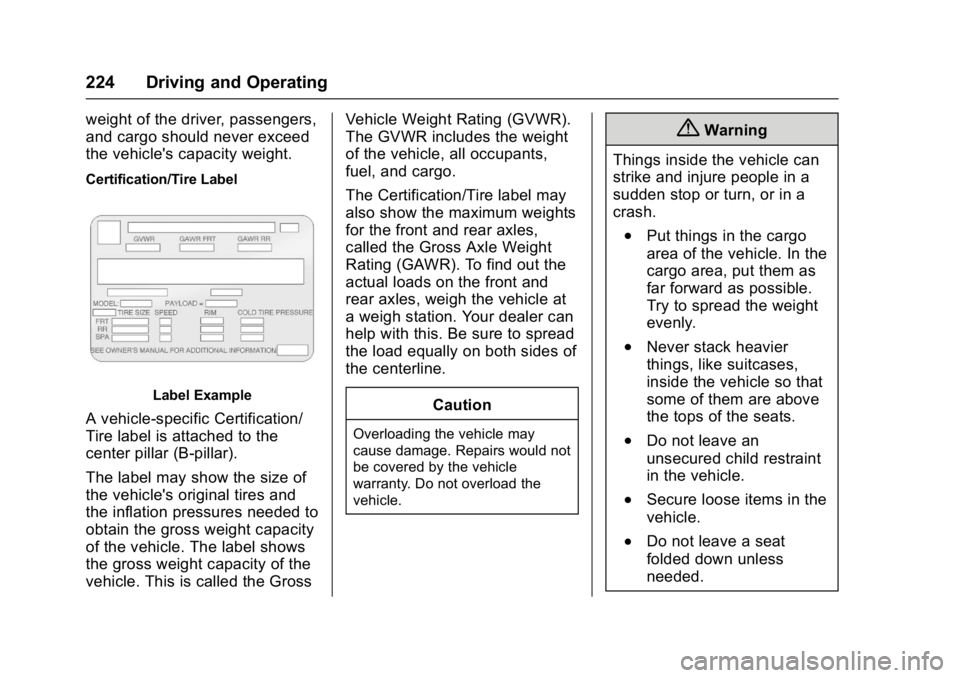
Certification/Tire Label
Label Example
A vehicle-specific Certification/
Tire label is attached to the
center pillar (B-pillar).
The label may show the size of
the vehicle's original tires and
the inflation pressures needed to
obtain the gross weight capacity
of the vehicle. The label shows
the gross weight capacity of the
vehicle. This is called the GrossVehicle Weight Rating (GVWR).
The GVWR includes the weight
of the vehicle, all occupants,
fuel, and cargo.
The Certification/Tire label may
also show the maximum weights
for the front and rear axles,
called the Gross Axle Weight
Rating (GAWR). To find out the
actual loads on the front and
rear axles, weigh the vehicle at
a weigh station. Your dealer can
help with this. Be sure to spread
the load equally on both sides of
the centerline.
CautionOverloading the vehicle may
cause damage. Repairs would not
be covered by the vehicle
warranty. Do not overload the
vehicle.
{Warning
Things inside the vehicle can
strike and injure people in a
sudden stop or turn, or in a
crash.
.Put things in the cargo
area of the vehicle. In the
cargo area, put them as
far forward as possible.
Try to spread the weight
evenly.
.Never stack heavier
things, like suitcases,
inside the vehicle so that
some of them are above
the tops of the seats.
.Do not leave an
unsecured child restraint
in the vehicle.
.Secure loose items in the
vehicle.
.Do not leave a seat
folded down unless
needed.
Page 279 of 419
GMC Acadia/Acadia Denali Owner Manual (GMNA-Localizing-U.S./Canada/
Mexico-9803770) - 2017 - crc - 7/12/16
278 Driving and Operating
additional weight may reduce the
trailering capacity more than the
total of the additional weight.
It is important that the vehicle does
not exceed any of its ratings—
GCWR, GVWR, RGAWR, Maximum
Trailer Rating or Tongue Weight.
The only way to be sure it is not
exceeding any of these ratings is to
weigh the vehicle and trailer.
Total Weight on the Vehicle's
Tires
Inflate the vehicle's tires to the
upper limit for cold tires. These
numbers can be found on the
Certification label or see Vehicle
Load Limits 0221 for more
information. Do not go over the
GVW limit for the vehicle, or the
GAWR, including the weight of the
trailer tongue. If using a weight
distributing hitch, do not go over the
rear axle limit before applying the
weight distribution spring bars.
Towing Equipment
Hitches
It is important to have the correct
hitch equipment. Crosswinds, large
trucks going by, and rough roads
are a few reasons why the right
hitch is needed.
. The rear bumper on the vehicle
is not intended for hitches. Do
not attach rental hitches or other
bumper-type hitches to it. Use
only a frame-mounted hitch that
does not attach to the bumper.
. Will any holes be made in the
body of the vehicle when the
trailer hitch is installed? If so,
then be sure to seal the holes
when the hitch is removed. If the
holes are not sealed, dirt, water,
and deadly carbon monoxide
(CO) from the exhaust may get
into the vehicle. See Engine
Exhaust 0232. Weight-Distributing Hitches and
Weight Carrying Hitches
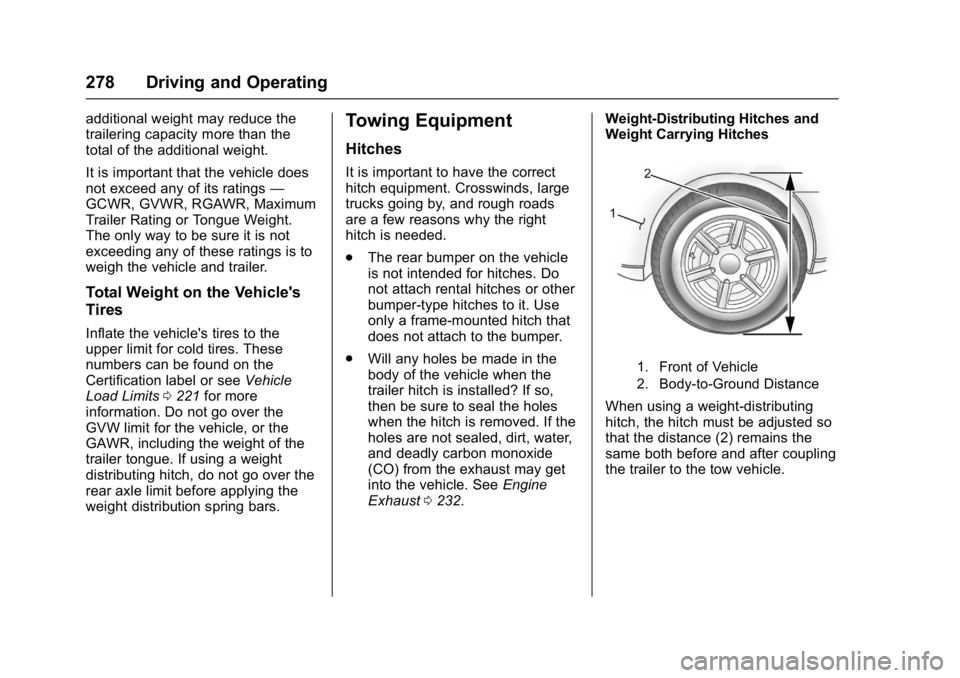
1. Front of Vehicle
2. Body-to-Ground Distance
When using a weight-distributing
hitch, the hitch must be adjusted so
that the distance (2) remains the
same both before and after coupling
the trailer to the tow vehicle.
Page 282 of 419
GMC Acadia/Acadia Denali Owner Manual (GMNA-Localizing-U.S./Canada/
Mexico-9803770) - 2017 - crc - 7/12/16
Vehicle Care 281
Vehicle Care
General Information
General Information . . . . . . . . . . 282
California Proposition65 Warning . . . . . . . . . . . . . . . . . 282
California Perchlorate Materials Requirements . . . . . 282
Accessories and Modifications . . . . . . . . . . . . . . . . 283
Vehicle Checks
Doing Your OwnService Work . . . . . . . . . . . . . . . 283
Hood . . . . . . . . . . . . . . . . . . . . . . . . . 284
Engine Compartment Overview . . . . . . . . . . . . . . . . . . . . 285
Engine Oil . . . . . . . . . . . . . . . . . . . . 288
Engine Oil Life System . . . . . . . 290
Automatic Transmission Fluid . . . . . . . . . . . . . . . . . . . . . . . . 291
Engine Air Cleaner/Filter . . . . . . 292
Cooling System . . . . . . . . . . . . . . 293
Engine Coolant . . . . . . . . . . . . . . . 294
Engine Overheating . . . . . . . . . . 297
Washer Fluid . . . . . . . . . . . . . . . . . 298
Brakes . . . . . . . . . . . . . . . . . . . . . . . 299
Brake Fluid . . . . . . . . . . . . . . . . . . . 300
Battery - North America . . . . . . 301
All-Wheel Drive . . . . . . . . . . . . . . . 302 Starter Switch Check . . . . . . . . . 302
Automatic Transmission Shift
Lock Control Function
Check . . . . . . . . . . . . . . . . . . . . . . . 302
Park Brake and P (Park)
Mechanism Check . . . . . . . . . . 303
Wiper Blade Replacement . . . . 303
Windshield Replacement . . . . . 304
Headlamp Aiming
Headlamp Aiming . . . . . . . . . . . . 305
Bulb Replacement
Bulb Replacement . . . . . . . . . . . . 305
Halogen Bulbs . . . . . . . . . . . . . . . . 305
LED Lighting . . . . . . . . . . . . . . . . . 305
License Plate Lamp . . . . . . . . . . 305
Electrical System
High Voltage Devices and Wiring . . . . . . . . . . . . . . . . . . . . . . . 306
Electrical System Overload . . . 306
Fuses and Circuit Breakers . . . 307
Engine Compartment Fuse Block . . . . . . . . . . . . . . . . . . . . . . . . 307
Instrument Panel Fuse Block . . . . . . . . . . . . . . . . . . . . . . . . 311
Rear Compartment Fuse Block . . . . . . . . . . . . . . . . . . . . . . . . 313
Wheels and Tires
Tires . . . . . . . . . . . . . . . . . . . . . . . . . . 315 All-Season Tires . . . . . . . . . . . . . . 316
Winter Tires . . . . . . . . . . . . . . . . . . 316
Summer Tires . . . . . . . . . . . . . . . . 317
Tire Sidewall Labeling . . . . . . . . 317
Tire Designations . . . . . . . . . . . . . 319
Tire Terminology and
Definitions . . . . . . . . . . . . . . . . . . 320
Tire Pressure . . . . . . . . . . . . . . . . . 323
Tire Pressure for High-Speed Operation . . . . . . . . . . . . . . . . . . . 324
Tire Pressure Monitor System . . . . . . . . . . . . . . . . . . . . . . 324
Tire Pressure Monitor Operation . . . . . . . . . . . . . . . . . . . 325
Tire Inspection . . . . . . . . . . . . . . . . 328
Tire Rotation . . . . . . . . . . . . . . . . . 329
When It Is Time for New Tires . . . . . . . . . . . . . . . . . . . . . . . . 330
Buying New Tires . . . . . . . . . . . . . 331
Different Size Tires and Wheels . . . . . . . . . . . . . . . . . . . . . . 332
Uniform Tire Quality Grading . . . . . . . . . . . . . . . . . . . . . 332
Wheel Alignment and Tire Balance . . . . . . . . . . . . . . . . . . . . . 334
Wheel Replacement . . . . . . . . . . 334
Tire Chains . . . . . . . . . . . . . . . . . . . 335
If a Tire Goes Flat . . . . . . . . . . . . 336
Tire Sealant and Compressor Kit . . . . . . . . . . . . . 337