ECO mode GMC ACADIA 2018 Get To Know Guide
[x] Cancel search | Manufacturer: GMC, Model Year: 2018, Model line: ACADIA, Model: GMC ACADIA 2018Pages: 20, PDF Size: 3.21 MB
Page 6 of 20

6
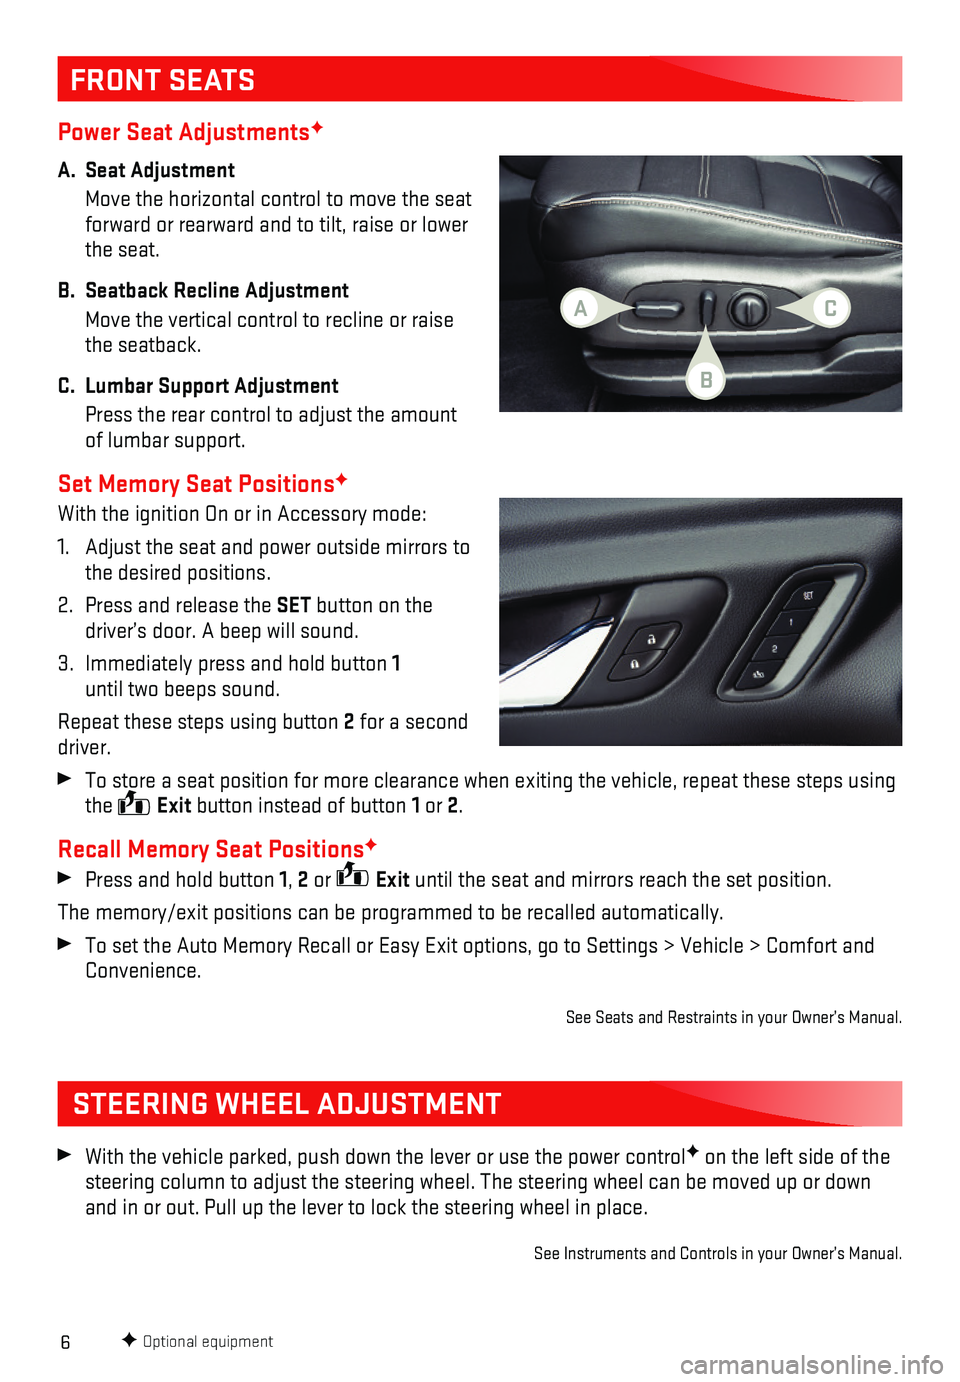
Power Seat AdjustmentsF
A. Seat Adjustment
Move the horizontal control to move the seat forward or rearward and to tilt, raise or lower the seat.
B. Seatback Recline Adjustment
Move the vertical control to recline or raise the seatback.
C. Lumbar Support Adjustment
Press the rear control to adjust the amount of lumbar support.
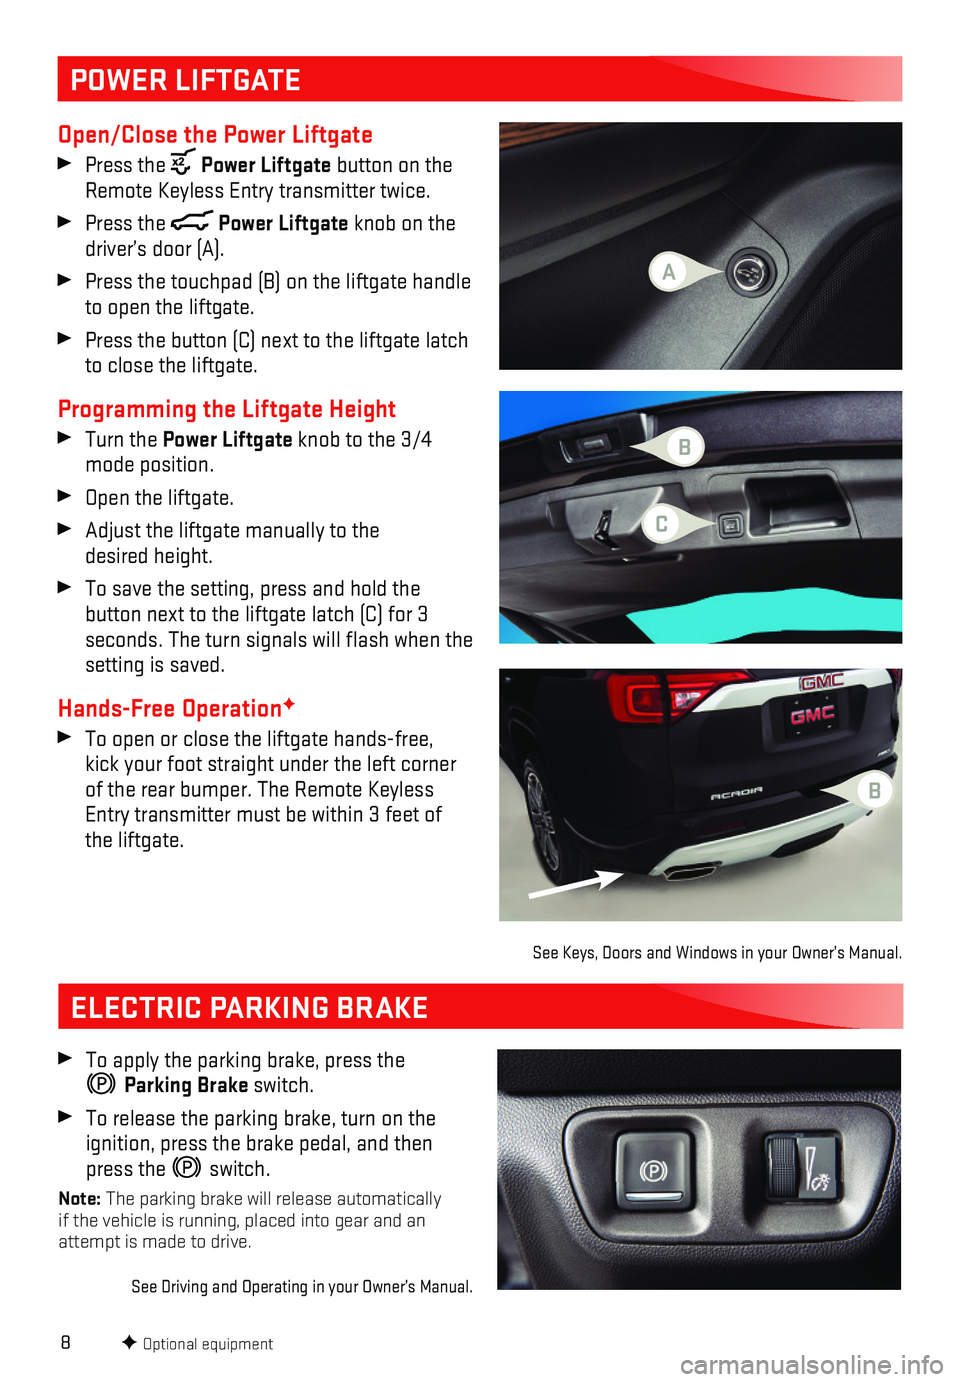
Set Memory Seat PositionsF
With the ignition On or in Accessory mode:
1. Adjust the seat and power outside mirrors to the desired positions.
2. Press and release the SET button on the driver’s door. A beep will sound.
3. Immediately press and hold button 1 until two beeps sound.
Repeat these steps using button 2 for a second driver.
To store a seat position for more clearance when exiting the vehicle, re\
peat these steps using the Exit button instead of button 1 or 2.
Recall Memory Seat PositionsF
Press and hold button 1, 2 or Exit until the seat and mirrors reach the set position.
The memory/exit positions can be programmed to be recalled automatically\
.
To set the Auto Memory Recall or Easy Exit options, go to Settings > Veh\
icle > Comfort and Convenience.
See Seats and Restraints in your Owner’s Manual.
FRONT SEATS
STEERING WHEEL ADJUSTMENT
With the vehicle parked, push down the lever or use the power controlF on the left side of the steering column to adjust the steering wheel. The steering wheel can be \
moved up or down and in or out. Pull up the lever to lock the steering wheel in place.
See Instruments and Controls in your Owner’s Manual.
F Optional equipment
AC
B
Page 8 of 20

8
POWER LIFTGATE
Open/Close the Power Liftgate
Press the Power Liftgate button on the Remote Keyless Entry transmitter twice.
Press the Power Liftgate knob on the driver’s door (A).
Press the touchpad (B) on the liftgate handle to open the liftgate.
Press the button (C) next to the liftgate latch to close the liftgate.
Programming the Liftgate Height
Turn the Power Liftgate knob to the 3/4 mode position.
Open the liftgate.
Adjust the liftgate manually to the desired height.
To save the setting, press and hold the
button next to the liftgate latch (C) for 3
seconds. The turn signals will flash when the setting is saved.
Hands-Free OperationF
To open or close the liftgate hands-free, kick your foot straight under the left corner of the rear bumper. The Remote Keyless Entry
transmitter must be within 3 feet of the liftgate.
See Keys, Doors and Windows in your Owner’s Manual.
ELECTRIC PARKING BRAKE
To apply the parking brake, press the
Parking Brake switch.
To release the parking brake, turn on the ignition, press the brake pedal, and then press the switch.
Note: The parking brake will release automatically if the vehicle is running, placed into gear and an attempt is made to drive.
See Driving and Operating in your Owner’s Manual.
F Optional equipment
C
A
B
B
Page 17 of 20

17
TRACTION SELECT
The Traction Select system automatically adjusts various vehicle controls based on driv-ing preferences, weather and road conditions.
Rotate the Traction Select knob on the
center console to select Tour,
All-Wheel Drive (AWD models only),
Sport, Snow/Ice (front-wheel drive models only), Off-Road (AWD models only), or Tow/Haul.
The AWD indicator will illuminate when an AWD mode is selected.
If the vehicle is in Tour or AWD mode, it will stay in that mode through\
future ignition cycles.
Hill Descent ControlF
Hill Descent Control sets and maintains vehicle speed from 2–14 mph w\
hile descending a very steep incline in a forward or reverse gear.
Press the Hill Descent Control button on the center console. Vehicle speed must be below 31 mph to turn on the system.
Increase or decrease speed by applying the accelerator or brake pedal, o\
r use the Cruise Control +/– buttons on the steering wheel. The adjusted speed becomes the new set s\
peed. The symbol flashes on the instrument cluster when the system is actively a\
pplying the brakes to maintain vehicle speed.
See Driving and Operating in your Owner’s Manual.
F Optional equipment
ACTIVE TOWF
Rear Vision Camera Center Guideline
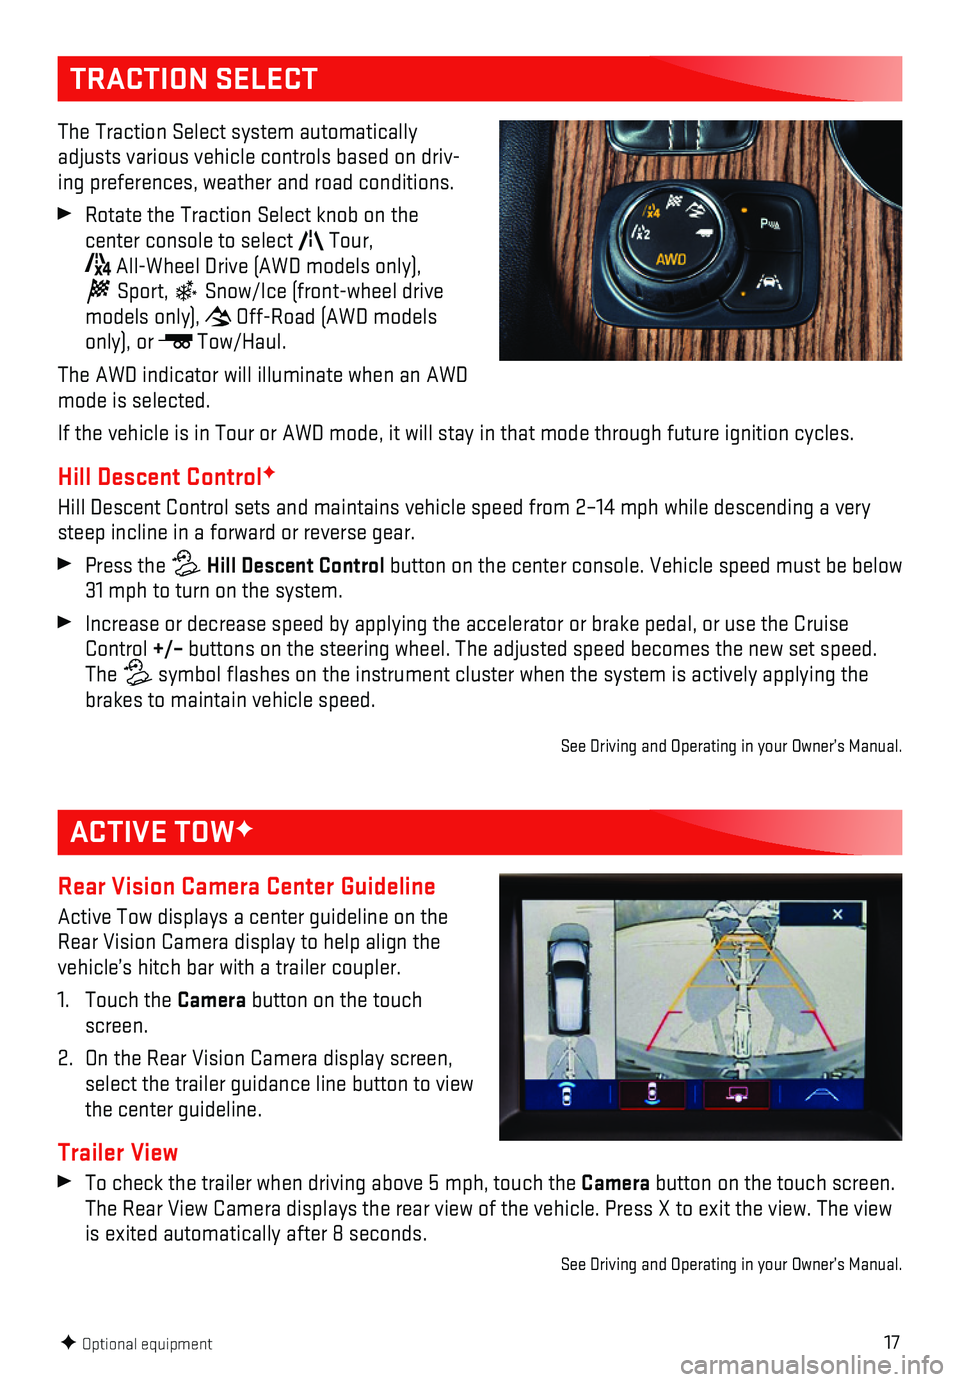
Active Tow displays a center guideline on the Rear Vision Camera display to help align the vehicle’s hitch bar with a trailer coupler.
1. Touch the Camera button on the touch screen.
2. On the Rear Vision Camera display screen, select the trailer guidance line button to view the center guideline.
Trailer View
To check the trailer when driving above 5 mph, touch the Camera button on the touch screen. The Rear View Camera displays the rear view of the vehicle. Press X to e\
xit the view. The view is exited automatically after 8 seconds.
See Driving and Operating in your Owner’s Manual.