warning GMC ACADIA 2018 Get To Know Guide
[x] Cancel search | Manufacturer: GMC, Model Year: 2018, Model line: ACADIA, Model: GMC ACADIA 2018Pages: 20, PDF Size: 3.21 MB
Page 2 of 20
2
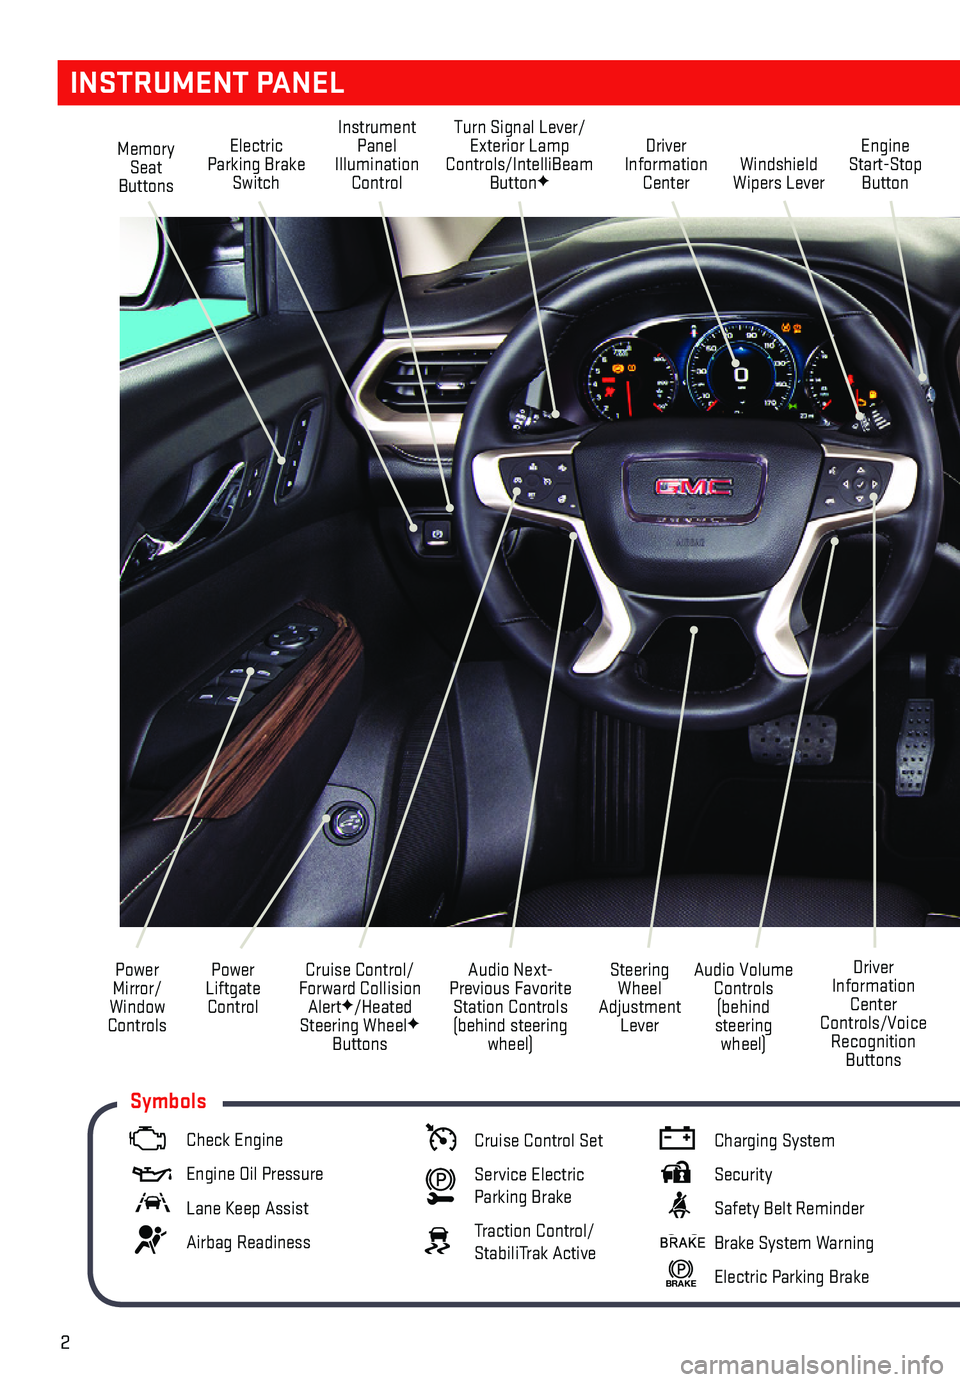
Memory Seat Buttons
Instrument Panel Illumination Control
Turn Signal Lever/Exterior Lamp Controls/IntelliBeam ButtonFWindshield Wipers Lever
Engine Start-Stop Button
Driver Information Center
Power Liftgate Control
Cruise Control/Forward Collision AlertF/Heated Steering WheelF Buttons
Power Mirror/ Window Controls
Audio Volume Controls (behind steering wheel)
Driver Information Center Controls/Voice Recognition Buttons
Audio Next-Previous Favorite Station Controls (behind steering wheel)
Steering Wheel Adjustment Lever
Electric Parking Brake Switch
INSTRUMENT PANEL
Check Engine
Engine Oil Pressure
Lane Keep Assist
Airbag Readiness
Cruise Control Set
Service Electric Parking Brake
Traction Control/StabiliTrak Active
Charging System
Security
Safety Belt Reminder
Brake System Warning
BRAKE Electric Parking Brake
Symbols
Page 3 of 20
3
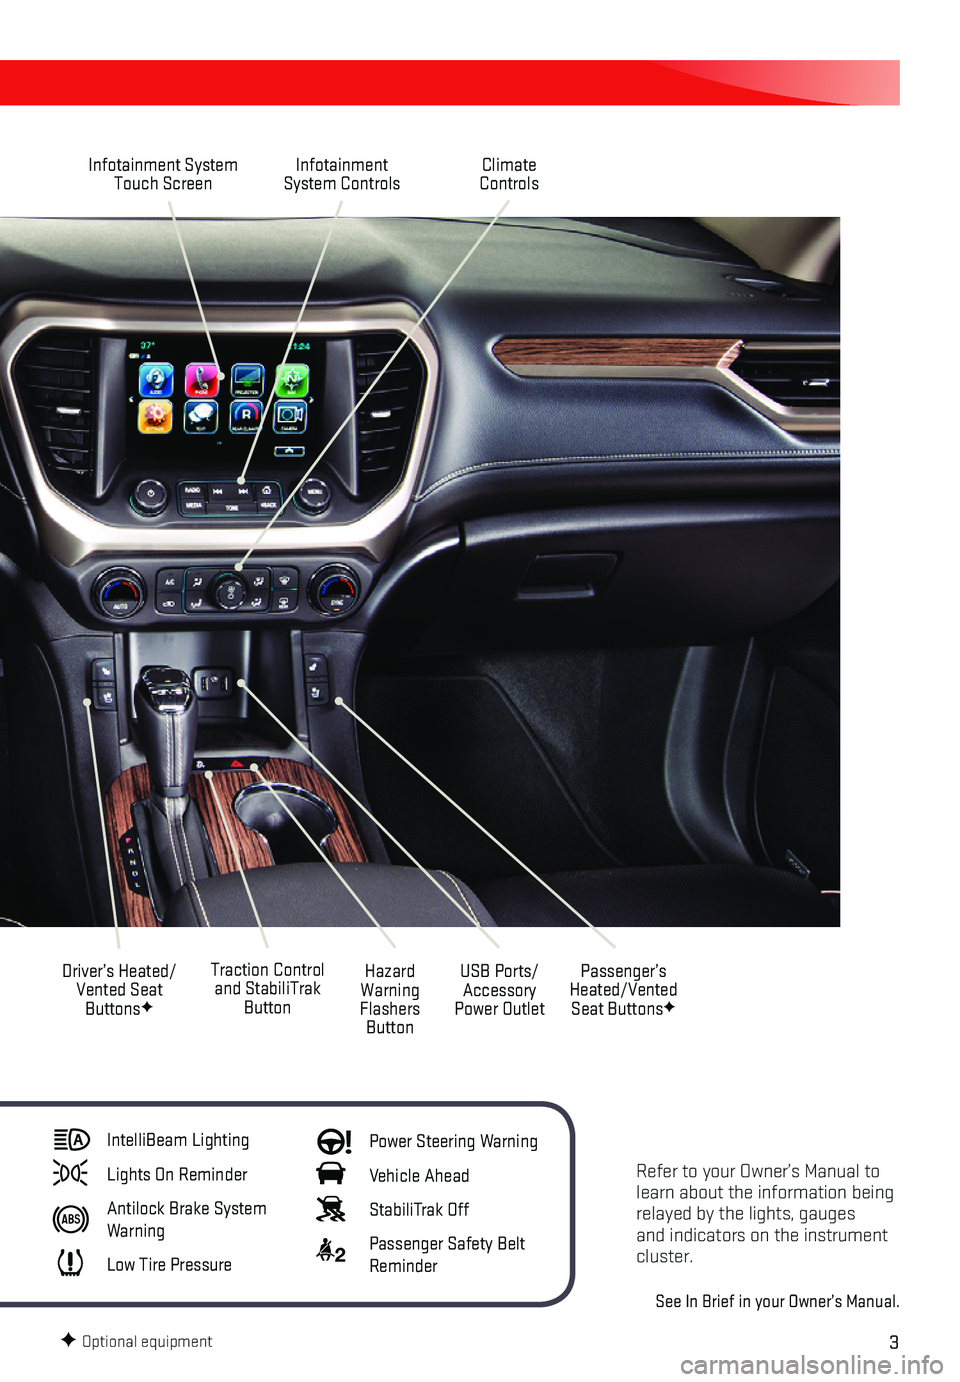
Refer to your Owner’s Manual to learn about the information being relayed by the lights, gauges and indicators on the instrument cluster.
See In Brief in your Owner’s Manual.
Infotainment System Touch ScreenInfotainment System Controls
Traction Control and StabiliTrak Button
Driver’s Heated/Vented Seat ButtonsF
Hazard Warning Flashers Button
USB Ports/Accessory Power Outlet
Climate Controls
Passenger’s Heated/Vented Seat ButtonsF
IntelliBeam Lighting
Lights On Reminder
Antilock Brake System Warning
Low Tire Pressure
Power Steering Warning
Vehicle Ahead
StabiliTrak Off
2 Passenger Safety Belt Reminder
F Optional equipment
Page 11 of 20
11
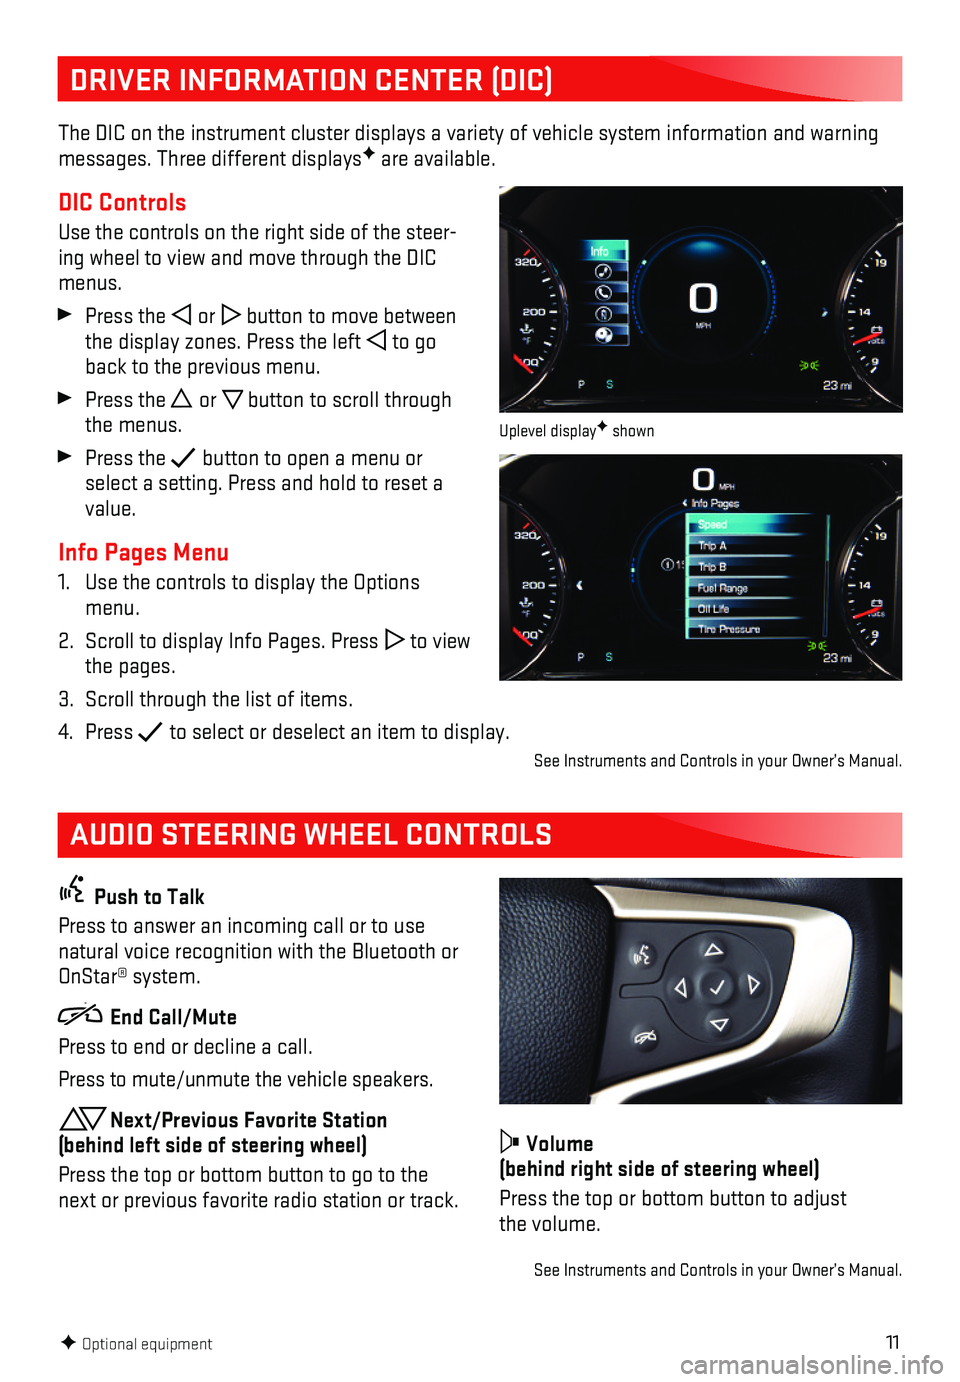
DRIVER INFORMATION CENTER (DIC)
AUDIO STEERING WHEEL CONTROLS
The DIC on the instrument cluster displays a variety of vehicle system i\
nformation and warning messages. Three different displaysF are available.
DIC Controls
Use the controls on the right side of the steer-ing wheel to view and move through the DIC menus.
Press the or button to move between the display zones. Press the left to go back to the previous menu.
Press the or button to scroll through the menus.
Press the button to open a menu or select a setting. Press and hold to reset a value.
Info Pages Menu
1. Use the controls to display the Options menu.
2. Scroll to display Info Pages. Press to view the pages.
3. Scroll through the list of items.
4. Press to select or deselect an item to display.
Push to Talk
Press to answer an incoming call or to use natural voice recognition with the Bluetooth or OnStar® system.
End Call/Mute
Press to end or decline a call.
Press to mute/unmute the vehicle speakers.
Next/Previous Favorite Station (behind left side of steering wheel)
Press the top or bottom button to go to the next or previous favorite radio station or track.
Volume (behind right side of steering wheel)
Press the top or bottom button to adjust the volume.
See Instruments and Controls in your Owner’s Manual.
F Optional equipment
Uplevel displayF shown
See Instruments and Controls in your Owner’s Manual.
Page 15 of 20
15F Optional equipment
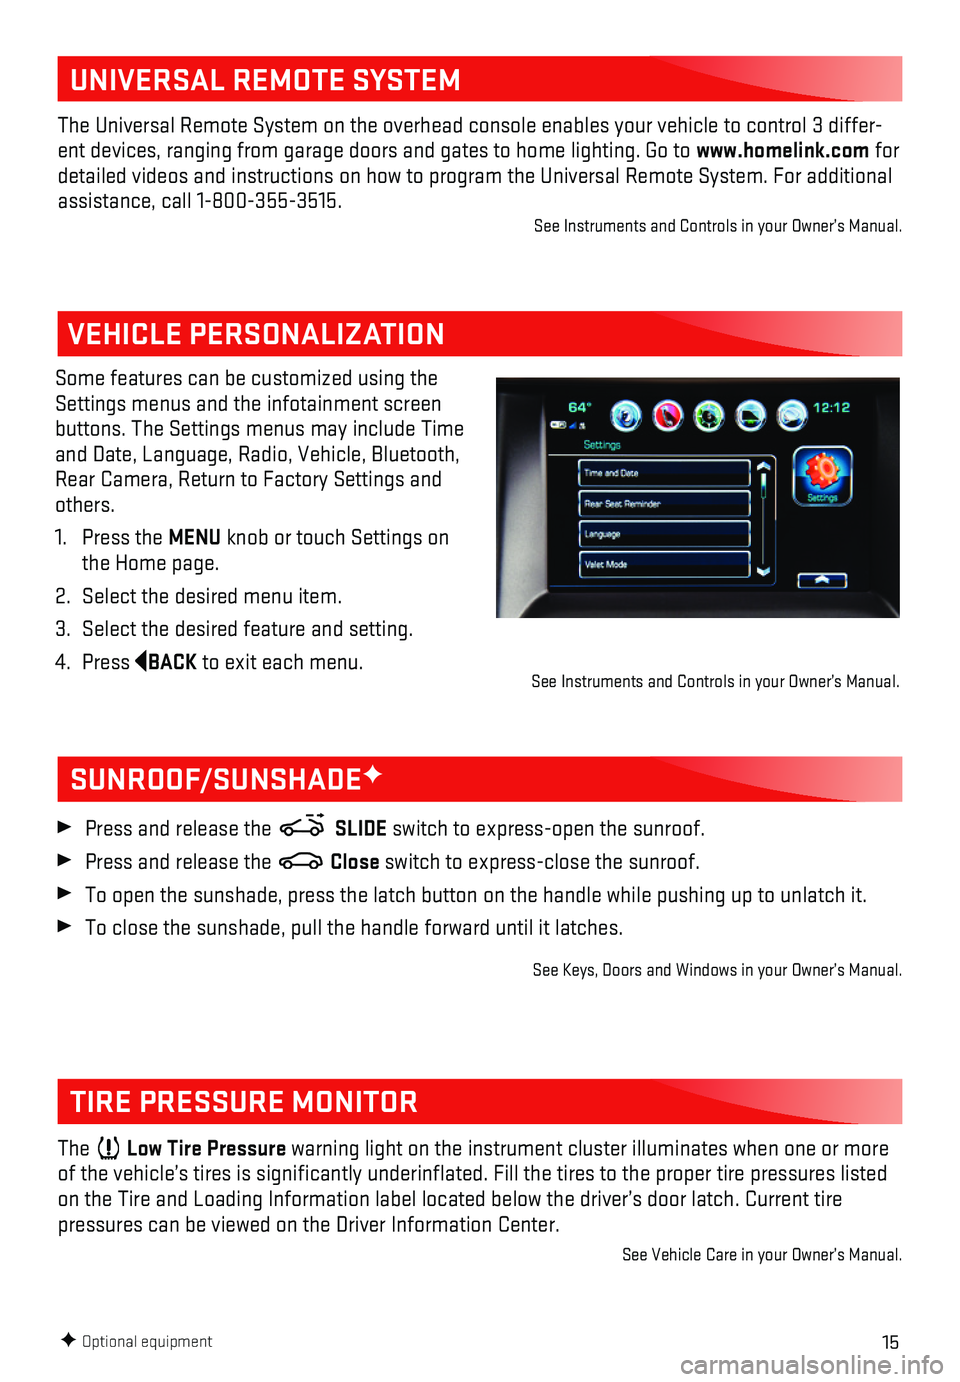
VEHICLE PERSONALIZATION
Some features can be customized using the Settings menus and the infotainment screen buttons. The Settings menus may include Time and Date, Language, Radio, Vehicle, Bluetooth, Rear Camera, Return to Factory Settings and others.
1. Press the MENU knob or touch Settings on the Home page.
2. Select the desired menu item.
3. Select the desired feature and setting.
4. Press BACK to exit each menu.
SUNROOF/SUNSHADEF
TIRE PRESSURE MONITOR
Press and release the SLIDE switch to express-open the sunroof.
Press and release the Close switch to express-close the sunroof.
To open the sunshade, press the latch button on the handle while pushing\
up to unlatch it.
To close the sunshade, pull the handle forward until it latches.
See Keys, Doors and Windows in your Owner’s Manual.
The Low Tire Pressure warning light on the instrument cluster illuminates when one or more of the vehicle’s tires is significantly underinflated. Fill the t\
ires to the proper tire pressures listed on the Tire and Loading Information label located below the driver’s \
door latch. Current tire
pressures can be viewed on the Driver Information Center.
See Vehicle Care in your Owner’s Manual.
See Instruments and Controls in your Owner’s Manual.
UNIVERSAL REMOTE SYSTEM
The Universal Remote System on the overhead console enables your vehicle\
to control 3 differ-ent devices, ranging from garage doors and gates to home lighting. Go to\
www.homelink.com for detailed videos and instructions on how to program the Universal Remote \
System. For additional assistance, call 1-800-355-3515.See Instruments and Controls in your Owner’s Manual.
Page 18 of 20
18
DRIVER ASSISTANCE SYSTEMS
Safety Alert SeatF
The driver’s seat pulses — left side, right side or simultaneously\
— to alert the driver of potential hazards.
Audible alerts or seat pulsing alerts may be selected. To change the ale\
rt settings, go to Settings > Vehicle > Collision/Detection > Alert Type.
Lane Change Alert with Side Blind Zone AlertF
While driving, the system displays a warning symbol on the left or right side mirror when a vehicle is detected in that side blind zone area or rapidly approachin\
g that area. The warning symbol flashes if a turn signal is activated when a vehicle has been d\
etected on the same side.
To turn on or off, go to Settings > Vehicle > Collision/Detection > Lane\
Change Alert.
Forward Collision AlertF
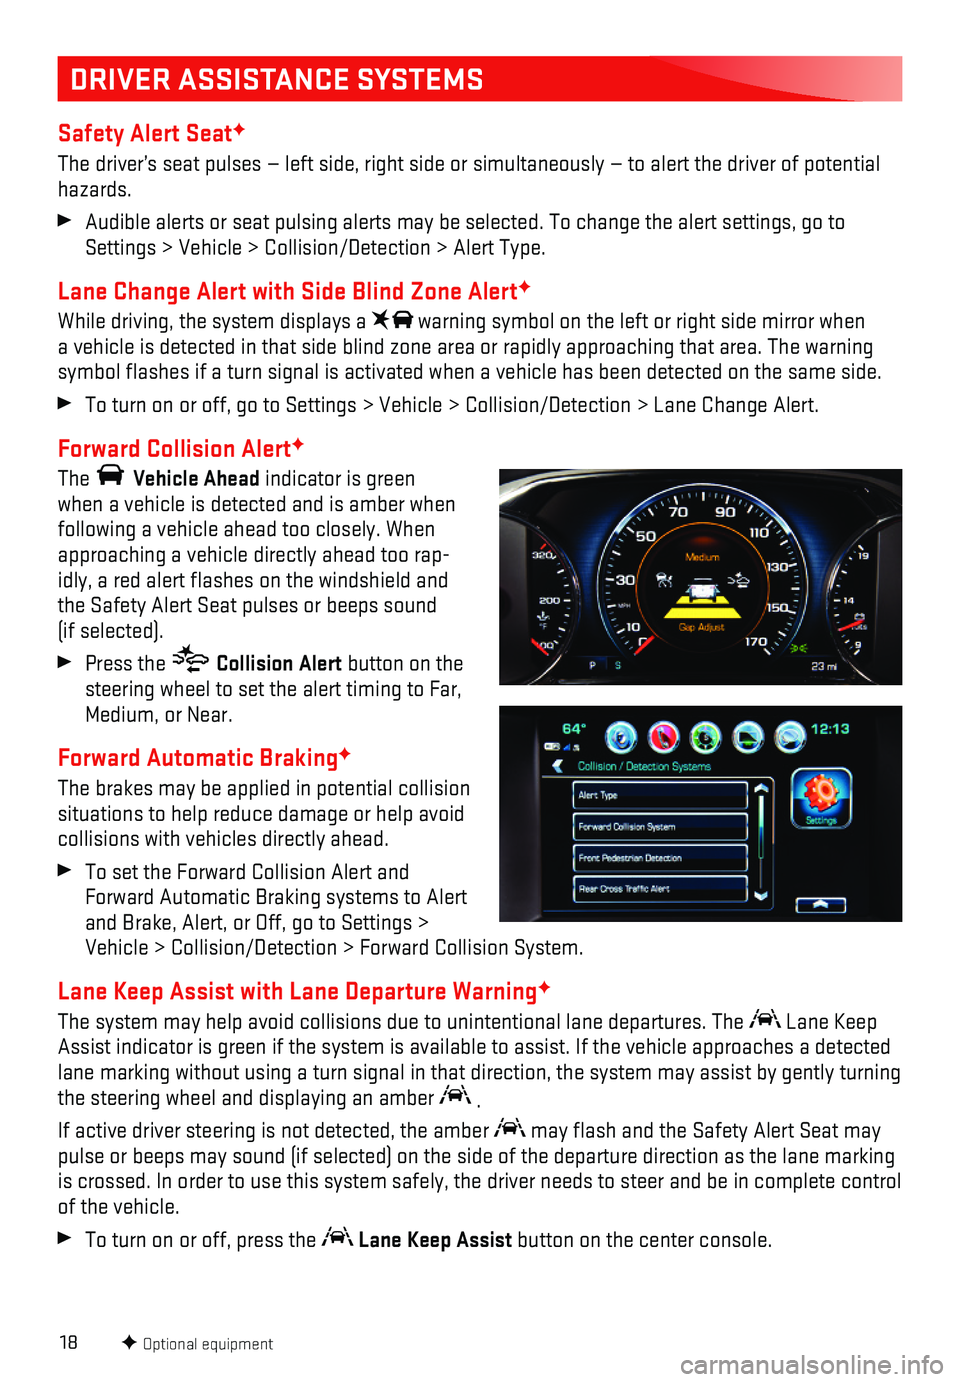
The Vehicle Ahead indicator is green when a vehicle is detected and is amber when following a vehicle ahead too closely. When approaching a vehicle directly ahead too rap-idly, a red alert flashes on the windshield and the Safety Alert Seat pulses or beeps sound (if selected).
Press the Collision Alert button on the steering wheel to set the alert timing to Far, Medium, or Near.
Forward Automatic BrakingF
The brakes may be applied in potential collision situations to help reduce damage or help avoid collisions with vehicles directly ahead.
To set the Forward Collision Alert and Forward Automatic Braking systems to Alert and Brake, Alert, or Off, go to Settings > Vehicle > Collision/Detection > Forward Collision System.
Lane Keep Assist with Lane Departure WarningF
The system may help avoid collisions due to unintentional lane departure\
s. The Lane Keep Assist indicator is green if the system is available to assist. If the v\
ehicle approaches a detected lane marking without using a turn signal in that direction, the system m\
ay assist by gently turning the steering wheel and displaying an amber .
If active driver steering is not detected, the amber may flash and the Safety Alert Seat may pulse or beeps may sound (if selected) on the side of the departure di\
rection as the lane marking is crossed. In order to use this system safely, the driver needs to stee\
r and be in complete control of the vehicle.
To turn on or off, press the Lane Keep Assist button on the center console.
F Optional equipment