four wheel drive GMC ACADIA 2023 Owners Manual
[x] Cancel search | Manufacturer: GMC, Model Year: 2023, Model line: ACADIA, Model: GMC ACADIA 2023Pages: 384, PDF Size: 17.04 MB
Page 15 of 384
GMC Acadia/Acadia Denali Owner Manual (GMNA-Localizing-U.S./Canada/
Mexico-16402009) - 2023 - CRC - 3/28/22
14 Keys, Doors, and Windows
Remote Vehicle Start
If equipped, this feature allows the engine
to be started from outside of the vehicle.
/:This button will be on the remote key
if the vehicle has remote start.
The climate control system will use the
previous settings during a remote start. The
rear defog may come on during a remote
start based on cold ambient conditions. The
rear fog indicator light does not come on
during a remote start.
If the vehicle has heated or ventilated seats,
they may come on during a remote start.
See Heated and Ventilated Front Seats 042.
If equipped with a remote start heated
steering wheel, the heated wheel will turn
on automatically in remote start along with
the heated seats when it is cold outside. See
Heated Steering Wheel 089.
Laws in some local communities may restrict
the use of remote starters. For example,
some laws may require a person using
remote start to have the vehicle in view.
Check local regulations for any
requirements.
Do not use remote start if the vehicle is low
on fuel as it may run out of fuel. Other conditions can affect the performance
of the remote key. See
Remote Key07.
Starting the Engine Using Remote Start
1. Press and releaseQon the remote key.
2. Immediately press and hold
/for at
least four seconds or until the turn
signal lamps flash. The turn signal lamps
flashing confirms the request to remote
start the vehicle has been received.
During the remote start the doors will be
locked and the parking lamps will remain
on as long as the engine is running.
The engine will shut off after 15 minutes
unless a time extension is done or the
vehicle is started.
3. With the remote key in the vehicle, press the brake pedal and start the
vehicle to drive.
Extending Engine Run Time
The engine run time can also be extended
by another 15 minutes, if during the first
15 minutes Steps 1 and 2 are repeated while
the engine is still running. An extension can
be requested 30 seconds after starting. This
provides a total of 30 minutes.
The remote start can only be extended once. When the remote start is extended, the
second 15-minute period is added on to the
first 15 minutes for a total of 30 minutes.
A maximum of two remote starts, or a
remote start with an extension, are allowed
between ignition cycles.
The vehicle must be started and then turned
off before the remote start procedure can be
used again.
Canceling a Remote Start
To cancel a remote start, do any of the
following:
.Press and hold/until the parking lamps
turn off.
.Turn on the hazard warning flashers.
.Turn the vehicle on and then off.
Conditions in Which Remote Start Will
Not Work
The remote start will not operate if any of
the following occur:
.A remote key is in the vehicle.
.The ignition is on.
.The hood is not closed.
.The hazard warning flashers are on.
.There is an emission control system
malfunction.
Page 120 of 384
GMC Acadia/Acadia Denali Owner Manual (GMNA-Localizing-U.S./Canada/
Mexico-16402009) - 2023 - CRC - 3/28/22
Instruments and Controls 119
been engaged, the display switches to the
gap setting page. This page shows the
current gap setting along with the vehicle
ahead indicator.
Driver Assistance :If equipped, shows
information for Lane Keep Assist (LKA), Lane
Departure Warning (LDW), and Forward
Collision Alert (FCA).
Battery Voltage : Displays the current
battery voltage, if equipped. Battery voltage
changes are normal while driving. See
Charging System Light 0106. If there is a
problem with the battery charging system, a
DIC will display a message.
Economy Trend : Shows history of the
Average Fuel Economy from the last 50 km
(30 mi). Each bar represents about 5 km
(3 mi) of driving. During driving the bars will
shift to always reflect the most recent
distance on the right side. Press
Vto open
the menu while this display is active to clear
the graph. Select yes or no and press
V.
ECO Index : Provides feedback on the
efficiency of current driving behavior. The
bar graph shows a value that is based on
current fuel consumption compared to what
is expected from the vehicle with good and
bad driving habits. Off Road :
Displays vehicle pitch and roll
information, road wheel angle, and
four-wheel drive (4WD) status.
Blank Page : Shows no information.
Driver Information Center (DIC)
(Uplevel)
The DIC displays are shown in the center of
the instrument cluster in the Info app.
SeeInstrument Cluster (Base Level and
Midlevel) 096 or
Instrument Cluster (Uplevel) 099. The
displays show the status of many vehicle
systems. The controls for the DIC are on the
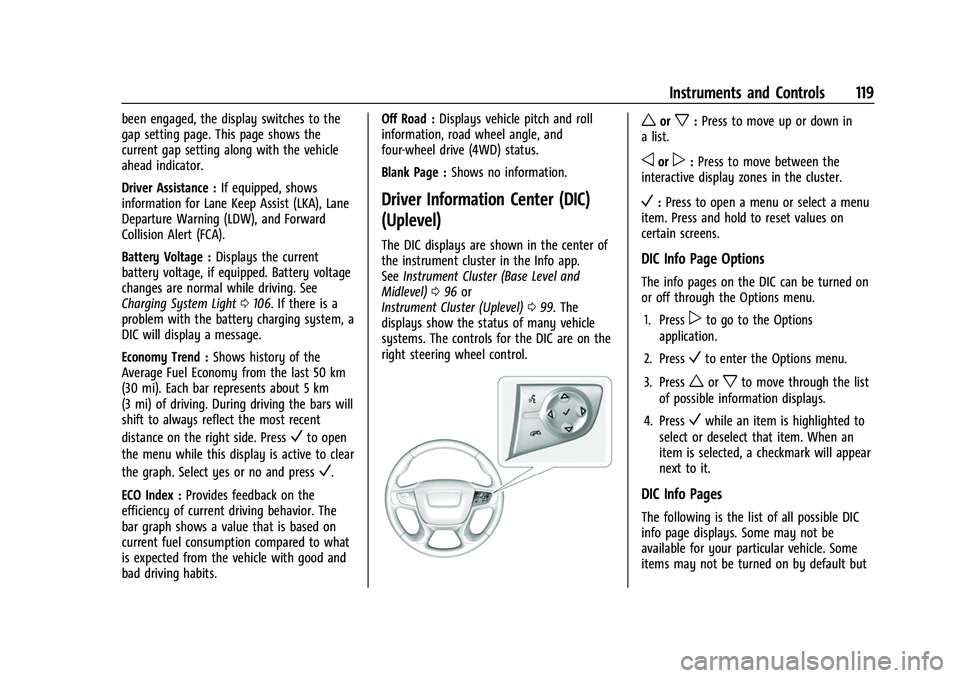
right steering wheel control.
worx: Press to move up or down in
a list.
oorp: Press to move between the
interactive display zones in the cluster.
V: Press to open a menu or select a menu
item. Press and hold to reset values on
certain screens.
DIC Info Page Options
The info pages on the DIC can be turned on
or off through the Options menu.
1. Press
pto go to the Options
application.
2. Press
Vto enter the Options menu.
3. Press
worxto move through the list
of possible information displays.
4. Press
Vwhile an item is highlighted to
select or deselect that item. When an
item is selected, a checkmark will appear
next to it.
DIC Info Pages
The following is the list of all possible DIC
info page displays. Some may not be
available for your particular vehicle. Some
items may not be turned on by default but
Page 122 of 384
GMC Acadia/Acadia Denali Owner Manual (GMNA-Localizing-U.S./Canada/
Mexico-16402009) - 2023 - CRC - 3/28/22
Instruments and Controls 121
Best Fuel Economy :Displays average fuel
economy, the best fuel economy over the
selected distance, and a bar graph showing
instantaneous fuel economy.
Press
pto change the selected distance.
Press and hold
Vwhile this display is active
to reset the best fuel economy and average
fuel economy. This display can also be reset
by selecting reset in the menu.
Top Consumers : Shows a list of the features
that are currently impacting the fuel
economy, in order from highest to lowest.
If a feature is turned off, it will be removed
from the list.
Economy Trend : Shows history of the
Average Fuel Economy from the last 50 km
(30 mi). Each bar represents about 5 km
(3 mi) of driving. During driving the bars will
shift to always reflect the most recent
distance on the right side. Press and hold
V
to clear the graph or presspto reset
through the menu.
Speed Signs : Shows sign information, which
comes from a roadway database in the
onboard navigation. Off Road :
Displays vehicle pitch and roll
information, road wheel angle, and
four-wheel drive (4WD) status.
Following Distance : The following distance
to a moving vehicle ahead in your path is
indicated in following time in seconds. See
Forward Collision Alert (FCA) System 0237.
Blank Page : Shows no information.
Transmission Fluid Temperature Gauge :
Shows the temperature of the automatic
transmission fluid in either degrees Celsius (°
C) or degrees Fahrenheit (°F).
Head-Up Display (HUD)
{Warning
If the HUD image is too bright or too
high in your field of view, it may take
you more time to see things you need to
see when it is dark outside. Be sure to
keep the HUD image dim and placed low
in your field of view.
If equipped with HUD, some information
concerning the operation of the vehicle is
projected onto the windshield. The
information is projected through the HUD lens on the driver side of the instrument
panel and focused out toward the front of
the vehicle.
Caution
If you try to use the HUD image as a
parking aid, you may misjudge the
distance and damage your vehicle. Do not
use the HUD image as a parking aid.
The HUD information can be displayed in
various languages. The speedometer reading
and other numerical values can be displayed
in either English or metric units.
The language selection is changed through
the radio and the units of measurement are
changed through the instrument cluster. See
Settings 0170 and “Options” under
Instrument Cluster (Base Level and Midlevel)
0 96 or
Instrument Cluster (Uplevel) 099.
Page 123 of 384
GMC Acadia/Acadia Denali Owner Manual (GMNA-Localizing-U.S./Canada/
Mexico-16402009) - 2023 - CRC - 3/28/22
122 Instruments and Controls
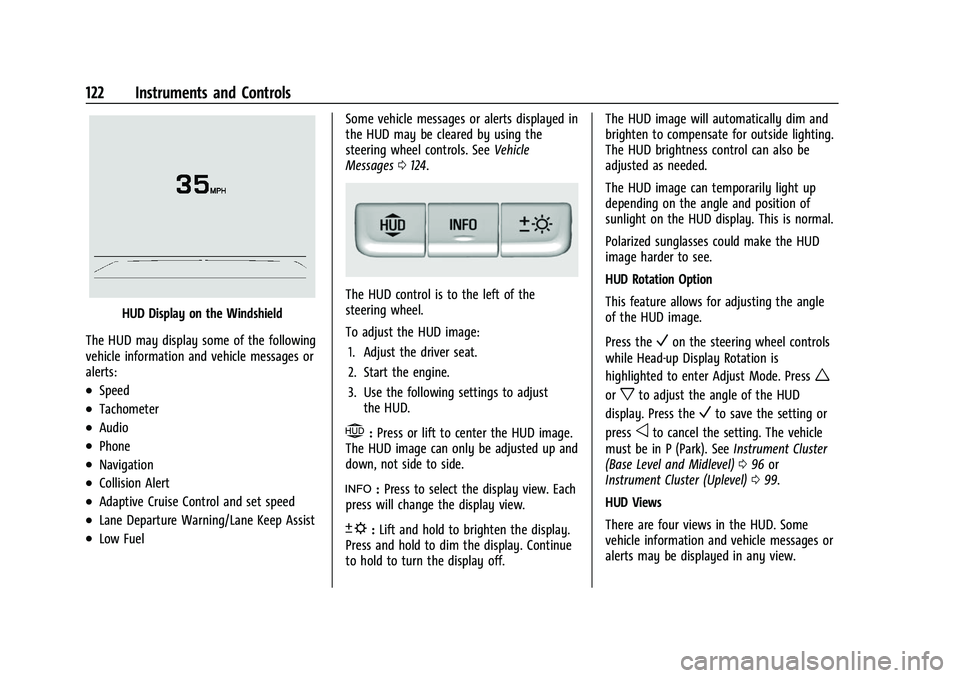
HUD Display on the Windshield
The HUD may display some of the following
vehicle information and vehicle messages or
alerts:
.Speed
.Tachometer
.Audio
.Phone
.Navigation
.Collision Alert
.Adaptive Cruise Control and set speed
.Lane Departure Warning/Lane Keep Assist
.Low Fuel Some vehicle messages or alerts displayed in
the HUD may be cleared by using the
steering wheel controls. See
Vehicle
Messages 0124.
The HUD control is to the left of the
steering wheel.
To adjust the HUD image:
1. Adjust the driver seat.
2. Start the engine.
3. Use the following settings to adjust the HUD.
$:Press or lift to center the HUD image.
The HUD image can only be adjusted up and
down, not side to side.
!: Press to select the display view. Each
press will change the display view.
D: Lift and hold to brighten the display.
Press and hold to dim the display. Continue
to hold to turn the display off. The HUD image will automatically dim and
brighten to compensate for outside lighting.
The HUD brightness control can also be
adjusted as needed.
The HUD image can temporarily light up
depending on the angle and position of
sunlight on the HUD display. This is normal.
Polarized sunglasses could make the HUD
image harder to see.
HUD Rotation Option
This feature allows for adjusting the angle
of the HUD image.
Press the
Von the steering wheel controls
while Head-up Display Rotation is
highlighted to enter Adjust Mode. Press
w
orxto adjust the angle of the HUD
display. Press the
Vto save the setting or
press
oto cancel the setting. The vehicle
must be in P (Park). See Instrument Cluster
(Base Level and Midlevel) 096 or
Instrument Cluster (Uplevel) 099.
HUD Views
There are four views in the HUD. Some
vehicle information and vehicle messages or
alerts may be displayed in any view.
Page 173 of 384
GMC Acadia/Acadia Denali Owner Manual (GMNA-Localizing-U.S./Canada/
Mexico-16402009) - 2023 - CRC - 3/28/22
172 Infotainment System
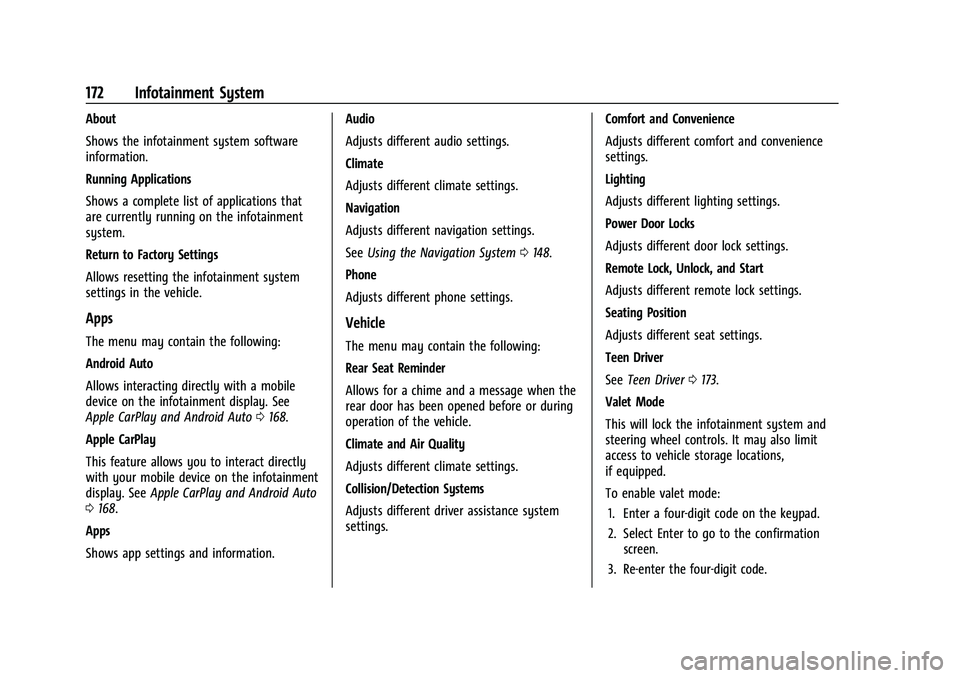
About
Shows the infotainment system software
information.
Running Applications
Shows a complete list of applications that
are currently running on the infotainment
system.
Return to Factory Settings
Allows resetting the infotainment system
settings in the vehicle.
Apps
The menu may contain the following:
Android Auto
Allows interacting directly with a mobile
device on the infotainment display. See
Apple CarPlay and Android Auto0168.
Apple CarPlay
This feature allows you to interact directly
with your mobile device on the infotainment
display. See Apple CarPlay and Android Auto
0 168.
Apps
Shows app settings and information. Audio
Adjusts different audio settings.
Climate
Adjusts different climate settings.
Navigation
Adjusts different navigation settings.
See
Using the Navigation System 0148.
Phone
Adjusts different phone settings.
Vehicle
The menu may contain the following:
Rear Seat Reminder
Allows for a chime and a message when the
rear door has been opened before or during
operation of the vehicle.
Climate and Air Quality
Adjusts different climate settings.
Collision/Detection Systems
Adjusts different driver assistance system
settings. Comfort and Convenience
Adjusts different comfort and convenience
settings.
Lighting
Adjusts different lighting settings.
Power Door Locks
Adjusts different door lock settings.
Remote Lock, Unlock, and Start
Adjusts different remote lock settings.
Seating Position
Adjusts different seat settings.
Teen Driver
See
Teen Driver 0173.
Valet Mode
This will lock the infotainment system and
steering wheel controls. It may also limit
access to vehicle storage locations,
if equipped.
To enable valet mode: 1. Enter a four-digit code on the keypad.
2. Select Enter to go to the confirmation screen.
3. Re-enter the four-digit code.
Page 216 of 384
GMC Acadia/Acadia Denali Owner Manual (GMNA-Localizing-U.S./Canada/
Mexico-16402009) - 2023 - CRC - 3/29/22
Driving and Operating 215
2. Press the plus or minus button on thecenter stack to increase or decrease the
gear range available.
When shifting to L (Low), the transmission
will shift to a preset lower gear range. For
this preset range, the highest gear available
is displayed next to the L in the DIC. See
Driver Information Center (DIC) (Base Level)
0 114 orDriver Information Center (DIC)
(Midlevel) 0116 orDriver Information Center
(DIC) (Uplevel) 0119. All gears below that
number are available to use. For example,
when 4 (Fourth) is shown next to the L,
1 (First) through 4 (Fourth) gears are shifted
automatically. To shift to 5 (Fifth) gear, press
the + (Plus) button or shift into D (Drive).
L (Low) will prevent shifting to a lower gear
range if the engine speed is too high.
If vehicle speed is not reduced within the
time allowed, the lower gear range shift will
not be completed. Slow the vehicle, then
press the −(Minus) button to the desired
lower gear range.
While using ERS, cruise control can be used.Drive Systems
All-Wheel Drive
Vehicles with this feature can operate in
AWD Mode.
Vehicles with this feature can operate in
All-Wheel Drive (AWD) Mode.
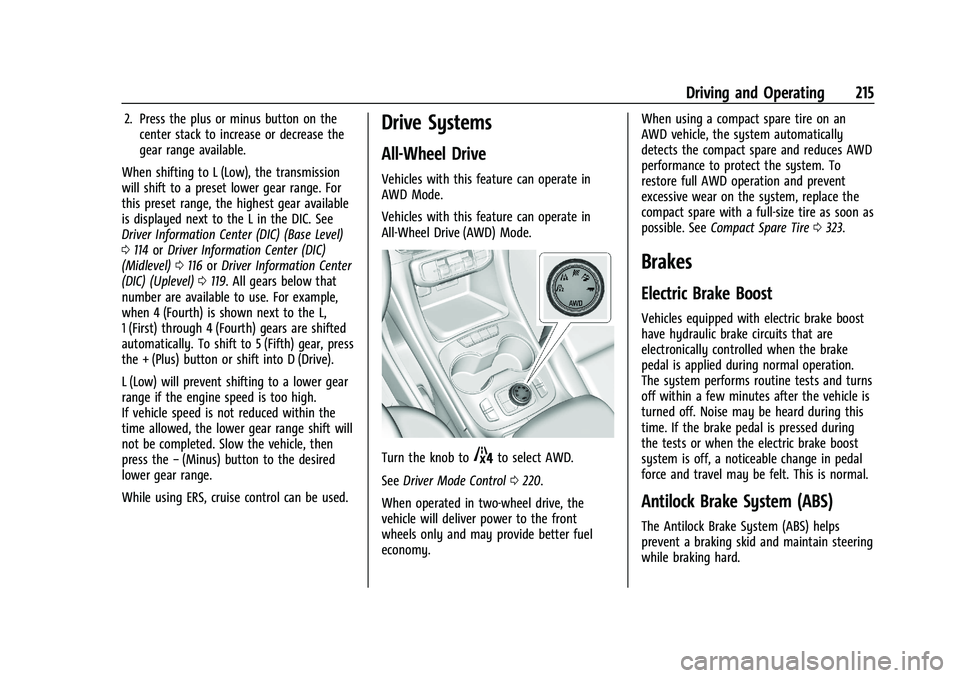
Turn the knob to4to select AWD.
See Driver Mode Control 0220.
When operated in two-wheel drive, the
vehicle will deliver power to the front
wheels only and may provide better fuel
economy. When using a compact spare tire on an
AWD vehicle, the system automatically
detects the compact spare and reduces AWD
performance to protect the system. To
restore full AWD operation and prevent
excessive wear on the system, replace the
compact spare with a full-size tire as soon as
possible. See
Compact Spare Tire 0323.
Brakes
Electric Brake Boost
Vehicles equipped with electric brake boost
have hydraulic brake circuits that are
electronically controlled when the brake
pedal is applied during normal operation.
The system performs routine tests and turns
off within a few minutes after the vehicle is
turned off. Noise may be heard during this
time. If the brake pedal is pressed during
the tests or when the electric brake boost
system is off, a noticeable change in pedal
force and travel may be felt. This is normal.
Antilock Brake System (ABS)
The Antilock Brake System (ABS) helps
prevent a braking skid and maintain steering
while braking hard.
Page 221 of 384
GMC Acadia/Acadia Denali Owner Manual (GMNA-Localizing-U.S./Canada/
Mexico-16402009) - 2023 - CRC - 3/29/22
220 Driving and Operating
HDC will remain enabled between 22–
60 km/h (14–37 mph); however vehicle
speed cannot be set or maintained in this
range. It will automatically disable if the
vehicle speed is above 80 km/h (50 mph) or
above 60 km/h (37 mph) for at least
30 seconds. Press
5again to re-enable HDC.
Driver Mode Control
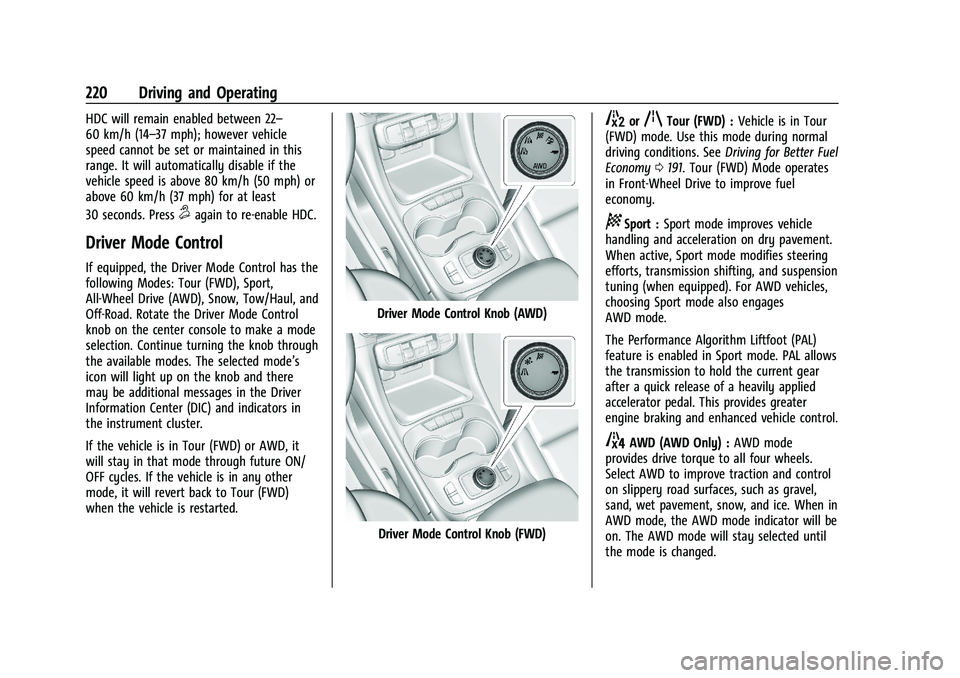
If equipped, the Driver Mode Control has the
following Modes: Tour (FWD), Sport,
All-Wheel Drive (AWD), Snow, Tow/Haul, and
Off-Road. Rotate the Driver Mode Control
knob on the center console to make a mode
selection. Continue turning the knob through
the available modes. The selected mode’s
icon will light up on the knob and there
may be additional messages in the Driver
Information Center (DIC) and indicators in
the instrument cluster.
If the vehicle is in Tour (FWD) or AWD, it
will stay in that mode through future ON/
OFF cycles. If the vehicle is in any other
mode, it will revert back to Tour (FWD)
when the vehicle is restarted.
Driver Mode Control Knob (AWD)
Driver Mode Control Knob (FWD)
5orqTour (FWD) :Vehicle is in Tour
(FWD) mode. Use this mode during normal
driving conditions. See Driving for Better Fuel
Economy 0191. Tour (FWD) Mode operates
in Front-Wheel Drive to improve fuel
economy.
8Sport : Sport mode improves vehicle
handling and acceleration on dry pavement.
When active, Sport mode modifies steering
efforts, transmission shifting, and suspension
tuning (when equipped). For AWD vehicles,
choosing Sport mode also engages
AWD mode.
The Performance Algorithm Liftfoot (PAL)
feature is enabled in Sport mode. PAL allows
the transmission to hold the current gear
after a quick release of a heavily applied
accelerator pedal. This provides greater
engine braking and enhanced vehicle control.
4AWD (AWD Only) : AWD mode
provides drive torque to all four wheels.
Select AWD to improve traction and control
on slippery road surfaces, such as gravel,
sand, wet pavement, snow, and ice. When in
AWD mode, the AWD mode indicator will be
on. The AWD mode will stay selected until
the mode is changed.
Page 305 of 384
GMC Acadia/Acadia Denali Owner Manual (GMNA-Localizing-U.S./Canada/
Mexico-16402009) - 2023 - CRC - 3/28/22
304 Vehicle Care
Warning (Continued)
pressure listed on the tire sidewall. See
Tire Sidewall Labeling0294 and
Vehicle Load Limits 0200.
If the tire is overinflated by more than
35 kPa (5 psi), the horn will sound multiple
times and the turn signal lamp will continue
to flash for several seconds after filling
stops. To release and correct the pressure,
while the turn signal lamp is still flashing,
briefly press the center of the valve stem.
When the recommended pressure is reached,
the horn sounds once.
If the turn signal lamp does not flash within
15 seconds after starting to inflate the tire,
the tire fill alert has not been activated or is
not working.
If the hazard warning flashers are on, the
tire fill alert visual feedback will not work
properly.
The TPMS will not activate the tire fill alert
properly under the following conditions:
.There is interference from an external
device or transmitter.
.The air pressure from the inflation device
is not sufficient to inflate the tire.
.There is a malfunction in the TPMS.
.There is a malfunction in the horn or turn
signal lamps.
.The identification code of the TPMS
sensor is not registered to the system.
.The battery of the TPMS sensor is low.
If the tire fill alert does not operate due to
TPMS interference, move the vehicle about
1 m (3 ft) back or forward and try again.
If the tire fill alert feature is not working,
use a tire pressure gauge.
TPMS Sensor Matching Process
Each TPMS sensor has a unique
identification code. The identification code
needs to be matched to a new tire/wheel
position after rotating the vehicle’s tires or
replacing one or more of the TPMS sensors.
The TPMS sensor matching process should
also be performed after replacing a spare
tire with a road tire containing the TPMS
sensor. The malfunction light and the DIC
message should go off at the next ignition
cycle. The sensors are matched to the tire/
wheel positions, using a TPMS relearn tool,
in the following order: driver side front tire,
passenger side front tire, passenger side rear
tire, and driver side rear tire. See your
dealer for service or to purchase a relearn tool. A TPMS relearn tool can also be
purchased. See Tire Pressure Monitor Sensor
Activation Tool at
www.gmtoolsandequipment.com or call
1-800-GM TOOLS (1-800-468-6657).
There are two minutes to match the first
tire/wheel position, and five minutes overall
to match all four tire/wheel positions. If it
takes longer, the matching process stops
and must be restarted.
The TPMS sensor matching process is:
1. Set the parking brake.
2. Place the vehicle in Service Mode. See Ignition Positions 0204.
3. Make sure the Tire Pressure info page option is turned on. The info pages on
the DIC can be turned on and off
through the Options menu. See Driver
Information Center (DIC) (Base Level)
0 114 orDriver Information Center (DIC)
(Midlevel) 0116 orDriver Information
Center (DIC) (Uplevel) 0119.
4. Use the DIC controls on the right side of the steering wheel to scroll to the Tire
Pressure screen under the DIC info page.
5. Press and hold
Vin the center of the
DIC controls.
Page 306 of 384
GMC Acadia/Acadia Denali Owner Manual (GMNA-Localizing-U.S./Canada/
Mexico-16402009) - 2023 - CRC - 3/28/22
Vehicle Care 305
The horn sounds twice to signal the
receiver is in relearn mode and the TIRE
LEARNING ACTIVE message displays on
the DIC display.
6. Start with the driver side front tire.
7. Place the relearn tool against the tire sidewall, near the valve stem. Then press
the button to activate the TPMS sensor.
A horn chirp confirms that the sensor
identification code has been matched to
this tire and wheel position.
8. Proceed to the passenger side front tire, and repeat the procedure in Step 7.
9. Proceed to the passenger side rear tire, and repeat the procedure in Step 7.
10. Proceed to the driver side rear tire, and repeat the procedure in Step 7. The horn
sounds two times to indicate the sensor
identification code has been matched to
the driver side rear tire, and the TPMS
sensor matching process is no longer
active. The TIRE LEARNING ACTIVE
message on the DIC display goes off.
11. Turn the vehicle off.
12. Set all four tires to the recommended air pressure level as indicated on the Tire
and Loading Information label.Tire Inspection
We recommend that the tires, including
the spare tire, if the vehicle has one, be
inspected for signs of wear or damage
at least once a month.
Replace the tire if:
.The indicators at three or more
places around the tire can be seen.
.There is cord or fabric showing
through the tire's rubber.
.The tread or sidewall is cracked, cut,
or snagged deep enough to show
cord or fabric.
.The tire has a bump, bulge, or split.
.The tire has a puncture, cut, or other
damage that cannot be repaired well
because of the size or location of the
damage.
Tire Rotation
Tires should be rotated according to the
interval specified in the Maintenance
Schedule. See Maintenance Schedule
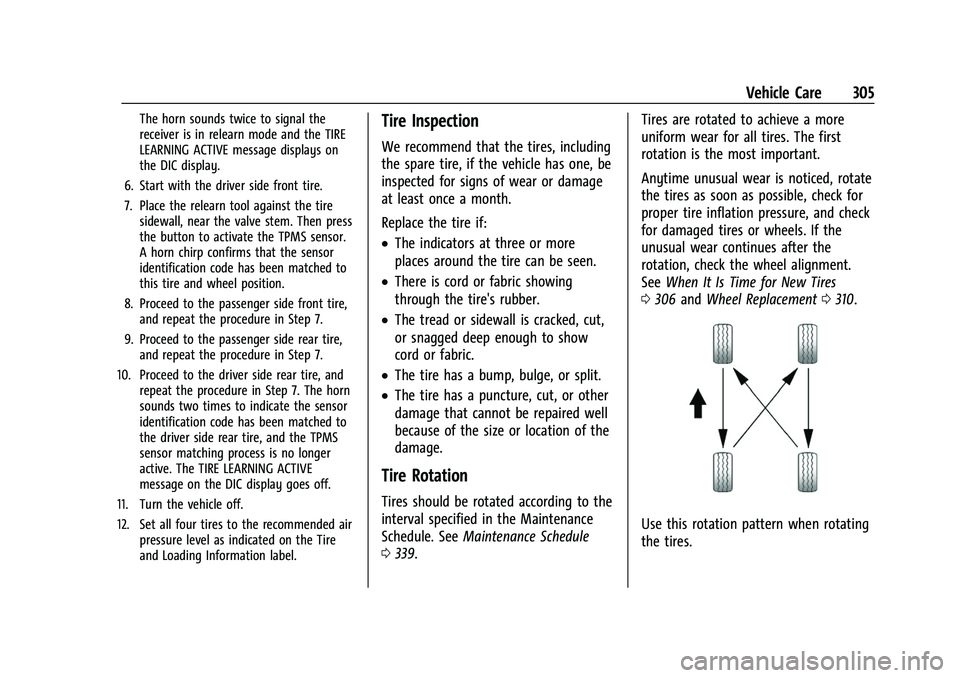
0 339. Tires are rotated to achieve a more
uniform wear for all tires. The first
rotation is the most important.
Anytime unusual wear is noticed, rotate
the tires as soon as possible, check for
proper tire inflation pressure, and check
for damaged tires or wheels. If the
unusual wear continues after the
rotation, check the wheel alignment.
See
When It Is Time for New Tires
0 306 andWheel Replacement 0310.
Use this rotation pattern when rotating
the tires.
Page 329 of 384
GMC Acadia/Acadia Denali Owner Manual (GMNA-Localizing-U.S./Canada/
Mexico-16402009) - 2023 - CRC - 3/28/22
328 Vehicle Care
Caution
Use of a shield mounted in front of the
vehicle grille could restrict airflow and
cause damage to the transmission. The
repairs would not be covered by the
vehicle warranty. If using a shield, only
use one that attaches to the towing
vehicle.
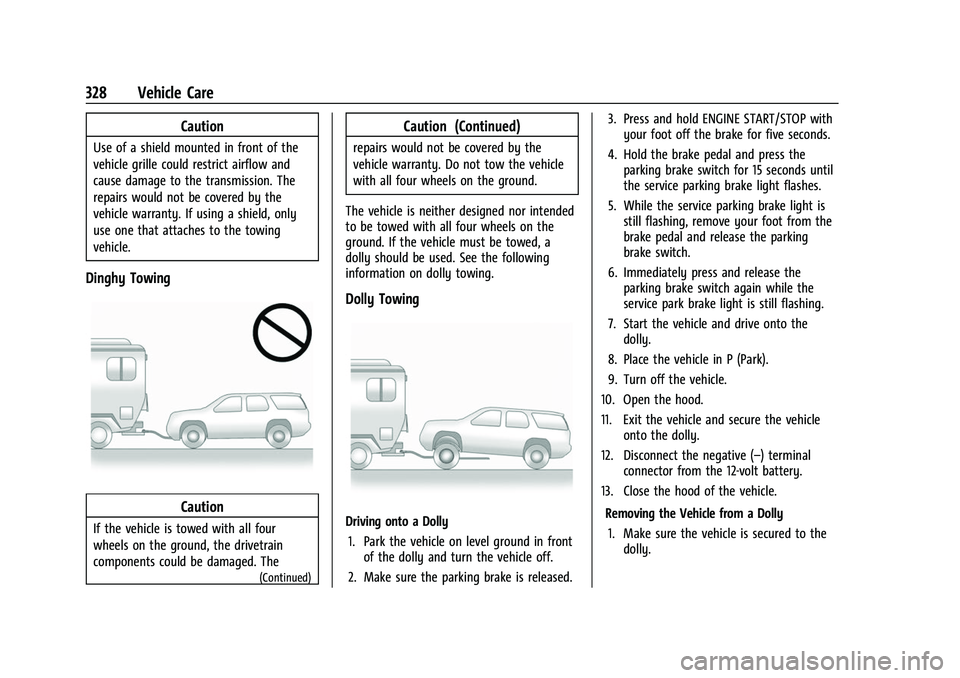
Dinghy Towing
Caution
If the vehicle is towed with all four
wheels on the ground, the drivetrain
components could be damaged. The
(Continued)
Caution (Continued)
repairs would not be covered by the
vehicle warranty. Do not tow the vehicle
with all four wheels on the ground.
The vehicle is neither designed nor intended
to be towed with all four wheels on the
ground. If the vehicle must be towed, a
dolly should be used. See the following
information on dolly towing.
Dolly Towing
Driving onto a Dolly 1. Park the vehicle on level ground in front of the dolly and turn the vehicle off.
2. Make sure the parking brake is released. 3. Press and hold ENGINE START/STOP with
your foot off the brake for five seconds.
4. Hold the brake pedal and press the parking brake switch for 15 seconds until
the service parking brake light flashes.
5. While the service parking brake light is still flashing, remove your foot from the
brake pedal and release the parking
brake switch.
6. Immediately press and release the parking brake switch again while the
service park brake light is still flashing.
7. Start the vehicle and drive onto the dolly.
8. Place the vehicle in P (Park).
9. Turn off the vehicle.
10. Open the hood.
11. Exit the vehicle and secure the vehicle onto the dolly.
12. Disconnect the negative (–) terminal connector from the 12-volt battery.
13. Close the hood of the vehicle.
Removing the Vehicle from a Dolly1. Make sure the vehicle is secured to the dolly.