check engine light GMC ACADIA 2023 User Guide
[x] Cancel search | Manufacturer: GMC, Model Year: 2023, Model line: ACADIA, Model: GMC ACADIA 2023Pages: 384, PDF Size: 17.04 MB
Page 116 of 384
GMC Acadia/Acadia Denali Owner Manual (GMNA-Localizing-U.S./Canada/
Mexico-16402009) - 2023 - CRC - 3/28/22
Instruments and Controls 115
oorp:Press to move between the
interactive display zones in the cluster.
V: Press to open a menu or select a menu
item. Press and hold to reset values on
certain screens.
DIC Info Page Options
The info pages on the DIC can be turned on
or off through the Options menu.
1. Press
oto access the cluster
applications.
2. Press
worxto scroll to the Options
application.
3. Press
Vto enter the Options menu.
4. Scroll to Info Pages and press
p.
5. Press
worxto move through the list
of possible information displays.
6. Press
Vwhile an item is highlighted to
select or deselect that item. When an
item is selected, a checkmark will appear
next to it.
DIC Info Pages
The following is the list of all possible DIC
info page displays. Some may not be
available for your particular vehicle. Some items may not be turned on by default but
can be turned on through the Options app.
See
“DIC Info Page Options” earlier in this
section.
Speed : Shows the vehicle speed in either
kilometers per hour (km/h) or miles per
hour (mph). A speed limit sign can also be
shown, if equipped.
Trip A or Trip B : Shows the current distance
traveled, in either kilometers (km) or
miles (mi), since the trip odometer was last
reset.
This also shows the approximate average
liters per 100 kilometers (L/100 km) or miles
per gallon (mpg). This number is calculated
based on the number of L/100 km (mpg)
recorded since the last time this menu item
was reset. This number reflects only the
approximate average fuel economy that the
vehicle has right now, and will change as
driving conditions change.
Press and hold
Vwhile this display is active
to reset the trip odometer and the average
fuel economy. Trip A and Trip B can also be
reset by pressing
pand choosing reset.
Fuel Range : Shows the approximate
distance the vehicle can be driven without
refueling. LOW will be displayed when the vehicle is low on fuel. The fuel range
estimate is based on an average of the
vehicle's fuel economy over recent driving
history and the amount of fuel remaining in
the fuel tank.
Remaining Oil Life :
Shows an estimate of
the oil's remaining useful life. If REMAINING
OIL LIFE 99% is displayed, that means 99%
of the current oil life remains.
When the remaining oil life is low, the
CHANGE ENGINE OIL SOON message will
appear on the display. The oil should be
changed as soon as possible. See Engine Oil
0 268. In addition to the engine oil life
system monitoring the oil life, additional
maintenance is recommended in the
Maintenance Schedule. See Maintenance
Schedule 0339.
The Oil Life display must be reset after each
oil change. It will not reset itself. Do not to
reset the Oil Life display at any time other
than when the oil has just been changed.
It cannot be reset accurately until the next
oil change. To reset, see Engine Oil Life
System 0270.
Tire Pressure : Shows the approximate
pressures of all four tires. Tire pressure is
displayed in either kilopascal (kPa) or in
pounds per square inch (psi). If the pressure
Page 125 of 384
GMC Acadia/Acadia Denali Owner Manual (GMNA-Localizing-U.S./Canada/
Mexico-16402009) - 2023 - CRC - 3/28/22
124 Instruments and Controls
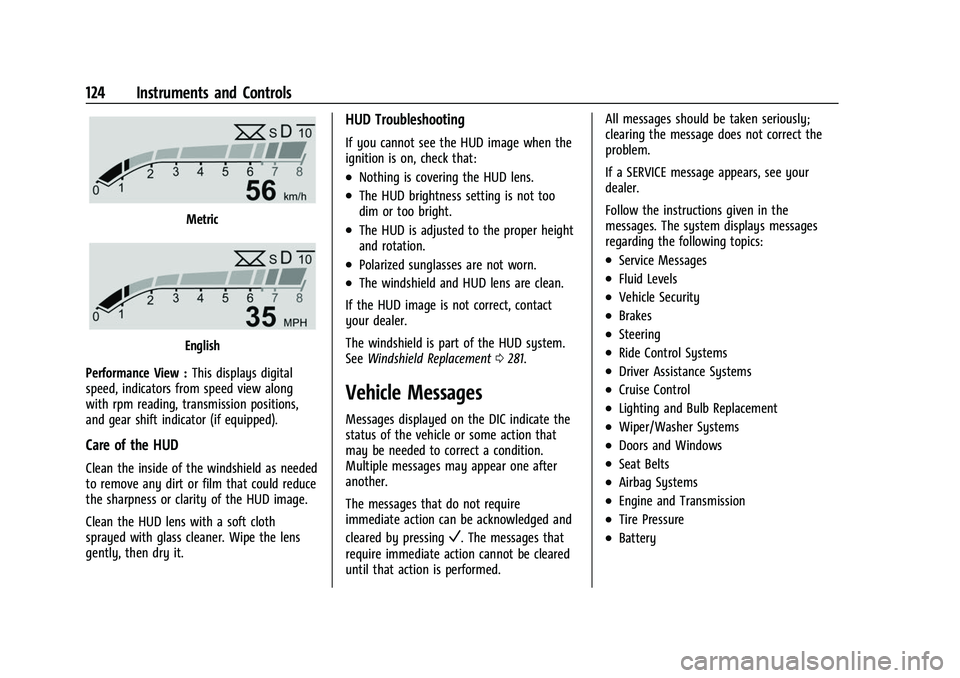
Metric
English
Performance View : This displays digital
speed, indicators from speed view along
with rpm reading, transmission positions,
and gear shift indicator (if equipped).
Care of the HUD
Clean the inside of the windshield as needed
to remove any dirt or film that could reduce
the sharpness or clarity of the HUD image.
Clean the HUD lens with a soft cloth
sprayed with glass cleaner. Wipe the lens
gently, then dry it.
HUD Troubleshooting
If you cannot see the HUD image when the
ignition is on, check that:
.Nothing is covering the HUD lens.
.The HUD brightness setting is not too
dim or too bright.
.The HUD is adjusted to the proper height
and rotation.
.Polarized sunglasses are not worn.
.The windshield and HUD lens are clean.
If the HUD image is not correct, contact
your dealer.
The windshield is part of the HUD system.
See Windshield Replacement 0281.
Vehicle Messages
Messages displayed on the DIC indicate the
status of the vehicle or some action that
may be needed to correct a condition.
Multiple messages may appear one after
another.
The messages that do not require
immediate action can be acknowledged and
cleared by pressing
V. The messages that
require immediate action cannot be cleared
until that action is performed. All messages should be taken seriously;
clearing the message does not correct the
problem.
If a SERVICE message appears, see your
dealer.
Follow the instructions given in the
messages. The system displays messages
regarding the following topics:
.Service Messages
.Fluid Levels
.Vehicle Security
.Brakes
.Steering
.Ride Control Systems
.Driver Assistance Systems
.Cruise Control
.Lighting and Bulb Replacement
.Wiper/Washer Systems
.Doors and Windows
.Seat Belts
.Airbag Systems
.Engine and Transmission
.Tire Pressure
.Battery
Page 199 of 384
GMC Acadia/Acadia Denali Owner Manual (GMNA-Localizing-U.S./Canada/
Mexico-16402009) - 2023 - CRC - 3/29/22
198 Driving and Operating
{Warning
Wet brakes can cause crashes. They
might not work as well in a quick stop
and could cause pulling to one side. You
could lose control of the vehicle.
After driving through a large puddle of
water or a car/vehicle wash, lightly apply
the brake pedal until the brakes work
normally.
Flowing or rushing water creates strong
forces. Driving through flowing water
could cause the vehicle to be carried
away. If this happens, you and other
vehicle occupants could drown. Do not
ignore police warnings and be very
cautious about trying to drive through
flowing water.
Hydroplaning
Hydroplaning is dangerous. Water can build
up under the vehicle's tires so they actually
ride on the water. This can happen if the
road is wet enough and you are going fast
enough. When the vehicle is hydroplaning, it
has little or no contact with the road.There is no hard and fast rule about
hydroplaning. The best advice is to slow
down when the road is wet.
Other Rainy Weather Tips
Besides slowing down, other wet weather
driving tips include:
.Allow extra following distance.
.Pass with caution.
.Keep windshield wiping equipment in
good shape.
.Keep the windshield washer fluid reservoir
filled.
.Have good tires with proper tread depth.
See
Tires 0293.
.Turn off cruise control.
.Activate All-Wheel Drive (AWD) mode. See
Driver Mode Control 0220.
Hill and Mountain Roads
Driving on steep hills or through mountains
is different than driving on flat or rolling
terrain. Tips include:
.Keep the vehicle serviced and in good
shape.
.Check all fluid levels, brakes, tires, cooling
system, and transmission.
.Shift to a lower gear when going down
steep or long hills.
{Warning
Using the brakes to slow the vehicle on a
long downhill slope can cause brake
overheating, can reduce brake
performance, and could result in a loss of
braking. Shift the transmission to a lower
gear to let the engine assist the brakes
on a steep downhill slope.
{Warning
Coasting downhill in N (Neutral) or with
the ignition off is dangerous. This can
cause overheating of the brakes and loss
of steering assist. Always have the engine
running and the vehicle in gear.
.Drive at speeds that keep the vehicle in
its own lane. Do not swing wide or cross
the center line.
.Be alert on top of hills; something could
be in your lane (e.g., stalled car, crash).
.Pay attention to special road signs (e.g.,
falling rocks area, winding roads, long
grades, passing or no-passing zones) and
take appropriate action.
Page 219 of 384
GMC Acadia/Acadia Denali Owner Manual (GMNA-Localizing-U.S./Canada/
Mexico-16402009) - 2023 - CRC - 3/29/22
218 Driving and Operating
accelerator pedal apply. The brakes release
when the accelerator pedal is applied. If the
accelerator pedal is not applied within a few
minutes, the Electric Parking Brake will
apply. The brakes may also release under
other conditions. Do not rely on HSA to hold
the vehicle.
HSA is available when the vehicle is facing
uphill in a forward gear, or when facing
downhill in R (Reverse). The vehicle must
come to a complete stop on a grade for HSA
to activate.
Ride Control Systems
Traction Control/Electronic
Stability Control
System Operation
The vehicle has a Traction Control System
(TCS) and StabiliTrak/Electronic Stability
Control (ESC), an electronic stability control
system. These systems help limit wheel spin
and assist the driver in maintaining control,
especially on slippery road conditions.
TCS activates if it senses that any of the
drive wheels are spinning or beginning to
lose traction. When this happens, TCSapplies the brakes to the spinning wheels
and reduces engine power to limit
wheel spin.
StabiliTrak/ESC activates when the vehicle
senses a difference between the intended
path and the direction the vehicle is actually
traveling. StabiliTrak/ESC selectively applies
braking pressure to any one of the vehicle
wheel brakes to assist the driver in keeping
the vehicle on the intended path.
If cruise control is being used and TCS or
StabiliTrak/ESC begins to limit wheel spin,
cruise control will disengage. Cruise control
may be turned back on when road
conditions allow. TCS and StabiliTrak/ESC will
automatically turn on when cruise control
is set.
Both systems come on automatically when
the vehicle is started and begins to move.
The systems may be heard or felt while
they are operating or while performing
diagnostic checks. This is normal and does
not mean there is a problem with the
vehicle.
It is recommended to leave both systems on
for normal driving conditions, but it may be
necessary to turn TCS off if the vehicle gets
stuck in sand, mud, ice, or snow. See
If the
Vehicle Is Stuck 0200 and“Turning the
Systems Off and On” later in this section.
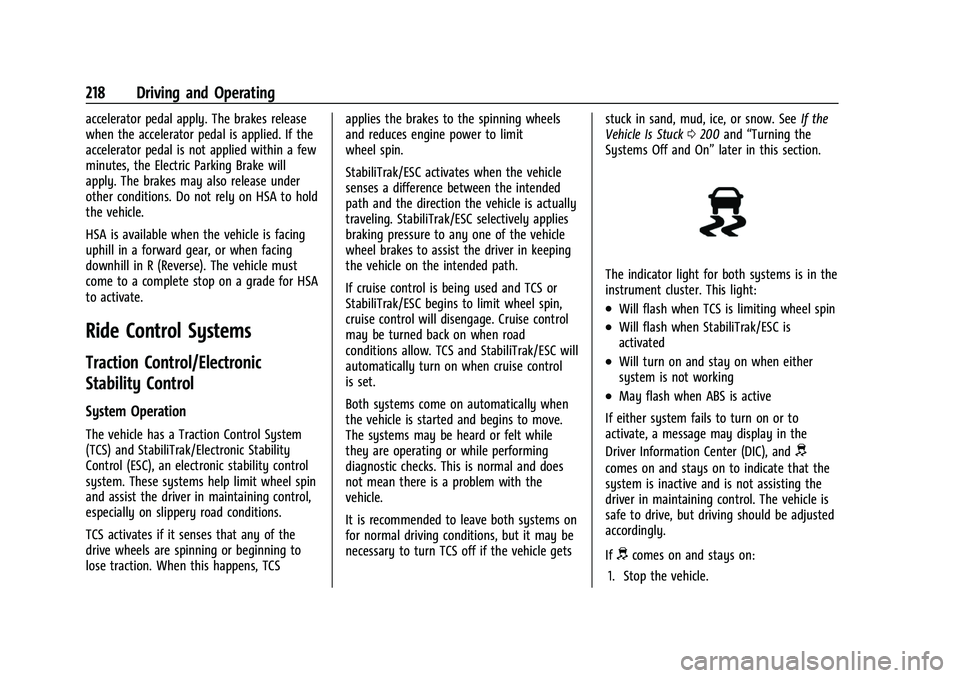
The indicator light for both systems is in the
instrument cluster. This light:
.Will flash when TCS is limiting wheel spin
.Will flash when StabiliTrak/ESC is
activated
.Will turn on and stay on when either
system is not working
.May flash when ABS is active
If either system fails to turn on or to
activate, a message may display in the
Driver Information Center (DIC), and
d
comes on and stays on to indicate that the
system is inactive and is not assisting the
driver in maintaining control. The vehicle is
safe to drive, but driving should be adjusted
accordingly.
If
dcomes on and stays on:
1. Stop the vehicle.
Page 259 of 384
GMC Acadia/Acadia Denali Owner Manual (GMNA-Localizing-U.S./Canada/
Mexico-16402009) - 2023 - CRC - 3/29/22
258 Driving and Operating
Battery FeedRed/Black or
Red/Blue
Brake Apply Signal White/Blue
Ground Black
Refer to the aftermarket electric trailer brake
controller owner's manual to determine wire
color coding of the electric trailer brake
controller. The wire colors on the brake
controller may be different from the vehicle.
It may be necessary to have a technician
connect the 12-volt power to the engine
compartment fuse block. The electric trailer
brake controller should be installed by your
dealer or a qualified service center.
Trailer Lamps
Always check all trailer lamps are working at
the beginning of each trip, and periodically
on longer trips.
Turn Signals When Towing a Trailer
When properly connected, the trailer turn
signals should will illuminate to indicate the
vehicle is turning, changing lanes,
or stopping. When towing a trailer, the
arrows on the instrument cluster will
illuminate even if the trailer is not properly
connected or the bulbs are burned out.
Tow/Haul Mode
For instructions on how to enter Tow/Haul
mode, see Driver Mode Control 0220.
Tow/Haul assists when pulling a heavy
trailer or a large or heavy load.
Tow/Haul Mode is designed to be most
effective when the vehicle and trailer
combined weight is at least 75% of the
vehicle's Gross Combined Weight Rating
(GCWR). See “Weight of the Trailer” under
Trailer Towing 0252.
Tow/Haul Mode is most useful when towing
a heavy trailer or carrying a large or
heavy load:
.through rolling terrain
.in stop-and-go traffic
.in busy parking lots
Operating the vehicle in Tow/Haul Mode
when lightly loaded or not towing will not
cause damage; however, it is not
recommended and may result in unpleasant
engine and transmission driving
characteristics and reduced fuel economy.
Trailer Sway Control (TSC)
Vehicles with StabiliTrak/Electronic Stability
Control (ESC) have a Trailer Sway Control
(TSC) feature. Trailer sway is unintended
side-to-side motion of a trailer while towing.
If the vehicle is towing a trailer and the TSC
detects that sway is increasing, the vehicle
brakes are selectively applied at each wheel,
to help reduce excessive trailer sway.
If equipped with the Integrated Trailer Brake
Control (ITBC) system, and the trailer has an
electric brake system, StabiliTrak/ESC may
also apply the trailer brakes.
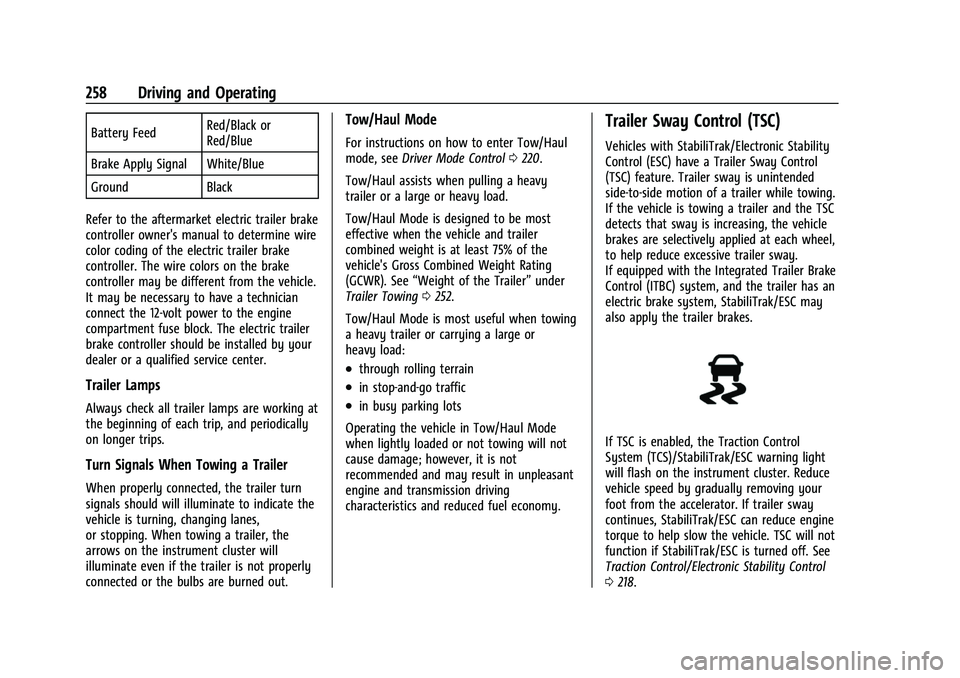
If TSC is enabled, the Traction Control
System (TCS)/StabiliTrak/ESC warning light
will flash on the instrument cluster. Reduce
vehicle speed by gradually removing your
foot from the accelerator. If trailer sway
continues, StabiliTrak/ESC can reduce engine
torque to help slow the vehicle. TSC will not
function if StabiliTrak/ESC is turned off. See
Traction Control/Electronic Stability Control
0 218.
Page 260 of 384

GMC Acadia/Acadia Denali Owner Manual (GMNA-Localizing-U.S./Canada/
Mexico-16402009) - 2023 - CRC - 3/29/22
Driving and Operating 259
{Warning
Trailer sway can result in a crash and in
serious injury or death, even if the
vehicle is equipped with TSC.
If the trailer begins to sway, reduce
vehicle speed by gradually removing your
foot from the accelerator. Then pull over
to check the trailer and vehicle to help
correct possible causes, including an
improperly or overloaded trailer,
unrestrained cargo, improper trailer hitch
configuration, or improperly inflated or
incorrect vehicle or trailer tires. See
Towing Equipment0255 for trailer
ratings and hitch setup recommendations.
Trailer Tires
Special Trailer (ST) tires differ from vehicle
tires. Trailer tires are designed with stiff
sidewalls to help prevent sway and to
support heavy loads. These features can
make it difficult to determine if the trailer
tire pressures are low only based on a visual
inspection. Always check all trailer tire pressures before
each trip when the tires are cool. Low trailer
tire pressure is a leading cause of trailer tire
blow-outs.
Trailer tires deteriorate over time. The trailer
tire sidewall will show the week and year
the tire was manufactured. Many trailer tire
manufacturers recommend replacing tires
more than six years old.
Overloading is another leading cause of
trailer tire blow-outs. Never load your trailer
with more weight than the tires are
designed to support. The load rating is
located on the trailer tire sidewall.
Always know the maximum speed rating for
the trailer tires before driving. This may be
significantly lower than the vehicle tire
speed rating. The speed rating may be on
the trailer tire sidewall. If the speed rating is
not shown, the default trailer tire speed
rating is 105 km/h (65 mph).
Conversions and Add-Ons
Add-On Electrical Equipment
{Warning
The Data Link Connector (DLC) is used
for vehicle service and Emission
Inspection/Maintenance testing. See
Malfunction Indicator Lamp (Check Engine
Light)
0106. A device connected to the
DLC —such as an aftermarket fleet or
driver-behavior tracking device —may
interfere with vehicle systems. This could
affect vehicle operation and cause a
crash. Such devices may also access
information stored in the vehicle’s
systems.
Caution
Some electrical equipment can damage
the vehicle or cause components to not
work and would not be covered by the
vehicle warranty. Always check with your
dealer before adding electrical equipment.
Page 262 of 384
GMC Acadia/Acadia Denali Owner Manual (GMNA-Localizing-U.S./Canada/
Mexico-16402009) - 2023 - CRC - 3/28/22
Vehicle Care 261
Vehicle Care
General Information
General Information . . . . . . . . . . . . . . . . . . . 262
California Perchlorate MaterialsRequirements . . . . . . . . . . . . . . . . . . . . . . . . 262
Accessories and Modifications . . . . . . . . . 262
Vehicle Checks
Doing Your Own Service Work . . . . . . . . 262
Doing Your Own Service Work . . . . . . . . 263
Hood . . . . . . . . . . . . . . . . . . . . . . . . . . . . . . . . . . 263
Engine Compartment Overview . . . . . . . . 265
Engine Oil . . . . . . . . . . . . . . . . . . . . . . . . . . . . . 268
Engine Oil Life System . . . . . . . . . . . . . . . . 270
Automatic Transmission Fluid . . . . . . . . . 270
Engine Air Filter Life System . . . . . . . . . . . 271
Engine Air Cleaner/Filter . . . . . . . . . . . . . . . 271
Cooling System . . . . . . . . . . . . . . . . . . . . . . . . 272
Engine Overheating . . . . . . . . . . . . . . . . . . . 276
Washer Fluid . . . . . . . . . . . . . . . . . . . . . . . . . . 277
Brakes . . . . . . . . . . . . . . . . . . . . . . . . . . . . . . . . . 278
Brake Fluid . . . . . . . . . . . . . . . . . . . . . . . . . . . . 278
Battery - North America . . . . . . . . . . . . . . . 279
All-Wheel Drive . . . . . . . . . . . . . . . . . . . . . . . 280
Park Brake and P (Park) Mechanism Check . . . . . . . . . . . . . . . . . . . . . . . . . . . . . . . 280
Wiper Blade Replacement . . . . . . . . . . . . . 281
Windshield Replacement . . . . . . . . . . . . . . . 281
Gas Strut(s) . . . . . . . . . . . . . . . . . . . . . . . . . . . 282
Headlamp Aiming
Front Headlamp Aiming . . . . . . . . . . . . . . . 283
Bulb Replacement
Bulb Replacement . . . . . . . . . . . . . . . . . . . . . 283
Halogen Bulbs . . . . . . . . . . . . . . . . . . . . . . . . . 283
LED Lighting . . . . . . . . . . . . . . . . . . . . . . . . . . . 283
Electrical System
Electrical System Overload . . . . . . . . . . . . 283
Fuses and Circuit Breakers . . . . . . . . . . . . . 285
Engine Compartment Fuse Block . . . . . . 285
Instrument Panel Fuse Block . . . . . . . . . . 288
Rear Compartment Fuse Block . . . . . . . . 290
Wheels and Tires
Tires . . . . . . . . . . . . . . . . . . . . . . . . . . . . . . . . . . 293
All-Season Tires . . . . . . . . . . . . . . . . . . . . . . . 293
Winter Tires . . . . . . . . . . . . . . . . . . . . . . . . . . . 294
Summer Tires . . . . . . . . . . . . . . . . . . . . . . . . . 294
All-Terrain Tires . . . . . . . . . . . . . . . . . . . . . . . 294
Tire Sidewall Labeling . . . . . . . . . . . . . . . . . 294
Tire Designations . . . . . . . . . . . . . . . . . . . . . . 296
Tire Terminology and Definitions . . . . . . 297
Tire Pressure . . . . . . . . . . . . . . . . . . . . . . . . . . 299
Tire Pressure for High-Speed Operation . . . . . . . . . . . . . . . . . . . . . . . . . . . 300
Tire Pressure Monitor System . . . . . . . . . 301
Tire Pressure Monitor Operation . . . . . . 302
Tire Inspection . . . . . . . . . . . . . . . . . . . . . . . . 305
Tire Rotation . . . . . . . . . . . . . . . . . . . . . . . . . . 305 When It Is Time for New Tires . . . . . . . . 306
Buying New Tires . . . . . . . . . . . . . . . . . . . . . 307
Different Size Tires and Wheels . . . . . . . 308
Uniform Tire Quality Grading . . . . . . . . . 308
Wheel Alignment and Tire Balance . . . . 309
Wheel Replacement . . . . . . . . . . . . . . . . . . . 310
Tire Chains . . . . . . . . . . . . . . . . . . . . . . . . . . . . 310
If a Tire Goes Flat . . . . . . . . . . . . . . . . . . . . . . 311
Tire Sealant and Compressor Kit . . . . . . . 312
Storing the Tire Sealant and
Compressor Kit . . . . . . . . . . . . . . . . . . . . . . 318
Tire Changing . . . . . . . . . . . . . . . . . . . . . . . . . . 318
Compact Spare Tire . . . . . . . . . . . . . . . . . . . . 323
Jump Starting
Jump Starting - North America . . . . . . . . 324
Towing the Vehicle
Transporting a Disabled Vehicle . . . . . . . 326
Recreational Vehicle Towing . . . . . . . . . . . 327
Appearance Care
Exterior Care . . . . . . . . . . . . . . . . . . . . . . . . . . 329
Interior Care . . . . . . . . . . . . . . . . . . . . . . . . . . . 333
Floor Mats . . . . . . . . . . . . . . . . . . . . . . . . . . . . 336
Page 280 of 384
GMC Acadia/Acadia Denali Owner Manual (GMNA-Localizing-U.S./Canada/
Mexico-16402009) - 2023 - CRC - 3/28/22
Vehicle Care 279
Checking Brake Fluid
With the vehicle in P (Park) on a level
surface, the brake fluid level should be
between the minimum and maximum marks
on the brake fluid reservoir.
There are only two reasons why the brake
fluid level in the reservoir may go down:
.Normal brake lining wear. When new
linings are installed, the fluid level goes
back up.
.A fluid leak in the brake hydraulic system.
Have the brake hydraulic system fixed.
With a leak, the brakes will not
work well.
Always clean the brake fluid reservoir cap
and the area around the cap before
removing it.
Do not top off the brake fluid. Adding fluid
does not correct a leak. If fluid is added
when the linings are worn, there will be too
much fluid when new brake linings are
installed. Add or remove fluid, as necessary,
only when work is done on the brake
hydraulic system.
{Warning
If too much brake fluid is added, it can
spill on the engine and burn, if the
engine is hot enough. You or others could
be burned, and the vehicle could be
damaged. Add brake fluid only when
work is done on the brake hydraulic
system.
When the brake fluid falls to a low level,
the brake warning light comes on. See Brake
System Warning Light 0107.
Brake fluid absorbs water over time which
degrades the effectiveness of the brake fluid.
Replace brake fluid at the specified intervals
to prevent increased stopping distance. See
Maintenance Schedule 0339.
What to Add
Use only GM approved DOT 4 brake fluid
from a clean, sealed container. See
Recommended Fluids and Lubricants 0343.
{Warning
The wrong or contaminated brake fluid
could result in damage to the brake
system. This could result in the loss of
(Continued)
Warning (Continued)
braking leading to a possible injury.
Always use the proper GM approved
brake fluid.
Caution
If brake fluid is spilled on the vehicle's
painted surfaces, the paint finish can be
damaged. Immediately wash off any
painted surface.
Battery - North America
The original equipment battery is
maintenance free. Do not remove the cap
and do not add fluid.
Refer to the replacement number shown on
the original battery label when a new
battery is needed. SeeEngine Compartment
Overview 0265 for battery location.
For replacement of the battery, see your
dealer.
The vehicle has an Absorbed Glass Mat
(AGM) 12-volt battery. Installation of a
standard 12-volt battery will result in
reduced 12-volt battery life.
Page 326 of 384
GMC Acadia/Acadia Denali Owner Manual (GMNA-Localizing-U.S./Canada/
Mexico-16402009) - 2023 - CRC - 3/28/22
Vehicle Care 325
Caution
If the jumper cables are connected or
removed in the wrong order, electrical
shorting may occur and damage the
vehicle. The repairs would not be covered
by the vehicle warranty. Always connect
and remove the jumper cables in the
correct order, making sure that the cables
do not touch each other or other metal.
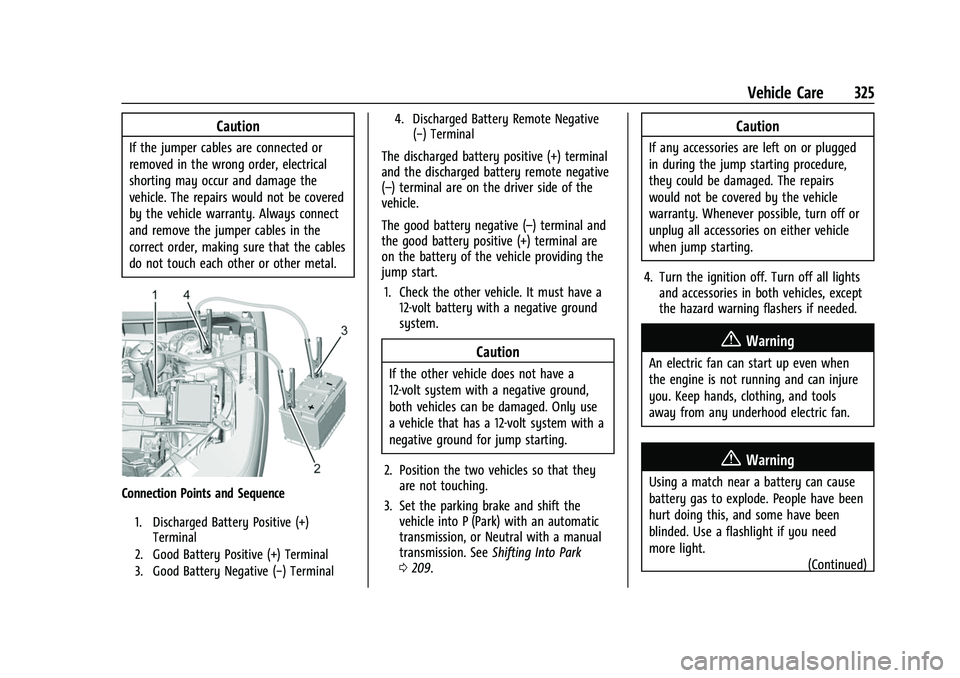
Connection Points and Sequence
1. Discharged Battery Positive (+)Terminal
2. Good Battery Positive (+) Terminal
3. Good Battery Negative (−) Terminal 4. Discharged Battery Remote Negative
(−) Terminal
The discharged battery positive (+) terminal
and the discharged battery remote negative
(–) terminal are on the driver side of the
vehicle.
The good battery negative (–) terminal and
the good battery positive (+) terminal are
on the battery of the vehicle providing the
jump start.
1. Check the other vehicle. It must have a 12-volt battery with a negative ground
system.
Caution
If the other vehicle does not have a
12-volt system with a negative ground,
both vehicles can be damaged. Only use
a vehicle that has a 12-volt system with a
negative ground for jump starting.
2. Position the two vehicles so that they are not touching.
3. Set the parking brake and shift the vehicle into P (Park) with an automatic
transmission, or Neutral with a manual
transmission. See Shifting Into Park
0 209.
Caution
If any accessories are left on or plugged
in during the jump starting procedure,
they could be damaged. The repairs
would not be covered by the vehicle
warranty. Whenever possible, turn off or
unplug all accessories on either vehicle
when jump starting.
4. Turn the ignition off. Turn off all lights and accessories in both vehicles, except
the hazard warning flashers if needed.
{Warning
An electric fan can start up even when
the engine is not running and can injure
you. Keep hands, clothing, and tools
away from any underhood electric fan.
{Warning
Using a match near a battery can cause
battery gas to explode. People have been
hurt doing this, and some have been
blinded. Use a flashlight if you need
more light.
(Continued)
Page 333 of 384
GMC Acadia/Acadia Denali Owner Manual (GMNA-Localizing-U.S./Canada/
Mexico-16402009) - 2023 - CRC - 3/28/22
332 Vehicle Care
snow and ice. If the check engine light is
activated, please check to see if the shutter
system is clear of debris, snow or ice.
Windshield and Wiper Blades
Clean the outside of the windshield with
glass cleaner.
Clean rubber blades using a lint-free cloth or
paper towel soaked with windshield washer
fluid or a mild detergent. Wash the
windshield thoroughly when cleaning the
blades. Bugs, road grime, sap, and a buildup
of vehicle wash/wax treatments may cause
wiper streaking.
Replace the wiper blades if they are worn or
damaged. Damage can be caused by
extreme dusty conditions, sand, salt, heat,
sun, snow, and ice.
Weatherstrips
Apply weatherstrip lubricant on
weatherstrips to make them last longer, seal
better, and not stick or squeak. Lubricate
weatherstrips at least once a year. Hot, dry
climates may require more frequent
application. Black marks from rubber
material on painted surfaces can be removed
by rubbing with a clean cloth. See
Recommended Fluids and Lubricants0343.
Tires
Use a stiff brush with tire cleaner to clean
the tires.
Caution
Using petroleum-based tire dressing
products on the vehicle may damage the
paint finish and/or tires. When applying a
tire dressing, always wipe off any
overspray from all painted surfaces on
the vehicle.
Wheels and Wheel Trim
Use a soft, clean cloth with mild soap and
water to clean the wheels. After rinsing
thoroughly with clean water, dry with a
soft, clean towel. A wax may then be
applied.
Caution
Chrome wheels and chrome wheel trim
may be damaged if the vehicle is not
washed after driving on roads that have
been sprayed with magnesium chloride or
calcium chloride. These are used on roads
for conditions such as dust and ice.
Always wash the chrome with soap and
water after exposure.
Caution
To avoid surface damage on wheels and
wheel trim, do not use strong soaps,
chemicals, abrasive polishes, cleaners,
or brushes. Use only GM approved
cleaners. Do not drive the vehicle through
an automatic car wash that uses silicon
carbide tire/wheel cleaning brushes.
Damage could occur and the repairs
would not be covered by the vehicle
warranty.
Brake System
Visually inspect brake lines and hoses for
proper hook-up, binding, leaks, cracks,
chafing, etc. Inspect disc brake pads for wear
and rotors for surface condition. Inspect all
other brake parts.
Steering, Suspension, and Chassis
Components
Visually inspect steering, suspension, and
chassis components for damaged, loose,
or missing parts or signs of wear at least
once a year.
Inspect power steering for proper electrical
connections, binding, cracks, chafing, etc.