remote control GMC ACADIA 2023 User Guide
[x] Cancel search | Manufacturer: GMC, Model Year: 2023, Model line: ACADIA, Model: GMC ACADIA 2023Pages: 384, PDF Size: 17.04 MB
Page 90 of 384

GMC Acadia/Acadia Denali Owner Manual (GMNA-Localizing-U.S./Canada/
Mexico-16402009) - 2023 - CRC - 3/28/22
Instruments and Controls 89
Controls
Steering Wheel Adjustment
To adjust the steering wheel:1. Pull the lever down.
2. Move the steering wheel up or down.
3. Pull or push the steering wheel closer or away from you.
4. Pull the lever up to lock the wheel in place.
Do not adjust the steering wheel while
driving. Power Tilt and Telescoping Steering Wheel
To adjust the power tilt and telescoping
steering wheel, if equipped:
Press the control to move the steering
wheel up and down or forward and
rearward.
Do not adjust the steering wheel while
driving.
Heated Steering Wheel
(:
If equipped, press to turn it on or off.
An indicator light next to the button
displays when the feature is turned on.
The steering wheel takes about
three minutes to start heating.
Automatic Heated Steering Wheel
If equipped with remote start, the heated
steering wheel will turn on automatically
during a remote start along with the heated
seats when it is cold outside. The heated
steering wheel indicator light may not
come on.
Page 126 of 384
GMC Acadia/Acadia Denali Owner Manual (GMNA-Localizing-U.S./Canada/
Mexico-16402009) - 2023 - CRC - 3/28/22
Instruments and Controls 125
Engine Power Messages
ENGINE POWER IS REDUCED
This message displays when the vehicle's
propulsion power is reduced. A reduction in
propulsion power can affect the vehicle's
ability to accelerate. If this message is on,
but there is no observed reduction in
performance, proceed to your destination.
Under certain conditions the performance
may be reduced the next time the vehicle is
driven. The vehicle may be driven while this
message is on, but maximum acceleration
and speed may be reduced. Anytime this
message stays on, or displays repeatedly,
the vehicle should be taken to your dealer
for service as soon as possible.
Under certain operating conditions,
propulsion will be disabled. Try restarting
after the ignition has been off for
30 seconds.
Vehicle Speed Messages
SPEED LIMITED TO XXX KM/H (MPH)
This message shows that the vehicle speed
has been limited to the speed displayed. The
limited speed is a protection for variouspropulsion and vehicle systems, such as
lubrication, thermal, brakes, suspension,
Teen Driver if equipped, or tires.
Universal Remote System
See
Radio Frequency Statement 0359 or
Radio Frequency Statement 0359.
Universal Remote System
Programming
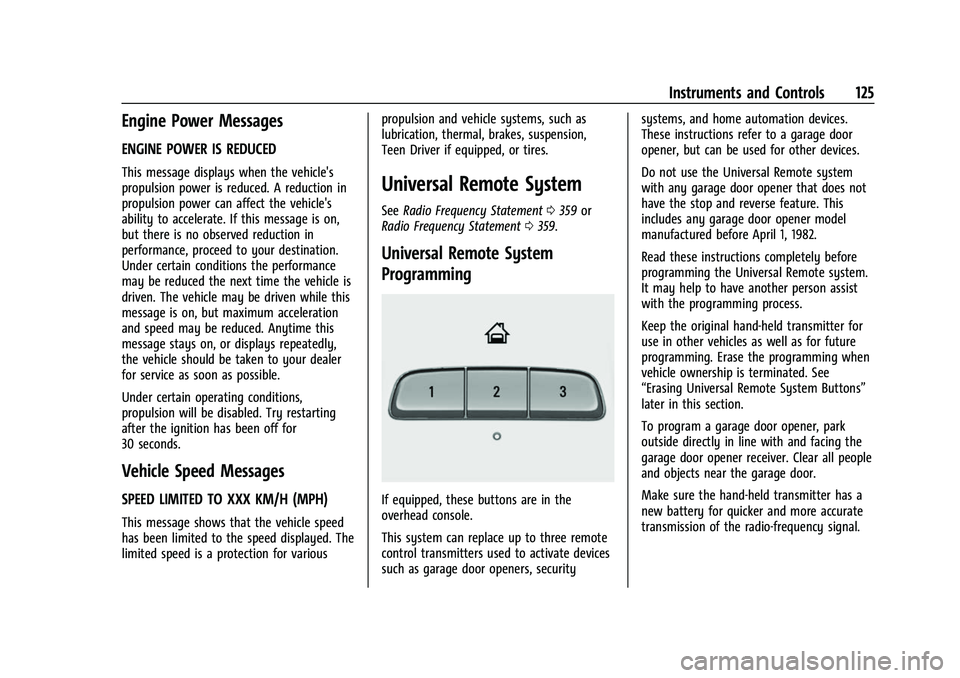
If equipped, these buttons are in the
overhead console.
This system can replace up to three remote
control transmitters used to activate devices
such as garage door openers, security systems, and home automation devices.
These instructions refer to a garage door
opener, but can be used for other devices.
Do not use the Universal Remote system
with any garage door opener that does not
have the stop and reverse feature. This
includes any garage door opener model
manufactured before April 1, 1982.
Read these instructions completely before
programming the Universal Remote system.
It may help to have another person assist
with the programming process.
Keep the original hand-held transmitter for
use in other vehicles as well as for future
programming. Erase the programming when
vehicle ownership is terminated. See
“Erasing Universal Remote System Buttons”
later in this section.
To program a garage door opener, park
outside directly in line with and facing the
garage door opener receiver. Clear all people
and objects near the garage door.
Make sure the hand-held transmitter has a
new battery for quicker and more accurate
transmission of the radio-frequency signal.
Page 127 of 384
GMC Acadia/Acadia Denali Owner Manual (GMNA-Localizing-U.S./Canada/
Mexico-16402009) - 2023 - CRC - 3/28/22
126 Instruments and Controls
Programming the Universal Remote
System
For questions or programming help, see
www.homelink.com/gm or call
1-800-355-3515. For calls placed outside the
U.S., Canada, or Puerto Rico, international
rates will apply and may differ based on
landline or mobile phone.
Programming involves time-sensitive actions,
and may time out causing the procedure to
be repeated.
To program up to three devices:1. Hold the end of the hand-held transmitter about 3 to 8 cm (1 to 3 in)
away from the Universal Remote system
buttons with the indicator light in view.
The hand-held transmitter was supplied
by the manufacturer of the garage door
opener receiver.
2. Press and release one of the three Universal Remote system buttons to be
programmed. Press and hold the
hand-held transmitter button. Do not
release the hand-held transmitter button
until the indicator light changes from a
slow to a rapid flash or continuous light.
Then release the hand-held transmitter
button. Some garage door openers may require
substitution of Step 2 with the procedure
under
“Radio Signals for Some Gate
Operators” later in this section.
3. Press and hold the newly programmed Universal Remote system button for
five seconds while watching the indicator
light and garage door activation.
.If the indicator light stays on
continuously or the garage door
moves when the button is pressed,
then programming is complete. There
is no need to complete Steps 4–6.
.If the indicator light does not come
on or the garage door does not
move, a second button press may be
required. For a second time, press
and hold the newly programmed
button for five seconds. If the
indicator light is continuously lit,
or the garage door moves,
programming is complete.
.If the indicator light flashes rapidly
and the garage door does not move,
continue with programming
Steps 4–6.
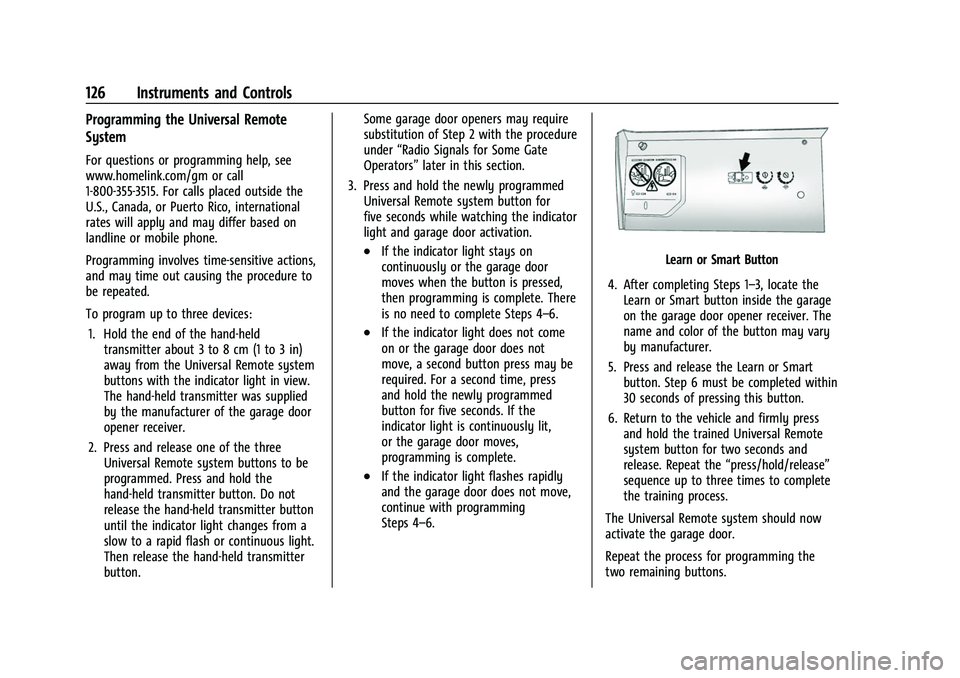
Learn or Smart Button
4. After completing Steps 1–3, locate the Learn or Smart button inside the garage
on the garage door opener receiver. The
name and color of the button may vary
by manufacturer.
5. Press and release the Learn or Smart button. Step 6 must be completed within
30 seconds of pressing this button.
6. Return to the vehicle and firmly press and hold the trained Universal Remote
system button for two seconds and
release. Repeat the “press/hold/release”
sequence up to three times to complete
the training process.
The Universal Remote system should now
activate the garage door.
Repeat the process for programming the
two remaining buttons.
Page 128 of 384
GMC Acadia/Acadia Denali Owner Manual (GMNA-Localizing-U.S./Canada/
Mexico-16402009) - 2023 - CRC - 3/28/22
Instruments and Controls 127
Radio Signals for Some Gate Operators
For questions or programming help, see
www.homelink.com/gm or call
1-800-355-3515. For calls placed outside the
U.S., Canada, or Puerto Rico, international
rates will apply and may differ based on
landline or mobile phone.
Some radio-frequency laws and gate
operators require transmitter signals to time
out or quit after several seconds of
transmission. This may not be long enough
for the Universal Remote system to pick up
the signal during programming.
If the programming did not work, replace
Step 2 under“Programming the Universal
Remote System” with the following:
Press and hold the Universal Remote system
button while pressing and releasing the
hand-held transmitter button every
two seconds until the signal has been
successfully accepted by the Universal
Remote system. The Universal Remote
system indicator light will flash slowly at
first and then change to a rapid flash or
continuous solid-light. Proceed with Step 3
under “Programming the Universal Remote
System” to complete.
Universal Remote System
Operation
Using the Universal Remote System
Press and hold the appropriate Universal
Remote system button for at least one-half
second. The indicator light will come on
while the signal is being transmitted.
Erasing Universal Remote System
Buttons
Erase all programmed buttons when vehicle
ownership is terminated.
To erase:
1. Press and hold the two outside buttons until the indicator light begins to flash.
This should take about 10 seconds.
2. Release both buttons.
Reprogramming a Single Universal
Remote System Button
To reprogram any of the system buttons: 1. Press and hold any one of the buttons. Do not release the button. 2. The indicator light will begin to flash
after 20 seconds. Without releasing the
button, proceed with Step 1 under
“Programming the Universal Remote
System.”
Page 133 of 384
GMC Acadia/Acadia Denali Owner Manual (GMNA-Localizing-U.S./Canada/
Mexico-16402009) - 2023 - CRC - 3/28/22
132 Lighting
Interior Lighting
Instrument Panel Illumination
Control
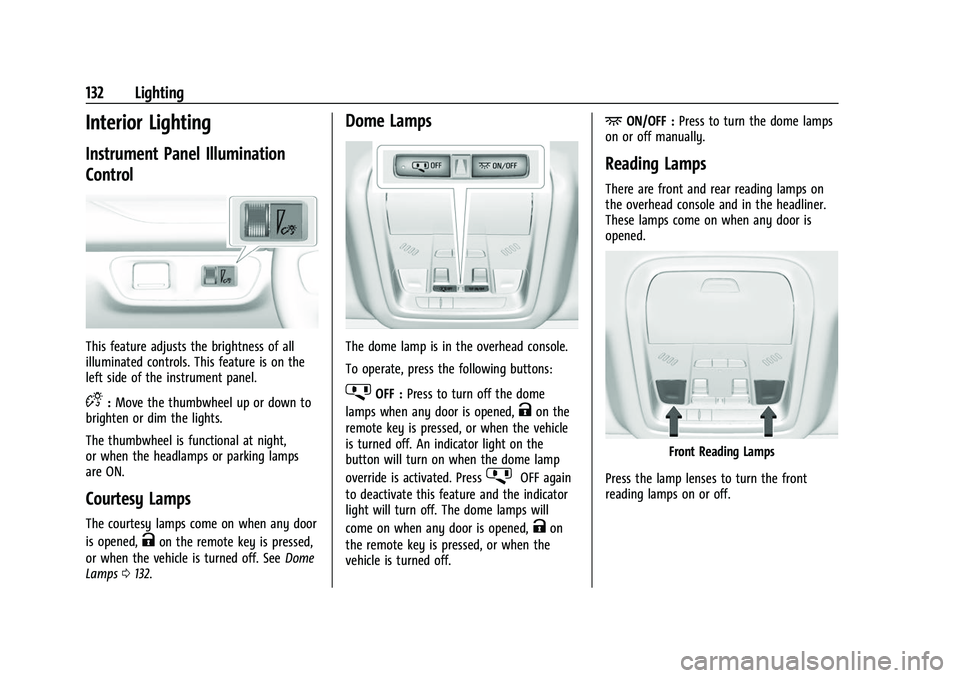
This feature adjusts the brightness of all
illuminated controls. This feature is on the
left side of the instrument panel.
D:Move the thumbwheel up or down to
brighten or dim the lights.
The thumbwheel is functional at night,
or when the headlamps or parking lamps
are ON.
Courtesy Lamps
The courtesy lamps come on when any door
is opened,
Kon the remote key is pressed,
or when the vehicle is turned off. See Dome
Lamps 0132.
Dome Lamps
The dome lamp is in the overhead console.
To operate, press the following buttons:
jOFF : Press to turn off the dome
lamps when any door is opened,
Kon the
remote key is pressed, or when the vehicle
is turned off. An indicator light on the
button will turn on when the dome lamp
override is activated. Press
jOFF again
to deactivate this feature and the indicator
light will turn off. The dome lamps will
come on when any door is opened,
Kon
the remote key is pressed, or when the
vehicle is turned off.
+ON/OFF : Press to turn the dome lamps
on or off manually.
Reading Lamps
There are front and rear reading lamps on
the overhead console and in the headliner.
These lamps come on when any door is
opened.
Front Reading Lamps
Press the lamp lenses to turn the front
reading lamps on or off.
Page 134 of 384
GMC Acadia/Acadia Denali Owner Manual (GMNA-Localizing-U.S./Canada/
Mexico-16402009) - 2023 - CRC - 3/28/22
Lighting 133
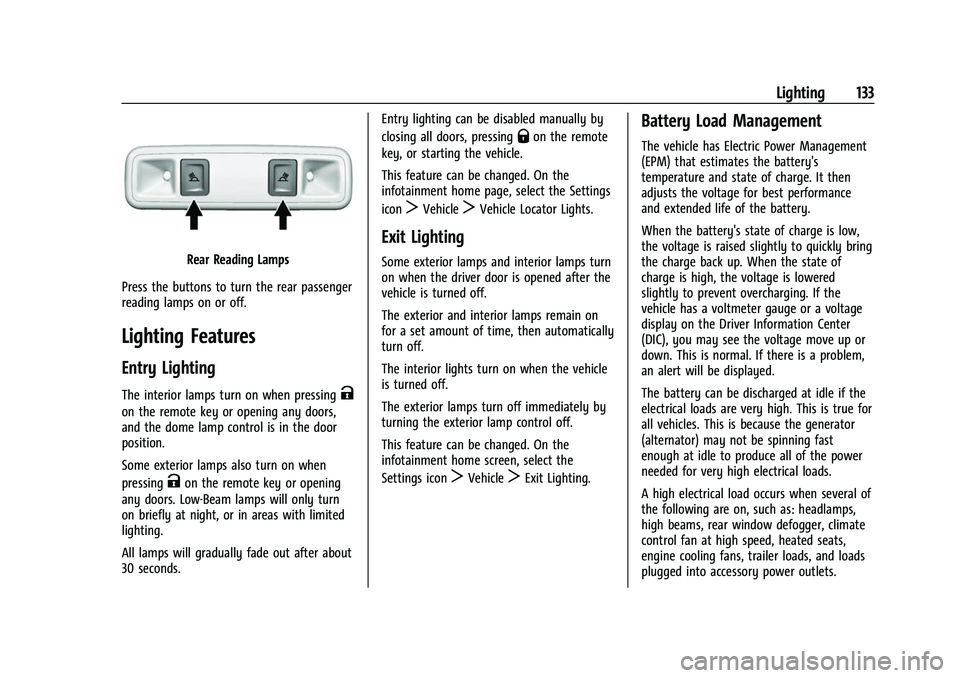
Rear Reading Lamps
Press the buttons to turn the rear passenger
reading lamps on or off.
Lighting Features
Entry Lighting
The interior lamps turn on when pressingK
on the remote key or opening any doors,
and the dome lamp control is in the door
position.
Some exterior lamps also turn on when
pressing
Kon the remote key or opening
any doors. Low-Beam lamps will only turn
on briefly at night, or in areas with limited
lighting.
All lamps will gradually fade out after about
30 seconds. Entry lighting can be disabled manually by
closing all doors, pressing
Qon the remote
key, or starting the vehicle.
This feature can be changed. On the
infotainment home page, select the Settings
icon
TVehicleTVehicle Locator Lights.
Exit Lighting
Some exterior lamps and interior lamps turn
on when the driver door is opened after the
vehicle is turned off.
The exterior and interior lamps remain on
for a set amount of time, then automatically
turn off.
The interior lights turn on when the vehicle
is turned off.
The exterior lamps turn off immediately by
turning the exterior lamp control off.
This feature can be changed. On the
infotainment home screen, select the
Settings icon
TVehicleTExit Lighting.
Battery Load Management
The vehicle has Electric Power Management
(EPM) that estimates the battery's
temperature and state of charge. It then
adjusts the voltage for best performance
and extended life of the battery.
When the battery's state of charge is low,
the voltage is raised slightly to quickly bring
the charge back up. When the state of
charge is high, the voltage is lowered
slightly to prevent overcharging. If the
vehicle has a voltmeter gauge or a voltage
display on the Driver Information Center
(DIC), you may see the voltage move up or
down. This is normal. If there is a problem,
an alert will be displayed.
The battery can be discharged at idle if the
electrical loads are very high. This is true for
all vehicles. This is because the generator
(alternator) may not be spinning fast
enough at idle to produce all of the power
needed for very high electrical loads.
A high electrical load occurs when several of
the following are on, such as: headlamps,
high beams, rear window defogger, climate
control fan at high speed, heated seats,
engine cooling fans, trailer loads, and loads
plugged into accessory power outlets.
Page 173 of 384
GMC Acadia/Acadia Denali Owner Manual (GMNA-Localizing-U.S./Canada/
Mexico-16402009) - 2023 - CRC - 3/28/22
172 Infotainment System
About
Shows the infotainment system software
information.
Running Applications
Shows a complete list of applications that
are currently running on the infotainment
system.
Return to Factory Settings
Allows resetting the infotainment system
settings in the vehicle.
Apps
The menu may contain the following:
Android Auto
Allows interacting directly with a mobile
device on the infotainment display. See
Apple CarPlay and Android Auto0168.
Apple CarPlay
This feature allows you to interact directly
with your mobile device on the infotainment
display. See Apple CarPlay and Android Auto
0 168.
Apps
Shows app settings and information. Audio
Adjusts different audio settings.
Climate
Adjusts different climate settings.
Navigation
Adjusts different navigation settings.
See
Using the Navigation System 0148.
Phone
Adjusts different phone settings.
Vehicle
The menu may contain the following:
Rear Seat Reminder
Allows for a chime and a message when the
rear door has been opened before or during
operation of the vehicle.
Climate and Air Quality
Adjusts different climate settings.
Collision/Detection Systems
Adjusts different driver assistance system
settings. Comfort and Convenience
Adjusts different comfort and convenience
settings.
Lighting
Adjusts different lighting settings.
Power Door Locks
Adjusts different door lock settings.
Remote Lock, Unlock, and Start
Adjusts different remote lock settings.
Seating Position
Adjusts different seat settings.
Teen Driver
See
Teen Driver 0173.
Valet Mode
This will lock the infotainment system and
steering wheel controls. It may also limit
access to vehicle storage locations,
if equipped.
To enable valet mode: 1. Enter a four-digit code on the keypad.
2. Select Enter to go to the confirmation screen.
3. Re-enter the four-digit code.
Page 187 of 384
GMC Acadia/Acadia Denali Owner Manual (GMNA-Localizing-U.S./Canada/
Mexico-16402009) - 2023 - CRC - 3/28/22
186 Climate Controls
conditioner will not run. The A/C light will
stay on even if the outside temperatures are
below freezing.
@:Press to turn on recirculation. An
indicator light comes on. Air is recirculated
to quickly cool the inside of the vehicle.
It can also be used to help reduce outside
air and odors that enter the vehicle. The air
conditioning compressor also comes on
when this mode is activated.
Rear Window Defogger
The rear window defogger uses a warming
grid to remove fog from the rear window.
K: Press to turn the rear window defogger
on or off. An indicator light on the button
comes on to show that the rear window
defogger is on.
The rear window defogger only works when
the ignition is on. The defogger turns off if
the ignition is turned to off or ACC/
ACCESSORY.
Caution
Using a razor blade or sharp object to
clear the inside rear window can damage
the rear window defogger. Repairs would
(Continued)
Caution (Continued)
not be covered by the vehicle warranty.
Do not clear the inside rear window with
sharp objects.
Heated Mirror : If equipped with heated
outside mirrors, the mirrors heat to help
clear fog or frost from the surface of the
mirror when the rear window defog button
is pressed. See Heated Mirrors 028.
Remote Start Climate Control Operation :
If equipped with remote start, the climate
control system may run when the vehicle is
started remotely. The rear defog may come
on during remote start based on cold
ambient conditions. The rear defog indicator
light does not come on during a remote
start.
If equipped, the heated seats will turn on if
it is cold outside or the ventilated seats will
turn on if it is hot outside. The heated and
ventilated seat indicator lights may not
come on during a remote start. If equipped,
the heated steering wheel will come on in a
remote start if it is cold outside. The heated
steering wheel indicator light may not
come on.
Sensors
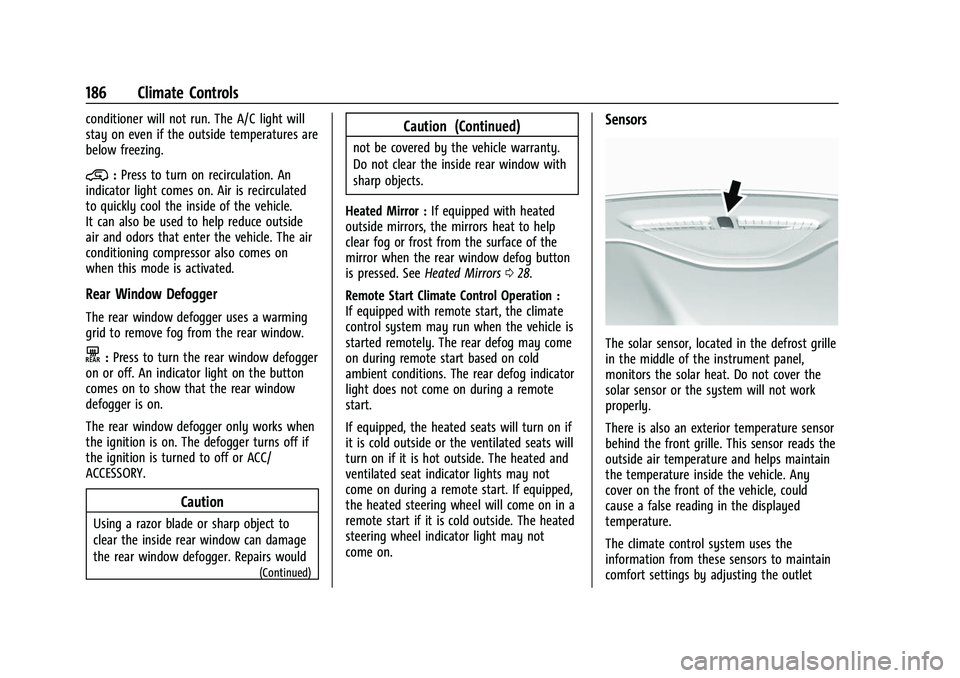
The solar sensor, located in the defrost grille
in the middle of the instrument panel,
monitors the solar heat. Do not cover the
solar sensor or the system will not work
properly.
There is also an exterior temperature sensor
behind the front grille. This sensor reads the
outside air temperature and helps maintain
the temperature inside the vehicle. Any
cover on the front of the vehicle, could
cause a false reading in the displayed
temperature.
The climate control system uses the
information from these sensors to maintain
comfort settings by adjusting the outlet
Page 207 of 384
GMC Acadia/Acadia Denali Owner Manual (GMNA-Localizing-U.S./Canada/
Mexico-16402009) - 2023 - CRC - 3/29/22
206 Driving and Operating
The idle speed will go down as the
engine gets warm. Do not race the
engine immediately after starting it.
If the remote key is not in the vehicle,
if there is interference, or if the remote
key battery is low, the Driver
Information Center (DIC) will display a
message.
Caution
Cranking the engine for long periods of
time, by trying to start the engine
immediately after cranking has ended,
can overheat and damage the cranking
motor, and drain the battery. Wait at
least 15 seconds between each try, to let
the cranking motor cool down.
2. If the engine does not start after five to 10 seconds, especially in very cold
weather (below −18 °C or 0 °F), it could
be flooded with too much gasoline. Try
pushing the accelerator pedal all the way
to the floor and holding it there as you
press ENGINE START/STOP, for up to a
maximum of 15 seconds. Wait at least
15 seconds between each try, to allow
the cranking motor to cool down. When
the engine starts, let go of the button and the accelerator. If the vehicle starts
briefly but then stops again, do the
same thing. This clears the extra gasoline
from the engine. Do not race the engine
immediately after starting it. Operate
the engine and transmission gently until
the oil warms up and lubricates all
moving parts.
Stop/Start System
The Stop/Start system will shut off the
engine to help conserve fuel. It has
components designed for the increased
number of starts.
{Warning
The automatic engine Stop/Start feature
causes the engine to shut off while the
vehicle is still on. Do not exit the vehicle
before shifting to P (Park). The vehicle
may restart and move unexpectedly.
Always shift to P (Park), and then turn
the ignition off before exiting the vehicle.
Auto Engine Stop/Start
When the brakes are applied and the vehicle
is at a complete stop, the engine may turn
off. When stopped, the tachometer displays
AUTO STOP. See Tachometer0101. When the brake pedal is released or the
accelerator pedal is pressed, the engine will
restart.
To maintain vehicle performance, other
conditions may cause the engine to
automatically restart before the brake pedal
is released.
Auto Stops may not occur and/or auto
restarts may occur because:
.The climate control settings require the
engine to be running to cool or heat the
vehicle interior.
.The vehicle battery needs to charge.
.The vehicle battery has recently been
disconnected.
.Minimum vehicle speed has not been
reached since the last Auto Stop
.The accelerator pedal is pressed.
.The engine or transmission is not at the
required operating temperature.
.The outside temperature is not in the
required operating range.
.The transmission is shifted out of
D (Drive) to any gear other than P (Park).
.Certain driver modes have been selected.
See
Driver Mode Control 0220.
.The vehicle is on a steep hill or grade.
Page 229 of 384
GMC Acadia/Acadia Denali Owner Manual (GMNA-Localizing-U.S./Canada/
Mexico-16402009) - 2023 - CRC - 3/29/22
228 Driving and Operating
Warning (Continued)
Always be ready to manually accelerate
or brake to complete the pass or lane
change.
Stationary or Very Slow-Moving Objects
{Warning
ACC may not detect and react to stopped
or slow-moving vehicles ahead of you. For
example, the system may not brake for a
vehicle it has never detected moving. This
can occur in stop-and-go traffic or when a
vehicle suddenly appears due to a vehicle
ahead changing lanes. Your vehicle may
not stop and could cause a crash. Use
caution when using ACC. Your complete
attention is always required while driving
and you should be ready to take action
and apply the brakes.
Irregular Objects Affecting ACC
ACC may have difficulty detecting the
following objects:
.Vehicles with cargo extending from the
back end.
.Non-standard shaped vehicles, such as
vehicle transport, vehicles with a side car
fitted, or horse carriages.
.Objects that are close to the front of your
vehicle.
ACC Automatically Disengages
ACC may automatically disengage and the
driver will need to manually apply the
brakes to slow the vehicle when:
.The sensors are blocked.
.The Traction Control System (TCS) or
StabiliTrak/ESC system has activated or
been disabled.
.There is a fault in the system.
.The radar may falsely report a blockage
when driving in a desert or remote area
with no other vehicles or roadside objects.
.A DIC message may display to indicate
that ACC is temporarily unavailable.
The ACC indicator will turn white when ACC
is no longer active.
In some cases, when ACC is temporarily
unavailable, regular cruise control may be
used. See “Switching Between ACC and
Regular Cruise Control” in this section.
Always consider driving conditions before
using either cruise control system. Notification to Resume ACC
ACC will maintain a follow gap behind a
detected vehicle and slow your vehicle to a
stop behind that vehicle.
If the stopped vehicle ahead has driven
away and ACC has not resumed, the vehicle
ahead indicator will flash as a reminder to
check traffic ahead before proceeding. In
addition, the left and right sides of the
Safety Alert Seat will pulse three times,
or three beeps will sound. Touch the
Settings icon on the infotainment home
page. Select
“Vehicle”to display the list of
available options and select ”Alert Type”and
“Adaptive Cruise Go Notifier” in“Collision/
Detection Systems”.
When the vehicle ahead drives away, ACC
resumes automatically if the stop was brief.
Press RES+ or the accelerator pedal to
resume cruise control. If stopped for more
than two minutes or if the driver door is
opened and the driver seat belt is
unbuckled, the ACC automatically applies the
Electric Parking Brake (EPB) to hold the
vehicle. The EPB status light will turn on.
See Electric Parking Brake 0216. To resume
ACC and release the EPB, press the
accelerator pedal.