ESP GMC CANYON 2007 Owner's Guide
[x] Cancel search | Manufacturer: GMC, Model Year: 2007, Model line: CANYON, Model: GMC CANYON 2007Pages: 492, PDF Size: 2.79 MB
Page 283 of 492
{CAUTION:
Snow can trap exhaust gases under your
vehicle. This can cause deadly CO (carbon
monoxide) gas to get inside. CO could
overcome you and kill you. You cannot see
it or smell it, so you might not know it is in
your vehicle. Clear away snow from around
the base of your vehicle, especially any
that is blocking your exhaust pipe. And
check around again from time to time to
be sure snow does not collect there.
Open a window just a little on the side of
the vehicle that is away from the wind.
This will help keep CO out.Run your engine only as long as you must.
This saves fuel. When you run the engine, make
it go a little faster than just idle. That is, push
the accelerator slightly. This uses less fuel for
the heat that you get and it keeps the battery
charged. You will need a well-charged battery to
restart the vehicle, and possibly for signaling
later on with your headlamps. Let the heater
run for a while.
Then, shut the engine off and close the window
almost all the way to preserve the heat. Start
the engine again and repeat this only when you
feel really uncomfortable from the cold. But do it as
little as possible. Preserve the fuel as long as
you can. To help keep warm, you can get out of
the vehicle and do some fairly vigorous exercises
every half hour or so until help comes.
283
Page 308 of 492
Your trailer’s brake system can tap into the
vehicle’s hydraulic brake system only if:
The trailer parts can withstand 3,000 psi
(20 650 kPa) of pressure.
The trailer’s brake system will use less than
0.02 cubic inch (0.3 cc) of �uid from your
vehicle’s master cylinder. Otherwise,
both braking systems won’t work well. You
could even lose your brakes.
If everything checks out this far, then make the
brake �uid tap at the port on the master cylinder
that sends �uid to the rear brakes. But don’t
use copper tubing for this. If you do, it will bend
and �nally break off. Use steel brake tubing.
Driving with a Trailer
Towing a trailer requires a certain amount of
experience. Before setting out for the open road,
you’ll want to get to know your rig. Acquaint
yourself with the feel of handling and braking with
the added weight of the trailer. And always
keep in mind that the vehicle you are driving is
now a good deal longer and not nearly as
responsive as your vehicle is by itself.Before you start, check all trailer hitch parts and
attachments, safety chains, electrical connector,
lamps, tires and mirror adjustment. If the trailer has
electric brakes, start your vehicle and trailer
moving and then apply the trailer brake controller
by hand to be sure the brakes are working.
This lets you check your electrical connection at
the same time.
During your trip, check occasionally to be sure
that the load is secure, and that the lamps and any
trailer brakes are still working.
Following Distance
Stay at least twice as far behind the vehicle ahead
as you would when driving your vehicle without
a trailer. This can help you avoid situations
that require heavy braking and sudden turns.
Passing
You’ll need more passing distance up ahead when
you’re towing a trailer. And, because you’re a
good deal longer, you’ll need to go much farther
beyond the passed vehicle before you can
return to your lane.
308
Page 311 of 492
Maintenance When Trailer Towing
Your vehicle will need service more often
when you’re pulling a trailer. SeeScheduled
Maintenance on page 437for more on this. Things
that are especially important in trailer operation
are automatic transmission �uid (don’t over�ll),
engine oil, axle lubricant, belt, cooling system and
brake system. Each of these is covered in this
manual, and the Index will help you �nd them
quickly. If you’re trailering, it’s a good idea
to review these sections before you start your trip.
Check periodically to see that all hitch nuts and
bolts are tight.
Trailer Wiring Harness
Your vehicle may be equipped with a four-pin
trailer towing harness. This harness has a four-pin
trailer connector that is attached to a bracket on
the hitch platform. The four-wire harness contains
the following trailer circuits:
Yellow: Left Stop/Turn Signal
Green: Right Stop/Turn Signal
Brown: Taillamps/Park lamps
White: Ground
Trailer Recommendations
You must subtract your hitch load from the
CWR for your vehicle. Weigh your vehicle with
your trailer attached, so that you won’t go over
the GVWR or the GAWR.
You’ll get the best performance if you spread out
the weight of your load the right way, and if
you choose the correct hitch and trailer brakes.
For more information, seeTowing a Trailer
on page 300later in this section.
311
Page 332 of 492
How to Check Automatic Transmission
Fluid
Because this operation can be a little difficult, you
may choose to have this done at the dealership
service department.
If you do it yourself, be sure to follow all the
instructions here, or you could get a false reading
on the dipstick.
Notice:Too much or too little �uid can
damage your transmission. Too much can
mean that some of the �uid could come out
and fall on hot engine parts or exhaust system
parts, starting a �re. Too little �uid could
cause the transmission to overheat. Be sure to
get an accurate reading if you check your
transmission �uid.
Wait at least 30 minutes before checking the
transmission �uid level if you have been driving:
When outside temperatures are above
90°F (32°C).
At high speed for quite a while.
In heavy traffic — especially in hot weather.
While pulling a trailer.To get the right reading, the �uid should be at
normal operating temperature, which is 180°F to
200°F (82°C to 93°C).
Get the vehicle warmed up by driving about
15 miles (24 km) when outside temperatures are
above 50°F (10°C). If it is colder than 50°F (10°C),
drive the vehicle in THIRD (3) until the engine
temperature gage moves and then remains steady
for 10 minutes.
A cold �uid check can be made after the vehicle has
been sitting for eight hours or more with the engine
off, but this is used only as a reference. Let the
engine run at idle for �ve minutes if outside
temperatures are 50°F (10°C) or more. If it is colder
than 50°F (10°C), you may have to idle the engine
longer. Should the �uid level be low during this cold
check, you must check the �uid hot before adding
�uid. Checking the �uid hot will give you a more
accurate reading of the �uid level.
Checking the Fluid Level
Prepare your vehicle as follows:
1. Park your vehicle on a level place. Keep the
engine running.
2. With the parking brake applied, place the shift
lever in PARK (P).
332
Page 375 of 492
GAWR RR:Gross Axle Weight Rating for the rear
axle. SeeLoading Your Vehicle on page 286.
Intended Outboard Sidewall:The side of
an asymmetrical tire, that must always face
outward when mounted on a vehicle.
Kilopascal (kPa):The metric unit for air pressure.
Light Truck (LT-Metric) Tire:A tire used on
light duty trucks and some multipurpose passenger
vehicles.
Load Index:An assigned number ranging from
1 to 279 that corresponds to the load carrying
capacity of a tire.
Maximum In�ation Pressure:The maximum air
pressure to which a cold tire may be in�ated.
The maximum air pressure is molded onto
the sidewall.
Maximum Load Rating:The load rating for a tire
at the maximum permissible in�ation pressure
for that tire.
Maximum Loaded Vehicle Weight:The sum of
curb weight, accessory weight, vehicle capacity
weight, and production options weight.Normal Occupant Weight:The number of
occupants a vehicle is designed to seat multiplied
by 150 lbs (68 kg). SeeLoading Your Vehicle
on page 286.
Occupant Distribution:Designated seating
positions.
Outward Facing Sidewall:The side of an
asymmetrical tire that has a particular side that
faces outward when mounted on a vehicle.
The side of the tire that contains a whitewall, bears
white lettering, or bears manufacturer, brand,
and/or model name molding that is higher
or deeper than the same moldings on the other
sidewall of the tire.
Passenger (P-Metric) Tire:A tire used on
passenger cars and some light duty trucks and
multipurpose vehicles.
Recommended In�ation Pressure:Vehicle
manufacturer’s recommended tire in�ation
pressure as shown on the tire placard. See
In�ation - Tire Pressure on page 377andLoading
Your Vehicle on page 286.
375
Page 377 of 492
In�ation - Tire Pressure
Tires need the correct amount of air pressure to
operate effectively.
Notice:Do not let anyone tell you that
under-in�ation or over-in�ation is all right. It is
not. If your tires do not have enough air
(under-in�ation), you can get the following:
Too much �exing
Too much heat
Tire overloading
Premature or irregular wear
Poor handling
Reduced fuel economy
If your tires have too much air (over-in�ation),
you can get the following:
Unusual wear
Poor handling
Rough ride
Needless damage from road hazardsA Tire and Loading Information label is attached to
the vehicle’s center pillar (B-pillar), below the
driver’s door latch. This label shows your vehicle’s
original equipment tires and the correct in�ation
pressures for your tires when they are cold.
The recommended cold tire in�ation pressure,
shown on the label, is the minimum amount of air
pressure needed to support your vehicle’s
maximum load carrying capacity.
For additional information regarding how much
weight your vehicle can carry, and an example of
the Tire and Loading Information label, see
Loading Your Vehicle on page 286. How you load
your vehicle affects vehicle handling and ride
comfort, never load your vehicle with more weight
than it was designed to carry.
When to Check
Check your tires once a month or more. Also
check the tire pressure of the spare tire. If
you have a compact spare tire, it should be at
60 psi (420 kPa). SeeSpare Tire on page 413for
additional information.
377
Page 379 of 492
For additional information and details about the
DIC operation and displays seeDIC Controls and
Displays on page 194andDIC Warnings and
Messages on page 198.
You may notice, during cooler weather conditions,
that the low tire pressure warning light and the
DIC LOW TIRE message may come on when the
vehicle is �rst started, and then turn off as you
start to drive. This may be an early indicator that
the air pressure in the tire(s) is getting low
and needs to be in�ated to the proper pressure.
Each tire, including the spare (if provided), should
be checked monthly when cold and in�ated to
the in�ation pressure recommended by the vehicle
manufacturer on the vehicle placard or tire
in�ation pressure label. (If your vehicle has tires of
a different size than the size indicated on the
vehicle placard or tire in�ation pressure label, you
should determine the proper tire in�ation
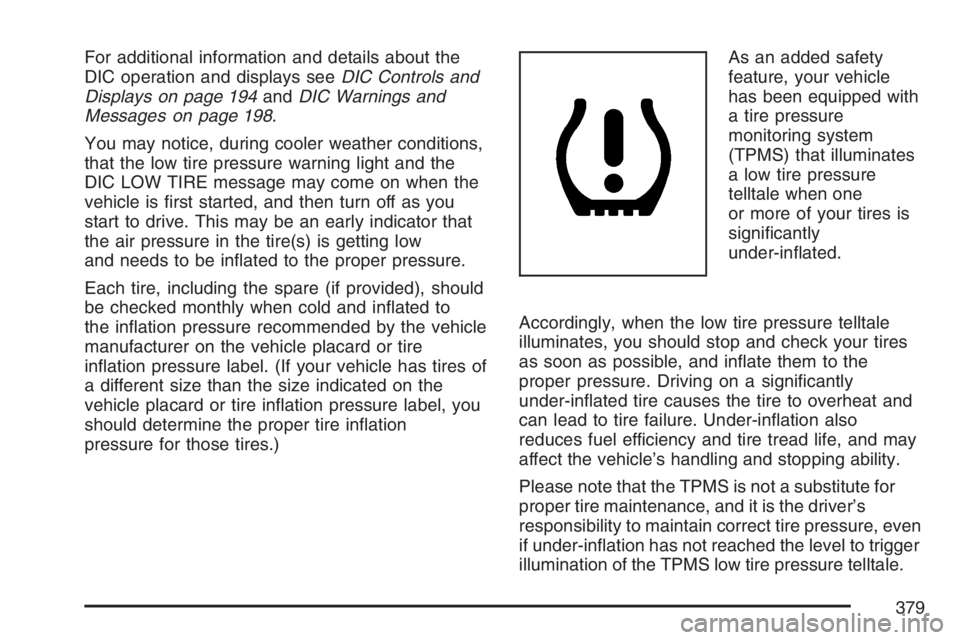
pressure for those tires.)As an added safety
feature, your vehicle
has been equipped with
a tire pressure
monitoring system
(TPMS) that illuminates
a low tire pressure
telltale when one
or more of your tires is
signi�cantly
under-in�ated.
Accordingly, when the low tire pressure telltale
illuminates, you should stop and check your tires
as soon as possible, and in�ate them to the
proper pressure. Driving on a signi�cantly
under-in�ated tire causes the tire to overheat and
can lead to tire failure. Under-in�ation also
reduces fuel efficiency and tire tread life, and may
affect the vehicle’s handling and stopping ability.
Please note that the TPMS is not a substitute for
proper tire maintenance, and it is the driver’s
responsibility to maintain correct tire pressure, even
if under-in�ation has not reached the level to trigger
illumination of the TPMS low tire pressure telltale.
379
Page 387 of 492
CAUTION: (Continued)
Because they were designed and
developed for use on your vehicle, it is all
right to drive your vehicle with the
compact spare installed properly.
Compact spare tires are designed for
temporary use only. SeeSpare Tire on
page 413.
{CAUTION:
If you use bias-ply tires on your vehicle,
the wheel rim �anges could develop
cracks after many miles of driving. A tire
and/or wheel could fail suddenly, causing
a crash. Use only radial-ply tires with the
wheels on your vehicle.If you must replace your vehicle’s tires with those
that do not have a TPC Spec number, make
sure they are the same size, load range, speed
rating, and construction type (radial and
bias-belted tires) as your vehicle’s original tires.
Your vehicle’s original equipment tires are listed on
the Tire and Loading Information Label. This
label is attached to the vehicle’s center pillar
(B-pillar). SeeLoading Your Vehicle on page 286,
for more information about the Tire and Loading
Information Label and its location on your vehicle.
387
Page 389 of 492
Uniform Tire Quality Grading
Quality grades can be found where applicable on
the tire sidewall between tread shoulder and
maximum section width. For example:
Treadwear 200 Traction AA Temperature A
The following information relates to the system
developed by the United States National Highway
Traffic Safety Administration (NHTSA), which
grades tires by treadwear, traction, and
temperature performance. This applies only to
vehicles sold in the United States. The grades are
molded on the sidewalls of most passenger car
tires. The Uniform Tire Quality Grading (UTQG)
system does not apply to deep tread, winter-type
snow tires, space-saver, or temporary use
spare tires, tires with nominal rim diameters of
10 to 12 inches (25 to 30 cm), or to some
limited-production tires.
While the tires available on General Motors
passenger cars and light trucks may vary with
respect to these grades, they must also conform
to federal safety requirements and additional
General Motors Tire Performance Criteria (TPC)
standards.
Treadwear
The treadwear grade is a comparative rating
based on the wear rate of the tire when tested
under controlled conditions on a speci�ed
government test course. For example, a tire
graded 150 would wear one and a half (1.5) times
as well on the government course as a tire
graded 100. The relative performance of tires
depends upon the actual conditions of their use,
however, and may depart signi�cantly from
the norm due to variations in driving habits, service
practices, and differences in road characteristics
and climate.
Traction – AA, A, B, C
The traction grades, from highest to lowest, are
AA, A, B, and C. Those grades represent the tire’s
ability to stop on wet pavement as measured
under controlled conditions on speci�ed
government test surfaces of asphalt and concrete.
A tire marked C may have poor traction
performance.
Warning:The traction grade assigned to this tire
is based on straight-ahead braking traction
tests, and does not include acceleration, cornering,
hydroplaning, or peak traction characteristics.
389
Page 390 of 492
Temperature – A, B, C
The temperature grades are A (the highest), B,
and C, representing the tire’s resistance to
the generation of heat and its ability to dissipate
heat when tested under controlled conditions on a
speci�ed indoor laboratory test wheel. Sustained
high temperature can cause the material of the tire
to degenerate and reduce tire life, and excessive
temperature can lead to sudden tire failure.
The grade C corresponds to a level of performance
which all passenger car tires must meet under
the Federal Motor Vehicle Safety Standard
No. 109. Grades B and A represent higher levels
of performance on the laboratory test wheel
than the minimum required by law.
Warning:The temperature grade for this tire is
established for a tire that is properly in�ated
and not overloaded. Excessive speed,
under-in�ation, or excessive loading, either
separately or in combination, can cause heat
buildup and possible tire failure.
Wheel Alignment and Tire Balance
The tires and wheels on your vehicle were aligned
and balanced carefully at the factory to give you
the longest tire life and best overall performance.
Adjustments to wheel alignment and tire
balancing will not be necessary on a regular basis.
However, if you notice unusual tire wear or your
vehicle pulling to one side or the other, the
alignment may need to be checked. If you notice
your vehicle vibrating when driving on a smooth
road, your tires and wheels may need to be
rebalanced. See your dealer for proper diagnosis.
Wheel Replacement
Replace any wheel that is bent, cracked, or badly
rusted or corroded. If wheel nuts keep coming
loose, the wheel, wheel bolts, and wheel
nuts should be replaced. If the wheel leaks air,
replace it (except some aluminum wheels,
which can sometimes be repaired). See your
dealer if any of these conditions exist.
390