tailgate GMC CANYON 2009 Get To Know Guide
[x] Cancel search | Manufacturer: GMC, Model Year: 2009, Model line: CANYON, Model: GMC CANYON 2009Pages: 20, PDF Size: 0.6 MB
Page 1 of 20

Congratulations on your purchase of a GMC Canyon. Please read this information and your Owner Manual
to ensure an outstanding ownership experience. Note that your vehicle may not include all the features
described in this booklet. Keep this booklet with your Owner Manual for easy reference.
DRIVER INFORMATION
Instrument Panel . . . . . . . . . . . . . .2
Instrument Panel Cluster . . . . . . .3
Driver Information Center . . . . . . .4
SAFETY & SECURITY
Safety Belts . . . . . . . . . . . . . . . . . .5
Child Comfort Guide . . . . . . . . . . .5
Child Restraints (LATCH) . . . . . . .6
Automatic Door Locks . . . . . . . . .6
Rear Door Security Locks . . . . . .6
Passenger Airbag Status
Indicator . . . . . . . . . . . . . . . . . . . . .7
Content Theft-Deterrent System .7
OnStar
® . . . . . . . . . . . . . . . . . . . . . .8
COMFORT
Power Seats . . . . . . . . . . . . . . . . . .8
Heated Seats . . . . . . . . . . . . . . . . .9
Manual/Power Lumbar . . . . . . . . .9
Preventing Window Fogging . . . .9
ENTERTAINMENT
Audio Systems . . . . . . . . . . . . . . .9
Radio Antenna . . . . . . . . . . . . . . .11
CONVENIENCE
Headlamp Controls . . . . . . . . . . .12
Automatic Headlamp System . . .12
Fog Lamps . . . . . . . . . . . . . . . . . .12
Cargo Lamps . . . . . . . . . . . . . . . .13
Dome Lamp Override . . . . . . . . .13
Sunroof . . . . . . . . . . . . . . . . . . . . .13
Rear Seat Folding Operation . . .14Flexible Tailgate . . . . . . . . . . . . . .14
Cargo Tie-Downs and
Bed Rails . . . . . . . . . . . . . . . . . . .15
Two-Tier Loading and
Optional Bed Extender . . . . . . . .15
PERFORMANCE & MAINTENANCE
Starting Your Engine . . . . . . . . . .16
Resetting the Oil Life System . .16
Automatic Locking Differential .16
Four-Wheel Drive System . . . . . .16
StabiliTrak
®– Stability Control
System . . . . . . . . . . . . . . . . . . . . .19
Tire Pressure Monitor . . . . . . . . .19
OWNER INFORMATION
Roadside Assistance . . . . . . . . .20
My GMLink . . . . . . . . . . . . . . . . . .20
Page 14 of 20

Getting to Know Your Canyon14
Rear Seat Folding Operation
(if equipped)
Fold down the forward-facing rear
seat on Extended Cab models
• Pull down on the bottom of the seat
until it is in place.
Store the seat
• Push the entire seat up until it is flush
with the trim panel.
Note:To ensure that the hinges or
latches do not damage the safety belt or
cause the belt buckle to rattle, fold and
store the belt between the seat cushion
and seatback using the Velcro attach-
ments provided on the lower portion of
the seat.
Fold the Crew Cab’s rear seatbacks
forward
1. Insert a small-tipped tool into the slot
to unlatch the center safety belt
buckle and move the belt to the side,
out of the way.
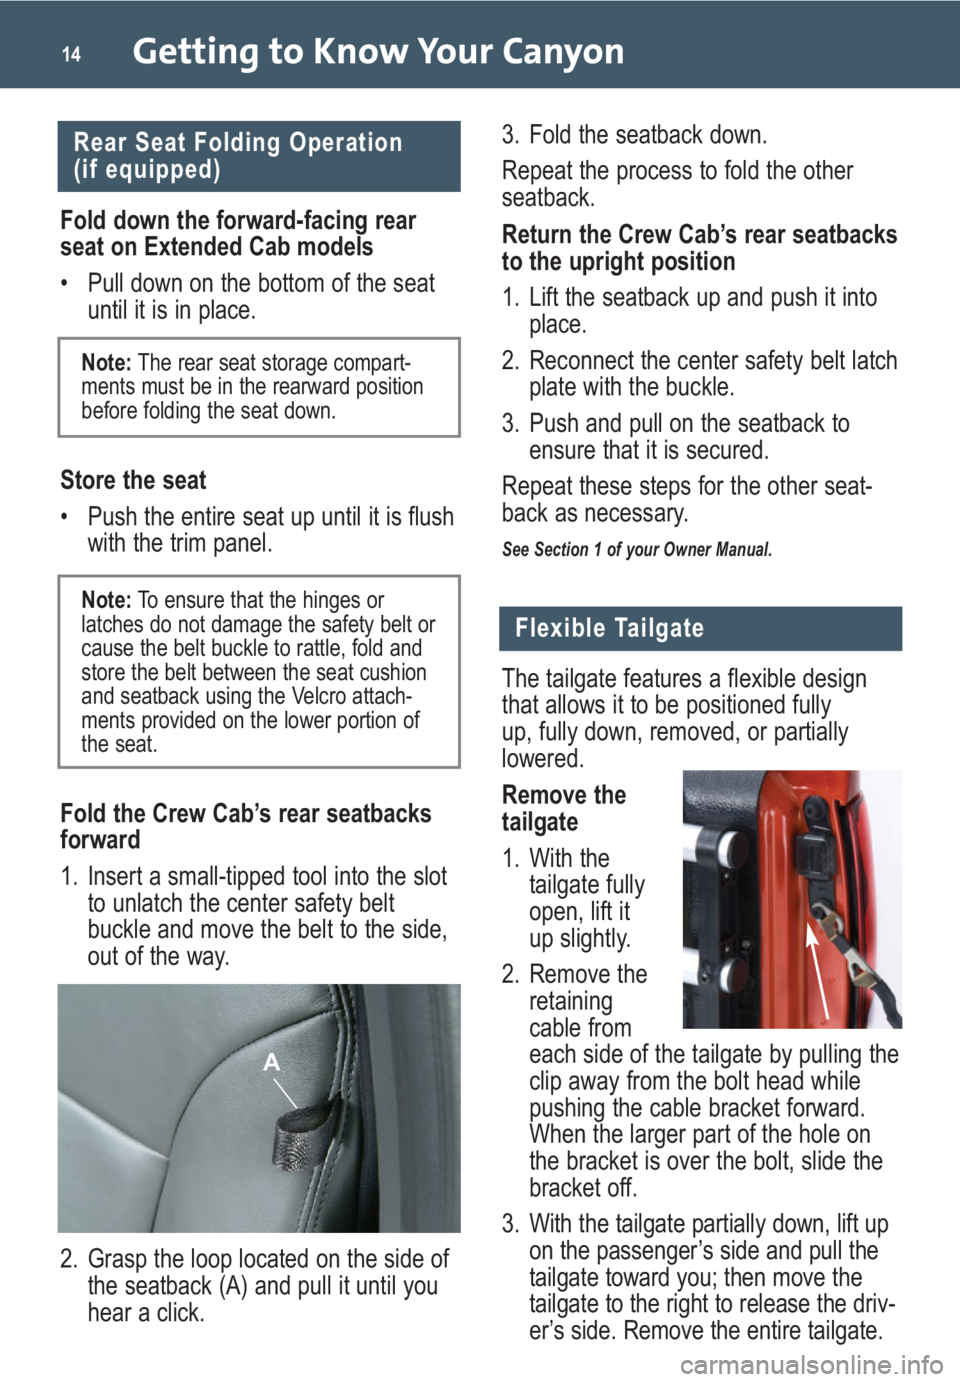
2. Grasp the loop located on the side of
the seatback (A) and pull it until you
hear a click.
A
Flexible Tailgate
The tailgate features a flexible design
that allows it to be positioned fully
up, fully down, removed, or partially
lowered.
Remove the
tailgate
1. With the
tailgate fully
open, lift it
up slightly.
2. Remove the
retaining
cable from
each side of the tailgate by pulling the
clip away from the bolt head while
pushing the cable bracket forward.
When the larger part of the hole on
the bracket is over the bolt, slide the
bracket off.
3. With the tailgate partially down, lift up
on the passenger’s side and pull the
tailgate toward you; then move the
tailgate to the right to release the driv-
er’s side. Remove the entire tailgate.
Note: The rear seat storage compart-
ments must be in the rearward position
before folding the seat down.
3. Fold the seatback down.
Repeat the process to fold the other
seatback.
Return the Crew Cab’s rear seatbacks
to the upright position
1. Lift the seatback up and push it into
place.
2. Reconnect the center safety belt latch
plate with the buckle.
3. Push and pull on the seatback to
ensure that it is secured.
Repeat these steps for the other seat-
back as necessary.
See Section 1 of your Owner Manual.
Page 15 of 20

Partially lower the tailgate
1. With the tailgate fully open, lift it up
slightly.
2. Remove the retaining cable from
each side of the tailgate by pulling the
clip away from the bolt head while
pushing the cable bracket forward.
When the larger part of the hole on
the bracket is over the bolt, slide the
bracket off.
3. Slide the
lower end fit-
ting onto the
top bolt on
each side of
the tailgate.
Partially
lower the
tailgate.
Tailgate lock (if equipped)
The tailgate also includes a lock that
can be used when the tailgate is in a
normal, upright position.
See Section 2 of your Owner Manual.
15
Two-Tier Loading and
Optional Bed Extender
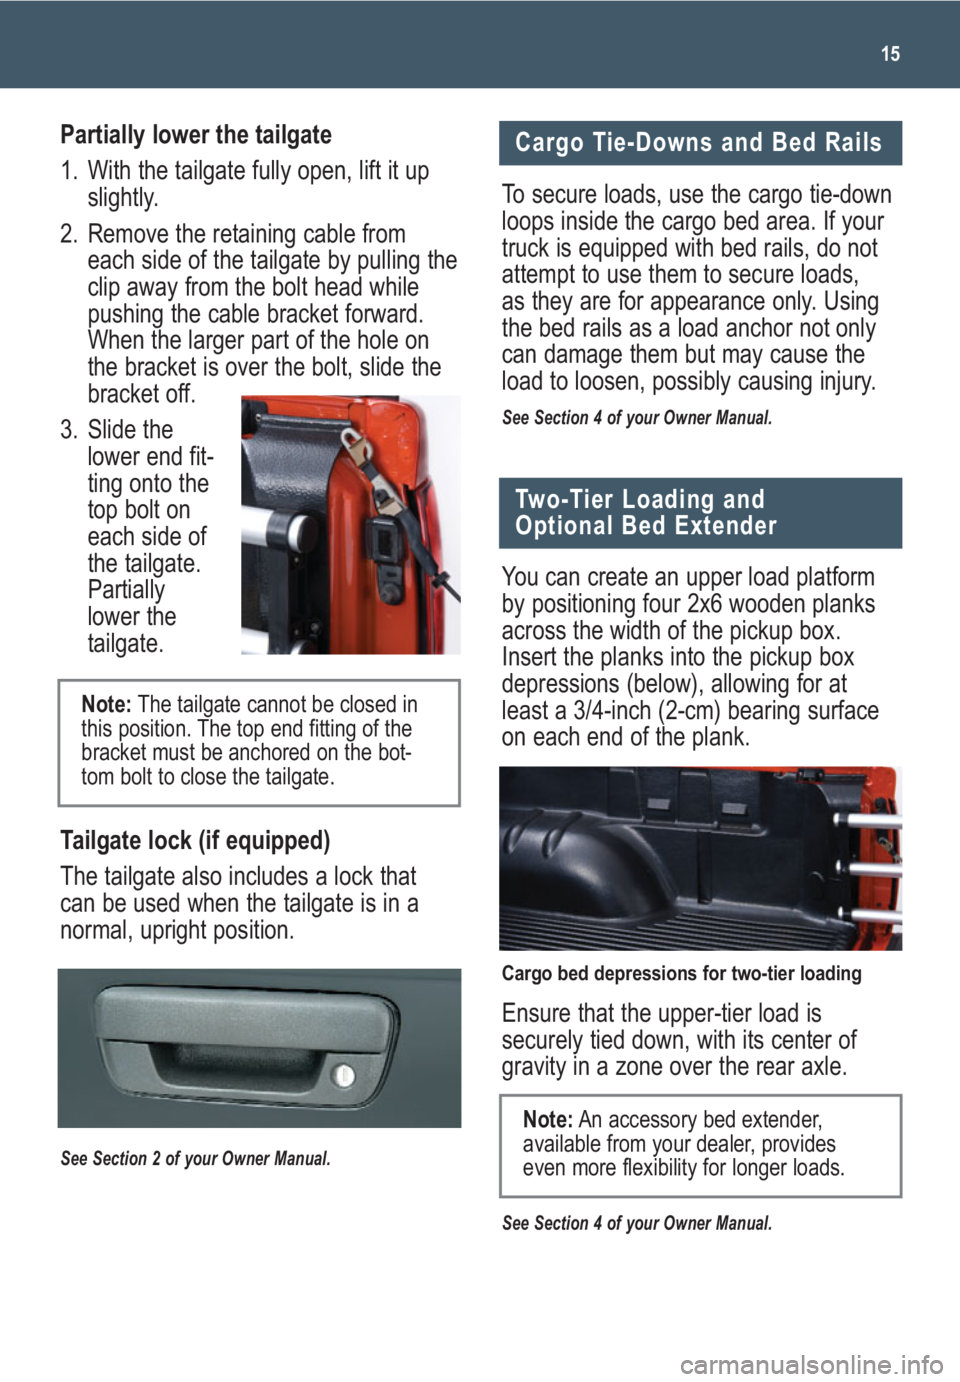
You can create an upper load platform
by positioning four 2x6 wooden planks
across the width of the pickup box.
Insert the planks into the pickup box
depressions (below), allowing for at
least a 3/4-inch (2-cm) bearing surface
on each end of the plank.
Ensure that the upper-tier load is
securely tied down, with its center of
gravity in a zone over the rear axle.
See Section 4 of your Owner Manual.
Cargo Tie-Downs and Bed Rails
To secure loads, use the cargo tie-down
loops inside the cargo bed area. If your
truck is equipped with bed rails, do not
attempt to use them to secure loads,
as they are for appearance only. Using
the bed rails as a load anchor not only
can damage them but may cause the
load to loosen, possibly causing injury.
See Section 4 of your Owner Manual.
Note:An accessory bed extender,
available from your dealer, provides
even more flexibility for longer loads.
Note:The tailgate cannot be closed in
this position. The top end fitting of the
bracket must be anchored on the bot-
tom bolt to close the tailgate.
Cargo bed depressions for two-tier loading