high beam GMC CANYON 2010 Owner's Manual
[x] Cancel search | Manufacturer: GMC, Model Year: 2010, Model line: CANYON, Model: GMC CANYON 2010Pages: 448, PDF Size: 2.62 MB
Page 5 of 448
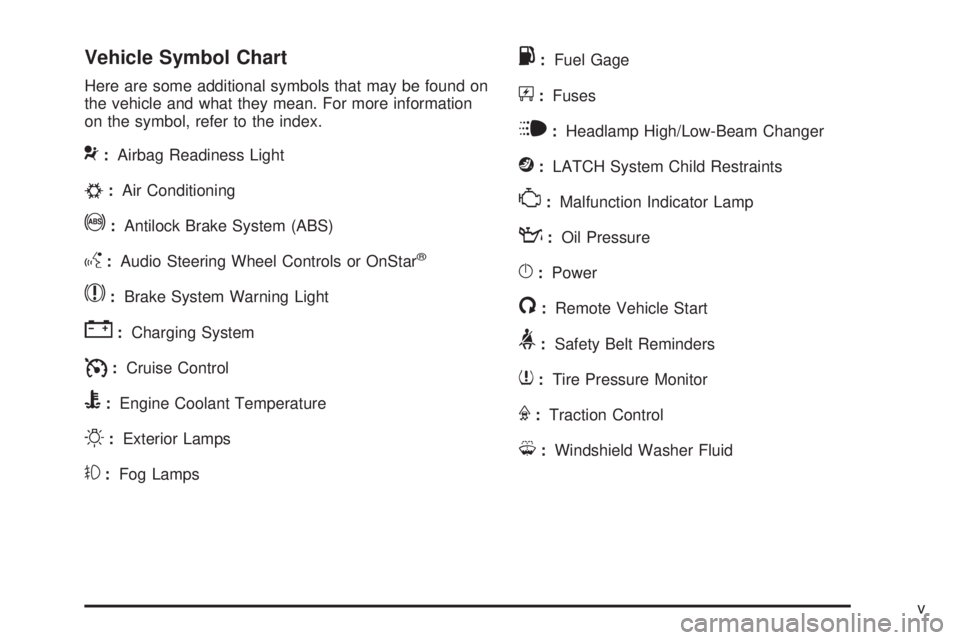
Vehicle Symbol Chart
Here are some additional symbols that may be found on
the vehicle and what they mean. For more information
on the symbol, refer to the index.
9:Airbag Readiness Light
#:Air Conditioning
!:Antilock Brake System (ABS)
g:Audio Steering Wheel Controls or OnStar®
$:Brake System Warning Light
":Charging System
I:Cruise Control
B:Engine Coolant Temperature
O:Exterior Lamps
#:Fog Lamps
.:Fuel Gage
+:Fuses
i:Headlamp High/Low-Beam Changer
j:LATCH System Child Restraints
*:Malfunction Indicator Lamp
::Oil Pressure
}:Power
/:Remote Vehicle Start
>:Safety Belt Reminders
7:Tire Pressure Monitor
F:Traction Control
M:Windshield Washer Fluid
v
Page 153 of 448
Instrument Panel Overview...............................4-3
Hazard Warning Flashers................................4-3
Horn .............................................................4-3
Tilt Wheel.....................................................4-3
Turn Signal/Multifunction Lever.........................4-4
Turn and Lane-Change Signals........................4-4
Headlamp High/Low-Beam Changer..................4-5
Flash-to-Pass.................................................4-5
Windshield Wipers..........................................4-5
Windshield Washer.........................................4-6
Cruise Control................................................4-7
Exterior Lamps.............................................4-10
Headlamps on Reminder................................4-11
Daytime Running Lamps (DRL).......................4-11
Automatic Headlamp System..........................4-12
Fog Lamps ..................................................4-12
Exterior Cargo Lamps....................................4-13
Instrument Panel Brightness...........................4-13
Dome Lamp .................................................4-13
Dome Lamp Override....................................4-14
Exit Lighting.................................................4-14
Electric Power Management...........................4-14
Battery Run-Down Protection..........................4-15
Accessory Power Outlet(s).............................4-15
Ashtray(s) and Cigarette Lighter......................4-16Climate Controls............................................4-16
Climate Control System.................................4-16
Outlet Adjustment.........................................4-18
Warning Lights, Gages, and Indicators............4-18
Instrument Panel Cluster................................4-19
Speedometer and Odometer...........................4-20
Trip Odometer..............................................4-20
Tachometer.................................................4-20
Safety Belt Reminders...................................4-21
Airbag Readiness Light.................................
.4-22
Passenger Airbag Status Indicator...................4-23
Charging System Light..................................4-24
Up-Shift Light...............................................4-24
Brake System Warning Light..........................4-25
Antilock Brake System (ABS) Warning Light.....4-26
StabiliTrak
®/Traction Control System (TCS)
Warning Light...........................................4-26
Engine Coolant Temperature Gage..................4-27
Tire Pressure Light.......................................4-28
Malfunction Indicator Lamp.............................4-28
Oil Pressure Light.........................................4-31
Security Light...............................................4-32
Cruise Control Light......................................4-32
Highbeam On Light.......................................4-32
Fuel Gage...................................................4-32
Section 4 Instrument Panel
4-1
Page 156 of 448
Turn Signal/Multifunction Lever
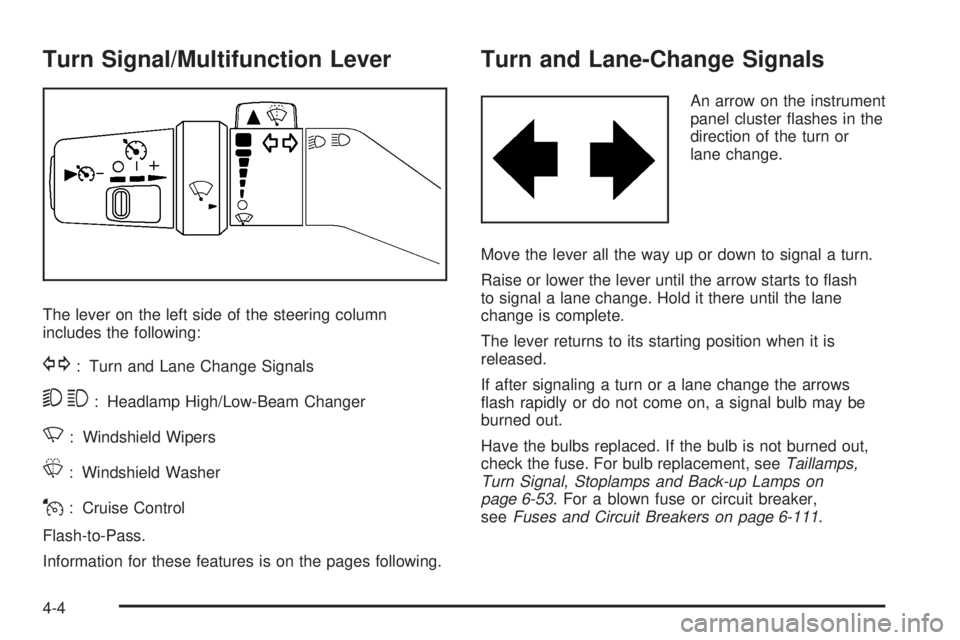
The lever on the left side of the steering column
includes the following:
G: Turn and Lane Change Signals
53: Headlamp High/Low-Beam Changer
N: Windshield Wipers
L: Windshield Washer
J: Cruise Control
Flash-to-Pass.
Information for these features is on the pages following.
Turn and Lane-Change Signals
An arrow on the instrument
panel cluster flashes in the
direction of the turn or
lane change.
Move the lever all the way up or down to signal a turn.
Raise or lower the lever until the arrow starts to flash
to signal a lane change. Hold it there until the lane
change is complete.
The lever returns to its starting position when it is
released.
If after signaling a turn or a lane change the arrows
flash rapidly or do not come on, a signal bulb may be
burned out.
Have the bulbs replaced. If the bulb is not burned out,
check the fuse. For bulb replacement, seeTaillamps,
Turn Signal, Stoplamps and Back-up Lamps on
page 6-53. For a blown fuse or circuit breaker,
seeFuses and Circuit Breakers on page 6-111.
4-4
Page 157 of 448
Turn Signal On Chime
If a turn signal is left on for more than 3/4 of a mile
(1.2 km), a chime will sound at each flash of the turn
signal and the message TURN SIGNAL will also appear
in the DIC. To turn the chime and message off, move
the turn signal lever to the off position.
See “TURN SIGNAL” underDIC Warnings and
Messages on page 4-37for more information.
Headlamp High/Low-Beam Changer
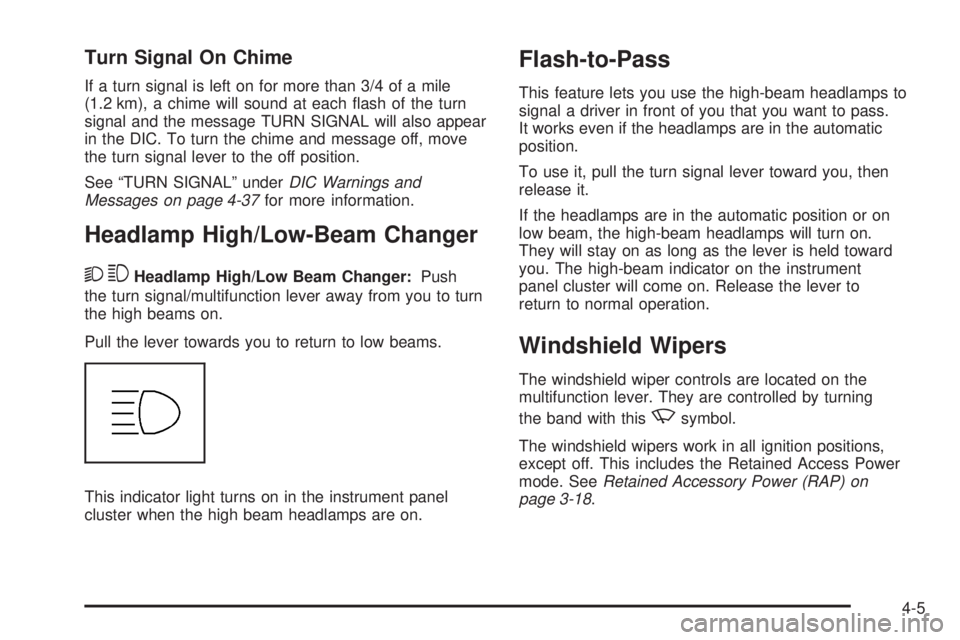
23Headlamp High/Low Beam Changer:Push
the turn signal/multifunction lever away from you to turn
the high beams on.
Pull the lever towards you to return to low beams.
This indicator light turns on in the instrument panel
cluster when the high beam headlamps are on.
Flash-to-Pass
This feature lets you use the high-beam headlamps to
signal a driver in front of you that you want to pass.
It works even if the headlamps are in the automatic
position.
To use it, pull the turn signal lever toward you, then
release it.
If the headlamps are in the automatic position or on
low beam, the high-beam headlamps will turn on.
They will stay on as long as the lever is held toward
you. The high-beam indicator on the instrument
panel cluster will come on. Release the lever to
return to normal operation.
Windshield Wipers
The windshield wiper controls are located on the
multifunction lever. They are controlled by turning
the band with this
zsymbol.
The windshield wipers work in all ignition positions,
except off. This includes the Retained Access Power
mode. SeeRetained Accessory Power (RAP) on
page 3-18.
4-5
Page 164 of 448
Automatic Headlamp System
When it is dark enough outside, the automatic headlamp
system will turn on after the transmission has been
shifted from P (Park) to D (Drive). The headlamps,
taillamps, sidemarker, parking lamps, roof marker
lamps, and the instrument panel lights turn on at normal
brightness. The radio lights will become dimmer when
the headlights are off compared to when the headlights
are on.
The vehicle has a light sensor located on the top of
the instrument panel. Do not cover the sensor, or the
system will be on whenever the ignition is on.
The system can turn on the headlamps when driving in
a parking garage, through a tunnel or when there is
overcast weather. This is normal.
There is a delay in the transition between the daytime and
nighttime operation of the Daytime Running Lamps (DRL)
and the automatic headlamp system so that driving under
bridges or bright overhead street lights does not affect the
system. The DRL and automatic headlamp system will
only be affected when the light sensor detects a change
in lighting lasting longer than the delay.If the vehicle is started in a dark garage, the automatic
headlamp system will come on immediately. Once the
vehicle leaves the garage, it will take about one minute
for the automatic headlamp system to change to DRL if it
is light outside. During that delay, the instrument panel
cluster may not be as bright as usual. Make sure the
instrument panel brightness control is in the full bright
position. SeeInstrument Panel Brightness on page 4-13.
Fog Lamps
The fog lamp button is located near the exterior lamps
control.
#:For vehicles with fog lamps, press to turn the fog
lamps on or off. An indicator light will turn on in the
button when the fog lamps are on.
The parking lamps or low-beam headlamps must be
on for the fog lamps to work. The fog lamps will go off
whenever the high-beam headlamps come on. When
the high beams go off, the fog lamps come on again.
Some localities have laws that require the headlamps to
be on along with the fog lamps.
4-12
Page 166 of 448
Dome Lamp Override
The dome lamp override button is located below the
exterior lamps control.
E(Dome Lamp Override):Press this button in to
make the dome lamps remain off when the doors are
open. To return the lamps to automatic operation,
press
Eagain and return it to the out position.
Exit Lighting
The interior lamps will come on when the key is
removed from the ignition. The lamps will not come
on if the dome override button is pressed in.
Electric Power Management
The vehicle has Electric Power Management (EPM)
that estimates the battery’s temperature and state
of charge. It then adjusts the voltage for best
performance and extended life of the battery.
When the battery’s state of charge is low, the voltage is
raised slightly to quickly bring the charge back up. When
the state of charge is high, the voltage is lowered slightly
to prevent overcharging. If the vehicle has a voltmeter
gage or a voltage display on the Driver InformationCenter (DIC), you may see the voltage move up or down.
This is normal. If there is a problem, an alert will be
displayed.
The battery can be discharged at idle if the electrical
loads are very high. This is true for all vehicles.
This is because the generator (alternator) may not
be spinning fast enough at idle to produce all the
power that is needed for very high electrical loads.
A high electrical load occurs when several of the following
are on, such as: headlamps, high beams, fog lamps,
rear window defogger, climate control fan at high speed,
heated seats, engine cooling fans, trailer loads, and loads
plugged into accessory power outlets.
EPM works to prevent excessive discharge of the
battery. It does this by balancing the generator’s output
and the vehicle’s electrical needs. It can increase
engine idle speed to generate more power, whenever
needed. It can temporarily reduce the power demands
of some accessories.
Normally, these actions occur in steps or levels, without
being noticeable. In rare cases at the highest levels of
corrective action, this action may be noticeable to the
driver. If so, a Driver Information Center (DIC) message
might be displayed, such as BATTERY SAVER ACTIVE,
BATTERY VOLTAGE LOW, or LOW BATTERY. If this
message is displayed, it is recommended that the driver
reduce the electrical loads as much as possible. SeeDIC
Warnings and Messages on page 4-37.
4-14
Page 184 of 448
If the light comes on and stays on, it means that oil is
not flowing through the engine properly. The vehicle
could be low on oil and it might have some other system
problem.
Security Light
For information regarding
this light and the vehicle’s
security system, see
Content Theft-Deterrent
on page 3-13.
Cruise Control Light
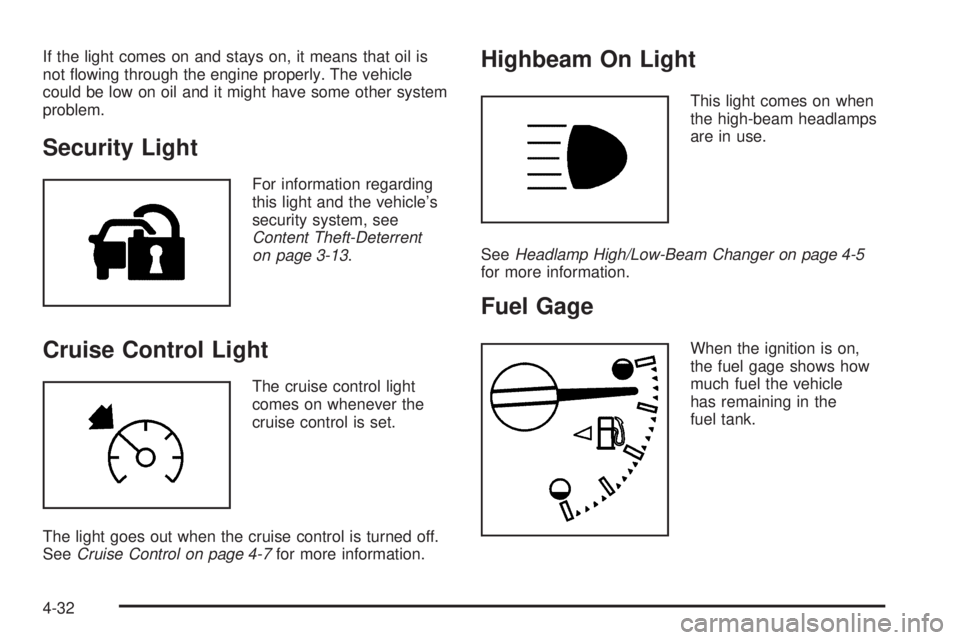
The cruise control light
comes on whenever the
cruise control is set.
The light goes out when the cruise control is turned off.
SeeCruise Control on page 4-7for more information.
Highbeam On Light
This light comes on when
the high-beam headlamps
are in use.
SeeHeadlamp High/Low-Beam Changer on page 4-5
for more information.
Fuel Gage
When the ignition is on,
the fuel gage shows how
much fuel the vehicle
has remaining in the
fuel tank.
4-32
Page 326 of 448
Headlamp Aiming
Headlamp aim has been preset at the factory and
should need no further adjustment.
However, if your vehicle is damaged in a crash, the
headlamp aim may be affected. Aim adjustment to the
low-beam headlamps may be necessary if oncoming
drivers flash their high-beam headlamps at you
(for vertical aim).
If the headlamps need to be re-aimed, it is
recommended that you take the vehicle to your
dealer/retailer for service.
Bulb Replacement
For the proper type of replacement bulbs, see
Replacement Bulbs on page 6-54.
For any bulb changing procedure not listed in this
section, contact your dealer/retailer.
Halogen Bulbs
{WARNING:
Halogen bulbs have pressurized gas inside and
can burst if you drop or scratch the bulb. You or
others could be injured. Be sure to read and follow
the instructions on the bulb package.
6-50
Page 327 of 448
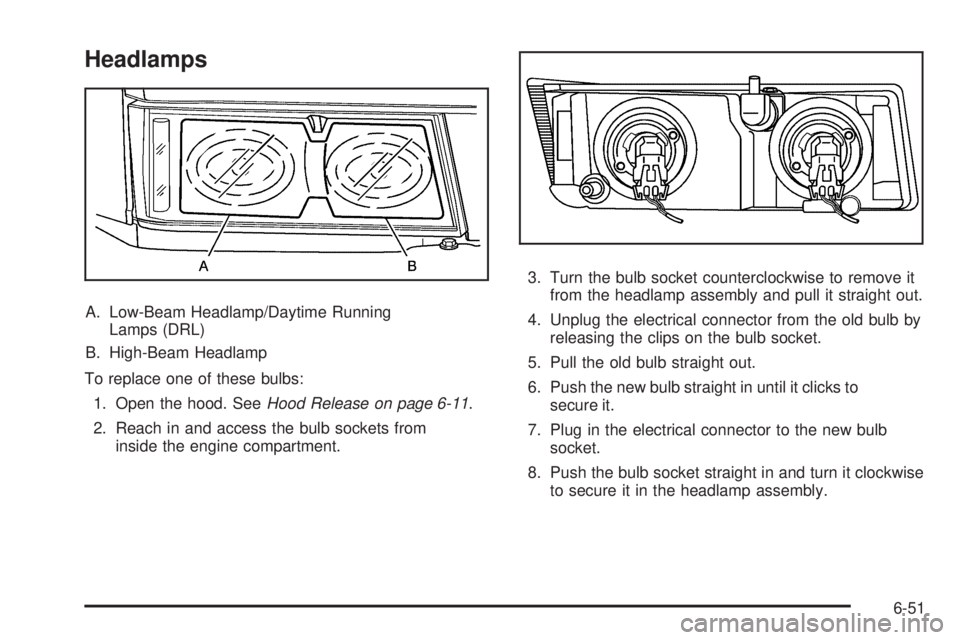
Headlamps
A. Low-Beam Headlamp/Daytime Running
Lamps (DRL)
B. High-Beam Headlamp
To replace one of these bulbs:
1. Open the hood. SeeHood Release on page 6-11.
2. Reach in and access the bulb sockets from
inside the engine compartment.3. Turn the bulb socket counterclockwise to remove it
from the headlamp assembly and pull it straight out.
4. Unplug the electrical connector from the old bulb by
releasing the clips on the bulb socket.
5. Pull the old bulb straight out.
6. Push the new bulb straight in until it clicks to
secure it.
7. Plug in the electrical connector to the new bulb
socket.
8. Push the bulb socket straight in and turn it clockwise
to secure it in the headlamp assembly.
6-51
Page 330 of 448
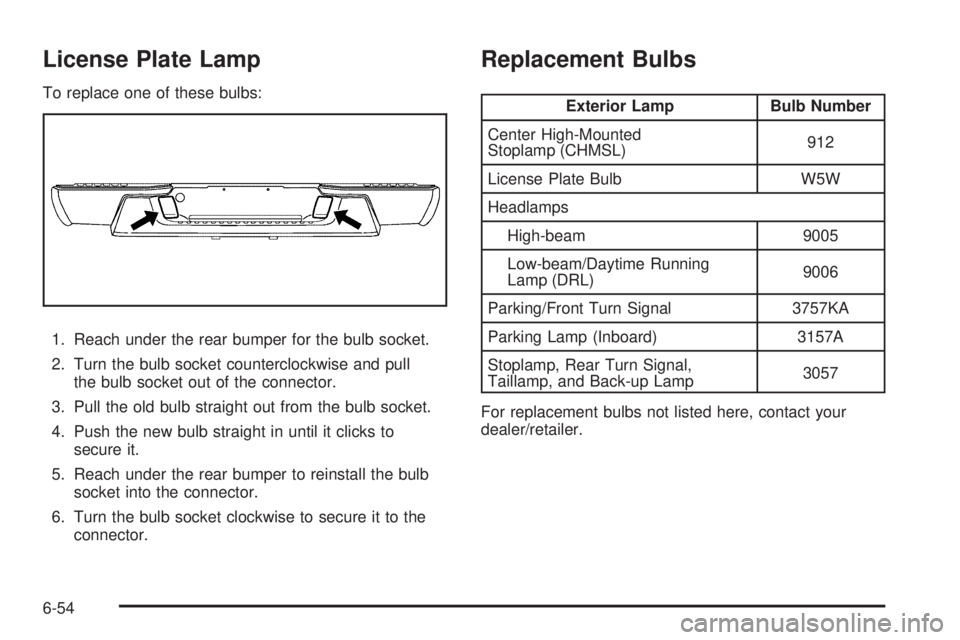
License Plate Lamp
To replace one of these bulbs:
1. Reach under the rear bumper for the bulb socket.
2. Turn the bulb socket counterclockwise and pull
the bulb socket out of the connector.
3. Pull the old bulb straight out from the bulb socket.
4. Push the new bulb straight in until it clicks to
secure it.
5. Reach under the rear bumper to reinstall the bulb
socket into the connector.
6. Turn the bulb socket clockwise to secure it to the
connector.
Replacement Bulbs
Exterior Lamp Bulb Number
Center High-Mounted
Stoplamp (CHMSL)912
License Plate Bulb W5W
Headlamps
High-beam 9005
Low-beam/Daytime Running
Lamp (DRL)9006
Parking/Front Turn Signal 3757KA
Parking Lamp (Inboard) 3157A
Stoplamp, Rear Turn Signal,
Taillamp, and Back-up Lamp3057
For replacement bulbs not listed here, contact your
dealer/retailer.
6-54