high GMC CANYON 2015 Owner's Manual
[x] Cancel search | Manufacturer: GMC, Model Year: 2015, Model line: CANYON, Model: GMC CANYON 2015Pages: 433, PDF Size: 4.61 MB
Page 5 of 433
Black plate (4,1)GMC Canyon Owner Manual (GMNA-Localizing-U.S./Canada-7587000) -
2015 - CRC - 3/17/15
iv Introduction
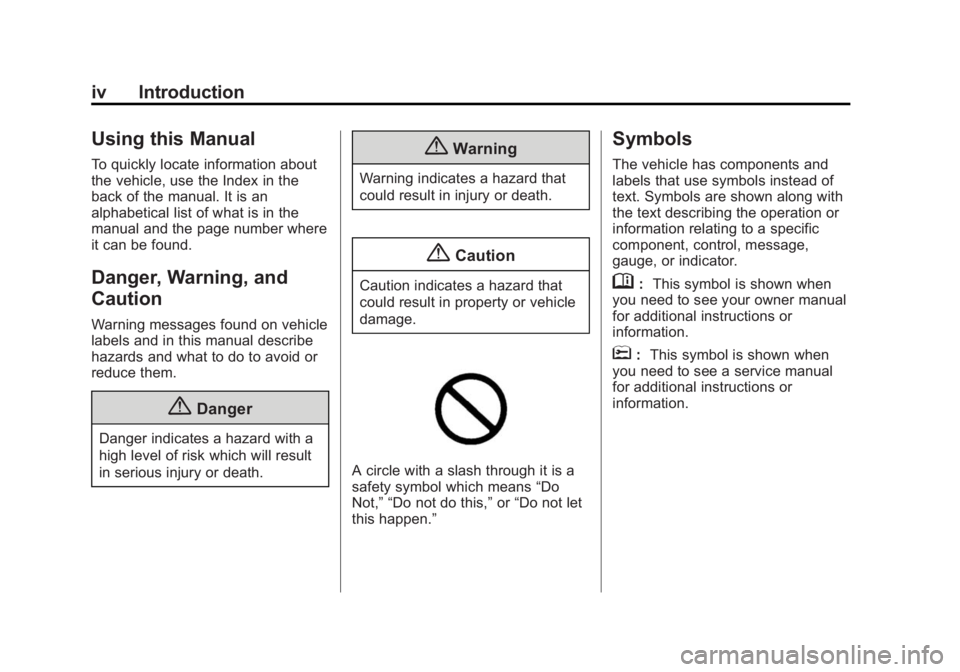
Using this Manual
To quickly locate information about
the vehicle, use the Index in the
back of the manual. It is an
alphabetical list of what is in the
manual and the page number where
it can be found.
Danger, Warning, and
Caution
Warning messages found on vehicle
labels and in this manual describe
hazards and what to do to avoid or
reduce them.
{Danger
Danger indicates a hazard with a
high level of risk which will result
in serious injury or death.
{Warning
Warning indicates a hazard that
could result in injury or death.
{Caution
Caution indicates a hazard that
could result in property or vehicle
damage.
A circle with a slash through it is a
safety symbol which means“Do
Not,” “Do not do this,” or“Do not let
this happen.”
Symbols
The vehicle has components and
labels that use symbols instead of
text. Symbols are shown along with
the text describing the operation or
information relating to a specific
component, control, message,
gauge, or indicator.
M: This symbol is shown when
you need to see your owner manual
for additional instructions or
information.
*: This symbol is shown when
you need to see a service manual
for additional instructions or
information.
Page 6 of 433
Black plate (5,1)GMC Canyon Owner Manual (GMNA-Localizing-U.S./Canada-7587000) -
2015 - CRC - 3/17/15
Introduction v
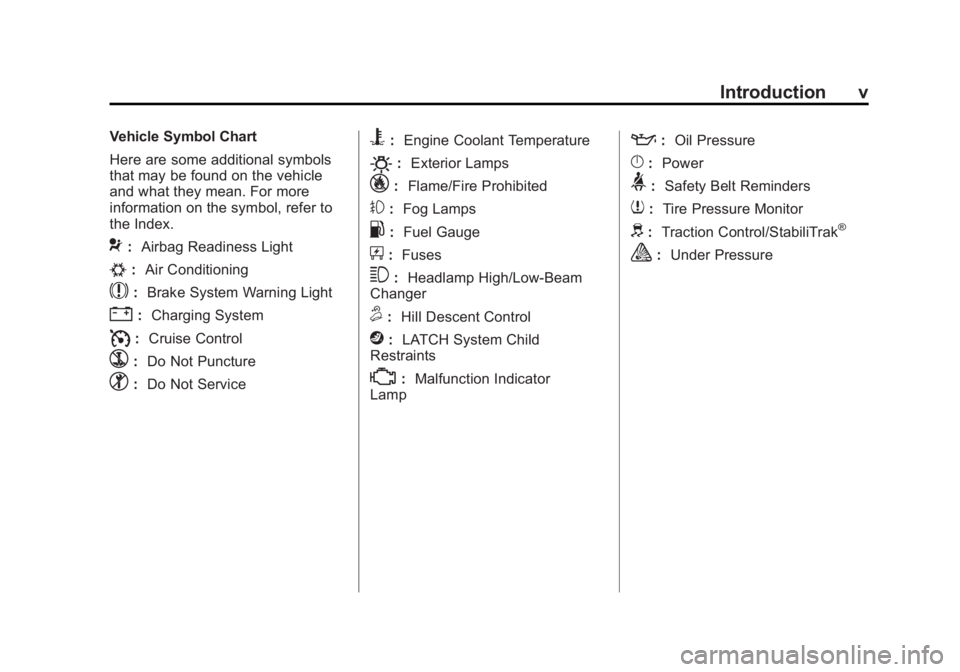
Vehicle Symbol Chart
Here are some additional symbols
that may be found on the vehicle
and what they mean. For more
information on the symbol, refer to
the Index.
9:Airbag Readiness Light
#:Air Conditioning
$:Brake System Warning Light
":Charging System
I:Cruise Control
`: Do Not Puncture
^:Do Not Service
B:Engine Coolant Temperature
O:Exterior Lamps
_:Flame/Fire Prohibited
#:Fog Lamps
.: Fuel Gauge
+:Fuses
3: Headlamp High/Low-Beam
Changer
5: Hill Descent Control
j:LATCH System Child
Restraints
*: Malfunction Indicator
Lamp
:: Oil Pressure
}:Power
>:Safety Belt Reminders
7:Tire Pressure Monitor
d:Traction Control/StabiliTrak®
a: Under Pressure
Page 22 of 433
Black plate (15,1)GMC Canyon Owner Manual (GMNA-Localizing-U.S./Canada-7587000) -
2015 - CRC - 3/17/15
In Brief 1-15
To enable:
1. Move the shift lever to theM (Manual Mode) position. The
current range will display next to
the M. This is the highest
attainable range with all lower
gears accessible. For example,
when 5 (Fifth) gear is selected,
1 (First) through 5 (Fifth) gears
are available.
2. Press the plus/minus button on the shift lever to select the
desired range of gears for
current driving conditions. See
Manual Mode on page 9-33.
Four-Wheel Drive
If the vehicle has four-wheel drive,
the engine's driving power can be
sent to all four wheels for extra
traction.
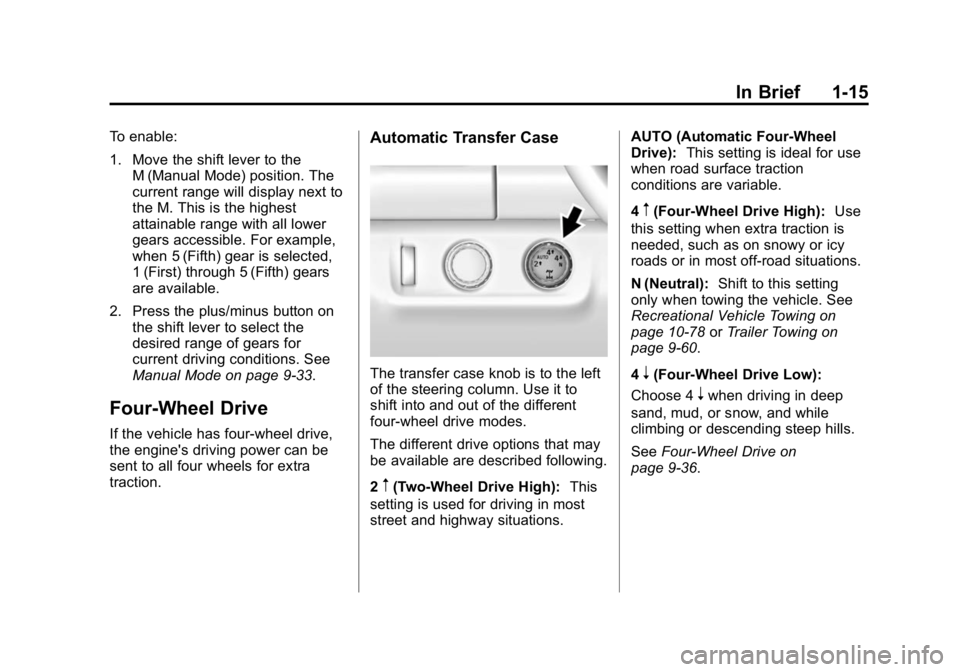
Automatic Transfer Case
The transfer case knob is to the left
of the steering column. Use it to
shift into and out of the different
four-wheel drive modes.
The different drive options that may
be available are described following.
2
m(Two-Wheel Drive High): This
setting is used for driving in most
street and highway situations. AUTO (Automatic Four-Wheel
Drive):
This setting is ideal for use
when road surface traction
conditions are variable.
4
m(Four-Wheel Drive High): Use
this setting when extra traction is
needed, such as on snowy or icy
roads or in most off-road situations.
N (Neutral): Shift to this setting
only when towing the vehicle. See
Recreational Vehicle Towing on
page 10-78 orTrailer Towing on
page 9-60.
4
n(Four-Wheel Drive Low):
Choose 4
nwhen driving in deep
sand, mud, or snow, and while
climbing or descending steep hills.
See Four-Wheel Drive on
page 9-36.
Page 36 of 433
Black plate (7,1)GMC Canyon Owner Manual (GMNA-Localizing-U.S./Canada-7587000) -
2015 - CRC - 3/17/15
Keys, Doors, and Windows 2-7
The vehicle cannot be remote
started if:
.The key is in the ignition.
.The hood is not closed.
.There is an emission control
system malfunction and the
malfunction indicator lamp is on.
The engine will turn off during a
remote vehicle start if:
.The coolant temperature gets
too high.
.The oil pressure gets low.
The RKE transmitter range may be
less while the vehicle is running.
Other conditions can affect the
performance of the transmitter.
See Remote Keyless Entry (RKE)
System on page 2-4 orVehicle
Personalization on page 5-41. Starting the Engine Using Remote
Start
1. Press and release
Q.
2. Immediately press and hold
/
until the turn signal lamps flash
or for at least four seconds.
When the vehicle starts, the
parking lamps will turn on. The
doors will be locked and the
climate control system may
come on.
The engine will continue to run for
10 minutes. Repeat the steps for
one 10-minute time extension. Place
the key in ON/RUN to operate the
vehicle.
Extending Engine Run Time
The engine run time can be
extended by 10 minutes, for a total
of 20 minutes, if during the first
10 minutes Steps 1–2 are repeated
while the engine is still running. An extension can be requested,
30 seconds after starting.
A maximum of two remote starts,
or a single start with an extension,
is allowed between ignition cycles.
The vehicle's ignition must be
turned on and then back off to use
remote start again.
Canceling a Remote Start
To cancel a remote start, do one of
the following:
.Press and hold/until the
parking lamps turn off.
.Turn on the hazard warning
flashers.
.Turn the vehicle on and then off.
Page 55 of 433
Black plate (6,1)GMC Canyon Owner Manual (GMNA-Localizing-U.S./Canada-7587000) -
2015 - CRC - 3/17/15
3-6 Seats and Restraints
2. Push and pull on the seatback tomake sure it is locked.
Heated Front Seats
{Warning
If you cannot feel temperature
change or pain to the skin, the
seat heater may cause burns. To
reduce the risk of burns, people
with such a condition should use
care when using the seat heater,
especially for long periods of
time. Do not place anything on
the seat that insulates against
heat, such as a blanket, cushion,
cover, or similar item. This may
cause the seat heater to
overheat. An overheated seat
heater may cause a burn or may
damage the seat.
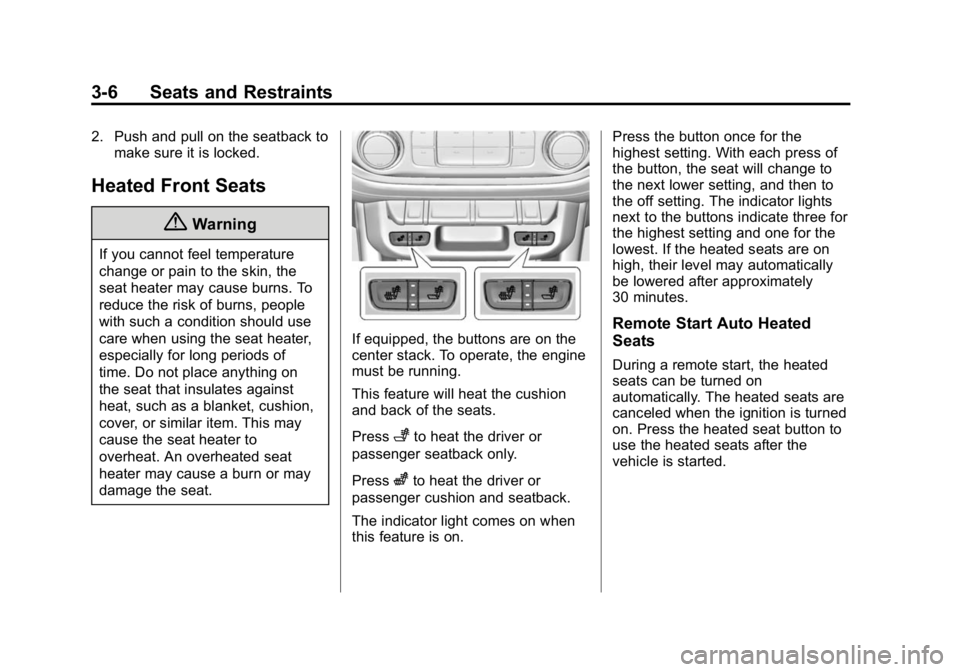
If equipped, the buttons are on the
center stack. To operate, the engine
must be running.
This feature will heat the cushion
and back of the seats.
Press
+to heat the driver or
passenger seatback only.
Press
zto heat the driver or
passenger cushion and seatback.
The indicator light comes on when
this feature is on. Press the button once for the
highest setting. With each press of
the button, the seat will change to
the next lower setting, and then to
the off setting. The indicator lights
next to the buttons indicate three for
the highest setting and one for the
lowest. If the heated seats are on
high, their level may automatically
be lowered after approximately
30 minutes.
Remote Start Auto Heated
Seats
During a remote start, the heated
seats can be turned on
automatically. The heated seats are
canceled when the ignition is turned
on. Press the heated seat button to
use the heated seats after the
vehicle is started.
Page 59 of 433
Black plate (10,1)GMC Canyon Owner Manual (GMNA-Localizing-U.S./Canada-7587000) -
2015 - CRC - 3/17/15
3-10 Seats and Restraints
safety belts. That is why wearing
safety belts makes such good
sense.
Questions and Answers About
Safety Belts
Q: Will I be trapped in the vehicleafter a crash if I am wearing a
safety belt?
A: You could be—whether you are
wearing a safety belt or not.
Your chance of being conscious
during and after a crash, so you
can unbuckle and get out, is
much greater if you are belted.
Q: If my vehicle has airbags, why should I have to wear safety
belts?
A: Airbags are supplemental
systems only; so they work with
safety belts —not instead of
them. Whether or not an airbag
is provided, all occupants still
have to buckle up to get the
most protection. Also, in nearly all states and in
all Canadian provinces, the law
requires wearing safety belts.
How to Wear Safety Belts
Properly
This section is only for people of
adult size.
There are special things to know
about safety belts and children. And
there are different rules for smaller
children and infants. If a child will be
riding in the vehicle, see
Older
Children on page 3-30 orInfants
and Young Children on page 3-32.
Follow those rules for everyone's
protection.
It is very important for all occupants
to buckle up. Statistics show that
unbelted people are hurt more often
in crashes than those who are
wearing safety belts.
There are important things to know
about wearing a safety belt properly.
.Sit up straight and always keep
your feet on the floor in front
of you.
.Always use the correct buckle
for your seating position.
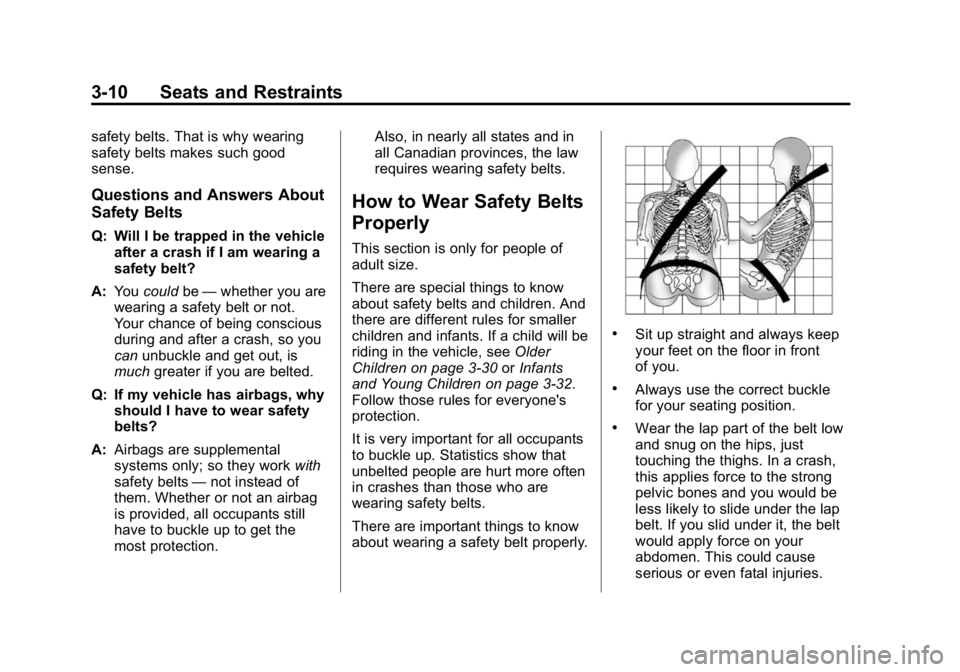
.Wear the lap part of the belt low
and snug on the hips, just
touching the thighs. In a crash,
this applies force to the strong
pelvic bones and you would be
less likely to slide under the lap
belt. If you slid under it, the belt
would apply force on your
abdomen. This could cause
serious or even fatal injuries.
Page 79 of 433
Black plate (30,1)GMC Canyon Owner Manual (GMNA-Localizing-U.S./Canada-7587000) -
2015 - CRC - 3/17/15
3-30 Seats and Restraints
Child Restraints
Older Children
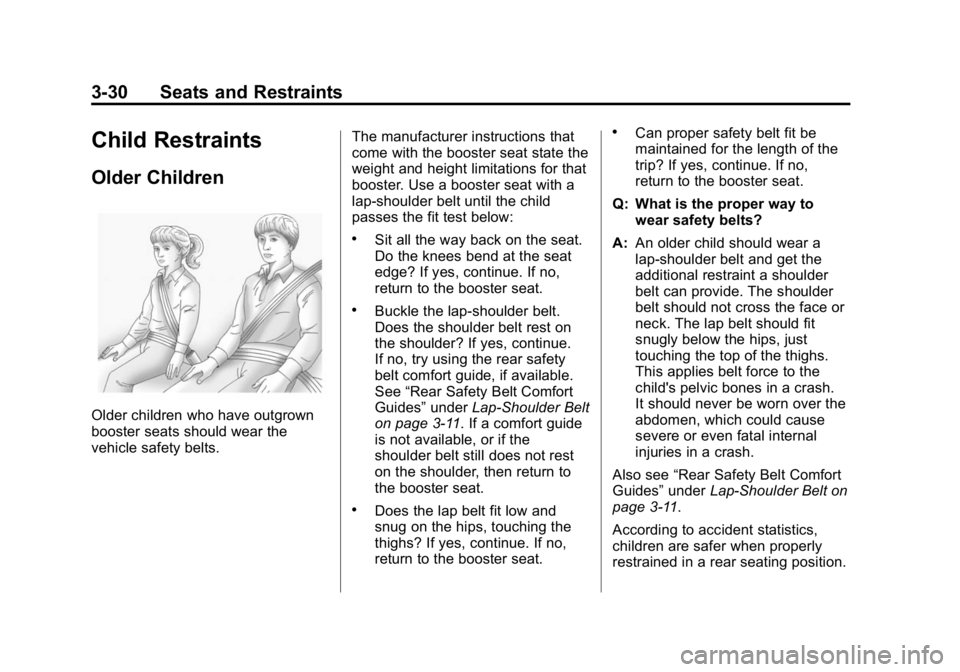
Older children who have outgrown
booster seats should wear the
vehicle safety belts.The manufacturer instructions that
come with the booster seat state the
weight and height limitations for that
booster. Use a booster seat with a
lap-shoulder belt until the child
passes the fit test below:
.Sit all the way back on the seat.
Do the knees bend at the seat
edge? If yes, continue. If no,
return to the booster seat.
.Buckle the lap-shoulder belt.
Does the shoulder belt rest on
the shoulder? If yes, continue.
If no, try using the rear safety
belt comfort guide, if available.
See
“Rear Safety Belt Comfort
Guides” underLap-Shoulder Belt
on page 3-11. If a comfort guide
is not available, or if the
shoulder belt still does not rest
on the shoulder, then return to
the booster seat.
.Does the lap belt fit low and
snug on the hips, touching the
thighs? If yes, continue. If no,
return to the booster seat.
.Can proper safety belt fit be
maintained for the length of the
trip? If yes, continue. If no,
return to the booster seat.
Q: What is the proper way to wear safety belts?
A: An older child should wear a
lap-shoulder belt and get the
additional restraint a shoulder
belt can provide. The shoulder
belt should not cross the face or
neck. The lap belt should fit
snugly below the hips, just
touching the top of the thighs.
This applies belt force to the
child's pelvic bones in a crash.
It should never be worn over the
abdomen, which could cause
severe or even fatal internal
injuries in a crash.
Also see “Rear Safety Belt Comfort
Guides” underLap-Shoulder Belt on
page 3-11.
According to accident statistics,
children are safer when properly
restrained in a rear seating position.
Page 85 of 433
Black plate (36,1)GMC Canyon Owner Manual (GMNA-Localizing-U.S./Canada-7587000) -
2015 - CRC - 3/17/15
3-36 Seats and Restraints
Children can be endangered in a
crash if the child restraint is not
properly secured in the vehicle.
When securing an add-on child
restraint, refer to the instructions
that come with the restraint which
may be on the restraint itself or in a
booklet, or both, and to this manual.
The child restraint instructions are
important, so if they are not
available, obtain a replacement
copy from the manufacturer.
Keep in mind that an unsecured
child restraint can move around in a
collision or sudden stop and injure
people in the vehicle. Be sure to
properly secure any child restraint in
the vehicle—even when no child is
in it.
In some areas of the United States
and Canada, Certified Child
Passenger Safety Technicians
(CPSTs) are available to inspect
and demonstrate how to correctly
use and install child restraints.
In the U.S., refer to the National
Highway Traffic Safety Administration (NHTSA) website to
locate the nearest child safety seat
inspection station. For CPST
availability in Canada, check with
Transport Canada or the Provincial
Ministry of Transportation office.
Securing the Child Within the
Child Restraint
{Warning
A child can be seriously injured or
killed in a crash if the child is not
properly secured in the child
restraint. Secure the child
properly following the instructions
that came with that child restraint.
Where to Put the
Restraint
According to accident statistics,
children and infants are safer when
properly restrained in a child
restraint system or infant restraint
system secured in a rear seating
position.Whenever possible, children aged
12 and under should be secured in
a rear seating position.
Never put a rear-facing child seat in
the front. This is because the risk to
the rear-facing child is so great if the
airbag deploys.
{Warning
A child in a rear-facing child
restraint can be seriously injured
or killed if the front passenger
airbag inflates. This is because
the back of the rear-facing child
restraint would be very close to
the inflating airbag. A child in a
forward-facing child restraint can
be seriously injured or killed if the
front passenger airbag inflates
and the passenger seat is in a
forward position.
Even if the passenger sensing
system has turned off the front
passenger frontal airbag, no
(Continued)
Page 114 of 433
Black plate (1,1)GMC Canyon Owner Manual (GMNA-Localizing-U.S./Canada-7587000) -
2015 - CRC - 3/17/15
Instruments and Controls 5-1
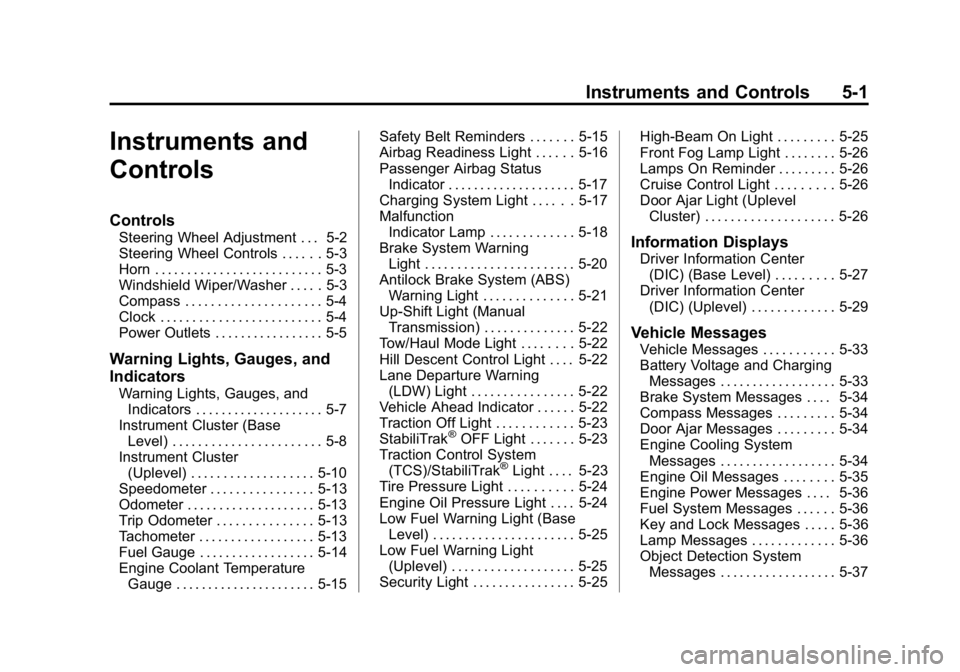
Instruments and
Controls
Controls
Steering Wheel Adjustment . . . 5-2
Steering Wheel Controls . . . . . . 5-3
Horn . . . . . . . . . . . . . . . . . . . . . . . . . . 5-3
Windshield Wiper/Washer . . . . . 5-3
Compass . . . . . . . . . . . . . . . . . . . . . 5-4
Clock . . . . . . . . . . . . . . . . . . . . . . . . . 5-4
Power Outlets . . . . . . . . . . . . . . . . . 5-5
Warning Lights, Gauges, and
Indicators
Warning Lights, Gauges, andIndicators . . . . . . . . . . . . . . . . . . . . 5-7
Instrument Cluster (Base Level) . . . . . . . . . . . . . . . . . . . . . . . 5-8
Instrument Cluster (Uplevel) . . . . . . . . . . . . . . . . . . . 5-10
Speedometer . . . . . . . . . . . . . . . . 5-13
Odometer . . . . . . . . . . . . . . . . . . . . 5-13
Trip Odometer . . . . . . . . . . . . . . . 5-13
Tachometer . . . . . . . . . . . . . . . . . . 5-13
Fuel Gauge . . . . . . . . . . . . . . . . . . 5-14
Engine Coolant Temperature
Gauge . . . . . . . . . . . . . . . . . . . . . . 5-15 Safety Belt Reminders . . . . . . . 5-15
Airbag Readiness Light . . . . . . 5-16
Passenger Airbag Status
Indicator . . . . . . . . . . . . . . . . . . . . 5-17
Charging System Light . . . . . . 5-17
Malfunction
Indicator Lamp . . . . . . . . . . . . . 5-18
Brake System Warning Light . . . . . . . . . . . . . . . . . . . . . . . 5-20
Antilock Brake System (ABS) Warning Light . . . . . . . . . . . . . . 5-21
Up-Shift Light (Manual Transmission) . . . . . . . . . . . . . . 5-22
Tow/Haul Mode Light . . . . . . . . 5-22
Hill Descent Control Light . . . . 5-22
Lane Departure Warning (LDW) Light . . . . . . . . . . . . . . . . 5-22
Vehicle Ahead Indicator . . . . . . 5-22
Traction Off Light . . . . . . . . . . . . 5-23
StabiliTrak
®OFF Light . . . . . . . 5-23
Traction Control System (TCS)/StabiliTrak
®Light . . . . 5-23
Tire Pressure Light . . . . . . . . . . 5-24
Engine Oil Pressure Light . . . . 5-24
Low Fuel Warning Light (Base Level) . . . . . . . . . . . . . . . . . . . . . . 5-25
Low Fuel Warning Light (Uplevel) . . . . . . . . . . . . . . . . . . . 5-25
Security Light . . . . . . . . . . . . . . . . 5-25 High-Beam On Light . . . . . . . . . 5-25
Front Fog Lamp Light . . . . . . . . 5-26
Lamps On Reminder . . . . . . . . . 5-26
Cruise Control Light . . . . . . . . . 5-26
Door Ajar Light (Uplevel
Cluster) . . . . . . . . . . . . . . . . . . . . 5-26
Information Displays
Driver Information Center(DIC) (Base Level) . . . . . . . . . 5-27
Driver Information Center (DIC) (Uplevel) . . . . . . . . . . . . . 5-29
Vehicle Messages
Vehicle Messages . . . . . . . . . . . 5-33
Battery Voltage and ChargingMessages . . . . . . . . . . . . . . . . . . 5-33
Brake System Messages . . . . 5-34
Compass Messages . . . . . . . . . 5-34
Door Ajar Messages . . . . . . . . . 5-34
Engine Cooling System Messages . . . . . . . . . . . . . . . . . . 5-34
Engine Oil Messages . . . . . . . . 5-35
Engine Power Messages . . . . 5-36
Fuel System Messages . . . . . . 5-36
Key and Lock Messages . . . . . 5-36
Lamp Messages . . . . . . . . . . . . . 5-36
Object Detection System Messages . . . . . . . . . . . . . . . . . . 5-37
Page 126 of 433
Black plate (13,1)GMC Canyon Owner Manual (GMNA-Localizing-U.S./Canada-7587000) -
2015 - CRC - 3/17/15
Instruments and Controls 5-13
Units:Presspwhile Units is
displayed to enter the Units menu.
Choose U.S. or metric units by
pressing
Vwhile the desired item is
highlighted.
Info Pages: Press
pwhile Info
Pages is displayed to enter the Info
Pages menu and select the items to
be displayed in the Info app. See
Driver Information Center (DIC)
(Base Level) on page 5-27 orDriver
Information Center (DIC) (Uplevel)
on page 5-29.
Speed Warning: The Speed
Warning display allows the driver to
set a speed that they do not want to
exceed. To set the Speed Warning,
press
pwhen Speed Warning is
displayed. Press
worxto adjust
the value. Press
Vto set the speed.
Once the speed is set, this feature
can be turned off by pressing
V
while viewing this page. If the
selected speed limit is exceeded, a
pop-up warning is displayed with a
chime.
Speedometer
The speedometer shows the
vehicle's speed in either kilometers
per hour (km/h) or miles per
hour (mph).
Odometer
The odometer shows how far the
vehicle has been driven, in either
kilometers or miles.
Trip Odometer
The trip odometer shows how far
the vehicle has been driven since
the trip odometer was last reset.
The trip odometer is accessed and
reset through the Driver Information
Center (DIC). See Driver
Information Center (DIC) (Base
Level) on page 5-27 orDriver
Information Center (DIC) (Uplevel)
on page 5-29.
Tachometer
The tachometer displays the engine
speed in revolutions per
minute (rpm).
{Caution
If there is a shaded warning area
at the high end of the tachometer
and the engine is operated with
the rpm’s in the warning area, the
vehicle could be damaged, and
the damage would not be covered
by the vehicle warranty. Do not
operate the engine with the rpm’s
in the warning area.