hood release GMC CANYON 2017 Owner's Manual
[x] Cancel search | Manufacturer: GMC, Model Year: 2017, Model line: CANYON, Model: GMC CANYON 2017Pages: 417, PDF Size: 5.36 MB
Page 8 of 417

GMC Canyon Owner Manual (GMNA-Localizing-U.S./Canada-10122677) -
2017 - crc - 1/20/17
In Brief 7
1.Air Vents 0211.
2. Turn Signal Lever. See Turn
and Lane-Change Signals
0 148.
Driver Information Center (DIC)
(Base Level) Controls (If
Equipped).
See Driver Information Center
(DIC) (Base Level) 0125 or
Driver Information Center (DIC)
(Uplevel) 0128.
3. Instrument Cluster (Base
Level) 0109 orInstrument
Cluster (Uplevel) 0111.
4. Windshield Wiper/Washer
0104.
5. Light Sensor. See Automatic
Headlamp System 0147.
Vehicle Alarm System Indicator
(If Equipped). See Vehicle
Alarm System 035.
6. Infotainment 0152.
7. Climate Control Systems 0207
(If Equipped).
Automatic Climate Control
System 0209 (If Equipped). 8.
Heated and Ventilated Front
Seats 047 (If Equipped).
9. Power Outlets 0106 (If
Equipped).
10. Shift Lever. SeeAutomatic Transmission
0 240 orManual Transmission
0 245.
11. Auxiliary Jack 0178.
USB Port (Base Radio) 0169
or USB Port (Base Radio with
Touchscreen) 0172.
12. Hazard Warning Flashers
0148.
Traction Control/Electronic
Stability Control 0253.
Cargo Lamp 0149.
Lane Departure Warning
(LDW) 0261 (If Equipped).
Hill Descent Control (HDC)
0 255 (If Equipped).
Tow/Haul Mode 0245 (If
Equipped). 13.
Steering Wheel Controls 0103
(If Equipped).
Driver Information Center (DIC)
(Uplevel) Controls (If
Equipped).
See Driver Information Center
(DIC) (Base Level) 0125 or
Driver Information Center (DIC)
(Uplevel) 0128.
14. Horn 0104.
15. Steering Wheel Adjustment
0102 (Out of View).
16. Cruise Control 0256.
Forward Collision Alert (FCA)
System 0260 (If Equipped).
17. Transfer Case Knob (If Equipped). See Four-Wheel
Drive 0247.
18. Hood Release. See Hood
0 280.
19. Parking Brake 0251.
Page 32 of 417

GMC Canyon Owner Manual (GMNA-Localizing-U.S./Canada-10122677) -
2017 - crc - 1/20/17
Keys, Doors, and Windows 31
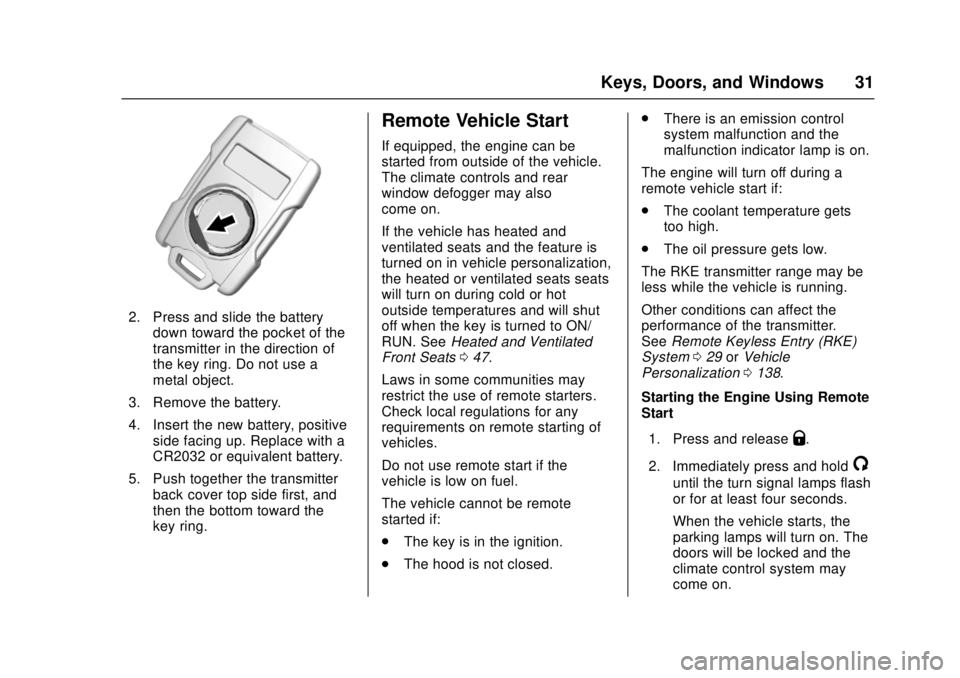
2. Press and slide the batterydown toward the pocket of the
transmitter in the direction of
the key ring. Do not use a
metal object.
3. Remove the battery.
4. Insert the new battery, positive side facing up. Replace with a
CR2032 or equivalent battery.
5. Push together the transmitter back cover top side first, and
then the bottom toward the
key ring.
Remote Vehicle Start
If equipped, the engine can be
started from outside of the vehicle.
The climate controls and rear
window defogger may also
come on.
If the vehicle has heated and
ventilated seats and the feature is
turned on in vehicle personalization,
the heated or ventilated seats seats
will turn on during cold or hot
outside temperatures and will shut
off when the key is turned to ON/
RUN. See Heated and Ventilated
Front Seats 047.
Laws in some communities may
restrict the use of remote starters.
Check local regulations for any
requirements on remote starting of
vehicles.
Do not use remote start if the
vehicle is low on fuel.
The vehicle cannot be remote
started if:
. The key is in the ignition.
. The hood is not closed. .
There is an emission control
system malfunction and the
malfunction indicator lamp is on.
The engine will turn off during a
remote vehicle start if:
. The coolant temperature gets
too high.
. The oil pressure gets low.
The RKE transmitter range may be
less while the vehicle is running.
Other conditions can affect the
performance of the transmitter.
See Remote Keyless Entry (RKE)
System 029 orVehicle
Personalization 0138.
Starting the Engine Using Remote
Start
1. Press and release
Q.
2. Immediately press and hold
/
until the turn signal lamps flash
or for at least four seconds.
When the vehicle starts, the
parking lamps will turn on. The
doors will be locked and the
climate control system may
come on.
Page 133 of 417

GMC Canyon Owner Manual (GMNA-Localizing-U.S./Canada-10122677) -
2017 - crc - 1/20/17
132 Instruments and Controls
Brake System Messages
BRAKE FLUID LOW
This message is displayed when the
brake fluid level is low; seeBrake
Fluid 0297.
HILL START ASSIST ACTIVE
This message is displayed when the
vehicle is stopped on a grade
sufficient to activate HSA. HSA
holds the braking pressure for a
maximum of two seconds to ensure
that there is no rolling, which will
assist the driver to transition
between releasing the brake pedal
and accelerating to drive off while
on the grade. The brakes will
automatically release when the
accelerator pedal is applied within
the two-second window. See Hill
Start Assist (HSA) 0252.
RELEASE PARKING BRAKE
This message is displayed as a
reminder that the parking brake is
on. Release it before you attempt to
drive.
SERVICE BRAKE ASSIST
This message may be displayed
when there is a problem with the
brake boost assist system. When
this message is displayed, the brake
boost assist motor may be heard
operating and you might notice
pulsation in the brake pedal. This is
normal under these conditions. Take
the vehicle to your dealer for
service.
Compass Messages
Dashes may be displayed if the
vehicle temporarily loses
communication with the Global
Positioning System (GPS).
Door Ajar Messages
DOOR OPEN
This message displays and a chime
may sound if a door is not fully
closed. Stop and turn off the
vehicle, check the door for
obstructions, and close the door
again. Check to see if the message
still appears on the DIC.
HOOD OPEN
This message displays and a chime
may sound if the hood is not fully
closed. Stop and turn off the
vehicle, check the hood for
obstructions, and close the hood
again. Check to see if the message
still appears on the DIC.
Engine Cooling System
Messages
AIR CONDITIONING OFF
This message displays when the
engine coolant becomes hotter than
the normal operating temperature.
See Engine Coolant Temperature
Gauge 0114. To avoid added strain
on a hot engine, the air conditioning
compressor automatically turns off.
When the coolant temperature
returns to normal, the air
conditioning compressor turns back
on. You can continue to drive your
vehicle.
If this message continues to appear,
have the system repaired by your
dealer as soon as possible to avoid
damage to the engine.
Page 281 of 417

GMC Canyon Owner Manual (GMNA-Localizing-U.S./Canada-10122677) -
2017 - crc - 1/20/17
280 Vehicle Care
Keep a record with all parts receipts
and list the mileage and the date of
any service work performed. See
Maintenance Records0376.
Caution
Even small amounts of
contamination can cause damage
to vehicle systems. Do not allow
contaminants to contact the fluids,
reservoir caps, or dipsticks.
Hood
To open the hood:
1. Pull the hood release lever with
this symbol on it. It is inside the
vehicle to the lower left of the
steering wheel.
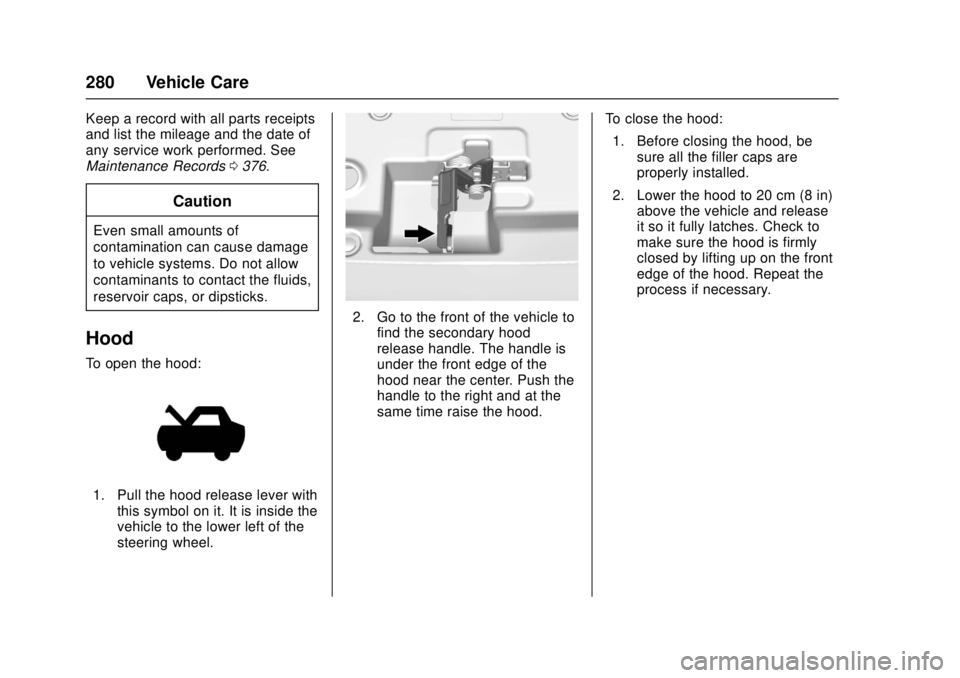
2. Go to the front of the vehicle tofind the secondary hood
release handle. The handle is
under the front edge of the
hood near the center. Push the
handle to the right and at the
same time raise the hood. To close the hood:
1. Before closing the hood, be sure all the filler caps are
properly installed.
2. Lower the hood to 20 cm (8 in) above the vehicle and release
it so it fully latches. Check to
make sure the hood is firmly
closed by lifting up on the front
edge of the hood. Repeat the
process if necessary.
Page 306 of 417

GMC Canyon Owner Manual (GMNA-Localizing-U.S./Canada-10122677) -
2017 - crc - 1/20/17
Vehicle Care 305
Headlamp
1. Open the hood.
2. Remove the headlamp bulbcover by turning it
counterclockwise.
3. Turn the bulb socket counterclockwise to remove it
from the headlamp assembly
and pull it straight out.
4. Unplug the electrical connector from the old bulb by releasing
the clip on the bulb socket.
Turn Signal/Sidemarker/
Parking Lamp
1. Open the hood.
2. Turn the bulb socket
counterclockwise to remove it
from the headlamp assembly
and pull it straight out.
3. Remove the bulb by pulling it straight out of the bulb socket.
Taillamps, Turn Signal,
Stoplamps, and Back-Up
Lamps
1. Open the tailgate.
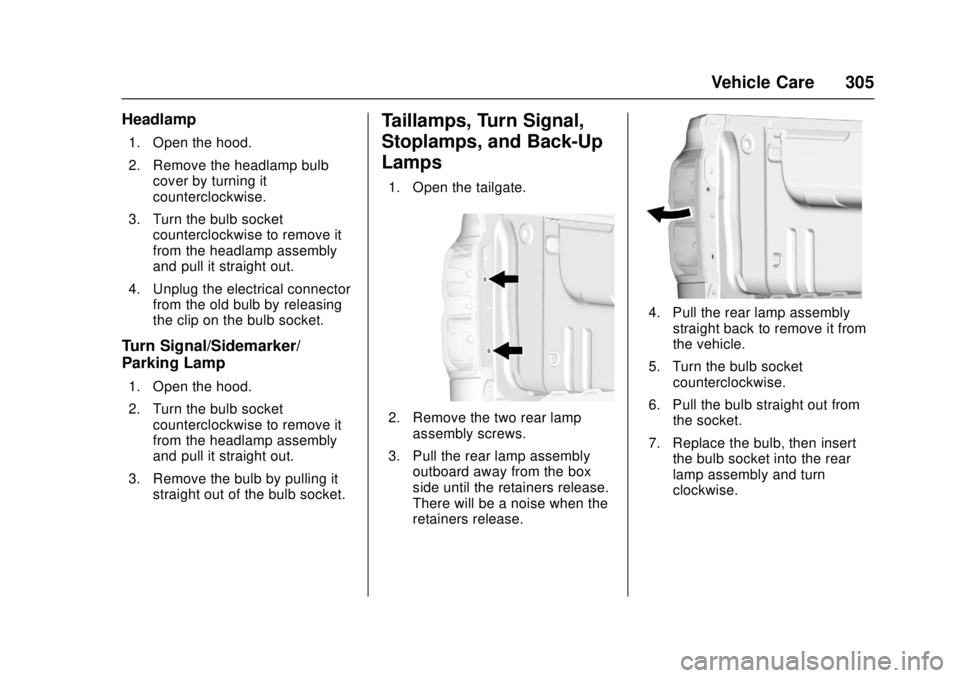
2. Remove the two rear lampassembly screws.
3. Pull the rear lamp assembly outboard away from the box
side until the retainers release.
There will be a noise when the
retainers release.
4. Pull the rear lamp assembly
straight back to remove it from
the vehicle.
5. Turn the bulb socket counterclockwise.
6. Pull the bulb straight out from the socket.
7. Replace the bulb, then insert the bulb socket into the rear
lamp assembly and turn
clockwise.